1
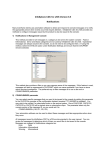
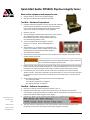
Quick Start Guide: PIT5000: Pipeline Integrity Tester
®
Receive the equipment and prepare for use:
1. Charge battery to 13.3 V using supplied charger.
2. See the User’s Manual for complete instructions.
Test Site - Hardware Preparations
1. PIT5000 should be positioned on a level surface with adequate
protection from precipitation, excessive heat and excessive
cold. Locate the PIT sufficiently distant for the pipe section
under test to meet your company’s safety guidelines.
2. Open the case lid.
3. Turn the PIT5000’s master power switch to the “ON” position.
(For PIT5000-00 models, connect charger output or
DC extension cord to the charge socket and also turn
the 12 Volt Charger switch to ON).
4. Turn on the MFT 4000 by pressing the “On/Off”
button for 0.5 second. Press the backlight key if
desired.
5. After the MFT is on, and before any connections are
made to the PIT5000, press the ZERO soft key (white,
rectangular key on left hand side below display) to
zero the pressure module.
6. Connect one end of the pressure hose to the control panel connection and the other end to
the pipe section under test.
Safe Working Pressure for the 1500 PSI pressure range is 3000 PSI.
Safe Working Pressure for the 3300 PSI pressure range is 3300 PSI.
Do not exceed the respective pressure limit.
7. Install one RTD to the mating end of each RTD cable. Install opposite cable end to the control
panel connection labeled “Pipe Temperature” or “Ambient Temperature”. Take care to locate
each RTD in the corresponding test site position (ambient or pipe temperature location).
8. For stroke counter use, install the counter cable to the control panel connection labeled
“Stroke Counter”. Connect the opposite end (#8 spade lugs) to a set of dry contacts activated
by the pressure pump’s stroke counter (contacts by user, normally open or normally closed
will work).
9. Verify the MFT display shows one pressure and two temperatures.
S1: pressure in PSIG
S2: ambient temperature in degrees F
S3: pipe temperature in degrees F
Test Site - Software Preparations
10920 Madison Ave
1. Open the PC display and press the power button to turn on.
2. PIT5000 software will open once the PC has booted up. If the software does not start
automatically, simply double click the “PIT5000” icon on the PC desk top to launch. The main
tab structure will be visible along the top of display.
3. Click on the “Setup” tab to reveal several sub-tabs to be completed prior to testing.
Cleveland · Ohio
44102
1-216-928-1100
1-800- 817-7849
4. Test Info: enter test information for test documentation. Select the desired pressure and
temperature units for the test (default units are PSI, degrees F and feet).
www.Meriam.com
Copyright © 2011 Meriam
9R148-A
September 2015
5. Pump Info: enter pump model and serial number.
Indicate if Stroke Count function is required. If yes,
enter pump stroke volume, Stroke Start Pressure
(value at which straight line stroke test should start)
and Stroke Rate Target (PSI/min). Use the pump contact indicator to check circuit continuity prior
to test.
6. Site Info: enter high point pressure and site elevation information for the pipe section under test.
Enter the “PIT5000 Elevation” with respect to the “-----Pressure Line-----” on the outside of the
case.
7. Test Limits: enter test duration, PLeak pressure, upper and lower PTest limits, etc. Some values
on this tab have been forwarded from earlier tabs.
8. PC Setup: click on the Get Cal Data button to verify PC communication to MFT and to retrieve
measurement device serial numbers. The PIT5000 is shipped with certificates of traceability to
NIST for all measurement devices. If clicking on the Get Cal Data button does not return serial
numbers, then select the Communication Port drop down menu, click on Refresh, select another
comm number from the list and retry. Consult the User’s Manual for alternate methods of serial
number verification.
Documenting the Hydro-Test
1. Start Program button – click to activate the PIT5000’s real time plot and
data logging features. Use this mode to verify PIT5000 operation during
site preparations and for pressurization up to PTest Pressure.
2. Click the “Strip Chart” tab to view real time plot of Tambient, Tpipe and
Pressure versus time.
3. Click the “Data” tab to view data sets saved to memory.
4. Click the “Details” tab to view various times tracked by the software, serial
numbers of measurement devices and the file path for test results.
5. Click on the “Stroke Count” tab to view pump stroke totals at any time.
Stroke data sets and stroke vs pressure plot are active when pressure goes
above the Stroke Start Pressure
6. Begin Test button – select this button once the pipe section under test is
pressurized to the PTest Instrument Pressure and is leak free.
7. Alarm conditions are shown on the Data Panel based on values entered
into the Setup / Test Limits tab. An alarm condition (limit exceeded) is
indicated by a red flashing background in the respective window.
8. Any main tab can be opened during Test mode. This does not interrupt
function of the PIT5000. To view Setup info, click on Setup tab and then
select a sub tab from the drop down menu located in the main tab line.
9. Perform the test and allow the PIT5000 to document all results. Add any
notes needed during the test period using the text field (type note text
here) and click on the Add Note button to save.
10. Stop button - ends a test from any point in the test program after a
confirmation question. Test data is saved to the file path indicated on the Details tab.
A test may not be restarted once it is stopped; that is, there is no way to
restart and append new data to an earlier file. If a test is ended
prematurely, restart the program and save the balance of the test under a
different, but similar file name.
PIT5000 Quick Start Guide
2