1
96M11224
3. Amplifier Expansion
Up to 16 expansion units can be connected
to each main unit.
1) Remove the expansion protective cover
from the main unit.
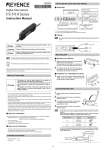
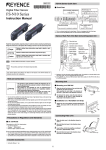
Dual Digital Fiber Sensor
FS-V22/22G/22R(P)/20R/22X
2) Mount each amplifier to the DIN rail.
Instruction Manual
3) Press the two claws of each expansion
unit to the grooves on the main unit
until the claws snap.
4) Mount the end units to the left- and
right-hand sides of the whole amplifiers in the method shown in the figure
at step 2.
5) Check that the amplifiers are securely sandwiched by the end units. Use a Phillips screwdriver and securely tighten the screws on the
end units (i.e., two screws on each end unit).
Read this manual before using the product in order to achieve
maximum performance.
Keep this manual in a safe place after reading it so that it can be
used at any time.
1. Safety Precautions
4. Connecting Fiber Unit
WARNING
1) Open the dust cover in the direction
shown by arrow ➀.
2) Move down the fiber lock lever in the
direction shown by arrow ➁.
3) Insert a fiber unit into the fiber insertion holes to a length of the fiber insertion sign (i.e., approximately 14
mm).
4) Move up and return the fiber lock lever
in the direction shown by arrow ➃.
• This product is just intended to detect the object(s). Do not use this
product for the purpose to protect a human body or a part of human
body.
• This product is not intended for use as explosion-proof product. Do
not use this product in a hazardous location and/or potentially explosive atmosphere.
• This product is a sensor of DC power supply type. Do not apply AC
power. The product may explode or burn if 100 VAC or a higher voltage is applied.
Fiber insertion sign
■ UL Certificate
This product is an UL/C-UL Listed product.
• UL File No. E301717
• Category NRKH, NRKH7
• Enclosure Type 1 (Based on UL50)
Note:If a thin fiber unit is used, an adapter provided with the thin fiber unit
will be required.
Unless the right adapter is connected, the thin fiber unit will not
detect targets correctly.
Be sure to consider the following specifications when using this product
as an UL/C-UL Listed Product.
• Use the power supply with Class 2 output defined in NFPA70 (NEC:
National Electrical Code).
• Use with the over current protection device which is rated 30V or more
(rated 40V or more for NPN output type) and not more than 2A.
Cable outer dia.
Adapter
Appearance
ø1.3
Adapter A
ø1.0
Adapter B
• To connect the coaxial reflective type fiber unit to the amplifier, connect
the single-core fiber to the transmitter side, and connect the multiplecore fiber to the receiver side.
Check that all the accessories are ready before use.
■ Accessories
Instruction manual (x1) End units (x2)
Expansion Sticker (x1)
Transmitter
Single-core fiber
Multi-core fiber
2. Part Names
• To remove the amplifiers added, take the steps opposite to the mounting procedure.
• Put the provided sticker close to the sensor.
Fiber lock lever
Operation indicator*
Set button
Digital
monitor
Manual
button
Receiver
Note • The FS-V22/22G/22R(P)/20R/22X incorporates a mutual
interference prevention function, thus allowing the close mounting
of a number of fiber units in the following modes.
Preset value (PV)
green indicator
Current value
(CV) red indicator
Power mode
FINE
TURBO
SUPER
TURBO
ULTRA
TURBO
Number of
units connected
4
8
8
8
5. I/O Cricuit
Expansion protective cover
Refer to the following I/O circuit diagram when connecting the unit to peripheral devices.
● FS-V22/22G/22R/22X
● FS-V22RP
Expansion connector
Mode button
Output selector
* The operation indicator of the FS-V22X (infrared model) will not be lit.
Black
0V
1
(Control output)
DC 5 to 40V
Overcurrent
protection circuit
Overcurrent
protection circuit
Photoelectric
sensor main circuit
Dust cover
Max. 20mA
Load
Photoelectric
sensor main circuit
DC 12 to 24V
Cable
Black
Max. 20mA
Load
(Control output)
0V
6. Making Sensitivity Settings
● Full Auto Calibration
In this mode, the PV will be set to the mean value of the maximum and
minimum incident values obtained within a certain period.
Use this mode to detect moving workpieces.
1) Press the set button for a minimum of three seconds while the target
workpiece is passing the sensing area of the fiber unit.
• While the set button is pressed, the sensitivity of the sensor will
be set according to the incident values.
● Manual Calibration
In this mode, make manual PV settings.
PV
The PV value decreases by pressing
this side of the manual button.
The PV value increases
by pressing this side of
the manual button.
Workpiece
● Positioning Calibration
In this mode, a workpiece will be detected when the front edge of the
workpiece has reached a preset position.
1) Press the set button for a moment without the workpiece in the sensing area (i.e., in front of the fiber unit).
Workpiece
The display will
3 s min. flash when the
settings are
completed.
• When the setting is finished, the digital monitor will display the PV
in green.
The display will be lit
when the workpiece
is detected.
PV (green)
2) Locate the front edge of the workpiece in the sensing area. Then
press the set button for a minimum of three seconds.
CV (red)
Workpiece
● Two-point Calibration
In this mode, the PV used will be the mean value of two sensing values
obtained with and without a workpiece.
1) Press the set button for a moment without the workpiece in the sensing area (i.e., in front of the fiber unit).
Front edge
3 s min.
Workpiece
The display will flash
for a moment when
the setting is
finished. Then the
PV will be displayed.
7. Selecting Output
The display will be lit
when the workpiece
is detected.
Either light-ON mode or dark-ON mode is selectable.
Press the mode button.
2) Locate the workpiece in the sensing area (i.e., in front of the fiber unit).
Then press the set button for a moment.
Workpiece
The display indicates that
the sensor is in dark-ON
mode. The CV will be
displayed if no buttons are
operated for approximately
five seconds.
The PV will appear when
the settings are completed.
* If there is extremely little difference in sensitivity between the sensing values, the display
will flash on completion of tuning.
Press the manual button
within five seconds after
pressing the mode button
• Take the same steps to set the sensor to light-ON mode again.
● Maximum Sensitivity Setting
If the sensing performance of the sensor drops due to dust or dirt, set
the sensitivity of the sensor to maximum.
1) Press the set button without a workpiece if the fiber unit is a reflective model. Press the set button with a workpiece if the fiber unit is a
through-beam model. In both cases, press the set button for a minimum of three seconds.
8. User-friendly Functions
● Access Mode Selection
Two modes are available to the display of values and menu items.
EASY
Only basic functions are displayed.
FULL
All available functions are displayed.
“Reflective model”
“Through-beam model”
3 s min.
The display will flash
for a moment when
the setting is finished.
Then the PV will be
displayed.
Press 3 s min.
Select
Completion
of selection
FULL
Press 3 s min.
• The mode is set to EASY before shipping.
* If the sensing distance is insufficient, make sensitivity settings in the
sensor in two-point tuning mode.
2
EASY
.
● Display Selection (Access Mode: EASY)
PV
● Menu Selection (Access Mode: FULL)
CV
Press the
mode button 3 s min
Access
mode
selection
Press
Press
Excess
gain
Press
CV
Normal operation use
Power
mode
selection
Output
Power
status mode status
FINE
Select
• The current value will be
displayed if no keys are operated
for approximately 30 s.
• If the timer function is set, the
output status with power mode
and the timer mode with set time
will be displayed alternately.
• The CV is displayed in
percent based on the
PV.
Press
Timer
function
setting
● Display Selection (Access Mode: FULL)
PV
Press
Select
CV
Press
Press
Press
Excess
gain
Other than
Power
mode status
Press
Output
status
CV
Power mode
,
Press
Peak
excess
gain
S-APC
mode
setting
Bottom
excess
gain
Press
LED bar
indicator
CV
Select
Press
Peak value
Bottom value
● Menu Selection (Access Mode: EASY)
Press the
mode button 3 s min
Access mode
selection
Press
Power mode
selection
Press manual
button to select
Press
Timer function
setting
Press manual
button to select
Press
Select
OFF (for normal operation use)
ECO half
ECO all
Other than
Power mode
Select
Press
OFF (for normal operation use)
Shift ON
Timer OFF (for
normal operation use)
OFF-delay timer
ON-delay timer
One-shot timer
Shift value adjustment
Press
Shift value
Other than
CV
Sensitivity Settings in Edge Detection Mode
The sensitivity of the sensor will be set to maximum by pressing the
while the sensor is in edge detection mode. Make fine sensitivity adjustments by pressing the
.
Press to manual button to
make timer adjustments
Press
OFF (for normal operation use)
Rising edge
Falling edge
Press
Power mode
Shift
function
setting
Select
Press
Power save
function
setting
Normal
FI N E operation use
Used if the sensing
TURBO distance is insufficient
while the sensor is in
fine mode.
Used if the sensing
SUPER environment is bad
TURBO due to dust or other
obstacles.
Timer adjustment range
1-ms increments
1~30ms
2-ms increments
30~50ms
50~200ms 10-ms increments
200~500ms 50-ms increments
* A maximum error of ±10% of the PV.
OFF (for normal operation use)
Used to detect sensing objects highly
precisely under clean environments.
Edge
detection
mode
selection
Press
Timer OFF (for normal operation use)
OFF-delay timer
ON-delay timer
One-shot timer
Timer adjustments
Other than
Power mode
,
Press
Used if the sensing distance is insufficient
TURBO while the sensor is in fine mode.
Used if the sensing environment is
SUPER TURBO bad due to dust or other obstacles.
Used if the incident is insufficient while
ULTRA TURBO the sensor is in SUPER TURBO mode.
Used to detect sensing objects
HIGH SPEED moving at high speed.
Used to detect delicate differences
HIGH RESO- within a short sensing distance.
LUTION
* For timer values, refer to the
corresponding table under FULL
mode.
Note:
• Press the mode button (
) for a minimum of three seconds to return to the display of the CV from any menu selection stage. To return to the
) of the manual button (
).
previous display, press the mode button ( ) first, and press the left side (
• When the power mode is set to HIGH RESOLUTION, the S-APC mode will be always turned ON.
• When the power mode is set to HIGH SPEED, the S-APC mode will be always turned ON in the case of the R model, or otherwise the S-APC mode
will be always turned OFF.
3
9. Key Lock
13. List of Digital Display Items
The key lock function disables the operation of all keys.
Press the manual button for
three seconds while pressing
the mode button.
Indicates that the
keys are locked.
• Take the same step to unlock the keys.
10. Mode Settings before Shipping (Initialization)
Preset value/Current value display
Timer function setting (OFF-delay timer)
Output selection (Dark ON)
Timer function setting (ON-delay timer)
Output selection (Light-ON)
Timer function setting (One-shot timer)
Access mode selection (EASY)
S-APC mode setting (S-APC OFF)
Access mode selection (FULL)
S-APC mode setting (S-APC ON)
Excess gain display
Edge detection mode (OFF)
LED bar display
Edge detection mode (Rising edge)
Hold display
Edge detection mode (Falling edge)
The following factory settings are made before shipping.
Access mode
EASY
Power mode
FINE
Timer function
OFF
Output selection
Light-ON
* Returning to factory settings: Press the
five seconds while pressing the button.
button for a minimum of
Power mode selection (FINE)
11. Hints On Correct Use
• To extend the cable length, use a cable with at least a 0.3 mm2 crosssection area. Limit the length of cable extension to no more than 100 m.
(To connect several units, contact Keyence for further information.)
• Do not wire the amplifier line along with power lines or high-tension
lines, or otherwise the sensor may malfunction or receive damage due
to noise.
• When using a commercially available switching regulator, ground the
frame ground terminal and ground terminal.
• Do not use the FS series outdoors, or in a place where extraneous light
can enter the light receiving surface directly.
• Due to the individual dispersion of characteristics and the difference in
fiber unit model, the maximum sensing distance or displayed value of
all the units are not the same.
• If the sensor is used in S-APC mode for a long time, the LED indicators
will be imposed with a heavy load. In that case, the sensor will be automatically set to ACC mode where the current consumption of the sensor for light emission will be constant, and “END APC” will be displayed.
The sensor can be continuously used in this case. Replace the sensor,
however, if highly precise detection is required.
Response time *1
Display shift function
Timer function
Control output
Environment resistance
Rating
Supply voltage
Current consumption
Ambient
illumination
Ambient
temperature
Relative humidity
Vibration
Shock resistance
Housing material
Size
Weight
Power mode selection (TURBO)
ECO mode setting (ECO half)
Power mode selection (SUPER TURBO)
ECO mode setting (ECO all)
Power mode selection (ULTRA TURBO)
Shift function setting (Shift OFF)
Power mode selection (HIGH SPEED)
Shift function setting (Shift ON)
Power mode selection (HIGH RESOLUTION)
Key lock setting
Timer function setting (Timer OFF)
Key unlock
Forecast maintenance warning (END APC)
WARRANTY
KEYENCE products are strictly factory-inspected. However, in the event of a failure, contact
your nearest KEYENCE office with details of the failure.
1. WARRANTY PERIOD
The warranty period shall be for one year from the date that the product has been
delivered to the location specified by the purchaser.
12. Specifications
Model
Light source
ECO mode setting (ECO mode OFF)
2. WARRANTY SCOPE
(1) If a failure attributable to KEYENCE occurs within the abovementioned warranty period,
we will repair the product, free of charge. However, the following cases shall be
excluded from the warranty scope.
• Any failure resulting from improper conditions, improper environments, improper
handling, or improper usage other than described in the instruction manual, the
user’s manual, or the specifications specifically arranged between the purchaser and
KEYENCE.
• Any failure resulting from factors other than a defect of our product, such as the
purchaser’s equipment or the design of the purchaser’s software.
• Any failure resulting from modifications or repairs carried out by any person other
than KEYENCE staff.
• Any failure that can certainly be prevented when the expendable part(s) is
maintained or replaced correctly as described in the instruction manual, the user’s
manual, etc.
• Any failure caused by a factor that cannot be foreseen at a scientific/technical level
at the time when the product has been shipped from KEYENCE.
• Any disaster such as fire, earthquake, and flood, or any other external factor, such as
abnormal voltage, for which we are not liable.
(2) The warranty scope is limited to the extent set forth in item (1), and KEYENCE assumes
no liability for any purchaser’s secondary damage (damage of equipment, loss of
opportunities, loss of profits, etc.) or any other damage resulting from a failure of our
product.
FS-V22 FS-V22G FS-V22R(P) FS-V20R FS-V22X
Red LED Greed LED 4-element red LED 4-element red LED Infrared (950 nm)
250µs (FINE)/500µs (TURBO)/1ms (SUPER TURBO)/
4ms (ULTRA TURBO)/500µs (HIGH RESOLUTION)/
50µs (HIGH SPEED)
Max. ±1999 (variable)
Timer OFF, OFF-delay timer, ON-delay timer, and one-shot timer
1 to 500 ms
NPN open collector output at 40 V (or PNP open collector output
at 30 V) with 20 mA max. and a residual voltage of 1 V max.
DC12-24V ±10% with a maximum ripple (peak to peak) of 10%, Class 2
S-APC
S-APC mode turned ON or when
mode OFF the HIGH SPEED mode is selected.
Other than Normal 580 mW
720 mW
R model ECO half 480 mW
600 mW
550 mW
ECO all 430 mW
R model Normal 650 mW
720 mW
600 mW
ECO half 530 mW
480
mW
550 mW
ECO all
Model
Mode
3. PRODUCT APPLICABILITY
KEYENCE products are designed and manufactured as general-purpose products for
general industries.
Therefore, our products are not intended for the applications below and are not
applicable to them. If, however, the purchaser consults with us in advance regarding
the employment of our product, understands the specifications, ratings, and
performance of the product on their own responsibility, and takes necessary safety
measures, the product may be applied. In this case, the warranty scope shall be the
same as above.
• Facilities where the product may greatly affect human life or property, such as
nuclear power plants, aviation, railroads, ships, motor vehicles, or medical
equipment
• Public utilities such as electricity, gas, or water services
• Usage outdoors, under similar conditions or in similar environments
Incandescent lamp: 20,000 lux max.
Sunlight: 30,000 lux max.
-10°C to 55°C (No freezing)*2
35% to 85% RH (No condensation)
10 to 55 Hz, 1.5-mm double amplitude,
each in X, Y, and Z directions for two hours
500 m/s2 Three times each in X, Y, and Z directions
Unit and cover are both polycarbonate made
W 9 mm x L70 mm x H 30 mm
Approximately 45 g (including 2-m Cable)
E 1040-1
*1. The FS-V20R has a response time between 210µs and 4.7 ms, depending on the number of Units connected.
*2. Ambient operating temperature with amplifier expansion
1 to 2 units: -10°C to 55°C
3 to 10 units: -10°C to 50°C
11 to 16 units: -10°C to 45°C
KEYENCE CORPORATION
1-3-14, Higashi-Nakajima, Higashi-Yodogawa-ku,
Osaka, 533-8555, Japan
PHONE: +81-6-6379-2211
Specifications are subject to change without notice.
Copyright (c) 2010 KEYENCE CORPORATION. All rights reserved.
11224E 1070-1 96M11224
Printed in Japan
4
A7WW1-MAN-0069