1
CALIBRATION
• For best results, calibrate frequently.
• Dip the tip of the electrode (bottom 4 cm/
1½") in pH 7.01 buffer solution at room temperature. Allow the reading to stabilize.
• Use a small screwdriver to adjust the pH7
trimmer until the display reads "pH 7.01".
INITIAL PREPARATION
The pH electrode is shipped dry. Before using
the Checker®, remove the protective cap and
condition the electrode by soaking the tip (bottom 4 cm/1½") in pH 7.01 buffer solution for a
couple of hours. Then follow the calibration
procedure.
OPERATION
• Do not be alarmed if white crystals appear
around the cap. This is normal with pH electrodes and they dissolve when rinsed with
water.
• Connect the electrode to the meter.
• Remove the protective cap and immerse the
tip of the electrode (bottom 4cm/1½") in the
sample to be tested.
• Stir gently and wait for stable reading.
NEVER IMMERSE THE ELECTRODE OVER
THE MAXIMUM IMMERSION LEVEL. THE
CONNECTOR MUST BE ALWAYS CLEAN
AND DRY.
• After use, rinse the electrode
with water and store it with
a few drops of HI 70300
storage solution in the protective cap.
DO NOT USE DISTILLED OR DEIONIZED WATER FOR STORAGE PURPOSES.
• Always replace the protective cap after use.
BATTERY REPLACEMENT
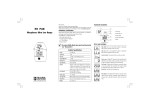
• Turn the Checker® on by sliding the switch
on the top.
Replace the batteries when the display fades
or the meter cannot be switched on.
Remove the battery
cover on the back of
the meter. Insert 2 new
1.5V batteries, while
paying attention to their
polarity.
Batteries should only be replaced in a safe
area using the battery type specified in this
instruction manual.
• Rinse the electrode with water and dip it in
pH 4.01 (or pH 10.01) buffer solution. Allow
the reading to stabilize.
• With a small screwdriver adjust the pH4/10
trimmer until the display reads "pH 4.01" (or
"pH 10.01").
• Calibration is now complete.
ALWAYS CALIBRATE USING FRESH BUFFER SOLUTIONS.