1
3001
Fig
For DOLPHIN caddy assembly
see page 4
A
Fig
Minimum 3 m. [10 ft]
G. F. I.
B
READ CAREFULLY BEFORE USING YOUR DOLPHIN ROBOTIC POOL CLEANER
DOLPHIN CADDY ASSEMBLY INSTRUCTIONS
Insert the wheel assembly (c-1 p.4) firmly into the groove underneath the yellow base ensuring it
is centered with a plastic washer (c-2 p.4) on each side.
Insert the 2 metal pipes (c-3 p.4) into the holes at the top of the white Caddy tower (c-4 p.4) until
they clip onto the wishbone clips in the studs at the base of the tower.
Fit the 2 hooks (c-5 p.4) to the top of the pipes until they clip into the wishbone clips.
Fit the top of the handle (c-6 p.4) in the upright position (see diagram) until it clips on the wishbone
clips in the hooks. Fig A.
INSTALLATION
The caddy and power supply (#1 p.5) should be positioned so that the DOLPHIN can reach all the
walls of the swimming pool. It must be in the shade and at a minimum distance of 10 ft (3 meters)
from the edge of the pool. Fig B.
Use only the original DOLPHIN power supply.
The power supply has been tested, and ETL approved (to UL1012 standard) for outdoor use.
Do not submerge power supply.
Fig
C
Fig
D
HANDLE
The DOLPHIN features an adjustable handle (#2 p.5) that is fitted into slots on each side of the
DOLPHIN body. This handle must be locked in a diagonal position across the top of the DOLPHIN
body in order to ensure optimum cleaning results.
Press downwards on each yellow latch (#3 p.5) to move each handle arm. Fig C.
To avoid cable coiling and for the most efficient cleaning pattern, reverse handle position after each
use. Fig D.
OPERATION
AVOID ENTERING THE SWIMMING POOL WHILE THE DOLPHIN IS IN OPERATION
• Connect the cable (#4 p.5) to the power supply.
• Properly line up notch and groove, push cable in firmly before closing screw collar.
• Place the DOLPHIN in the pool. Fig. E.
• Rock from side to side, releasing trapped air, until the DOLPHIN sinks slowly to the bottom
of the pool.
• Connect the power supply to a protected grounded outlet and switch on.
Fig
E
Caution: Do not operate the DOLPHIN out of water. This may result in extensive damage to the
pump motor seals, thus voiding the warranty.
• Optimum water temperature for the DOLPHIN is 64˚F-90˚F (18 ˚C-32 ˚C).
1
Fig
F
AUTOMATIC SHUT DOWN
The DOLPHIN will automatically shut down after a work cycle of 12 hours. Should a second cycle
be required, switch off the power supply for at least 30 seconds before restarting.
SWITCH OFF THE POWER SUPPLY BEFORE REMOVING THE DOLPHIN FROM THE POOL.
Caution: Surges and interruptions to electric power may cause the DOLPHIN to restart.
Fig
G
After completing cleaning:
• SWITCH OFF the power supply.
• Pull the Dolphin to the surface by gently pulling the cable.
• Lift the Dolphin out of the water by the handle – NOT THE CABLE.
• Place the Dolphin upside down, release the 2 yellow locking clips (#5 p.5). Fig. F. and remove
Fig
H
the bottom lid assembly (#6 p.5) Fig. G.
• Remove the 2 black filter bag clips (#7 p.5) and the filter bag (#8 p.5).
• Turn the filter bag inside out and wash thoroughly with a garden hose. Fig. H.
• The bag may be laundered using a regular synthetics cycle. This should be done at least once
every 2 months. An additional filter bag is included.
• Remove the yellow inlet cover (#9 p.5) by pulling it gently upwards.
• Remove the inlet flaps (#10 p.5).
• Clean the inlet flaps, cover and under the locking clips.
• Reinstall the flaps & the inlet cover.
• Replace the filter bag with the tag on the outside & positioned centrally along the long side
Fig
I
Fig
J
of the bottom lid.
• Stretch the elastic ring of the bag over the 2 metal frames and over the white lip
of the bottom lid.
• Gather all the excess filter material into the center of the metal frames.
• Gather the material along the top of the frames so that the corners of the bag are adjacent
to the corners of the frame.
• Install a black filter bag clip over the top of each frame Fig. I.
• Install the bottom lid assembly in the body and lock it in place.
• Before cleaning moving parts ensure power supply is turned off & unit is unplugged.
• Turn the roller brushes (#11 p.5) and remove anything caught under the tracks (#12 p.5).
• Turn the Dolphin over & remove the yellow impeller tube (#13 p.5) by turning it gently counter
clockwise. Fig. J.
• Remove debris or hair clogged in the impeller (#14 p.5).
• Replace the impeller tube.
• Change the position of the handle by pressing downwards on the yellow latches and locking the
handle in the opposite diagonal position.
• Store the Dolphin upright on the Caddy and coil the cable loosely around the Caddy hooks. Fig. L.
• Store the Dolphin in a dry, shaded place Fig. K.
113˚F [45˚C]
41˚F [5 ˚C]
Fig
K
2
Fig
M
IMPORTANT TIPS
• Clean the filter bag whenever you remove the DOLPHIN from the pool (if a bag is left
dirty it may become unusable).
• A green clean-up filter bag is available for collection of large debris (e.g. leaves).
Contact your dealer.
• Replace worn brushes (#15 p.5) to ensure maximum cleaning performance.
• To prevent the Dolphin from getting stuck on the “main drain”, install a main drain cover.
• Protruding wall fittings (e.g. return outlets for fountains etc) may impede the DOLPHIN’s lateral
movement. An additional cleaning cycle, with the handle in the reverse diagonal, may be
necessary to clean entire pool.
• When first used the Dolphin may climb too high and suck in air when it reaches the waterline.
If so, remove the yellow handle fioats by pushing them downward. Fig M.
If the problem continues, add a flat weight of approximately 8 oz (or as heavy as possible so
long as the Dolphin continues to climb the walls) to the upper side of the inlet cover.
• For more advice see Trouble Shooting Guide or please contact SmartPool’s customer support
line 866-730-9880 or email to [email protected] .
GENERAL SPECIFICATIONS
Calculated Ground Speed
Calculated Scanning Rate
50 ft/min
63 ft2/min
900 m/hr
350 m2/hr
Suction Rate
Weight (w/o cable)
4750 gals/hr
20.8 lbs
18,000 l/hr
9.4 kg
POWER SUPPLY
Primary Voltage
115 VAC
Secondary Voltage
Rated Output
29 VDC-nominal
250 Watts
These specifications may vary for different swimming pools and for the various electrical
configurations.
Although the DOLPHIN has been tested in a wide range of swimming pools, the manufacturer
cannot accept responsibility if the DOLPHIN is not entirely suitable for any particular swimming
pool.
For more details contact SmartPool customer support 866-730-9880, or email to
[email protected]
Note: The sealed motor unit and the DOLPHIN power supply contain no user-serviceable parts.
Opening these units will automatically void your warranty.
The manufacturer reserves the right to change these specifications without prior notice.
U.S. Patent No. 4168557. S.A. Patent No. 76/7474. AUST Patent No. 509698
3
Fig
A
DOLPHIN CADDY ASSEMBLY
C-6
Fig
L
C-5
• Store the Dolphin upright on the Caddy and coil
the cable loosely around the Caddy hooks.
C-3
C-4
C-1
C-2
4
DOLPHIN ASSEMBLY
#2
#3
#1
#13
#12
#4
#15
#11
#14
#7
#8
#9
#66
#10
#5
5
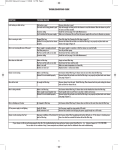
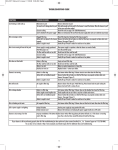
DOLPHIN TROUBLE SHOOTING
Symptom
Possible reasons
Corrective action
• Air bubbles expelling from impeller tube or
Dolphin falling backwards at waterline
• Dolphin climbing too high
• Remove handle floats &, if necessary, attach
8oz weight to bottom inlet cover
• Cable twisting
• Handle position not changed
• Change handle diagonal after each use
• Gets stuck on main drain cover
• Turn off filter & install main drain covering
Straighten cable & lay in sun periodically
• Check tracks are free & not stretched
• Lock bottom lid securely
• Tracks need replacing. Call Dolphin support line
•Place power supply in a position so that
Dolphin can reach all walls
• Dolphin moving in circles
• Dolphin does not reach all pool areas
• Dolphin does not climb walls
• Dirt stuck in drive system
• Bottom lid is loose
• Track is stretched &/or worn
• Power supply wrongly positioned
• Dolphin is too light
• Remove handle floats &, if necessary, attach
8oz weight to bottom inlet cover
• Power supply wrongly positioned
• Filter is on
• Place power supply in a position so that
Dolphin can reach all walls
• Turn off pool filter
• Handle not in diagonal position
• Not traveling sideways along waterline
• Lock handle in diagonal position
• Move handle floats to one side & place
• Dolphin does not climb walls
8 oz weight in filter bag on other side
• See below
• Dolphin too heavy
• Empty & wash filter bag & add floats if necessary
• Filter bag clogged with fine debris
• Algae on walls
• Water temperature too low
• Water inside handle
• Brushes worn
• Dolphin too light
• Machine wash filter bag
• Brush walls
• Water temperature should be above 65˚F
• Call Dolphin Support Line
• Brushes need replacing. Call Dolphin support line
• Remove handle floats & attach 8oz. weight to
bottom inlet cover if necessary
• Debris caught around impeller
• Untwist impeller tube & clean impeller
• Motors not working
• Impeller blocked
• Drive system blocked
• Electrical problem – motor unit, cable,
power supply
• Clean around impeller
• Clean tracks & wheels
• Check cable & wall plugs & sockets.
Call Dolphin Support Line
• Dolphin will not sink
• Air caught in filter bag
• Turn Dolphin upside-down under water or
machine-wash filter bag
Note: Operating the Dolphin out of the water will void warranty.
Dolphin Customer Support 866-730 9880 Monday to Friday 8.30 to 5.30 Eastern Time or email to [email protected] .
6