1
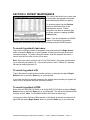
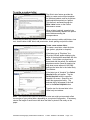
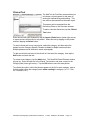
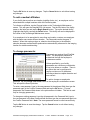
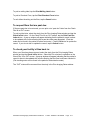
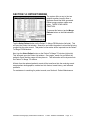
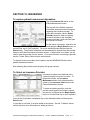
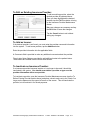
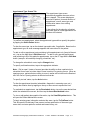
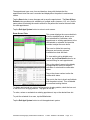
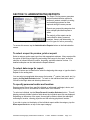
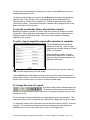
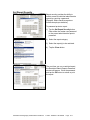
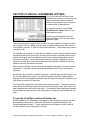
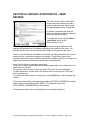
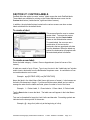
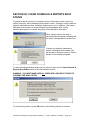
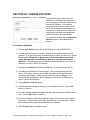
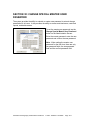
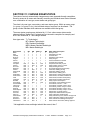
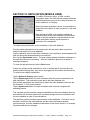
Bookmarks can help you add information to your letter by pulling data from the database
already entered. For example: today’s date, patient name, last exam date, next exam
date, etc. To add a bookmark, place the cursor at the location where you wish to insert
the bookmark in the Letter Body text window. You can type the bookmark in, making
sure to use the exact format or use the bookmark drop down menu to select and insert
the bookmark. Once you have selected the bookmark from the drop down menu, it will
be inserted into the letter at the location of the cursor. Example: [TODAY]
To check the letter, any bookmark(s) and formatting, tap the View button. The letter will
open in Microsoft Word. If the bookmark doesn’t populate (area left blank), the
information relating to that bookmark might not have been entered in the patient’s
record, or that bookmark might not be available for this letter type. Please see the
Appendix A of the Mammography Administrative Handbook for more information on
adding bookmarks and availability of the bookmarks. When you have finished
previewing the letter, you can close Word.
For each letter, a note can automatically be inserted in the patient’s record regarding the
custom letter. To enter a note, type the note in the Patient Record Note field before
saving the letter. Example note: Benign biopsy letter sent.
After you have entered the text for this letter, enter a letter name into the LetterName
field and then save the letter by tapping the Save button located in the lower left hand
corner of the screen. The new letter will appear in the Letter Name window.
Printing a custom letter:
To print a letter, select the letter and tap the Print w/Note button. This will print the
letter and insert the letter note (if entered) and date into the patient’s notes letter
category, documenting the correspondence.
Note: If the Print button is tapped and there is a note entered in the notes field, the
note will not populate in the patient’s record. To update the patient’s record to reflect
the note, you must tap the Print w/Note button. The Print button is generally used for
testing new letter templates. It is recommended that the Print w/Note button is always
used to print the actual letter.
Edit existing custom letter:
To edit an existing letter template, select the letter from the Letter Name window. The
body of the letter will appear in the Letter Body Text window. Make any changes as
necessary. Tap the Save button to save any changes.
To verify the changes, select the letter once again from the Letter Name window. This
will refresh the letter template.
To print a label for a custom letter:
Tap the Print Label button to print a label addressed to the selected individual,
physician or facility.
PenRad™ Mammography Administrative Handbook
© 1995 - 2006 Rev. 04/14/2006
Page 4-17