1
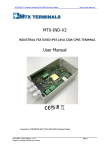
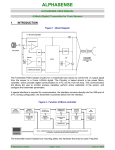
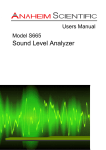
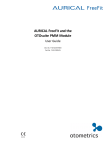
Ambio Remote Health
Monitoring System
User Guide
1-000-0060 User Guide Rev G
5/1/13
Ambio Remote Health Monitoring
System
Customer Service
www.ambiohealth.com/contact
[email protected]
203-612-5600
Manufacturer
Ambio Health
Soundview Plaza Suite 700R
1266 E. Main Street
Stamford, CT 06902
© 2012 Ambio Health, Soundview Plaza Suite 700R, 1266 E. Main Street,
Stamford, CT 06902
Firmware © Ambio Health 2012
Ambio Care Portal © Ambio Health 2012
This device complies with Part 15 of the FCC Rules. Operation
is subject to the following two conditions: (1) this device may
not cause harmful interference, and (2) this device must
accept any interference received, including interference that
may cause undesired operation.
FCC Caution: Any changes or modifications not expressly approved by
the party responsible for compliance could void the user’s authority to
operate this equipment.
Contents
1. General Precautions ............................................ 1
2. Terms Used in This Guide ..................................... 3
3. How to Set Up Your Devices ................................. 4
A.
Set Up the Gateway ....................................... 4
B.
Set Up the Wireless Connectors..................... 5
4. How to Set Up the Care Portal ............................. 7
A.
Accept Invitation, Set Up Account ................. 7
B.
Log In ............................................................. 8
C.
Add / Edit Patients ......................................... 8
D.
Add / Edit a Caregiver .................................. 11
E.
Add / Edit Devices ........................................ 12
F.
Set Health Meter Alerts ............................... 14
G. Set Motion Sensor Alarm Settings ............... 15
H.
Reading Schedule and Reminders ................ 17
I.
Set Goals ...................................................... 19
J.
Set Up Patient Survey .................................. 20
5. How to Take and Send Readings ........................ 22
A. Blood Pressure Readings ................................ 22
B. Blood Glucose Readings .................................. 23
C. Scale Readings ................................................. 25
6. How to Use the Care Portal ................................ 26
A.
Dashboard .................................................... 26
B.
Health Readings ........................................... 29
C.
Goal Tracking................................................ 34
7. Maintenance and Cleaning ................................. 35
8. Troubleshooting ................................................. 36
9. Device Display Outputs ....................................... 38
10. Specifications .................................................... 38
11. Symbols ............................................................ 41
12. Warranty .......................................................... 42
1. General Precautions
When using the Ambio Health Remote Health Monitoring
System (“System”), basic precautions should always be
followed. The System is intended for home use. Please
read and follow all instructions and warnings before using
this product. Save these instructions for future reference.
The Ambio Health Remote Monitoring System is not
intended for diagnosis or as a substitute for medical care,
and it is not intended to provide real-time data. All
patient diagnoses and treatment are to be performed
under the supervision of a healthcare professional. The
data is made available to the patients when time-critical
care is not required. The System is contraindicated for
patients requiring direct medical supervision or
emergency intervention.
Reminder functionality is for convenience only and should
not be used for health readings or medications that must
be taken with close adherence to schedule.
Follow all instructions and precautions in the owner
guides provided by the Glucose Meter and Blood Pressure
Meter manufacturers.
Only use the System with compatible devices specified in
this User Guide.
1
Do not attempt to service, calibrate, or repair System
components. Periodically inspect System components
including the supplied AC Power Adapter for damage. If
components are damaged, contact Ambio Health for
replacements.
Avoid exposing the System to extremes in temperature or
humidity or to direct sunlight, shock and dust. Store and
use within the temperature and humidity ranges noted on
page 36.
Remove and replace batteries if devices are not used for
more than six months.
To reduce the risk of fire or electric shock, carefully follow
these instructions. The supplied power unit (AC Adapter)
is intended to be correctly oriented in a vertical or floor
mount position.
The System complies with the applicable standards for
Electromagnetic Compatibility; however it is not
recommended that it be used in the presence of strong
electromagnetic fields. When using the System, keep
away from sources of electromagnetic disturbances such
as electric motors or radio transmitting equipment.
The System is intended for use only by those who have
agreed to the Ambio Health terms and conditions.
2
2. Terms Used in This Guide
Patient
The person whose readings are taken and
stored in the Care Portal.
Care Circle
The Patient’s support team of Care
Partners.
Care
Partners
One or more individuals supporting the
Patient; can include family members,
peers, and/or professional caregivers.
Care Portal
Secure web-based application for viewing
readings and managing settings for
reminders, alerts and goals.
Health
Meters
Homedics BPA-060 Blood Pressure Meter
Wavesense Presto Blood Glucose Meter
Ambio Scale
Wireless
Connector
Device that plugs into
the Blood Pressure or
Blood Glucose Meter to
send readings from the
meter to the Gateway.
Gateway
Device that plugs into
your home internet
router to send readings
to the Care Portal.
3
3. How to Set Up Your Devices
To use the Ambio System, you will need home
broadband internet service with an open port.
A. Set Up the Gateway
1. Plug one end of the
supplied Ethernet
cable into the
Gateway.
2. Plug the other end of
the supplied Ethernet
cable into your home
internet router or hub.
3. Plug the round end of
the supplied AC power
adapter into the other
side of the Gateway.
4
4. Plug the supplied AC
power adapter into a
standard 120V outlet.
A green light should
appear on top of the
Gateway.
B. Set Up the Wireless Connectors
1. Your Wireless
Connector has a
CR2450 battery preinstalled. If the LED is
not blinking green,
replace the battery (see
Section 8)
2. For the Glucose Meter,
remove the rubber tab
on top of the meter.
5
3. Plug the Wireless
Connector with the
cross icon into the top
of the meter.
4. For the Blood Pressure
Meter, plug the
Wireless Connector
with the heart icon into
the side of the meter.
Verify Gateway Set up: Green light (on top of
Gateway) means it is connected. Orange light
means there is power but no internet connection check your Ethernet cables. No light means there is
no power. Check your AC adapter connection.
Verify Wireless Connector: Green blinking light
indicates it is ready to use. Orange blinking light
means it is sending readings. Do not take a new
reading. No light means it needs a fresh battery.
6
4. How to Set Up the Care Portal
If you are a first-time user, we recommend setting
up your system following the sequence of this User
Guide. After initial set-up you can edit settings as
you wish.
A. Accept Invitation, Set Up Account
1.
Look for the email from Ambio Health.
2.
Review the email from Ambio Health and click I
KNOW THEM if you wish to join.
3.
The Ambio Health User Agreement will display.
Click I AGREE TO TERMS button if you agree.
4.
The Set Your Password page will display.
a. Enter and retype the password you wish to
use. Passwords must be 6 or more
characters and contain at least 2 of the
following: a lower-case letter, an uppercase
letter, a number, a special character.
b. Check “Keep me signed in” if you want the
system to remember your password for you.
c. Click Set Password to save.
At this point the system will automatically Log In for
you to set your preferences.
7
B. Log In
1. Open your web browser program* and go to
www.ambiohealth.com/account/login.
* Internet Explorer v6 or higher, Chrome v8 or
higher, Safari v4 or higher or Firefox v8 or higher
2. Enter the Email and the Password you selected
when you set up your account.
3. If necessary, click on Forgot Password? Your
password will be sent to your Email.
4. Check the Keep me signed in box if you would
like the system to automatically log you in when
you visit the Care Portal.
C. Add / Edit Patients
To edit Patient information:
1. Click on the Patients link on the top of the page.
Or, if you are logged in as the Patient, click your
Name.
8
2. Update Name, Email and Telephone as needed.
3. Set meal times for the Blood Glucose reading
display.
4. Set the Patient’s time zone. This is used to
receive Reminders at the proper time.
5. Set number of glucose test strips you have. This
is used for test strips re-ordering.
6. Click the Save Changes button.
7. If you want to deactivate the Patient, click the
button. When prompted, click Yes, Delete
to confirm.
To add a Patient:
1. Click the Add New button at the bottom of the
Patients page.
2. Enter the Patient Name, Email and Telephone
Number.
2. Click the Save Changes button.
9
3. An invitation email from Ambio will be sent to
the Patient. Once the Patient accepts the
invitation (see Section 4.A) he or she will be
activated in the system.
You can resend the email invitation by going
back to the Patients button, locating the Patient
record and clicking the Resend Invite link.
To set Portal Edit and message delivery
preferences:
1. Click on the Settings tab and then the Care
Circle tab.
2. Portal Edit enables users to set preferences,
reminders and alerts.
3. Check CC: on Reminders to turn on/off reminder
messages.
10
4. Check Send Reports Daily or Weekly to turn
on/off reports.
5. Check Send Alerts & Reminders By Email, SMS
or Phone method to turn on/off delivery
methods for messages.
6. Click the Save Changes button.
Note: Account Owner may display next to one person,
which indicates they own the devices assigned to the
Patient. Only the Account Owner can manage or reassign those devices.
D. Add / Edit a Caregiver
1. Click the Add New button at the bottom of the
Care Circle page. The following section will
appear:
11
2. Enter the Caregiver’s name, email and telephone
number.
3. Check boxes to indicate if the Caregiver will be
able to edit Portal settings, receive copies of
reminders, receive reports, and method to
receive alerts.
4. An invitation email will be sent to the new
Caregiver. Once the Caregiver has accepted the
invitation (see Section 4.A) he or she will be
activated in the system.
E. Add / Edit Devices
Care Circle members who own meters (listed as the
Account Owner in the Care Circle) are authorized to
re-assign those meters. If you have a Wireless
Connector or Scale and do not see the serial number
in the device list, you can add it.
To view / reassign devices:
Click on the Devices button on the top right of the
page.
12
To manage device assignments:
1. Use the Assigned to drop-down list to reassign a
device.
2. Click the Save Changes button to save.
To add a new device:
1. Click the Add New button at the bottom of the
Devices page. The following section will appear:
2. Locate the Serial Number (SN) and Password
(PW) on the back of the device.
3. USE ALL CAPITAL LETTERS to enter the Device ID
(SN) and Password (PW) on this page.
13
4. Click the Find button to confirm the entry is
valid.
5. To assign the meter, select a Patient from the
drop-down menu next to the device.
6. Click Save Changes when done.
F. Set Health Meter Alerts
1. To set alert levels for the Scale, Blood Pressure
Meter and Blood Glucose Meter, click the
Settings tab and then the Alerts/Alarms tab.
You will then see a page to set alerts for your
meters:
14
2. Alerts can be sent if readings are above or below
the level you set. Enter Below and Above
values you want to trigger an alert.
3. For the Scale, you can set an alert if the Patient’s
weight changes more than a specified number of
pounds within a specified number of days.
4. Enter a number of days in the Inactive for box to
send a reminder if a reading has not been taken
for the specified number of days. If you want
readings more than once per day use the
Reminders tab instead.
5. Use the check boxes under Send alert to if you
want the Patient and/or the Caregiver to
receive the alerts. Go to the Care Circle tab to
specify which Caregivers will receive alerts and
the delivery method (Email, Text, Telephone).
G. Set Motion Sensor Alarm Settings
If you have the Ambio Activity Monitoring Product,
you will see a section in the Alerts/Alarms page
under the Settings tab listing your Motion and
Door/Window Sensors.
1. Click the Settings tab and then the Alerts tab.
15
You will then see a page to set alarms for each of
your sensors:
2. ”No movement by” will send an alarm message
if there is no movement at that sensor between
midnight and the time set.
3. ”Movement after” will send an alarm message if
there is movement after the time set.
4. ”Movement at any time” box checked will send
an alarm if there is movement at any time at
that sensor.
5. Alarm messages will be sent via email, text or
telephone based on settings in the Care Circle
page.
16
H. Reading Schedule and Reminders
Enter the health meter reading schedule based on
your care plan. The schedule is used both to send
reminders and to determine points for readings
taken in the Goals and Rewards section.
1. Click on the Settings tab and then the
Reminders tab to manage Reminders settings:
You will then see a page to set your reading
schedule and reminder settings for each of your
meters:
2. Set the times per day a reading should be taken.
Leave boxes set to ”disable” if you have fewer
than four readings per day.
17
3. Check the Per Schedule box if you want
reminders sent at the scheduled times.
4. Check the If No Reading box if you want
reminders sent only if a scheduled reading was
not received.
5. Check the CC Caregivers box if you want
Caregivers to receive copies of the reminders.
6. Reminders will be sent by email, text or
telephone based on settings in the Care Circle
page.
7. Click the Add Medication button at the bottom
of the Reminders page to add a new medication.
The following section will be displayed:
8. For each medication, enter up to four scheduled
times per day to take the medication.
9. Select the frequency:
18
•
•
•
Daily – Every day at the specified times
Weekly by specifying the days of the week
Monthly by specifying the day of the month
10. Enter the dosage and instructions for taking the
medication and click the Save Changes button.
11. Verify the Patient received the expected
reminders per the reminder schedule.
I. Set Goals
Goals can be set for taking readings per the
schedule, keeping readings within target ranges, and
tracking progress toward a target weight. The
readings schedule you set up on the Reminders tab
is used to calculate points for taking readings.
1.
Click on the Goals tab and then the Set Goals
tab to manage goal settings:
2.
Click the Add New button to add a new goal.
You can add as many goals as you want.
19
3.
Select the goal you wish to track from the dropdown list.
4.
Enter a number for Weekly Goal Points.
5.
Enter a Reward that is something the Patient
enjoys.
6.
Click Save Changes to save.
7.
Click the
button next to a goal to remove it.
J. Set Up Patient Survey
The Survey tool can be used to gather qualitative
information such as “How are you feeling today?”
Surveys can be sent by email or telephone based on
Patient preferences set on the Care Circle tab.
1. Click on the Settings Tab, then on the Survey
tab.
20
2. Click the Add Survey button to create a new
survey.
3. Enter the survey name to create a new survey,
or select a predefined template using the dropdown box.
4. Enter the frequency for sending the survey
(daily, weekly, monthly) and the time of day it
should be sent.
5. To add questions, click the Add Question
button. You can add multiple questions in a
survey.
6. Enter the question to ask and the answer
options.
7. Check the Send alert when answer is chosen
box if you would like an alert to be sent if the
Patient responds with that answer. Alerts will
be sent by email, text or telephone based on
preferences set in the Care Circle tab.
8. Click the Add Answer Choices button to add
additional answers.
9. Click the Save Changes button when done.
21
5. How to Take and Send Readings
A. Blood Pressure Readings
Please read and follow the directions in the
HoMedics BPA-060 User Manual. Be sure you set
the date and time in the meter.
1. Plug the Ambio
Wireless Connector
into the meter (if not
already attached).
2. Place blood pressure
cuff on arm with the
tube in the front and
tighten until snug.
Rest arm on armrest
or table.
22
3. Press the Start/Stop
button. Try not to
move while the
reading is being taken.
4. Readings are sent
automatically 3 times
per day. Press the
button if you want to
send the reading
immediately.
B. Blood Glucose Readings
Please read and follow the directions in your
WaveSense Presto Owner’s Guide. Be sure you set
the date and time in the meter.
1. Plug the Ambio
Wireless Connector
into the meter (if not
already attached).
23
2. Insert a test strip into
the meter.
3. Apply blood sample
to test strip.
4. Remove test strip
from the meter.
5. Readings are sent
automatically 3 times
per day. Press the
button if you want to
send the reading
immediately.
24
C. Scale Readings
Set weight unit:
1. Step on scale to turn on
2. Turn the scale over
3. Press the unit switch
button until the desired
unit (Lb or Kg) appears
on the LCD display.
Taking a weight reading:
1. Place scale on a flat hard flat surface. Avoid
carpeting or other soft surfaces.
2. Step evenly on the scale. Keep your body
balanced with your weight even on both feet.
3. Your weight will appear in a few seconds.
4. Your reading will be sent automatically to the
Care Portal and the scale will switch off
25
6. How to Use the Care Portal
A. Dashboard
Device Overview
Each device assigned to the Patient is displayed with
a status icon and the value and time of the last
reading. Click on a device to see readings history for
that device.
will display if an Ambio Wireless Connector has
a low battery. Please replace the battery in this
device.
26
Calendar / Month View
The calendar displays appointments entered by Care
Circle members, as well as reading alerts generated
by the system. The event description can be viewed
by moving the mouse over the day and time of the
event.
To add a new appointment
1. Click month buttons to move to the desired
month.
2. Place the cursor on a specific day and click the
Add New button that appears.
3. Fill in the details of the appointment.
4. Check the Send Notification box to add a
reminder.
5. Click the Save button to save in the calendar.
To edit an appointment
1. Click on the desired appointment time.
2. Edit the description, time or send notification.
3. To delete the appointment, click the Delete
button.
27
Calendar / List View
The List View can be used as a message board for
the Care Circle.
To add a message
1. Enter the text of the message and click the Post
Message button.
2. Click the This is an event box to add the
message as an appointment on the calendar.
The date and time select boxes will display when
you check this box.
Goal Status
The Patient’s percent achievement toward the
current week’s goal is displayed. See Section 4.I to
learn how to set goals.
28
B. Health Readings
Click on the Health tab to go to the Health
Information page.
From this page there are tabs for Device Readings,
Survey Results, Exercise Log, Food Log, and Patient
Record.
Device Readings
Under this tab reading history can be viewed for
each of the Patient’s meters. You can select
different time period using the select box next to
Show readings for.
29
You can add a comment to a reading by clicking on
the reading number. Click on the yellow note icon
to view a comment for a reading.
You can email or print your readings using the
buttons on this page.
30
Device Readings – Set Alert Levels
Set upper and lower threshold levels that will trigger
an alert and determine who should receive the alert.
Set alert levels based on your healthcare provider’s
guidance. Go to the Care Circle tab on the Settings
page to specify which caregivers should receive the
alerts. When done click the Save button.
Survey Results
This tab displays completed survey results for the
specified Patient.
31
Select the survey you wish to review using the Select
a survey drop-down menu, and change the display
time period using the time period drop-down menu.
Exercise Log
On this tab you can view and add entries for
Number of Steps (from pedometer) and/or Minutes
of Exercise.
Click the + Add Entry button to add a new entry.
Click the Graph tab to show entries in graph format
and the Log tab to show entries in log format.
32
Food Log
On this tab you can view and add entries including
food items and total carbs and calories eaten.
•
Click + Add Entry to add a new entry.
Patient Record
On this tab Patient examination and test results can
be viewed and entered.
•
Click + Add New to add a new entry.
33
C. Goal Tracking
Click on the Goals menu tab and then the Goal
History tab to see the goals results history.
•
The Goal History graph on the left side shows
weekly points achieved and the points target for
the selected patient.
•
The Current Week chart on the right side shows
the points earned so far as a percentage of the
target and number of days remaining.
34
7. Maintenance and Cleaning
Maintenance:
Check the Gateway, Wireless Connectors and Scale
for cracks and check the supplied AC adapter for
damage with each use. If damaged, discontinue use
and contact Ambio for replacements.
Cleaning:
As needed, clean the Gateway, Wireless Connectors
and Scale with a soft cloth with a mild detergent.
Detach the AC adapter before cleaning the Gateway.
Replacing Batteries:
Wireless connectors:
a. Turn Wireless Connector
upside down
b. Pinch latches on the battery
tray and pull out.
c. Place CR2450 battery on
tray with plus + side up
d. Slide battery tray back in
35
Scale:
Turn the Scale over and remove battery
compartment cover. Replace 4 AAA alkaline
batteries with positive + and negative – terminals
matching the display in battery compartment.
Replace the battery compartment over.
Note: Batteries are hazardous waste. Do not dispose
of them together with the household garbage.
Consult your local regulations for proper disposal.
8. Troubleshooting
Problem: Readings from your device(s) do not
appear in the Care Portal.
Possible Solutions:
1. Devices may be out of range of the Gateway.
Bring device(s) closer to the Gateway.
2. Is the Gateway LED light green? If not:
36
•
•
•
Verify the supplied AC power adapter is
plugged into the Gateway and an active
outlet.
Check that the Ethernet cable is plugged into
the Gateway and your home router / hub
and that your internet connection is live by
going to www.google.com. If that website
does not display, contact your ISP.
If a green light is still not displayed on the
Gateway, contact us to replace it.
3. On the Wireless Connector is there a blinking
green or orange light? If not, replace the battery
(see Section 7). If there is still no blinking light,
contact us.
4. Is your device assigned to you in the Care
Portal? Go to the Devices tab. Confirm that 1)
your device is listed, 2) it is assigned to the
correct User and 3) the Serial Number on the
back of the device matches the Device ID in the
screen. If not, add your device (see Section 5.C)
or assign to the desired User.
If you are still having trouble, contact us:
• Visit us at www.ambiohealth.com/contact.
• Email us at: [email protected].
• Call us at 203-612-5600.
37
9. Device Display Outputs
Wireless
Connectors
Gateway
Scale
Green blinking light – ready to use
Orange blinking light – transmission in
progress, wait until green light reappears
No light – replace battery
Green light – ready to use
Orange light – no internet connection
No light – no power connection
Weight display solidly lit – weight reading
in progress
Weight display blinking – weight reading
complete
Display not back lit – battery low
Kg / Lb – weight unit
EEEE – reading error, step off and back on
to try again
10. Specifications
Gateway:
Dimensions:
Power Source:
Ethernet Port:
Operation
Environment:
Storage
Environment:
Wireless function
38
115 mm x 68 mm x 37 mm
Approved UL-60601 Medical Grade
power supply DC 5V 1.5W
Ethernet RJ-45
Temperature: 50°F~104°F (10°C ~40°C)
Humidity: 15% ~ 90% RH
Temperature: -4°F~158°F (-20°C~70°C)
Humidity: Less Than 90% RH
Communicate with Ambio Wireless
Wireless RF
frequencies
Wireless range:
Accessories
Connectors and Ambio Scale
908.5 Mhz + 1.1235*n Mhz (where
0<=n<=10)
30 meters (98 feet) typical in home
UE Switching Power Adapter
(UE08WCP-050030SPA)
3’ Ethernet cable CAT-5
Type B Equipment
IPx0-No special protection against the
ingress of water
Not suitable for use in presence of
flammable mixtures
Continuous operation
Wireless Connectors:
Dimensions:
46 mm x 43 mm x 15 mm
Power Source:
One CR2450, 3 volt, lithium battery,
replaceable
Data Port:
USB-Mini-B–5male
Wireless function
Communicate with Ambio Gateway
Wireless RF
908.5 Mhz + 1.1235*n Mhz (where
frequencies
0<=n<=10)
Wireless range:
30 meters (98 feet) typical in home
Operation
Temperature: 50°F~104°F (10°C ~40°C)
Environment:
Humidity: 15% ~ 90% RH
Storage
Temperature: -4°F~158°F (-20°C~70°C)
Environment:
Humidity: Less Than 90% RH
Internally powered equipment
Type B Equipment
IPx0-No special protection against the
ingress of water
39
Not suitable for use in presence of
flammable mixtures
Continuous operation
Scale:
Function
Dimensions:
Power Source:
Capacity:
Accuracy:
Wireless function
Wireless RF
frequencies
Wireless range:
Operation
Environment:
Storage
Environment:
Auto step on / off
Automatic switch off
Unit: Kg / Lb
12” x 12” x 1”
6V - four ‘AAA’ 1.5 volt alkaline
5-180 kg (11-396 lb)
+/- 0.1 kg (0.2 lb)
Communicate with Ambio Gateway
908.5 Mhz + 1.1235*n Mhz (where
0<=n<=10)
30 meters (98 feet) typical in home
Temperature: 32°F~95°F (0°C ~35°C)
Humidity: 15% ~ 90% RH
Temperature: -4°F~158°F (-20°C~70°C)
Humidity: Less Than 90% RH
Internally powered equipment
Type BF Equipment
IPx0-No special protection against the
ingress of water
Not suitable for use in presence of
flammable mixtures.
Continuous operation
NOTE: Specifications are subject to change without prior notice or any
obligation on the part of the manufacturer.
40
11. Symbol Definitions
Attention, consult instructions
Type B Applied Part
Type BF Applied Part
Direct Current
41
12. Warranty
Ambio Health offers customers who buy (“You”) a new Ambio
Gateway and/or a new Ambio Wireless Connector and/or a new
Ambio Scale (“Devices”) within the United States the following
purchase protections.
Ambio Health extends a two-year limited warranty to
consumers who buy a new Ambio Device. Under this limited
warranty, Your new Device is covered for a period of two years
from date of purchase as long as it has not been modified,
altered or misused. Under this warranty Ambio Health will
replace, free of charge, Your Device if it is defective in material
or workmanship. No other warranties express or implied, are
made. Ambio Health will not be liable for any incidental or
consequential damages, so the above limitations or exclusions
may not apply to You. This Warranty gives You specific legal
rights, and You may also have other rights that vary from state
to state.
To obtain Warranty service on Your Device, mail the Device and
either Your dated sales receipt or Your Ambio Care Portal Email
User ID (as proof of purchase) to:
Ambio Health – Warranty Dept.
112 Southfield Avenue
Stamford, CT 06902
Ambio Health may adjust the terms of this Warranty at any time
without notice.
The Ambio Care Portal warranty is specified in the Ambio Terms
and Conditions for Sale found at ambiohealth.com/pages/term
42
1-000-0060 Rev G