Transcript
IMPORTANT
Follow these instructions carefully. If you do not understand the instructions,
have the installation done by a professional bike mechanic.
FLAK JACKET
TM
Flak Jacket Cables are a fully shielded cable system which depend on ShieldLock ferrules. These ferrules must not fit too tightly through the holes in the
cable stops. If your cable stops have unusually small holes, they will pinch the
tubes and create extra friction in the system. The cable stop holes should be
2.4mm in diameter or larger. They need to be filed if they are undersized.
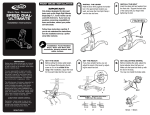
DERAILLEUR CABLE INSTALLATION INSTRUCTIONS
1
CUT THE HOUSING
THREAD THE CABLE
Using bicycle cable cutters, cut
the Flak Jacket cable housing to
length. Keep the housing as short as
possible while avoiding sharp bends.
Install the inner wire into the shifter and thread it through
the housing and shield. The front derailleur cable will be
sealed with the rubber Overcoat .
5
TM
FOR TOP TUBE
ROUTING
The Overcoat is
installed over the
Shield-Lock ferrule
tube at the seat tube
cable stop.
Use an awl or other pointed
object to flare open the housing liner.
NOTE: If your cable cutters are not very sharp and in excellent
condition, don’t even try to cut it.
For full suspension bikes, be sure to use enough housing near the rear
pivot to allow for suspension travel.
2
3
INSERT THE CABLE FERRULES
CABLE STOP
If the housing end goes to a shifter,
put on a conventional ferrule.
If the housing end goes to a
cable stop, put on one of
the Shield-Lock ferrules.
FOR UNDER THE BOTTOM
BRACKET ROUTING
The Overcoat is installed
over the end of the
black tubing.
CUT THE RED CABLE SHIELD TUBING
Measure the distance between cable stops (where any exposed
cable runs) and cut the tubing 1/4 to 1/2 inch shorter than the
distance you measure.
TOP TUBE ROUTING
ATTACH THE CABLE TO THE DERAILLEUR
Tighten the cable anchor bolt onto the cable to the
manufacturer’s specifications. Cut off the excess cable
and crimp on the enclosed cable end.
TEST THE SYSTEM
UNDER THE B.B. ROUTING
4
NOTE: For under the bottom bracket routing, measure from the down
tube cable stop to the bottom bracket for both the front and rear
derailleur. Then measure from the bottom bracket to the rear cable
stop on the chainstay.
Shift through the gears to ensure the cables are seated
properly and operate smoothly. Make sure the cable has not
slipped at the cable anchor bolt. Re-torque if necessary.
Ye’r done!
PUT IT IN PLACE
NOTE: This kit includes many parts to account for different possible
derailleur cable routings. Depending on your specific bike,
you may need to use the pieces differently than stated here.
Install the housing and cable shields into their proper locations,
inserting the Shield-Lock ferrule tubes into the cable shield at
the cable stops.
CABLE STOP
For under the bottom bracket routing: Included are two pieces of
semi-rigid black tubing. The longer one is for the front derailleur.
These are installed into the cable guide under the bottom bracket.
The cable shield that runs from the down tube cable stops to the bottom
bracket cable guide, and from the bottom bracket cable guide to the
rear derailleur, is then installed over the black tubing.
© 2002, Avid LLC
www.avidbike.com
Email: [email protected]
6
7