1
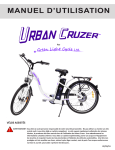
USER MANUAL ™ By POWER ASSISTED BICYCLES ! WARNING: You are the only person responsible for your personal safety. Do not operate or ride any Power Assisted Bicycle unless you are already a competent bicycle rider. The bike can quickly reach high speeds, caution must be exercised when operating the Urban Ryder. Carefully read the following information (even if you are an experienced rider), wear a helmet and safety equipment, and obey all Provincial and Federal motor vehicle laws. An unprotected head is highly susceptible to injury, even from the lightest contact, but wearing a helmet that meets UL or CSA testing standards may help prevent injury. 3/20/13 TABLE OF CONTENTS USER MANUAL - URBAN RYDER™ Table of Contents Parts Identification Diagram...........................................................................................................................................3 Assembly Instructions....................................................................................................................................................4 Assemble the Bike: Handlebars............................................................................................................................5 Assemble the Bike: Front Wheel......................................................................................................................... 6 Assemble the Bike: Front Wheel & Pedals........................................................................................................... 7 Assemble the Bike: Seat Installation & Tire Pressure.......................................................................................... 8 Urban Ryder™ Operation: Battery Removal & Installation, Precautions, Charging, and Storage.......................... 9 Removal & Install the Battery...............................................................................................................................9 Charging the Battery...........................................................................................................................................10 Long Term Battery Care...................................................................................................................................... 11 Extending the Life of Your Battery......................................................................................................................12 Urban Ryder™ Operation: System and Battery Power “ON/OFF”........................................................................... 13 Introduction.........................................................................................................................................................13 Power Up Your E-Bike........................................................................................................................................13 Using the King Meter®........................................................................................................................................14.. Time Setting........................................................................................................................................................14 Top Riding Speed.......................................................................................................................................14 Display Units...............................................................................................................................................15 Wheel Diameter Setting..............................................................................................................................15 Backlight Brightness...................................................................................................................................15.. Exit Settings........................................................................................................................................................15 Normal Operation of E-Bike................................................................................................................................15 Power OFF.................................................................................................................................................15 Speed Display............................................................................................................................................15 Pedal Assist Level and Throttle Power Off/On Selection.................................................................................... 16 King Meter® Display Backlight and Bike Head Light.................................................................................. 16 Distance and Time Display.........................................................................................................................16 Battery Capacity.........................................................................................................................................16 Malfunction Codes..............................................................................................................................................17 Display Malfunction Codes......................................................................................................................... 17 Button Battery Replacement...............................................................................................................................17 Pedal Assist & Thumb Throttle............................................................................................................................17 Braking System...................................................................................................................................................17 Pre-Ride Checklist..............................................................................................................................................18 Pre-Ride Checklist and Familiarization Before Your First Ride.................................................................. 18 Operation of Power Assisted Bicycle Controls........................................................................................... 18 “10 Point” Check List..................................................................................................................................18 Urban Ryder™ Operation: Usage................................................................................................................................19 Urban Ryder™: Troubleshooting.................................................................................................................................20 Urban Ryder™: Care & Maintenance........................................................................................................................... 21 Transporting an Electric Bicycle.......................................................................................................................... 21 Care & Cleaning.................................................................................................................................................22 Urban Ryder™: Warranty..............................................................................................................................................23 WARRANTY REGISTRATION INFORMATION CARD.................................................................................................. 24 1-855-GRN-RYDE (1-855-476-7933) 2 www.greenlightcycle.com PARTS IDENTIFICATION DIAGRAM USER MANUAL - URBAN RYDER™ Parts Identification Diagram 9 8 10 7 15 11 6 12 14 5 18 16 17 13 4 3 19 20 2 21 22 1 23 29 31 30 28 25 24 32 27 1. Tektro® Front Disc Brake 2. Tire Valve Stem 3. Front Suspension 4. Front Fender 5. Front Light 6. Brake Levers 7. King Meter® LCD Display 8. Bell 9. Thumb Throttle 10. Shift Lever 11. Handlebar 12. Frame 13. Seat Post 14. Quick Release Seat Lock 15. Seat 16. Battery Key 1-855-GRN-RYDE (1-855-476-7933) 26 17. Battery 18. Rear Fender 19. Rear Brake Calliper 20. Tektro® Rear Disc Brake 21. Shimano® Freewheel 22. Hub Motor by 8FUN 23. Shimano® Derailleur 24. Tires 25. Spokes 26. Rims 27. Kickstand 28. Chain 29. Controller box 30. Chain Wheel and Crank 31. Pedals 32. Front Brake Calliper 3 www.greenlightcycle.com ASSEMBLY INSTRUCTIONS USER MANUAL - URBAN RYDER™ Assembly Instructions Congratulations on receiving your Urban Ryder™ Electric Bicycle! Open the box from the top by cutting the 3 bands and the packaging tape. Carefully remove the 3 styrofoam packing blocks. Remove the front wheel before removing the bicycle. Remove the bicycle by lifting it straight out of the box (may require 2 people). Be careful not to scratch yourself or the bike on the carton. Stand the bike on a clean flat surface and remove the styrofoam packing material strap tied to the frame and various parts. Be careful not to scratch the bike or cut yourself when snipping the strap ties. Be sure to keep any small packages of parts and paperwork that come with the bike. Check all contents to ensure you have each part required for assembly. Box Contents: 1 x Bike Frame with Rear Wheel Attached 1 x Front Wheel 2 x Pedals (Left & Right) 1 x Lithium Battery 48 Volts 10Ah 2 x Battery Keys 1 x 120 Volt Charger 1 x Seat 1 x Tool Kit: 5 x Hex Wrenches (2mm, 3mm, 4mm, 5mm, 6mm) 3 x Wrenches, double sided (8mm & 10mm, 13mm & 15mm, 14mm & 17mm) 1 x Screwdriver, double sided (star & slot configuration) 1 x King Meter® Owner’s Manual 1 x Shimano® Gear and Tektro® Brake Data Sheets 1 x Green Light Cycle Owner’s Manual Now that you have your bike out of the box and unpacked, it is time to charge the battery. Please refer to the Battery Removal & Installation, Precautions, Charging, and Storage instructions on page 10. It is better to remove the battery from the bike for the first charging as this will make the bike assembly easier, with no cords in your way. ! WARNING: Please keep the keys to your electric bicycle in a safe place. Each set of keys are unique to your particular electric bicycle and we do not keep a copy of your key on file. ! Unlock the battery with the key by inserting the key in the bottom lock close to the frame. Turn the key one half turn counter clockwise to unlock and remove the key. Pull the battery straight up by the folding handle to remove from the bike. Follow the charging instructions to complete the battery to full charge. Reinstall the battery into the bike after you have completed the bike assembly. Battery Lock 1-855-GRN-RYDE (1-855-476-7933) 4 www.greenlightcycle.com ASSEMBLE THE BIKE: HANDLEBARS USER MANUAL - URBAN RYDER™ Assemble the Bike: Handlebars Tools required (received in your Tool Kit): 5 x Hex Wrenches (2mm, 3mm, 4mm, 5mm, 6mm) 3 x Wrenches, double sided (8mm & 10mm, 13mm & 15mm, 14mm & 17mm) 1 x Screwdriver, double sided (star & slot configuration) Fig. 1.1 Handlebars 1. Handlebars Install the handlebars by removing the 2 stem faceplate bolts. Turn the handlebar to ensure that the wiring is not twisted and flows upward toward the handlebars without kinking. Place the handlebars in the half round stem cut-out making sure that the grooves (splines) are aligned correctly, in the centre of the cut-out. Replace the faceplate and tighten the bolts evenly so that the faceplate sits flat over the handlebar. Fig. 1.2 Handlebar Stem Cut-out Fig. 1.3 Handlebar Stem With Handlebar Inserted Fig. 1.4. Handlebar Faceplate With Tightened Bolts Quick Release Lever on the Front Wheel Urban Ryder™ uses a quick release lever to lock the front wheel into the fork dropouts. Quick release levers are safe and convenient when adjusted properly. Before riding your bicycle you must understand how they work and how to use them properly to prevent serious injury or death from a fall. Quick release levers use a cam action to clamp the front wheel in place. Due to their adjustable nature, it is critical that you understand how they work, their proper use, and how much force is needed to secure them correctly. 1-855-GRN-RYDE (1-855-476-7933) 5 Fig 1.5. Quick Release Lever, Front Wheel www.greenlightcycle.com ASSEMBLE THE BIKE: FRONT WHEEL USER MANUAL - URBAN RYDER™ Assemble the Bike: Front Wheel ! CAUTION: The full force of the cam action is needed to clamp the wheel securely. Holding the nut with one hand and turning the lever like a wing nut, is NOT a safe or effective way to close a quick release and will not clamp the wheel safely to the forks. ! ! WARNING: Operating the bike with an improperly adjusted wheel or Quick Release Lever, can allow the wheel to wobble or fall off the bicycle. This can cause serious injury or death. ! It is essential that you know how to install and remove your wheels safely. If you are unsure ask your local bike shop to install or assemble your bike and wheels. Understand and apply the correct technique for clamping your wheel in place with a Quick Release Lever. Before each ride of your bike, check that the wheel is securely clamped properly and the Quick Release Lever is in the correct position and locked. 2. Installing the Front Wheel Install the front wheel by first inserting the Quick Release rod into the wheel axel. There are 2 small springs on the Quick Release rod that have different diameters on each end. Install the springs so that the ends with the larger diameter are next to the Quick Release and the round nut. Make sure the round black nut is on the disc side of the wheel and the lock lever is on the opposite side. Tighten the round nut onto the rod so the rod threads are almost flush with the outside of the nut. Be careful not to cross the threads and tighten by hand only. Larger Diameter to Outsides Fig. 2.1 Front Wheel Quick Release Fig. 2.2 Quick Release Nut & Rod Thread Place the Quick Release Lever in the open position. Have someone hold and lift the bike by the handlebars to position the front wheel into the forks. Make sure that you line up the brake disc with the brake calliper when inserting the front wheel axel into the fork drop outs. Check to ensure that the axel has engaged all the way into the fork dropouts before clamping. Fig. 2.3 Front Wheel, Quick Release Inserted Into Wheel Axle 1-855-GRN-RYDE (1-855-476-7933) Fig. 2.4 Front Forks & Brake Calliper 6 Fig. 2.5 Quick Release Lever In Closed Position www.greenlightcycle.com ASSEMBLE THE BIKE: FRONT WHEEL USER MANUAL - URBAN RYDER™ Assemble the Bike: Front Wheel To tighten the Quick Release and axel into the fork dropout, ensure the Quick Release is in the open position with the lever parallel to the ground (the lever should be at a 90° angle to the forks). With the lever in this position, tighten the round nut finger tight. You will not be able to close the lever to the locked position yet. Next, loosen the nut approximately 3 quarter turns (counter clockwise) and lift the lever upward to lock the wheel in place. The lever should be almost parallel to the front fork when locked. If the tension is correct, the lever should close tightly. When closing the lever it should leave a clear imprint in the palm of your hand (the imprint may not be as deep as the hand model’s picture). When the lever is locked in this position (parallel to the fork), it will not easily be opened if it catches on any objects while riding your bike. To increase or decrease the tension, open the lever and adjust the nut clockwise or counter clockwise, 1/8 turn at a time. Repeat until the tension is sufficient. Less than 1/2 a turn on the adjusting nut can make the difference between safe clamping force and unsafe clamping force. Fig. 2.6 Imprint of Quick Release Lever After Correctly Closed 3. Pedal Installation Note: “L” and “R” (“L”=left & “R”=right) is stamped on the threaded ends of the pedals. The pedals have opposite thread directions and must go on a specific side of the bike. Left and right side of the bike is determined by sitting on the seat. Fig. 2.7 Forks Secured Onto Front Wheel Fig. 3.1 Left & Right Pedals The Left Pedal has a reverse, non-standard thread and must be turned counter clockwise to be screwed in. Fig. 3.2 Crank Arm, Right Pedal Inserted The Right Pedal has a standard thread and must be turned clockwise to be threaded in. Apply some grease to the pedal threads before attaching. Install the Right Pedal to the chain sprocket side of the bike and the Left Pedal to the opposite side (same side as the battery key). Start the pedal threads into the crank arm threads, by hand, at least 4 complete 360° turns to ensure the pedals are not cross-threaded. Incorrect installation of the pedals is not covered under warranty. Complete by securely tightening with a 15mm wrench. ! WARNING: Poorly tightened pedals can result in injury or death. 1-855-GRN-RYDE (1-855-476-7933) 7 ! www.greenlightcycle.com ASSEMBLE THE BIKE: SEAT INSTALLATION USER MANUAL - URBAN RYDER™ Assemble the Bike: Seat Installation 4. Seat Installation Identify the “Minimum Insert Line” on the seat post. Insert the seat post into the seat tube so the Minimum Insert Line is not visible. The seat post shaft must be installed so that the Minimum Insert Line is below the Quick Release Lever. Fig. 4.1. Seat Post, “Minimum Insert Line” Fig. 4.2 Incorrectly Installed Seat Post Fig. 4.3 Seat Post Inserted Correctly, Past “Minimum Insert Line” With the Quick Release Lever in the open position (the lever should be at a 90° angle to the seat tube), insert the seat post into the seat tube. Tighten the Quick Release clamp by turning the tension adjusting nut clockwise, with one hand on the cam lever to keep it from rotating. Lift the Quick Release Lever up to the locked position. Grab the seat by the saddle with both hands to attempt to rotate the seat. If you are unable to force the seat out of alignment with the frame the clamp is tight enough. If the seat moves out of alignment with the frame, increase the tension on the adjusting nut approximately a 1/4 turn and try again. The seat height can be adjusted from 37.4 - 42.1 inches (950mm - 1070mm). ! ! CAUTION: Less than 1/2 a turn on the adjusting nut can make the difference between safe clamping force and unsafe clamping force. CAUTION: A poorly adjusted seat can result in personal injury or death. ! ! 5. Tire Pressure ! CAUTION: The tires have NOT been filled with air to the correct capacity for shipping purposes. ! Using a hand pump, fill the tires with air to the rating on the sidewall. We recommend a hand pump to avoid over inflating the tires, which can easily happen when using a high pressure air line at a gas station or automotive tire store. The tires are rated for a maximum of pressure of “450 kPa” or “65 PSI”. 1-855-GRN-RYDE (1-855-476-7933) Fig. 5.1 Tire Pressure Ratings 8 www.greenlightcycle.com URBAN RYDER™ OPERATION: BATTERY USER MANUAL - URBAN RYDER™ Urban Ryder™ Operation: Battery - Removal & Installation, Precautions, Charging, and Storage 6. Remove and Install the Battery ! ! ! CAUTION: Fully charge the battery before the first use! Failure to do this can result in decreased battery performance for the life of the bike and void your battery warranty. CAUTION: Do not attempt to open or repair your battery or charger. If you need another battery or charger contact your dealer or Green Light Cycle Ltd.™ CAUTION: Do not touch the battery sockets or blades with your hands, any metal object or other material that conducts electricity. ! ! ! ! CAUTION: Never put the battery or charger in reach of children. ! ! CAUTION: Do not use any charger except the one that came with your Urban Ryder™ Electric Bike. ! Fig. 6.1 Battery Lock 1/2” Rounded Edge Unlock the battery from the controller box by inserting the battery key into the lock, located on the bottom of the battery near the crank arm and pedals. Remove the key before trying to lift the battery away from the bike. Remove the seat or turn it sideways to slide the battery straight up and out of the cradle, using one hand on the folding handle and the other hand to hold the bike steady. Install the battery in the reverse order of removal. Ensure the top of the controller box, where the base of the battery rests, is clear of any dirt or debris. Slide the battery into the grooved cradle with the 1/2” rounded edge against the seat post tube, until the battery base rests tightly onto the controller box and the connecting blades are firmly in the battery sockets. Fig. 6.2 Battery - 1/2” Rounded Edge Towards Seat Post Do not use excessive force to fit the battery into the base, as it could damage the connection sockets or blades. Be sure to always lock the battery after placing in the cradle. Lithium Battery Precautions ! ! CAUTION: Do not attempt to open or repair your battery. This may cause electrical shock or fire and will void your warranty. Should you have a problem or need another battery contact Green Light Cycle Ltd.™ Should your battery become hot, emit smoke or unusual orders, remove the battery to a dry area outside immediately. CAUTION: Fully charge the battery before the first use! Failure to do this can result in decreased battery performance for the life of the bike and void your warranty. 1-855-GRN-RYDE (1-855-476-7933) 9 ! ! www.greenlightcycle.com URBAN RYDER™ OPERATION: BATTERY USER MANUAL - URBAN RYDER™ Urban Ryder™ Operation: Battery - Removal & Installation, Precautions, Charging, and Storage As lithium batteries do not suffer from Memory Effect, it is not required for the battery to be empty to begin a charge. Top up charging every time you have completed your ride is recommended. A new battery might take 2 or 3 charges before it performs at its full capacity. All batteries have a finite life cycle and eventually lose storage capacity below a useful level. Kept in good condition, a lithium battery will perform at least 300 to 900 full charge cycles with a retention of 70% from its original capacity. Small top up charges count fractionally towards a single full cycle charge. The battery may be charged on or off the bike. Always charge the battery with the key in the “OFF” position. Never charge a hot battery or immediately after a long ride; let the battery cool for approximately 1 hour prior to charging. Do not leave the charger plugged into the battery for long periods of time, as this can damage the battery. Always charge the bike in a dry, clean place. Keep the charger dry and clean. Avoid storing your batteries in extreme temperatures, hot or cold, and keep in a cool dry place. Always plug the battery charger into a grounded ELECTRICAL circuit. ! WARNING: Never charge the battery outside in wet weather, as there is a chance of electrical shock, electrocution, and death. ! The battery can be used in any weather between 1°C to 38°C. Extreme heat or extreme cold can shorten the battery range. Try to avoid fully discharging the battery. It may be possible after the battery is discharged to turn off the bike, wait a few seconds, and turn it back on to get a small amount of power. This “pulsing” (turning off and on) will permanently damage the battery. Lithium batteries prefer frequent partial discharge charge cycles rather than fewer, full, deep cycle charges. To prevent premature failure of your battery and for your warranty to remain in effect, you must charge and discharge the battery at least once per month. 7. Charging the Battery The supplied battery is a Lithium, 48 Volts and 10amp hours. Check to ensure that the charger voltage is correct for your battery. The charger should read “Output 55VDC 2A”. Only use a wall receptacle with a grounded circuit to plug your charger into. Fig. 7.1 Battery Key - OFF 1-855-GRN-RYDE (1-855-476-7933) Fig. 7.2 Battery Charging Port 10 Fig. 7.3 Battery & Charger www.greenlightcycle.com URBAN RYDER™ OPERATION: BATTERY USER MANUAL - URBAN RYDER™ Urban Ryder™ Operation: Battery - Removal & Installation, Precautions, Charging, and Storage • Turn the key to “OFF” and remove the key from the battery. • Locate the charging port on the battery (top right side) and remove the rubber dust cover. • Insert the battery charger plug into a 120Volt wall socket receptacle with a grounded circuit. Do not use an extension cord. The light on the charger should illuminate to steady red. • Insert the round plug of the charger into the battery charging port. • When the light on the charger changes to a steady green, the battery is charged. Unplug the charger from the wall receptacle and then from the bike battery. Always disconnect the plugs in this order. Fig. 7.4 Battery Charged Green LED A full charge will take approximately 4 to 6 hours to complete. Avoid overcharging and damaging the battery. After the light changes to steady green, the charger is in “trickle mode”. Avoid prolonged charging in this mode as it may damage the battery. Maximum continuous charging time is 10 hours. The charger will become warm during charging so keep the charger away from any flammable materials. The charger may reach temperatures up to 185°F/85°C during normal charging. Never enclose the charger or put anything on top of it when charging. The charger must be well ventilated. Fig. 7.5 Battery Charging Red LED If the charger emits a peculiar smell or the temperature is too high, stop charging immediately. Do not drop or damage the charger. Avoid any contact with water when charging your battery. If a plug or socket gets wet, dry it completely before using. Always use the charger according to the instructions. Improper use or attempting to open/repair the charger will void your warranty. Long Term Battery Care When storing your battery for a long period of time (more than 60 days): Charge the battery to about 75%, then recharge every 60 days as needed to maintain this level. Allowing your battery to sit for longer than 60 day periods in a discharged state could lead to permanent capacity loss and void your warranty. • Ideally batteries should be stored between 50°F/10°C to 80°F/27°C. Avoid long periods of freezing and extreme heat, 104°F/40°C or higher. • Do not leave the battery in direct sunlight for prolonged periods of time. • Keep the bike in the shade during summer months. • Store the battery in a clean dry location with low humidity conditions. 1-855-GRN-RYDE (1-855-476-7933) 11 www.greenlightcycle.com URBAN RYDER™ OPERATION: BATTERY USER MANUAL - URBAN RYDER™ Urban Ryder™ Operation: Battery - Removal & Installation, Precautions, Charging, and Storage • Do not allow the battery to accumulate condensation such as dew, heavy fog or rain, as this could cause shorting. • Do not clean or wash the battery with pressurized water; wipe with a damp cloth only and towel dry completely. • Do not connect the battery to the bike in wet conditions. • Do not submerse the battery in water. Extending the Life of Your Battery To help extend the life of the battery, assist the bike as much as possible. A few tips to prolong the battery life during certain conditions are as follows: • Always turn your battery key “OFF” after each use, as the electrical system will still draw minute power from your battery. • Charge the battery frequently. If possible, before using 50% of the power. • When starting from dead stop, use the pedals to bring the bike up to speed. • When riding uphill or against the wind, pedal to supplement the battery power. • When the battery meter indicates the voltage is low, switch to the lowest pedal assist mode or 0 to avoid using the battery and shortening the battery life. • Do not ride your bike in heavy rain storms, thunder showers, or extreme conditions. • When riding downhill, you must have the key and King Meter® Controller in the “ON” position, as the motor will generate electricity. Having the key in the “OFF” position may damage your battery, controller, or electrical parts, and may void your warranty. • Store your battery in a location with a temperature above 50°F/10°C for best results. 1-855-GRN-RYDE (1-855-476-7933) 12 www.greenlightcycle.com URBAN RYDER™ OPERATION: BATTERY USER MANUAL - URBAN RYDER™ Urban Ryder™ Operation: Battery - Removal & Installation, Precautions, Charging, and Storage Introduction To ensure better performance of your E-Bike, please read through the J-LCD product introduction carefully before using or starting your bike. Familiarize yourself and become competent with the Function Summary, Button Definition, and Introduction of User Settings on the King Meter® Display before your first ride. Stay safe: understand how the bike operates! The user settings include: set local time, top riding speed, Imperial or Metric system, wheel size, and LCD backlight brightness. The LCD display indicates: battery capacity, time, motor power ratio, riding speed, total riding distance, trip distance, 6Km/h power assist walk mode, and malfunction codes of the electrical controls and systems. The “30 Button”, with up down arrows and mode button, controls the E-Bike’s power “ON/OFF”, programming the display, and settings. 8. Power Up Your E-Bike To turn on the bike battery, turn the key on the battery to the “ON” position clockwise 1/8 turn until you hear the click and the key stops. The battery power is now turned on. ! ! ! WARNING: DO NOT illuminate the King Meter® if you are NOT on the bike and ready to ride forwards. This avoids false starts and crashes! WARNING: ALWAYS REMEMBER to hold a brake lever depressed firmly when getting on and off the bike SO THE BRAKE LEVER KILL SWITCH can stop the electrical flow to the motor. This avoids false starts and crashes! This will help reduce accidents caused by pressing the thumb throttle accidentally or initiating the pedal assist before you are ready to ride. WARNING: Always turn the key “OFF” immediately after you dismount from the bike. Fig. 8.1 Battery Key - ON 1-855-GRN-RYDE (1-855-476-7933) Fig. 8.2 Keep Break Lever Depressed 13 ! ! ! Fig. 8.3 Battery Key - OFF www.greenlightcycle.com URBAN RYDER™ OPERATION: SYSTEM USER MANUAL - URBAN RYDER™ Urban Ryder™ Operation: System - System and Battery Power “ON/OFF” 9. Using the King Meter® To turn the bike motor on and illuminate the King Meter® Display. Identify the “30 Button” on the handlebar, beside the King Meter® Display. Hold down the centre “MODE” button between the UP and DOWN arrows for approximately 2 seconds, until the display illuminates. When the King Meter® display is illuminated and the “ASSIST” indicates a number (1 to 5), the motor can be started by actuating the thumb throttle or the pedal assist. For safety, use the DOWN arrow to set the “ASSIST” to “0” while programming the King Meter®. Fig. 9.1 King Meter® Display, OFF Fig. 9.2 Hold Down “MODE” Button for 2 Seconds Fig. 9.3 King Meter® Display, Set “ASSIST to “0” While Programming After LCD display lights up, hold the UP and DOWN arrows at the same time for 3 seconds; the LCD will display the default setting mode. Time Setting After entering into the setting mode, first set the hour by using the up and down arrows. Press the MODE button to confirm the setting. Next, set the minutes using the UP and DOWN arrows. Press the MODE button to confirm the setting. Top Riding Speed The default setting on the top riding speed has been set to 32Km per hour. The top riding speed can be set from 10Km/h to 32Km/h by using the UP and DOWN arrows. Press the MODE button to confirm the setting. The top riding speed in Canada is 32km per hour in all cities, streets, and highways. Check with Police to determine the local laws and bylaws to confirm the maximum legal speed setting in your riding area. ! WARNING: Do not exceed the top riding speed of 32Km per hour as you will be breaking the E-Bike speed limit law and putting yourself in personal danger which may result in prosecution, severe injury, or death. 1-855-GRN-RYDE (1-855-476-7933) 14 ! MAXIMUM 32 Km/h Fig. 10.1 Maximum Legal Riding Speed In Canada www.greenlightcycle.com URBAN RYDER™ OPERATION: SYSTEM USER MANUAL - URBAN RYDER™ Urban Ryder™ Operation: System - System and Battery Power “ON/OFF” Display Units Press the Up or Down Arrow to choose between Imperial or Metric display units. Press the Mode button to confirm the setting. Wheel Diameter Setting Press the Up or Down Arrow to choose a corresponding wheel diameter to ensure the accurate display of speed and distance on the LCD. The Urban Ryder™ wheel size is 26 inches. Press the Mode button to confirm the setting. Backlight Brightness Press the Up or Down Arrow to modify the backlight brightness. You can choose from levels 1 to 3. Level 1 is the minimum brightness and uses the least power from the battery. Level 3 is the brightest and will use more power from the battery. Press the Mode button to confirm the setting. Exit Settings When in a setting mode, press the Mode button within 2 seconds of making your choice to confirm. Press and hold the Mode button for more than 2 seconds to save the current settings and exit the setting interface. The King Meter® is now set. 10. Normal Operation of the E-Bike Before you turn on the battery power to ride the bike, sit on the bike seat and assume a comfortable position to ride forward. With the key in the “ON” position, press the Mode button and the display will illuminate. The motor is now powered. Keep one hand brake depressed after turning on the King Meter® until you are ready to ride forward. When the King Meter® is turned on (display illuminated), holding or pressing the Mode button again will turn the power to the bike motor off. If no controls are pressed for approximately 5 to 7 minutes and the bike is not in motion, the King Meter® will power off. Fig. 10.2 Hold down “MODE” Button for 2 Seconds Power OFF In the power “OFF” state, the King Meter® uses minimal power to keep the clock running. It is advisable to turn the key on the battery to the “OFF” position to conserve energy and keep your bike and the people around you safe. Speed Display When the King Meter® illuminates, the display will automatically show the current speed. By pressing and holding the Up Arrow for 2 seconds, the display will show the average (AVG) speed during this ride. Press and hold the Up Arrow again and the display will change to show the maximum (MAX) speed during this ride. Repeat to show current speed again. 1-855-GRN-RYDE (1-855-476-7933) 15 www.greenlightcycle.com URBAN RYDER™ OPERATION: SYSTEM USER MANUAL - URBAN RYDER™ Urban Ryder™ Operation: System - System and Battery Power “ON/OFF” 11. Pedal Assist Level and Throttle Power Off/On Selection When the King Meter® is illuminated, pressing the UP or DOWN Arrows will change the output power of the motor for the pedal assist, or turn off the power to the motor completely (set assist to “ASSIST 0”). The pedal assist power ranges form Level 1 to 5. Level 1 is the minimum power the motor will supply by turning the pedals and Level 5 is the maximum power (100%). The default level when the King Meter® is started is Level 1. When the “ASSIST” is set to “0”, no power will be supplied from the motor by pedalling or by using the thumb throttle. Use this mode when you want to ride the bike without any motor assist. Fig. 11.1 Thumb Throttle The thumb throttle allows you to immediately increase the power to the motor with the touch of your thumb, similar to the throttle on a motorcycle. Increasing pressure on the thumb throttle will increase the power and speed. The “ASSIST” settings (Level 1 to 5), will not adjust the power to the thumb throttle. When the “ASSIST” selection is set at “0”, the thumb throttle is “OFF”. When the assist selection is set at Level 1 to 5, the thumb throttle is “ON”. King Meter® Display Backlight and Bike Head Light To turn the back light and bike head light “ON” and “OFF”, hold the UP Arrow and MODE button together for 3 seconds. Use this feature at night or in low light conditions to illuminate the display and your headlight for safe riding. Fig. 11.2 Backlight & Bike Headlight, Hold down “MODE & UP Arrow Button for 3 Seconds Distance and Time Display When the King Meter® is illuminated, it will display the odometer setting “ODO” which is the total distance the bike has been ridden. Press the MODE button to change the display to show the riding distance for this trip. Battery Capacity When the battery charge is full, the battery symbol will show 5 segments illuminated in black. As the battery is consumed, the segments will disappear to indicate the amount of power available, until all the segments have disappeared and the battery symbol is white, indicating the level is severely low. Fig. 11.3 King Meter® Display, Set ASSIST to “0” While Programming When the battery symbol is completely white, it will begin to flash. A flashing battery symbol means that you need to recharge immediately. We advise that you do not use the electric power to assist your bicycle in this state. Set the “ASSIST” to “0” and use only your own pedal power until you can recharge the battery. This will help give your battery a longer life. 1-855-GRN-RYDE (1-855-476-7933) 16 www.greenlightcycle.com URBAN RYDER™ OPERATION: SYSTEM USER MANUAL - URBAN RYDER™ Urban Ryder™ Operation: System - System and Battery Power “ON/OFF” Display Malfunction Codes Should there be something wrong with the electronic controls, motor, or battery, the King Meter® will automatically show an error code below: Code 21 22 23 24 25 Definition Electrical Current Abnormality Throttle Abnormality Motor Open-Phase Motor Hall Signal Brake Abnormality Button Battery Replacement To replace the display battery, first detach the display from the handlebar. Remove the battery cap and old batteries. The battery model is # CR2032. Install the new battery, ensuring it is in the correct position (+/-). The life of the battery is approximately 2 years. After replacing the battery you may need to reset the time. 12. Pedal Assist and Thumb Throttle With the King Meter® illuminated and “ASSIST” set from Level 1 to 5, the thumb throttle is active. When pressed downward, the bike will drive forward. The thumb throttle delivers up to 100% of the motor power depending on how much the lever is depressed. The Pedal Assist function watches the rotation of the pedals to deliver power to the motor. Depending on which level the “ASSIST” is set to (Level 1 to 5), the King Meter® will determine how much power the motor delivers to move the bike forward. Using the “ASSIST” on the lowest setting will consume the least amount of power from the battery and give you the longest riding distance. Fig. 12.1 Thumb Throttle 13. Braking System The bike is equipped with two brake levers located on the left and right sides of the handlebar. To stop the bike, depress both break levers. The left brake lever controls the back wheel and the right brake lever controls the front wheel. Fig. 12.2 Pedal Rotation 1-855-GRN-RYDE (1-855-476-7933) 17 www.greenlightcycle.com USER MANUAL - URBAN RYDER™ URBAN RYDER™ OPERATION: PRE-RIDE CHECKLIST Urban Ryder™ Operation: Pre-Ride Checklist Pre-Ride Checklist and Familiarization Before Your First Ride We want you to have a fun ride, but also a safe one. Carefully read the following information, even if you are an experienced rider. The Urban Ryder™ can quickly reach high speeds; caution must be exercised when operating the bike. Green Light Cycle Ltd.™ is the producer of this Owner’s Manual and assumes no responsibility for your personal safety. The bike manufacturer assumes that you already know how to ride a bicycle and gives no instruction on basic riding skills, rules of the road, Federal and Provincial Laws, or Motor Vehicle Regulations. ! ! ! ! ! WARNING: You are the only person responsible for your personal safety when operating this electric bike and you must be aware of its operation in any riding conditions. WARNING: Wear safety equipment when operating any bike. Dress to be seen with high visibility reflective clothing. WARNING: Remember, bike helmets can save lives and help to avoid serious injury. Always wear an approved helmet when riding any bike. WARNING: Never operate electronic handheld devices like cell phones, headsets or computers while riding. WARNING: Do not drink and ride. ! ! ! ! ! Operation of Power Assisted Bicycle Controls Bell - Signals to traffic you are there. Pedals - Drive the bike forward. Headlight - LED light controlled by pressing the Mode and Up Arrow buttons at the same time. Bike Keys - turns the battery electrical supply off/on to the bicycle controls and locks the battery in place on the bike. King Meter® - Controls the Pedal Assist speed level, records trip information, controls the headlight, and turns thumb throttle “ON/OFF”. Handlebars - Contain the controls (King Meter®, Brakes, Gear Shifter, Bell, & Thumb Throttle), and steer the bike left or right. Brake Handles - Stop the bike by squeezing the handle toward the hand grips. The brake handles also have kill switches built in to them that stop the electricity flow to the motor, turning it off. Any time the brakes are applied, the motor will stop pushing the bike in a forward direction. Shimano® 7 Speed Shifter - Switches between gears on the rear wheel to adjust ease of pedaling in order to climb grades or ride at different speeds. “10 Point” Check List - Before your First Ride and Every Ride After 1. Battery is connected, locked, and charged. 2. Electrical devices are working correctly. 3. All nuts and bolts are tight. 4. The front and rear wheels are secured to the bike frame and cam locks are tight. 5. The tires are filled to the correct pressure, indicated on the tire side wall. 6. The brakes are adjusted and operating correctly, including the brake kill switches. 7. The seat is locked and the seat stem is adjusted to the correct height. 8. Handlebars are tightened firmly. 9. Chain and crank arms run smoothly and are lubricated. 10. The rider is wearing appropriate high visibility reflective clothing, helmet, and eye protection. 1-855-GRN-RYDE (1-855-476-7933) 18 www.greenlightcycle.com URBAN RYDER™ OPERATION: USAGE USER MANUAL - URBAN RYDER™ Urban Ryder™ Operation: Usage Usage • Wear shoes that grip firmly to the pedals, no bare feet. • Wear high visibility clothing no loose clothing and dress to be seen. • Wear an approved bicycle helmet and eye protection. • Keep your speed levels appropriate to road conditions and speed limits. • Ride slow on wet or slippery surfaces and brake sooner than anticipated. • Avoid cycling at night or in poor weather such as fog, rain, snow, or icy conditions. • Familiarize yourself with usage of the bike and know how to maintain it. • Be familiar with traffic signs, rules and laws, and be aware of other traffic. • When possible, ride in bike lanes and in the correct direction of traffic flow. • Do not ride on the sidewalk and dismount when using pedestrian crossings. • Keep both hands on the handlebars when riding. • Keep in mind that other traffic may underestimate the speed of an electric bicycle. • Ride defensively, keep alert, and have fun! The Urban Ryder™ Electric Assisted Bicycle has a 48 Volt battery at 10 amp hours, supplying the power to a 500 Watt electric brushless 8FUN rear hub motor. This is a powerful electric assisted bicycle in a mountain bike shaped frame and special care must be taken when getting to know it. You will be riding faster than you think! Because the bike can quickly reach high speeds, you need to exercise caution when operating this E-Bike. Even though you may be an experienced bicycle rider, your first ride should be in an area without traffic or other hazards. We suggest that you ride the bike as a bicycle with no power assist turned on (set “ASSIST” to “0”), to familiarize yourself with the bike’s extra weight and slow handling and stopping. Test the bike’s braking ability to determine your stopping distances. Once you become confident in your riding ability, set the assist level to the lowest setting, Level 1, and begin riding the bike. When you feel confident and familiar with the feel from the powerful 500 watt motor, try using the thumb throttle and higher Assist Levels. Pay special attention to the weather and road conditions when learning to ride your E-Bike. Wet roads require longer stopping distances than dry roads. Always look ahead when riding to give yourself time to stop in emergency situations. Remember that pedestrians may not be able to hear or see you approaching from behind. Slow down and use extra caution when passing foot or vehicle traffic, parked cars, or other cyclists. Do not be afraid to use your bell, it’s there to signal “Here I Am”. Once you have mastered the Urban Ryder™ Electric Assisted Bicycle, your commute to work or leisure bike rides will become an easy and fun experience. E-Bikes are a great way for persons recovering from heart conditions to engage in cardio exercise. When you get tired you can use the power assist to supplement your pedalling power or simply bring you home. This way you will not stress your body and can build your strength gradually on your road to recovery. The Green Light Cycle Ltd.™ Team wishes you safe riding and better health. Thank you for your purchase, T�� G���� Te�� 1-855-GRN-RYDE (1-855-476-7933) 19 www.greenlightcycle.com URBAN RYDER™: TROUBLESHOOTING USER MANUAL - URBAN RYDER™ Urban Ryder™: Troubleshooting SYMPTOM DIAGNOSIS King Meter® is illuminated, does not display speed: Magnet on front wheel spoke is not aligned to King Meter® receiver on right fork. The magnet should line up to the round bottom of the receiver. King Meter® is illuminated, motor will not start: “ASSIST” is set to 0. Battery level is too low. Brake lever is slightly depressed. Controller is defective. Thumb Throttle failure, Pedal Assist works: Thumb throttle is defective. Thumb throttle has bad connection. Controller is defective. Thumb throttle works, Pedal Assist failure: Pedal Assist connection to controller. Pedal Assist sensor is defective. When riding, you stop. The throttle will not restart the motor: Brake lever has not released. Brake lever kill switch is defective. Controller is defective. Motor has low power: Check tire pressure Check brake calliper is sticking closed. Check battery is charged. Head light will not turn on, but King Meter® backlight works: Wire is loose or disconnected at light. LED’s in head light are defective. Charger is plugged in, but green or red LED indicator light does not illuminate: Check the wall receptacle; move to another and retest. Charger is plugged in, but will only show green light illuminated: Battery is fully charged. Charger fuse may be burnt. If the above symptoms do not relate to your malfunction, please call Green Light Cycle Ltd.™ or your local E-Bike shop for assistance. 1-855-GRN-RYDE (1-855-476-7933) 20 www.greenlightcycle.com URBAN RYDER™: CARE & MAINTENANCE USER MANUAL - URBAN RYDER™ Urban Ryder™: Care & Maintenance Transporting an Electric Bicycle Caution: Make absolutely certain that the bike rack on your car is suitable for the increased weight and the frame style of your Urban Ryder™ E-Bike. A rack that is not suitable for the increased weight can be damaged or even break during the transport. Remove the battery and protect the electronics from inclement weather, your motor and system connections should be protected from the elements. Also remember that most commercial flights will not accept a lithium battery even when installed in the bike. Maintenance Squeeze the brakes and rock the bike to check for any looseness with each forward or backward movement. Look at the headset, brake disc and callipers, wheels, wheel nuts, forks, pedals and crank, and saddle. Check cables for rust kinks and fraying. Squeeze the spokes in adjoining pairs between your thumb and index finger to confirm they have the same tension. Wheels Check the wheel nuts are secure and tight by removing the plastic caps and inspecting. Rims Spin the wheels and check for side to side wobble and up and down oblongata. The wheels when true will not have more that 1.0mm on each side or up and down. Wheels should only be adjusted by certified mechanics. Spokes Check for damaged stainless spokes regularly. Replace broken bent or fatigued stainless spokes with manufacture’s suggest spokes only Tires Check tires for cuts or punctures and ware. Tire pressure should be adjusted as per the sidewall specifications. Chain The chain should run smoothly when clean and lubricated. Lubricate the chain regularly at least every 3 months or after a wet ride Brakes Check the brake pads for wear. They are held into the calliper magnetically. Pads can be removed by grasping the pad end tab and lifting the pad clear of the piston pin and then manoeuvring it out of the rotor slot in the calliper body. If they have worn to the point where the calliper piston pin-positioning hole goes all the way through then they need to be replaced. Adjust cables as needed to increase braking power. Check the brake cable tension and adjust by either using the adjusting screws on the brake levers or the adjusting screws at the brake callipers, or retention the cable with the cable adjuster bolt/ nut clamp. After riding remove any mud or other contamination from the rotor slot in the calliper. Clean the calliper body and rotor slot with brake cleaner and lubricate the brake lever pivot with thick oil or grease. Check to make sure that all bolts are tightened to torque specifications. 1-855-GRN-RYDE (1-855-476-7933) 21 www.greenlightcycle.com URBAN RYDER™: CARE & CLEANING USER MANUAL - URBAN RYDER™ Urban Ryder™: Care & Cleaning Care and Cleaning Never use a high pressure washer or a garden hose to clean your bike. The force of the water jet could damage the electrical components. We recommend a soft cloth or brush to clean the bike. Use a moist cloth to clean the battery and docking station. Always use very little water and keep water away from the electrical contacts Check the plug-in connections for moisture after cleaning and let these dry if necessary before using or charging the bike. Keys for the Battery ! WARNING: Keep the keys to your E-Bike in a safe place! Each set of keys are unique to your bike only and unfortunately we do not keep a copy of your key on file or have a way of reproducing your exact keys. If you lose your set of keys you may require a locksmith to replace the complete locking mechanisms. 1-855-GRN-RYDE (1-855-476-7933) 22 ! www.greenlightcycle.com URBAN RYDER™: WARRANTY USER MANUAL - URBAN RYDER™ Urban Ryder™: Warranty Warranty, Disclaimer, and Exclusions The company will not be responsible for any breakdown, damage, or losses, direct or indirect, arising in contract or in tort from any cause whatsoever including failure to follow the Urban Ryder™ user manual instructions specifically, careless handling, improper assembly ,normal wear and tear, alterations, modification, misuse, neglect, or abuse. All warranties are void if the electric bicycle is used for other than normal activities including, but not limited to, using the electric bicycle for rental or commercial activities, stunt riding, or in competitive events, or training for such activities or events. All warranties are void if products are sold by a non-authorized re-seller. Parts and/or products which are determined by Green Light Cycle Ltd.™ in its sole discretion to be defective, will be replaced only after a valid warranty claim has been processed by Green Light Cycle Ltd.™ Warranty claims must be made within the warranty period stated below. Warranty Green Light Cycle Ltd.™, to the original purchaser, with proof of purchase, for a period of one year from the date of purchase, warrants all parts and assemblies as to workmanship and materials used in their manufacture. Green Light Cycle Ltd.™ at its sole discretion has the option of replacing all parts or assemblies with a new part or a factory re-certified part. There is no cosmetic warranty on bikes that have been ridden or operated. Any Urban Ryder™ products containing defective parts, if returned prepaid to an Authorized Service Depot or to the factory in Burnaby BC within a one year time limit, will be repaired free of charge, FOB the Authorized Service Depot or the Factory making such repairs and is expressly limited to the replacement of goods complying with this warranty. The company will not be responsible for any breakdown or losses, direct, incidental, or consequential damages, including without limitation, damages for personal injury, property damage or economic losses, losses direct or indirect arising in contract or in tort from any cause whatsoever, including failure to follow the Urban Ryder™ User Manual instructions specifically, careless handling, corrosion, build-up of minerals on the parts or assemblies for any reason or from any source; nor for transportation and or other charges incurred in the removal, replacement or repair of defective products or parts; all warranties are void if the electric bicycle is used for other than normal activities, including but not limited to, using the electric bicycle for rental or commercial activities, stunt riding, ramp jumping, acrobatics, trick riding or similar activities, competitive events or training for such activities or events, or use in any other manner for which the products were not specifically designed for. All warranties are void if products are sold by a non-authorized reseller and there are no warranties or conditions expressed or implied or otherwise applicable, to the company’s products except as expressly stated herein. Claiming Warranty To begin a warranty claim, the Warranty Registration information (found on the last page of the User Manual), must be completed and returned to Green Light Cycle Ltd.™ We recommend you record this information as soon as you have completed reading the User Manual. To claim warranty, please have the Warranty Registration information ready and call Green Light Cycle Ltd.™ (1-855-476-7933), between the hours of 8:00am to 4:30pm Monday to Friday Pacific Standard Time, or send an email to: [email protected]. 1-855-GRN-RYDE (1-855-476-7933) 23 www.greenlightcycle.com URBAN RYDER™: WARRANTY REGISTRATION USER MANUAL - URBAN RYDER™ Urban Ryder™: Warranty Registration Warranty Registration Please record the following information, should you ever require parts or service, or to begin a warranty claim. The frame serial number is located on the underside of the bike frame, where the crank arms attach. Keep this page in your manual for your own records. To initiate your warranty, please submit the following information online at www.greenlightcycle.com/productregistration or mail a copy of this page to: Green Light Cycle Ltd.™ 6909 Antrim Ave. Burnaby, BC V5J 4M5 WARRANTY REGISTRATION INFORMATION CARD PERSONAL INFORMATION First Name: Last Name: Address: City:Province: Country: Postal Code: Phone: ( ) - PURCHASING INFORMATION Company Name: Address: City:Province: Country: Postal Code: Purchase Receipt #: Model Purchased: E-Bike Frame Serial #: E-Bike Motor Serial #: E-Bike Frame Colour: 1-855-GRN-RYDE (1-855-476-7933) 24 www.greenlightcycle.com