1
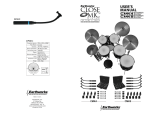
Printed in U.S.A.
Custom Made in the U.S.A.
Notes:
Congratulations on your purchase of the innovative Earthworks Touring PianoMic™
System. We know that you will be thrilled with the results you will achieve using the
Touring PianoMic™ System for both live performance and recording.
Items Enclosed with your New Earthworks Touring PianoMic™ System:
PianoMic™ System Model PM40-T
2 – PianoMic™ telescoping bars with attached microphone heads
1 – Microphone electronics box
1 – Leather pouch for electronics box
2 – Felt pads with adhesive backing
1 - User’s Manual for PianoMic™ System
1 – Carrying case
1 – Earthworks Full Line Catalog with Demo CD
EVEN IF YOU DON’T LIKE READING MANUALS PLEASE READ
THIS SECTION BEFORE INSTALLING THE PIANOMIC™ SYSTEM
USING THE PIANOMIC™ SYSTEM
The majority of those who purchase the PianoMic™ System have experience in
miking pianos with conventional microphones, and may find the close-miking
techniques described in this Manual to be unconventional. Please keep in mind
that the PianoMic™ System utilizes a number of new technologies and that the
PianoMic™ microphones work and perform much differently than conventional
microphones. The typical practices for piano miking using conventional microphones will most likely not apply when using the PianoMic™ System. With the
PianoMic™ System the rules for miking pianos have changed.
Conventional miking practices suggest that a piano must be miked from outside
to achieve a good sound, and that a good piano sound cannot be achieved with
closely placed microphones inside the piano, especially with the lid closed. When
you listen to the incredible results achieved using the PianoMic™ System (at fullstick, half-stick or lid closed), you will realize how unique and groundbreaking it
actually is. As the PianoMic™ System changes many of the conventional rules
and methods of miking pianos; we strongly suggest that you start by following our
guidelines first. Afterwards, if you want to experiment, you can take it from there.
The Earthworks PianoMic™ System incorporates a number of proprietary
technologies that allow this method of close-miking pianos to achieve results
that have previously not been possible. This improved performance has been
accomplished by using specially designed High Definition Microphones created specifically to work inside a piano. These are carefully matched Random
Incidence omni microphones with extremely fast impulse response, very short
diaphragm settling time, extended frequency response (4Hz to 40kHz), near
perfect polar response, high current Class A amplifiers and the ability to handle
sound pressure levels up to 148dB SPL.
12
Version 1, December 15, 2009
1
ASSEMBLING & DISASSEMBLING THE TOURING PIANOMIC™
The PianoMic™ System is quick and easy to install. Once you have initially set up
the PianoMic™ System you will be able to do it from that point on in just a few
minutes. Here are some helpful guidelines:
WARRANTY
All Earthworks products carry a two-year limited warranty (parts and labor). If you have any
problems with your Earthworks products, please contact our warranty/repair department by
email at: [email protected] or by telephone at (603) 654-6427, Ext. 20.
CAUTION – the microphone heads and goosenecks are permanently attached to
the two PianoMic™ telescoping tubes and cannot be moved, or removed. Once
assembled, the distance between the two goosenecks is fixed at 16 inches (onethird of the width of a piano keyboard).
Check that all items are included with your Touring PianoMic™ System by using
the list of “Items Enclosed” on page one of this manual.
TO ASSEMBLE
1. Remove the two PianoMic™ telescoping bars from the case. Notice that on
each of the two telescoping bars, there is a special XLR type connector. There is a
rotating collar next to the special XLR type connector on the telescoping bar that
has a cable coming out of one end, (see Section B in Fig 1-A).
PianoMic™ Polar Response
PM40T
Specifications
Figure 1-A
Sections A & B of PianoMic
2. Rotate the collar on the XLR connector so it is snug against the connector cover,
but not too tight. (Fig. 1-B)
Figure 1-B
Rotate collar all the way
to the right.
Frequency Response: 4Hz - 40kHz
Polar Pattern: Omnidirectional
(random incidence)
Sensitivity:
Power requirements:
Peak Acoustic Output:
Output:
Min. Output Load:
Noise:
Mic Gooseneck Length:
Rod Length Assembled:
Rod Length Separated:
Carrying Case :
3. Next, rotate the collar two turns in the opposite direction (moving it away from
the connector cover toward the connector pins). (Fig. 1-C)
Figure 1-C
Rotate collar two
turns to the left
2
Product Weight:
Shipping Dimensions:
Shipping Weight:
15mV/Pa (-36 dBV/Pa)
48V Phantom, 10mA
148 dB SPL
XLR-3 (pin 2+)
600 ohms (pins 2 & 3)
22dBA
4.875” (12cm)
64”(160cm) fully extended
46”(115cm) fully collapsed
23”(58.4cm) fully collapsed
24.5”x12.5”x4”
(619x317x100 cm)
6 lbs. (2.7 kg)
26”x18”x8” (66x46x20 cm)
13 lbs. (6 kg)
Earthworks, Inc.
37 Wilton Rd.
Milford, NH 03055
603-654-6427, ext. 14
www.earthworksaudio.com
Made in U.S.A.
11
Now you should be ready to use the PianoMic™ System and achieve some
impressive sonic results for recording or live performances.
If you have any questions after reading and following the directions in this
manual, please contact Earthworks directly using the contact information on
page 11 of this manual.
Earthworks: the New Science in Microphones
David Blackmer, the brilliant engineer who invented the technologies of dbx, is also the inventor and founder of Earthworks. In the last few
years of his life, David developed a number of
revolutionary technologies that dramatically
improve the quality and performance of microphones. In short, Earthworks High Definition
Microphones™ will pick up sounds and details
that other microphones cannot. These dramatic
improvements are in the areas of impulse response, diaphragm settling time and improved
polar pattern technologies. Those who have heard
Earthworks High Definition Microphones™ say
that they hear more attack, more subtle detail and a more pristine quality in
the sound than with any other microphones regardless of price. Since David’s
death in 2002 the Earthworks engineers have continued to develop new innovations in microphone design such as the PianoMic™ System, FlexWand™
and High Definition Drum Microphones.
4. Now, take the two PianoMic telescoping sections and mate the connectors just
like you would mate a standard XLR connector (see Fig. 1-D). First mate the keyways and then push the connectors together until you hear a “click.” If you do not
hear a click, then change the position of the rotating collar and try to mate the two
sections again.
Figure 1-D
Mate the two sections
by pushing until you
hear a click.
5. Once you have heard the click when mating the two sections, rotate the collar
until it is firmly positioned against the mating connector cover (finger tight). At this
point two sections should be firmly attached and will not be loose or wiggle. (Fig.
1-E)
Figure 1-E
Rotate collar all the way to the left
firmly against the left connector body
TO DISASSEMBLE
7. To dissamble the PianoMic, rotate the collar between the XLR connectors the
full distance from its mating half until it is snuggly against the right connector body
as shown in Fig. 1-F.
Figure 1-F
Rotate collar all the way
to the right connector body
8. Then grab the two mating connectors (one with each hand) and pull the two sections apart as shown in Fig. 1-G. Do not pull apart holding onto the telescoping
tubes.
Figure 1-G
Separate the two sections
by holding onto each connector body
9. Collapse the telescoping bars and place them in the carrying case along with the
electronics box and leather pouch. Now you’re ready to take your PianoMic™ to
the next gig.
10
3
The PianoMic™ System provides the following benefits:
•
•
•
•
Excellent overall piano sound with uniform level from all strings
Superb sound with the piano lid up or down
Tremendous gain before feedback
Minimal leakage from other instruments surrounding the piano
(with piano lid closed)
• Microphones are not visible from outside the piano
People are astonished when they hear the exceptional sound quality of
the PianoMic™ System with the piano lid closed. Conventional microphones
perform poorly in a piano as the sound inside the piano is coming from every
direction and from multiple sound sources. Every string is a sound source. The
soundboard is a large and complex sound source. In addition, sounds are reflected off the piano sides, the soundboard and the piano lid multiple times with
little attenuation. Sounds inside a piano are randomly arriving from every possible direction at similar levels, all at the same time. This is a classic example of
a “diffuse sound field” which is defined as a confined area where there are multiple
sound sources and multiple reflections arriving at the microphone from every angle at similar levels simultaneously. A microphone that is placed in such a diffuse
sound field has to pickup all of the sound with a proper tonal balance. For optimum
results, this task requires a High Definition Random-Incidence Microphone.
Conventional microphones
are “Free Field” microphones, and regardless
of their pickup pattern are
designed to only pick up
sounds accurately in front
of the microphone (See
Figure 2).
Figure 2. Conventional “Free Field” Microphones inside a piano
only pick up sound accurately in front of the microphone
Figure 3. Random Incidence Microphones inside a piano pick
up sound accurately from all directions
4
Random-incidence microphones are designed to
uniformly pick up sounds
arriving simultaneously
from all angles and directions, rather than to the
sound coming only from
a primary source that is in
front of the microphone.
Random-incidence microphones have exceptional accuracy and tonal balance in
a diffuse sound field, where
sound arrives from all directions randomly and simultaneously (See Figure 3).
Leather Bag
Figures 15. Placing the Electronics Box
in the Pouch.
Figures 16. Attaching the Pouch
to the Piano Leg.
Leather Pouch Attached to Piano Leg
The enclosed leather pouch has Velcro straps that allow it to be attached to the leg
of a piano. The pouch is open at the top and the bottom has a strap to prevent the
electronics box from falling out of the bottom. There is an opening at the bottom
of the pouch to conveniently attach the two standard XLR-3 microphone cables
that go to your mixer preamp inputs (See Figures 15 and 16).
Figure 17.
Mounting Electronics Box
on a Microphone Stand
Electronics Box Attached to Mic Stand Bracket
The electronics box has a threaded insert in the bottom of the box that will
mate with the threads on a standard microphone stand. By this method, the
electronics box can be mounted to a short mic stand to keep it above floor level,
if desired (see Figure 17).
9
11. With the PianoMic™ placed inside the piano and the microphones
properly positioned you are ready to
connect the PianoMic™ cable to the
electronics box via a 5-pin XLR connector. The back of the electronics
box has two XLR-3 connectors that
will connect the microphone outputs
to the preamp inputs of your mixer
(See Figure 13).
Any recording or live sound engineer will tell you that conventional microphones do
a poor job inside a piano with the lid closed. Sound engineers were amazed when
they heard the exceptional sound quality of the PianoMic™ System used inside a
piano with the lid open and at half-stick. But they were absolutely floored upon hearing the fantastic performance with the lid closed.
When using a PianoMic™ System for live performance you will achieve the most
gain before feedback with the piano lid fully closed. You will also have the least
amount of leakage from sounds outside the piano with the piano lid closed.
Figure 13. Front
and Rear of the
Electronics Box
We know you will be more than pleased with the performance of the PianoMic™
System for both recording and live sound applications.
SETTING UP THE PIANOMIC
12. Notice in Figure 14 that
the top of each microphone
head has a number. These
numbers correspond to the
numbers on the rear of the
electronics box. Depending
upon how the PianoMic™ is
placed in the piano the high
strings will be indicated by
either the number 1 or number 2. Once the PianoMic™
has been placed, identify the
microphone numbers on the
Figure 14. Corresponding
mic heads for both the high
Numbers on Microphone
Heads and Outputs of
and low strings and rememElectronics Box.
ber that they correspond to
the numbers on the rear of the
electronics box. This will allow you to correctly identify the microphone signals for high and low strings that are connected to the preamps of your mixer.
Remember that the PianoMic™ requires 48-volt phantom power.
13. There are two ways to mount the electronics box: (1) in a leather pouch
strapped to the leg of the piano, or (2) attached to a short microphone stand.
The PianoMic™ System comes equipped to install the electronics box in
either of these two ways.
8
Figure 4. Loosening the Clutches
1. With the PianoMic™ assembled,
loosen the two clutches on either side
of the two microphone goosenecks
(See Figure 4). When adjusting the
clutches, be sure to hold the larger
diameter tube section with one hand
while rotating the clutch with the
other hand as indicated in figure 4.
However, do not loosen the clutches
all the way; just enough so the bar can
be extended and still have a little friction. This will make it easier to adjust
the length of the bar from both ends
once it is placed inside the piano.
2. Extend both sides of the bar so
that it is wider than the piano.
3. Notice that on each end of the PianoMic™ bar there are support brackets that will
be placed on the upper edge of the piano case sides. These support brackets have
rounded edges and are covered with a soft polyolefin coating to avoid scratching
the piano. The support brackets are
thin enough to allow the piano lid
to be completely closed with the PianoMic™ System inside the piano.
The PianoMic comes with felt pads
installed on the top of each support
arm. If you desire a more snug fit
with the lid closed or if vibration
becomes an issue, install one of the
enclosed spare felt pads on the bottom side of the support brackets as
Figure 5. Support Arms and Installing Felt Pads
shown in Figure 5.
5
6. Once you have determined which placement will provide you with the ability to have the microphone heads two to three inches in front of the dampers,
you are ready to place the PianoMic™ System inside the piano. With the bar
fully extended and the clutch adjusted where there is still a little friction, place
the support bracket on the edge of the piano case opposite you. Then push on
the bar until the PianoMic™ is the correct length to allow the support bracket
to easily rest on the edge of the piano case nearest to you.
Figure 6. Facing the Mic Heads Towards the Dampers
Figure 7. Facing the Mic Heads Away From the Dampers
4. The PianoMic™ can be placed inside the piano with the microphone heads either
facing the dampers (Figure 6) or facing away from the dampers (Figure 7). For optimum results, the PianoMic™ System should be placed in the piano with the microphone heads positioned two to three inches away from the dampers. How you place
the PianoMic™ System in the piano will depend upon the piano, its size and how it is
made. This will govern whether the microphone heads can be faced toward or faced
away from the dampers. It is best to position the PianoMic™ System so that the support bracket does not rest on the curved part of the piano case.
Figure 9. Favoring the High Strings
Figure 10. Favoring the Low Strings
7. With the PianoMic™ in place, you will need to determine if you want the
microphones to favor the high strings, low strings or neither. The center section of the PianoMic™ can slide up to eight inches in either direction in order
to favor the high or low strings, if desired. This positioning is illustrated in
Figures 9 and 10.
8. Once you have positioned the PianoMic™ center section, tighten both clutches
to insure that the PianoMic™ bar stays in place.
PianoMic multi-conductor
shielded cable that connects to
electronics box via 5-pin XLR.
Figure 8. Positioning the PianoMic Cable
5. Notice that one end of the PianoMic™ has a multi-connector shielded cable
coming out of the tube below the support arm (Figure 8). It doesn’t matter which
side of the piano the cable exits. The main objective is to place the PianoMic™ in
the piano so that the microphone heads can be easily placed 2 to 3 inches in front of
the dampers. The cable is long enough to easily reach the opposite side of the piano
should you decide to locate the electronics box on the opposite side of the piano from
where the cable comes out of the PianoMic™. You will need to position the cable so
it does not lie on top of the support arm. The combined thickness of the support arm
with the cable on top if it would exceed the size of the opening between the piano
case and the lid. Therefore when the lid is closed it would pinch and deform the
cable. To avoid this, place the cable to one side of the support arm. You may also
position the cable so it comes out the open area of the piano as illustrated in Figure 8.
6
Figure 11. Adjustable flex arms for the Microphones
Figure 12. Adjusting the Microphone Height
9. With the PianoMic™ in place, you can move the flex arms attached to the microphone heads several inches to the left or to the right to achieve your desired
placement (See Figure 11).
10. The flex arms also allow you to adjust the height of the microphone heads as
shown in Figure 12. It is suggested that you place the microphone heads two to
three inches above the piano strings.
7