1
User Manual
Network Interface
Rev. 1.00
SRP-350plusll
SRP-352plusll
http://www.bixolon.com
Network Interface
■ Table of Contents
1. Manual Information........................................................................................................3
2. Specifications.................................................................................................................3
2-1 Hardware version.....................................................................................................3
2-2 Configuration Tool....................................................................................................3
3. How to install..................................................................................................................4
4. Configuration Tool .........................................................................................................5
5. Web Server .....................................................................................................................8
6. Ethernet Test by using Windows Test Page ..............................................................11
7. Factory Reset ...............................................................................................................17
8. Function Key set up.....................................................................................................18
9. Troubleshooting...........................................................................................................19
[Appendix 1] Details of interface card............................................................................21
[Appendix 2] Virtual Driver..............................................................................................21
Rev.1.00
-2-
Network Interface
1. Manual Information
The purpose of this manual is to provide information on the operation and usage
instructions of the Ethernet Interface for the BIXOLON Printers.
We at BIXOLON maintain ongoing efforts to enhance and upgrade the functions and
quality of all our products. In following, product specifications and/or user manual content
may be changed without prior notice.
2. Specifications
2-1 Hardware version
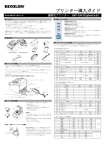
Interface Card
Picture
IFA-EP TYPE
2-2 Configuration Tool
BIXOLON provides 2 types of network and serial communication set up utilities as a below.
- Configure_Vx.x.x.exe
- Web Server
Rev.1.00
-3-
Network Interface
3. How to install
1) Check the interface version.
[Note]
Each version uses its own Configuration Tool.
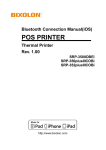
2) Turn of the printer and insert the interface card.
Interface Card
Printer
IFA-EP TYPE
SRP-350plusII
Rev.1.00
-4-
Picture
Network Interface
4. Configuration Tool
Install SRP-350plusll PSP and excute it.
(Start >> BIXOLON >> SRP-350plusll POS Software Package >> PSP Launcher)
Select the “Printer Setting >> Comm Setting” and click the “Net Configuration button”
Click the Ethernet Configuration button when the printer is connected to the Ethernet.
Rev.1.00
-5-
Network Interface
LAN Configuration
When you press the Search button, the SRP-350plusll printer connected to the network
will be shown in the list.
The following warning message may pop up if the firewall is installed.
Select [Unblock], and then retry the Search operation.
Select the SRP-350plusll printer from the list and press the [Setting] button, and then the
following window for setting Ethernet settings will pop up.
Rev.1.00
-6-
Network Interface
Enter the proper IP Address, Subnet Mask, and Gateway for the currently used network,
and then press the Save button to save the settings.
(Device Baudrate setting, which is used for other models, is not necessary for SRP350plusll.)
Select the SRP-350plusll printer from the list and press the [Configuration(Web)] button
you will see the web browser for changing the Ethernet and WLAN settings as shown
below.
Rev.1.00
-7-
Network Interface
5. Web Server
1) Execute Internet Explorer.
2) Enter IP address of the printer at Address of Internet Explorer and click go.
[Note]
- If you are not aware of IP address, check IP address by pushing Function key.
- Ask Network administrator IP Address and its related information.
3) When Configuration Window appears, enter new Network Setting.
Rev.1.00
-8-
Network Interface
[Note]
- If you are not aware of Subnet Mask, refer to the below.
- When the IP address is
(1) 1~126.xxx.xxx.xxx: Subnet Mask: 255.0.0.0
(2) 128~191.xxx.xxx.xxx: Subnet Mask: 255.255.0.0
(3) 192~223.xxx.xxx.xxx: Subnet Mask: 255.255.255.0
For example, when the IP address is 192.168.192.321,
Subnet mask is 255.255.255.0.
- If you are not aware of Gateway.
(1) When the Network is connected to Internet (Router or Server computer),
refer to the Network setting of other computers on the Network.
(2) When the Network is connected to Internet (Router or Server computer),
enter 0.0.0.0 for Gateway.
[Note]
- When the setting finishes successfully, the following message appears.
Please press here if you would like to back to the configuration
4) If you click the message, you can check your configuration setting.
[Note]
- If any change was not found after setting on Web Server, check the bellows.
(1) Execute Internet Explorer.
(2) Internet Explorer Menu → Tools → Internet options.
Rev.1.00
-9-
Network Interface
(3) General tab → Temporary internet file → Settings
(4) Check for newer version of stored pages → Click Every visit to the page.
(5) Click Refresh in Internet Explorer.
Rev.1.00
- 10 -
Network Interface
6. Ethernet Test by using Windows Test Page
You can use the Windows printer driver as shown below when there is no test program.
Operating systems that allow you to use the Windows printer driver are Windows 2000, XP,
2003 Server, VISTA, 2008 Server, 7.
1) Install the Windows printer driver.
[Note]
- The Windows driver is included in the CD, and you can download the latest
version from our home page.
(www.bixolon.com)
2) Click the Start button, and then select “Printers and Faxes.”
3) Select and right click on the corresponding model, and then select “Properties.”
Rev.1.00
- 11 -
Network Interface
4) Select the “Ports” tab from the “Properties” window.
5) Click “Add Port…”
Rev.1.00
- 12 -
Network Interface
6) Select “Standard TCP/IP Port” and click “New Port...”
7) Click the [Next] button in the “Add Standard TCP/IP Printer Port Wizard” window.
8) Enter the IP address assigned to the printer in the “Printer Name or IP Address” field in
the “Add Port” pop up window, and then click the [Next] button.
[Note]
- Enter the same IP address entered during the installation of the interface card.
Only enter the “Printer name or IP address.”
Rev.1.00
- 13 -
Network Interface
9) Click the [Next] button in the “Additional Port Information Required” window.
[Note]
- Click the [Next] button to proceed without any changes.
10) Click the [Finish] button at the “Completing the Add Standard TCP/IP Printer Port
Wizard” window.
11) Click the “Cancel” button in the Printer Port window, closing the window.
Rev.1.00
- 14 -
Network Interface
12) Click the “Configure Port...” button in the “Properties” window.
13) Enter the same number as the local port number set during the installation of the
interface card in the “Port Number” field in the Raw Settings.
[Note]
- Do not change any other items except the RAW Settings.
Rev.1.00
- 15 -
Network Interface
14) Click [OK] when you finish entering the required values, and then click the [Apply]
button.
15) Select the “General” tab in the Properties window, and then select the “Print Test
Page” to check the printing status.
Rev.1.00
- 16 -
Network Interface
7. Factory Reset
1) Default setting after factory reset
- Activate DHCP mode
- Local Port: 9100
- Inactivity Time: 0
2) How to reset
(1) Turn off the printer.
(2) Turn on the printer while pressing Function Key .
[Note]
- Press Function key 3 more seconds after turning on the printer.
(3) Wait 10 seconds until new IP address is allocated to the printer.
- The IP address will be allocated automatically under DHCP mode.
[Note]
- DHCP Network environment
Connect to web-server with newly allocated IP address.
Check new IP address by pressing Function key.
- Static IP Network environment
The IP address will not be allocated automatically.
Set up Static IP with Configuration utility.
(4) Print Network setting information by pressing Function key.
Connect web-server to change any network setting.
Rev.1.00
- 17 -
Network Interface
8. Function Key set up
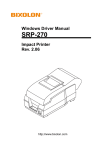
1) How to use
(1) Turn on the printer.
(2) Wait 10 or more seconds until the Ethernet interface boots up.
(3) Push the Function key.
Function key
(4) The settings will be printed only one time since the printer is turned on.
(5) Turn off and on the printer to print them again.
2) Printed settings
- MAC address
- IP address
- Subnet Mask
- Gateway
- Port
- Inactivity time
- Serial speed
- Firmware Version
Rev.1.00
- 18 -
Network Interface
9. Troubleshooting
When printing doesn’t work
Check network setting
When using Ethernet
- IP Address
Check whether the IP Address band of the printer rand the AP (or
wireless terminals) are the same. The first three digits of the four digit
value in the IP Address must be the same.
- Subnet Mask
Check whether the subnet mask of the printer matches with the one in
AP (or wireless terminal).
- Port
Check whether the port configured in the printer and the host (PC,
PDA) are the same.
When using WLAN
Check the wireless network setting of the AP and the printer.
(Refer to Configuration for checking/changing the printer settings)
- SSID
Check whether the SSID of the printer matches with the one in AP (or
wireless terminal).
- 802.11 mode
Check whether AP supports 802.11b or 802.11g.
BIXOLON printer supports 802.11b/g, and 802.11a is not supported.
- Network Mode
Check the network mode of the printer.
Network mode must be set to “Infrastructure” to connect to AP and
“Ad-hoc” to connect between wireless terminals.
- IP Address
Check the band of the IP Address.
Check whether the band of the printer and the AP (or wireless
terminals) are the same.
The first three digits of the four digit value of the IP address must be
the same.
- Subnet Mask
Check whether the subnet mask of the printer matches the one in AP
(or wireless terminal).
Rev.1.00
- 19 -
Network Interface
-
-
Port
Check whether the port configured in the printer and the host (PC,
PDA) are the same.
Authentication / Encryption
Check the authentication/encryption setting status.
Check whether the settings of the printer and the AP (wireless
terminals) are the same.
PING Check
Checking IP collision
- When entering IP address manually without using DHCP, you must
check whether the corresponding IP address is used by other
equipment. The printer may not work normally when there is a
collision in the IP address.
- When the printer is turned off, carry out the Ping Test to the printer IP.
Ping TEST
-
Turn off the printer.
Select “Run” from the Windows Start menu, and then enter “cmd”.
Enter “ARP –d” and delete ARP table.
Enter “ping {printer IP}”.
ARP –d, ping {IP address}
When you see “Request timed out.” as shown below, it means that there is no collision.
The corresponding IP can be used.
Rev.1.00
- 20 -
Network Interface
On the other hand, if there is a reply as shown below, then the corresponding IP is used by
another network terminal and it cannot be used for the printer IP.
Check Cable
When using Ethernet
- In order to check whether the problem is due to the LAN cable,
connect the cable connected to the printer to other terminals or the
PC to confirm whether its operation is normal.
[Appendix 1] Details of interface card
Item
Network interface
Protocol
IP mode
RX buffer
Flow control
Details
10/100 Base-T All in one (Auto detection)
TCP, IP, ICMP,IGMP, ARP, HTTP
static IP, DHCP (Dynamic Host Configuration Protocol)
2K Byte
Hardware (RTS/CTS)
[Appendix 2] Virtual Driver
It converts output of Serial (COM) port into output of Ethernet (TCP/IP) port.
It is available for Windows 2000, XP, 2003 Server, VISTA, 7.
Rev.1.00
- 21 -