1
HAGERMAN
T E C H N O L O G Y
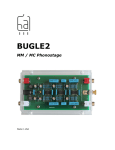
Bugle
Phono Preamp Kit
User’s Manual
Bugle Phono Preamp Kit Manual
2
Warnings
This product does not use any dangerous voltages. Power is supplied from two 9V
batteries and is inherently safe. However, some kit builders may want to design their
own power supplies or install into another product that connects to the ac power line. In
such a case, potentially lethal voltages can be involved, and Hagerman Technology
assumes no liability.
Signal outputs are dc-coupled and may present a dc offset voltage if one of the batteries
fails prior to the other.
Copyrights & Trademarks
© Copyright Hagerman Technology LLC 2002. All rights reserved. No part of this
document may be photocopied, reproduced, or translated to another language without the
prior written consent of Hagerman Technology LLC.
AnyEQ is a trademark of Hagerman Technology LLC.
Disclaimer
The information contained in this document is subject to change without notice.
Hagerman Technology LLC shall not be liable for errors contained herein or for
consequential damages in connection with the furnishing, performance, or use of this
material. See Chapter 7 for warranty information.
Bugle Phono Preamp Kit Manual
3
1 Before You Begin
Description
Congratulations! You have just purchased one of the highest performance-per-dollar
audiophile products available. The Bugle was designed to be a simple yet flexible phono
stage capable of achieving very good sound quality comparable to far more costly units.
The circuit topology uses dual audio opamps to implement passive split equalization
filters and provide a low output impedance to drive interconnects. Gain can be selected
(fixed) to accommodate virtually any moving magnet or moving coil cartridge.
The Bugle half-kit comprises only a blank circuit board and these instructions. To
complete, you must decide upon equalization and gain specifications, determine
component values, and then purchase them yourself from DigiKey (www.digikey.com).
A finished project will cost about $50 total. Since it is a kit, and the circuit board is
professionally layed-out with a ground plane and narrow traces, you must be rather
skilled at soldering.
Features
•
•
•
•
•
Battery operated for low hum
AnyEQ™ split passive customizable equalization
40dB to 60dB gain
Clean, quiet solid-state design
Quality components
Uses
•
•
•
•
Phono stage for older non-RIAA equalized LPs (two per board)
Outboard phono stage for your existing linestage
Rip your vinyl collection onto CD
Build into other equipment
Tools
You will need a few basic shop tools (screwdriver, pliers, wire cutters, etc.) and a fine-tip
soldering iron to build this kit.
4
Bugle Phono Preamp Kit Manual
2 Parts to Buy
Kit
If you purchased the assembled version, go straight to Chapter 6.
The Bugle kit does not need to be built as specified. You may make any circuit and
component changes you wish. Feel free to upgrade opamps or capacitors. Buy your
parts from anyone. A suggested parts list is given below using DigiKey part numbers. If
you do plan to make changes, please read Chapter 5 before ordering parts.
AnyEQ™
To customize your equalization to other-than-RIAA, visit www.anyeq.com and follow
the online instructions for calculating component values. You should be able to print out
a parts list, which consists of changes to the table below.
Parts List
This parts list is for a stock 40dB gain RIAA phono stage. You can order components
directly from www.digikey.com. Not listed are the few assorted screws, nuts, standoffs,
batteries, etc., that you’ll need to finish the project. The grounding nut and corner
mounting holes are sized for #6-32 screws. The battery holders need tiny #2-56 screws
and nuts to hold in place.
5
Bugle Phono Preamp Kit Manual
Component
Qty
DigiKey
Reference Designators
220uF 16V el
0.1uF 50V pe
0.01uF 50V pp
0.22uF 50V pp
316
1.00k
1.30k
1.43k
8.45k
13.0k
47.5k
OPA2134
Battery Holder
RCA Jack
Socket, DIP 8
Switch, DPDT
2
2
2
4
4
6
4
4
2
8
4
3
2
4
3
1
P5139
BC1639
495-1301
495-2320
316XBK
1.00KXBK
1.30KXBK
1.43KXBK
8.45KXBK
13.0KXBK
47.5KXBK
OPA2134PA
BH9V-PC
CP-1402
A400
EG1905
C7, C10
C8, C11
C2, C5
C1, C3, C4, C6
R7, R13, R25, R31
R9, R11, R12, R27, R29, R30
R3, R5, R21, R23
R1, R14, R19, R32
R8, R26
R2, R4, R6, R10, R20, R22, R24, R28
R15, R17, R33, R35
U1, U2, U3
B1, B2
J1, J2, J3, J4
U1, U2, U3
S1
6
Bugle Phono Preamp Kit Manual
3 Assembly
Step by Step
Please follow this systematic procedure for assembling the amplifier. Make sure you
have purchased all necessary components before you begin.
Bend and form the leads on the resistors and install into their proper places.
Solder in place and cut leads.
Install sockets and solder in place.
Install RCA jacks and solder in place. Cut signal leads so they don’t stick out.
Install capacitors, solder in place and cut leads.
Install switch and solder in place.
Mount battery connectors, secure in place using at least one screw. Solder in place.
That’s it for the electronics. However, there is one more recommended step, and that is
to clean the flux and other surface contaminants from the board. To do this, soak the
entire assembly in isopropyl alcohol. You can buy a bottle at any drug store. Soak for
about ½ hour, and then use a paintbrush (big) to dab in-between components scrubbing
away any remaining residue. Use a strong fan (or leaf blower) to dry both sides. When
finished, the circuit board will be shiny and clean. Cleanliness is key to eliminating
leakage current paths that develop over time.
Add screw to grounding nut.
Install opamps.
Chassis Mounting
Mount the circuit board on legs so that nothing is touching the leads or traces on the
bottom. A shielded chassis will help reduce stray EMI fields. Install 9V batteries and
you are ready to go!
Bugle Phono Preamp Kit Manual
7
4 Testing & Installation
Testing
Performance testing is possible if you have access to laboratory test equipment, but is
typically unnecessary. You can do a basic test with a DVM by checking supply voltages
on the opamps and insuring there is no dc offset at the outputs.
Connections
Connect the Bugle just like any other phono stage. The input and output jacks are RCA
types. Make sure the ground lead from the turntable is connected to the grounding screw
between the input jacks.
Battery operation should help eliminate ground loops and hum, but not necessarily. The
location of the open-frame circuit board may prove critical. Close proximity to large
electric or magnetic fields will induce hum or buzz into the signal. This will be common
to all phono stages.
For maximum battery life, always turn off when not in use. There is no warm-up time.
Bugle Phono Preamp Kit Manual
8
5 Customization
Circuit Modifications
The Bugle does not have to be built as specified. For example, you do not need to use the
batteries for power. A good, clean +/-15V supply will add more headroom. The stock
opamps can handle supplies up to +/-18V. Be sure to add adequate decoupling and pay
attention to grounding.
You can mount the Bugle into a linestage or other piece of equipment. If the circuit
board is too large, it can be cut down using a hacksaw. Just chop off the battery “wings”.
Use a file to smooth any cut edge to make sure no traces short to the ground plane.
Connectors can be panel mounted and then wired to the circuit board. You may need to
use shielded cables. The switch can also be remotely mounted or even bypassed. Buy
only the parts you need!
For moving coil cartridges, the loading resistance is often specified to be much less than
47k. There are two unused resistor locations on the board, R16 and R34, where you can
solder in whatever load resistance you need.
The two channels do not have to be identical. You can implement two independent mono
channels for different 78rpm equalizations and just use one at a time. It is best to short
the unused input to reduce any possible crosstalk.
Component Substitution
You can substitute any component with another type or manufacturer. Value changes are
possible too if you are careful. For example, the 0.22uF and 0.01uF capacitors used in
the equalization networks can be changed to any other value you prefer, just be sure to recalculate resistor values using the AnyEQ™ online web calculator.
Stock component values were specifically chosen by design to optimize the circuit for
sound quality, noise, distortion, bandwidth, power dissipation, availability, and cost.
Stray from nominal values at your own risk.
The most popular substitution will be the opamps. That is why sockets are specified.
Everyone has his or her own sonic tastes and preferences. Each opamp will sound
different. The recommended Burr-Brown (www.ti.com) OPA2134PA opamps are a good
fit for this particular circuit. However, they will discharge the batteries rather quickly.
Bugle Phono Preamp Kit Manual
9
For a 10x improvement (160 hours), use the OPA2137PA. Beware, these are much
noisier devices and should not be used for high gain stages. Opamps using bipolar
transistor front-ends are not recommended because of their tendency to demodulate radio
stations and the Bugle’s non-inverting architecture. Most importantly, use DUAL
devices and make sure pin 1 is oriented towards the output jacks.
A good alkaline 9V battery will have about 500mAh of energy. The stock opamps draw
about 5mA per amplifier, and there are six of them (three dual packages), for a total of
30mA idle current. The rest of the circuit does not add to this, except under signal and
load. Since average signal levels are low, the typical battery draw is roughly equal to the
idle current. Life is then calculated by 500mAh / 30mA = 16.7 hours.
10
Bugle Phono Preamp Kit Manual
6 Specifications
The following specifications are subject to change without notice. Values given are for
stock components at 40dB gain.
Item
Specification
Gain
Input Impedance
Output Impedance
RIAA Response
Bandwidth (-3dB)
Distortion
SNR
Overload
Battery Life
Size (PCB)
40dB to 60dB (fixed)
47k ohm plus 14pF
330 ohms
+/-0.5dB from 30Hz to 60kHz
15Hz to 150kHz (minimum)
0.05% @1kHz
74dB ref 5mV A-weighted
55mV @1kHz
16 hours
3” x 5”
Bugle Phono Preamp Kit Manual
11
7 Warranty & Service
Warranty
Hagerman Technology LLC warrants this product free of defects in materials and
workmanship for 10 years. If you discover a defect, Hagerman Technology LLC will, at
its option, repair or replace the product at no charge to you provided you return it during
the warranty period, transportation charges prepaid to Hagerman Technology LLC. This
warranty does not apply if the product has been damaged by negligence, accident, abuse
or misuse or misapplication, has been damaged because it has been improperly connected
to other equipment or has been modified without the express written permission of
Hagerman Technology LLC. This warranty is limited to the replacement or repair of this
product and not to damage to equipment of other manufacturers.
Any applicable implied warranties, including warranty of merchantability, are limited in
duration to a period of the express warranty as provided herein beginning with the
original date of purchase and no warranties, whether express or implied shall apply to the
product thereafter.
Under no circumstances shall Hagerman Technology LLC be liable for any loss, direct,
indirect, incidental, special, or consequential damage arising out of or in connection with
the use of this product.
Service
Refer to Chapter 4 for troubleshooting information. If the problem persists, contact
Hagerman Technology for service at http://www.hagtech.com.
Hagerman Technology LLC
PO Box 61911
Honolulu, HI 96839 USA
808-383-2704 (voice)
Bugle Phono Preamp Kit Manual
12
Bugle Phono Preamp Kit Manual
13
Bugle Phono Preamp Kit Manual
14
1
2
3
4
5
A
A
J4
InRight
J2
InLeft
1
2
1
2
Battery
B2
Battery
B1
R34
1k00
B
-9V
U1A
OPA2134
1
C
+9V
C6
220nF
R32
1k43
1k00
R29
-9V
C11
100nF
13k0
R28
1k30
(392)
R21
C3
220nF
R14
1k43
1k00
R11
C10
220uF
16V
S?
Switch SPDT
S?
Switch SPDT
-9V
U1B
OPA2134
7
13k0
R10
1k30
(392)
R3
C8
100nF
4
8
+9V
4
8
+9V
C
C7
220uF
16V
R35
47k5
5
6
13k0
1k30
(392)
R30
R24
R17
47k5
R23
R16
1k00
3
2
13k0
1k30
(392)
R12
R6
R5
B
5
6
13k0
R22
3
2
13k0
R4
-9V
4
8
-9V
U2B
OPA2134
7
+9V
4
U2A
OPA2134
1
+9V
8
D
D
8k45
R26
8k45
R8
C5
10nF
R31
316
220nF
C4
C2
10nF
R13
316
220nF
C1
1k00
R27
1k43
R19
1k00
R9
1k43
R1
3
2
13k0
R2
E
R33
47k5
5
6
13k0
R20
R15
47k5
E
-9V
U3A
OPA2134
1
4
8
-9V
U3B
OPA2134
7
+9V
4
8
+9V
J3
OutRight
J1
OutLeft
40dB
(60dB)
Date:
Size
F
Thursday, April 04, 2002
n/a
Document Number
Bugle: Phono
Title
P.O. Box 26437
Honolulu, HI 96825
Sheet
Hagerman Technology LLC
316
R25
316
R7
F
1
G
G
of
1
A
Rev
1
2
3
4
5