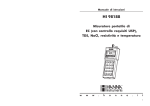
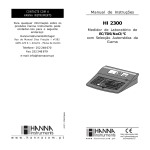
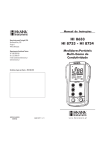
Download Instruction Manual
Transcript
Instruction Manual Multiparameter Benchtop Meter Dear Customer Thank you for choosing a Hanna Instrument product. Please read this instruction manual carefully before using this instrument. This manual will provide you with the necessary information for correct use of this instrument, as well as a precise idea of its versatility. If you need additional technical information, do not hesitate to e-mail us at [email protected] or view our worldwide contact list for a Hanna representative near you at www.hannainst.com. All rights are reserved. Reproduction in whole or in part is prohibited without the written consent of the copyright owner, Hanna Instruments Inc., Woonsocket, Rhode Island, 02895 , USA 2 Included........................................................................................................................ 4 Safety Measures..........................................................................................................5 Description................................................................................................................... 6 Diagram...................................................................................................................7-11 Product Diagram.................................................................................................................................................................. 7-8 Probe Diagram...........................................................................................................................................................................9 Keypad Function.....................................................................................................................................................................10 Guide to Indicators................................................................................................................................................................. 11 Setting Up edge™...........................................................................................................................................................12-14 Electrode & Probe Connections.......................................................................................................................................14 General Setup...................................................................................................................................................................15-17 Basic Mode................................................................................................................................................................................17 Logging Function............................................................................................................................................................18-21 Viewing Logged Data................................................................................................................................................... 21-24 PC & Storage Interface.................................................................................................................................................25-26 Basic vs Standard pH Mode........................................................................................................................................27-28 pH Meter Configurations.................................................................................................................................................... 29 pH Calibration..................................................................................................................................................................30-38 Calibration Messages....................................................................................................................................................39-41 pH GLP Information.......................................................................................................................................................41-43 pH Measurement...........................................................................................................................................................43-45 Basic vs Standard EC Mode ...................................................................................................................................... 46-47 EC Meter Configuration................................................................................................................................................47-50 EC/TDS Calibration.........................................................................................................................................................50-53 % NaCl Calibration ........................................................................................................................................................54-55 EC/TDS GLP Information.............................................................................................................................................55-59 EC/TDS Measurements................................................................................................................................................60-61 Salinity Measurements............................................................................................................................................... 62-64 Dissolved Oxygen Setup............................................................................................................................................ 65-66 DO Probe Diagram................................................................................................................................................................. 67 DO Meter Configuration.............................................................................................................................................. 68-70 DO Calibration.................................................................................................................................................................. 70-71 DO Calibration Messages....................................................................................................................................................72 DO GLP Information....................................................................................................................................................... 72-74 DO Measurements......................................................................................................................................................... 74-75 pH Probe Maintenance................................................................................................................................................76-79 EC Probe Maintenance........................................................................................................................................................ 79 DO Probe Maintenance................................................................................................................................................80-81 Troubleshooting Guide................................................................................................................................................82-83 Table of Contents Setup/ Installation.............................................................................................. 12-26 Operational Guide............................................................................................... 27-75 Maintenance........................................................................................................76-83 Specifications.........................................................................................................................84-87 Accessories..............................................................................................................................88-90 Warranty...........................................................................................................................................91 3 Included Remove the instrument from the packing material and verify damage has not occurred during shipping. Remove protective film from meter. Notify your nearest Hanna Customer Service Center if damage is observed. Each instrument is supplied with: Edge meter Bench cradle Wall cradle Electrode holder USB cable 5 Vdc Power Adapter Instruction Manual Quality Certificate Model Specific Components include: HI 2020 (pH) HI 2030 (EC) HI 2040 (DO) HI 11310: Digital pH Electrode with integral temperature sensor HI 763100: Digital 4 ring conductivity probe with integral temperature sensor HI 764080: Digital polarographic dissolved oxygen probe with integral temperature sensor pH 4.01, 7.01 & 10.01 Buffer Sachets 1413 µS/cm and 12.88 mS/ cm Conductivity Standard Sachets HI 7041S Electrolyte for HI 764080 DO probe 2 DO membarne caps for HI 764080 DO probe HI 700601 General Purpose Cleaning Solution 2 replacement O-rings Note: Save all packing material until you are sure that the instrument works correctly. Any defective item must be returned in its original packing. 4 Included Before using this product, make sure that it is entirely suitable for your specific application and for the environment in which it is used. Operation of this instrument may cause unacceptable interferences to other electronic equipment, thus requiring the operator to take all necessary steps to correct interferences. Any variation introduced by the user to the supplied equipment may degrade the instrument’s EMC performance. Safety Measures To avoid damages or burns, do not put the instrument in microwave ovens. For your and the instrument’s safety, do not use or store the instrument in hazardous environments. Safety Measures 5 Description edge™ enables the user to make fast, accurate measurements of commonly measured laboratory parameters using one of the Hanna edge™ digital sensors for pH, Conductivity or Dissolved Oxygen. The digital sensors are individually serialized and identified by the meter. Once connected to the meter, they are ready to measure their individual parameters along with temperature. The clean user interface permits you to adapt edge™ to your exact measurement requirements. The intuitive design simplifies configuration, calibration, measurement, data logging and transfer of data to a USB thumb drive or computer. edge™ also offers a basic operation mode that streamlines measurement configuration and is useful for many routine applications. Every feature and measurement detail is designed to give you an edge in measurement technology. edge™ is versatile in many ways. The slim meter and probe can be used remotely as a portable device (using its rechargeable battery) or used in its bench or wall cradles (that also power the meter) as a line-powered laboratory instrument. 6 Description Product Diagram Front View 1. 2. 3. 4. Liquid Crystal Display (LCD) Capacitive Touch Keypad 3 mm jack input for edge™ digital probes Top mounted ON/OFF button 5. 6. Micro USB device connection for power or PC interface Standard USB host connection for data transfer to a USB thumb-drive Product Diagram 7 Product Diagram Side & Back View Top & Bottom View • • • • • • 8 Product Diagram Sleek, clean, intuitive design Internal clock and date Adjustable resolution for pH and EC measurements Auto parameter recognition Dedicated GLP key GLP data included with logged data • • • Basic mode for simplified operation Simplified data transfer to a PC Up to 8 hours battery life when used as a portable device Probe Diagram Probes pH Electrode • • • • • • • EC Electrode DO Electrode Process measurement signal directly for noise free determinations Support auto sensor recognition Store calibration specific data from the last calibration Are built with materials suitable for use in chemical analysis Have integral temperature measurement Incorporate a 3 mm jack termination Unique serial ID in every probe for traceability Product Diagram 9 Keypad Function 1.CAL/MODIFY - Used to enter and exit calibration mode. In SETUP used to initiate modification of a configuration setting. 5. / - Used to scroll through SETUP menu. Used to change selection when modifying a parameter in SETUP. 2.GLP/CFM - Used to display GLP calibration information. In SETUP, used to confirm change made. In calibration, used to accept calibration points 6.RCL - Used to view log records or view % log memory used. 3.RANGE/u - Used to select measurement range. In SETUP used to move to right in pick list. In log RCL used to view GLP data for a data point. 4.SETUP/CLR - Used to enter/ exit SETUP mode. During Calibration used to clear previous calibration data. In log RCL used to clear log records. 10 Product Diagram 7.LOG - Used to initiate a manual (log on demand) or manual (log on stability) log or to start/stop interval logging. Note: You can increase/ decrease the speed to change the value of the parameters. Proceed as follows: Press and hold down the p or q key, then slide the finger toward the double apex to increase the rate of change. Guide to Indicators 1. 2. 3. 4. 5. 6. 7. 8. Mode tags Confirm tag USB connection status pH electrode diagnostics Probes symbol Battery symbol Arrow tags, displayed when they are available pH calibration buffers used 9. 3rd LCD line, message area 10. Labels 11. 2nd LCD line, temperature measurement 12. Temperature units 13. Temperature status 14. Measurement line 15. Measurement units 16. Stability Indicator The third line of the LCD is a dedicated message line. During measurement the user may use the p q arrows to select desired message. Options include Date, time, calibration data, battery charge or no message. If a measurement error or log status change occurs during measurement, the third line will display a pertinent message. Product Diagram 11 Setting Up edge™ The main operating modes of edge™ are setup, calibration, measurement, data logging, and data export. Follow this general outline of steps to get you started in taking measurements. The following topics are expanded upon in the sections that follow in this manual. 1. 2. Familiarize yourself to the design features of this unique meter. Decide how the meter will be used and set up the wall or bench cradle in a clean area near line power. 3. Turn edge™ on using the ON/OFF button located on the top of the meter. 4. Plug in the probe required for measurement. 5. SETUP the measurement parameters required for the measurement you will be making. 6. Calibrate the sensor/probe. You are now ready for measurements. Bench Cradle Setup Insert electrode holder arm into the post on the pivoting base. Connect the probe connector to the socket located at the bottom of the instrument. Slide edge™ into the cradle while positioning the probe cable behind the cradle. Put the probe/sensor into the electrode holder and secure cable in clips. 12 Setup/Installation Connect the power adapter cable to the rear socket of the bench cradle. Verify the battery icon indicates charging when meter is powered. Setting Up edge™ Wall Cradle Setup Choose suitable wall location. Use the drilling diagram to drill holes as indicated. (Use 2.5 mm or US #3 bit). Fasten the wall cradle using the provided screws. Snap cover over screw heads. Connect the power adapter cable to the bottom socket of the wall cradle. Connect the probe connector to the socket located at the bottom of edge™. Slide edge™ into the wall cradle. Verify the battery icon indicates charging when meter is powered. Setup/Installation 13 Setting Up edge™ Power Connection Connect the micro USB connector into the USB socket on the cradle or into the micro USB socket of edge™. Plug the 5 Vdc adapter into the power supply socket. edge™ can be also powered by connecting with a USB cable directly to a PC. Note: edge™ is supplied with a rechargeable battery inside, which ensures about 8 hours of continuouse use. Whenever edge™ is connected to the power adapter or to a PC, the battery is recharging. Electrode & Probe Connections Connect the connector of the probe to the probe input located on the bottom of edge™. Make sure the probe is completely connected. If the probe is recognized, “CONNECTING” message is displayed. If the probe is not connected or not recognized, “NO PROBE” message is displayed. 14 Setup/Installation The following General Setup parameters are displayed with all probe measurements and remain if switching to another probe type. Only these parameters are available when no probe is attached. Parameters are tabulated in the table below with choices and default values. Parameters are accessed by pressing SETUP. Loop through the parameters by using the p q arrows. To modify a setting, press MODIFY. The parameter may be modified by using u, p and q arrows. Press CFM to confirm the change. To exit SETUP press SETUP. Parameter Description Choices *Only seen when cable connection between micro USB and PC is made. Select to log data on edge™ or to export data to PC Log on edge™ of export to PC Log Select log type to be used from 3 types of logs: Manual, Manually initiated Stability log (3 settings available), or a continuous Lot logging with measurements logged in timed intervals. Set Calibration Expiration Warning Meter will indicate “CAL DUE” when set time in this parameter has been exceeded. Default General Setup Basic mode* (EC and pH) Log on edge™ Available Interval (5 Sec) Manual log or Stability log: Medium Not available Manual Log Stability Log: Fast, Medium, Accurate; Interval Log: Seconds: 5, 10, 30; Interval Log Minutes: 1, 2, 5, 15, 30, 60, 120, 180. 1, 2, 3, 4, 5, 6, 7 days or OFF Setup/Installation 15 General Setup 16 Setup/Installation Parameter Description Choices Default Basic mode* (EC and pH) Probe Specific Parameters are inserted here in SETUP list. Set Date Press MODIFY key to Set current date, displayed in ISO format. Press CFM to save changes. YYYY/MM/DD Date Set date Available Set Time Press MODIFY key to Set current time, displayed in ISO format. Press CFM to save changes. 24hr:MM:SS Time Set time Available Set Auto Off Used to save battery life by automatically turning off when no key press is detected for time set and meter is not in active logging or calibration mode. 5, 10, 30, 60 Min or Off 10 MIN Available Sound If enabled, a short audible tone is produced or key stroke or calibration confirmation and a longer tone for wrong key. On or Off On Available Temperature Unit Select degree Celsius or Fahrenheit scale for displayed and logged temperatures. ºC or ºF ºC Available LCD Contrast Permits modification of the display contrast for various lighting conditions 1 to 8 3 Available Flash Format Only seen when log errors are present. Permits formatting the flash drive. On or Off OFF Available Message Transition User may choose how messages are displayed on 3rd LCD line of display. Word scroll messages or letter scroll messages Letter scroll messages Available Reset Config To Default Press the MODIFY key and CFM (when prompted) to reset parameters. Available: RESETS with Basic Mode OFF. Instrument Firmware/ Probe Firmware Displays firmware version of meter. Using the u key switches to Probe firmware (if connected) and diagnostic made for troubleshooting. View only Current firmware version. Available Meter ID 4 digit numeric User selectable 0000 Available General Setup Note: Parameters that are grayed out are seen under special conditions only. edge™ offers a basic operation mode that streamlines measurement configuration for pH and EC measurements and is useful for many routine applications. Basic pH SETUP reduces parameter selection to the basic set. The meter limits calibration to 5 standard pH buffers; 6.86, 7.01, 4.01, 9.18 and 10.01 buffers. All pH measurements will display, log and export with 0.01 pH resolution. Interval logging is also eliminated. Manual and Manual stability Logs on demand are still functional. pH CONDITION, RESPONSE graphs are not displayed, giving the display a “Basic” measurement screen with just pH data Basic Mode Setup/Installation 17 and temperature. Basic EC reduces specific EC SETUP parameters to 3. The meter defaults setting to common parameters and auto ranges measurements automatically. The Basic EC meter may be used for conductivity and TDS measurements (salinity is not available). Interval logging is also eliminated. Manual and Manual medium stability Log on demand are still functional. Logging Function Note: • If powering edge™ through the micro USB connector to a PC, a SETUP parameter will require the choice “LOG ON EDGE”. • 1000 log records can be stored into the Edge memory. This memory is shared between all measurement types (pH, EC, DO) and all logging types (Manual, Manual Stability, Interval logs) • The maximum number of records for an Interval Lot is 600 records (provided log space is available). The maximum number of Interval Lots that may be stored is 100. If a 101st lot is attempted, “MAX LOTS” will be displayed. Some lots will need to be deleted. The lot numbering is up to 999 and restarts if all LOT logs are deleted. The maximum number of records that may be stored in a MANUAL or STABILITY lot is 200 records. If the log memory is full during any logging session, the “LOG FULL“ message will be displayed on the 3rd LCD line for a brief moment and logging will cease. The display will return to the measurement screen. Logging type is configured in SETUP. The types of Types of Logging Interval is a continuous log made using the user-selected sample period. (This is not available in Basic mode). 18 Setup/Installation Manual (log on demand) readings are logged each time LOG is pressed. All of the records are stored in a single Manual lot for the measurement type. New records made on different days are stored in the same Manual lot. Logging Function Stability is a log on demand that is made each time LOG is pressed and the stability criterion is reached. Stability may be set with Fast, Medium or Accurate settings. Use the u arrow to select between Interval, Manual, Stability. When Interval is displayed use the p and q arrows to select the setting for the timed interval. When Stability is displayed, use the p and q to select the measurement stability setting A complete set of GLP information including date, time, range selection, temperature reading, calibration information and probe serial number is stored with each log made. Select Interval and sampling period in the SETUP menu (Not available in Basic mode). To start Interval logging, press the LOG key while the instrument is in measurement. Interval Logging A “PLEASE WAIT” message will be displayed followed the number of free spaces. During active interval logging, lot information is displayed on the 3rd LCD line. The line indicates in which lot the data will be placed and keeps track of the number of logged records taken. The “LOG“ tag is continuously on during active logging. Pressing u during an interval log will display the number of logs available. Setup/Installation 19 Logging Function Pressing the LOG key again will stop the Interval logging session. The “LOG STOPPED“ message will be displayed for a few seconds. If a sensor failure occurs during interval logging, the message “OUT OF FREE SPACE” will alternate with logging information Manual Logging Select Manual in the SETUP menu. To initiate a Manual log, press the LOG key while the instrument is in measurement. The “PLEASE WAIT” screen will be displayed briefly followed by a screen indicating the measurement has been saved and then the log record number. Following the saved and recorded number, the amount of free space will be displayed. The “LOG” tag will be displayed on all 3 screens. Stability Logging Select Stability and choose measurement stability criteria in the SETUP menu. Only Stability Medium is available in Basic mode. To initiate the Stability log, press the LOG key while the instrument is in measurement. The “PLEASE WAIT” screen will be displayed briefly followed by a screen showing the stability tag, “LOG” tag and a “WAITING” message. The log can be stopped while the “WAITING” message is displayed by pressing LOG again. 20 Setup/Installation When the stability selected criteria has been met, a “SAVED” message will be displayed followed by a screen indicating of how much log space is available. The “LOG” tag will be displayed on all 4 screens. Logging Function All log records stored on edge™ may be viewed on the meter by pressing the RCL key. The log records are grouped according to measurement (pH, EC, DO). The parameter displayed first is based on the probe/ sensor connected. The display also indicates the percentage of log memory used. Press CFM to display those logs. Viewing Logged Data If no sensor or probe is connected, use the u arrow to select the desired measurement type. Press CFM to display those logs. Use the p q arrows to scroll through the records and find the desired lot of interest. Setup/Installation 21 Viewing Logged Data If no data was logged for the selected measurement range, the instrument displays the following messages (ex. for pH range): No Manual Logs No Stability Logs Press CFM to enter inside lot information to view memorized records. Use the ARROW keys to toggle between different records. Use u to display GLP data. Press CLR then CFM when deleting records or lots. Press RCL to exit the lot you are viewing. Press RCL to return to the measurement screen. Delete Record/Lot Press RCL and select measurement log. Use the keys to select the Manual/Stability records or Interval lots to delete. The instrument will display “CLEAR MANUAL” for MANUAL, “CLEAR STAB” for STABILITY. For Interval lots, the message “Clear” followed by the selected lot will be displayed with “CFM” tag blinking. Press the ARROW keys to select a different lot. Press CFM. The instrument will display “PLEASE WAIT”. For Interval, use the keys to select a different lot. Press CFM. The instrument will display “PLEASE WAIT”. “CLEAR DONE” is displayed for a few seconds after the selected Interval lot is deleted. 22 Setup/Installation To delete individual records (Manual and Stability logs only), enter Manual (Stability) log by pressing CFM when Manual (Stability) is displayed. Use the ARROW keys to select the record to be deleted and then press CLR. Viewing Logged Data The instrument will display “CLEAR REC.“ and record number along with “CFM” tag blinking. Use the ARROW keys to select another record if necessary. Press CFM. The instrument will display “PLEASE WAIT” and then “CLEAR DONE” message. When individual logs are deleted within saved MANUAL or STABILITY logs, the logs will renumber, filling in the deleted data but staying in chronological order. To delete all records of the MANUAL (STABILITY) log, proceed as described above for LOTS. Select the Manual (Stability) lot and press CLR. The ”CLEAR” message will be displayed along with ”MANUAL” or “STABILITY” and CFM tag blinking on the LCD. Press the CFM key to confirm the deleting of the selected lot (MANUAL or STABILITY) or all records. Press CLR to exit without deleting. The lot number is used to identify particular sets of data. The lot numbers are allocated successively until 100, even if some lots were deleted. The total number of lots that can be saved is 100. If some are deleted (for example 1-50), fifty additional logs may be stored. These will be numbered 101-150. The lots are allocated successively (provided available memory space) until 999 is reached. After this, it is necessary to delete all the LOT logs to start over the numbering. Setup/Installation 23 Viewing Logged Data Delete All All pH logs, (or all EC, all DO logs) may be deleted in a single clear. This function will delete all MANUAL, STABILITY and INTERVAL logs for the measurement type selected. Press the RCL key. The pH, EC, or DO type will be blinking. Use u to select desired measurement parameter log data to delete. While the measurement type is blinking and message states “LOG RECALL”, press CLR. “CLEAR ALL” and measurement type will be displayed with CFM tag blinking. Press CFM. “PLEASE WAIT” and the percent cleared will blink until completed. The procedure can be repeated for the other measurement modes. Note: If CLR is pressed in error, press CLR again to exit without deleting. 24 Setup/Installation Logged data on edge™ can be transferred from the meter to a USB flash drive by using the log recall function. The minimum requirement for the drive is USB 1.1. Select the pH, EC or DO record you wish to export and follow the simple steps below. PC & Storage Interface Connect USB flash drive to the USB host socket, located on the top of the meter. Press the RCL key and select the parameter to view. Press the CFM key. Select Manual, Stability, or interval lots by using the p q arrow keys. Press the LOG key (not CFM). The “USB HOST” tag should come on. “PLEASE WAIT” message appears followed by “EXPORT”. Press CFM to export the selected record or lot. If CFM is not pressed in 10 seconds, the USB host will become inactive. The meter will display the percentage of export. The export percentage should go to 100%. Remove USB flashdrive. The display will return to the selected file. Press the RCL key twice to return to measurements. Note: Do not remove USB flash drive during an active export transfer. Setup/Installation 25 PC & Storage Interface Logged data on edge™ can be transferred from the meter to a PC by following these simple directions. The minimum operating system for the PC is Windows XP. 1. 2. 3. Connect the edge™ to the PC using the supplied micro USB cable. Turn on the edge™. If “LOG ON EDGE” is enabled, go to SETUP and chagne to “EXPORT TO PC”. The PC should detect the edge as a removable drive. Open the drive to view the stored files. Log files are formatted as comma separate values (*.csv) and can be opened with any text editor or spreadsheet program Interval logs are designated as pH, EC or DO Lots. ie. PHLOT001, ECLOT002, DOLOT003. The Manual Lots are PHLOTMAN, ECLOTMAN, and DOLOTMAN. The Stability Lots are PHLOTSTAB, ECLOTSTAB, and DOLOTSTAB. All stability logs, regardless of stability setting, are located in the same stability file for that measurement. Click on the desired log to view data. Note: If C! appears in log data the sensor/probe was used out of the operation parameters. If C!! appears in log data, the temperature probe is broken 26 Setup/Installation Basic vs Standard pH mode For optimum pH measurements, follow these steps: 1. Understand the benefits and features of Standard and Basic Operation. 2. Set up edge™ meter by configuring preferences. 3. Calibration 4. Measurement The “Standard” pH operation includes up to a 5-point buffer calibration, use of custom buffers, choice of displaying 0.001 pH resolution, use of the full diagnostic features of Calibration Check™ (that includes buffers used, probe condition, response time and messages indicating a contaminated buffer or pH sensor requiring maintenance during calibration). Additional Sensor Check™ indicators are available if using HI 11311 or HI 12301 pH electrodes. These include a continuous diagnostic to detect if the electrode is broken or the reference junction has been compromised by sample contamination or fouling. The Standard pH operation also includes full logging capability including Interval, Manual log on demand and Manual log on stability. “Basic” pH operation provides a simplified SETUP menu; there are no decisions to make regarding the pH measurement itself. The meter will display 0.01 pH resolution and permit a 3-point buffer calibration from the following pH buffers; 4.01, 6.86, 7.01, 9.18 or 10.01. Calibration Check™ and Sensor Check™ features are limited to messages during calibration. Calibration reminders are also not available. The GLP will still provide offset, slope, buffers used and a calibration date. The Basic pH operation includes Manual log on demand and Manual log on stability (medium setting). Note: When changing from Standard to Basic operation in SETUP, previous calibration data will be cleared. A prompt will force the user to facilitate this. Operational Guide 27 Basic vs Standard pH mode Major differences between Standard and Basic modes are tabulated below. Standard Basic* Calibration 5 points including 2 custom buffers Diagnostics Cal Check™ Feature Sensor Check™ Feature Error messages GLP Log types Manual Log on demand Manual Log on stability Interval Manual Log on demand Manual Log on stability Recommended pH electrodes: HI 11310, HI 12300 HI 11311, HI 12301 HI 10530, HI 10430 HI 11310* HI 12300 3 points Basic error messages GLP basic * All Sensors work in this mode, but diagnostic and all buffers will not be available 28 Operational Guide pH meter operation is configured by using the SETUP key with a pH probe connected to the meter. The parameter-specific parameters will be seen inserted into the menu. If Basic mode is configured “On”, the pH parameter list will not be displayed. See Basic mode for a description of this operation before choosing how to SETUP the meter. Parameter Choices Default Basic Mode When “On”, a limited set of parameters and calibration buffers are available for use. Description Off or On Off Available Information Visual indication of buffers used, Probe Condition and Response times are determined and displayed when calibration uses 7 and 4 and/or 10 pH buffers. Off or On On Buffers used, probe conditions, and response times are not displayed. First Custom Buffer When “On”, it permits the user to enter a custom pH buffer value to use during probe calibration. Off or On Off Not Available Second Custom Buffer When “On”, permits user to enter a custom pH buffer value to use during probe calibration. Off or On Off Not Available First Calibration Point Allows the user to choose how the first point in calibration will be made. Offset or point Offset Not Available (automatically uses Offset). Resolution Allows the user to select between 0.01 and 0.001 pH resolution. 0.01 Or 0.001 pH 0.01 pH Not Available (automatically uses 0.01 pH resolution). Set Out Of Calibration Range When “On”, a measurement outside the calibration buffer window used will trigger a warning message. Off or On On Not Available, No Error messages displayed. pH Meter Configuations Basic mode Operational Guide 29 pH Calibration pH operation in standard mode offers full function of edge™ meter. This includes seven standard buffers and two custom ones. Five pH buffers may be used for calibration. The instrument should be recalibrated whenever: • High accuracy and sensor verification are required. • The pH electrode is replaced. • At least once a week. • After testing aggressive chemicals. • If ”CAL DUE” is displayed on the 3rd LCD line. Every time you calibrate the instrument use fresh buffers and perform an electrode maintenance as required. It is advised to choose calibration buffers that bracket the sample pH. Preparation Pour small quantities of the buffer solutions into clean beakers. If possible, use plastic to minimize any EMC interferences. For accurate calibration and to minimize cross-contamination, use two beakers for each buffer solution. One for rinsing the electrode and one for calibration. If you are measuring in the acidic range, use pH 7.01 or 6.86 as the first buffer and pH 4.01 (or 3.00*) as the second buffer. If you are measuring in the alkaline range, use pH 7.01 or 6.86 as first buffer and pH 10.01 or 9.18 as the second buffer. Procedure Calibration can be performed using up to five calibration buffers. For accurate measurements, a minimum of a three-point calibration is recommended. The calibration buffer can be selected from the calibration buffer list that includes the custom buffers and the standard buffers: pH 1.68, 4.01 (pH 3.00*), 6.86, 7.01, 9.18, 10.01 and 12.45. * pH 3.00 is only visible when using specific pH electrodes and will replace 4.01 pH buffer. 30 Operational Guide The custom buffers allow the user to calibrate in a buffer solution different from a standard one. Two custom buffers can be set in SETUP menu. See page 30 for more information about using custom buffers. The instrument will automatically skip the buffer used during calibration and the buffers which are in a ±0.2 pH window, around one of the calibrated buffers. pH Calibration Submerse the pH electrode approximately 3 cm (1¼”) into a buffer solution and stir gently. Press CAL to enter calibration. The “CAL” tag will appear and the “7.01” buffer will be displayed on the 3rd LCD line. If necessary, press the ARROW keys to select a different buffer value. The “ ” along with “STIR” tag will be displayed and “WAIT” will blink on the LCD until the reading is stable. When the reading is stable and close to the selected buffer, “CFM” tag will blink. Press CFM to confirm calibration. The calibrated value will be displayed on the 1st LCD line and the second expected buffer value on the 3rd LCD line. After the first calibration point is confirmed, rinse and submerse the pH electrode approximately 3 cm (1¼”) into the second buffer solution and stir gently. If necessary, press the ARROW keys to select a different buffer value. Operational Guide 31 pH Calibration The “ ” along with “STIR” tag will be displayed and “WAIT” will blink on the LCD until the reading is stable. When the reading is stable and close to the selected buffer, “CFM” tag will blink. Press CFM to confirm calibration. Repeat procedure with additional pH buffers. A total of five pH buffers can be utilized. After confirming the last desired buffer calibration points, press CAL or if all five buffer values were calibrated the instrument will automatically display “SAVING”, as it stores information and it will then return to normal measurement mode. Each time a buffer is confirmed, the new calibration data replaces the old data for the corresponding buffer or for any near buffer in a ±0.2 pH proximity. If current buffer has no previous data stored and the calibration is not full (five buffers), the current buffer is added to the existing calibration. If the existing calibration is full, the instrument asks which buffer to replace. Press the ARROW keys to select another buffer to be replaced. Press CFM to confirm the buffer that will be replaced. Press CAL to leave calibration without replacing. Note: If the replaced buffer is outside the ±0.2 pH window around each of the calibrated buffers, it is possible to select this buffer for next calibration during current calibration. 32 Operational Guide Working With Custom Buffers If a custom buffer was set in SETUP menu, it can be selected during calibration by pressing the ARROW keys. The “C1” or “C2” tag will be on once selected. pH Calibration Press u if you want to modify the custom buffer value. The buffer value will start blinking. Use the ARROW keys to change the buffer value. After 5 seconds, the buffer value is updated. Press u if you want to change it again. Note: Custom buffer value can be adjusted in a ±1.00 pH window around the set value during calibration. When a custom buffer is displayed, the “C1” or “C2” tag is displayed. First Calibration Point When performing a new calibration, or adding to an existing one, the user has a choice how the first new calibration point will be treated in reference to the existing calibration point. This is selected in SETUP by the parameter FIRST CALIBRATION POINT. The two SETUP selectable options are “POINT” or “OFFSET”. Point: A new buffer can be added to an existing calibration. The electrode slope will be reevaluated with the addition of this buffer (normal operation). Offset: The new buffer calibration point can create a constant offset to all existing pH calibration data (existing calibration must have a minimum of two pH buffers). Operational Guide 33 pH Calibration Recalibrating a pH sensor or adding to an existing calibration is simple and follows the PROCEDURE outlined on page 28. Press CAL. Place sensor in desired buffer and select buffer from choices. When sensor has equilibrated, the CFM tag will turn on and blink. Press the CFM key. Press CAL to escape the calibration. Alternately continue calibrating in additional buffers. The latest calibration point will be added to the existing data. GLP will reflect the latest calibration data. Older calibration buffers will be seen as blinking buffers. Note: Each time a buffer is confirmed, the new calibration data replaces the old data for the corresponding buffer or for any near buffer in a ±0.2 pH proximity. If the current buffer has no previous data stored and the calibration has not used five buffers, the current buffer is added to the existing calibration. If the existing calibration is full, the instrument asks which buffer to replace. Note: When using Standard mode (Basic mode Off), the user has a choice if they want the display to show the CONDITION and RESPONSE gauges on the display. These are part of the Cal Check™ system and are selected in SETUP by the parameter INFORMATION. The choice is ON or OFF. Electrode Condition And Electrode Response Time edge™ pH Calibration Check™ feature will assess electrode condition and response time during each calibration and display it for the rest of the day. The condition gauge shows the electrode’s condition that is based on the offset and slope characteristics of the pH electrode at the time of calibration. The response gauge is a function of the stabilization time between the first and second calibration buffers, when calibration is performed between a pair of 4.01, 7.01, or 10.01. These gauges reflect the electrode’s performance and should be expected to slowly decrease over the life of the electrode. 34 Operational Guide pH Calibration If the instrument is not calibrated the calibration history was deleted, or it has been calibrated only at one point, the electrode condition and the electrode response gauges will be empty. For a continuous display of the electrode’s condition and response, daily calibration is necessary. This information can also be viewed in the GLP data. Junction Condition (HI 11311 And HI 12301 Only) edge™ pH Sensor Check™ feature will assess the health of the pH electrode’s reference junction during each calibration. The junction gauge may be viewed directly in GLP but will also blink a warning on the display if the junction is compromised (not 100%). Should this happen, the junction condition will appear on the display with the junction blinking. The Junction Condition is a function of the electrode’s reference impedance which should be kept low. If the reference junction becomes fouled from a precipitate or coating, the impedance will rise and cause the pH measurement to drift. This diagnostic feature serves as a warning to clean the sensor. Operational Guide 35 pH Calibration Procedure Basic mode operation permits up to three-point buffer calibration. For accurate measurements, at least a two-point calibration is recommended. However, a single point calibration can also be used. The calibration buffers can be selected from the calibration buffer list that includes the standard buffers, pH 4.01, 6.86, 7.01, 9.18 and 10.01. Three-Point Calibration Submerse the pH electrode approximately 3 cm (1¼”) into a buffer solution and stir gently. Press CAL. The “CAL” tag will appear and the “7.01” buffer will be displayed on the 3rd LCD line. If necessary, press the ARROW keys to select a different buffer value. The “ ” along with “STIR” tag will be displayed and “WAIT” will blink on the LCD until the reading is stable. When the reading is stable and close to the selected buffer, the “CFM” tag will blink. Press CFM to confirm calibration. The calibrated value will be displayed on the 1st LCD line and the second expected buffer value on the 3rd LCD line. After the first calibration point is confirmed, rinse and submerse the pH electrode approximately 3 cm (1¼”) into the second buffer solution and stir gently. If necessary, press the ARROW keys to select a different buffer value. 36 Operational Guide The “ ” along with “STIR” tag will be displayed and “WAIT” will blink on the LCD until the reading is stable. When the reading is stable and close to the selected buffer, the “CFM” tag will blink. Press CFM to confirm calibration. pH Calibration The calibrated value is then displayed on the 1st LCD line and the third expected buffer value on the 3rd LCD line. After the second calibration point is confirmed, rinse and submerse the pH electrode approximately 3 cm (1¼”) into the last buffer solution and stir gently. If necessary, press the ARROW keys to select a different buffer value. The “ ” along with “STIR” tag will be displayed and “WAIT” will blink on the LCD until the reading is stable. When the reading is stable and close to the selected buffer, the “CFM” tag will blink. Press CFM to confirm calibration. At the end of calibration the instrument displays “SAVING”, stores the calibration value and returns to normal measurement mode. The calibration sequence may be reduced to two buffer values or a single one. Press CAL to return to measurement after the desired number of buffers. Note: • When performing a new calibration or adding to an existing calibration the first calibration point will be treated as an offset. See page 33 for details. • Press CAL after the first or second calibration point are confirmed and the instrument will store the calibration data. Then it will return to measurement mode. • If the value measured by the instrument is not close to the selected buffer, “WRONG BUFFER” will blink. Check if the correct buffer has been Operational Guide 37 pH Calibration used, or clean the electrode by following the Cleaning Procedure (see page 76). If necessary, change the buffer or the electrode. If the buffer temperature exceeds the temperature limits of the buffer, “WRONG BUFFER TEMPERATURE” will be displayed. Press CLR after entering calibration to clear all calibration parameters. “CLEAR ALL” message will be displayed and the instrument will return to measurement mode displaying “CAL DUE” message. • • pH Buffer Temperature Dependence The temperature has an effect on pH. The calibration buffer solutions are affected by temperature changes also. During calibration the instrument will automatically calibrate to the pH value corresponding to the temperature. During calibration the instrument will display the pH buffer value at 25 ºC. TEMP 38 Operational Guide pH BUFFERS ºC ºF 1.679 3.000 4.010 6.862 7.010 9.177 10.010 12.454 0 32 1.670 3.072 4.007 6.982 7.130 9.459 10.316 13.379 5 41 1.670 3.051 4.002 6.949 7.098 9.391 10.245 13.178 10 50 1.671 3.033 4.000 6.921 7.070 9.328 10.180 12.985 12.799 15 59 1.673 3.019 4.001 6.897 7.046 9.273 10.118 20 68 1.675 3.008 4.004 6.878 7.027 9.222 10.062 12.621 25 77 1.679 3.000 4.010 6.862 7.010 9.177 10.010 12.450 30 86 1.683 2.995 4.017 6.851 6.998 9.137 9.962 12.286 35 95 1.688 2.991 4.026 6.842 6.989 9.108 9.919 12.128 40 104 1.693 2.990 4.037 6.837 6.983 9.069 9.881 11.978 45 113 1.700 2.990 4.049 6.834 6.979 9.040 9.847 11.834 50 122 1.707 2.991 4.062 6.834 6.978 9.014 9.817 11.697 55 131 1.715 2.993 4.076 6.836 6.979 8.990 9.793 11.566 60 140 1.724 2.995 4.091 6.839 6.982 8.969 9.773 11.442 65 149 1.734 2.998 4.107 6.844 6.987 8.948 9.757 11.323 70 158 1.744 3.000 4.123 6.850 6.993 8.929 9.746 11.211 75 167 1.755 3.002 4.139 6.857 7.001 8.910 9.740 11.104 80 176 1.767 3.003 4.156 6.865 7.010 8.891 9.738 11.003 85 185 1.780 3.002 4.172 6.873 7.019 8.871 9.740 10.908 90 194 1.793 3.000 4.187 6.880 7.029 8.851 9.748 10.819 95 203 1.807 2.996 4.202 6.888 7.040 8.829 9.759 10.734 The Calibration Check™ feature may flag diagnostic messages during a calibration. As electrode aging is normally a slow process, substantial changes from previous calibrations are likely due to a temporary problem with the electrode or buffers that can be addressed easily. These messages are seen in Standard and Basic modes. Calibration Messages Wrong Buffer This message appears when the difference between the pH reading and the value of the selected buffer is too great. If this error message is displayed, check if you have selected the proper calibration buffer and have poured the desired buffer. Wrong-Old Points Inconsistency This message is displayed if the new calibration differs significantly from the last value of that sensor in that buffer. In this case it may be best to clear the previous calibration and attempt a new calibration with fresh buffers. Press CAL then press CLR. “CLEAR CALIBRATION” will be displayed. Press CAL to exit calibration if you want to keep old calibration data instead of clearing. Press the CFM key. “CLEAR ALL” will be displayed followed by “CAL DUE”. Operational Guide 39 Calibration Messages Clean Electrode This error message indicates poor electrode performance (offset out of accepted window, or slope under the accepted lower limit). Often cleaning the sensor will improve the pH electrodes response. See pH Electrode Conditioning and Maintenance for details. Repeat calibration after cleaning. Check Electrode Check Buffer This error message appears when electrode slope exceeds the highest accepted slope limit. You should check your electrode and use fresh buffer. Cleaning may also improve this response. Bad Electrode This message appears if the cleaning procedure performed as a result of the above two messages is found to be unsuccessful. In this case it is advised to replace the electrode. Wrong Buffer Temperature This message appears if the temperature of the buffer is outside the defined buffer temperature range. The calibration buffer solutions are affected by temperature changes in a defined manner. During calibration the instrument will automatically calibrate to the pH value corresponding to the measured temperature but display it to the value at 25 ºC. Immediately after calibration the buffer should read the value of the buffer at the temperature of measurement. Note: Temperature limits will be reduced to actual sensor specifications. 40 Operational Guide Contaminated Buffer This warning message appears in order to alert that the buffer could be contaminated. Refresh your buffer and continue the calibration procedure. Calibration Messages Good Laboratory Practice (GLP) refers to a quality control function used to ensure uniformity of sensor calibrations and measurements. The dedicated GLP key opens a file of the latest calibration information. Use the q p keys to scroll the stored information. This includes the buffers used, temperature of the buffer, and time and date of the last calibration, the sensor serial number and the calculated offset and percent slope. This information is available in Basic and Standard Modes. This information is also included with every data log. Newest calibration points report as a solid number, older calibration data (that is still used) will be displayed blinking. pH GLP Information If calibration has not been performed, the instrument displays “NO CAL” message blinking. The pH calibration offset and slope (the GLP slope is the average of the calibration slopes; the percentage is referred to the ideal value at 25º C). Operational Guide 41 pH GLP Information The last calibration date (yyyy.mm.dd) together with the current reading. Note:For each custom buffer used in calibration, the “C1” and “C2” tags will be displayed. If only the second custom buffer is in calibration the tag will be “C1” and the value will be displayed. Calibration Expiration status together with the current reading: If disabled, “EXPIRATION WARDING DISABLED” is displayed Or if enabled the number of days until the calibration alarm “CAL DUE” will be displayed. The number of days since the calibration expired. (I.E. “CAL EXPIRED 2 DAYS AGO”). 42 Operational Guide The probe serial number together with the current reading. pH GLP Information If a buffer is not from the last calibration, the buffer tag will be displayed blinking. In Standard Mode, Condition, Response gauges are visible on the day of calibration (See Electrode Condition And Electrode Response Time page 34). If configured in SETUP, a countdown message displays the number of days remaining until a new Calibration is due. If using a HI 11311 or HI 12301 sensor, the glass impedance is continuously monitored, updated and reported here and the Junction Condition Gauge is fully visible. When a pH electrode is connected, the instrument will recognize it and the “REMOVE PROTECTIVE AND FILLING CAPS” message will be displayed along with “PH”. Press any key to skip the message. The instrument will enter measurement mode. Make sure the electrode has been calibrated before taking measurements. pH Measurement Operational Guide 43 pH Measurement Rinse the pH sensor with water and a sample aliquot if possible. Submerse the electrode tip approximately 3 cm (1¼”) into the sample to be tested and stir sample gently. Allow time for the electrode to stabilize. The pH is displayed on the 1st LCD line and the temperature on the 2nd LCD line. Using the arrows, date, time, battery status and offset with slope can be displayed on the 3rd LCD line. If the reading is out of measurement range, the closest full scale value will be displayed blinking on the 1st LCD line. If measurements are taken successively in different samples, it is recommended to rinse the electrode thoroughly with deionized water or tap water and then with some of the next sample to prevent crosscontamination. The pH reading is affected by temperature. The temperature effect is compensated for using the temperature sensor inside the probe. The resulting measurement is the actual pH at the temperature of measurement. If the temperature reading is out of range, the closest full scale value will be displayed and the “ºC” will blink on the 2nd LCD line. If the temperature reading is out of electrode specification range, the value is displayed blinking along with “ELECTRODE OUT OF SPEC” message. If the temperature sensor of the electrode is broken (interrupt), the message “BROKEN TEMPERATURE SENSOR” and “25ºC” is displayed and the unit tag is blinking on the 2nd LCD line. mV Reading Of The pH The mV reading of the measured pH can be displayed on the LCD by pressing the RANGE key. 44 Operational Guide Range Specific Messages Displayed On Alphanumeric Line During Measurement (3rd Lcd Line) All the messages described in GENERAL section (page 15) are displayed in pH range. pH Measurement Temperature Sensor Problem (if there is one) Cal Due or Offset and Slope Value Time Date Battery or Charge Status Logging Messages The specific CALIBRATION INFORMATION that can be viewed: • Condition and response time gauge (if calibrated using 7.01, 4.01 or 10.01 buffers) • Calibration buffers • pH calibration Offset (mV) and Slope (%) • Out Of Calibration Range This information is displayed if it is enabled in SETUP menu. Operational Guide 45 Basic vs Standard EC mode Steps To Optimize Steps to optimize measurement using an EC probe: 1. Determine what measurement you wish to make with the EC probe. 2. Determine if Standard or Basic mode is best for your measurement. 3. Connect the Probe and configure your measurement using the SETUP menu. 4. Calibrate the EC probe. 5. Take measurements using a EC probe. Measurements Available With The EC Probe The four-ring EC probe may be used for 3 different measurement applications with edge™. • It may be used for temperature compensated or absolute conductivity measurements (with units of μS/cm or mS/cm). • TDS (Total Dissolved Solids) measurements (a calculated measurement derived from the ionized particles in a sample and the conductivity measurement. This has measurement units of mg/L, ppm or g/L). • Salinity: 3 different seawater salinity scales are supported; Practical Salinity (PSU), the Natural Seawater Scales (g/L), and the % NaCl (not available in basic mode). The RANGE key is used to change from conductivity to TDS to Salinity (standard mode only). Basic Versus Standard EC Mode Standard operation mode allows complete configuration of all parameters for the measurement of Conductivity, TDS or Salinity measurements. Measurement data can be logged using Manual log on demand, Manual Log on Stability or Interval logs. All logged data can be exported to a thumb drive or PC. Basic operation mode is used for conductivity and TDS measurements. Common default values are used for Cell Factor (C.F.), temperature compensation coefficient and TDS conversion factor. Measurement units are user selectable for TDS. The meter uses continuous auto-ranging to simplify the measurement experience. 46 Operational Guide Measurement data can be logged using Manual Log on Demand or Manual Log on Stability or Interval Logging. The measurement logs may be exported to a thumb drive or PC. Standard Basic Measurement Conductivity, TDS, Salinity Conductivity, TDS Set up Parameters Fully selectable Default values used Log types Manual Log on demand Manual Log on stability Interval Loggin (Fast, Medium, Accurate) Manual Log on demand Manual Log on stability EC (Electrolytic Conductivity) meter operation is configured using the SETUP key with an EC probe connected to the meter. The EC-specific parameters will be seen inserted into the menu. If Basic mode is configured “On”, the EC parameter list will be simplified, limiting the parameters the user can change. See Basic mode for a description of this operation before choosing how to SETUP the meter. Parameter Description BASIC MODE Choices Default Basic vs Standard EC mode EC Meter Configuration Basic mode OFF, ON OFF Available TEMPERATURE COMPENSATION The user may select Automatic Temperature Compensation or No TC to configure absolute conductivity No TC or ATC ATC Not available. ATC is automatically used. C.F (cm-1) User may enter actual Cell factor value (if known). 0.01 to 9.999 cm-1 1.000 cm-1 Not available. Automatically determined during calibration. Operational Guide 47 EC Meter Configuration 48 Operational Guide Parameter Description Choices Default Basic mode T.Coef. (%/ºC) This parameter is related to the solution being measured at temperatures other than 20 or 25 ºC. It is used to correct measured conductivity to a reference temperature by applying a fixed factor for linear compensation 0.0 to 6.00 (%/ ºC) Note: Setting to 0.00 is the same as using No TC. 1.90 (%/ºC) Close for natural waters or salt solutions. Not available. Automatically set to 1.90%/ºC. T.Ref. (ºC) The user may select either 20ºC or 25ºC reference temperature for temperature corrected conductivity. 20 ºC or 25 ºC 25 ºC Available TDS Conversion Factor. This factor is used to mathematically convert conductivity to a TDS value. 0.40 to 0.80 0.50 Available VIEW T.Ref. or T.Coef. The user may choose whether to display the reference temperature (T.Ref) or the Temperature coeficient on the display with the measurement. T.Ref (ºC) or T. Coef. (%/ºC) T.Ref (ºC) T.Ref (ºC) automatically displayed during measurement. Parameter Description Choices Default Basic mode EC RANGE If AUTO is used, the edge™ will automatically find the correct conductivity range and unit. If a fixed value is used, measurements made outside the ranges are considered Out of Range, but units will remain fixed throughout the measurement. AUTO, 29.99 μS/cm, 299.9 μS/cm, 2999 μS/cm, 29.99 mS/cm, 200.0 mS/cm, 500.0 mS/cm AUTO Not available but measurement autoranges as needed. TDS RANGE If AUTO is used, the edge™ will automatically find the correct TDS measurement range and units. If a fixed value is used, measurements made outside the ranges are considered Out of Range, but units will remain fixed throughout the measurement. AUTO, 14.99 mg/L, 149.9 mg/L, 1499 mg/L, 14.99 g/L, 100.0 g/L, 400 g/L AUTO Not available but measurement autoranges as needed. TDS UNIT Select units of measurement for TDS measurement. mg/L or ppm ppm Available to select. EC Meter Configuration Operational Guide 49 EC Meter Configuration Parameter EC SALINITY SCALE Description Choices Three measurement scales are available for salinity measurement in Seawater. (Practical Salinity Scale, Percent Scale and Natural Seawater Scale). PSU, NaCl%, g/L Default NaCl% Basic mode Not available. EC Range (Not Available In Basic Mode) The EC and TDS measurements may be configured in SETUP as AUTO (meaning auto-ranging, the measurement automatically finds the correct conductivity or TDS unit and resolution), or it may be configured with a user-selected measurement range and resolution (if you know ahead of time where your samples will fall). If AUTO is selected, the meter will select the scale with the highest possible resolution, but may change in the middle of a series of measurements changing units and displayed resolution). Note: The selected range is only active during measurements. Auto-ranging is used during calibration. If a fixed range is selected and during measurement goes beyond the range limits, the full scale value of that range will flash on the display. EC/TDS CALIBRATION 50 General Guidelines Calibrate the instrument frequently, especially if high accuracy is required. The instrument should be recalibrated: • Whenever the EC probe is replaced. • At least once a week. • After testing aggressive chemicals. • If “CAL DUE” is displayed on the 3rd LCD line. Operational Guide Every time you calibrate the instrument use fresh standard and perform electrode maintenance as required. It is recommended to chose a calibration standard that is close to the sample. EC/TDS CALIBRATION Preparation Pour small quantities of the standard solutions into a beaker. If possible, use a plastic beaker to minimize any EMC interferences. For accurate calibration and to minimize cross-contamination, use two beakers for the standard solution. One for rinsing the probe and one for calibration. Procedure Select standard to be used for calibration. 0.00 μS (probe in air) may be used for an offset calibration. This should be done first. Hanna Conductivity standards are available at 84 μS/cm, 1413 μS/cm, 5.00 mS/cm, 12.88 mS/cm, 80.0 mS/cm, 111.8 mS/cm and are used for the cell factor calibration. Rinse the probe with calibration solution or deionized water. Shake off excess solution. Submerse the probe in the calibration solution. The sleeve holes must be completely submersed. If possible, center the probe in the beaker away from the bottom or beaker walls. Raise and lower the probe to refill the center cavity and tap the probe repeatedly to remove any air bubbles that may be trapped inside the sleeve. Press CAL to enter calibration. The “CAL” tag and the recognized standard value will appear on the 3rd LCD line. If necessary, press the ARROW keys to select a different standard value. The “ “ along with “STIR” tag will be displayed and “WAIT” will blink on the LCD until the reading is stable. Operational Guide 51 EC/TDS CALIBRATION When the reading is stable and close to the selected standard, “CFM” tag will blink and the message “SOLUTION STANDARD” will scroll. Press CFM to confirm calibration. The Instrument displays “SAVING”, stores the calibration values and returns to measurement mode. 52 Operational Guide The following table lists the temperature dependence of Hanna EC calibration standards. edge™ uses these values during calibration and their temperature coefficients. ºC ºF HI7030 HI8030 (μS/cm) HI7031 HI8031 (μS/cm) HI7033 HI8033 (μS/cm) HI7034 HI8034 (μS/cm) HI7035 HI8035 (μS/cm) HI7039 HI8039 (μS/cm) 0 32 7150 776 64 48300 65400 2760 5 41 8220 896 65 53500 74100 3180 10 50 9330 1020 67 59600 83200 3615 15 59 10480 1147 68 65400 92500 4063 16 60.8 10720 1173 70 67200 94400 4155 17 62.6 10950 1199 71 68500 96300 4245 18 64.4 11190 1225 73 69800 98200 4337 19 66.2 11430 1251 74 71300 100200 4429 20 68 11670 1278 76 72400 102100 4523 21 69.8 11910 1305 78 74000 104000 4617 22 71.6 12150 1332 79 75200 105900 4711 23 73.4 12390 1359 81 76500 107900 4805 24 75.2 12640 1386 82 78300 109800 4902 25 77 12880 1413 84 80000 111800 5000 26 78.8 13130 1440 86 81300 113800 5096 27 80.6 13370 1467 87 83000 115700 5190 28 82.4 13620 1494 89 84900 117700 5286 29 84.2 13870 1521 90 86300 119700 5383 30 86 14120 1548 92 88200 121800 5479 31 87.8 14370 1575 94 90000 123900 5575 EC/TDS CALIBRATION Operational Guide 53 % NaCl CALIBRATION PREPARATION Pour a small quantity of the calibration solution into a beaker. If possible, use a plastic beaker to minimize any EMC interferences. Before pressing CAL verify in SETUP: • Basic mode is off • Salinity Scale is NaCl% Use the RANGE key to select the Salinity measurement. The NaCl% tag will be on. NaCl calibration is a single point calibration at 100.0% NaCl. Use the HI 7037L calibration solution (sea water solution) as a 100% NaCl calibration solution. Procedure Rinse the probe with some of the HI 7037L calibration solution or deionized water. Shake off excess solution. Submerse the probe in the calibration solution. The sleeve holes must be completely submersed. If possible, center the probe in the beaker away from the bottom or beaker walls. Raise and lower the probe to refill the center cavity and tap the probe repeatedly to remove any air bubbles that may be trapped inside the sleeve. Press CAL to enter calibration. The ” “, ”STIR” and “CAL” tags will turn on and the 1st LCD line will display the percent NaCl reading, the 2nd LCD line will display the temperature and the 3rd LCD line will display ”WAIT” message until the reading is stable. When the reading is stable and close to the standard, “CFM” tag will blink and “SOLUTION STANDARD” will scroll. Press CFM to confirm calibration. 54 Operational Guide The Instrument displays “SAVING”, stores the calibration values and returns to measurement mode. Note:If a new EC calibration is performed, the NaCl calibration is automatically cleared. A new NaCl calibration is required. Wrong Standard If the reading is too far from the expected value, the “WRONG STANDARD” will scroll. Calibration cannot be confirmed. In this case check if the calibration solution has been used correctly or clean the probe by following the EC PROBE MAINTENANCE (see page 79). % NaCl CALIBRATION Calibration Messages Wrong Standard Temperature If the temperature is out of the 0.0 to 60.0 ºC range, “WRONG STANDARD TEMPERATURE” message will be displayed and the temperature value will blink. GLP is a set of functions that allows storage and retrieval of data regarding the maintenance and status of the electrode. The following information can be viewed on the 3rd LCD line during measurement: TEMPERATURE SENSOR problem (if there is one), CAL DUE or CELL FACTOR, TEMPERATURE COEFFICIENT or T.Ref (User-selected) TIME DATE RANGE and BATTERY CHARGE STATUS EC/TDS GLP Information To view more information, enter GLP mode by pressing GLP key. EC calibration data is stored automatically after a successful calibration. Operational Guide 55 EC/TDS GLP Information To view the EC calibration data, press GLP when the instrument is in EC measurement mode. The instrument will display the calibration standard and the temperature of the calibrated standard. Use the ARROW keys to scroll through the calibration data displayed on the 3rd LCD line. The cell factor in cm-1 determined from the calibration with the current reading. The calibration offset factor in μS/cm together with the current reading. The Solution Standard and calibration temperature. The temperature coefficient set at the calibration moment together with the current reading. The reference temperature together with the current reading. 56 Operational Guide The last calibration time (hh:mm:ss) together with the current reading. EC/TDS GLP Information The last calibration date (yyyy.mm.dd.) together with the current reading. Calibration Expiration status together with the current reading: If disabled, “EXPIRATION WARNING DISABLED” is displayed If enabled, the number of days until the calibration alarm “CAL DUE” will be displayed. Or if the number of days the calibration has expired ( I.E. “CAL EXPIRED 2 DAYS AGO”). The serial number of the probe together with the current reading. Operational Guide 57 EC/TDS GLP Information %NaCl Calibration Data in GLP To view the NaCl% calibration data, press GLP when the instrument is in NaCl% measurement mode. Use the ARROW keys to scroll through the calibration data. The instrument will display the calibration temperature and solution. The edge™ will indicate: probe cell constant together with the current reading. The salinity coefficient determined from the calibration together with the current reading. The Solution Standard together with the calibrated temperature. The last calibration time (hh:mm:ss) together with the current reading. The last calibration date (yyyy.mm.dd.) together with the current reading. 58 Operational Guide EC/TDS GLP Information Calibration Expiration status together with the current reading: If disabled, “EXPIRATION WARNING DISABLED” is displayed If enabled, the number of days until the calibration alarm “CAL DUE” will be displayed. Or if the number of days the calibration has expired ( I.E. “CAL EXPIRED 2 DAYS AGO”). The serial number of the probe. Note: Press GLP at any moment and the instrument will return to measurement mode. Operational Guide 59 EC/TDS Measurements The RANGE key will change measurement from conductivity to TDS to Salinity. Conductivity Measurements Connect the conductivity probe to the instrument and wait until probe parameters are loaded. The following message is then displayed on the LCD: “Probe Connected” Verify if the probe has been calibrated. Suspend the probe into the solution to be tested. The sleeve holes must be completely submersed. Tap the probe repeatedly to remove any air bubbles that may be trapped inside the sleeve. The conductivity value will be displayed on the 1st LCD line, the temperature on the 2nd LCD line and calibration or range specific information on the 3rd LCD line. To toggle between information displayed on the 3rd LCD line, use the ARROW keys. If the reading is out of range when the range is automatic, the full-scale value (200.0 mS/cm for ATC mode or 500.0 mS/cm for absolute conductivity) will be displayed blinking. Temperature-compensated and absolute conductivity are available for measurement. This is selected in the SETUP configuration. Automatic (ATC): The conductivity probe has a built-in temperature sensor; the temperature value is used to automatically compensate the EC/TDS reading. When this option is selected, “ATC” tag is displayed. A temperature coefficient for the sample must also be set. 60 Operational Guide No Temperature Compensation (No TC): The temperature value is displayed, but not taken into account. When this option is selected, the “NoTC” tag will be displayed. The reading displayed on the primary LCD is the uncompensated EC or TDS value. EC/TDS Measurements Note: • The default compensation mode is ATC • The compensation is referenced to the selected reference temperature (see SETUP for details). If temperature compensation is selected, measurements are compensated using the temperature coefficient (default value 1.90 %/ºC, is recommended for natural water samples). To change the temperature coefficient, enter the SETUP mode and select “T.COEF.(%/ºC)” (see SETUP). The current temperature coefficient can be viewed on the 3rd LCD line by pressing the ARROW keys until it is displayed. The value is displayed along with Cell Factor. If the temperature reading is out of range, the closest full scale value will be displayed with “ºC” blinking on the 2nd LCD line. If the temperature reading is out of probe specification range, the value is displayed blinking along with “PROBE OUT OF SPEC” message. If the temperature sensor is broken, the message “BROKEN TEMPERATURE SENSOR” and “----” is displayed along with the unit tag blinking on the 2nd LCD line. TDS Measurements Press the RANGE key. The instrument will switch to TDS measuring range. The TDS reading will be displayed on the 1st LCD line and the temperature reading on the 2nd LCD line. If the reading is out of range, the full-scale value (100.0 g/L for ATC mode or 400.0 g/L for uncompensated TDS) will be displayed blinking. Operational Guide 61 Salinity Measurements Salinity Measurements (Not Available In Basic Mode) Press the RANGE key twice to switch from conductivity to the configured Salinity scale. Verify the desired scale is configured in SETUP. The meter supports three salinity scales: Practical Scale 1978, Percent Scale %, and Natural Sea Water 1966, [g/L]. (Information on the 3 scales follows) Note: These are for determining salinity as they relate to general oceanographic use. Practical salinity and the Natural Seawater require a conductivity calibration. % NaCl requires a calibration in HI 70371 standard. PSU - Practical Salinity Scale The practical salinity (S) of seawater relates the ratio of electrical conductivity of a normal seawater sample at 15 ºC and 1 atmosphere to a potassium chloride solution (KCl) with a mass of 32.4356 g/Kg water at the same temperature and pressure. Under these conditions the ratio is equal to 1, and S=35. The practical salinity scale may be applied to values through 42 PSU at temperature between -2 to 35 ºC. According to the definition, salinity of a sample in PSU (practical salinity units) is calculated using the following formula: 62 Operational Guide RT - ratio of sample conductivity to standard conductivity at Temp =(T) CT(sample)-conductivity at T ºC; C(35,15)=42.914µS/cm - the corresponding of KCI solution containing a mass of 32.4356 g KCl/1 Kg solution rT - Temperature compensation polynomial a0 = 0.008 a1 = -0.1692 a2 = 25.3851 a3 = 14.0941 a4 = -7.0261 a5 = 2.7081 c0 = 0.008 c1 = 0.0005 X = 400RT Y = 100RT Salinity Measurements b0 = 0.0005 b1 = -0.0056 b2 = -0.0066 b3 = -0.0375 b4 = 0.0636 b5 = -0.01442 f(t)= T-15 1 + 0.0162•(t-15) NaCl% Percent Scale The NaCl % scale is an older scale salinity scale used for seawater salinity. In this scale 100% salinity is equivalent to roughly 10% solids. High percentages were made by evaporation. To display NaCl in % units, enter SETUP and select NaCl% unit. Press the RANGE key until “NaCl%” is displayed on the LCD. The instrument will display the NaCl% reading on the 1st LCD line and the temperature reading on the 2nd LCD line. If the reading is out of range, the full-scale value (400.0%) will be displayed blinking. Operational Guide 63 Salinity Measurements Natural Sea Water Scale The Natural Sea Water Scale extends from 0 - 80.0 g/L. It determines salinity based upon a conductivity ratio of sample to “standard seawater” at 15 °C. Where R15 is the conductivity ratio and salinity is defined by the following equation: S = - 0.08996 + 28.2929729R15 + 12.80832R152 10.67869R153 + 5.98624R154 -1.32311R155 Note: The formula can be applied for temperatures between 10 ºC and 31 ºC. 64 Operational Guide Steps To Optimize 1. Determine if Concentration or % Saturated measurements will be made. 2. Prepare the D.O. probe for measurement. 3. Connect the probe to the meter and configure the SETUP parameters. 4. Calibrate the D.O. sensor. 5. Take measurements using the DO sensor. Dissolved Oxygen Setup Measurements Available Concentration measurements in water, and % oxygen saturated measurements are available using edge™ together with HI 764080 DO probe. Algorithms used for concentration measurements (units of ppm or mg/L) are based upon the oxygen solubility in air-saturated fresh water. Compensation for salinity and altitude are made by configuring SETUP parameters. Percent saturation measurements are based upon the partial pressure of oxygen and are suitable for measurement in samples other than air saturated fresh water. It is advised to check material compatibility of the probe with the sample. DO Probe Preparation CAUTION: Use care during servicing and use. The HI 764080 contains a glass insulator. Do not drop or handle carelessly. Probes from Hanna Instruments are shipped dry. 1. Carefully remove the cardboard shipping tube used to protect the probe during shipping. Save should the probe be stored dry again. 2. Open membrane package and remove one O-ring and one membrane cap. 3. Position o-ring in cap as indicated. 4. Rinse the membrane cap with a small amount of HI 7041 electrolyte and discard. Refill membrane cap 3/4 full with electrolyte solution, ensure to cover the o-ring. 5. Holding the membrane cap by the top, tap the side walls of the membrane cap to dislodge gas bubbles and force them to rise to the surface. Do not tap on the membrane directly as it may damage it. 6. With the cathode facing down, slowly screw the cap Operational Guide 65 Dissolved Oxygen Setup clockwise until the threads are fully engaged. Electrolyte will overflow. 7. Rinse outer body of the probe and inspect membrane for entrapped gas bubbles. The cathode area should be free of bubbles. 8. Connect the DO probe to the edge™ meter and turn meter on 9. Allow probe conditioning function to occur. Note: When not in use and during polarization, use the protective transparent cap. During this process, the following message will be displayed on the LCD, “DISSOLVED OXYGEN PROBE CONDITIONING”. The conditioning message will be displayed for about 60 seconds while the DO probe is conditioned. If the probe was conditioned and a new conditioning is not necessary, press any key to enter measurement mode. The probe is polarized with a fixed voltage of approximately 800 mV between the cathode and anode. Probe polarization is essential for stable measurements. With the probe properly polarized, oxygen is continually consumed as it passes through gas permeable PTFE membrane. If polarization is interrupted, the electrolyte solution continues to be enriched with oxygen until it reaches an equilibrium with the surrounding solution. Whenever measurements are taken with a non-polarized probe, the measurement will be drifty and inaccurate. The measurement will jump when the probe is moved. 66 Operational Guide DO Probe Diagram 1. 2. 3. 4. 5. 6. 7. 8. 9. 10. 11. 12. Strain Relief Probe Cap PEI Probe Body Temperature Sensor Threads for Membrane Cap Ag/AgCl Anode and Reference Glass Insulator Platinum Cathode O-Ring Disposable Membrane Cap Oxygen Permeable PTFE Membrane Shipping Tube Operational Guide 67 DO Meter Configuration DO (Dissolved Oxygen) meter operation is configured using the SETUP key with a DO probe connected to the meter. The parameter-specific parameters will be seen inserted into the menu. There is no Basic mode for Dissolved Oxygen measurements. Parameter 68 Operational Guide Choices Default -500, -400, -300, -200, -100, 0, 100, 200, 300, 400, 500, 600, 700, 800, 900, 1000, 1100, 1200, 1300, 1400, 1500, 1600, 1700, 1800, 1900, 2000, 2100, 2200, 2300, 2400, 2500, 2600, 2700, 2800, 2900, 3000, 3100, 3200, 3300, 3400, 3500, 3600, 3700, 3800, 3900, 4000 m 0 ALTITUDE (m) Concentration measurements of dissolved oxygen change depending on atmospheric pressure. A convenient way to estimate atmospheric pressure effects is by the related parameter of elevation (m) above or below sea level. Enter altitude in meters closest to the actual altitude to ensure the most accurate calibration and concentration measurement. Description 0, 1, 2, 3, 4, 5, 6, 7, 8, 9, 10, 11, 12, 12, 14, 15, 16, 17 18, 19, 20, 21, 22, 23, 24, 25, 26, 27, 28, 29, 30, 31, 32, 33, 34, 35, 36, 37, 38, 39, 40 g/L 0 SALINITY (g/L) Dissolved oxygen solubility decreases if water contains salts. Selecting this factor as to be close to your known salt level, will improve the accuracy of DO concentration calibration and measurement. DO Units Select preferred measurement units for DO concentration. mg/L or ppm Salinity and Altitude Compensation Temperature, altitude and salinity compensation are used for dissolved oxygen concentration measurements (ppm or mg/L). When the water is colder, it can hold more dissolved oxygen, when it is warmer it holds less oxygen. Compensation for temperature-related solubility is done automatically using the built-in temperature sensor within the DO probe and algorithms in the edge meter. When water is measured at an altitude below sea level, oxygen solubility increases, but above sea level the oxygen solubility decreases. To compensate for this during calibration and measurement, the user must provide the approximate altitude (in meters) in the SETUP menu. The settings are in 100 m increments; select the value closest to the actual altitude. Some examples of altitudes around the world follow: Location Sebkha paki Tah, Morocco Lake Frome, Australia Netherlands, coastal providence Meter Feet -55 -180 -6 -20 -1 to -7 -3 to -23 Lake Michigan, USA 176 577 Lake Geneva; France, Switzerland 372 1220 Denver, CO USA 1609 5279 Mount Everest 8848 29029 DO Meter Configuration The solubility of oxygen in water is also influenced by the amount of salt the water contains. Seawater typically has a salinity of 35g/L and the oxygen solubility is 18% less compared to fresh water at 25°C. By entering the approximate salinity value, the calibration and subsequent concentration measurement will be compensated to display the correct oxygen concentration. A 18% error would result if the salinity value is not entered. Note: Salinity and Altitude have no effect on % oxygen solubility range. Operational Guide 69 DO Meter Configuration When water is fresh containing no sea water, the concentration of oxygen will be at a maximum. The solubility of the oxygen dissolved in water is decreased when water is brackish or seawater. The solubility of oxygen in water is decreased when measurements are made at elevations above sea level. DO Calibration Before proceeding with the calibration, make sure the probe is ready for measurements (see page 65), i.e. the membrane cap is filled with electrolyte, the probe is connected to the meter and properly polarized. For an accurate calibration, it is recommended to wait at least 15 minutes to ensure conditioning of the probe. Keep the protective cap on during polarization time and remove it for calibration and measurements. Follow the calibration procedure. Calibrate the probe frequently, especially if high accuracy is required. The probe can be calibrated at 2 points: 100.0 % (slope calibration) and 0.0 % (zero calibration). Initial Preparation Prepare a fresh bottle of HI 7040 by following package directions. Use solution within one month of preparation. Pour small quantities of HI 7040 Zero Oxygen solution into a beaker. Remove the protective cap if used. 100% Saturated Calibration It is suggested to perform the slope calibration in water/saturated air. Pour a small beaker of water. Rinse the polarized probe with clean water. Dry the probe tip and allow a few seconds for the LCD reading to stabilize (probe in air). Suspend over beaker of water. Press CAL. The “ ” tag will be displayed along with “WAIT” blinking on the LCD until the reading is stable. 70 Operational Guide DO Calibration When the reading is stable and is within the limits, “CFM” tag starts blinking. Press CFM to confirm the 100.0 % DO calibration. Press CAL to leave calibration after the first point. The instrument will display “SAVING” message and it will return to measurement mode memorizing the slope calibration data. Zero Calibration Press CAL or continue with calibration after confirming first point.. The meter will display “WAIT” and “0.0 %” will be displayed in lower right corner. Submerse the probe membrane and temperature sensor into the beaker containing HI 7040 Zero Oxygen solution and stir gently for 2-3 minutes. The reading will go down. When the reading is stable and stops decreasing, “CFM” tag starts blinking. Press CFM to confirm the 0.0 % DO calibration. The instrument will display “SAVING” message and it will return to measurement mode. Rinse probe tip off in water before taking measurements in samples. Operational Guide 71 DO Calibration Messages Calibration Messages If the reading is outside limits, “WRONG STANDARD“ message will be displayed. If the temperature goes out of (0.0 - 50.0 ºC) range during calibration, the “WRONG STANDARD TEMPERATURE” message will be displayed and temperature value will blink. DO GLP Information GLP refers to a quality control function used to ensure uniformity of probe calibrations and measurements. The dedicated GLP key opens a file of the latest calibration information. Use the q p keys to scroll the stored information. This includes the standards used, temperature of the standard, Altitude and Salinity factor, time and date of the last calibration, the expired calibration information and the probe serial number. This information is also included with every logged data. Last DO Calibration Data The last DO calibration data is stored automatically after a successful calibration. To view the DO calibration data, press GLP when the instrument is in measurement mode. The instrument will display: The calibration standard and the calibration temperature: 0.0 % if instrument was calibrated in this point. 100% calibration point, if instrument was calibrated in water saturated . 72 Operational Guide The altitude and salinity setting at the moment of calibration together with the current reading. DO GLP Information The time of the calibration together with the current reading. The date of the calibration together with the current reading Calibration Expiration status together with the current reading: If disabled, “EXPIRATION WARNING DISABLED” is displayed If enabled, the number of days until the calibration alarm “CAL DUE” will be displayed. Or if the number of days the calibration has expired ( I.E. “CAL EXPIRED 2 DAYS AGO”). Operational Guide 73 DO GLP Information The probe serial number together with the current reading DO Measurements Make sure that the probe is polarized, calibrated and the protective cap has been removed. Rinse probe. Submerse the probe in the sample to be tested, make sure temperature probe is also immersed. Allow reading to stabilize. The sample should be stirred. The Dissolved Oxygen value (in %) is displayed on the 1st LCD line and the temperature on the secondary LCD. Press RANGE to change the reading from % to ppm (mg/L) and vice versa. Oxygen is consumed during the measurement. For accurate Dissolved Oxygen measurements, water movement of 0.3 m/s is suggested. This is to ensure that the oxygen-depleted membrane surface is constantly measuring representative sample. The use of a magnetic stirrer is recommended. The probe has a built-in temperature sensor. Make sure it is also in sample. The measured temperature is indicated on the 2nd LCD line as shown above. Allow the probe to reach thermal equilibrium before taking 74 Operational Guide any measurement. This can take several minutes. The greater the difference between the temperature at which the probe was stored and the temperature of the sample, the longer the time will be. DO Measurements Note: • If the temperature is displayed blinking, the temperature is out of range for the probe. The measurement LCD will display “---”. • If the temperature sensor is broken, the message “BROKEN TEMPERATURE SENSOR” and “----” is displayed along with the unit tag blinking on the 2nd LCD line. Operational Guide 75 pH Probe Maintenance Remove the protective cap of the pH electrode. DO NOT BE ALARMED IF SALT DEPOSITS ARE PRESENT. This is normal with electrodes. They will disappear when rinsed with water. During transport, tiny bubbles of air may form inside the glass bulb affecting proper functioning of the electrode. These bubbles can be removed by “shaking down” the electrode as you would do with a glass thermometer. If the bulb and/or junction is dry, soak the electrode in HI 70300 or HI 80300 storage solution for at least one hour. 76 Maintenance For refillable electrodes: If the filling solution (electrolyte) is more than 2½ cm (1”) below the fill hole, add HI 7082 or HI 8082 3.5M KCl Electrolyte Solution for double junction. Unscrew the fill hole cover during measurements so the liquid junction maintains an outward flow of electrolyte. pH Probe Maintenance Measurement Rinse the electrode tip with distilled water. Submerse the tip (3 cm /1¼”) in the sample and stir gently for a few seconds. For a faster response and to avoid cross-contamination of the samples, rinse the electrode tip with a few drops of the solution to be tested, before taking measurements. Storage Procedure To minimize clogging and ensure a quick response time, the glass bulb and the junction should be kept wet and not allowed to dry out. Replace the solution in the protective cap with a few drops of HI 70300 or HI 80300 Storage Solution or, in its absence, Filling Solution (HI 7082 or HI 8082 for double junction electrodes). Follow the preparation procedure before taking measurements. Note: NEVER STORE THE ELECTRODE IN DISTILLED OR DEIONIZED WATER. Periodic Maintenance Inspect the electrode and the cable. The cable used for connection to the instrument must be intact and there must be no points of broken insulation in the cable or cracks in the electrode stem or bulb. Connectors must be perfectly clean and dry. If any scratches or cracks are present, replace the electrode. Rinse off any salt deposits with water. For refillable electrodes: Refill the reference chamber with fresh electrolyte (HI 7082 or HI 8082 for double junction electrodes). Allow the electrode to stand upright for 1 hour. Follow the Storage Procedure above. Maintenance 77 pH Probe Maintenance Cleaning Procedure Use diagnostic messages to aid pH electrode troubleshooting. Several cleaning solutions are available: General – Soak in Hanna HI 7061 or HI 8061 General Cleaning Solution for approximately ½ hour. Protein –Soak in Hanna HI 7073 or HI 8073 Protein Cleaning Solution for 15 minutes. Inorganic – Soak in Hanna HI 7074 Inorganic Cleaning Solution for 15 minutes. Oil/grease – Rinse with Hanna HI 7077 or HI 8077 Oil and Fat Cleaning Solution. Note: After performing any of the cleaning procedures, rinse the electrode thoroughly with distilled water, refill the reference chamber with fresh electrolyte (not necessary for gel-filled electrodes) and soak the electrode in HI 70300 or HI 80300 Storage Solution for at least 1 hour before taking measurements. Temperature Correlation For pH Sensitive Glass Verify the temperature range by reading the limits on electrodes cap. The pH electrode’s life also depends on the temperature that is used. If constantly used at high temperatures, the life of the electrode is drastically reduced. 78 Maintenance Alkaline Error High concentrations of sodium ions interfere with readings in alkaline solutions. The pH at which the interference starts to be significant depends upon the composition of the glass. This interference is called alkaline error and causes the pH to be underestimated. Hanna’s glass formulations have the indicated characteristics. pH Probe Maintenance Sodium Ion Correction for the glass at ambient temperature Concentration 0.1 mol/L Na+ 1.0 mol/L Na+ pH Error 12.5 0.05 13.0 0.11 13.5 0.16 14.0 0.20 11.5 0.01 12.0 0.06 12.5 0.11 13.0 0.15 13.5 0.21 14.0 0.27 Rinse the probe with clean water after measurements. If a more thorough cleaning is required, remove the probe sleeve and clean the probe with a cloth or a nonabrasive detergent. Make sure to reinsert the sleeve onto the probe properly and in the right direction. After cleaning the probe, recalibrate the instrument. EC Probe Maintenance The insulator used to support the platinum rings is made of glass. Use extreme caution when handling this probe. Maintenance 79 DO Probe Maintenance The oxygen probe body is made of PEI. A temperature sensor provides temperature measurements of the sample. Use the protective cap when the probe is not in use. To replace the membrane or refill with electrolyte, proceed as follows: Remove the protective shipping tube by gently twisting and pulling it off the body of the probe (see fig. 1). Unscrew the membrane cap by turning it clockwise (see fig. 2). The new membrane cap supplied with the meter should be rinsed with electrolyte solution. Refill with clean electrolyte solution. Gently tap the sides of the membrane cap to ensure that no air bubbles remain trapped. Do not tap the bottom directly with your finger, as this will damage the membrane. Make sure that the rubber O-ring sits properly inside the membrane cap. With the sensor facing down, slowly screw the membrane cap clockwise. Some electrolyte will overflow. 80 Maintenance The platinum cathode (DO Probe Diagram, page 67) should always be bright and untarnished. If it is tarnished or stained, the cathode should be cleaned. You can use a clean lint-free cardboard or cloth. Rub the cathode very gently side to side 4-5 times. This will be enough to polish and remove any stains without damaging the platinum tip. Afterwards, rinse the probe with deionized or distilled water and install a new membrane cap using fresh electrolyte and follow DO Probe Preparation page 65. DO Probe Maintenance Important In order to have accurate and stable measurements, it is important that the membrane surface is in perfect condition. This semi-permeable membrane isolates the sensor elements from the environment but allows oxygen to enter. If any dirt is observed on the membrane, rinse carefully with distilled or deionized water. If imperfections still exist, or any damage is evident (such as wrinkles or tears), the membrane should be replaced. Make sure that the O-Ring sits properly in the membrane cap. Maintenance 81 Troubleshooting Guide Symptoms Slow response/excessive drift. Readings fluctuate up and down (noise). The meter does not accept the buffer/ standard solution for calibration. If the display shows: “pH” and “-2.00” or “16.00” blinking. The display shows EC, TDS or NaCl readings blinking. The display shows DO reading blinking. 82 Maintenance Problems Solution Dirty pH electrode. Clean the electrode and then soak the tip in HI 7061 or HI 8061 for 30 minutes. pH: Clogged/dirty junction. Low electrolyte level (refillable electrodes only). Clean the electrode. Refill with fresh solution (for refillable electrodes only). Check cable and connectors. EC: EC probe sleeve not properly inserted; air bubbles inside sleeve. Reinstall the sleeve. Tap the probe to remove air bubbles. Move to center of beaker. Verify top hole in sleeve is covered with solution. DO: DO probe electrolyte contains entrapped gas. Remove cap. Refill, tap and reinstall. pH: Dirty electrode or contaminated buffer. Follow the cleaning procedure. If still no results, replace the electrode. Replace buffer. EC: The EC probe is defective. Follow the cleaning procedure. If still no results replace the probe. Verify correct standard is selected. Out of range in the pH scale. A) Verify that the shipping cap has been removed. B) Make sure the pH sample is in the specified range. C) Check electrolyte level and general state of the electrode. Out of range in EC, TDS or NaCl scale. Out of range in DO scale. Verify the plastic shipping spacer has been removed from probe. Recalibrate the probe. Make sure the solution is in specified range. Make sure the range is not locked. (Select Auto range) Verify area of cathode is free of bubble inside cap. Verify solution movement past membrane. Remove cap, inspect and clean if necessary. Install new cap, fresh electrolyte with no bubbles, permit longer polarization. Stir or increase flow rate. Symptoms Problems Solution If the display shows: “mV” and “-1000” or “1000” blinking. Out of range in the mV scale. A) Verify the shipping cap has been removed. B) Make sure the sample pH is within specified range. C) Verify electrolyte level in pH sensor is topped off. D) Verify no bubbles inside pH membrane. The meter does not measure temperature. “----” is displayed on 2nd LCD line. Broken temperature sensor. Replace the probe. The meter fails to calibrate NaCl. Incorrect EC calibration. Recalibrate the meter in EC range. Set cell constant to 1. The meter fails to calibrate or gives faulty readings. Broken pH electrode. Replace the electrode. At startup the meter displays all LCD tags permanently. One of the keys is stuck. Check the keyboard or contact your local Hanna Office CAL “Prod” message at startup. Instrument was not factory calibrated or lost factory calibration. Contact Hanna Technical Support for help. Troubleshooting Guide Maintenance 83 Specifications pH Temperature Range -2.00 to 16.00 pH -2.000 to 16.000 pH* ±1000.0 mV -20.0 to 120.0 ºC (-4.0 to 248.0 °F)** Resolution 0.01 pH 0.001 pH* 0.1 mV 0.1 ºC Accuracy @ 25 °C / 77 °F ±0.01pH ±0.002 pH* ±0.2 mV ±0.5 ºC pH Calibration Automatic, up to 3 points (5 points*) calibration, 5 standard (7 standard*) buffers available (1.68*, 4.01 or 3.00, 6.86, 7.01, 9.18, 10.01, 12.45*) and 2 custom buffers* Temperature compensation Automatic using integral temperature sensor. pH Electrode HI 11310 Intelligent pH/temperature electrode (included) Log feature Up to 1000* records organized in: Log on demand (Max. 200 logs) Log on stability (Max. 200 logs) Interval logging* *Standard Mode Only ** Temperature limits will be reduced to actual probe/sensor limits 84 Specifications EC TDS Salinity Range 0.00 to 29.99 μS/ cm, 3.00 to 29.99 μS/cm, 300. to 2999. μS/cm, 3.00 to 29.99 mS/cm, 30.0 to 200.0 mS/cm, up to 500.0 mS/ cm, absolute * conductivity 0.00 to 14.99 ppm (mg/L), 15.0 to 149.9 ppm (mg/L), 150. to 1499. ppm (mg/L), 1.50 to 14.99 g/L, 15.0 to 100.0 g/L, up to 400.0 g/L absolute * TDS (with 0.80 factor) 0.0 to 400.0% NaCl **, 2.00 to 42.00 PSU **, 0.0 to 80.0 g/L ** Resolution 0.01 μS/cm, 00.1 μS/cm, 0.01 μS/ cm, 0.01 mS/cm, 00.1 mS/cm 0.01 ppm, 0.1 ppm, 1 ppm, 0.01 g/L, 0.1 g/L 0.1% NaCl, 0.01 PSU, 0.01 g/L Accuracy @ 25 °C / 77 °F ±1% of reading (±0.05 μS/cm or 1 digit, whichever is greater) ±1% of reading (±0.03 ppm or 1 digit, whichever is greater) ±1% of reading EC Calibration 1 Cell Factor calibration;6 standards available: 84, 1413 μS/cm, 5.00, 12.88, 80.0, 111.8 mS/cm, 1 point offset: 0.00 μS/cm Salinity Calibration %NaCl (only) Single point with HI 7037L Standard Temperature compensation Automatic NoTC - can be selected to measure absolute conductivity. Specifications Specifications 85 Specifications Conductivity temperature coefficient 0.00 to 6.00% / ºC (for EC and TDS only). Default value is 1.90% / ºC TDS factor 0.40 to 0.80 (default value is 0.50) EC Probe HI 763100 Log feature Up to 1000 ** (400) records organized in: Manual log on demand (Max. 200 logs), Manual log on stability (Max. 200 logs), Interval logging ** (Max. 600 logs; 100 lots) * Absolute conductivity (or TDS) is the conductivity (or TDS) value without temperature compensation. ** Standard mode only. 86 Specifications DO Range 0.00 to 45.00 ppm (mg/L) 0.0 to 300.0% -20.0 to 120.0 ºC (-4.0 to 248.0 °F)* Resolution 0.01 ppm (mg/L) 0.1% 0.1 °C Accuracy @ 25 °C / 77 °F ±1.5% of reading or ±1 digit ±0.5 ºC DO Calibration One or two points at 0% (HI 7040) and 100% (water saturated air) Altitude Compensation Resolution -500 to 4,000 m (-1640 to 13120’) 100 m (328’) Salinity Compensation Resolution 0 to 40 g/L 1 g/L Temperature Compensation 0.0 to 50.0 ºC (32.0 to 122 ºF) DO Probe HI 764080 Log feature Up to 1000 records organized in Manual Log on Demand (Max. 200 logs) Manual Log on Stability (Max. 200 logs) Interval Logging 100 lots, Max. 600 logs/lot Specifications Additional Specifications PC Interface Micro USB Storage Interface USB Power Supply 5 VDC Adapter (included) Environment 0-50 ºC (32-122 ºF) Max 95% RH non-condensing Dimensions 202 x 140 x 12 mm (7.9 x 5.5 z 0.5”) Weight 250g (8.82 oz) * Temperature limits reduced to actual sensor limits. Specifications 87 Accessories pH Buffer Solutions HI 70004P pH 4.01 Buffer Sachets, 20 mL (25 pcs.) HI 70007P pH 7.01 Buffer Sachets, 20 mL (25 pcs.) HI 70010P pH 10.01 Buffer Sachets, 20 mL (25 pcs.) HI 7001L pH 1.68 Buffer Solution, 500 mL HI 7004L pH 4.01 Buffer Solution, 500 mL HI 7006L pH 6.86 Buffer Solution, 500 mL HI 7007L pH 7.01 Buffer Solution, 500 mL HI 7009L pH 9.18 Buffer Solution, 500 mL HI 7010L pH 10.01 Buffer Solution, 500 mL HI 8004L pH 4.01 Buffer Solution in FDA approved bottle, 500 mL HI 8006L pH 6.86 Buffer Solution in FDA approved bottle, 500 mL HI 8007L pH 7.01 Buffer Solution in FDA approved bottle, 500 mL HI 8009L pH 9.18 Buffer Solution in FDA approved bottle, 500 mL HI 8010L pH 10.01 Buffer Solution in FDA approved bottle, 500 mL ELECTRODE STORAGE SOLUTIONS HI 70300L Storage Solution, 500 mL HI 80300L Storage Solution in FDA approved bottle, 500 mL ELECTRODE CLEANING SOLUTIONS HI 70000P Electrode Rinse Sachets, 20 mL, 25 pcs HI 7061L General Cleaning Solution, 500 mL HI 7073L Protein Cleaning Solution, 500 mL HI 7074L Inorganic Cleaning Solution, 500 mL HI 7077L Oil & Fat Cleaning Solution, 500 mL HI 8061L General Cleaning Solution in FDA approved bottle, 500 mL HI 8073L Protein Cleaning Solution in FDA approved bottle, 500 mL HI 8077L Oil & Fat Cleaning Solution in FDA approved bottle, 500 mL ELECTRODE REFILL ELECTROLYTE SOLUTIONS 88 Accessories HI 7082 3.5M KCl Electrolyte, 4x30 mL, for double junction electrodes HI 8082 3.5M KCl Electrolyte in FDA approved bottle, 4x30 mL, for double junction electrodes. EC Conductivity Solutions HI 70030P 12880 μS/cm, 20 mL sachets (25 pcs.) HI 70031P 1413 μS/cm, 20 mL sachets (25 pcs.) HI 70039P 5000 μS/cm, 20 mL sachets (25 pcs.) HI 7030M 12880 μS/cm, 230 mL bottle HI 7031M 1413 μS/cm, 230 mL bottle HI 7033M 84 μS/cm, 230 mL bottle HI 7030M 12880 μS/cm, 230 mL bottle HI 7034M 80000 μS/cm, 230 mL bottle HI 7035M 111800 μS/cm, 230 mL bottle HI 7039M 5000 μS/cm), 230 mL bottle HI 7030L 12880 μS/cm, 500 mL bottle HI 7031L 1413 μS/cm, 500 mL bottle HI 7033L 84 μS/cm, 500 mL bottle HI 7034L 80000 μS/cm, 500 mL bottle HI 7035L 111800 μS/cm, 500 mL bottle HI 7039L 5000 μS/cm, 500 mL bottle HI 7037L 100% NaCl sea water standard solution, 500 mL bottle HI 8030L 12880 μS/cm, 500 mL FDA approved bottle HI 8031L 1413 μS/cm, 500 mL FDA approved bottle HI 8033L 84 μS/cm, 500 mL FDA approved bottle HI 8034L 80000 μS/cm, 500 mL FDA approved bottle HI 8035L 111800 μS/cm, 500 mL FDA approved bottle HI 8039L 5000 μS/cm, 500 mL FDA approved bottle Accessories Accessories 89 Accessories DO HI 7040M Zero Oxygen Solution, 230 ml HI 7040L Zero Oxygen Solution, 500 ml HI 7041S Refilling Electrolyte Solution, 30 ml HI 764080 Spare probe with 2 meter (6.7') cable HI 764080A/P 5 spare membranes Other Accessories HI 75110/220U Voltage adapter from 115 Vac to 5 Vdc (USA plug) HI 75110/220E Voltage adapter from 230 Vac to 5 Vdc (European plug) HI 76404B Electrode holder HI 2000WC Wall cradle HI 2000BC Bench cradle Ordering Information 90 Accessories HI 2020-01 edge™ instrument with US plug HI 2020-02 edge™ instrument with EU plug HI 11310 Glass body, double junction, pH/temperature electrode HI 11311 Glass body, double junction, pH/temperature electrode with enhanced diagnostics HI 12300 Plastic body, double junction, pH/temperature electrode HI 12301 Plastic body, double junction, pH/temperature electrode with enhanced diagnose HI 763100 EC/temperature probe HI 764080 DO/temperature probe edge™ is guaranteed for two years against defects in workmanship and materials when used for its intended purpose and maintained according to instructions. Electrodes and probes are guaranteed for six months. This warranty is limited to repair or replacement free of charge. Damage due to accidents, misuse, tampering or lack of prescribed maintenance is not covered. If service is required, contact your local Hanna Office. If under warranty, report the model number, date of purchase, serial number and the nature of the problem. If the repair is not covered by the warranty, you will be notified of the charges incurred. If the instrument is to be returned to Hanna Instruments, first obtain a Returned Goods Authorization number from the Technical Service department and then send it with shipping costs prepaid. When shipping any instrument, make sure it is properly packed for complete protection. Warranty Hanna Instruments reserves the right to modify the design, construction or appearance of its products without advance notice. Warranty 91 Notes 92 Warranty Notes Warranty 93 Notes 94 Warranty Notes Warranty 95 contacts Local Office Hanna Instruments Inc. Highland Industrial Park 584 Park East Drive Woonsocket, RI 02895 www.Hannainst.com Hanna Instruments USA 270 George Washington Highway Smithfield, RI 02917 Phone: 800.426.6287 Fax: 401.765.7575 e-mail: [email protected] Printed in USA man_egde_0913 World Headquarters


