1
User's Guide
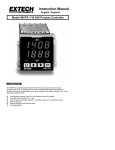
RPM Controller / Monitor
Model 461960
Introduction
Congratulations on your purchase of the Extech 461960 RPM Controller/Monitor. This meter is
shipped fully tested and calibrated and, with proper use, will provide years of reliable service.
Features
∗
∗
∗
∗
∗
∗
∗
∗
∗
∗
∗
∗
∗
Professional Tachometer (RPM, m/min., ft/min. ) monitor and controller.
Build in control relay and alarm relay.
Alarm Relay will close when the measured value reaches the high or low alarm value.
Control Relay will close when the measured value reaches the control value.
Hysteresis value setting for control and alarm function.
Set the number of input pulses per revolution.
Settable roller diameter for the surface speed ( m/min., ft/min. ) function.
Works in conjunction with the optional proximity or photo sensor.
Large easy to read red LED display.
RS232 computer interface for use with optional software.
Microprocessor circuit ensures high accuracy and provides special functions and features.
Standard 96 X 48 mm DIN case.
Optional data acquisition software.
2
461960 V1.2
03/12
Safety
International Safety Symbols
Caution : Risk of electric shock !
This symbol, adjacent to a terminal, indicates that, under normal use, hazardous voltages
may be present
Caution : Risk of electric shock !
This symbol, adjacent to another symbol or terminal, indicates the user must refer to the
manual for further information.
Equipment protected throughout by Double Insulation or Reinforced Insulation.
Safety Procedures
∗
∗
∗
∗
∗
∗
Do not use fingers or any tool to touch the Wire Terminals.
Do not exceed 0.5A relay contact load (resistive load).
The instrument contains no user serviceable parts and should not be opened by the
user.
Repair or service should be done by a qualified technician only.
Always apply the correct AC power voltage
Cleaning - Only use the dry cloth to clean the plastic case !
Operating conditions
∗
∗
∗
∗
∗
Comply with EN61010. Transient overvoltage at Mains Supply 2500V.
Pollution Degree 2.
Altitude up to 2000 meters.
Indoor use.
Relative humidity 80% max.
3
461960 V1.2
03/12
Meter Description
1.
Display
2.
PV ( process value ) indicator
3.
SV ( set value ) indicator
4.
Set Button
5.
▼ Button
6.
▲ Button
7.
Function Button
8.
Control relay indicator
9.
Alarm relay indicator
10. RPM indicator
11. ft/min indicator
12. m/min indicator
13. Wire terminals
14. Case holder
15. RS232 terminal
Terminal connections
Do not input an over voltage to the AC input terminals
1.
Input the ACV power (90 to 260 ACV) to T1, T2.
2.
Connect the "Control Relay" output from T3, T4.
3.
Connect the "Alarm Relay" output from T5, T6. 3)
4.
Connect the proximity or photo sensor to the input terminal T8, T9, T10.
T8 is DC 12 V power supply terminal. (Brown wire)
T9 is the ground ( - ) terminal. (Blue wire)
T10 is the pulse input terminal. (Black or green wire)
4
461960 V1.2
03/12
Operation
RPM measurement
1.
Apply power to the meter.
2.
Press the “Function Button" once until the "RPM” and the "PV" indicators are on.
3.
The display will indicate the RPM value.
4.
The RPM value equals :
Total input signal (pulse) per min.
Number of pulses per revolution
Example:
If the total signal (pulse) input per minute is 5,124, the number of pulses per revolution is set to
1, the RPM value will be;
5,124/1 = 5,124
Surface speed ( m/min., ft/min. ) measurement
1.
Apply power to the meter
2.
Press the "Function” button once until the "m/min” indicator is on. The display will show the
m/min. value.
3.
Press the "Function” button once until the "ft/min” indicator is on. The display will show the
ft/min. value.
4.
Under the surface speed measurement, the "PV” indicator will also light.
5.
To calculate m/min:
Total input signal ( pulse ) per min. x roller diameter ( cm ) x 3.14
Number of pulses per revolution
÷ 100
Example: If the total input signal (pulse) per minute is 501, the number of pulses per revolution is
set to 1, the roller diameter is 10 cm the m/min. value will be;
501/1 x 10 x 3.14/100 = 157.3
6.
To calculate ft/min:
Total input signal ( pulse ) per min. x roller diameter ( cm ) x 3.14
Number of pulses per revolution
÷ 30.48
Example: If the total input signal (pulse) per minute is 501, the number of pulses per revolution is
set to 1, the roller diameter is 10 cm the ft/min. value will be;
501/1 x 10 x 3.14/30.48 = 516.1
461955 Proximity Sensor
Brown wire (+12 V
Blue wire(Ground)
Black wire (Signal)
461957 Photo Sensor
Brown wire (+12 V)
Blue wire (Ground)
Black wire (Positive to Negative transition) or Green wire (Negative to Positive transition)
5
461960 V1.2
03/12
1st layer setting procedures
CtSP
Control value setting (RPM/FPM set point)
LoLt
Alarm - Low limit value setting
HILt
Alarm - High limit value setting
Control Value Setting
1.
Press the "Set” button" once, the display will show " CtSP ", the meter is now ready for the "
Control value " setting.
2.
Use the "▼” button and the "▲” to adjust the desired "Control value".
Note: When adjusting the value, the "SV” indicator will light.
Low Limit Alarm Value Setting
1.
Press the "Set” button" twice, the display will show " LoLt ", the meter is now ready for the "
Low Limit value " setting.
2.
Use the "▼” button and the "▲” to adjust the desired "Low limit value ".
Note: When adjusting the value, the "SV” indicator will light.
High Limit Alarm Value Setting
1.
2.
After setting the "Low Limit" value, press the "Set” button twice, the display will show "HILt",
the meter is now ready for the humidity "High Limit" value setting.
Use the "▼” button and the "▲” to adjust the desired "High limit value ".
Note: When adjusting the value, the "SV” indicator will light.
1st layer setting considerations;
1.
Under the normal display, if the "Function” button is set to the "RPM function" and the
"RPM” indicator is on, then the 1st layer setting procedures will be ready for the "RPM"
function.
2.
Under the normal display, if the " Function” button is set to the "m/min. function", and the
"m/mi” indicator is on, then the 1st layer setting procedures will be ready for the "m/min."
function.
3.
3) Under the normal display, if the "Function” button is set to the "ft/min. function" and the
"ft/min” indicator " is on, then the 1st layer setting procedures will be ready for the "ft/min."
function.
6
461960 V1.2
03/12
2nd layer setting procedures
PULS
Pulse no. per revolution setting
dIA
Roller diameter value setting (cm)
CtHy
Control Hysteresis value setting
ALHy
Alarm Hysteresis value setting
Pulse no. per revolution setting (RPM)
1.
Press and hold the "Set” button for at least two seconds, the display will show "PULS", now
the meter is ready for the "Pulse no. per revolution" setting.
2.
Use the "▼” button and the "▲” button to adjust the desired "Pulse no. per revolution".
Note: When adjusting the value, the "SV” indicator will light.
Roller diameter value setting (Surface speed)
1.
After setting the "Pulse no. per revolution", press the " Set” button twice, the display will
show dIA ", now the meter is ready for the "Roller diameter value" setting.
2.
Use the "▼” button and the "▲” button to adjust the "Roller diameter value" in the unit of
cm.
Note: When adjusting the value, the "SV” indicator will light.
Control Hysteresis value setting
1.
After setting the "Roller diameter value", press the "Set” button twice, the display will show
“CtHy", now the meter is ready for the "Control Hysteresis value" setting.
2.
Use the "▼” button and the "▲” button to adjust the desired Hysteresis value".
Note: When adjusting the value, the "SV” indicator will light.
CtSP (500)
1
2
CtHy (495)
Example: Control value: 500, Control Hysteresis value : 5
The state of the control relay will stay ON for measured values up to 500 (1) and then turn
OFF. The control relay will turn back ON when the measured value reaches 495 (2).
7
461960 V1.2
03/12
Alarm Hysteresis value setting
1.
After selecting the "Control Hysteresis value" , press the "Set” button twice, the display will
show " ALHy ", the meter is now ready for the "Alarm Hysteresis” value setting.
2.
Use the "▼” button and the "▲” button to adjust the desired Alarm Hysteresis value.
Note: When adjusting the value, the "SV” indicator will light.
Example :
High limit value : 100, Low limit value : 20, Alarm Hysteresis value : 5
HiLt (100)
1
ALHy (95)
2
4
ALHy (25)
3
LoLt (20)
The alarm relay will turn On when the measured value reaches100 (1).
The alarm relay will turn Off when the measured value reaches 95 (2).
The alarm relay will turn On when the measured value reaches 20 (3).
The alarm relay will turn Off when the measured value reaches 25 (4).
SYSTEM RESET
Power on the meter. Press and hold the "Set” and "Function” buttons simultaneously for more
than 5 seconds until the display shows the text "rSt". Release the buttons.
"rSt" will flash 2 times and the display will then return to the normal screen. The system will be
reset, all of the calibration data will be cleared, and the meters internal functions will return to the
factory default values.
8
461960 V1.2
03/12
Specifications
General Specifications
Display
Unit
Circuit
Sampling Time
Relay Output
Setting Value
Input Signal Time base
Sensor Power Supply
Data Output
Operating Temperature
Operating Humidity
Power Supply
Power Consumption
Weight
Dimension
Optional Accessories
4 digits red LED, digit size : 14 mm.
RPM
RPM
m/min ( meter per min. )
Surface speed
ft/min ( feet per min. )
Custom chip of microprocessor LSI circuit.
Approx. 1 second.
* Input : one pulse per revolution, ≥ 60 RPM
Two relays: Relay 1:Control relay, Relay 2: Alarm relay
Max Load: 0.5 ACA/250 ACV or 0.5 DCA/24 DCV (resistive)
Note: Do not apply a load current that exceeds 0.5A. Large currents will
damage the relay and also void the warranty.
Control value setting. Alarm high limit value setting. Alarm low limit value
setting. Pulse no. of each revolution. Roller diameter value setting.
Hysteresis value setting.
* Setting for RPM, m/min., ft/min.
Pulse, Quartz crystal
DC 12 V, 50 mA max.
RS 232 PC serial interface.
32 to 122°F (0 to 50 °C).
Less than 80% R.H.
90 to 260 ACV, 50/60 Hz.
Approx. 4.7 VA/AC 110V. Approx. 5.3 VA/AC 220V.
384 g/ 0.84 LB.
DIN size : 96 x 48 mm.
Depth : 110 mm.
Proximity sensor, 461955. * Photo sensor, 461957.
Data Acquisition software, 407001A
Electrical Specifications (23±5 °C)
Range
Photo Tachometer : 10 to 99,999 RPM
Surface Speed ( m/min. ) :0.05 to 9,999 m/min.
Surface Speed ( ft/min. ) :0.2 to 32,805 ft/min.
Accuracy ± ( 0.1 % + 1 digit ).
Resolution RPM
0.1 RPM
< 1,000 RPM
1 RPM
1,000 to 9,999 RPM
10 RPM
10,000 to 99,999 RPM
m/min.
0.01 m/min.
<100 m/min.
0.1 m/min.
100 to 999 m/min.
1 m/min.
1,000 to 9,999 m/min.
0.1 ft/min.
< 1000 ft/min.
ft/min.
1 ft/min.
1,000 to 9,999 ft/min.
10 ft/min.
10,000 to 32,805 ft/min.
•
Above specification tests under the environment RF Field Strength less than 3 V/M &
frequency less than 30 MHz only.
9
461960 V1.2
03/12
461955 Proximity Sensor Specifications (23±5 °C)
Output method
PNP, NO(normal open)
Sensing direction
Vertical.
Sensing distance
4 mm.
Operating voltage
10-30 VDC.
Standard Sensing object
Iron 18 x 18 x 1 mm.
Current consumption
8 mA, no load.
Response frequency
600 Hz.
Output current
250 mA max.
Leakage current
1.1 mA.
Residual voltage
0.9 VDC.
Operating Temperature
-4 to 158°F (-20 to 70 °C)
Operating Humidity
35 to 95% RH.
Wire Dimension
4.7 mm Dia. x 2 m x 3 cores.
Cable length
6 ft (1.8 meters)
461957 Photoelectric Sensor Specifications
Range
Up to 6000 RPM (100 Hz)
Power
12 - 24VDC ±10%; Consumption: 40mA max.
Response time
< 1ms
Output
NPN transistor; Max load 80mA
Photo beam color
Green
Photo beam wavelength
5500 Angstroms
Cable length
6 ft (1.8 meters)
10
461960 V1.2
03/12
Warranty
EXTECH INSTRUMENTS CORPORATION (a FLIR company) warrants this instrument to be free of defects in parts and workmanship for
one year from date of shipment (a six month limited warranty applies to sensors and cables). If it should become necessary to return the
instrument for service during or beyond the warranty period, contact the Customer Service Department for authorization. Visit our website
www.extech.com for contact information. A Return Authorization (RA) number must be issued before any product is returned to Extech. The
sender is responsible for shipping charges, freight, insurance and proper packaging to prevent damage in transit. This warranty does not
apply to defects resulting from action of the user such as misuse, improper wiring, operation outside of specification, improper maintenance
or repair, or unauthorized modification. Extech specifically disclaims any implied warranties or merchantability or fitness for a specific
purpose and will not be liable for any direct, indirect, incidental or consequential damages. Extech's total liability is limited to repair or
replacement of the product. The warranty set forth above is inclusive and no other warranty, whether written or oral, is expressed or
implied.
Calibration and Repair Services
Extech offers repair and calibration services for the products we sell. Extech also provides NIST certification for most products. Call the
Customer Service Department for information on calibration services available for this product. Extech recommends that annual calibrations
be performed to verify meter performance and accuracy.
Support lines: U.S. 877-439-8324, Intl. 603-324-7800
Technical support: Option 3; E-mail: [email protected]
Repair & Returns: Option 4; E-mail: [email protected]
Product specifications subject to change without notice
Visit our website: www.extech.com
Extech Instruments Corporation, 9 Townsend West, Nashua, NH 03063
ISO 9001 Certified since 1995
11
461960 V1.2
03/12