1
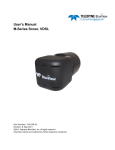
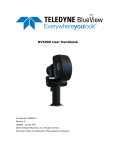
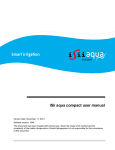
Install ProScan Software Insert The CD Run Setup If prompted, click “Do not block” Configure your PC network interface card Set your PC Network IP address to 192.168.1.3 Set the Net Mask to 255.255.255.0 Bench Test the Sonar Connect the sonar as shown below, making sure the sonar cable is connected to the port labeled “SONAR J1” and the standard Ethernet cable to the port labeled “PC J2” on the POE Box. Your sonar and POE box may look different than the ones depicted below. Apply AC power to the POE Box. Start the ProScan Software. Once the Sonar is fully powered up (approximately 45 seconds) click the connect button: Page | 1 Mount the Sonar The sonar images like a camera out the front of the nose cone. Take this into consideration when mounting the sonar. Sound Speed Calibration If an image looks broken or misaligned, the most likely cause an incorrect Sound Speed value. To access the Sound Speed slider from within ProScan, press Ctrl + J. Broken Image Fixed Image Page | 2 Shutdown To avoid data loss, be sure to close and save any sonar data files before removing the sonar power. When power cycling the sonar, be sure to allow at least 10 seconds of ‘off time’ before turning the sonar back on. User’s Manual For the complete user’s manual, please see the manual cd, which is included with the sonar. Or you can navigate to your sonar model online at http://www.blueview.com/products/2d-imagingsonar/ PPS Enabled Sonar For the sonars with PPS enabled refer to the user’s manual appendix for more information. Comments If you have any questions or comments, please contact us. Teledyne BlueView, Inc. www.blueview.com (425) 492-7376 Email: [email protected] Part Number 205697-01 Revision: Rev -, June 2015 © 2015 Teledyne BlueView, Inc. All rights reserved. All product names are trademarks of their respective companies Page | 3