1
WARNING!
This Product is for indoor use only.
Not for use in wet locations.
length is protruding. Retighten the Lock Knob securely.
9. When dispensing transparent labels, it is recommended to place the sensor as
close to the labels as possible.
IMPORTANT INFORMATION:
10. Use “HIGH” or “LOW” Switch setting to select the desired speed.
•
11. IMPORTANT – Pull labels UP when removing them. If excess dust or dirt
•
•
•
•
•
•
•
•
This product is a label dispenser. It is only to be used to dispense labels of the
recommended dimensions and weight in an indoor, dry environment.
The machine has to be unplugged before any manipulation.
The machine is to be used on a flat surface, if the surface is not flat, it is to be fixed
using the holes in the base plate.
Do not leave the power cable in a passageway.
The ambient light of the working area needs to be sufficient to avoid any risk.
The dispenser can be used in ambient temperatures of +2°C to 40°C.
For operators working long hours on the machine, it is recommended to wear glasses
protecting from the light (e.g. light sunglasses).
All measures have been taken to minimise risks of injuries with the take-up shaft but
the operator has to be careful when manipulating the bail.
Connection of the machine to the power source must respect local and European
legislations.
accumulates on the Label Sensor Eye the Dispenser may not sense labels correctly.
Use a cloth or paper towel dampened with water to gently clean the Label Sensor.
12. Do not use any chemicals on the sensor.
13. Optional Flanges for the inside and outside of the label roll are available (Order LDFLANGES. Set of two Flanges). These Flanges are recommended for narrow or
loosely wound labels that may have a tendency to fall off the roll.
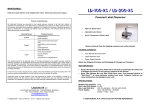
Label Threading Path
SET-UP AND USE:
1. Make sure the Power Switch is in the “OFF” position.
2. Set your LD-100-U or LD-200-U in place and plug the cord from the Power Supply
Module into the Power Input Jack on the rear of the Unit.
3. Connect the Power Supply Module to a suitable power source.
4. Place your roll of labels on the Label Roll Holder & slide the Roll Edge Guide(s) to
the width of your label web. The Label Web can be positioned from side to side as
required to ensure that the label lines up with the reflective Sensor.
5. Thread the label web between the Stripper Bar and the round Guide Rod directly
above it. See the Label Threading Path illustration.
6. Pull the label web under (or over) the round Web Guide and slide the width
adjusters to the width of the web.
7. Loop the web UNDER the Wire Bail on the Take-Up Shaft as shown in the
illustration.
8. Slightly loosen the Label Sensor Lock Knob, until you can just rotate the Sensor.
Point the sensor up so it is pointing at the bottom of the Stripper Bar. Place the
Power Switch in the “LOW” position. Slowly rotate the Sensor down until the label
begins to advance. Continue to rotate the Sensor slowly until the desired label
OPTIONAL LABEL COUNTER: The optional Label Counter will add one count to the
displayed number for each label that is dispensed. This Option is available only factory
installed in new Units.
When the LD-100-U/LD-200-U is first turned on, it will display a count of “1” or it will
display the number from the previous count. You can reset the Label Counter to zero
(“0”) by pressing the “R” Reset Button.
FOR YOUR SAFETY:
Switch off device before removing the take-up shaft.