1
HM-12RGB5A3-RC-2 USER MANUAL
HM-12RGB5A3-RC-2
LED RGB CONTROLLER
(Version V2.00)
Manual
Safety
Thanks for choosing our HM-12RGB5A3-RC-2 Full Color Multifunction Controller. Before installation and
usage, we strongly recommend you to read through this manual carefully.
1. Please don’t install this controller in lightening, intense magnetic and high
-voltage fields.
2. To reduce the risk of component damage and fire caused by short circuit, make sure correct connection
3. Always be sure to mount this unit in an area that will allow proper ventilation to ensure a fitting
temperature.
4. Check if the voltage and power adapter suit the controller & if anode or cathode definition is the same as
the controller’s.
5. Don’t connect cables with power on; make sure a correct connection and no short circuit checked with
instrument before power on.
6. Please don’t open controller cover and operate if problems occur.
For update information, kindly please consult with your supplier.
HM-12RGB5A3-RC-2 USER MANUAL
Product brief
HM-12RGB5A3-RC-2 Full-color Multifunction Controller is dedicated to control color changes of
LED lights with 4-pin 3-loop cables (common anode). It can be controlled through manual buttons
and its match remote controller. Also this unit can run standalone or networking with multi controller
(working with HM-12RGB5A3-EX power expansion, output voltage can be unlimitedly expanded)
Product features
Three channels, 5 Amp maximum for each channel;
With output protecting function, it could extend the life of LED;
Maximum 32 modes can be selected, and 256 levels of grayscale;
Speed and brightness can be adjusted separately for each mode;
Mode, suspend power memory function;
Change patterns and suspension of power-off
memory function;
ON/OFF switch.
Product Specification
Power input
DC12~24V
Power output
5A(Max) per channel, 12V≤
Standby Power
<0.5W
Size
Weight
211(L)X40(W)X30(H) mm
300g
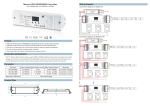
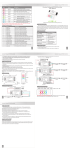
Product Structure:
180W; 24V≤ 360W
HM-12RGB5A3-RC-2 USER MANUAL
Switch Mode Instruction
1: Static Red
9: 7-color flicker
17: White jumping
25: White fade in, fade out
2: Static Greed
10: 6-color jumping
18: 7-color gradual change
26: RG fade in, fade out
3: Static Blue
11: 6 color flicker
19: RGB gradual change
27: RB fade in, fade out
4: Static yellow
12: RGB jumping
20: RG gradual change
28: GB fade in, fade out
5: Static purple
13: RGB flicker
21: RB gradual change
29: Red fade in, fade out
6: Static cyan
14: RG jumping
22: GB gradual change
30: Green fade in, fade out
7: Static white
15: RB jumping
23: 7-color fade in, fade out
31: Blue fade in, fade out
8: 7-color jumping
16: GB jumping
24: RGB fade in, fade out
32: Switch
Operation Instructions
The TEST function on the controller:
The 'TEST' button Make the RF controller work homologous with the controller.
The purpose to have this function is to make sure the RF controller will work correspondingly with this
controller, as well as not to be interfered by other RF signals.
How to use this function? Power the controller, and then press the “T EST” button, then press any
button on the RF remote controller.
REMARK:
For HM-12RGB5A3-RC-2, please clear code before match code;
To clear code: press and hold the “TEST” button. The Test light comes on at the moment and goes off
in 10 seconds. The code is cleared.
To match code: press a nd re l eas e the “TEST” button. In 30 seconds press any button on the remote
controller. If the test light flash, Remote controller is successfully matched.
HM-12RGB5A3-RC-2 USER MANUAL
Instruction of buttons on RF remote controller:
RC
button
Function
Instruction
1
Mode+
Press to change to next mode
2
Mode-
Press to go back to previous mode.
3
SPEED+
To increase speed by every press.
(default is set to maximum speed)
4
SPEED-
To decrease speed by every press.
5
Pause
Press once to retain the current color, press
again to keep changing color.
6
ON/OFF
Press this button to turn off, press again to
turn on.
Troubleshooting Guide
Problem
Reason
The power wire not connected well or
Solution
Reconnect the power wire or change
no output
a power supply
Lamp’s power wire not connected well
Reconnect the power wire
2. Some color was off
Wire of this color not connected well
Reconnect the power wire
3. Irregular flicker
Line is too long or not connected well
Shorten the line or add a amplifier
1.All the lamps were off
Trouble shooting solutions:
Fault Case
Reasons
1、 No power from plug
No light
2、 At black mode
3、 The fuse broken
4、 Incorrect connection
Incorrect
5、 Incorrect RGB connection
Solutions
1、 Change the socket
2、 Change the running
mote
3、 Replace the fuse
4、 Check the connection
5、 Check
RGB
HM-12RGB5A3-RC-2 USER MANUAL
Color, not
synchronous
No running
light
6、 Wrong
sync-cable
connection
7、 Running light off.
connection
6、 Check sync-cable
7、 Press DIM to turn on.
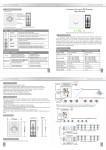
Wiring Diagram (LED module as an example)
Connecting to extension controllers (LED module as an example)
Three connecting methods, these three methods can be mixed in applications.
HM-12RGB5A3-RC-2 USER MANUAL
Method 1:
Method 2:
HM-12RGB5A3-RC-2 USER MANUAL