1
TABLE OF CONTENTS
Section
Page
1 Safety Warnings ..................................................................... 3
2 Precautions and Safety Measures .......................................... 6
3 Introduction............................................................................. 7
4 Battery Percentage and Charge Time ..................................... 9
5 Important Facts About Battery Charging ................................. 9
6 Status Indicators ................................................................... 10
7 Typical Applications .............................................................. 11
8 Features ............................................................................... 12
9 Operation.............................................................................. 12
10 Lead-Acid Battery Charging Setup........................................ 13
11 Maintenance and Care.......................................................... 14
12 Mechanical Specifications..................................................... 14
13 Options and Part Number Description................................... 15
14 Limited Warranty...................................................... Back Page
Table
Page
1 Specifications ......................................................................... 8
Figure
Page
1 Improper Connection Warning ................................................ 5
2 Lead-Acid Battery Charging Setup........................................ 13
3 Quick Hook-Up Connectors .................................................. 13
4 Mechanical Specifications..................................................... 14
5 Part Number Description....................................................... 15
2
1 ─ SAFETY WARNINGS
WARNING! WORKING WITH LEAD-ACID BATTERIES CAN BE
DANGEROUS. LEAD ACID BATTERIES CAN GENERATE
EXPLOSIVE AND HAZARDOUS GASES DURING NORMAL
OPERATION AND WHILE CHARGING.
WARNING! To reduce the risk of battery explosion or injury, you
must follow all instructions provided in this manual including the
instructions provided by the battery manufacturer and the
instructions provided with the equipment in which the battery will
be used.
WARNING! Always wear safety goggles and protective clothing,
including gloves, when working with lead-acid batteries to reduce
the risk of injury from contact with corrosive battery acid and the
risk of coming in contact with lead. Always wash hands
thoroughly after handling lead-acid batteries.
WARNING! Always inspect the battery for defects or leaks before
attempting to charge it. Never attempt to charge a defective or
leaking battery.
WARNING! Never use the SmartCHARGER™ for any purpose
other than to charge a lead-acid type battery, such as those used
in cars, trucks, vans, motorcycles, RVs, ATVs, etc. and as
specified in this manual. Never use the SmartCHARGER™ to
charge any other types of batteries, such as dry-cell batteries
used in household electronics or appliances as these batteries will
explode and may cause serious personal injury.
WARNING! Never attempt to disassemble or repair the
SmartCHARGER™. The SmartCHARGER™ is designed to
provide long-term operation if used properly. Tampering with the
circuitry can cause malfunction and increase the risk of explosion.
If the SmartCHARGER™ malfunctions, stop using it immediately
and contact Creative Technologies, Inc. for instructions on
replacement.
3
1 ─ SAFETY WARNINGS (CONTINUED)
WARNING! Always make sure that all connections are secure
and correct before attempting to charge the battery.
WARNING! Always unplug the SmartCHARGER™ from the
battery and the AC line input when not in use.
WARNING! Never place the SmartCHARGER™ on top of or
under the battery.
WARNING! When performing maintenance on the battery, such
as reading specific gravity or filling it, never allow the battery acid
to drip onto the SmartCHARGER™.
WARNING! Never attempt to charge a fully frozen or partially
frozen battery. Allow the battery to thaw completely before
charging it.
WARNING! The charging process should always be performed in
a well ventilated area to avoid build-up of toxic and explosive
gases from the lead-acid battery.
WARNING! Always place the SmartCHARGER™ as far as
possible from the battery, to avoid explosive gases coming in
contact with the SmartCHARGER™.
WARNING! Do not use or expose the SmartCHARGER™ to rain,
snow, running water, or where ground water may collect.
WARNING! Always perform the charging process where children
will not have access to the SmartCHARGER™, wires, or the leadacid battery.
WARNING! Never operate the SmartCHARGER™ if the line cord
or the battery clamp wires have been damaged. Exposed wires
will cause sparks and may cause an explosion.
4
1 ─ SAFETY WARNINGS (CONTINUED)
WARNING! To reduce the risk of electrical shock, unplug the
SmartCHARGER™ from the AC line input before attempting any
maintenance or cleaning.
WARNING! Keep all wires away from fan blades, belts, pulleys,
engine parts, and any other moving parts.
WARNING! During normal operation, the SmartCHARGER™
can get hot and must be in a well ventilated location. Do not
place the charger on or near flammable materials such as
carpeting,
upholstery,
paper,
cardboard,
etc.
The
SmartCHARGER™ may damage leather, plastic, rubber, etc.
WARNING! Be sure the line cord and battery clamp are
positioned such that they are not subject to being stepped on,
tripped over, or damaged.
WARNING! All boat and watercraft batteries must be charged on
shore.
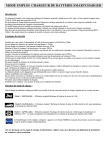
WARNING! Never connect the SmartCHARGER™ to more than
one battery at a time.
WARNING! Never use the supplied cables to connect two
batteries together! This situation is extremely dangerous! This
will connect the batteries in opposing polarity and cause a
dangerous short circuit. Sparking and an explosion may occur.
See Figure 1.
Figure 1 – Improper Connection Warning
(-)
(-)
5
1 ─ PRECAUTIONS AND SAFETY MEASURES
● Always wear appropriate safety goggles and protective clothing
(such as a long-sleeved shirt, pants (no shorts), shoes, and
gloves to minimize the amount of exposed skin that may come
in contact with the lead-acid from the battery).
● It is advisable to remove bracelets and rings before working
with lead-acid batteries, since these items may cause shorts
and sparks.
● If possible, have someone within range of your voice, that may
be able to come to your aid, should you accidentally get injured
while working with the lead-acid battery.
● Have access to clean water and soap in case you need to wash
battery acid that may have come in contact with your skin.
Then seek medical attention immediately.
● If you get battery acid into your eyes, flush them for at least 10
minutes. Seek medical attention immediately.
● Never touch your eyes when working with a lead-acid battery.
● Discard any clothing that may have come in contact with battery
acid.
● If battery acid is spilled, use plenty of baking soda to neutralize
the acid before cleaning it up. Safely discard all brooms, pans,
rags, etc. used to clean up the spill.
● Never smoke or cause sparks near lead-acid batteries. This
can cause an explosion.
● Avoid dropping metal tools on the battery to prevent sparks or
short circuits. This can cause an explosion.
6
3 ─ INTRODUCTION
Thank you for purchasing the SmartCHARGER™ from
Creative Technologies, Inc. The SmartCHARGER™ will provide
the best and most reliable charging for your lead-acid batteries.
The easy-to-use SmartCHARGER™ is specifically designed to
better maintain your lead-acid batteries and keep them lasting
longer than a basic charger.
That means less battery
deterioration, longer battery life, and fewer batteries to buy.
The SmartCHARGER™ contains 8 indicator LEDs. The 4 Status
LEDs indicate operation (POWER, CHARGE, ERROR, and
CONNECTION). The 4 Battery LEDs indicate the battery's
charged level (25%, 50%, 75%, and 100%).
The SmartCHARGER™ is available in 12 Volt or 6 Volt models
and 115 Volt or 230 Volt AC line input. An enclosure with optional
Mounting Tabs is also available.
Two Quick Hook-Up Connectors are provided (one with alligator
clamps and one with ring terminals for permanent mounting,
which allows quick and easy charging/maintaining hook-up).
The SmartCHARGER™ is designed to charge and maintain your
battery, as well as, provide power to battery loads up to 1.0 Amp
to prevent them from discharging your battery.
See Table 1, on page 8, for the SmartCHARGER™ specifications. See
Section 13, on page 15, for options and ordering information.
The SmartCHARGER™ Is Better than the Basic Charger
The Basic Charger: Only applies a fixed voltage to the battery
being charged and turns off with a timer. High capacity batteries
may not have received a full charge before the timer has shut
down the charging process and turned off the charger.
Conversely, a battery that is almost fully charged and connected
to the basic charger may eventually be overcharged because it
will receive the same duration of charge, which it does not need
and may cause damage to the battery or reduce its life
expectancy.
7
The SmartCHARGER™: Is microprocessor controlled with a
3-stage charging algorithm, which senses the battery charge level
and when the battery has reached a full charge by measuring the
voltage rise and charging current. The SmartCHARGER™ then
automatically switches to a monitored trickle charge mode to
maintain the battery fully charged until it is ready to be used. This
means the SmartCHARGER™ can be connected to a fully
charged or completely discharged battery and it will safely and
automatically charge or maintain the battery depending upon the
amount of charge needed. The SmartCHARGER™ provides
repeatable, reliable worry-free charging all the time.
Table 1 – Specifications
Description
Charging Current
Nominal AC Line Input Voltage
Output Voltage Range (12 Volt Model)
(Maintain Mode (Trickle Charge))
Output Voltage Range (6 Volt Model)
(Maintain Mode (Trickle Charge))
Specification
1.0 Amp
115 Volts AC
13.0 – 13.4
6.5 – 6.7
Battery Cable Lengths
4.0' (1.2 m)
AC Line Cable Length
6.5' (2 m)
Optional Quick Hook-Up Connector Length
1.5' (0.5 m)
Enclosure Dimensions
(with and without Optional Mounting Tabs)
See Figure 4,
on page 14.
Shipping Weight (SmartCHARGER™)
Operating Temperature Range
1.5 Lbs. (0.68 kg)
0–40 °C / 32–104 °F
See Section 13, on page 15, for input and output voltage model
selection and for other options available.
8
4 ─ BATTERY PERCENTAGE AND CHARGE TIME
The SmartCHARGER™ uses a microprocessor to automatically
adjust the charging rate in order to charge the battery completely,
efficiently, and safely.
The duration of the charging process is a determination of two
factors, which can be used to estimate the charging time.
● Battery State: If the battery has only been slightly discharged,
it can be charged quickly. The same battery could take up to
10 times longer if discharged severely.
● Battery Rating: A higher rated battery will take longer to charge
than a lower rated battery under the same conditions. A
battery is rated in ampere-hours (AH), reserve capacity (RC),
and cold cranking amps (CCA). The lower the rating the faster
the battery will be charged.
5 ─ IMPORTANT FACTS ABOUT BATTERY CHARGING
● The battery percent shown on the SmartCHARGER™ is an
indication of the relative progress of the charging process.
The higher the battery % displayed, the less charge time
remains.
● The SmartCHARGER™ keeps your battery in a fully charged
state, which inherently prevents battery sulfation from
occurring.
● A 12 Volt battery will measure approximately 12.9 volts when it
is fully charged and approximately 11.4 volts when it is fully
discharged.
9
6 ─ STATUS INDICATORS
● POWER LED: Illuminates green, indicating that AC power is
applied to the SmartCHARGER™.
● CHARGE LED: Flashes blue, indicating that the charging
process has started. The 3-stage charging processes of the
SmartCHARGER™ are "bulk", "absorption", and "maintain"
(trickle).
Note: If, for any reason, the charging process is interrupted,
and restarted, the SmartCHARGER™ will automatically detect
the battery's condition and continue the charging process
shortly after restarting or reconnection. Also, shortly after the
SmartCHARGER™ is initially connected to a battery, the
appropriate BATTERY LED will illuminate, indicating the
battery charge level and the charging process will continue
until the battery is fully charged.
▪ BULK CHARGE MODE: The CHARGE LED flashes every
0.1 second. In this mode, the SmartCHARGER™ supplies
a constant current to the battery and the battery voltage
rises. This delivers the fastest charge to the battery.
▪ ABSORPTION CHARGE MODE: The CHARGE LED
flashes every 0.5 second. In this mode, the charge current
is reduced and the battery voltage remains constant. This
ensures that the battery reaches its full charge.
▪ MAINTAIN MODE (TRICKLE CHARGE): The CHARGE
LED flashes every 1.0 second.
In this mode, the
SmartCHARGER™ keeps the battery fully charged by
delivering small amounts of current, when necessary. In
the event that the SmartCHARGER™ is connected to a
battery under a heavy load, the charging current may be
diverted to the load. The SmartCHARGER™ will regulate
and limit the load current to 1.0 Amp. This means that
keeping the SmartCHARGER™ connected to your battery
is a great way to keep heavy loads, like lights, Lo-jack, etc.,
powered without the worry of draining your battery.
Note: A heavy load is a load, which draws more than 0.3
Amps from the battery.
10
● ERROR LED: Illuminates red if there is an abnormal problem
with the SmartCHARGER™. If the ERROR LED illuminates,
disconnect it from the battery and the AC line input and call
Creative Technologies, Inc. for instructions on return and
replacement.
Note: When disconnecting the AC line input power cord, the ERROR
LED may flash momentarily. This is normal and no action is required.
● CONNECTION LED: Illuminates red if the battery is
disconnected from the SmartCHARGER™ or connected
improperly to the battery. The LED will turn off when a proper
battery connection is detected.
● BATTERY LEDs: Illuminate in series according to the
approximate battery charge level as the charging progresses.
Note: If the SmartCHARGER™ has completed the charging process
but the battery does not hold a charge, then the battery is defective and
should be replaced.
▪ The "25%" LED illuminates red, indicating that the battery is
approximately 25% charged.
▪ The "50%" LED illuminates orange, indicating that the
battery is approximately 50% charged.
▪ The "75%" LED illuminates yellow, indicating that the battery
is approximately 75% charged.
▪ The "100%" LED illuminates green, indicating that the
battery is fully charged.
7 ─ TYPICAL APPLICATIONS
The SmartCHARGER™ has many applications for 12 Volt and
6 Volt lead-acid batteries, such as:
● Motorcycles, Automobiles, Vans, SUVs, Trucks.
● Boats, Watercraft, All Terrain Vehicles (ATVs), Snowmobiles.
● Children's Scooters and Mobility Scooters.
● Lawn Mowers, Generators and Tractors.
● Maintenance of batteries that are unused over winter months or
experience slight loads such as alarms, LoJack, etc., which
drain the battery after several weeks.
11
8 ─ FEATURES
The SmartCHARGER™ has many important features.
●
●
●
●
●
●
●
●
●
●
●
●
●
●
●
●
●
Optimal 3-Stage Charging
Microprocessor Controlled Technology
Monitors Both Voltage and Current
Won't Overcharge Batteries
Prevents Battery Sulfation
Energy Efficient Trickle Charge Mode
Built-In Status Indicators
Reverse Polarity Protection
Demand Sensing
Spark-Free Hook-Up
Fuse Protected
Short Circuit Protection
Line Regulation
Output Regulation
Charges Any Size (Capacity) Lead-Acid Battery
Simple to Use
10 Year Warranty
9 ─ OPERATION
The charging process starts when the battery clamps are properly
connected to the battery and the SmartCHARGER™ is connected
to the AC line input. The SmartCHARGER™ will indicate that the
3-stage charging process has started by flashing the "Charge"
LED with one of three flash sequences, as described in Section 6,
on page 10 (Charge LED). The flash sequence displays what
stage of the charge sequence the SmartCHARGER™ is in
("bulk", "absorption", or "Maintain" (trickle).
The approximate battery capacity is displayed by illuminating a
series of LEDs (25%, 50%, 75%, and 100%), as described in
Section 6, on page 11 (Battery LEDs).
12
10 ─ LEAD-ACID BATTERY CHARGING SETUP
Read all Safety Warnings, Section 1, on pages 3 – 5 and all
Precautions and Safety Measures, Section 2, on page 6.
Figure 2 shows a typical lead-acid battery charging setup. The
battery and SmartCHARGER™ should always be placed as far as
possible from each other.
Figure 2 – Typical Lead-Acid Battery Charging Setup
+
Figure 3 shows the two Hook-Up Connectors that are provided.
The Ring Terminals Connector is used for permanent mounting to
screw-on battery terminals to provide easy hook-up when
charging or maintaining the battery. The Alligator Clamps
Connector is used for quick temporary connections to the battery.
Figure 3 – Quick Hook-Up Connectors (Supplied)
13
11 ─ MAINTENANCE AND CARE
The SmartCHARGER™ requires very little maintenance and care
to provide years of use.
● Clean the clamps after every use, to make sure no acid
residue or lead is left on them.
● Wrap up the line cord and the battery clamp wires neatly when
storing the SmartCHARGER™. This will help protect the wires
and the SmartCHARGER™.
● Always store the SmartCHARGER™ in a cool and dry location.
Humidity may corrode the battery clamps.
● Wipe off the enclosure of the SmartCHARGER™ with a clean
and dry soft cloth.
12 ─ MECHANICAL SPECIFICATIONS
The SmartCHARGER™ is available in a regular enclosure or with
optional mounting tabs, as shown in Figure 4. See Section 13, on
page 15, for ordering information.
Figure 4 – Mechanical Specifications
6.00
5.50
1.50
5.05
Ø0.19 (2 PLCS.)
3.50
Optional
Mounting Tabs
14
3.57
13 ─ OPTIONS AND PART NUMBER DESCRIPTION
See Figure 5, for part number description of the models and
options available.
● 115 and 230 Volt AC Line Input Voltage Options: The 115
Volt AC SmartCHARGER™ is designed to work with standard
115 Volt AC line input. The 230 Volt AC SmartCHARGER™ is
designed to work with 230 Volt AC line input.
● 12 and 6 Volt Output Voltage Options: The 12 Volt
SmartCHARGER™ is designed to work with 12 Volt batteries.
The 6 Volt SmartCHARGER™ is designed to work with 6 volt
batteries.
● Mounting Tabs Option: Allows the SmartCHARGER™ to be
panel mounted or wall mounted. See Figure 4, on page 14.
Figure 5 – Part Number Description
CTI-115-12-T
T = Mounting Tabs
X = No Mounting Tabs
Creative Technologies, Inc
12 = 12 Volt DC Battery Charger Model
6 = 6 Volt DC Battery Charger Model
115 = 115 Volt AC Line Input Model
Example: Model CTI-115-12-T is a 115 Volt AC line input
SmartCHARGER™ for a 12 Volt lead-acid battery with optional
Mounting Tabs.
15
14 ─ LIMITED WARRANTY
This limited warranty is not transferable. Creative Technologies,
Inc. makes this limited warranty to the original purchaser for the
original retail value of this product. The total liability of Creative
Technologies, Inc., under any circumstance, shall not exceed the
full purchase price of this product.
For a period of 10 years from the date of original purchase,
Creative Technologies, Inc. will repair or replace, without charge,
this SmartCHARGER™ if our examination proves that it is
defective in material or workmanship. This warranty is valid if the
unit has not been tampered with by unauthorized persons,
misused, abused, or improperly installed and has been used in
accordance with the instructions and/or ratings supplied. This
warranty is in lieu of any other warranty or guarantee, expressed
or implied.
Creative Technologies, Inc. is not responsible for any expense,
including installation and removal, inconvenience, or
consequential damage, including injury to any person, caused by
items of our manufacture or sale. Some states do not allow
certain exclusions or limitations found in this warranty and
therefore they may not apply to you.
Creative Technologies, Inc. shall not be held responsible or liable
for injuries or death caused as a result of negligence, abuse,
misfiring, or intentional misuse of this product. This product must
be used in accordance with the guidelines provided in this
manual.
Creative Technologies, Inc.
www.SmartChargerOnline.com
Phone: 954.729.5541 ● Fax: 954.428.9722
E-Mail: [email protected]
COPYRIGHT © 2009 Creative Technologies, Inc.
Rev. B – 3/2/2010