1
PrestaShop Quick Start Guide
What's in this Chapter?
After you have had your store installed, you are ready to do a Quick Start. Covers
everything you must do to open your store.
If you have any difficulty, contact your installer.
PrestaShop is a copyright of Bruno Leveque. This Quick Start Guide is an excerpt from SHOWME™ Guides' PrestaShop
User Manual ©2008 Pithy Productions, Inc. www.osCommerceManuals.com. THIS PRESTASHOP QUICK START GUIDE
MAY BE REDISTRIBUTED IF THIS ENTIRE COPYRIGHT STATEMENT REMAINS INTACT.
Like this free guide? You'll love the full PrestaShop User Manual. Get it from www.osCommerceManuals.com.
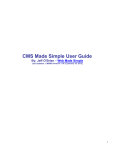
Log onto your New PrestaShop Back Office for the First Time
Using your web browser such as Internet Explorer, go to the following
address:http://www.yourdomainname.com/admin.
If you receive a security warning that says the certificate does not match the name of your
site, relax if you are temporarily using your web host's security certificate which is not the
same domain name as yours. Before your store opens, have your own certificate installed
by your web host so your customers are not scared by the same warning.
This brings you to your new Back Office Login Panel:
1
Quick Start Guide Chapter excerpted from ShowMe Guides PrestaShop User Manual
www.oscommercemanuals.com
TIP: BOOKMARK your new Back
Office page or add it to your
browser's “FAVORITES” List NOW!
You will be going there every day
from now on to check and pick up
orders.
TIP: If you forget the password, click “Lost password?” and look for a message at the email
address you gave during installation.
ENTER the email address and password you selected during installation or in your pre-setup
checklist.
This brings you to your MAIN BACK OFFICE PAGE:
2
Quick Start Guide Chapter excerpted from ShowMe Guides PrestaShop User Manual
www.oscommercemanuals.com
Click to enlarge
TIP: If the enlarged picture is not clear, hold your mouse over it and click the "Enlarge"
Button that appears:
TIP: The instructions in this book just use the address "yourstorename.com/admin" but if
your store back office address includes "catalog" "shop" or something similar, just
substitute that.
Use the Main Back Office Administration Menu
TIP: The tiny blue clocks above tell you how much time and effort a task will take. Hold
your mouse over the clock (without clicking) for a detailed explanation. One clock means
easy and quick, anybody can do it!
To make changes to your store in PrestaShop, you will click a tab in the top navigation bar, click a
sub-item name, fill in a form box to change it, and click a SAVE Button.
The following six tabs MUST be changed when you first set up your store, and are covered here in
this Quick Start Guide. There are also many optional settings that are covered in later, detailed
chapters of this book. For now, we just want to get you up and operating quickly.
Note: we will not actually DO these items from left tab to right, because some default items need to
be done first. This just shows you the tabs you must click.
3
Quick Start Guide Chapter excerpted from ShowMe Guides PrestaShop User Manual
www.oscommercemanuals.com
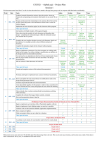
1. CATALOG menu: Product Info. Enter product information and assign products to
categories, like departments of a store. Specify names of manufacturers of your
products.
2. PAYMENT menu : Set default currency (dollars, euros, etc.). Link to Credit Card,
PayPal, or specify if customers can pay with checks; select currencies you will accept
and countries from which you will accept orders. Set tax rates. Optional: set up gift
vouchers.
3. SHIPPING menu: Specify fees by carrier, geographical zone, and ranges; add
handling fees and/or free shipping; specify whether shipping fees are billed by weight or
price.
4. MODULES menu: Select payment modules, turn on Information box ("Block") and
select pages for Information box to display; turn on new order alerts. Many optional cool
items such as Customer Loyalty & Rewards programs, Tag blocks, Quick Search,
Wishlists. For best results keep optional modules to a minimum until AFTER your store
is launched and tested.
5. PREFERENCES menu: Miscellaneous configuration. Set default weight (pounds or
kilograms). Turn off requirement for customers to accept or decline terms of service
before processing the order; turn off gift wrapping offer.
6. TOOLS-CMS: Content Management Set Informational text on About Us, Terms &
Conditions of Use, Legal Notice, Delivery, Secure Payment pages - or add additional
pages - as easily as typing an email.
This Quick Start Guide will guide you through the menus to accomplish the following tasks
IN THE FOLLOWING ORDER. Detailed instructions for each step follow this summary.
Quick Start Summary:
1. Select default currency, weight measure, and manufacturers
2. Specify payment methods, currencies you will accept, zones and taxes
3. Set shipping & handling fees
4. Select additional optional modules
5. Misc. preferences
6. Content management of extra pages
7. Finally, enter your product information
4
Quick Start Guide Chapter excerpted from ShowMe Guides PrestaShop User Manual
www.oscommercemanuals.com
If you have any difficulty, ask your installer or turn to the detailed chapters.
1. Set your default currency, weight measures, and manufacturers
In order to begin adding products to our store, we first specify the currency (dollars, euros, etc.),
weights (pounds or kilos), and some manufacturers names (optional) so they display correctly in
your Back Office.
A. Set your default currency
From your Back Office's top navigation bar, click the PAYMENT tab, then click the CURRENCIES
link. This brings you to the Currencies screen. SCROLL DOWN to the Currencies Options section,
and from the Default Currency drop-down menu, select DOLLAR, then click the SAVE Button:
5
Quick Start Guide Chapter excerpted from ShowMe Guides PrestaShop User Manual
www.oscommercemanuals.com
B. Set your shop's weight measures
Next, set the weight you want to display in your shop. From your Back Office's top navigation bar,
click the PREFERENCES Tab, then click the LOCALIZATION link. This brings you to the
Localization screen.
Simply type the weight unit you wish to use, i.e. Lb., then click the SAVE Button:
C. Set your manufacturers' names
If your customers will shop for branded merchandise, such as Dell Computers, Microsoft Software,
Levi's Jeans, etc., specify the manufacturer names so your customers can search in your store and
display only that brand.
You need to insert the manufacturer's name before adding the product to your Back Office, or the
manufacturer's name will not appear on the Product Information page.
To begin adding a manufacturer's name, from your Back Office's top navigation bar, click the
CATALOG tab, then click the MANUFACTURERS link. This brings you to the Manufacturers
screen.
•
•
•
•
6
To ADD a new Manufacturer name, click the ADD NEW link. See additional steps below.
To VIEW existing Manufacturer information, click the VIEW Icon (magnifying glass).
To EDIT Manufacturer information, click the EDIT Icon (notepad and pencil). See additional
steps below.
To DELETE a Manufacturer, click the Red X Icon.
Quick Start Guide Chapter excerpted from ShowMe Guides PrestaShop User Manual
www.oscommercemanuals.com
Additional steps for adding or editing a manufacturer
After clicking Add or Edit, the edit manufacturer screen comes up. Enter information as follows:
•
•
•
Name: Manufacturer's name.
Description: A brief description.
Logo: (OPTIONAL) Click the BROWSE Button to find the manufacturer's logo on your
computer.
When finished, click the SAVE Button. Repeat for each manufacturer.
7
Quick Start Guide Chapter excerpted from ShowMe Guides PrestaShop User Manual
www.oscommercemanuals.com
3. Specify payment methods, currencies you will accept, taxes
and countries
Next link to Credit Card, PayPal, or specify if customers can pay with checks; select currencies you
will accept and countries from which you will accept orders. For the Quick Start we will set up
PayPal; however, you may select any of the alternate methods by going to the detailed chapter.
TIP: Installing modules is always a two-step process: 1 - click the INSTALL button if it is not
already installed; and 2 - click the CONFIGURE link to set it up.
To select the PayPal payment method, from your Back Office's top navigation bar, click the
PAYMENT tab, then scroll down until you find the PAYPAL Module.
If it is not already installed, start by simply clicking the INSTALL Button.
Then click the CONFIGURE link:
This brings you to the PayPal Module:
8
Quick Start Guide Chapter excerpted from ShowMe Guides PrestaShop User Manual
www.oscommercemanuals.com
Enter the email address you used when you registered with PayPal.com. Leave "Sandbox mode"
to NO to do real transactions; set it to YES if you wish to make test purchases in your store that do
not actually get deducted.
Click the UPDATE SETTINGS Button when you are finished.
TIP: Be sure to set "Sandbox" (Test) mode back to NO when you are ready to open your
store!
Additional step at paypal.com required to use PayPal with
PrestaShop:
In order to use your PayPal payment module, you have to configure your PayPal account. Log in to
PayPal and follow these instructions.
In Profile > Selling Preferences > Instant Payment Notification Preferences, set:
- Instant Payment Notification (IPN) to On,
- Instant Payment Notification (IPN) URL to
http://yourdomainname.com/modules/paypal/validation.php
In Profile > Selling Preferences > Website Payment Preferences, set:
- Auto Return : Off,
- Payment Data Transfer to Off.
- In Shipping Calculations, check "Click here to allow transaction-based shipping values to override
the profile shipping settings listed above"
- Your PayPal email address must be verified.
See detailed chapter for additional help.
Setting Your Zones and Taxes
9
Quick Start Guide Chapter excerpted from ShowMe Guides PrestaShop User Manual
www.oscommercemanuals.com
If some or all of your merchandise is taxable, you must set "Enable tax" to YES, tell PrestaShop
where to collect taxes (Zones and/or State), then tell PrestaShop how much tax to collect.
•
•
•
STEP 1. Turn taxes on or off.
STEP 2. Create the Zone(s).
STEP 3. Create the Tax Rate(s).
CAUTION: Check with your accountant or lawyer so you know exactly what taxes to
charge.
STEP 1. Turn taxes on or off.
If the merchandise you sell in your store is not taxable in your area, simply turn off taxes.
To turn OFF taxes in your store, from your store's Back Office, in the top navigation bar, click the
PAYMENT tab and click the TAXES link, click No, then the SAVE Button:
STEP 2. Create the Zone(s).
Zones are used for both shipping and tax calculations.
A Zone can be any size, from several countries down to a city or even a local precinct.
To create a Zone, from your store's Back Office, in the top navigation bar click the SHIPPING tab,
then click ZONES.
Next click the link, Add New:
Enter a name for the zone, and click the SAVE Button.
10
Quick Start Guide Chapter excerpted from ShowMe Guides PrestaShop User Manual
www.oscommercemanuals.com
STEP 3. Create the Tax Rate(s).
Tell PrestaShop how much tax to collect for customers in the zone(s).
To create a Tax Rate, from your store's Back Office, in the top navigation bar click the PAYMENT
tab, then click TAXES.
Next click the link, Add New:
NAME: type a name that explains the tax to your customer.
RATE: type the tax rate you are required to collect.
ZONE or STATE: select either the Zone or the state in which you must collect the tax.
Do not select BOTH.
11
Quick Start Guide Chapter excerpted from ShowMe Guides PrestaShop User Manual
www.oscommercemanuals.com
When you are finished, click the SAVE Button.
IMPORTANT: Delete the sample data by clicking the red X, then clicking the OKAY button,
or all your customers in the sample zones will be charged the sample tax!
If you try to create the tax first then create the zone, the tax will not display properly. Start
over by deleting the tax, creating the zone, THEN the tax.
12
Quick Start Guide Chapter excerpted from ShowMe Guides PrestaShop User Manual
www.oscommercemanuals.com
TIP: If you ALSO select US, the tax will be applied to ALL US customers.
4. Set shipping & handling fees
For your customers' shipping charges to automatically be calculated online, you need to specify
shipping fees. See detailed instructions including rates and contact information in the Shipping
chapter.
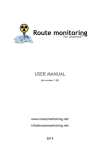
HANDLING CHARGES: If you
wish to set a per-order handling
charge, i.e. cost for your labor
packing and shipping the item,
enter it here.
FREE SHIPPING STARTS AT
(PRICE): If you wish to offer
free shipping over a certain
dollar size order, enter the
dollar amount here.
FREE SHIPPING STARTS AT
(WEIGHT): If you wish to offer
free shipping over a certain
package weight, enter it here.
BILLING: According to total
price OR total weight - select
one.
When you are finished,
click the SAVE Button.
13
Quick Start Guide Chapter excerpted from ShowMe Guides PrestaShop User Manual
www.oscommercemanuals.com
5. Select additional optional modules
Select payment modules, turn on Information box ("Block") and select pages for Information box to
display; turn on new order alerts. Many optional cool items such as Customer Loyalty & Rewards
programs, Tag blocks, Quick Search, Wishlists. For best results keep optional modules to a
minimum until AFTER your store is launched and tested.
Because these modules are optional, we do not cover them here. See the detailed PRODUCT
MANAGEMENT chapter for additional help.
6. Miscellaneous preferences
Turn off requirement for customers to accept or decline Terms of Service before processing the
order; turn off gift wrapping offer; display customer's last shopping cart after they log in, specify
Contact Us page details; check other preferences.
These are annoying things that can be difficult to find. They are in the Preferences tab. We
recommend looking at all tabs in this menu, but at a minimum editing the General and Contact
screens.
To begin editing your miscellaneous preferences, from your Back Office's top navigation bar tab,
click the PREFERENCES tab. This brings you to the GENERAL preferences, a very long screen
(only part of the screen is shown below). Scroll down to the bottom to check and/or edit the
following, and click the SAVE Button when finished:
14
Quick Start Guide Chapter excerpted from ShowMe Guides PrestaShop User Manual
www.oscommercemanuals.com
Next, still in the PREFERENCES tab, click the CONTACT link.
This brings you to the Contact Details screen that is displayed on your Contact Us page and in emails, page titles and on your store's invoices.
CAUTION: You must balance your own security with your customers' need to know. If you
do not give ANY contact information, your potential customers may worry that you are a
scammer and not buy from you. On the other hand, if you work from home, do not give out
personal information - get a PO Box instead.
Add your address, zip, phone and contact information as desired, and click the SAVE Button.
15
Quick Start Guide Chapter excerpted from ShowMe Guides PrestaShop User Manual
www.oscommercemanuals.com
7. Content management of additional pages
TOOLS-CMS: Content Management Edit pages About Us, Terms & Conditions of Use, Legal
Notice, Delivery, Secure Payment pages - or add additional pages - as easily as typing an email.
To add or edit information pages, from your Back Office's top navigation bar, click the TOOLS tab,
then click the CMS Link.
This brings you to the CMS Screen.
16
Quick Start Guide Chapter excerpted from ShowMe Guides PrestaShop User Manual
www.oscommercemanuals.com
•
•
•
•
•
To ADD a new page, click ADD NEW. See additional step below in ADDING OR EDITING A
PAGE.
To VIEW an existing page, click the VIEW icon (magnifying glass).
To EDIT a page, click the EDIT icon (pencil & paper). See additional step below in ADDING
OR EDITING A PAGE.
To DELETE a page, click the red X icon.
To DELETE MULTIPLE PAGES, put a check in the left box, then click the DELETE
SELECTION Button and click the OKAY Button.
ADDING or EDITING a page
After clicking the Add New or EDIT Icon, it brings you to the CMS Edit screen.
Enter information as follows:
•
•
•
•
•
Meta Title: The title to appear at the top and in search engine results.
Meta description: The description to appear in search engine results.
Meta keywords: Words customers will use to find this page.
Friendly URL: A descriptive name instead of a number as the file name in the browser's
address bar; helps customers understand the page and helps search engines find you
better. NOTE your web host must allow this - if it doesn't seem to work, ask your web host
about it.
Page content: The actual page text.
When finished, click the SAVE Button.
17
Quick Start Guide Chapter excerpted from ShowMe Guides PrestaShop User Manual
www.oscommercemanuals.com
7. Enter Product Information
The CATALOG menu
Before you can add your own products, you must first create a Category for it. The Category is like
a department in a non-online store.
To add a new category, from the top navigation tabs click the CATALOG tab, then click ADD A
NEW SUBCATEGORY as shown below:
18
Quick Start Guide Chapter excerpted from ShowMe Guides PrestaShop User Manual
www.oscommercemanuals.com
TIP: Curious about an item? For a clue about any item, put your mouse
over the icon:
Each item is also covered in detail later in this book.
TIP: If you are still not sure about an item after reading about it in this
Quick Start section, turn to the detailed section of this manual or ask your
installer for help.
Adding your First Category:
To add a new category, from your categories/products menu shown above, click the NEW
CATEGORY Button and fill in the following:
19
Quick Start Guide Chapter excerpted from ShowMe Guides PrestaShop User Manual
www.oscommercemanuals.com
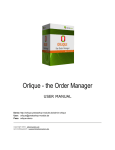
Name: what link do you
want to appear in the
Categories InfoBox shown
above?
Displayed: click the green
checkmark to display, the
red x to hide.
Parent category: If you
want it to be linked from
the top, select HOME.
Otherwise to make it a
subcategory click the
category under which you
want it to appear.
Description: what
descriptive text do you
want to appear below the
page heading title?
Image: If you wish to
attach a category image,
click the BROWSE Button
and find the image on your
computer. Otherwise, skip
for now, you can always
add later.
Meta title: The words you
want to appear in the
customer's top browser
bar, words that describe
this page.
Meta description: the
description you want
search engines to see and
display.
Meta keywords:
keywords you think
customers will use when
searching for a website like
yours.
Friendly URL: the web
address you would like to
display in your customers'
browser address box and
for search engines to find
and display (optional).
After you have made your changes, click the SAVE Button.
20
Quick Start Guide Chapter excerpted from ShowMe Guides PrestaShop User Manual
www.oscommercemanuals.com
Look at your new category in your store - see what your customer sees - before continuing.
To look at your new category, in your browser like Internet Explorer, type the address of
your store, then click the new category link you see in the Category InfoBox.
Adding your first new product:
To add your first product, you start by telling your store what category you will want to place your
new product in.
In your store Back Office, under Catalog - Categories/Products, click the new category name to
SELECT it. In this example, we are adding a guitar, so we select the GUITARS category:
TIP: You can always move a product if you put it in the wrong
category.
Next click ADD A NEW PRODUCT:
This brings you to the very long Product Information screen. For a Quick Start, you must fill in the
following boxes (see more info below picture):
21
Quick Start Guide Chapter excerpted from ShowMe Guides PrestaShop User Manual
www.oscommercemanuals.com
NAME: Enter a descriptive name for your product. Your customers will see this name.
STATUS: Click ENABLED for the product to display in your shop or DISABLED to hide it.
MANUFACTURER: (optional) Select a manufacturer if you have added them, or click CREATE. Use only if you sell branded
merchandise that customers must search for by name.
22
Quick Start Guide Chapter excerpted from ShowMe Guides PrestaShop User Manual
www.oscommercemanuals.com
TIP: YOU WILL LOSE YOUR WORK if you click CREATE NOW. Finish editing the product, then create a manufacturer
or supplier and add it to this product.
SUPPLIER: (optional) If you wish your Back Office to track your suppliers, select a supplier name if you have added them, or click
CREATE. Use only if you sell branded merchandise that customers must search for by name.
REFERENCE: Create a model number or code for this product.
EAN13: European Article Number or UPC bar code number. more info
SUPPLIER REFERENCE: (optional) Your supplier's model number.
LOCATION: (optional) Where you purchase the item.
WEIGHT: Product weight, necessary for shipping calculations.
DOWNLOADABLE? Check if this is a virtual product such as software, music, ebooks that customers will download from your store.
PRE-TAX WHOLESALE PRICE: (optional) The price you pay your supplier.
PRE-TAX RETAIL PRICE: The price you want your customers to pay.
TAX: If you are required to charge tax on this item, select the tax you have previously created or go back to the tax section and
create the tax. You may also save your work and return later to insert the tax.
RETAIL PRICE WITH TAX: This is a calculated field.
ECO-TAX: Some European countries are required to charge eco-tax. It is calculated from the product price.
REDUCTION AMOUNT: Set a sale discount in either dollars (i.e. $10.00 off) or as a percent (i.e. 20% off).
AVAILABLE FROM: Sale dates, will automatically show and then remove the sale pricing on these dates.
DISPLAY "ON SALE" ICON: Check to display this icon:
23
Quick Start Guide Chapter excerpted from ShowMe Guides PrestaShop User Manual
www.oscommercemanuals.com
QUANTITY: If you wish to use your store to track stock and stop selling when stock is low, enter the quantity.
DISPLAYED TEXT WHEN IN STOCK: Example, "In stock now!"
DISPLAYED TEXT WHEN ALLOWED TO BE BACKORDERED: Example, "Accepting orders, will be in stock soon!"
DEFAULT CATEGORY: Select the category in which you wish this product to appear.
CATALOG: Select additional categories if you wish this product to appear in other categories.
CLICK HERE TO IMPROVE PRODUCT'S RANK IN SEARCH ENGINES: The following four items will appear:
META TITLE: Give a detailed name that will appear in search engines and in the product page's top browser bar.
META DESCRIPTION: Give a detailed, one-sentence description using words that customers may use to search for
this product. Approx. 25 words or less.
META KEYWORDS: Keywords that customers may use to search for this product, separated by commas. Be sure to
also use these words in your product description.
FRIENDLY URL: Instead of a number for this page file name, a descriptive name separated by dashes (-) NO
SPACES to help search engines find this item.
24
Quick Start Guide Chapter excerpted from ShowMe Guides PrestaShop User Manual
www.oscommercemanuals.com
SHORT DESCRIPTION: A short caption to appear under your product image.
DESCRIPTION: The longer description to go on the product information page.
TAGS: Tags if you are using the optional Tags Module. more info
ACCESSORIES: If you have defined accessories, select one. Otherwise wait until you have clicked the SAVE Button, then click the
ADD AN ACCESSORY Icon (green +).
When you are finished, be sure to click the SAVE AND STAY Button to continue editing, or SAVE AND BACK TO CATEGORY to
move to the next tab, IMAGES.
25
Quick Start Guide Chapter excerpted from ShowMe Guides PrestaShop User Manual
www.oscommercemanuals.com
IMAGES TAB
FILE: Click the BROWSE Button to select the product picture from your computer. See Chapter 4 for "Creating Good Product
Photos With Paint Shop Pro or Photoshop"
CAPTION: Words that you want to appear when the customer puts their cursor on the picture, like so:
COVER: Check this box to use this image as the main product image.
THUMBNAILS RESIZE METHOD: Select Automatic for the program to resize images, or Manual if you will create and upload them
manually.
When you are finished, be sure to click the SAVE IMAGES Button.
26
Quick Start Guide Chapter excerpted from ShowMe Guides PrestaShop User Manual
www.oscommercemanuals.com
IMAGE MANAGEMENT:
If you have more than one image, to move the image UP click the UP ARROW Icon.
To move the image down click the DOWN ARROW Icon.
To use the selected image as the main photo, check the COVER Icon.
To edit the image, click the EDIT Icon (pencil and paper).
To delete the image, click the DELETE Icon (red X).
IMPORTANT! IF you fail to specify a product weight, or if you enter a weight of zero, the
program thinks it is a downloadable product and will NOT charge shipping!
For detailed assistance, and lots more pictures, or if you need to set up product sizes,
colors, or other attributes, turn to the PRODUCT MANAGEMENT chapter or contact your
installer for help.
(OPTIONAL) Combinations, Features, Customization & Discounts
Tabs
These optional tabs allow you to customize and add extra functionality to your product descriptions.
See the detailed PRODUCT MANAGEMENT chapter for additional help.
This completes your Quick Start! If you want detailed information on any of the subjects covered
here, turn to the corresponding chapter in this book.
TALK BACK! Did you want more information on anything in this chapter? Click here to
let us know!
Return to Table of Contents
Go to Next Chapter
PrestaShop is a copyright of Bruno Leveque. This Quick Start Guide is an excerpt from SHOWME™ Guides' PrestaShop
User Manual ©2008 Pithy Productions, Inc. www.osCommerceManuals.com. THIS PRESTASHOP QUICK START GUIDE
MAY BE REDISTRIBUTED IF THIS ENTIRE COPYRIGHT STATEMENT REMAINS INTACT.
Like this free guide? You'll love the full PrestaShop User Manual. Get it from www.osCommerceManuals.com.
27
Quick Start Guide Chapter excerpted from ShowMe Guides PrestaShop User Manual
www.oscommercemanuals.com