1
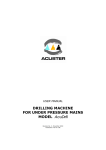
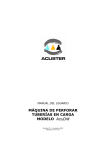
USER MANUAL
DRILLING MACHINE
FOR UNDER PRESSURE MAINS
MODEL AcuDrill Plus
Revision Nº 3 - November 2010
Publication: MU-41-15E
NOTES !
The modifications carried out against the previous revision of this
publication are indicated with 2 on the right margin.
USER MANUAL
AcuDrill Plus DRILLING MACHINE
CONTENTS:
Page:
CHAPTER 1:
INTRODUCTION..................................................................
1.1
Introduction.............................................................
1.2
General information...................................................
1.3
“CE” declaration of conformity....................................
1.4
Guarantee................................................................
4
4
5
6
7
CHAPTER 2:
MACHINE DESCRIPTION.......................................................
2.1
Components of the drilling machine.............................
2.2
Machine accessories..................................................
2.3
Hole saws diameters and characteristics.......................
8
8
10
11
CHAPTER 3:
MODE OF USE.....................................................................
3.1
Machine application layout.........................................
3.2
Drilling under pressure over flanged branch connections
3.2.1 Initial operations.............................................
3.2.2 Branch connection installation...........................
3.2.3 Assembly of the valve......................................
3.2.4 Assembly of drilling machine............................
3.2.5 Pressure test..................................................
3.2.6 Drilling the mains............................................
3.2.7 Disassembly of the machine and accessories.......
3.2.8 Connecting the branch connection.....................
3.3
Drilling over threaded outlet saddles............................
3.3.1 Initial operations.............................................
3.3.2 Saddle installation...........................................
3.3.3 Assembly of the valve......................................
3.3.4 Assembly of drilling machine............................
3.3.5 Pressure test..................................................
3.3.6 Drilling the mains............................................
3.3.7 Disassembly of the machine and accessories.......
3.3.8 Connecting the branch connection.....................
12
12
13
13
13
13
14
15
15
16
17
18
18
18
18
18
20
20
21
22
CHAPTER 4:
MAINTENANCE.................................................................... 23
4.1
General information................................................... 23
CHAPTER 5:
TECHNICAL CHARACTERISTICS............................................. 24
Edition: November 2010
Revision: No. 3
GENERAL CONTENTS -
3
USER MANUAL
AcuDrill Plus
DRILLING MACHINE
CHAPTER 1: INTRODUCTION
1.1
INTRODUCTION
The AcuDrill Plus drilling machine is especially designed to drill on mains, under pressure
or pressureless, on any type of material: gray-iron casting, ductile casting, PVC, PE, PP,
asbestos cement, polyester, clay, steel, etc. For drilling mains under pressure, the
maximum allowable pressure is 16 bar (for water mains).
It is specially designed to be used over:
C
All kind of DIN flanged branch connections:
T-clamps with flange connection (such as the Acuster’s ARH branch T-clamp), or
any clamp or fitting with flange connection.
The available flange adapters for the drilling machine go from DN65 up to DN200
(PN10/PN16).
This option allows holes of up to 185 mm diameter to be drilled, using standard
hole saws (of high-speed steel, tungsten carbide, etc), long series hole saws
(according to the pipe wall thickness to be drilled) or hole saws for plastics (PE,
PVC, PP) and coupon retainer-equipped pilot dill.
C
Threaded outlet saddles:
Also it is used to drill over any saddle or ferrule with threaded outlets of 2", 2½”
and 3" BSP. It allows holes from 32 up to 76 mm diameter to be drilled, using
standard hole saws (of high-speed steel, tungsten carbide, etc), long series hole
saws (according to the pipe wall thickness to be drilled) or hole saws for plastics
(PE, PVC, PP) and coupon retainer-equipped pilot dill.
The assembly of the different drilling accessories to the drilling machine is done by means
of a flange which is provided with lossless anchoring screws and a venting valve for
depressurizing and pressurizing test operations. The assembly to the threaded outlet
saddles is achieved by a 3" threaded dome on which the three possible thread adapters
((2", 2½” and 3" BSP) are fitted to. In case of fitting the flange adapters to the drilling
machine, the smallest flange adapter of DN65 / DN80 is directly screwed in the 3" dome
whereas the rest of flange adapters (DN100 / DN125, DN150 and DN200) are directly
fitted on the drilling machine mounting flange.
The size range of hole saws are mounted on a modified universal arbor which is installed
and removed from the chuckshaft without any threaded connection, just using an
anchoring locking pin. The hole saw arbor is provided with a 9 mm pilot drill with coupon
retainer. Depending on the hole saw diameter, a transmission disc must be used which
is supplied separately.
The chuckshaft can be fixed in four different positions according to the position of the
accessories to be drilled. Its length allows it to drill through valves of sizes up to DN200
(short series), assembled on the corresponding pipeline flanged T-clamp.
4
- INTRODUCTION
Edition: November 2010
Revision: No. 3
USER MANUAL
AcuDrill Plus
DRILLING MACHINE
The machine is equipped with an absorbing mechanism that ensures a soft and regular
operation system of the drill and hole saw over the pipe during drilling, absorbing
excessive feed that could lead to blocking of the hole saw, allowing continuous drilling.
It can be operated manually by means of a ratchet wrench, although it is designed to be
used through a swivel gear with an electric actuator.
The basic set includes the machine body with its chuckshaft, a 3" dome, a modified
universal hole saw arbor with pilot drill (with coupon retainer system), a 3/4" ratchet
wrench, in addition to carrying case with User Manual. The rest of components and
accessories are supplied separately although on the carrying case foam the necessary
rooms to locate the 80-120 mm hinged pin key, the three threaded adapters, the
DN65/DN80 flange adapter, the plug carrier and the adapter for the electric actuator are
already prepared. The remaining three flange adapters are supplied with its own package.
The technical information provided in this Manual is purely informative, and subject to
change without prior notification. ACUSTER, S.L. shall not be responsible for any claims
derived from misuse of this publication or any errors and/or omissions that could be
detected in it following its publication.
1.2
GENERAL INFORMATION
The development, documentation, production, testing and shipping of the products
described have been performed:
C
C
in compliance with the applicable safety rules, and
in accordance with the Acuster, S.L. quality assurance requirements.
WARNING !
Only qualified personnel are authorized to perform drilling work with the
AcuDrill Plus drilling machine. Qualified personnel must be familiar with all
safety measures, potential hazards and maintenance rules described in
this Manual.
The safe usage of the products described herein requires appropriate
transport, storage, installation and use, careful treatment and compliance
with the pre-established regular maintenance.
Edition: November 2010
Revision: No. 3
INTRODUCTION -
5
USER MANUAL
AcuDrill Plus
1.3
DRILLING MACHINE
“CE” DECLARATION OF CONFORMITY
ACUSTER, S.L.
Juan de la Cierva, 1
Polígono Industrial Nº 1
08960 Sant Just Desvern
we declare, under our sole responsibility that the AcuDrill Plus drilling machine
has been manufactured in compliance with the following specifications:
Directive
2006/42/CE
Machine safety Directive
Related specification
EN-ISO 12100-1
EN-ISO 12100-2
Model
AcuDrill Plus
Sant Just Desvern, 3rd September 2007
Ramon García Solé
6
- INTRODUCTION
Edition: November 2010
Revision: No. 3
USER MANUAL
AcuDrill Plus
1.4
DRILLING MACHINE
GUARANTEE
Guarantee declaration:
All AcuDrill Plus drilling machines are manufactured from high quality material
and have been subjected to rigorous tests for resistance and working order as
well as passing all the quality control tests required by the applicable normative
(see "CE" Declaration of conformity).
Regardless of whether an incident might occur during the period of guarantee,
we recommend a careful reading of the following general guarantee conditions.
General conditions of Guarantee:
1.
ACUSTER S.L. guarantees that this product has no manufacturing defect
at the time of its purchase and extends this guarantee for the period of
TWO years.
2.
If the product proves defective during this period, due to the materials
or its assembly, it will be repaired free of charge, including the cost of
materials and labour at Acuster, S.L.'s Technical Service.
3.
The Guarantee is not valid in the following cases:
When the fault in the product is a result of:
!
!
!
!
4.
Edition: November 2010
Revision: No. 3
Usual wear and tear due to usage.
Abuse or incorrect use of the unit
Repairs carried out without authority from Acuster, S.L..
Accidents, natural disasters (including lightning, water action etc)
as well as any cause beyond Acuster, S.L.'s control.
In all claims against this guarantee, information relating to the model,
date of purchase, Serial number and any other additional information
must at all times be stated.
INTRODUCTION -
7
USER MANUAL
AcuDrill Plus
DRILLING MACHINE
CHAPTER 2: MACHINE DESCRIPTION
2.1
COMPONENTS OF THE DRILLING MACHINE
The AcuDrill Plus drilling machine assembly is made of the following components:
Figure 1
1
2
3
4
5
8
Carrying case with die cut foam
Drilling machine
Modified universal hole saw arbor ($32 mm) with pilot drill with coupon retainer
3" dome
3/4" ratchet wrench
- MACHINE DESCRIPTION
Edition: November 2010
Revision: No. 3
USER MANUAL
AcuDrill Plus
DRILLING MACHINE
Main parts of the AcuDrill Plus drilling machine:
1
2
3
4
5
6
7
8
Connecting flange with spindle
Includes four lossless screws and a front oring for the 3" dome and flange adapters
tightness.
Venting valve
PN16
valve
for
depressurizing
and
pressurizing test operations.
Machine body
Includes end travel mechanism and
absorbing mechanism to optimize drilling
power.
CE identification plate
Marking pursuant to Machinery Safety
Directive.
End travel mechanism
Blocks the machine’s end travel but allows a
manual release through the retractable
handle.
Chuckshaft
Features four fastening openings to select
the most appropriate length for drilling.
Absorbing mechanism
Assembly which includes the absorbing
mechanism.
Chuckshaft fastening mechanism
This allows quick and safe fastening of the
chuckshaft to the fastening bush.
In case of carrying out an automatic drilling
through an electric actuator, this fastening
mechanism should be replaced by an
adapter.
Figure 2
Edition: November 2010
Revision: No. 3
MACHINE DESCRIPTION -
9
USER MANUAL
AcuDrill Plus
2.2
DRILLING MACHINE
MACHINE ACCESSORIES
The AcuDrill Plus drilling machine also features the following accessories:
Figure 3
1
2
3
4
5
6
7
8
Saddle adapter kit on three different sizes: 2", 2½" y 3".
1a
Saddle adapter.
1b
Gasket (metal-rubber washer for 2" adapter and o-ring for 2½" and 3"
adapters).
1c
Variable pitch hole saws of 46, 60 and 76 mm, respectively.
In addition to the hole saws sizes indicated above, other optional sizes can
be ordered.
There are special hole saws for drilling PE pipes.
For additional information, refer to clause 2.3 of this Manual.
80-120 mm hinged pin key.
Hole saw transmission discs.
For hole saws from 76 to 105 mm.
For hole saws from 108 to 152 mm.
Flange adapters of PN10/PN16.
4a
DN65/DN80 >
Threaded connection to the 3" dome.
4b
DN100/DN125, DN150 and DN200 >
Screwed in the machine flange
Plug carrier, 19 mm squared size.
Adapter for electric actuator.
Chuckshaft extension (it provides an additional length of 100 mm).
Shaft retention tool.
10 - MACHINE DESCRIPTION
Edition: November 2010
Revision: No. 3
USER MANUAL
AcuDrill Plus
2.3
DRILLING MACHINE
HOLE SAW DIAMETERS AND CHARACTERISTICS FOR ACUDRILL & ACUDRILL PLUS
ADAPTER
SIZE
ADAPTER
INSIDE
DIAMETER
3/4"
HOLE SAW DIAMETER (MAX*)
APPLICATION
Bi-metal
HSS
Tungsten
Carbide Grit
Carbide
Tipped
For plastic
pipes
20
19
19
19
19
AcuDrill
1"
245
22
22
22
22
AcuDrill
1¼”
325
30
29
30
29
AcuDrill
1½”
375
33
32
33
35
AcuDrill
2"
49
46
44
46
48
AcuDrill+Acudrill Plus
2½”
65
60
60
60
60
AcuDrill Plus
3”
78
76
76
75
76
AcuDrill Plus
DN65/80
78
60 / 76
60 / 76
60 / 75
62/76
AcuDrill Plus
DN100/125
125.8
95 / 121 95 / 121 95 / 121 98/114
AcuDrill Plus
DN150
160.3
146
146
146
133
AcuDrill Plus
DN200
184.7
177
152
152
160
AcuDrill Plus
GENERAL CHARACTERISTICS
Bi-metal HSS:
Hole saw made of speed steel type M3.
Sizes: from 14 to 210 mm; cutting depth of 35 mm.
Long series: request information (cutting depth of 48 mm).
Application: standard pipelines made of ductile iron, steel and
asbestos cement.
Tungsten carbide grit: Hole saw made of tungsten carbide dust.
Sizes: from 19 to 152 mm; cutting depth of 38 mm.
Application: pipelines made of ductile iron.
Tungsten carbide:
Hole saw made from tungsten carbide tooth welded on a solid
body of special steel.
Sizes: from 19 to 152 mm; cutting depth of 38 mm.
Application: pipelines made of ductile iron and steel.
For plastic pipes:
Hole saw made of tungsten carbide tooth welded on a sheet
body.
Sizes: from 16 to 210 mm; cutting depth of 50-55 mm.
Application: plastic pipelines, such as PE, PP, PVC, etc.
(MAX*) The indicated hole saw diameter is the one recommended based on:
C Available diameters according to the hole saw supplier.
C Maximum diameter depending on the drilling machine adapter used.
C Maximum diameter depending on the saddle, T-clamp, valve (full bore), connecting
accessories, etc., of the DN used.
Edition: November 2010
Revision: No. 3
MACHINE DESCRIPTION - 11
USER MANUAL
AcuDrill Plus
DRILLING MACHINE
CHAPTER 3: MODE OF OPERATION
3.1
MACHINE APPLICATION LAYOUT
The AcuDrill Plus drilling machine can be operated in accordance with the following
combinations:
Figure 4
12 - MODE OF USE
Edition: November 2010
Revision: No. 3
USER MANUAL
AcuDrill Plus
3.2
DRILLING MACHINE
DRILLING UNDER PRESSURE OVER FLANGED T-CLAMP:APPLICATION EXAMPLE USING AN
ACUSTER’S ARH FLANGE CONNECTION (DIN DN80 & DN100 FLANGE)
3.2.1 Initial operations:
Before performing the drilling operations, ensure that you have all the necessary material
and that it is in good condition:
C
C
C
C
C
C
C
C
C
Complete drilling machine.
Modified universal hole saw arbor (with pilot drill installed).
Chuckshaft extension (only for very long T-clamps neck: see information below).
Hole saw of diameter to be used (plus transmission disc for diameter $76 mm).
Flange adapter: DN80 or DN100 for ARH (DN according to the valve to be
installed).
Flat gaskets for DN80 or DN100 (according to the valve to be installed).
Full bore flange-connection gate valve of DN80 or DN100
(according to branch).
Shaft retaining tool (if required).
Tools: flat screwdriver, open-end spanners of 19 and 24 mm,
3/4" ratchet wrench (manual drilling) and electric actuator with
its chuckshaft adapter (if applicable).
3.2.2 Branch connection installation:
The installation of the Acuster’s ARH clamp or equivalent is performed
placing the saddle with its rubber gasket on the pipe (on ARH’s the
gasket is factory glued to the saddle). Next, fasten the clamp between
the saddle and mains (the hinge joints should remain above the
saddle), equally tightening the fastening bolts to ensure tightness.
For more information, refer to Fitting Instructions
included with the accessory.
3.2.3 Assembly of the valve:
Install the full bore flange-connection gate valve. Screw it over the
flange branch connection previously installed on the line. Use the flat
gasket of the proper size.
Leave the gate valve in the fully OPEN position.
Figure 5
Edition: November 2010
Revision: No. 3
MODE OF USE - 13
USER MANUAL
AcuDrill Plus
DRILLING MACHINE
INFORMATION ABOUT VALVE INSTALLATION !
Saddle of flanged T-clamp:
Depending on the dimension H of the saddle, the shaft extension shall be
necessary to be used:
H # 120 mm: without shaft extension.
H > 120 # 220 mm: with shaft extension.
Gate valve:
Depending on the DN used, the dimension L could be different. Side-to-side
flange dimension according to EN 1092-1 for a gate valve VAG EKO PLUS or
equivalent:
DN
SHORT SERIES (F4)
65
170 mm
80
180 mm
100
190 mm
125
200 mm
150
210 mm
200
230 mm
3.2.4 Assembly of the drilling machine:
C
C
Choose the flange adapter which matches the valve flange size installed on the
branch connection. Refer to Figure 6.
> Valve with DN80 flange: install the 3" dome and the DN65/DN80 flange
adapter.
> Valve with DN100 flange: install the DN100/DN125 flange adapter directly on
the drilling machine flange.
Set up the modified universal hole saw arbor with the pilot drill in the chuckshaft.
This step is carried out just the first time of machine operation or when using
the shaft extension. Normally the hole saw arbor keeps always installed in
the chuckshaft: it is not necessary to disassembly it when the drilling is
completed. So, for normal routine applications the assembly of the hole saw
corresponding to the diameter to be drilled would be the standard procedure.
C
C
C
Screw the hole saw matching the size outlet of the branch connection into the hole
saw arbor. For hole saws from 76 mm diameter a transmission disc must be used.
See Figure 7.
Place the body of the machine in its upper position (unscrew it until the end travel
mechanism is released).
Now assemble the AcuDrill Plus drilling machine onto the valve. Install the gasket
of the corresponding size. See Figure 5.
Select the position of the chuckshaft depending on the distance it will have to
travel during drilling (on the current example: ARH clamp + gate valve), placing
the retention mechanism in the most appropriate opening of the four located on
the shaft (locking pin or actuator’s adapter, according to the operation mode
used). See Figure 8.
Slid the chuckshaft downwards till the pilot drill touches the pipe. Then move the
chuckshaft upwards to fit the retention mechanism in the closest shaft opening.
14 - MODE OF USE
Edition: November 2010
Revision: No. 3
USER MANUAL
AcuDrill Plus
DRILLING MACHINE
Figure 6
Figure 7
Figure 8
3.2.5 Pressure test:
Once the drilling machine set and accessories are installed on
the valve, perform a pressure test.
To do so, apply compressed air through the venting valve to
check tightness of the assembly (see Figure 9).
Once the interior is pressurized, and with the venting valve
closed, check for leaks in the connected parts and their gaskets
using a spray detector or soapy water. Correct in case of leaks.
Once the check is complete, open the venting valve to
depressurize, then leaving it in the “closed” position.
Figure 9
3.2.6 Drilling the mains:
Once the pressure test is complete, lower the chuckshaft by rotating the machine body
(with your hand in the knurled area), until the pilot drill makes contact with the pipe (the
chuckshaft will have risen depending on the contact force: see dimension a of Figure 10).
At this point, withdraw the tip of drill from the pipe by approximately one turn.
Now begin drilling the mains by activating the chuckshaft using the ratchet wrench, if
drilling is manual, or through the electrical swivel gear.
SWIVEL GEAR
If an electrical actuation swivel gear (threading machine) is used, the
following considerations must be taken into account:
C The adapter components may be supplied Acuster, S.L.
C The usage and safety recommendation given by the manufacturer must
be followed.
Edition: November 2010
Revision: No. 3
MODE OF USE - 15
USER MANUAL
AcuDrill Plus
DRILLING MACHINE
Feed is achieved by making the machine body rotate (with the
hand placed in the knurled area). Do not exceed the feed
(increasing of dimension a: see Figure 10).
WARNING !
It is recommended to avoid excess of feed,
especially in the pilot drill work phase, given that
the drill could break specially at low revolutions.
Once perforated with the drill, remember that distance a will be
increased by the internal mains pressure. If due to an excess of
compression (feed + internal pressure) the drilling resistance
increases, turn slightly in the opposite direction to release that
increase of drilling resistance.
Figure 10
WARNING !
In case of using an electric threading machine as drilling actuator, take
in mind that an excess of feed results in a high increase of torque which
might lead to a potential risk of accident for the operator.
Depending on the working conditions the drilling operation could be carried out with the
venting valve open to remove chip residues produced during the drilling. Ensure that the
drilling is complete by making one or two additional turns. Close the venting valve in case
it was in the open position.
If a length longer than the machine’s travel is necessary, the drilling can be continued by
moving the retention mechanism to the opening above the one it was fastened to on the
shaft (unless the highest anchoring has been in use). See Figure 8.
3.2.7 Disassembly of the machine and accessories:
Once the mains has been perforated, move the chuckshaft up by turning the machine
body counterclockwise until the end travel mechanism is activated. Because the
chuckshaft has not rose enough to close the valve, proceed with the following steps:
Conventional method (Figure 11a):
Continue withdrawing the chuckshaft by pulling the retention mechanism out of the
opening where it is located on the shaft. To do so, first place the ratchet wrench on the
end shaft 3/4" square and push down to facilitate the retention mechanism removal.
Then, take control with the ratchet wrench of the moving up of the chuckshaft due to
pipeline pressure. The chuckshaft will fully rise until the hole saw is positioned on the
upper part of the dome.
Using the shaft retention tool (Figure 11b):
Install the shaft retention tool. Fix the anchorage plate screwing the knob (1) inside the
existing hole on the drilling machine. Assembly the upper plate in the shaft square end
(2). Slide the nut (3) until it fits in the plate orifice.
16 - MODE OF USE
Edition: November 2010
Revision: No. 3
USER MANUAL
AcuDrill Plus
DRILLING MACHINE
Turn the handle (4) slightly clockwise to be able to remove the bolt of the adapter (5).
Once the adapter bolt removed, turn the handle (4) on the opposite direction to allow the
shaft to go up until the hole saw is positioned on the upper part of the flange adapter
dome.
Figure 11a
Figure 11b
Figure 12
WARNING !
Due to internal mains pressure, the chuckshaft will pop up by itself. Take
the necessary safety precautions to avoid any sort of accident during the
operation.
Carefully open the venting valve to remove chip residues. Next, close the valve again.
Then switch the gate valve to the CLOSED position.
Open again the venting valve to depressurize the drilling machine and to be sure that the
gate valve is fully closed as well.
Disassemble the drilling machine and flange adapter set from the gate valve.
The coupon resulting from drilling the mains will have remained trapped by the pilot drill’s
coupon mechanism. To extract the coupon, disassemble the drill by loosening the
fastening stud. Remove the coupon through the upper part of the drill and fit it to the hole
saw arbor again (place correctly the drill’s slot aligned with the fastening stud position).
See Figure 12.
3.2.8 Connecting the branch connection:
Make the necessary branch connection to the gate valve flange. If required, make a
pressure test of the new connection before opening the valve. Retighten the saddle
branch connection fasteners.
Edition: November 2010
Revision: No. 3
MODE OF USE - 17
USER MANUAL
AcuDrill Plus
3.3
DRILLING MACHINE
DRILLING OVER THREADED OUTLET SADDLES
3.3.1 Initial operations:
Before performing the drilling operations, ensure that you have all the
necessary material and that it is in good condition:
C
C
C
C
C
C
C
Complete drilling machine.
Modified universal hole saw arbor (with pilot drill installed).
Hole saw of diameter to be used.
Threaded adapter (with gasket included) of the diameter of the
thread matching the saddle to be installed.
If the drilling operation is under pressure, intermediate full bore
valve of the size corresponding to the saddle’s threaded outlet.
Adapter fitting (if necessary).
Shaft retaining tool (if required).
Tools: flat screwdriver, open-end spanner of 19 mm, 80-120 mm
hinged pin key, 3/4" ratchet wrench (manual drilling) and electric
actuator with its chuckshaft adapter (if applicable).
3.3.2 Branch connection installation:
The installation of the threaded outlet saddle is performed placing the
saddle and gasket on the pipe. Next, fasten the clamp between the
saddle and mains, equally tightening the fastening bolts to ensure
tightness.
For more information, refer to Fitting Instructions
included with the accessory.
3.3.3 Assembly of the valve (for under pressure drilling only):
Figure 13
Install the full bore intermediate valve (not supplied with the equipment). Screw it directly
(or through an adapter fitting) over the branch connection previously installed on the line.
Put the valve actuation lever in OPEN position.
3.3.4 Assembly of the drilling machine:
C
C
Fit the 3" dome on the drilling machine flange.
Choose the threaded adapter that matches the thread of the saddle and screw it
into the installed dome: adapters of 2", 2½” and 3". See Figure 14.
This assembly can be done manually. If necessary, use the 80-120 mm
hinged pin key.
18 - MODE OF USE
Edition: November 2010
Revision: No. 3
USER MANUAL
AcuDrill Plus
C
DRILLING MACHINE
Set up the modified universal hole saw arbor with the pilot drill in the chuckshaft.
This step is carried out just the first time. Normally the hole saw arbor keeps
always installed in the chuckshaft: it is not necessary to disassembly it when
the drilling is completed. So, for normal routine applications the assembly
of the hole saw corresponding to the diameter to be drilled would be the
standard procedure.
C
Screw the hole saw matching the size outlet of the branch connection into the hole
saw arbor. See Figure 15.
Place the body of the machine in its upper position (unscrew it until the end travel
mechanism is released).
Figure 14
C
Figure 15
Figure 16
With the installed valve actuation lever in the open position (for under pressure
drilling operations), now assemble the AcuDrill Plus drilling machine, screwing it
onto the valve or over the saddle installed on the pipe, depending on the situation.
The adapter must have the gasket installed. See Figure 13.
WARNING !
If the support face of the intermediate valve is not flat enough, apply
Teflon tape to the adapter thread to achieve tightness.
Manually tighten the machine body. If necessary, retighten using a 80-120
mm hinged pin key.
C
Select the position of the chuckshaft depending on the distance it will have to
travel during drilling (under pressure or pressureless drilling operation), placing
the retention mechanism in the most appropriate opening of the four located on
the shaft (locking pin or actuator’s adapter, according to the operation mode
used). See Figure 16.
Edition: November 2010
Revision: No. 3
MODE OF USE - 19
USER MANUAL
AcuDrill Plus
DRILLING MACHINE
WARNING !
Be sure that the retention mechanism is placed in the correct shaft
opening: the hole saw arbor with its hole saw and pilot drill must be
located inside the threaded adapter dome. Modify accordingly.
3.3.5 Pressure test (for under pressure drilling only):
Once the drilling machine set and accessories are installed on the
valve, perform a pressure test.
To do so, apply compressed air through the venting valve to
check tightness of the assembly (see Figure 17).
Once the interior is pressurized, and with the venting valve
closed, check for leaks in the connected parts and their gaskets
using a spray detector or soapy water. Correct in case of leaks.
Once the check is complete, open the venting valve to
depressurize, then leaving it in the “closed” position.
3.3.6 Drilling the mains:
Figure 17
Once the pressure test is complete (for under pressure drilling only), lower the chuckshaft
by rotating the machine body (with your hand in the knurled area), until the pilot drill
makes contact with the pipe (the chuckshaft will have risen depending on the contact
force: see dimension a of Figure 18). At this point, withdraw the tip of drill from the pipe
by approximately one turn.
Now begin drilling the mains by activating the chuckshaft using the ratchet wrench, if
drilling is manual, or through the electrical swivel gear.
SWIVEL GEAR
If an electrical actuation swivel gear (threading machine) is used, the
following considerations must be taken into account:
C The adapter components may be supplied Acuster, S.L.
C The usage and safety recommendation given by the manufacturer must
be followed.
Feed is achieved by making the machine body rotate (with the
hand placed in the knurled area). Do not exceed the feed
(increasing of dimension a: see Figure 18).
WARNING !
It is recommended to avoid excess of feed,
especially in the pilot drill work phase, given that
the drill could break specially at low revolutions.
Figure 18
20 - MODE OF USE
Edition: November 2010
Revision: No. 3
USER MANUAL
AcuDrill Plus
DRILLING MACHINE
Once perforated with the drill, remember that distance a will be increased by the internal
mains pressure (for under pressure drilling operation only). If due to an excess of
compression (feed + internal pressure) the drilling resistance increases, turn slightly in
the opposite direction to release that increase of drilling resistance.
WARNING !
In case of using an electric threading machine as drilling actuator, take
in mind that an excess of feed results in a high increase of torque which
might lead to a potential risk of accident for the operator.
Depending on the working conditions the under pressure drilling operation could be
carried out with the venting valve open to remove chip residues produced during the
drilling. Ensure that the drilling is complete by making one or two additional turns. Close
the venting valve in case it was in the open position.
3.3.7 Disassembly of the machine and accessories:
Once the mains has been perforated, move the chuckshaft up by turning the machine
body counterclockwise until the end travel mechanism is activated.
In case of being installed an intermediate valve and the chuckshaft would not be up
enough, continue withdrawing the chuckshaft proceeding with following steps:
Conventional method (Figure 19a):
Continue withdrawing the chuckshaft by pulling the retention mechanism out of the
opening where it is located on the shaft. To do so, first place the ratchet wrench on the
end shaft 3/4" square and push down to facilitate the retention mechanism removal.
Then, take control with the ratchet wrench of the moving up of the chuckshaft due to
pipeline pressure. The chuckshaft will fully rise until the hole saw is positioned on the
upper part of the dome.
Using the shaft retention tool (Figure 19b):
Install the shaft retention tool. Fix the anchorage plate screwing the knob (1) inside the
existing hole on the drilling machine. Assembly the upper plate in the shaft square end
(2). Slide the nut (3) until it fits in the plate orifice.
Turn the handle (4) slightly clockwise to be able to remove the bolt of the adapter (5).
Once the adapter bolt removed, turn the handle (4) on the opposite direction to allow the
shaft to go up until the hole saw is positioned on the upper part of the flange adapter
dome.
WARNING !
Due to internal mains pressure, the chuckshaft will pop up by itself. Take
the necessary safety precautions to avoid any sort of accident during the
operation.
Edition: November 2010
Revision: No. 3
MODE OF USE - 21
USER MANUAL
AcuDrill Plus
Figure 19a
Figure 19b
DRILLING MACHINE
Figure 20
If the drilling operation was under pressure, carefully open the venting valve to remove
chip residues. Next, close the valve again.
Then switch the intermediate valve to the CLOSED position.
Open again the venting valve to depressurise the drilling machine and to be sure that the
intermediate valve is fully closed as well.
Disassemble the saddle adapter and drilling machine using the 80-120 mm hinged pin
key.
The coupon resulting from drilling the mains will have remained trapped by the pilot drill’s
coupon mechanism. To extract the coupon, disassemble the drill by loosening the
fastening stud. Remove the coupon through the upper part of the drill and fit it to the hole
saw arbor again (place correctly the drill’s slot aligned with the fastening stud position).
See Figure 20.
3.2.8 Connecting the branch connection:
Connect the branch connection to the appropriate outlet for the intermediate valve or
saddle, according to the layout. Retighten the saddle branch connection fasteners.
22 - MODE OF USE
Edition: November 2010
Revision: No. 3
USER MANUAL
AcuDrill Plus
DRILLING MACHINE
CHAPTER 4: MAINTENANCE
4.1
GENERAL INFORMATION
As a general principle, we recommend maintaining the drilling machine (and all
components and accessories) in perfect conditions of cleanliness and lubrication, ready
for use, and stored in their original carrying case.
The preventive maintenance for the equipment is minimal; cleaning and lubricating the
chuckshaft, the optional shaft extension, the spindle threads and machine dome is
sufficient. Monitor the cutting condition of the drill and hole saws before usage. It is
recommended they be replaced in case of fault.
On a regular basis, and especially when the equipment is used over a prolonged period,
we recommend it be sent to the ACUSTER S.L. After-Sales Service Department for a
complete inspection (generally, with time and use, the O-rings and gaskets need to be
changed).
Edition: November 2010
Revision: No. 3
MAINTENANCE - 23
USER MANUAL
AcuDrill Plus
DRILLING MACHINE
CHAPTER 5: TECHNICAL CHARACTERISTICS
Usage
:
Drilling of mains made of steel, gray cast iron, ductile
casting, asbestos cement, clay, polyester, PVC, PE, PP, etc.
Flanged branch connections :
T-clamps with flange connection (such as the Acuster’s ARH
branch T-clamp), or any clamp or fitting with DIN flange
connection, sizes from DN65 up to DN200 (PN10/PN16),
both included .
Threaded outlet saddles
:
Any saddle or ferrule with threaded
outlets of 2", 2½” and 3" BSP.
Maximum drilling capacity
:
Up to φ. 76 mm (threaded
connections)
Up to φ. 185 mm (flanged
connections)
Maximum range
:
141 mm
255 mm
100 mm
396 mm
496 mm
from the machine
body.
from the chuckshaft
(moving the fastening
openings).
Optional shaft
extension.
Total, adding range
travel and fastening
shaft.
Total, adding range
travel, fastening shaft
and shaft extension.
Service pressure
:
16 bar for water mains
Operation
:
Manual by means of a 3/4" ratchet
wrench.
Optionally by means of an electric
swivel gear (threading machine).
Total equipment weight
:
20 kg (including carrying case)
Outer dimensions
:
Carrying case:
Length:
915 mm
Width:
390 mm
Height:
165 mm
Figure 21
24 - TECHNICAL CHARACTERISTICS
Edition: November 2010
Revision: No. 3
USER MANUAL
AcuDrill Plus
DRILLING MACHINE
Weight of optional items:
80-120 mm hinged pin key
:
2" threaded saddle adapter
:
2-1/2" threaded saddle adapter
:
3" threaded saddle adapter
:
DN65/DN80 flange adapter
:
DN100/DN125 flange adapter
:
DN150 flange adapter
:
DN200 flange adapter
:
Transmission disc (76-105 mm hole saws) :
Transmission disc (108-152 mm hole saws):
Plug carrier, 19 mm squared size
:
Adapter for electric actuator
:
Electric actuator (threading machine)
:
Shaft retaining tool
:
Edition: November 2010
Revision: No. 3
0.685 Kg
0.990 Kg
0.810 Kg
0.670 Kg
3.920 Kg
7.735 Kg
10.355 Kg
15.330 Kg
0.230 Kg
0.615 Kg
0.220 Kg
0.425 Kg
8.515 Kg (with carrying case)
1.290 Kg
TECHNICAL CHARACTERISTICS - 25
USER MANUAL
AcuDrill Plus
DRILLING MACHINE
RESERVED FOR NOTES
26 - TECHNICAL CHARACTERISTICS
Edition: November 2010
Revision: No. 3