1
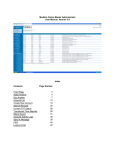
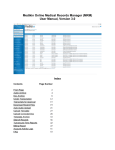
e-ComM
Client User Manual
for SIRIM
Ver 1.2
Prepared By:
SIRIM QAS International SDN BHD,
Product Certification, Inspection & Testing Department,
SIRIM Complex, No.1, Persiaran Dato’ Menteri,
P.O Box 7035, 40911, Shah Alam,
Selangor Darul Ehsan, Malaysia
Page 1 of 47
Table of Contents
1.0 Login Screen ........................................................................................................................ 3
2.0 Company Access and Screen View ..................................................................................... 5
2.1 Company Registration .............................................................................................. 5
2.2 Menu Bar .................................................................................................................. 9
2.3 Company Profile ......................................................................................................10
2.4 User Profile..............................................................................................................11
2.5 Consultant Profile ....................................................................................................12
3.0 Consultant Access and Screen View ...................................................................................13
3.1 Consultant Registration ...........................................................................................13
3.2 Menu Bar (Consultant Screen) ................................................................................13
3.3 Consultant & User Profile (Consultant Screen) ........................................................14
3.4 Company / Client List (Consultant Screen) ..............................................................15
3.5 Consultant submitting Application for TAC / SA .......................................................16
4.0 Application Screen ..............................................................................................................17
5.0 Search ................................................................................................................................19
6.0 Type Approval .....................................................................................................................20
7.0 Special Approval .................................................................................................................33
8.0 Registration of Manufacturer ...............................................................................................39
9.0 Tax Exemption ....................................................................................................................44
10.0 IT/Networking Product .......................................................................................................46
Page 2 of 47
INTRODUCTION
e-ComM is a web-based online application system that allows companies to interact with SIRIM and
apply for Type Approval Application. This manual explains the usage of this system for 2 types of Client
Users :a.) Companies
b.) Consultants (applying for TAC on behalf of their clients)
1.0 Login Screen
Existing
clients
can
enter
username
and
password
to
login.
For
new
clients,
click
on
to create new account and register Company.
Figure 1.0 : e-ComM Login Screen
Page 3 of 47
1.1 Forgot ID/Password
Enter Email address to receive forgotten username or password information via email.
Figure 1.1 : e-ComM Password Recovery Screen
Page 4 of 47
2.0 Company Access and Screen View
2.1 Company Registration
2.1.1 Login Information
Figure 2.1.1 : Client Registration Login Information Screen
2.1.1.1 Enter required login information.
2.1.1.2 Click on
provide new login ID.
to check if Login ID (UserName) is available. If not available,
2.1.1.3 Click on
. Under Login Tab, the login details is displayed and is editable. You
can also change the Password.
Figure 2.1.1.3 : Client Registration Login Information Screen
Page 5 of 47
2.1.2 Company Information
Figure 2.1.2: Client Registration Company Information Screen
2.1.2.1 Under ‘Company Information’ Tab, Enter company details and click
.
Page 6 of 47
2.1.3 Supporting Document
In this section, client must attach soft copy of relevant ROB and ROC documents.
Figure 2.1.3: Supporting Document Screen
2.1.3.1 Click on
to attach documents.
2.1.3.2 Click on
to view attached documents.
2.1.3.3 Click on
to delete attached documents.
2.1.3.4 Click on
2.1.3.5 Check on
to proceed to next section.
if hard copy is sent as well. (e.g: by mail)
Page 7 of 47
2.1.4 Declaration
Figure 2.1.4: Company Registration Declaration Screen
2.1.4.1
Complete the Company Registration with the Declaration section and Submit
Application.
This section is compulsory. Enter Applicant Name, IC No and type in any request in the
remarks section. Click on
to Submit application. Applications not declared or
submitted will be saved as ‘Draft’.
2.1.4.2 Upon submission, Application Status will display as ‘Awaiting Approval’.
2.1.4.3 Client can login to system, and view login details, company details and documents
attached, but not allowed to make any amendments after submission. Applications under ‘Draft’
status are still editable.
2.1.4.4 Upon verification of application details by SIRIM, Application Status will display as
‘Application Verified’ before it is Approved.
Page 8 of 47
2.2 Menu Bar
After Company Registration has been Approved, client can view and have access to the following
screens. Point to the main menu or sub menu to access particular screen.
2.2.1 e-ComM consists of the following Application Type as shown in the Menu Bar above:2.2.1.1 Type Approval
2.2.1.2. Special Approval
2.2.1.3 Registration of Manufacturer
2.2.1.4 Tax Exemption Application
2.2.1.5 IT/Networking Product Application
Page 9 of 47
2.3 Company Profile
2.3.1 This screen allows client to view and manage its company information, including :View and edit company details
Add/Delete Company Branches
Search for Company
Figure 2.3.1: Company Profile Screen
2.3.2 Company List displayed includes Company HQ and its Branches. Click on Company (row) to view
and edit its details.
2.3.3 To create new Branch, enter details and click on
.
2.3.4 Click on
to Delete selected Company Branch (row).
2.3.5 Click on
to Search for Company and
to clear textbox.
Page 10 of 47
2.4 User Profile
2.4.1 This screen allows client to manage different users across many of its company branches,
including:-
View and edit user details;
Add/Delete users;
Search for existing users
Figure 2.4.1 : User Profile Screen
2.4.2 User List displays all users that have access to e-ComM within the company organization and
Branches
2.4.3 Only Admin can decide to Add, Delete, or Modify User details.
2.4.4 Enter User details, and select the branch (or HQ) where user is located.
Page 11 of 47
Figure 2.4.4 : User Profile Screen
2.4.5 Tick ‘Active’ to activate user account and tick ‘Admin’ if user is Administrator.
2.4.6 Click on
to Add new user.
2.4.7 Click on User (Row) to view and edit its details.
2.5 Consultant Profile
2.5.1 Click on
to select Consultant from a list of Consultants pre-registered with SIRIM.
Figure 2.5.1 : Consultant Profile Screen
2.5.2 Once Company has added a particular Consultant, Consultant will be allowed to submit application
on their behalf, via e-ComM.
2.5.3 This page will display list of Consultants authorized by Company to submit application on their
behalf. Consultant will also be able to view list of companies that have requested their services on their
own login screen.
2.5.4 To discontinue the services of any particular Consultant, Click on Consultant (Row) and click on
to remove Consultant from authorized Consultant list.
Page 12 of 47
3.0 Consultant Access and Screen View
For applications done by Consultant on behalf of Companies, Consultants must be pre-registered with
SIRIM before they can proceed with application submission via e-ComM.
3.1 Consultant Registration
3.1.1 Consultants must liaise with SIRIM to register as valid Consultant.
3.1.2 Upon successful registration, SIRIM will then provide Consultant with login account details via
email.
3.1.3 Consultant can proceed to login to e-ComM with user details provided.
3.2 Menu Bar (Consultant Screen)
3.2.1 Upon successful login, Consultant can view and have access to the following screens. Point to the
main menu or sub menu to access particular screen.
3.2.2 e-ComM consists of the following Application Type as shown in the Menu Bar above:3.2.2.1 Type Approval
3.2.2.2. Special Approval
3.2.2.3 Registration of Manufacturer
3.2.2.4 Tax Exemption Application
3.2.2.5 IT/Networking Product Application
Page 13 of 47
3.3 Consultant & User Profile (Consultant Screen)
3.3.1 This screen allows Consultants with admin user rights to view and manage its information,
including :View and edit contact and user login details
Add/Delete contact and user login details
Search for contact and user login details
Figure 3.3.1: Consultant & User Profile Screen (Admin View)
3.3.2 Consultants with no admin user rights will only be able to view and search for Consultant and
contact details.
Figure 3.3.2 : Consultant Profile Screen (Normal User View)
Page 14 of 47
3.4 Company / Client List (Consultant Screen)
3.4.1 This screen displays list of companies that have added Consultant, authorizing them to submit
applications via e-ComM, on their behalf.
Figure 3.4.1 : Company / Client List Screen
3.4.2 Only companies that have added Consultant will have their information displayed on this page.
3.4.3 Consultant can only provide their services to companies listed on this page.
3.4.4 Companies / clients can choose to discontinue Consultant’s services by removing Consultant’s
name from Company screen.
Page 15 of 47
3.5 Consultant submitting Application for TAC / SA
3.5.1
Click on “Search Client” Under ‘Company Information’, to view list of all clients.
Figure 3.5.1 : Search Client List
3.5.2
Select client attached to the TAC Application.
3.5.3
Upon clicking on “Save”, name and details of Consultant will appear in ‘Consultant’ Tab. This
indicates that Application was sent by Consultant.
Figure 3.5.3 : Consultant Details
Page 16 of 47
4.0 Application Screen
4.1 This screen displays the list of Applications by Client, their status and current action on each
application.
Figure 4.1 : e-ComM Application List Main Screen (Company/Client View)
4.2 For Consultant, this screen displays the list of Applications created by Consultant for various
clients/companies,
the
status
and
current
action
of
each
application.
Figure 4.2 : e-ComM Application List Main Screen (Consultant view)
Page 17 of 47
4.3 ‘Status’ explains the state of each application while ‘Action’ explains the current processing phase as
follows :-
Status
Action
Explanation
Draft
Edit
Applications that are not submitted yet and
are still editable.
New
Application already submitted and cannot be
edited. Awaiting verification by SIRIM.
Awaiting Quotation/Scheduling
Awaiting Scheduling
Quotation
Applications
successfully
/Scheduling
currently quotation is being prepared
Scheduling
Applicant
has
received
verified,
and
and
confirmed
Quotation.
Awaiting Testing
Testing
Applicant has confirmed scheduling date for
Testing and is awaiting Testing results
Approved
Certification, Test
Application
Report / COC
successfully.
has
completed
Testing
Certification and Test Report is prepared.
Rejected
Certification
Application has been rejected due to any of
the following reasons :i.)
Application
details
submitted
are
incomplete
ii.) Testing results unsuccessful.
Cancelled
Certification
Existing Application has been cancelled.
Renew
Application requires renewal since nearing
expiry date/application already expired
Page 18 of 47
5.0 Search
This screen allows Client Users to search for existing applications by entering relevant information in text
field.
Figure 4.0: Search Application
5.1 Client can search based on File No, Entry Date, Category, Status and Application Type.
Figure 5.1: TAC Application Category
Figure 5.1.1 : TAC Application Status
Page 19 of 47
6.0 Type Approval
The Type Approval (TAC) Application Form is used to apply for Type Approval for Testing and
Certification of products to be imported, before proceeding to apply for permit. This Form consists of the
following sections to be filled by Applicant:6.1 New Type Approval Application
6.1.1 Company Information
Figure 6.1.1: Type Approval Application Form Company Information
6.1.1.1 Click on
registered companies.
to select Company Information from database of
6.1.1.2 Select Application Purpose as ‘Business’ or ‘Manufacturer’.
Figure 6.1.1.2. : Type Approval Application Form Application Purpose
6.1.1.3 Tick on Application Category as follows :i.) Fast Track
ii.) Normal (Default)
iii.) Parallel
iv.) Parallel + Fast Track
Page 20 of 47
6.1.1.4 Click on
to Save Company details before proceeding to next section.
6.1.2 Product Information
Figure 6.1.2 : Type Approval Application Form Product Information and Specification
6.1.2.1 Click on
6.1.2.2 Click on
6.1.2.3 Click on
to view list of TAC associated with this Model ID.
to select from available list of models.
to add new model information that is not available in the
database of Model List. Enter relevant Tariff, Principal, Manufacturer and Standard details. Click
on
to save details. New Model entered will display as XXXX (NEW MODEL). New
Model details will have to be verified and approved by SIRIM during the processing of
application.
Figure 6.1.2.3 : Type Approval Application Form Add/Edit New Model
Page 21 of 47
6.1.3 Enter Product Specification details
Figure 6.1.3: Type Approval Application Form Product Specification
6.1.4 Principal and Manufacturer Information
6.1.4.1 Both Principal and Manufacturer Information are automatically selected and displayed
when product type is selected.
Page 22 of 47
Figure 6.1.4 : Type Approval Application Form Principal Information
6.1.5 Standard Information
6.1.5.1 Standard Information is automatically displayed when product type is selected.
Figure 6.1.5.1 : Type Approval Application Form Standard Information
6.1.5.2 Client can also click on
6.1.5.3 Click on
to search and add existing standards.
to Add a new standard not available in existing database. New
Standard information will be verified and approved by SIRIM before it can be used and added to
existing database.
Page 23 of 47
Figure 6.1.5.3: Add New Standard
6.1.5.4 Click on
to add test report if available and enter relevant details.
Figure 6.1.5.4: Add Test Report
6.1.5.5 Select Scope to view list of Test Labs and Accreditation Body.
6.1.5.6 Tick on checkbox of Test Lab not in the list and enter its details in textbox provided. New
Test Lab information will be verified and approved by SIRIM before it can be used and added to
existing database.
Figure 6.1.5.6: Add Test Report
Page 24 of 47
6.1.6 Consultant Information
6.1.6.1 If Application done by Client, this section will be blank.
6.1.6.2 If Application done by Consultant, Consultant details will be displayed when company
information is saved.
Figure 6.1.6.2 : Type Approval Application Form Consultant Information
6.1.7.Supporting Document
6.1.7.1 Attach relevant supporting documents for this TAC Application. This section is
compulsory.
Figure 6.1.7.1 : Type Approval Application Form Supporting Document
Page 25 of 47
6.1.8 Declaration
6.1.8.1 Complete the TAC Application with the Declaration section and Submit Application. This
section is compulsory. Enter Applicant Name (person filling in the form details), IC No
and type in any request in the remarks section.
6.1.8.2 Click on
to Submit application. Applications not declared or submitted will
be saved as ‘Draft’ and is still editable. Click on
to view terms and
conditions of Type Approval.
Figure 6.1.8.2: Type Approval Application Form Declaration
6.1.8.3 Login to system to monitor status of application.
Page 26 of 47
6.2 Application Status
6.2.1 Upon submission, Application Status for TAC will automatically display as ‘New’. File No will have
the following format :’DRAFT/NA/11/XXXX’
Figure 6.2.1: Type Approval List
6.2.2 Upon verification of details by SIRIM, Application Status will automatically display as ‘Awaiting
Quotation/Scheduling’ and the current Action on this application is ‘Quotation/Scheduling’. File No will
have the following format : SQA SI/NA/11/XXXX’
Figure 6.2.2: Type Approval List Quotation/Scheduling
6.2.2.1 Click on
to view application details.
6.2.2.1 If verification unsuccessful, client will receive notification and comments via email.
Page 27 of 47
6.3 Quotation/Scheduling
6.3.1 Create and Submit a Draft Quotation (Optional).
6.3.1.1 Click on
to create a draft Quotation. Client can create more than 1 Draft
Quotations , but can submit them ONCE ONLY.
Figure 6.3.1.1 : Create Quotation
6.3.1.2 Processing Fee is by default RM 100. Enter remarks if necessary.
6.3.1.3 Select Registration Fee from DDL provided. Enter remarks if necessary. (mandatory)
6.3.1.4 Click on ‘Save’. Must Save Quotation first before proceeding with Evaluation Fee. (optional)
6.3.1.5 Click on
. Select relevant fees.
Figure 6.3.1.5 : Select Evaluation Fee
Page 28 of 47
6.3.1.6 Click on
to save selected fees.
6.3.1.7 Communication Fees selected are displayed in GridView below. If ‘Safety’, ‘EMC’ and ‘EMC for
BPL only’ fees are selected, amount is shown in textbox highlighted below. Enter remarks if necessary.
Figure 6.3.1.7 : Select Evaluation Fee
6.3.1.8 Total Evaluation Fee Selected is shown. The individual fees are shown in the respective textbox.
6.3.1.9 The following pop up is a reminder to ‘Save’ details entered in order to view List of Quotations
created.
Page 29 of 47
Figure 6.3.1.9 : Pop Up Reminder to Save Quotation to view Quotation List
6.3.1.10 To clear selection, click on
save selection clearance.
6.3.1.11 To cancel clear selection, Click on
. Remember to click on
to
to go back to previous selection.
Figure 6.3.1.11 : Clear Selection Remark
6.3.1.12 Select Renewal Fee from DDL provided. Enter remarks if necessary. (optional)
6.3.1.13 Enter Remarks and fees for (d), (f), (g), (h), and (i) (optional)
6.3.1.14 Click on ‘Calculate’ to calculate Total Fee. (Fee will also automatically be calculated accordingly
when click on Save).
6.3.1.15 Click on Save to Save Details. Quotation will be displayed in Quotation List, as shown below.
(indicates that Quotation has been saved).
Figure 6.3.1.15 : List of Quotations Created / Saved
6.3.1.16 Click on ‘Submit Draft’ to submit Draft Quotation to SIRIM for review and approval. Must
submit application first before submitting Draft Quotation.
Figure 6.3.1.16 : Pop Up Reminder to Submit Application Draft first
Page 30 of 47
1.17 Draft Quotation is sent to backend for processing, and the following message will be displayed.
(Applicant can create more than 1 Draft Quotations , but can submit them ONCE ONLY.).
Figure 6.3.1.17 : Draft Quotation Submitted Remark
1.18 This page will be hidden once SIRIM submits Final Quotation to Client. (Client cannot Create
Quotation once SIRIM submits Quotation to Client).
6.3.2 Client Receives Final Quotation from SIRIM
6.3.2.1 Go to Application Screen and Click on
to view Quotation details. Choose to Accept or
Reject Quotation.
6.3.2.2 Click on
to view Scheduling Details.
Figure 6.3.2: Scheduling Details for Testing
6.3.2.3 Upon confirmation, Application Status will automatically display as ‘Awaiting Testing’ and the
current Action on this application is ‘Testing’.
Page 31 of 47
6.4 Testing
Figure 6.4: Type Approval List Testing
6.4.1 Click on
to view Testing results and Application Approval Status.
6.4.2 Status of TAC Approval for each TAC Application is as follows:i.) Process : TAC Application for Approval still in process.
ii.) Cancel : Existing TAC Applications (previously Approved) are Cancelled.
iii.) Fail : TAC Application Failed.
iv.) Approved : TAC has been Approved. TAC No is generated here.
6.4.3 If Testing results is successful, Application Status will automatically display as ‘Approved’ and the
current Action on this application is ‘Test Report/COC’.
6.4.4 Click on
to view Test Reports and Certification report uploaded.
6.5 Renewal
6.5.1 TAC Applications that have expired or nearing expiry date will have Status as ‘Renew’.
6.5.2 Click on
to Renew TAC.A request will be sent to SIRIM for further action.
Figure 6.5.2 : Renewal Type Approval Application
Page 32 of 47
7.0 Special Approval
Special Approval is intended for walk-in customers with different purpose of importation as
compared to Type Approval. This screen displays the Special Approval (SA) Application Form
used to apply for new Special Approval. The SA Application Form consists of the following
sections to be filled by Applicant:7.1 New Special Approval Application
7.1.1 Company Information
Figure 7.1.1: Special Approval Application Form Company Information
7.1.1.1 If Company already registered with e-ComM, click on ‘Search Company’ to select
Company Information from database of registered companies.
7.1.1.2 If Company not registered before (not in database), allow them to enter details in
textbox provided.
7.1.1.2 Select any one of the following Purpose of Importation.
Figure 7.1.1.2 : Special Approval Application Form Purpose of Importation
Page 33 of 47
7.1.1.3 Click on
to Save Company details before proceeding to next section.
7.1.2 Product Information
Figure 7.1.2 : Special Approval Application Form Product Information
7.1.2.1 Click on
to search for Type of Product. Click on
to clear the
information selected.
7.1.2.2 Click on
to select from available list of models.
7.1.2.3 Click on
to add new model information that is not available
in the database of Model List. Enter relevant Tariff, Principal, Manufacturer and
Standard details. Click on
to save details. New Model details will have to
be verified and approved by SIRIM during the processing of application.
Page 34 of 47
Figure 7.1.2.3: Special Approval Application Form Add/Edit New Model
7.1.3 Consultant Information
7.1.3.1 If Application done by Client, this section will be blank.
7.1.3.2 If Application done by Consultant, Consultant details will be displayed when
company information is saved.
Figure 7.1.3.2 : Special Approval Application Form Consultant Information
7.1.4 Supporting Document
7.1.4.1 Attach relevant supporting documents for this SA Application. This section is
compulsory.
Figure 7.1.4.1 : Special Approval Application Form Supporting Document
Page 35 of 47
7.1.5 Declaration
7.1.5.1 Complete the SA Application with the Declaration section and Submit Application. Enter
Applicant Name,IC No and type in any request in the remarks section. Click on
to Submit application. Applications not declared or submitted will be saved as ‘Draft’. This
section is compulsory.
7.2 Application Status
7.2.1 Upon submission, Application Status for SA will automatically display as ‘New’. File No will have the
following format : ‘DRAFT/SA/10/XXXX/X’
Figure 7.2.1: Special Approval List
7.2.2 Upon verification of details by SIRIM, Application Status will automatically display as ‘Awaiting
Quotation/Scheduling’ and the current Action on this application is ‘Quotation/Scheduling’. File No will
have the following format : ‘SQA SI/SA/10/XXXX/X’
Figure 7.2.2: Special Approval List Quotation/Scheduling
7.2.2.1 Click on
to view application details.
7.2.2.2 If verification unsuccessful, client will receive notification and comments via email.
7.3 Quotation/Scheduling
7.3.1 Click on
7.3.2 Click on
to view Quotation details. Choose to Accept or Reject Quotation.
to view Scheduling Details.
Page 36 of 47
Figure 7.3.2: Scheduling Details for Testing
7.3.4 Upon confirmation, Application Status will automatically display as ‘Awaiting Testing’ and the current
Action on this application is ‘Testing’.
Page 37 of 47
7.4 Testing
Figure 7.4: Special Approval List Testing
7.4.1 Click on
to view Testing results and Application Approval Status.
7.4.2 Status of SA Approval for each SA Application is as follows:i.) Process : SA Application for Approval still in process.
ii.) Cancel : Existing SA Applications (previously Approved) are Cancelled.
iii.) Fail : SA Application Failed.
iv.) Approved : SA has been Approved. SA No is generated here.
7.4.3 If Testing results is successful, Application Status will automatically display as ‘Approved’ and the
current Action on this application is ‘Test Report/COC’.
7.4.4 Click on
to view Test Reports and Certification report uploaded.
7.5 Renewal
7.5.1 SA Applications that have expired or nearing expiry date will have Status as ‘Renew’.
7.5.2 Click on
to Renew SA. A request will be sent to SIRIM for further action.
Figure 7.5.1 : Renewal Special Approval Application
Page 38 of 47
8.0 Registration of Manufacturer
This screen displays the Registration of Manufacturer (RM) Application Form used to register
new manufacturer. This Form consists of the following sections to be filled by Applicant:-
Figure 8.0 : Registration of Manufacturer Application Form
8.1 Registration of Manufacturer New Application
8.1.1 Click on
to Save Company details before proceeding to next section.
8.1.2 Under TAC Tab, Click on
to select from a database of existing TAC applications.
8.1.3 Under Sample Tab, Click on
to search for Model (Sample). Click on
to enter new model information that is not available in the database of
Sample Tariff List. New Model details will have to be verified and approved by SIRIM during the
processing of application.
8.1.4 Under Re-Export Tab, Click on
on
to search for Model (Sample). Click
to enter new model information that is not available in the database of
Sample Tariff List. New Model details will have to be verified and approved by SIRIM during the
processing of application.
8.1.5 Under Premises, Enter the following details :-
Page 39 of 47
Figure 8.1.5: Registration of Manufacturer Application Form
8.1.6 Under Consultant Tab,
8.1.6.1 If Application done by Client, this section will be blank.
8.1.6.2 If Application done by Consultant, Consultant details will be displayed when
company information is saved.
Figure 8.1.6.2 : Registration of Manufacturer Application Form Consultant Information
8.1.7 Under Document Tab, attach all relevant documents necessary for this application
8.1.8 Under Declaration Tab, Complete the Registration of Manufacturer Form with the
Declaration section and Submit Application. Enter Applicant Name, IC No and type in any request
in the remarks section. Click on
to Submit application. Applications not declared or
submitted will be saved as ‘Draft’. This section is compulsory.
Page 40 of 47
8.2 Application Status
8.2.1 Upon submission, Application Status for RM will automatically display as ‘New’. File No will have the
following format : ‘DRAFT/REG/10/XXXX’
Figure 8.2.1: Registration of Manufacturer List
8.2.2 Upon verification of details by SIRIM, Application Status will automatically display as ‘Awaiting
Quotation/Scheduling’ and the current Action on this application is ‘Quotation/Scheduling’. File No will
have the following format : ‘SQA SI/SA/10/XXXX/X’
Figure 8.2.2: Special Approval List Quotation/Scheduling
8.2.3.2 Click on
to view application details.
8.2.3.3 If verification unsuccessful, client will receive notification and comments via email.
Page 41 of 47
8.3 Quotation/Scheduling
8.3.1 Click on
8.3.2 Click on
to view Quotation details. Choose to Accept or Reject Quotation.
to view Scheduling Details.
Figure 8.3.2: Scheduling Details for Testing
8.3.4 Upon confirmation, Application Status will automatically display as ‘Awaiting Testing’ and the current
Action on this application is ‘Testing’.
Page 42 of 47
8.4 Testing
Figure 8.4: Registration of Manufacturer List Testing
8.4.1 Click on
to view Testing results and Application Approval Status.
8.4.2 Status of RM Approval for each RM Application is as follows:i.) New: New application for Manufacturer Registration
ii.) Pre-Acceptance: Application still undergoing Site Inspection
iii.) Active: RM has been Approved. RM No is generated here.
iv.) Withdraw: Existing RM Applications (previously Approved) are Cancelled.
v.) Terminate: RM Application Failed.
vi.) Suspend : Application still undergoing Site Inspection
8.4.3 If Testing results is successful, Application Status will automatically display as ‘Approved’ and the
current Action on this application is ‘Test Report/COC’.
8.4.4 Click on
to view Test Reports and Certification report uploaded.
8.5 Renewal
8.5.1 RM Applications that have expired or nearing expiry date will have Status as ‘Renew’.
8.5.2 Click on
to Renew RM. A request will be sent to SIRIM for further action.
Figure 8.5.2 : Renewal Registration of Manufacturer Application
Page 43 of 47
9.0 Tax Exemption
This screen displays the Tax Exemption (TAX) Application Form used to apply for new Tax
Exemption after TAC has been Approved. The Tax Exemption Application Form consists of the
following sections to be filled by Applicant:9.1 Tax Exemption New Application
9.1.1 Company Information
Figure 9.1.1 : Tax Exemption Application Form Company Information
9.1.1.1 Click on
to Save Company details before proceeding to next section.
9.1.1.2 Under TAC Tab, Click on
to select from a database of existing TAC
applications.
9.1.1.3 Under Consultant Tab, if Application done by Client, this section will be blank. If
Application done by Consultant, Consultant details will be displayed when company
information is saved.
Figure 9.1.1.3: Tax Exemption Application Form Consultant Information
Page 44 of 47
9.1.1.4 Under Document Tab, Attach relevant supporting documents
9.1.1.5 Under Declaration Tab, Complete the Tax Exemption Form with the Declaration
section and Submit Application. Enter Applicant Name, IC No and type in any
request in the remarks section. Click on
to Submit application.
Applications not declared or submitted will be saved as ‘Draft’. This section is
compulsory.
Page 45 of 47
10.0 IT/Networking Product
Figure 10.0 : IT/Networking Application Form Company Information
10.1 IT/Networking Product Application
10.1.1 Product Information
Figure 10.1.1: IT/Networking Application Form Product Information
10.1.1.1 Select Product Category and enter product information
10.1.1.2 Click on
and proceed to the next Tab
10.1.1.3 Under Document Tab, Attach relevant supporting documents
10.1.1.4 Under Declaration Tab, Complete the IT/Networking Form with the Declaration section
Page 46 of 47
and Submit Application. Enter Applicant Name, IC No and type in any request in the remarks
section. Click on
to Submit application. Applications not declared or submitted will be
saved as ‘Draft’. This section is compulsory.
Page 47 of 47