1
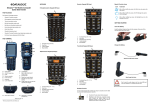
TMS scanning manual Object Software Ontwikkeling BV Index Index ................................................................................................................................................................... 1 Introduction ......................................................................................................................................................... 1 Start the TMS scanning application ........................................................................................................... 1 Working with the TMS scanning application ...................................................................................................... 1 Switching between Lend, Issue and Return ................................................................................................... 1 Scanning an employee code .......................................................................................................................... 1 Scanning/entering Productcodes and numbers .............................................................................................. 2 Undo a transaction .......................................................................................................................................... 2 Miscleaneous...................................................................................................................................................... 2 About ............................................................................................................................................................... 2 Exit .................................................................................................................................................................. 2 Data exchange ................................................................................................................................................... 2 Final tips ............................................................................................................................................................. 3 Support ............................................................................................................................................................... 3 Introduction This document describes the usage of the TMS scanning application on Datalogic Windows CE portable data collection barcode readers. Currently this covers the Datalogic Memor, Skorpio, Kyman, Elf en Falcon types. This manual assumes that the TMS software has been installed on the barcode reader and PC and that it is properly configured. Start the TMS scanning application Normally the TMS scanning application does not need to be started because it can always stay active on the barcode reader. But in case you need to start the TMS scanning program you can find it in the start menu (start button down left) under ProgramsTMSTMS scanning. You can also find it on the readers Windows CE desktop. Tap on the icon to start the program. Working with the TMS scanning application On top you’ll find the TMS functions ‘Lend, Issue, Pid and Return’ that are selectable with the stylus or with a finger. You can also use the function keys F1 to F4 for each function respectively. Beneath that, the selected TMS function is shown. On the bottom of the screen the number of saved transactions (Records) and the last scanned barcode is displayed. Above that you’ll find the ‘Undo’ button which can also be activated with the F5 key. In the (white) center of the screen, the respective Employee- and Productcodes and the number of items can be entered or scanned. With the up and down arrow keys and the escape key you can move around these fields. Switching between Lend, Issue and Return Selecting ‘Lend’ – F1 activates the TMS Lend functionality. ‘Issue’ – F2 activates the Issue (give away) function. With ‘Return’ – F4 you activate the intake of items. You can switch between ‘Lend’, ‘Issue’ and ‘Return’ at any given time. For each function a different beep is played and the selected function is shown on top of the screen. Scanning an employee code By tapping ‘Pid’ of pressing the F3 key you can select a different employee/person by scanning or entering the employee code. Employee barcode labels that have been printed with TMS v2.7 or higher can also be scanned in the other entry fields (Product and #) and are then automatically treated as employee code. In that case it is not necessary to press F3 and scan the code in the ‘Person’ field. TMS immediately switches the employee. After the Employeecode has been scanned/entered the name of the person – as stored in O:\Dossier\TMS\TMS WinCE scanning manual.docx 1/3 revision 19 - 30/1/2012 TMS scanning manual Object Software Ontwikkeling BV TMS – is displayed. If this person has been deactivated in TMS this will be shown on screen and a double beep can be heard. If the employee code does not exist in TMS the message ‘Unknown ID’ will be shown and accompanied with the double beep. You can still continue to lend or return items but expect errors later on when you process the transaction in TMS (on PC) because the user has been blocked or the ID does not exist at all in TMS. Scanning/entering Productcodes and numbers The yellow field is the field that is currently in focus and where the keyboard entry or a barcode scan will land. After an employee code has been scanned or entered in the employee (Person) field you can scan or enter a Productcode or Companycode in the Product field. When the code is a product code (not a Companycode) you need to enter the number of items in the “#’ field. When a Company code (unique serial number of an item) is scanned this step is skipped because the number is then always one (1). When all data has been entered/scanned (employeecode, productcode and number) the transaction is stored and another item can be scanned. The number of stored transactions is always shown in the statusbar at the bottom of the screen behind ‘Records’. Undo a transaction With the ‘Undo’ – F5 button the last transaction can be undone. The productcode and number fields are redisplayed in the ‘Product’ and ‘#’ fields for easy correction purposes. In that way you can for instance easily correct a faulty lend and change it to a return or change the number of items. Storing transactions and undoing them works similar to a stack of paper. Each new transaction is stored on top of the stack. With Undo the last transaction is removed from the top of the stack. Using Undo again removes the former last transaction of the stack and so on. When there are no more transactions (0 records) the Undo function does not work. Miscleaneous Tapping the ‘>>’ button on the upper right side of the screen shows two more functions; About This option shows the version and release number of the TMS scanning application and some copyright information. Exit This option closes the TMS scanning program. Normally it is not necessary to close TMS on the barcodereader. Only in case of a program update or maybe in case of problems with the application you can use this option to close the scanning application. To restart the TMS scanning application again see Start the TMS scanning application on page 1. Data exchange To transfer the transactions to a PC you must insert the barcode reader in the cradle or use an USB cable to connect it to the computer. Dependant of the kind of TMS setup on the PC (see the manual ‘TMS WinCE barcodereaders installation’) the TMS data transfer program will automatically start or you must select the [Transfer] button in TMS (only v2.7 of higher) to start the data transfer program. In this screen you have the option to export the TMS Employees to the barcode reader by checking the box in front of Employee export (recommended). Exporting employees to the barcode reader is a quick process but if no changes have taken place in the employee list you can skip this step to save time. Start the transfer of data by clicking the [Transfer data] button. TMSxFer will then export the TMS employees and start the transfer module on the barcode reader. The date and time will be synced with the PC and the barcode reader transactions will be transferred to the PC. Behind ‘Itembag import’ you can see how many transactions have been transferred. Meanwhile the employees are imported on the barcode reader. O:\Dossier\TMS\TMS WinCE scanning manual.docx 2/3 revision 19 - 30/1/2012 TMS scanning manual Object Software Ontwikkeling BV After successful import/export of the data the barcode reader sounds a few beeps indicating that the transfer is complete and that the reader is ready for use again . In TMS (on the PC) the itembag screen is opened showing all the unprocessed transactions of the barcode reader(s). If this screen is not automatically opened you can open it by selecting ManageItembag in the TMS menubar or by pressing the control-B key combination. Final tips Do at least one synchronisation of the barcode readers prior to using the TMS scanning application in production. In that case the barcode reader at least has the correct date and time and employee information. Check the date and time on the barcode reader regularly. The date and time on the barcode readers must be equal with that on the PC (± 10 seconds) so that the correct date/time for lends and returns is registered. In case multiple barcode readers are used you should collect the transactions of all barcode readers at once before processing them with TMS. A return on one barcode reader can be lend on another resulting in incomplete information when only one of them is processed. By collecting all transactions first and then process them as a whole all transactions are processed in the right order. This is the main purpose of the TMS itembag. The TMS scanning program is available in English and Dutch. Other languages can be created on request. Support For information and support on TMS contact Object Software Ontwikkeling BV in the Netherlands. Contact information: Object Software Ontwikkeling BV – www.objectso.nl Molenstraat 8a 2242 HT Wassenaar +31 (0)70-5177286 [email protected] O:\Dossier\TMS\TMS WinCE scanning manual.docx 3/3 revision 19 - 30/1/2012