1
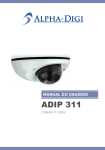
755z Speed Dome Camera Installation Guide The product image shown above may differ from the actual product. Please use this camera with a DVR which supports HD video recording. Please read the instructions thoroughly before using the product. CAUTION RISK OF ELECTRIC SHOCK CAUTION: To reduce the risk of electric shock, do not expose this apparatus to rain or moisture. Only operate this apparatus from the type of power source indicated on the label. The company shall not be liable for any damages arising out of any improper use, even if we have been advised of the possibility of such damages. The lightning flash with arrowhead symbol, within an equilateral triangle, is intended to alert the user to the presence of uninsulated “dangerous voltage” within the product’s enclosure that may be of sufficient magnitude to constitute a risk of electric shock to persons. This exclamation point within an equilateral triangle is intended to alert the user to the presence of important operating and maintenance (servicing) instructions in the literature accompanying the appliance. ROHS Announcement All lead-free products offered by the company comply with the requirements of the European law on the Restriction of Hazardous Substances (RoHS) directive, which means our manufacture processes and products are strictly “lead-free” and without the hazardous substances cited in the directive. The crossed-out wheeled bin mark symbolizes that within the European Union the product must be collected separately at the product end-of-life. This applies to your product and any peripherals marked with this symbol. Do not dispose of these products as unsorted municipal waste. CE Mark This apparatus is manufactured to comply with the radio interference. The company does not warrant that this manual will be uninterrupted or error-free. We reserve the right to revise or remove any content in this manual at any time. z592_quick_V0.9 TABLE OF CONTENTS FEATURES........................................................................................................................................................ 1 PACKAGE CONTENT....................................................................................................................................... 1 DIMENSIONS .................................................................................................................................................... 1 CABLE OVERVIEW .......................................................................................................................................... 2 INSTALLATION ................................................................................................................................................. 3 CAMERA MODE, ID & BAUD RATE SETUP ................................................................................................... 5 WHERE TO SET ................................................................................................................................... 5 SET TO IP CAMERA............................................................................................................................. 5 SET TO TVI CAMERA........................................................................................................................... 5 INSERT A MICRO SD CARD............................................................................................................................ 6 PTZ CONTROL ................................................................................................................................................. 7 VIA HD CCTV DVR / NVR..................................................................................................................... 7 VIA IP CAMERA INTERFACE............................................................................................................... 8 VIA JOYSTICK AVX102 (OPTIONAL)................................................................................................. 10 SPECIFICATIONS............................................................................................................................................11 MICRO SD CARD COMPATIBLE LIST .......................................................................................................... 13 FEATURES Tribrid video output of IP, TVI and AHD to fulfill different customers' requirements Zoom lens of f4.7 ~ 94mm with 20x optical zoom and auto focus, suitable for various monitoring environments PTZ control for seamless monitoring: - Capable of 360° pan rotation continuously with the tilt movement of -6° ~ 90°, allowing quick and smooth action of the camera lens - Auto Tracking to follow moving objects - Hot Point support to quickly move the camera to the specified point remotely - Up to 256 preset points & four sequence groups programmable for multiple points monitoring, and auto pan External alarm I/O device connection ONVIF ( MicroSD card support (up to 64GB) for video storage WDR to increase image recognizability in overexposure and dark areas Line in / out jacks available for audio transmission IR effective range up to 200 meters for night surveillance. When IR Turbo mode is on, the effective range could be more than 200 meters. IP66 for outdoor application Remote Surveillance ) standard supported to simplify system integration -- Fully compatible with iOS and Android devices, and Internet Explorer on Windows operating system -- Push Video available on your iOS and Android devices when used with Push Video NVR series PACKAGE CONTENT Camera User manual Bracket (w/carabiner) Terminal block DIMENSIONS *Dimensional Tolerance: ± 5mm 1 CABLE OVERVIEW Cable Description Power cable Connect to the supplied adapter. BNC cable Connect to an HD CCTV DVR with a coaxial cable (Used as an HD CCTV camera). Terminal block 1. ALARM IN Alarm input for an alarm device like magnetic contacts. 2. ALARM OUT Alarm output for an alarm device like a siren. 3. GND Ground wire 4. RS485A Used for PTZ camera or other device connection. 5. RS485B Used for PTZ camera or other device connection. RJ45 network cable Connect to an NVR with a RJ45 network cable or directly connect to a router (Used as an IP camera). Line in* Colored as blue, used to connect to a microphone for audio input. Line out* Colored as green, used to connect to a speaker for audio output. RESET Remove the insulating coating of wire, and twist it with a ground wire together to reset default camera GND Ground wire * The audio function is available only when this camera is used as an IP camera. 2 INSTALLATION Step1: Set the camera mode, ID and baud rate as needed. NOTE: This camera could be used as an IP camera, a TVI camera or an AHD camera. You need to manually set the camera for this device to work properly. For details, please check the section, “CAMERA MODE, ID & BAUD RATE SETUP”. Step2: Locate to where you want to install this camera and drill 4 holes for bracket installation. (Figure 1) NOTE: Drill one hole for the cable to go through if necessary. Step3: (Optional) Insert a microSD card for local recording. NOTE: The recording function is available only when the camera is used as an IP camera. For details, please check the next section, “INSERT A MICRO SD CARD”. Step4: Pass the cables on the camera through the bracket and hook them together with the carabiner and wire. (Figure 2) Figure 1 Figure 2 Step5: Lean them against the wall where you want to install this camera. Arrange the cables to the down side of the bracket or through the wall. (Figure 3) 3 Step6: Screw the bracket onto the wall. (Figure 4) NOTE: You might need another hand to hold the camera in this step. OR Figure 3 Figure 4 Step7: Screw the bracket and camera together. (Figure 5) Figure 4 4 CAMERA MODE, ID & BAUD RATE SETUP This camera could be used as an IP camera, a TVI camera and an AHD camera. Before connecting this camera to any recorder, you may need to manually set the camera mode, ID & baudrate for the camera to work properly. Plase check the description below for details. WHERE TO SET Remove the panel as indicated below to find the dip switch. SET TO IP CAMERA Mode: SET TO TVI CAMERA Mode: You might need to set the ID and baud rate if you’re connecting to other brand’s TVI DVR: ID: The ID number can be set from 0~255 (binary). Please check the examples below. Baud Rate: 5 SET TO AHD CAMERA Mode: You might need to set the ID and baud rate if you’re connecting to other brand’s AHD DVR: ID: The ID number can be set from 0~255 (binary). Please check the examples below. Baud Rate: INSERT A MICRO SD CARD NOTE: A microSD card could be inserted to the camera for local recording, but the recording function is available only when the camera is used as an IP camera, not a TVI or AHD camera. The data originally saved in the microSD card (if any) will be removed after inserting it into the camera. The camera doesn’t support hot-swapping. Please insert or remove the microSD card with power disconnected. Please follow the directions in the below graphic to insert MicroSD card properly. Step1: Remove the four screws. Then remove the plastic hull. Step2: After opening the camera hull, you can see the inner structure. As the below illustration shows, insert the SD card face down into the slot. Figure 4 Step3: Replace the hull back, and make sure it’s fastened tightly to ensure the waterproof function works properly. 6 PTZ CONTROL VIA HD CCTV DVR / NVR NOTE: The panel below is available only when the camera is used with our brand’s HD CCTV DVR or NVR, and not all functions in the panel are supported for this camera. Right-click to return to the live view, and click the channel with this speed dome camera connected. Then, click on the bottom left side of the screen to show the PTZ control panel. / / +/- / / / Up / Down / Left / Right / / Click the arrow keys ( / camera lens up / down / left /right. ) to move the Zoom in / out max Click to zoom in on the image to the largest / zoom out on the image to its original size. Zoom in / out Click to zoom in / out the image. Focus near / far Click to adjust the focus of the image. Click to activate the auto function. Auto mode Before using it, you need to assign a specific function that will be enabled when “ ” is clicked. For details, please see “CAMERA PARAMETERS”. Auto tracking Click to start auto tracking, and click again to stop. Preset point Click to configure or go to the preset point you want to see. For details, please see “SEQUENCE SETUP”. Auto Focus Click to automatically adjust the focus of the camera. NOTE: PTZ control is also available via the optional USB joystick and EagleEyes. For details, please check their respective user manuals. 7 VIA IP CAMERA INTERFACE When this camera is individually used and is not connected to any NVR, PTZ control can be done via the interface of the camera. Step1: Open your web browser, and key in http://ipaddress:portnum in the URL address box. For example, for the IP address 60.121.46.236 and port No. 888, please key in ”http://60.121.46.236:888” into the URL address box, and press “Enter”. Step2: In the login page, key in the user name and password, and enter the security code from the image below if any. Then, click “LOGIN”. Step3: The wizard is then started. ‧ To skip the wizard and directly access the camera live view, click “Close”. ‧ To directly access the camera live view without starting the wizard for the login next time, check “Do not start wizard at login”. Note: If you’re prompted to install “VLC player”, “Software” or “H264 Streaming Viewer”, please agree to proceed the installation. Or, you might not be able to see the live view properly. Step4: When the login is successful, the live view is shown. Note: The buttons available depend on the camera model you have, and the user level used to log in. 8 Function Icon Description Switch to the system configuration page, and the functions available for “Supervisor” and “Power User” are different. Config. For details, please refer to the user manual. Arrow keys panel -- Click to move the camera lens up / up-left / down / up-right / left / down-right / right / down-left. Preset points -- Click the numbering of the preset point you want to move the PTZ camera to the selected preset point. To set preset points, please go to “Config”. For details, please refer to the user manual. Zoom-in / out / Click to zoom in / out the current image. Max. Zoom-in / out / Click to zoom in the image to the largest / zoom out the image to its original size. Focus near / far / Click to adjust the clearness of the video images. Click to enable digital PTZ functions with zoom-in ratio up to 16X. DPTZ Click to activate the auto tracking function. Auto Tracking Auto Mode For setting details, please go to “Config”. For details, please refer to the user manual. Click to activate the auto function. Before using it, you need to assign a specific function that will be enabled when “AUTO” is clicked. For details, please refer to the user manual. This function will be disabled when DPTZ is enabled. Focus Zone Auto Move Click to assign the point for focus adjustment. This function will be disabled when DPTZ is enabled. Click to enable the auto move function. It allows the camera to move to the direction where your cursor stays. This function will be disabled when DPTZ is enabled. Pan- / Tilt-Move Manually There are three ways to manually move the camera view by: Using the arrow key panel Hot point – Directly click on the live view to move the camera view. Using sliders – Click and drag sliders on the top and left side of the live view to move the camera view. NOTE: PTZ control is also available via the optional USB joystick and EagleEyes. For details, please check their respective user manuals. 9 VIA JOYSTICK AVX102 (OPTIONAL) When this camera is connected to our brand’s DVR or NVR, simply plug the joystick to the recorder, switch to the channel which connects this camera and you’re ready to control via the joystick. When this camera is connected remotely via our free PC program, CMS Lite, simply plug this joystick to your PC or laptop, switch to the channel which connects this camera, and you’re ready to control via the joystick. NOTE: CMS Lite could be downloaded from our official website and it’s only compatible with Windows XP, Windows Vista, Windows 7 and Windows 8. For details, please check our website. 10 SPECIFICATIONS ▓ Network LAN Port LAN Speed Data Transmission Speed Supported Protocols ONVIF Compatible Number of Online Users Security Remote Access YES 10/100 Based-T Ethernet 10/100/1000 Based-T DDNS, PPPoE, DHCP, NTP, SNTP, TCP/IP,ICMP, SMTP, FTP, HTTP, RTP, RTSP, RTCP,IPv4, Bonjour,UPnP, DNS,UDP,IGMP, QoS, IEEE802.1X, SNMP YES (Profile S) 10 (1) Multiple user access levels with password (2) IP address filtering (3) Digest authentication (1) Internet Explorer on Windows operating system (2) 16CH Video Viewer on Windows & MAC operating system (3) EagleEyes on iPhone, iPad & Android mobile devices ▓ Video Video Output Compression Format Video Resolution Frame Rate Multiple Video Streaming Bitrate Control IP, TVI*,AHD* and CVBS H.264 (Main Profile) / MJPEG 1920 x 1080 / 1280 x 720 / 720 x 480 / 352 x 240 30 fps 4 (H.264, MJPEG) SVBR control (VBR + Max bitrate) ▓ General Image Sensor 1/2.8" Sony CMOS image sensor Min Illumination 0.1 Lux / F1.6(Wide)~F3.5(Tele), 0 Lux (IR LED ON) Shutter Speed 1 / 60 (1/50) to 1 / 100,000 sec. S/N Ratio Lens Viewing Angle IR LED IR Effective Distance IR Shift Smart Light Control White Balance More than 48dB (AGC off) f4.7 ~ 94mm / F1.6 (Wide) ~ 3.5(Tele), auto focus 1X: 60.8° (Horizontal) / 35.3° (Vertical) / 68.3° (Diagonal) 20X: 3.4° (Horizontal) / 1.9° (Vertical) / 3.8° (Diagonal) 8units Default: Up to 200 meters / IR Turbo mode: More than 200 meters YES YES Auto / 2500K / 3200K / 4200K / 5800K / 9500K AGC YES IRIS Mode YES Sharpness YES WDR External Alarm I/O RAM MicroSD Card Slot YES YES (1 input / 1 output) 20MB YES (up to 64GB) RS-485 YES IP Rating (weather-proof) IP66 Operating Temperature -25℃ ~ 50℃ Power Source (±10%) AC 24V / DC19V Current consumption (±10%) DC19V / 1.3A Power Consumption (±10%) 25W Net Weight (kg) 6.9 11 ▓ Audio Line in YES (Mono) Line out YES (Mono) ▓ PTZ Mechanism Pan Range 360° continuous rotation Max. Pan Speed 90º/s Tilt Range -6° ~ 90° Max. Tilt Speed 70º/s Zoom Ratio 20X Optical Zoom Max. Zoom Speed Approx. 3s (Tele ~ Wide) Preset Points Up to 256 preset points Sequence Group 1. Up to four groups can be set 2. One group can include up to 16 preset points Auto Tracking YES ▓ Others Mobile Surveillance iOS & Android Event Notification FTP / Email / SMS Digital Pan / Tilt / Zoom YES Reset Default YES Motion Detection YES RTC (real-time clock) YES Minimum Web Browsing Requirements ‧ Intel core i3 or higher, or equivalent AMD ‧ 2GB RAM ‧ AGP graphics card, Direct Draw, 32MB RAM ‧ Windows 8, Windows 7, Windows Vista & Windows XP, DirectX 9.0 or ‧ Internet Explorer 7.x or later later Optional Peripherals USB Joystick (AVX102) * TVI and AHD output: 1.0 Vp-p composite, 75Ω **The specifications are subject to change without notice. 12 MICRO SD CARD COMPATIBLE LIST Manufacturer ADATA Apacer SanDisk Verico Silicon Power Kingmax Capacity 2GB 4GB 2GB 4GB 2GB 4GB 8GB 16GB 32GB 2GB 4GB 16GB 64GB 64GB Class -Class 6 -Class 4 -Class 4 Class 4 Class 4 Class 4 -Class 4 Class 10 --- Manufacturer Transcend Kingston TOSHIBA TOPRAM Capacity 2GB 4GB 4GB 4GB 8GB 16GB 2GB 4GB 8GB 32GB 64GB 16GB 32GB Class -Class 2 Class 4 Class 6 Class 6 Class 10 -Class 4 Class 4 Class 4 Class 10 Class 4 Class 10 13