1
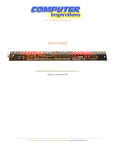
PROFESSIONAL LIGHT CONTROLLER
USER’S MANUAL
TR-256
KEEP THIS MANUAL FOR FUTURE NEEDS
For your own safety, please read this user manual carefully
before installing the device.
Every person involved with the installation, operation and
maintenance of this device has to
- be qualified
- consider this manual to be part of the total product
- keep this manual for the entire service life of the product
- pass this manual on to every further owner or user of the
product
- download the latest version of the user manual from the
Internet
INTRODUCTION
Thank you for having chosen a TR-256. If you follow the
instructions given in this manual, we are sure that you will enjoy
this device for a long period of time.
Unpack your TR-256.
SAFETY INSTRUCTIONS
This device has left our premises in absolutely perfect condition.
In order to maintain this condition and to ensure a safe operation,
it is absolutely necessary for the user to follow the safety
instructions and warning notes written in this user manual.
1
Important:
Damages caused by the disregard of this user manual are not
subject to warranty. The dealer will not accept liability for
any resulting defects or problems.
Always plug in the power unit least.
Keep away from heaters and other heating sources!
If the device has been exposed to drastic temperature fluctuation
(e.g. after transportation), do not switch it on immediately. The
arising condensation water might damage your device. Leave the
device switched off until it has reached room temperature.
This device falls under protection-class III. The device always
has to be operated with an appropriate transformer.
Always disconnect from the mains, when the device is not in use
or before cleaning it.
Please note that damages caused by manual modifications on the
device or unauthorized operation by unqualified persons are not
subject to warranty.
Keep away children and amateurs from the device!
There are no serviceable parts inside the device. Maintenance and
service operations are only to be carried out by authorized
dealers.
OPERATING DETERMINATIONS
2
This device is a DMX-recorder for controlling DMX-effects or
spots in discotheques, on stages etc. This product is allowed to be
operated with a direct voltage of DC 9V, 1A and was designed
for indoor use only.
Do not shake the device. Avoid brute force when installing or
operating the device.
When choosing the installation-spot, please make sure that the
device is not exposed to extreme heat, moisture or dust. There
should not be any cables lying around. You endanger your own
and the safety of others!
Operate the device only after having familiarized with its
functions. Do not permit operation by persons not qualified for
operating the device. Most damages are the result of
unprofessional operation!
Please use the original packaging if the device is to be
transported.
Please consider that unauthorized modifications on the device are
forbidden due to safety reasons!
Never remove the serial barcode from the device as this would
make the guarantee void.
If this device will be operated in any way different to the one
described in this manual, the product may suffer damages and the
guarantee becomes void. Furthermore, any other operation may
lead to dangers like short-circuit, burns, electric shock, etc.
DESCRIPTION
3
Features
For playing back your light shows
1.
2.
3.
4.
5.
DMX-Recorder for 256 channels
9 macros with up to 9 chasers
32 chasers with up to 56 scenes
Sound-control via built-in mic
Ideal for rentals.
SETUP
Installation
Install the device on a plane.
Connect the connection cable of the power-unit with the DC
IN-socket. Plug the power unit into your outlet.
Sound-control
The sound-control works via the built-in microphone.
DMX-512 connection / connection between recorder and
projector
4
Only use a stereo-shielded cable and 3-pin XLR-plugs and
connectors in order to connect the controller with the recorder or
one fixture with another.
If you are using controllers with this occupation, you can connect
the DMX-output of the controller directly with the DMX-input of
the first fixture in the DMX-chain. If you wish to connect
DMX-controllers with other XLR-outputs, you need to use
adapter-cables.
Building a serial DMX-chain:
Connect the DMX-output of the first fixture in the DMX-chain
with the DMX-input of the next fixture. Always connect one
output with the input of the next fixture until all fixtures are
connected.
Caution: At the last fixture, the DMX-cable has to be terminated
with a terminator. Solder a 120-Ohm resister between Signal (–)
and Signal (+) into a 3-pin XLR-plug and plug it in the
DMX-output of the last fixture.
OPERATION
After you connected the device to the mains, the TR-256 is ready
for use. With the Power-button, you can switch the device on and
off.
Press the Cancel-button twice in order to return to the original
setting.
5
When the controller TR-256 is power on, the state of EMS
memory is locked in order to avoid false operation.
You are supposed to press "CANCEL" and "DOWN" together
for a while until the display shows "--UL", then the controller is
released from the locking state and you can use the controller
normally.
When press "CANCEL" and "DOWN" together again for a while
until the display shows "---L", the controller will enter the
locking state, and at this time, the controller can not record or
play programme.
Record a chaser
Run the desired chaser on your controller.
Please note: the chaser in the controller must run without
fade-time. Set the Fade Time-control of your controllers to 0.
Press the Up-button in order to change to the Auto Record-mode.
Press the Enter-button. Select the desired chaser via the
Up/Down-buttons. Press the Enter-button. Select the number of
scenes via the Up/Down-buttons. Press the Enter-button. The
scenes are recorded.
Record scenes individually
If your controller does not feature a Fade Time-control, you need
to record the scenes step-by-step.
Call up the desired scene in your controller.
Press the Up-button in order to change to the Manual-mode. Press
the Enter-button. Select the desired chaser via the
Up/Down-buttons. If the chaser is empty, a dot appears behind
6
the chaser number. Press the Enter-button. Select the desired
scene via the Up/Down-buttons. Press the Record-button. The
scene is now recorded. Select the next scene in your recorder and
controller. Press the Record-button. Press the Enter-button in
order to leave this mode.
Call up a chaser
Disconnect the controller from the Recorder.
Press the Up-button in order to change to the Run Chaser-mode.
Press the Enter-button. Select the desired chaser via the
Up/Down-buttons. Press the Enter-button. The chaser is played
back. During the playback, you can change the chaser via the
Up/Down-buttons.
Adjusting the program speed
The projectors run through the selected program step by step with
the programmed speed. The program speed can be adjusted via
the time-Fader. The Control Display shows the current speed
between 0.2 and 25 seconds.
Adjusting the waiting time
The projectors run through the selected program step by step with
the programmed waiting time. The waiting time can be adjusted
via the Cross-Fader. The Control Display shows the current
waiting time between 0 and 100.
Activating the sound-control
If the sound-control is activated, the program moves in the
bass-tact of the music.
Press the Music-button (LED shines) and the sound-control is
activated.
7
Delete a chaser
Press the Up-button in order to change to the Manual mode. Press
the Enter-button. Select the desired chaser via the
Up/Down-buttons. Press the Delete-button and Insert-button at
the same time. The chaser will be deleted.
Insert/delete a scene
Press the Up-button in order to change to the Manual mode. Press
the Enter-button. Select the desired chaser via the
Up/Down-buttons. Press the Enter-button. Select the desired
scene via the Up/Down-buttons. Press the Insert-button in order
to inset the scene before the current scene or press Delete in order
to delete the current scene.
Call up a scene
Press the Up-button in order to change to the Manual mode. Press
the Enter-button. Select the desired chaser via the
Up/Down-buttons. Press the Enter-button. Select the desired
scene via the Up/Down-buttons. Press and hold the
Preview-button in order to call up the scene.
Create a macro
A Macro is a chain of several chasers.
Disconnect the controller from the Recorder.
Press the Up-button in order to change to the Manual mode. Press
the Macro-button. Select the desired macro via the
Up/Down-buttons. Press the Enter-button. Select the desired
chaser via the Up/Down-buttons. Press the Record-button. The
chaser will be added to the macro. After adding the last chaser, do
not press the Enter-button. Rather press the Enter-button to
memorize.
8
Call up a macro
Disconnect the controller from the Recorder.
Press the Up-button in order to change to the Run Chaser-mode.
Press the Macro-button. Select the desired macro via the
Up/Down-buttons. Press the Enter-button. The macro is played
back.
The program speed, the waiting time and the sound-control can
be adjusted like described above.
Delete a macro
Press the Up-button in order to change to Manual-mode. Press the
Macro-button. Select the desired macro via the Up/Down-buttons.
Press the Delete-button. The macro will be deleted.
PROBLEM CHART
CLEANING AND MAINTENANCE
We recommend a frequent cleaning of the device. Please use a
soft lint-free and moistened cloth. Never use alcohol or solvents!
There are no serviceable parts inside the device. Maintenance and
service operations are only to be carried out by authorized
9
dealers.
Should you need any spare parts, please use genuine parts.
Should you have further questions, please contact your dealer.
TECHNICAL SPECIFICATIONS
Power supply:
Power consumption:
Sound-control:
Dimensions:
Weight:
9 V DC, 1 A
9W
Via built-in microphone
192 x 172 x 32 mm
1 kg
Please note: Any information is subject to change without
prior notice.
10