1
Table of Contents
Your Aakash Tablet ................................................................. 1
1.4.4) Drag and Drop .....................................................................8
Copyright ................................................................................ 1
1.4.5) Pinch In ................................................................................8
Charging Battery ..................................................................... 2
1.4.6) Pinch Out .............................................................................8
Memory Card .......................................................................... 3
1.5) Display Indicators .............................................................9
1) Getting Started.................................................................... 4
1.6) Tablet Keypad .................................................................10
1.1) Isometric View ..................................................................4
1.6.1) Alpha Mode .......................................................................10
1.2) Switch ON/OFF..................................................................5
1.2.1) Switch ON ........................................................................... 5
1.2.2) Switch OFF .......................................................................... 6
1.3) Lock / Unlock ....................................................................6
1.3.1) Lock Screen ......................................................................... 6
1.3.2) Unlock Screen ..................................................................... 6
1.6.2) Numeric and Special Character Mode ..............................12
2) Customize Desktop ........................................................... 14
2.1) Add to Home Screen .......................................................14
2.1.1) Wallpaper ..........................................................................14
2.1.2) Shortcuts/Apps ..................................................................14
2.1.3) Widgets .............................................................................15
1.3.3) Home Screen ....................................................................... 7
2.2) Delete from Home Screen ...............................................15
1.4) Operating the Touch Screen..............................................7
3) Select, Cut, Copy, and Paste .............................................. 16
1.4.1) Tap / Touch ......................................................................... 7
3.1) Select ..............................................................................17
1.4.2) Touch and hold ................................................................... 7
3.2) Select all..........................................................................17
1.4.3) Slide .................................................................................... 7
3.3) Cut ..................................................................................17
3.4) Copy ................................................................................17
4.5.5) Copy/Move Single/Multiple Folder ....................................23
3.5) Paste ...............................................................................17
4.5.6) Paste Folder/s....................................................................23
4) File Manager ..................................................................... 18
4.5.7) Paste into Folder................................................................23
4.1) Organization and Tools ...................................................18
5) Configuring Wi-fi ............................................................... 24
4.2) Navigating to a Directory/File ........................................19
5.1) Selecting a Wi-fi Network ...............................................24
4.3) Creating a New Directory / Folder ..................................20
5.2) Adding a Wi-fi Network ..................................................25
4.4) Operations on Files .........................................................21
5.3) Removing a Wi-Fi Network .............................................25
4.4.1) Selecting / Marking Single File .......................................... 21
6) Aakash Applications .......................................................... 26
4.4.2) Selecting / Marking Multiple Files..................................... 21
7) Aakash Programming Lab.................................................. 26
4.4.3) Renaming a File ................................................................ 21
4.4.4) Deleting Single/Multiple File/s .......................................... 21
4.4.5) Copy or Move (Single/Multiple) File/s ............................... 22
4.4.6) Paste File/s ....................................................................... 22
4.5) Operations on Folders .....................................................22
4.5.1) Selecting / Marking Single Folder ..................................... 22
4.5.2) Selecting / Marking Multiple Folders ................................ 22
4.5.3) Renaming a Folder ............................................................ 22
4.5.4) Deleting Single/Multiple Folder/s ..................................... 23
4
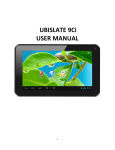
Your Aakash Tablet
Aakash tablet was launched in India by MHRD for educational
use. In near future, Government of India plans to deploy Millions
of these tablets amongst students, to enhance the effectiveness of
their learning.
Aakash is now available in an enhanced version (Aakash-2) of
the original tablet. It has a 1 GHz processor, 512 MB memory,
4GB portioned NAND flash, a capacitive touch screen. It runs
the Android 4.0 Operating System. Future versions of the tablet
will continue to have further enhancements. Under the National
Mission on Education through Information and Communication
Technologies (NME-ICT), IIT Bombay is conducting a project
for empowerment of teachers using these tablets. Apart from the
standard applications available on Android, several important
educational applications and contents have been added by IIT
Bombay. These are being distributed in Open Source.
The tablet you are using is procured by IIT Bombay as a part of
this project, and has been issued to you at no cost, for use in your
college for educational purposes. As such, it shall remain the
property of IIT Bombay. Feedback from students and teachers
will help improving it further.
Please visit http://www.it.iitb.ac.in/aakash2 for more details, and
for the latest version of the manuals.
Copyright
Aakash logo is the copyright of
Government of India
NME-ICT, MHRD,
Applications developed at IIT Bombay are copyright of IIT
Bombay, released in Open Source under Creative Commons ‘By
Attribution’ license.
User Manual Version 1.1 - October 2012
1
Charging Battery
Your device has a built-in battery. Before using the device for the first time, you must charge the battery for 6 to 8 hours. Use only
datawind approved chargers. Unauthorized charger may cause damage to your device and / or may lead to overcharging and explosions.
When your battery is low, the battery level indicator will be very thin. The device will automatically turn off after the battery is drained
out.. Recharge the battery to continue use. Recharge the battery, by first inserting the cable into the charging point and then plugging
into a standard AC power outlet. After charging, unplug the charging head from the power outlet and remove the cable from the device.
Fig 1
2
Memory Card
Memory card is to store additional files. Your
device accepts micro SD Card with a maximum
capacity of 32GB (this varies by memory card
manufacturer).
Insert the memory card into the tablet as shown
in the figure given on the right. Push the
memory card into the tablet till you feel the
click.
To remove the memory card from the tablet,
press the memory card till you feel the click.
Pull the memory card from the tablet.
Fig 2
3
1) Getting Started
1.1) Isometric View
Fig 3
4
1.2) Switch ON/OFF
1.2.1) Switch ON
Press the power button for 3
seconds to switch on the tablet.
The following screen will be
displayed when the tablet
switches on.
Fig 4
5
1.2.2) Switch OFF
Press the power button for 3 seconds to switch off the tablet. Select
“OK” to confirm switching off. Select “Cancel” to avoid switching
off the tablet.
Fig 5
1.3) Lock / Unlock
1.3.1) Lock Screen
Press the power button to lock the screen. The tablet will hibernate into sleep mode. The tablet
also hibernates and the screen gets locked if, it is not used for certain amount of time.
1.3.2) Unlock Screen
To unlock the screen, press the power button. The home screen will be displayed, but the
screen will remain locked. If no action is performed within 5 seconds, the tablet will hibernate
into sleep mode again. After pressing the power button slide the lock icon from the current
position towards the “unlock” icon, positioned on the right. Refer 1.4.3 to perform slide
operations on touch screen.
Fig 6
6
1.4) Operating the Touch Screen
1.3.3) Home Screen
1.4.1) Tap / Touch
Tap or touch the screen with your finger, to select an application
or button, or to type using android keyboard.
1.4.2) Touch and hold
To view more features of the application,
or to activate the drag feature, touch and
hold the screen for two seconds at the
desired position.
Fig 8
1.4.3) Slide
Fig 9
Touch the screen of the tablet and
without lifting your finger, slide
your finger on to the screen in the
desired direction. The action will
result the screen image or content
to shift up,, down, left or right. To
view more content placed on the
right, slide the finger towards the left.
Fig 7
7
Similarly, to view more content placed below, slide your finger
upwards. This is shown in Fig 11 and Fig 12
Fig 10
1.4.5) Pinch In
Pinch In operation is used to
perform zoom in operation. It is
normally used to increase the
size of the image or object. The
pinch in operation is performed
by placing the two fingers(close
to each other) on the screen and
moving them apart from each
other.
Fig 13
Fig 11
1.4.6) Pinch Out
1.4.4) Drag and Drop
Use the drag and drop
facility to add, remove and
reposition
applications.
Touch the application icon
on the screen that is to be
moved, and without lifting
your finger from the
screen, slide your finger to
desired place and release
it.
8
Pinch Out operation is used to
perform zoom out operation. It
is normally used to decrease the
size of the image/object. The
pinch
out
operation
is
performed by placing the two
fingers(at a distance) on the
screen and moving them
towards each other.
Fig 12
Fig 14
1.5) Display Indicators
The display indicators are present in the notification bar placed at the bottom (Fig 7) of the screen.
Fig 15
9
1.6) Tablet Keypad
1.6.1) Alpha Mode
Fig 16
Fig 17
10
In many text editing applications, a virtual keyboard is used for typing. It has two modes: 1) Alpha; 2) Numeric and Special Characters.
In a text editing/browsing application, the mode is lower case by default, but it can be changed, as explained later. Alpha mode (layout
on the left page) is used to type lower and upper case alphabets. To type, touch the respective keys on the touch screen. The layout of the
virtual keyboard is similar to a typewriter/computer “QWERTY” keyboard, and row 1, 2, and 3 are similar.
The first row has alpha characters: q w e r t y u i o p and
Backspace key.
The second row has alpha characters: a s d f g h j k l and
Return/Enter key.
The third row has Shift, z x c v b n m comma (,) full stop (.),
and hyphen (-).
The fourth row has Switch mode, tab (|), (.com), long central
key space, forward slash (/), hyphen(-), and Settings key.
Switch
The first row has alpha characters: Q W E R T Y U I O P, and
Backspace key.
Return/Enter (Places text on next line
The second row has alpha characters: A S D F G H J K L, and
Return/Enter key.
Tab .com
Space
Slash Hyphen
Settings
Hyphen
Backspace (Deletes last character)
Shift: Toggles the text between lower and upper case
The third row has Shift, Z X C V B N M, comma (,) full stop
(.), and hyphen (-).
Tap Once : Converts only next letter from lower to upper case.
e.g. a b c Shift A b c”.
The fourth row is same as that in lower case
Tap Twice:: Convert rest of the text from lower to upper case.
e.g. “a b c Shift Shift a b c”.
Convert
: Upper to lower case, touch the key once.
e.g. “A Shift a b c”
Fig 18
11
1.6.2) Numeric and Special Character Mode
Fig 19
Fig 20
12
This mode is used to type numbers or special characters. The general layout of this mode is shown below. Touch the “Alt” key to view
and utilize other available special characters/numbers. The numeric mode is activated using the “Switch mode” key on the keypad.
ad. To
switch back to the alpha mode, again press the “Switch mode” key. It is a toggle key that switches between two modes. Touch the
respective keys on the touch screen of the virtual keyboard to type.
The top row has numbers from 0 to 9, “1 2 3 4 5 6 7 8 9 0” and
Backspace key.
The second row consists of special characters. “# $ % & * - + (
)”, and Return/Enter key.
The third row also consists of special characters. The left edge
has “~\{“ i.e. Alt key.
The fourth row has Switch mode, tab (|), @, long central key
space, double quotes (“), underscore (_), and Settings key.
The top row has ~ ` | •
√ ∏ ÷ × § ∆ and backspace key.
The second row has Pound, Cent, Euro, ^
Return/Enter
o
± { }, and
Switch
Tab
Switches to
alpha mode
Space
Settings
Return/Space
Backspace
ALT
Toggles between Math Symbols, and
Numbers and Special Characters
Fig 21
The third row has “?123”, \, , , , c/ο [, ], ¡, and ¿.
The fourth row, has Switch mode, tab (|), a long central key space, and Settings.
13
Browse through the list using slide operation(E.g. Wallpaper)
2) Customize Desktop
Touch the Option button ‘⋮
⋮’ present in the notification bar. A
list is displayed containing ‘Wallpaper’, ‘Manage apps’,
‘System settings’ as shown below.
Wallpaper
Manage apps
System settings
Fig 22
2.1) Add to Home Screen
Fig 24
2.1.1) Wallpaper
Touch Set Wallpaper.
Touch Wallpaper
Touch the source of
wallpaper (Gallery image captured
from camera; Live
Wallpaperanimated
wallpapers;
Wallpaper-images)
2.1.2) Shortcuts/Apps
Touch the menu button on the home screen, which displays a
list of applications.
Browse through the list.
Touch and hold the desired application. The application will be
selected and the home screen will be displayed
Fig 23
14
Drop the applicationn at the desired position on the home screen
by lifting the finger from the screen.
2.1.3) Widgets
Touch the menu button on the home screen, which displays a
list of applications installed.
Touch Widgets tab
Browse through the list of widgets in your tablet.
Touch and hold the desired widget. The widget will be selected
and home screen will be displayed.
Drop the widget at the desired position on the home screen by
lifting the finger from the screen.
2.2) Delete from Home Screen
Touch and hold the desired item on the home screen.
The selected item will be magnified and the “Trash” icon(X)
will be displayed at top center of the screen.
Drag the item over the trash and release it.
When the icon is placed over the “Trash”, the color of the
selected item changes to “red”.
15
3) Select, Cut, Copy, and
Paste
Select, cut, copy, and paste
are general editing operations
that are common to all text
editing
or
text
input
applications like Notepad,
browser search, configuring
applications, naming and
renaming folders, setting
reminders, etc. To perform
editing operations, open any
text editing application like
‘Notepad’.
Touch menu button, which
will list all applications
installed in the tablet.
Browse
through
applications
and
Notepad 4.0
the
select
Fig 25
Touch New button. A new blank Notepad page opens. Touch the screen to activate the virtual keyboard, for writing notes. Write the
intended notes. The editing options are “Select”, “Select all”, “Cut”, “Copy”, and “Paste”. All editing operations are performed only
after selecting the text.
16
3.1) Select
Touch and hold the desired
area or text for 3seconds.
The current word gets
highlighted and is placed in
between the start and end
tabs (blue color).
Drag the start and end tabs
to select more or less text.
Fig 26
3.4) Copy
3.2) Select all
Perform Select operation(Refer 3.1)
Perform Select operation(Refer 3.1)
Touch Copy option placed at the top of the screen
Touch Select All option placed at the top of the screen
3.3) Cut
The selected text will be copied on to the clipboard for future
reference.
Perform Select operation(Refer 3.1)
3.5) Paste
Touch Cut option placed at the top of the screen
Perform ‘cut’, and ‘copy’ editing operations.(Refer 3.3 and 3.4)
The selected text will be copied onto the clipboard and the text
will be deleted from the screen.
Place the cursor at the desired position, by tapping the screen.
Touch and hold the screen for 3 seconds
Touch Paste button.
17
4) File Manager
File manager is used to keep track of the files, folders, maintain and create directory structures, for organizing data on the tablet.
Touch Menu button on the home screen.
Touch File Manager
Fig 27
This will list all files/folders which are categorized by the storage locations and type, like external memory card, USB, etc..
Fig 28
4.1) Organization and Tools
Files or Folders can be created, copied, and stored in various locations. The locations are present at the top of the screen. Touch
appropriate storage locations of the files and folders by tapping on respective icons, as shown in Fig 28.
18
An example that displays a list of images is shown below. Touch a particular image to view it.
Fig 29
4.2) Navigating to a Directory/File
Select File Manager (Refer 4).
Touch location as shown in Fig 28.
Browse through the folders and select the desired one. Continue browsing and selecting files or folders (if exists).
19
4.3) Creating a New Directory / Folder
Navigate to the desired directory (Refer 4 and 4.2)
Touch Option button ‘⋮
⋮’ present in the notification
bar. It will display a list of options.
Fig 30
Touch the first option New Directory
Write the name of the directory.
e.g. “Aakash”
Fig 31
Touch Create
A new directory is created in the internal
memory of the tablet. This is shown in
Fig 32.
Fig 32
20
4.4) Operations on Files
Touch File/Folder Editing options. Refer Fig 28.
The various operations that can be performed on a file are
‘Delete’, ‘Rename’, ‘Copy’, ‘Cut’, and ‘Email’.
Touch the desired files. The selected files will have a green
colored tick mark.
File Operations
4.4.3) Renaming a File
Delete File
Rename File
Perform select operation
for single file (Refer
4.4.1)
Copy File
Touch Rename File.
Move(Cut) File
Type the desired name
using the keyboard.
Email File
Fig 34
Fig 33
4.4.1) Selecting / Marking Single File
Navigate to the desired file(Refer 4.2).
Touch and hold the desired file for 3 seconds.
A list of operations that can be performed on the file are
displayed in Fig 33.
Touch Rename.. A confirmation message is displayed after the
file is renamed.
4.4.4) Deleting Single/Multiple File/s
Perform select operation for single file (Refer 4.4.1).
Or
Perform select operation for multiple files (Refer 4.4.2).
Touch Delete.
4.4.2) Selecting / Marking Multiple Files
Touch Delete to confirm.
Navigate to the desired file(Refer 4.2).
21
4.4.5) Copy or Move (Single/Multiple) File/s
4.5.1) Selecting / Marking Single Folder
Navigate to the desired file(Refer 4.2).
Navigate to the desired directory(Refer 4.2).
Perform select operation for single file (Refer 4.4.1). Or
Touch and hold the desired folder for 3 seconds.
Perform select operation for multiple files (Refer 4.4.2).
Touch Copy File or Move(Cut) File.
A list of operations that can be performed on the folder are
displayed in Fig 35.
4.4.6) Paste File/s
4.5.2) Selecting / Marking Multiple Folders
Perform Cut or Copy operations(Refer 4.4.4 and 4.4.5).
Navigate to the desired folder(Refer 4.2).
Navigate to the desired directory(Refer 4.2).
Touch File/Folder Editing options. Refer Fig 28.
Touch File/Folder Editing options. Refer Fig 28.
Touch the desired folder. The selected folder will have a green
colored tick mark.
Touch Paste.
4.5) Operations on Folders
The various operations that
can be performed on a folder
are
‘Delete’,
‘Rename’,
‘Copy’, ‘Cut’, ‘Zip’, ‘Extract
Here’, and ‘Paste Into.
22
Folder operations
Delete Folder
Rename Folder
4.5.3) Renaming a Folder
Copy Folder
Move(Cut) Folder
Type the desired name using the keyboard.
Zip Folder
Paste into Folder
Extract here
Fig 35
Perform select operation for single folder (Refer 4.5.1).
Touch Rename Folder.
Touch Rename. A confirmation message is displayed after the
folder is renamed.
4.5.4) Deleting Single/Multiple Folder/s
4.5.7) Paste into Folder
Perform select operation for single folder (Refer 4.5.1). Or
Perform select operation for multiple folders (Refer 4.5.2).
Perform Cut or Copy operations(Refer 4.4.4, 4.4.5, 4.5.4, and
4.5.5).
Touch Delete.
Navigate to the desired directory(Refer 4.2).
Touch Delete to confirm.
Touch and hold the desired folder for 3 seconds.
Touch File/Folder Editing options. Refer Fig 28.
4.5.5) Copy/Move Single/Multiple Folder
Navigate to the desired folder(Refer 4.2).
Perform select operation for single folder (Refer 4.5.1).
Or
Perform select operation for multiple folder (Refer 4.5.2).
Touch Copy or Move(Cut).
4.5.6) Paste Folder/s
Perform Cut or Copy operations(Refer 4.4.4 and 4.4.5).
Navigate to the desired directory(Refer 4.2).
Touch File/Folder Editing options. Refer Fig 28.
Touch Paste.
23
5) Configuring Wi-fi
5.1) Selecting a Wi-fi Network
Touch Menu button on the
home screen
Touch Settings
Fig 36
Touch Wi-Fi. (Fig 37)
Touch OFF to switch on Wi-Fi
connectivity
Fig 38
Fig 39
The tablet will list all the
available Wi-Fi connections.
Touch any one of the available
Fig 37
Wi-Fi networks. (e.g. AAKASH)
Touch Connect
24
5.2) Adding a Wi-fi Network
Touch Wi-Fi settings (Refer 5.1)
Touch “ADD NETWORK” placed on top right corner of the tablet
Fig 40
Touch
appropriate
security
configurations of that
network.
Touch Save to
confirm, else touch
Cancel.
Fig 42
Provide details for configuring the Wi-Fi network. Input Network SSID.
5.3) Removing a Wi-Fi Network
Touch Wi-Fi settings(Refer 5.1)
Touch and hold the desired Wi-Fi connection for 3
seconds.
Touch Forget network.
Fig 41
Fig 43
25
6) Aakash Applications
7) Aakash Programming Lab
Apart from the standard applications available on Android,
several educational applications and contents have been added
by IIT Bombay.
Touch menu button on the home screen.
Touch menu button on the home screen
Touch Aakash Programming Lab
Browse through the list of installed applications.
Browse through the list of applications.
Touch Aakash Applications
(Demonstration)
Fig 46
Aakash Programming
A list of all applications installed under ‘Aakash
Lab’ is displayed, which is shown below.
Fig 44
Applications developed at IIT Bombay will appear through their
icons shown below.
Fig 47
Fig 45
26
Notes(1)
27
Notes(2)
28