1
ETC® Supplement
Eos Family v2.0.1 Supplement to Operations Manual
The following information is new for version 2.0.1. This document is supplemental to information in
the Eos Titanium, Eos, and Gio v2.0 Operations Manual, Ion v2.0 Operations Manual, and Element
v2.0 User Manual, and should be used in conjunction with it.
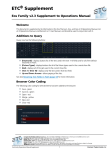
Display Changes
Changes in this section impact the System Basics chapter and the Facepanel Shortcuts appendix.
Latching Data and Time
[Data] Key
Pressing and holding [Data] allows you to view the values behind any referenced or marked data.
[Data] exposes the next lower reference level. So if you view a palette reference and press [Data],
the absolute data will be displayed instead. If you are viewing a preset, absolute or palette data will
be displayed, depending on what is contained in the preset.
On Eos Ti, Eos, Gio, and Ion, you can lock this mode by pressing [Shift] + [Data]. When in display
reference values mode, “Data Latched” will display in the upper left of the live display and the
[Data] key will be lit in green on Eos Ti and Gio. To exit this mode, press [Shift] +[Data] again.
[Time] Key
Pressing and holding the [Time] (the one by [Data] on Eos Ti, Eos, and Gio) allows you to view
discrete timing data behind any channel parameter. [Time] exposes channel or parameter specific
timing for any channels in the current cue. The first value is the delay time. If “--” is displayed, there
is no delay. The value to the right of the / is the transition time.
On Eos Ti, Eos, and Gio, you can lock this mode by pressing [Shift] + [Time]. When in display time
mode, “Timing Latched” will display in the upper left of the live display and the [Time] key will be lit
in green on Eos Ti and Gio. To exit this mode, press [Shift] +[Time] again.
On Ion, you can lock this mode by pressing [Shift] + [Time] [Time]. To exit this mode, press [Shift]
+[Time].
Category Time in PSD
When the {PSD Time Countdown} setup option (Setup> Desk> Displays) is enabled, each
category time will individually turn gold when that timing has completed.
Manual Control Changes
Changes in this section impact the Basic Manual Control or the Advanced Manual Control chapter.
Rem Dim /
Rem Dim levels can either be an absolute value, such as Full or 50%, or a proportional value, which
would set the levels to a percentage value of their current levels. To use a proportional value, press
[/] before entering the percentage value.
For Example:
Assume that channels 1 through 10 are selected and set to an intensity level of 60. Select channel
1 and dim the remaining channels.
Corporate Headquarters 3031 Pleasant View Road, P.O. Box 620979, Middleton, Wisconsin 53562-0979 USA Tel +608 831 4116 Fax +608 836 1736
London, UK Unit 26-28, Victoria Industrial Estate, Victoria Road, London W3 6UU, UK Tel +44 (0)20 8896 1000 Fax +44 (0)20 8896 2000
Rome, IT Via Pieve Torina, 48, 00156 Rome, Italy Tel +39 (06) 32 111 683 Fax +44 (0) 20 8752 8486
Holzkirchen, DE Ohmstrasse 3, 83607 Holzkirchen, Germany Tel +49 (80 24) 47 00-0 Fax +49 (80 24) 47 00-3 00
Hong Kong Rm 1801, 18/F, Tower 1 Phase 1, Enterprise Square, 9 Sheung Yuet Road, Kowloon Bay, Kowloon, Hong Kong Tel +852 2799 1220 Fax +852 2799 9325
Service: (Americas) [email protected] (UK) [email protected] (DE) [email protected] (Asia) [email protected]
Web: www.etcconnect.com QSF 4.1.9.1 Copyright © 2013 ETC. All Rights Reserved. Product information and specifications subject to change.
4250M1211-2.0.1 Rev A Released 2013-06 ETC intends this document to be provided in its entirety.
Eos F ami ly v 2. 0. 1 Ope r at io ns Ma nu al Su pp le ment
Pag e 1
El ect r on ic T he at r e Con t ro ls , I nc .
ETC Supplement
Eos Family v2.0.1
•
[1] [Rem Dim] [/] [5][0] [Enter]
Channels 2 through 10 will be dimmed to 30.
Highlight Rem Dim
To temporarily override the {Highlight Rem Dim} option in Setup, you can use either of the
following syntax examples:
• [channel list] [Highlight] [Rem Dim] [#] [Enter]
• [channel list] [Highlight] [Rem Dim] [/] [#] [Enter]
[ -] [Select Manual] / [Select Active]
[-] [Select Manual] or [-] [Select Active] can be used to modify channel selections. Using [-]
[Select Manual] will select all of the channels in the list except those that have manual data. Using
[-] [Select Active] will select all of the channels in the list except those that are active.
• [1] [Thru] [2] [0] [-] [Select Manual] [Enter] - selects channels 1 through 20 except any
channels that currently have manual data.
[1] [Thru] [2] [0] [-] [Select Active] [Enter] - selects channels 1 through 20 except any channels
that are currently active.
[ Undo] [Undo] [Enter]
Pressing [Undo] [Undo] will scroll to the most recent undo-able command in the command history
display. To undo the command, press [Enter].
Captur e Latch
Previously Capture Latch would be enabled for all users when it was enabled by one user. Now
Capture Latch works on a user by user basis. For more information on using Capture Latch, see the
Using [Capture] section of the Advanced Manual Control chapter.
Recording and Playback Changes
Changes in this section impact the Cue Playback, Storing and Using Submasters, or Using
Partitioned Control chapters.
Loading a Cue with Temporary Time
A cue can be loaded with a temporary time.
• [Cue] [3] [Time] [6] [Load] - loads cue 3 with the
manual time of 6.
Note:
For multipart cues, the temporary time will be applied to the entire cue, not just the
part on the command line.
For cues with discrete timing, its parameters will use the temporary time instead
of the assigned discrete timing.
Submasters
The number of submasters has increased to 999. The number of fader pages available is still 30,
which means that there is a still a limit of 300 submasters being used with physical faders at a time.
Partitions on Cue Lists
A partition may be assigned to a cue list. If a partition has already been applied to a cue list, any
channels not in the cue list's partition will not be included in cues when they stored or replayed.
Any data for a cue list that already existed before a partition is applied, will be maintained, including
data for channels not included in the partition. If data existed before the partition was assigned, in
Eos F ami ly v2 . 0. 1 Ope ra t io ns Ma nu al Sup pl eme nt
Pag e 2
El ect r on ic T he at r e Con tr o ls , I nc.
ETC Supplement
Eos Family v2.0.1
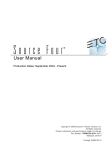
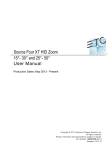
blind, channels that are not in the partition will display without a channel graphic, any levels will be
in gray, and a small superscript N will display with it.
Channels that were
initially saved in the
cue list but are not in
the currently
assigned partition
Assigned partitions will display in the external links column in the cue list index.
To assign a partition to a cue list:
• [Cue] [n] [/] {Partition} [n] [Enter]
To remove a partition from a cue list:
• [Cue] [n] [/] {Partition} [Enter]
Wor k i n g w i t h a S i n g l e C u e L i s t C h a n g e s
Changes in this section applies to the Working with a Single Cue List chapter.
Aut o-block Cleanup
Cues that have auto-blocks will display a underscored b in the PSD. {Autoblock Clean} is used to
remove all auto-blocks from a single cue, cue range or entire cue list. {Autoblock Clean} is a
softkey that will be posted when a cue list and/or cue number are on the command line in the Cue
List Index, Live, and Blind. A range of cues or a cue list can be specified with this command.
For Example:
• [Cue] [1] [/] {Autoblock Clean} [Enter] - clears all auto-blocks from cue list 1. Only blocks
displayed with the white underscore are removed. If the [Block] key was previously used, this
command will not unblock it.
• [Cue][1] [/] [1][0] [Thru] [1][0][0] {Autoblock Clean} [Enter] - clears the auto-blocks just
from cues 10 through 100 of cuelist 1.
Default Update Modes
The default Update modes have changed. Eos defaults to Make Absolute for the {Update Mode},
with {Break Nested} and {Update Last Ref} enabled.
Default Update Setup Options
Eos F ami ly v2 . 0. 1 Ope ra t io ns Ma nu al Sup pl eme nt
Pag e 3
El ect r on ic T he at r e Con tr o ls , I nc.
ETC Supplement
Eos Family v2.0.1
Ti m i n g D i s a b l e
This change affects the Setup and Cue Playback chapters.
You can assign a separate time value for [Timing Disable] in Setup> Desk> Manual Control>
Default Times> Timing Disable. When a fader has been set to timing disable mode, cues will use
the time set in Setup. The default time is 0.
[Shif t] + [Go] and [Shif t] + [Back]
[Shift] + [Go] and [Shift] + [Back] can be used to cut to the next cue in the same way as [Timing
Disable] + [Go] and [Timing Disable] + [Back].
Show File
An indicator has been added to show when a show file has been
modified but not saved. An asterisk (*) will display beside the show file
name.
Mirror Mode
This change affects the Mirror Mode section of the Multi-console and Synchronized Backup
chapter.
A device that is currently in mirror mode can select which user number it is mirroring by using the
alphanumeric keyboard shortcut M + # (# being the user number). M + ESCAPE can be used to
leave mirror mode.
Note:
If a device is not currently in mirror mode, pressing M on an alphanumeric
keyboard will post Mark to the command line.
Collapsing PSD Columns
This change affects the Playback Status Display section of the System Basics chapter.
To collapse a column in the Playback Status Display, press [Escape] while clicking on the column
you want to collapse. Press [Shift] + [Select] to bring back all of the collapsed columns.
Magic Sheets on Direct Selects
Magic Sheets can now be accessed from the direct selects. Clicking on a magic sheet direct select
will open the Magic Sheet tab and display the selected magic sheet. Pressing a different magic
sheet direct select will change the displayed sheet.
Using Park Changes
Changes in this section impact the Using Park chapter.
Recall Fr om Par k
You can use [Recall From] [Park] to set a channel or parameter to the same level as the current
park value.
For Example:
Let’s assume that channels 1 through 5 are parked at 55. To recall that level to channels in live or
blind, use the following syntax:
•
[1] [Thru] [1][5] [Recall From] [Park] [Enter]
Channels 1 through 5 will be set to 55 and channels 6 through 15 will be unaffected.
Note:
This does not release the Park buffer.
Eos F ami ly v2 . 0. 1 Ope ra t io ns Ma nu al Sup pl eme nt
Pag e 4
El ect r on ic T he at r e Con tr o ls , I nc.
ETC Supplement
Eos Family v2.0.1
[Thr u][Thru] in Park
When parking a range of addresses in Park, using [Thru] will only park the intensities. If you want
to park all of the addresses and parameters within the selected range, you will need to use [Thru]
[Thru].
Patch Changes
Changes in this section impact the Patch chapter.
{Swap} in Patch
Additional options have been added to {Swap} in Patch.
•
•
•
•
{Swap} - swaps only the patched address
{Swap} {Plus Show} - swaps all show and patch data
{Swap} {Only Show} - swaps only the show data and not patch data
{Swap} {Plus Patch} - swaps addresses and patch data but not show data
Fixtur e Editor Parameter s
The fixture editor parameters list is now displayed in alphabetical order.
[Thru] [Thru]
This change applies to the Multipart Cues chapter.
[Thru] [Thru] can be used in blind to create multiple cue parts in a range. For example, [Cue] [1]
[Part] [1] [Thru] [Thru] [4] [Enter] will create parts 1 through 4. If you were to use just [Thru]
instead of [Thru] [Thru] in that example you would create parts 1 and 4.
Subgroups
This change applies to the Using Groups chapter.
You can create subsets of channels within a group by using [Shift] + [/]. [Shift] + [/] will create
parentheses. These subsets of channels or subgroups are treated as a single channel in the
following ways:
• When applying absolute or relative effects from live, the subgroups are treated as a single
channel by the effect.
• When setting a range of step's channels on a step based effect, the subgroup will not be
spread out amongst multiple steps.
• When the group is selected and next/last is pressed, each subgroup is traversed.
• When a group has subgroups, {Reverse}, {Reorder}, and {Random} in the group editor will
affect the subgroups instead of the channels in each subgroup. {Reorder} will order the
groups based on the first channel in each group.
Subgroups can be created either in the group list or live.
Subgroups
To create a subgroup in live:
• [Shift] + [/] [1] [Thru] [4] [Shift] + [/] [Record] [Group] [2] [Enter]
To create a subgroup in the group list index:
• [Group] [2] [Enter] [Shift] + [/] [1] [Thru] [4] [Shift] + [/] [Enter]
Note:
Fan is not currently supported with Subgroups.
Eos F ami ly v2 . 0. 1 Ope ra t io ns Ma nu al Sup pl eme nt
Pag e 5
El ect r on ic T he at r e Con tr o ls , I nc.
ETC Supplement
Eos Family v2.0.1
Managing Show Files Changes
Changes in this section impact the Managing Show Files chapter.
Impor ting Custom Gobo Images
Custom gobo images can be imported by going to Browser> Import> Gobo Images and selecting
an image file or folder. If a folder is selected, all image files within the folder will be imported. All
standard image files are supported with the exception of .svg files.
Imported gobo images can be deleted by going into Browser> Import> Gobo Images> Imported
Gobos, selecting the image, and pressing [Delete] [Enter].
Impor ted Media and Part ial Show Op en/Mer ge
A new tile, {Media} has been added to the Partial Show Opening and Merge displays. Media is
imported gobo and magic sheet images.
Note:
Media will be included by default when you select Patch, Fixtures, or Magic
Sheets.
Vi r t u a l M e d i a S e r v e r
Changes in this section impact the Virtual Media Server chapter.
Number of Pixel Maps
The number of pixel maps per show file is now 40. Previously it was limited to 10 maps.
{Flash}
The {Flash} softkey is available in the Pixel Map Editor display. {Flash} works the same as it does
in Live. See the section on Flash in the Basic Manual Control chapter for more information.
Patch b y Channel
An option for setting the starting channel has been added to the Edit display for mapping channelbased pixels.
• When either {Starting Channel} or {Starting Address} is selected, both fields will be
cleared.
• Address-based pixels can not overlap with channel-based pixels. This includes the entire
DMX fixture footprint.
• If using {Starting Channel}, any overlapping channel-based pixels will be removed and any
overlapping address-based fixtures will be unpatched.
• If using {Starting Address}, any overlapping address-based pixels will be removed and any
overlapping channel-based fixtures will be unpatched.
• When the [Data] key is latched, the address for channel-based pixels will display.
• When [Format] is pressed, the address will toggle between port/offset and address number.
Eos F ami ly v2 . 0. 1 Ope ra t io ns Ma nu al Sup pl eme nt
Pag e 6
El ect r on ic T he at r e Con tr o ls , I nc.
ETC Supplement
Eos Family v2.0.1
Park and Address Check
You can use Park and Address Check for Virtual Media Server outputs.
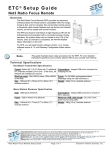
Color Picker
A second color picker has been added for virtual effect layers. The second color picker will be
labeled as End Color and will control RGB2.
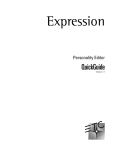
Cop ying Color
You can copy or swap a color between the two color pickers using the buttons located between the
two color pickers.
Copies Start Color to End Color
Swaps Start Color and End Color
Copies End Color to Start Color
FDX Dimmer Feedback
ECU Settings
Changes in this section impact the ECU appendix.
FDX Feedback
Clicking in the enable box will allow Eos to receive FDX dimmer feedback over the network.
Broadcast Type
• Directed Broadcast - Broadcast packets are directed to a subnet based on the IP address and
subnet mask of the sender.
• Limited Broadcast - The limited broadcast address is 255.255.255.255. It is limited because
routers will never forward datagrams with that destination address. This means that
datagrams with the limited broadcast address are confined to the particular network segment
on which they originate.
About System
Changes in this section impact the About chapter.
Clicking on a FDX rack in the {About System} list will open the About Rack display, which shows
the following information about the rack:
•
•
•
•
•
•
•
Rack number
Rack Type
Phase A,B,C Voltages
Frequency
System Number
IP Address
Software Version
Device List
For information about FDX Dimmer feedback, see the Device List section in the Patch chapter.
Eos F ami ly v2 . 0. 1 Ope ra t io ns Ma nu al Sup pl eme nt
Pag e 7
El ect r on ic T he at r e Con tr o ls , I nc.