Download Dealer Setup Checklist
Transcript
Residential Split---System Heat Pumps
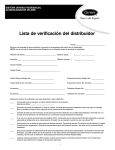
Dealer Setup Checklist
Date:__________________________________
Remove from literature packet and place in customer file at dealership.
NOTE: Read the entire installation instruction manual before starting the installation.
Customer Name:_______________________________________
Home Phone No.: (
)______--_______________
Address:______________________________________________
Business Phone: (
)______--_______________
City, State:____________________________________________
Zip Code:______________________________________________
Outdoor Unit Model No.:___________________________________
Indoor Coil Model No.: _______________________
Outdoor Unit Serial No.:___________________________________
Indoor Coil Serial No.: _______________________
Accessories:____________________________________________
Furnace Model No.: _________________________
Accessories:____________________________________________
Furnace Serial No.: __________________________
Check off the following items when they apply to this installation:
_____ Check equipment for shipping damage. Note Damages: _____________________________________________________
_____ Locate and level unit. See Installation Instructions under Install on a Solid, Level Mounting Pad and Clearance
Requirements sections.
_____ If unit is installed in a low--ambient application, see Installation Instructions Accessory Usage table.
_____ Elevate unit to ensure proper drainage.
_____ Check defrost thermostat to ensure proper location and attachment. See Installation Instruction Defrost Thermostat
Location figure.
_____ Ensure proper line set sizes are used. See Installation Instructions under Make Piping Connections section and
Refrigerant Connections and Recommended Liquid and Vapor Tube Diameters table.
_____ If line sets exceed 80 ft and/or exceeds 3 ft of buried line, see Installation Instructions Accessory Usage table for required
accessories and appropriate Residential Split System Application Guidelines.
_____ Install solenoid valve and filter drier when required. Consult Product Data Sheet for proper accessory kit.
_____ Install proper wire size and fuse/circuit breaker. Consult Product Data Sheet and/or local codes for recommended wire
size and fuse/circuit breaker.
_____ Connect power and control wiring connections. See Installation Instructions under Make Electrical Connections section
and 24--v circuit connection figures.
Power Supply Voltage:__________________________Volts
Control Voltage:____________________Volts
_____ Evacuate line set and indoor coil per Installation Instructions Piping Connections section.
_____ Open refrigerant valves and check refrigerant charge. See Installation Instructions under Check Charge section. Use
Superheat Charging procedure and appropriate Charging tables in INstallation Instructions or in unit labels.
_____ Check refrigerant connections for leaks.
Suction Pressure:_____________________________ psig
Outdoor Temperature:__________________F
Discharge Pressure: ___________________________psig
Indoor Temperature: ___________________F
Superheat/Subcooling: ________________________F
_____ Check factory tubing to ensure tubes are not rubbing against each other or any sheet metal. Pay close attention to feeder
tubes on both indoor and outdoor coils. Ensure wire ties are tight.
_____ Check factory wires and wire connections to ensure terminations are secured properly. See wiring label on unit for proper
wiring identification.
_____ Check wire routing to ensure wires are not in contact with tubing or sheet metal. Check wire routing around fan motor to
ensure wires will not come in contact with fan blades.
_____ Check field wiring for proper support, terminations, and grounding.
_____ Check unit charge and adjust accordingly. Run unit in cooling, heating, and defrost modes. See Installation Instructions
for defrost operation check procedure.
_____ Before leaving job, ensure that all panels and covers are securely fastened and that service valve stem caps are tightened
with wrench to 1/12th turn past finger tight.
_____ Ensure all work areas are clean.
_____ Leave User’s Manual with Owner.
Always Ask For
Copyright 2005 Carrier Corp. S 7310 W. Morris St. S Indianapolis, IN 46231
Manufacturer reserves the right
Printed in U.S.A.
Edition Date: 11/05
to cange, at any time, specifications and designs without notice and without obligations.
2
Catalog No: CL38-- 4
Replaces: CL38--- 2


