1
: $SEMBLY
Two people are required for assembly. Set the treadmill in a cleared area and remove all packing materiaTe.
De no! dispose of the packing materials until assemb!y is cem_!_t,
.._.'_.r-'b!y r_.quir_s the i,':.:!ud_d 7!:_,....
;.'i ._i1wrench
_
aild your owil ph]i]i;_s -_','-_,..,:" ,,,-
- -. - : *
.
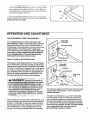
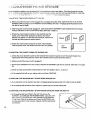
1. Firmly hold one of the Uprights (6, 88) with both hands.
Raise the Uprights until the Front Wheels (58) are resting
on the floor. The inset drawing shows how the treadmill
should appear when this step is completed.
88
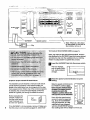
2. Pivot the Console (10) to the angle shown. You should
feel the Console lock into position.
,--,,
2
i
i
," I
D
Jl
I
i
i
i
10
I1
.
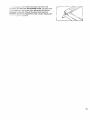
If you do not feel the Console lock into position, use the
7/32" Allen Wrench (89) to tighten the two Crossbar Bolts
(1) two complete turns. Pivot the Console (10) up and
down slightly until you feel it lock into position. When the
Console is locked in position, tighten the Crossbar Bolts.
Look under the Left and Right Console Brackets (3, 36)
and find the two small holes in each end of the Console
Crossbar (9). Tighten Crossbar Screws (99) into all four
holes in the Crossbar.
"
3
99¸
9.'
6