1
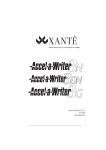
PLEASE READ:
Important information
about using some software
applications with your HP
DesignJet 2500CP Printer!
This document contains information you need to set up your application software to use PostScript with the HP DesignJet 2500CP
Printer.
The information in this document explains how to get help, locate
the driver software, answer configuration questions, use some additional features, and troubleshoot while configuring.
There is a section dealing with each of these topics:
Using the PSPrinter 8.3.1 Driver . . . . . . . . . . . . . . . . page 4
Apple Macintosh applications:
Aldus Freehand and Macromedia Freehand . . . . . . . .
Adobe Illustrator . . . . . . . . . . . . . . . . . . . . . . . . . . . .
Aldus PageMaker and Adobe PageMaker . . . . . . . . .
Adobe PhotoShop . . . . . . . . . . . . . . . . . . . . . . . . . . . .
Quark XPress . . . . . . . . . . . . . . . . . . . . . . . . . . . . . . .
page 9
page 12
page 13
page 14
page 19
Windows application:
CorelDRAW . . . . . . . . . . . . . . . . . . . . . . . . . . . . . . . . page 23
If you can’t find your application in the list above, and you are using the PSPrinter 8.3.1 driver, check the section on page 4;
otherwise refer to the User’s Guide that came with your printer for
some helpful information.
Copyright Hewlett-Packard Company 1997
HP Part Number C4704-90051
Printed in Europe, May 1997
Introduction
This document describes the most efficient way to successfully configure your software application to use the HP DesignJet 2500CP
printer (part number C4704A).
Although your software application documentation contains general
information about configuring devices, you’ll find this information
to be helpful because it pertains specifically to the HP DesignJet
2500CP printer.
Read all instructions and perform each step in this document in sequence. You’ll learn how to:
Configure your device to work with your computer and your
application software.
Answer questions asked by your application during device
configuration.
Use your software application and the device to configure
additional features (optional).
Before you begin
Here’s what you should do before using the instructions in this document:
2
Install your software application on your computer.
Set up the HP DesignJet 2500CP printer using the instructions
in the User’s Guide that was packaged with the device. The
guide instructs you on loading media and print cartridges, and
connecting the printer to your computer.
If you need help
If you have questions about the information or instructions presented in this document, contact your software application dealer for
help. If you need further assistance with your printer, contact your
HP Customer Support Center:
United States:
HP Customer Support Center, Boise
(208) 323 2551
6 a.m.–6 p.m.* Mountain Standard Time (Weekdays)
* The center closes at 4:00 p.m. on Wednesdays
Europe:
HP European Customer Support Center
Amsterdam, The Netherlands
8:30 a.m.–6 p.m.* Central European Time (Monday–Friday)
* The center closes at 4:00 p.m. on Wednesdays
Dutch:
English:
French:
German:
Italian:
Spanish:
(+31) 20 681 6473 or 020 606 8751
(+31) 20 682 8291 or 0171 512 5202
(+31) 20 681 8260 or 04 50 43 98 53
(+31) 20 681 7174 or 084 880 1111
(+31) 20 581 3318 or 02 26410350
(+31) 20 581 3319 or 902 321 123
Asia/Pacific:
Australia: (+61–3) 9272 8000 (8:30 a.m.–5:30 p.m. Mon.–Fri.)
Korea:
(+82–2) 3270 0700 (8:30 a.m.–7 p.m. Mon.–Fri.)
New Zealand: (+64–9) 356 6640 (8:30 a.m.–4 p.m. Wed) AEST
People’s Republic of China: (+86–10) 505 5630 or (+86–10) 505
3888
extension 8800 (8:30 a.m.–5:30 p.m. Mon.–Fri.)
Singapore: (+65) 271 7233 (9 a.m.–5 p.m. Mon.–Fri.)
Taiwan:
(+886–2) 717 9609 (8:30 a.m.–5:30 p.m. Mon.–Fri.)
In case of difficulty, check in the latest Hewlett-Packard Support
Services document.
You can also refer to the documents that came with your software
application and the user’s manual that came with your printer for
more information.
3
Using the PSPrinter 8.3.1 Driver
The PSPrinter 8.3.1 driver lets you print to a “Virtual Printer”.
In this way you don’t need to have a “physical” printer available when you use the driver. You can create a PostScript file
by sending it to a “Virtual Printer”. To use this, select “Virtual Printer” in the Type entry in the Chooser, and then
configure it by selecting the right PPD.
You can see the dimensions of the page you will print on by
clicking on the image on the left on the Page Setup dialog
box.
4
The PSPrinter 8.3.1 driver supports Custom Page sizes. Go to
the Paper Size dialog box and select the Custom setting that is
last in the list. Then set the dimensions you want.
Troubleshooting
When using the PSPrinter 8.3.1 driver, you should be aware of the
following behaviors:
The PSPrinter 8.3.1 driver allows some printers to print using
a larger print area for images on the page. If your documents
were originally formatted for such a printer, you may find that
text in some documents reflows or is clipped to fit the new
area.
Printing multiple documents with the Finder may not work if
the documents have been created by different application programs.
With some graphics applications, the cover page may not be
printed at the end of a multi-page document. If this is the
case, select the Before Document cover page option.
5
Using the PSPrinter 8.3.1 Driver with Some Popular Application Programs
Some applications do not yet take advantage of the HP LaserJet 8.3.1
driver features, or they have small incompatibilities that result in
printing problems. If you experience problems with a program, contact the publisher of the program. In some cases, a newer version of
the program may be available that will resolve your problems.
The following list describes some special problems that you should
be aware of when working with some application programs. (There
may be other problems with these programs or with other programs
not mentioned in this document.)
Aldus PageMaker 4.2a
Do not scale EPS images if you are using the printer driver’s 2-up
or 4-up page layout option.
Aldus Freehand 3.11
You cannot print using Layout options in the Page Setup dialog. If
you choose a layout from the Layout pop-up menu, the document
does not print and no error message appears.
EPS files created using Freehand cannot be used in other programs.
Selecting the Unlimited Downloadable Fonts option in the Page
Setup Options dialog results in a PostScript error.
Freehand 4.0 resolves these issues.
Aldus Personal Press 2.0
Using several font style combinations may result in character spacing problems.
Aldus Persuasion 2.1.2
Gradient fill patterns will print as solid patterns. This is corrected
in Persuasion 3.0.
Documents that contain EPS graphics may not print correctly if
you select the printer driver’s 2-up or 4-up page layout option.
Aldus SuperPaint 3.0
Rotated or filled polygons print as solid gray objects.
Rotating one-bit “Superbits” images may cause PostScript errors.
Styled text with gradient fill may cause unfilled text and PostScript errors.
Apple Appletalk Remote Access
6
Under some circumstances, Remote Access does not allow printer
setup or printing using the printer driver.
CA CricketDraw III 1.0
To import an EPS file created with the printer driver, save EPS
files as “EPS Mac Standard Preview” or “EPS Mac Enhanced Preview.”
You must ensure that there is enough free hard disk space to hold
intermediate spool files. Otherwise, the application may malfunction. Typically, the free space required is roughly equivalent to the
file size.
CA CricketPresents 2.1
To import an EPS file created with the printer driver, save EPS
files as “EPS Mac Standard Preview” or “EPS Mac Enhanced Preview.”
Claris MacDraft 2.1
Do not print using the “Cut Marks” option. This will generate a
PostScript error.
Claris HyperCard 2.1
Use of the “Print a Card” option may result in output being saved
to a file or as a fax job. There is no work-around for this HyperCard problem.
Deneba Canvas 3.0.6
Printing with substituted fonts may result in incorrect text spacing.
DesignStudio ReadySetGo! 4.5 and
5.0
Versions 4.5 and 5.0 are not supported by HP LaserJet 8.3.1 driver
or LaserWriter 8. Use LaserWriter 7.
Version 6.0 is supported by the printer driver.
Electronic Arts Studio/8 and
Studio/32
To create an EPS file using the printer driver, select the Quick
Draw Printer option.
Microsoft PowerPoint 2.01f
To import an EPS file created with the printer driver, save EPS
files as “EPS Mac Standard Preview” or “EPS Mac Enhanced Preview.”
Microsoft Works 3.0
Printing documents that have rotated objects with rounded corners
will result in a PostScript error.
QuarkXPress 3.11
EPS files that contain certain TrueType fonts may not print.
Shana Informed Manager 1.3.5
Shaded headings in a document may not print correctly.
Some documents may print extra pages.
Symantec More 3.1
When creating EPS files with the printer driver, be sure there is
sufficient disk space. No “Disk Full” error message appears when
your hard disk becomes full.
7
Using the PSPrinter 8.3.1 Driver with Spoolers
If a Novell spooler rejects a printing connection due to insufficient
user privileges (queue security option turned on) or an internal
error, the driver may hang indefinitely.
Netware 3.11 may cause the driver to download fonts more often
than necessary, resulting in poor printing performance.
Versions of Netware prior to 4.0 do not support PSPrinter’s Auto
Setup capability. In these environments, manually select the appropriate PPD for your printer. For more information, see the
chapter “Selecting a PPD” in the HP DesignJet Printing Guide for
Macintosh.
In general, spoolers that do not comply with version 3.0 of
Adobe’s PostScript Language Document Structuring Conventions
may not take advantage of PSPrinter’s advanced features, or they
may exhibit other printing problems.
8
Aldus Freehand and Macromedia Freehand
on an Apple Macintosh
PostScript Driver
Use the supplied HP DesignJet PostScript Drivers for Macintosh
disk.
Printing
When printing from Freehand (either version 4.0 or 5.x), on the
Print Menu, select the Print button, located in the lower left of the
dialog box.
8.3.1
The Print Options menu will appear.
9
HP DesignJet 2500CP
If you click on “Use defaults”, the settings you define in the Page
Setup dialog box will be used.
If you click on “Use PPD information”,, the settings in the current
dialog box will be used instead and all those in the Page Setup
dialog box will be ignored. Check first if the right PPD is set.
Otherwise, click on the Select PPD button, and select the one corresponding to the DesignJet printer you are using (2500CP). Then
select the appropriate options you want for printing.
You are recommended to select “Use defaults”; then all the settings are controlled by the driver.
Scaling: If you selected “Use defaults” in the Print Options dialog
box, the scale factor you set in the Page Setup dialog box is added
to the one you set in Freehand’s Print dialog box. If “Use PPD
information” was selected, only the scale factor in Freehand’s
Print dialog box is used.
Large Page Sizes: You may experience problems if you set a
large page size from Freehand’s Print dialog box. Select “Use defaults” and set the page size in the Page Setup dialog box to solve
these problems.
10
Color Management
PANTONE Colors:
If you use PANTONE colors from tables within the application, select SWOP as the emulation to use (in the
Color Management entry in the Print Options dialog box).
This method of selecting PANTONE colors is simpler
because you do not need to concern yourself with the media or with halftoning.
You can also use the PANTONE tables provided on the
diskettes for the PostScript driver. These tables are specifically designed for use with the HP DesignJet 2500CP
printer and some specific media and halftoning.
Imported Images:
1 If you import images from Adobe Photoshop, you are
recommended to use EPS RGB to get the best color accuracy, since PhotoShop includes the PostScript code to
match colors across different devices, when it generates
EPS files with RGB data.
2
If you import CMYK images, you should select the appropriate color standard (SWOP, EuroScale or Toyo) in
the Color Management entry in the Print Options dialog
box. Then the colors printed on the DesignJet will emulate the colors of that standard. If you send CMYK data
with “No Color Adjustment” and the color values you
send to the printer are inappropriate, the printer may use
an excessive volume of ink (more than 200% ink density)
which will saturate your media and could, in extreme
cases, result in serious printhead damage.
3
If you import RGB TIFF images and you deselect the
“Convert RGB TIFF to CMYK” button that is available
from the Output... menu in the Print dialog box, your colors will not be correct. Note that if you select “Convert
RGB TIFF to CMYK”and use “No Color Adjustment”,
and the color values you send to the printer are inappropriate, the printer may use an excessive volume of ink
(more than 200% ink density) which will saturate your
media and could, in extreme cases, result in serious printhead damage.
11
Adobe Illustrator on an Apple Macintosh
PostScript Driver
Use the supplied HP DesignJet PostScript Drivers for Macintosh
disk.
Printing
Screening: By default, Adobe Illustrator for Mac prints images in
a “cluster” type of screening. To achieve the best print quality, use
the “HP Scatter Screen Technology” that is available in the HP
DesignJet series devices. This places dots in a random matrix that
avoids patterns in area fills. From the Document Setup dialog
box, select “Use Printer’s Default Screen”, or set Halftoning to
Scatter in the Print Options dialog box.
Color Management
PANTONE Colors:
12
If you use PANTONE colors from tables within the application, select SWOP as the emulation to use (in the
Color Management entry in the Print Options dialog box).
This method of selecting PANTONE colors is simpler
because you do not need to concern yourself with the media or with halftoning.
You can also use the PANTONE tables provided on the
diskettes for the PostScript driver. These tables are specifically designed for use with the HP DesignJet 2500CP
printer and some specific media and halftoning.
Aldus PageMakerr and Adobe PageMakerr
on an Apple Macintosh
PostScript Driver
Use the supplied HP DesignJet PostScript Drivers for Macintosh
disk.
Printing
Length Limitation: PageMaker can accept a maximum page size
of 42 by 42 inches. Even if the printer can print larger images,
selecting a larger page size than this in the driver will result in a
clipped image; the drawing is shifted and incomplete.
Color Management
PANTONE Colors:
S
If you use PANTONE colors from tables within the application, select SWOP as the emulation to use (in the
Color Management entry in the Print Options dialog box).
This method of selecting PANTONE colors is simpler
because you do not need to concern yourself with the media or with halftoning.
S
You can also use the PANTONE tables provided on the
diskettes for the PostScript driver. These tables are specifically designed for use with the HP DesignJet 2500CP
printer and some specific media and halftoning.
Imported Images:
1 If you import images from Adobe Photoshop, you are
recommended to use EPS RGB to get the best color accuracy, since PhotoShop includes the PostScript code to
match colors across different devices, when it generates
EPS files with RGB data.
2
If you import CMYK images, you should select the appropriate color standard (SWOP, EuroScale or Toyo) in
the Color Management entry in the Print Options dialog
box. Then the colors printed on the DesignJet will emulate the colors of that standard. If you send CMYK data
with “No Color Adjustment” and the color values you
send to the printer are inappropriate, the printer may use
an excessive volume of ink (more than 200% ink density)
which will saturate your media and could, in extreme
cases, result in serious printhead damage.
13
Adobe PhotoShop on an Apple Macintosh
PostScript Driver
Use the supplied HP DesignJet PostScript Drivers for Macintosh
disk.
Printing
Screening: By default, PhotoShop uses its own screening, resulting in a printout that shows patterns in area fills.
In the Page Setup dialog, set the halftone screens to “Use Printers
Default Screens”. Without this setting, you will not get the true
color or dynamic range of values necessary for a good quality
print. This setting turns on HP Scatter Screen Technology.
14
8.3.1
Preview: Before printing, you can check the layout of your final
print by clicking on the box at the bottom right corner of your
image.
Also, if you are using the separation table from the HP DesignJet
2500CP, activate the “Gamut Warning” in the Mode menu, when
you print or export files to other applications.
Color Management
PANTONE Colors:
If you use PANTONE colors from tables within the application, select SWOP as the emulation to use (in the
Color Management entry in the Print Options dialog box).
This method of selecting PANTONE colors is simpler
because you do not need to concern yourself with the media or with halftoning.
You can also use the PANTONE tables provided on the
diskettes for the PostScript driver. These tables are specifically designed for use with the HP DesignJet 2500CP
printer and some specific media and halftoning.
Choosing the Color Format: PhotoShop lets you send images in
either RGB or CMYK format. For the best color fidelity
compared with the calibrated screen original, send images in RGB
format to the DesignJet.
15
If you select RGB format, PhotoShop uses the device-independent
color path in the printer, which is a PostScript level 2 feature allowing colors to be converted consistently among different
devices. As a result, RGB colors are received by the printer, and
the PostScript interpreter in the printer uses a device-independent
color path (one of the stages of the process uses a Color Rendering
Dictionary) to perform the conversion to CMYK.
In addition, if you send RGB data, changes to the gamma setting
in the PhotoShop Monitor Preferences dialog box will affect the
overall lightness of the printed colors; reducing the gamma setting
results in lighter colors printed, and increasing it results in darker
colors printed.
If you want your document converted to CMYK in PhotoShop to
be printed on a DesignJet, either directly from PhotoShop or from
another application, use the DesignJet Color Separation Tables for
the conversion from RGB to CMYK; they are on the driver diskettes.
Saving Images to be Imported into Other Applications: If you
save an image from PhotoShop as an EPS file, do not include
screening in it. Otherwise, when you print the EPS file from
another application, your output will use PhotoShop’s screening,
which shows patterns in area fills. You are also recommended to
save the EPS file in RGB format. In that way you will achieve
accurate colors in the application that does the printing, because
PhotoShop includes device-independent color-path code in the
RGB files, allowing a consistent conversion to CMYK values.
Similarly, when you save an image as a TIFF file, to be imported
into another application, you are recommended to save it in
CMYK format, using the DesignJet Color Separation Tables for
the conversion from RGB to CMYK, which are on the driver diskettes.
16
Printing Scanned Images
Resolution and Image Size: What is the best resolution needed
for scanning an image that will be printed later on an HP DesignJet 2500CP?
The color resolution for this device in Best mode when printing
PostScript is 600 dpi. However, if you send to the DesignJet a 600
dpi image with its original size identical to the desired print size
(that is, with no scaling applied), there will be too much information for the printer. This is because the DesignJet uses a a group
of dots to simulate every non-pure color from its four inks (halftoning or screening). You may then experience memory problems
because you sent too much data.
The image’s resolution should not exceed 150 pixels per inch,
again assuming that the original size matches the paper size on
which you are printing. A larger value will not improve the appearance of the image, but merely take longer to print. Avoid
sending images with resolutions lower than 75 pixels per inch,
which may make the image break up into large pixel blocks. You
are recommended to use a value between 100 and 150 pixels per
inch.
If your scanned image is smaller than the final print you want, you
will need to use Scaling; multiply the previous numbers appropriately (for example, if you use a 200% scaling factor, double the
resolution for each dimension).
If you have already scanned an image at too high a resolution and
you are having memory problems, reduce its resolution under the
Image Size selection in the Image menu (the File Size box should
be deselected in order to reduce the information in the image).
17
Overall Clarity of the Printed Images: If you obtain printed
images that are too dark compared with your scanned images, reduce the gamma in the PhotoShop Monitor Preferences dialog
box; if they appear too light, increase its value.
18
QuarkXPress on an Apple Macintosh
PostScript Driver
Use the supplied HP DesignJet PostScript Drivers for Macintosh
disk.
QuarkXPress 3.1 and 3.2 require the use of PDF files for correct
printing. This PDF file (called HP DesignJet 2500CP.PDF) is located in the “HP DesignJet” folder (or whatever name you gave it
during installation) on your hard disk. You must copy the appropriate PDF file from the PDF folder into the folder where the
application’s executable code is located.
Paper Size
In the File menu, select the Page Setup submenu:
PSPrinter Page Setup
8.3.1
2500CP
Select, at Printer Type, the printer model you are using (HP DesignJet 2500CP).
The Paper Size entry is the QuarkXPress setting for the page size
to be used for printing. Ensure that this is the same as that selected in the Paper entry, since the Paper Size selection overrides
the Paper setting.
19
The HP LaserJet 8.3.1 driver supports Custom Page Size, but
QuarkXPress does not allow it to be selected from its Paper Size
entry; the Paper Size entry overrides your Custom Page Size definition. Changing the Printer Type to Generic Color (an internal
QuarkXPress printer definition) lets you use a Custom Page Size.
Although the Custom paper feature works, we cannot guarantee
the results, as this is not a specific type definition for your DesignJet.
If you experience problems getting the correct page size when you
print a document from QuarkXPress 3.3, select Page Setup from
the File menu, and change the Printer Type to Generic Color.
Then select the Paper size from the top of the Page Setup dialog.
Screening
You can use either a QuarkXPress screening (or halftoning) algorithm or one that is internal to the printer. (Halftoning is the
method of placing dots in order to obtain non-pure colors from a
limited number of pure ones.)
Select “Use PDF Screen Values” to use QuarkXPress
screening, which mixes the C, M, Y, and K color planes
by applying rotations to them.
Select “Scatter” in the Print—>Options dialog box (available from the File menu) to select DesignJet halftoning or
screening. Scatter screening mixes the four color planes
in a random way, avoiding moiré patterns.
You will obtain different colors depending on your selection.
Scatter produces slightly lighter results.
Printing
When you are ready to print, select the Print option from the File
menu. The printer submenu will appear. Make whatever choices
you want (number of copies, pages to print, destination, and so
on). Click the Options button if you want to change any of the
output settings. (Refer to the HP DesignJet Printing Guide for
Macintosh for more information on this option.) Remember that
you should select “Scatter” in the Halftoning entry of the Print
Options dialog box, to override the default QuarkXPress halftoning algorithm.
20
8.3.1
Note on QuarkXPress 3.32
When you use the PSPrinter 8.3.1 driver to print from
QuarkXPress 3.32, you may encounter a system error, with a message such as “Sorry, a system error occurred. QuarkXPress error
type 11”, after you select Print. You can avoid this problem by
removing the “Balloon Help” from the QuarkXPress folder, that is,
by creating a subfolder named “Balloon” and dropping the “Balloon Help” inside it. The next time you open QuarkXPress, you
should be able to print with no problem.
Color Management
PANTONE Colors:
If you use PANTONE colors from tables within the application, select SWOP as the emulation to use (in the
Color Management entry in the Print Options dialog box).
This method of selecting PANTONE colors is simpler
because you do not need to concern yourself with the media or with halftoning.
You can also use the PANTONE tables provided on the
diskettes for the PostScript driver. These tables are specifically designed for use with the HP DesignJet 2500CP
printer and some specific media and halftoning.
Imported Images:
If you import images from Adobe Photoshop, you are
recommended to use EPS RGB to get the best color accuracy, since PhotoShop includes the PostScript code to
match colors across different devices, when it generates
EPS files with RGB data.
21
22
If you import CMYK images, you should select the appropriate color standard (SWOP, EuroScale or Toyo) in
the Color Management entry in the Print Options dialog
box. Then the colors printed on the DesignJet will emulate the colors of that standard. If you send CMYK data
with “No Color Adjustment” and the color values you
send to the printer are inappropriate, the printer may use
an excessive volume of ink (more than 200% ink density)
which will saturate your media and could, in extreme
cases, result in serious printhead damage.
CorelDRAW on Windows
Page Size Limitation
CorelDRAW 5.0 has a limitation in the size of the document that
you can define. The largest page size supported by CorelDRAW
5.0 and previous versions is 30 inches by 30 inches. To print larger pages, you may need to use the Scaling feature (see below for
guidance on how to scale your images).
CorelDRAW 6.0 does not have this limitation.
Memory Size
Some CorelDRAW documents may result in big PostScript files,
that take a lot of memory and time to be printed. You can try to
reduce the time needed for the file to be processed by using the
Scaling feature, that is, by specifying a smaller document page
size in CorelDRAW and scaling it inside the printer.
Scaling in CorelDRAW
The recommended way of scaling using CorelDRAW is to scale to
a specific page size. You should ensure that the page size in the
CorelDRAW Layout—>Page setup is the same as that in the driver’s Print—>Properties—>Paper tab.
Then in Windows 95, set the Enable Scaling button in the File—>
Print—>Properties—>Graphics tab, select Scaling Options, pick
“Scale to this standard page size” and set the appropriate size.
Or in Windows 3.1 or 3.11, set the Enable Scaling button in the
File—>Print—>Properties—>Feature tab, select Scaling and set
the appropriate size.
Other possibilities for scaling: A second option is to use
CorelDRAW’s scaling by selecting the source size in the
Page—>Setup—>Layout dialog box, and the target size in the
File—>Print—>Properties—>Paper tab. Then in the
File—>Print—>Options set “Fit to Page” under the Layout tab.
If you scale using the Front Panel, both the scaling factor and the
paper size for printing are taken from the front panel; however,
although the Paper Size defined in the driver’s dialog box is not
used as the size of the final printout, it is used for other purposes,
so it should be properly set. Follow these steps to scale an image
from the front panel:
1 Ensure that the Enable Scaling button in the File—>
Print—>Properties—>Graphics tab is not set.
2
Set the Page Size you want to print on the Front Panel
(Page Format).
23
3
Set “Fit to Page” on the Front Panel
(Page Format—>PS Scale—>Fit to Page).
If you want to scale a standard page with no margins, for example,
a full Letter size, you need then to select “Full Bleed US Letter”
size in the driver’s dialog box. Otherwise some part of the image
will be missed.
A further option is to use the percentage scaling options in the
driver or in the front panel, though these are not particularly recommended.
The following scaling factors should be used:
To scale your ANSI A PostScript file to...
ANSI
B
ANSI
C
Arch
C
ANSI
D
Arch
D
Arch
E1
ANSI
E
Arch
E
Use... 129% 200% 210% 258% 282% 352% 400% 419%
To scale your ISO A4 PostScript file to...
ISO
A3
Use... 141%
Color Management
24
ISO/JIS
A2
200%
OS
A2
210%
ISO/JIS
A1
282%
OS
A1
352%
ISO/JIS
A0
400%
OS
A0
419%
PANTONE Colors:
If you use PANTONE colors from tables within the application, select SWOP as the emulation to use (in the
Color Management entry in the Print Options dialog box).
This method of selecting PANTONE colors is simpler
because you do not need to concern yourself with the media or with halftoning.
You can also use the PANTONE tables provided on the
diskettes for the PostScript driver. These tables are specifically designed for use with the HP DesignJet 2500CP
printer and some specific media and halftoning.
Notes
25
Notes
26
Notes
27
Driver Distribution
We are continually striving to improve our drivers. As we update
these drivers, they are made available through our driver distribution channel. In the U.S.A., call 1-303-339-7009.
In Europe, contact Bridge/KOP. In other regions of the world, contact your local dealer or HP sales and support office.
Windowsr is a registered trademark of Microsoft Corporation.
PostScriptr is a registered trademark of Adobe Systems Incorporated
Macintoshr is a registered trademark of Apple Computer Incorporated
PANTONEr* Colors generated by the HP DesignJet 2500CP are
four-color process simulations and may not match PANTONE-identified
solid color standards.
Use current PANTONE Color Reference Manuals for accurate color.
PANTONE color simulations are only obtainable with this product when
driven by qualified Pantone-licensed software packages. Contact
Pantone, Inc. for a current list of qualified licensees.
*Pantone, Inc.’s check-standard trademark for color. ePantone, Inc.,
1988.
R
E Copyright Hewlett-Packard Company 1997
Printed on Recycled Paper
All rights reserved. No part of this document may be photocopied,
reproduced, or translated to another language without the prior written consent of Hewlett-Packard Company.
Hewlett-Packard Company
Barcelona Division
Avda. Graells, 501
08190 Sant Cugat del Vallès
Barcelona, Spain