1
IEEE 1394 OHCI PCI Board
for Windows 98SE/2000/Me
PCIFW3U
User’s Guide
Rev. 1.0
March 2001
PCIFW3U User's Guide
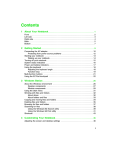
1. Introduction........................................................................... 1
1-1. Before Using the PCIFW3U
1-2. Package Confirmation
1
1
2. Setup the OHCI Driver ........................................................ 2
2-1. Windows 98 SE Installation
2-2. Windows 2000 Installation
2-3. Windows Me Installation
3
10
12
3. Setup the 1394 Device ......................................................... 15
3-1. DVCAM Installation
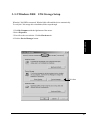
3-1-1. Windows 98 SE DV Driver Setup
3-1-2. Windows 2000 DV Driver Setup
3-1-3.Windows Me DV Driver Setup
3-2. Desktop CCD Camera Installation
3-2-1. Windows 98 SE CCD Camera Setup
3-2-2. Windows 2000 CCD Camera Setup
3-2-3. Windows Me CCD Camera Setup
3-3. 1394 Storage Installation
3-3-1. Windows 98 SE 1394 Storage Setup
3-3-2. Windows 2000 1394 Storage Setup
3-3-3. Windows Me 1394 Storage Setup
15
16
17
19
20
21
22
24
25
26
27
29
4. Setup RsDvCap.................................................................... 30
4-1. Installing RsDvCap/RsDvStill/CompressAVI
4-2. Installing MSDV update for Windows98 SE only
30
33
5. How to use RsDvCap .......................................................... 34
5-1. Main menu
5-2. Control Bars
5-2-1. Camera and Audio Select Bar
5-2-2. Camera Control Bar
5-2-3. Video Control Bar
5-3. Application settings
5-4. Capturing a video from a DVCAM in camera mode
5-5. Capturing a video from a DV tape
5-6. DV Batch Capture
5-7. Exporting a video data to a DVCAM
35
36
36
36
37
38
42
43
44
46
6. How to use RsDvStill .......................................................... 47
6-1. Main menu
6-2. How to save a BMP file
47
50
7. How to use CompressAVI ................................................... 52
7-1. How to convert the MS DV-AVI2 format into other formats?
7-2. How to convert other formats to the MS DV-AVI2 format?
53
57
8.Troubleshooting.................................................................... 60
8-1. Camera can not be recognized
8-2 When playing back the captured file is choppy or jerky
8-3. What kind of video Editing Software works?
60
62
64
9.Registration and Tech-Support........................................... 65
9-1. How to Register
9-2. Software Update and Support
9-3. System Requirements
9-4. Restrictions
65
65
66
66
10.Options ................................................................................ 67
11.Specifications ...................................................................... 68
1. Introduction
This User’s Guide describes how to install, use, and troubleshoot the RATOC PCIFW3U
1394 PCI Board(called PCIFW3U in this User’s Guide).
The information in the README.TXT file on the CD-ROM may include the latest information.
Be sure to read the README.TXT file as well.
1-1. Before Using the PCIFW3U
• Never attempt to disassemble the PCI Board.
• Do not bend, drop or strike the PCI Board or the cable, or subject it to heavy pressure.
• Information in this document is subject to change without notice.
• If you have any questions or find errors in this guide, do not hesitate to let us know.
1-2. Package Confirmation
• PCIFW3 1394 OHCI PCI Board
• Low Profile Bracket (1pc)
• 6 feet 1394 6pin - DV 4pin cable (1pc)
• HDD power connector extended cable (1pc)
• PCIFW3U capture software (CD-ROM)
• Premiere Plug-In User’s Manual
• Ulead Video Studio 5.0 (CD-ROM)
• User’s Guide (This document)
• Software License Agreement
NOTE
If any of these items are missing from the PCIFW3U retail package, contact your
supplier immediately.
1
2. Setup the OHCI Driver
This section describes the OHCI driver installation. First, confirm your Windows version.
When your Windows version is Windows 98 SE(Second Edition), go to the section 2-1.
When your Windows version is Windows 2000, go to the section 2-2.
When your Windows version is Windows Me(Millennium Edition), go to the section 2-3.
2
2-1.Windows 98 SE Installation
To use the PCIFW3U on Windows 98 Second Edition, follow steps through.
Make sure your Windows is Windows98 Second Edition by checking the “Properties”
of “My Computer”. If you can find “Second Edition”, you have Windows98 Second Edition.
Windows98SE
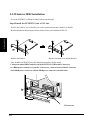
Step1.Install the PCIFW3U into a PCI slot
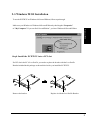
If a PCI slot in the PC is Low Profile, you need to replace the bracket with the Low Profile
Bracket included in this package as shown below before you install the PCIFW3U.
Remove the bracket.
Replace it with the Low Profile Bracket
3
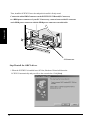
Then, install the PCIFW3U into a slot and push it in until it is firmly seated.
Connect the white HDD Connector on the PCIFW3U PCI Board(J2 Connector)
to a HDD power connector of your PC. If necessary, connect between this J2 connector
Windows98SE
and a HDD power connector with the HDD power connector extended cable.
J2 Connector
Step2.Install the OHCI driver
1.When the PCIFW3U is installed into a PCI slot, Hardware Wizard will detect the
PCIFW3U automatically and you will see the screen below. Click [Next].
4
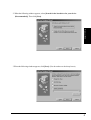
2. When the following window appears, select [Search for the best driver for your device
(Recommended)]. Then click [Next].
Windows98SE
3.When the following window appears, click [Next]. (You do not have to check any boxes)
5
Windows98SE
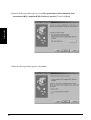
4.When the following window appears, select [The updated driver (Recommended) Texas
Instruments OHCI Compliant IEEE 1394 Host Controller]. Then click [Next].
5.When the following window appears, click [Next].
6
6.When the following window appears, insert the Windows 98 Second Edition CD-ROM
into the CD-ROM drive. Then click [OK].
Windows98SE
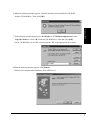
7.If the following window appears, type “D:\Win98” or “C:\Windows\options\cabs” in the
Copy files from box, where “D” means the CD-ROM drive. After that, click [OK].
If your CD-ROM drive is not “D”, you must replace “D” to the appropriate drive name.
8.When the following window appears, click [Finish].
You have now completed the installation of the OHCI driver.
7
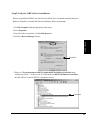
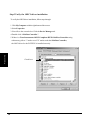
Step3.Verify the OHCI driver installation
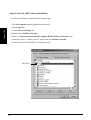
To verify the OHCI driver installation,follow steps through.
1.Click My Computer with the right button of the mouse.
Windows98SE
2.Select Properties.
3.Click the Device Manager tab.
4.Double-click “1394 Bus Controller”.
5.If there is a Texas Instruments OHCI Compliant IEEE 1394 Host Controller string
without any yellow “!” marks or red “X” marks under the 1394 Bus Controller,
the OHCI driver for the PCIFW3U is installed correctly.
Check here
8
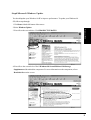
Step4.Microsoft Windows Update
You should update your Windows 98 SE to improve performance. To update your Windows 98
SE, follow steps through.
1.Click Start with the left button of the mouse.
2.Select Windows Update.
Windows98SE
3.You will see the screen below. Click PRODUCT UPDATES.
4.You will see the screen below.Check Windows 98 Second Edition 1394 Storage
Supplement and download the component. For more information on the component, refer to
Read this first on the screen.
9
2-2.Windows 2000 Installation
To use the PCIFW3U on Windows 2000, follow steps through.
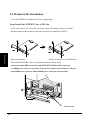
Step1.Install the PCIFW3U into a PCI slot
Windows2000
If a PCI slot in the PC is Low Profile, you need to replace the bracket with the Low Profile
Bracket included in this package as shown below before you install the PCIFW3U.
Remove the bracket.
Replace it with the Low Profile Bracket
Then, install the PCIFW3U into a slot and push it in until it is firmly seated.
Connect the white HDD Connector on the PCIFW3U PCI Board(J2 Connector)
to a HDD power connector of your PC. If necessary, connect between this J2 connector
and a HDD power connector with the HDD power connector extended cable.
J2 Connector
10
Step2.Verify the OHCI driver installation
When you install the PCIFW3U into a PCI slot, the OHCI driver is installed automatically by the
Hardware Wizard.To verify the OHCI driver Installation, follow steps through.
1.Click My Computer with the right button of the mouse.
2.Select Properties.
3.You will see the screen below. Click the Hardware tab.
4.Click the “Device Manager” button.
Windows2000
Click here
5.If there is a Texas Instruments OHCI Compliant IEEE 1394 Host Controller string
without any yellow “!” marks or red “X” marks under the IEEE 1394 Bus host controllers,
the OHCI driver for the PCIFW3U is installed correctly.
Check here
11
2-3.Windows Me Installation
To use the PCIFW3U on Windows Me, follow steps through.
Step1.Install the PCIFW3U into a PCI slot
Windows Me
If a PCI slot in the PC is Low Profile, you need to replace the bracket with the Low Profile
Bracket included in this package as shown below before you install the PCIFW3U.
Remove the bracket.
Replace it with the Low Profile Bracket
Then, install the PCIFW3U into a slot and push it in until it is firmly seated.
Connect the white HDD Connector on the PCIFW3U PCI Board(J2 Connector)
to a HDD power connector of your PC. If necessary, connect between this J2 connector
and a HDD power connector with the HDD power connector extended cable.
J2 Connector
12
Step2.Install the OHCI driver
1.When the PCIFW3U is installed into a PCI slot, Hardware Wizard will detect the
PCIFW3U automatically and you will see the screen below. Select [Automatic search for a
better driver(Recommended)] and click [Next].
Windows Me
2.When the following window appears, click [Finish].
You have now completed the installation of the OHCI driver.
3.When the following window appears, click [Yes] to restart your PC.
13
Step3.Verify the OHCI driver installation
To verify the OHCI driver installation, follow steps through.
1.Click My Computer with the right button of the mouse.
2.Select Properties.
3.You will see the screen below. Click the Device Manager tab.
4.Double-click “1394 Bus Controller”.
5.If there is a Texas Instruments OHCI Compliant IEEE 1394 Host Controller string
without any yellow “!” marks or red “X” marks under the 1394 Bus Controller,
Windows Me
the OHCI driver for the PCIFW3U is installed correctly.
Check here
14
3. Setup the 1394 Device
3-1.DVCAM Installation
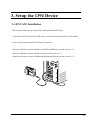
This section describes how to connect a DVCAM and install the DV driver.
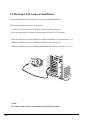
Connect the PCIFW3U and a DVCAM using a 1394 cable attached to the DVCAM as shown
below. And you must turn the DVCAM power switch on.
When your Windows version is Windows 98 SE(Second Edition), go to the section 3-1-1.
When your Windows version is Windows 2000, go to the section 3-1-2.
When your Windows version is Windows Me(Millennium Edition), go to the section 3-1-3.
15
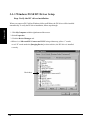
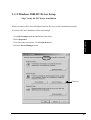
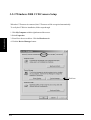
3-1-1.Windows 98 SE DV Driver Setup
Step. Verify the DV driver installation
Windows98SE
When you connect a DVCAM on Windows 98 Second Edition, the DV driver will be installed
automatically. To verify the DV driver installation, follow steps through.
1.Click My Computer with the right button of the mouse.
2.Select Properties.
3.Click the Device Manager tab.
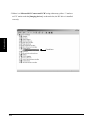
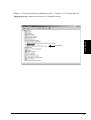
4.If there is a “Microsoft DV Camera and VCR” string without any yellow “!” marks
or red “X” marks under the [Imaging Device] as shown below, the DV driver is installed
correctly.
Check here
16
3-1-2.Windows 2000 DV Driver Setup
Step. Verify the DV driver installation
When you connect a DVCAM on Windows 2000, the DV driver will be installed automatically.
To verify the DV driver installation, follow steps through.
1.Click My Computer with the right button of the mouse.
2.Select Properties.
Windows2000
3.You will see the screen below. Click the Hardware tab.
4.Click the Device Manager button.
Click here
17
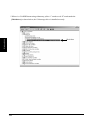
5.If there is a “Microsoft DV Camera and VCR” string without any yellow “!” marks or
red “X” marks under the [Imaging devices] as shown below, the DV driver is installed
Windows2000
correctly.
Check here
18
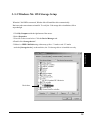
3-1-3.Windows Me DV Driver Setup
Step. Verify the DV driver installation
When you connect a DVCAM on Windows Me, the DV driver will be installed automatically.
But it may take some minutes to install it. To verify the DV driver installation, follow steps through.
1.Click My Computer with the right button of the mouse.
2.Select Properties.
3.Click the Device Manager tab.
4.If there is a camera name string without any yellow “!” marks or red “X” marks under the
[Imaging Device] as shown below, the DV driver is installed correctly.
Windows Me
Check here
19
3-2.Desktop CCD Camera Installation
This section describes how to connect a CCD camera and install the driver.
Follow steps through to connect a CCD camera.
1.Connect a CCD camera to the PCIFW3U with a 1394 6pin-6pin cable.
2.You can connect the CCD camera without turning off the PC or CCD camera.
When your Windows version is Windows 98 SE(Second Edition), go to the section 3-2-1.
When your Windows version is Windows 2000, go to the section 3-2-2.
When your Windows version is Windows Me(Millennium Edition), go to the section 3-2-3.
NOTE
The 6 pin to 6 pin cable is not included in the PCIFW3U package.
20
Windows98
3-2-1.Windows 98SE CCD Camera Setup
When the CCD camera is connected, the CCD camera will be recognized automatically.
Windows98SE
To verify the CCD driver installation, follow steps through.
1.Click My Computer with the right button of the mouse.
2.Select Properties.
3.Click the Device Manager tab.
4.Double-click “Imaging Device”.
5.If there is a CCD camera name string without any yellow “!” marks or red “X” marks under the
[Imaging Device] as shown below, the driver is installed correctly.
Check here
21
3-2-2.Windows 2000 CCD Camera Setup
When the CCD camera is connected, the CCD camera will be recognized automatically.
To verify the CCD driver installation, follow steps through.
1.Click My Computer with the right button of the mouse.
Windows2000
2.Select Properties.
3.You will see the screen below. Click the Hardware tab.
4.Click the Device Manager button.
Click here
22
5.If there is a CCD camera name string without any yellow “!” marks or red “X” marks under the
[Imaging devices] as shown below, the driver is installed correctly.
Windows2000
Check here
23
3-2-3.Windows Me CCD Camera Setup
When the CCD camera is connected, the CCD camera will be recognized
automatically. But it may take some minutes to install it. To verify the CCD driver installation, follow
steps through.
1.Click My Computer with the right button of the mouse.
2.Select Properties.
3.Click the Device Manager tab.
4.Double-click “Imaging Device”.
5.If there is a CCD camera name string without any yellow “!” marks or red “X” marks under the
Windows Me
[Imaging Device] as shown below, the driver is installed correctly.
Check here
24
3-3.1394 Storage Installation
This section describes how to connect a 1394 storage and install the driver. 1394 storage means Hard
Disk Drives(HDDs), Magneto Optical Disks(MOs), etc. Only Windows98 Second Edition, Windows
2000 or Windows Me support such 1394 storage.
Follow steps through to connect a 1394 Hard Disk Drive(HDD).
1.Connect a 1394 HDD to the PCIFW3U with an 1394 6pin-6pin cable.
2.You can connect the 1394 HDD without turning off the PC or 1394 HDD.
When your Windows version is Windows 98 SE(Second Edition), go to the section 3-3-1.
When your Windows version is Windows 2000, go to the section 3-3-2.
When your Windows version is Windows Me(Millennium Edition), go to the section 3-3-3.
NOTE
The 6 pin to 6 pin cable is not included in the PCIFW3U package.
25
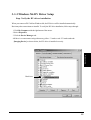
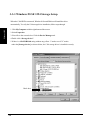
3-3-1.Windows 98 SE 1394 Storage Setup
Windows98SE
When the 1394 HDD is connected, Window98 Second Edition will install the driver
automatically. To verify the 1394 storage driver installation, follow steps through.
1.Click My Computer with the right button of the mouse.
2.Select Properties.
3.You will see the screen below. Click the Device Manager tab.
4.Doble-click “Storage device”.
5.If there is a 1394/USB Disk string without any yellow “!” marks or red “X” marks
under the [Storage device] as shown below, the 1394 storage driver is installed correctly.
Check here
26
3-3-2.Windows 2000 1394 Storage Setup
When the 1394 HDD is connected, Window2000 will install the driver automatically.
To verify the 1394 storage driver installation,follow steps through.
1.Click My Computer with the right button of the mouse.
2.Select Properties.
3.You will see the screen below. Click the Hardware tab.
4.Click the Device Manager button.
Windows2000
Click here
27
5.If there is a 1394 HDD name string without any yellow “!” marks or red “X” marks under the
[Disk drives] as shown below, the 1394 storage driver is installed correctly.
Windows2000
Check here
28
3-3-3.Windows Me 1394 Storage Setup
When the 1394 HDD is connected, Window Me will install the driver automatically.
But it may take some minutes to install it. To verify the 1394 storage driver installation, follow
steps through.
1.Click My Computer with the right button of the mouse.
2.Select Properties.
3.You will see the screen below. Click the Device Manager tab.
4.Doubl-click “Storage device”.
5.If there is a IEEE 1394 Disk string without any yellow “!” marks or red “X” marks
under the [Storage device] as shown below, the 1394 storage driver is installed correctly.
Windows Me
Check here
29
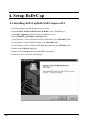
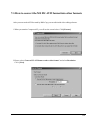
4. Setup RsDvCap
4-1.Installing RsDvCap/RsDvStill/CompressAVI
1.Close all programs currently running on your computer.
2.Set the RATOC IEEE1394 PCI Board CD-ROM in your CD-ROM drive.
3.Open [My Computer] and double-click CD-ROM drive icon.
4.Open [Win98SE], [Win2000] or [WinMe] folder.
If your Windows version is Windows98 SE(Second Edition), open [Win98SE] folder.
If your Windows version is Windows2000, open [Win2000] folder.
If your Windows version is Windows ME(Millennium Edition), open [WinMe] folder.
5.Double-click the [RsDvCap] folder.
6.Double-click on [Setup.exe] to install the RsDvCap software.
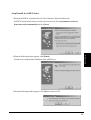
7.You will see the screen below.Click [Next].
30
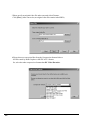
8.You will see the screen below. Click [Next].
9.You will see the screen below. Click [Next].
31
10.You will see the screen below.
Select [Yes, I want to restart my computer now] and click [Finish].
You have now completed installing the capture software.
NOTE
If you have installed this software already and start this installer, this installer will delete
this software and end. To install this software, you have to start this installer again.
32
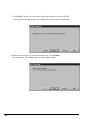
4-2.Installing MSDV update for Windows98 SE only
Install MSDV update program(252640USA8.EXE) only when you use Windows98
SE(Second Edition). If you use Windows2000 or Windows ME(Millennium Edition),
skip this installation of MSDV update program.
Follow steps through to install MSDV update program.
1.Set the RATOC IEEE1394 PCI Board CD-ROM into your CD-ROM drive.
2.Open [My Computer] and double-click CD-ROM drive icon.
3.Double-click [Win98se] folder and double-click the [DvPatch] folder.
4.Double-click on [252640USA8.EXE].
33
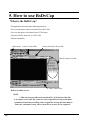
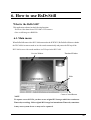
5. How to use RsDvCap
What is the RsDvCap?
This application software has the following functions.
•Preview and capture video/sound data from a DVCAM.
•Preview and capture video data from a CCD camera.
•Export media file from a PC to a DVCAM.
•Playback media file.
Main menu Camera Control Bar
Camera and Audio Select Bar
Batch Capture List Bar
Video Control Bar
RsDvCap Main Screen
NOTE
1.This software uses Microsoft standard DV-AVI2 format video file.
2.To capture correct DV file, you have to use original DV footages which has
continuous Timecode(recording). If the original DV footage has intermittent
Timecode, sometimes it may cause system freeze or may not be captured.
34
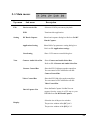
5-1.Main menu:
Top menu
File
Setting
View
Display
Sub menu
Description
Review movie file
Select an AVI file you want to play back.
END
Terminate this application.
DV Batch Capture
Show batch capture dialog box.Refer to 5-6.DV
Batch Capture.
Application Setting
Show RsDvCap parameter setting dialog box.
Refer to 5-3.Application settings.
Cam Setting
Show CCD camera control dialog box.
Camera Audio Select Bar
Show Camera and Audio Select Bar.
Refer to 5-2-1.Camera and Audio Select Bar.
Camera Control Bar
Show the DVCAM camera mode control bar.
You can control a DVCAM.Refer to 5-2-2.
Camera Control Bar.
Video Control Bar
Show the DVCAM video mode control bar.
You can control a DVCAM.Refer to 5-2-3.
Video Control Bar.
Batch Capture List
Show the Batch Capture List Bar.You can
capture favorite scenes in a DV tape to your
HDD.Refer to 5-6.DV Batch Capture.
Select the size of the preview window.
The preview window of the [PC] is 4:3.
The preview window of the [DV] is 3:2.
35
5-2.Control Bars
5-2-1.Camera and Audio Select Bar:
Camera list box
Sound device list box
This bar has the Camera list box and Sound device list box as shown above. Camera list
box displays a list of camera device connected to your PC. If this list box is blank, your camera
isn't recognized. When you use Windows98 SE(Second Edition), Windows 2000 or Windows
Me(Millennium Edition), “Microsoft DV Camera and VCR” string will appear. Sound device
list box displays a list of sound device.
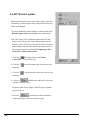
5-2-2.Camera Control Bar :
You can preview and capture a video image from the connected DVCAM. The bar will
appear automatically when the DVCAM is set to camera mode. The DVCAM have a switch
which selects video mode or camera mode. Set this switch to camera mode to preview and
capture a video image.
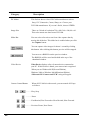
.....When you click this button, you can preview a video image.
.....When you click this button, you can pause a video image.
.....When you click this button, you can capture a video image to the HDD.
.....When you click this button, you can stop previewing or capturing a video image.
.....When you click this button, you will see the Help contents.
.....When you click this button, you can play back an AVI file.
36
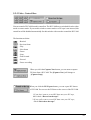
5-2-3.Video Control Bar :
You can control a DVCAM from this control bar. The DVCAM have a switch which select video
mode or camera mode. If you set this switch to camera mode or a DV tape is not inserted, this
control bar will be disabled automatically. Set this switch to video mode to control the DVCAM.
The functions are below:
...Rewind
...Previous frame
...Play
...Next frame
...Pause
...Stop
...Fast forward
...Record
...Pause recording
When you click the Capture Now button, you can start to capture
DV data from a DVCAM. The [Capture Now] will change to
[Capture Stop].
When you click the DV Export button, you can export DV data to
a DVCAM.You can see the DV data on the screen of the DVCAM.
1.If you don’t want to record DV data onto your DV tape,
don’t check “Record on the tape”.
2.If you really want to record DV data onto your DV tape,
check “Record on the tape”.
,
37
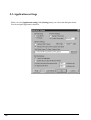
5-3.Application settings
When you select [Application setting] of the [Setting] menu, you will see the dialog box below.
You can set up this application’s behavior.
38
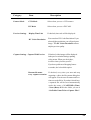
Category
Item
Camera Mode
CCD Mode
Select when you use a CCD camera.
DV Mode
Select when you use a DVCAM.
Display TimeCode
If checked, timecode will be displayed.
Preview Settings
DV Codec Resolution
Description
You can select DV Codec Resolution. If you
select a higher resolution, you will get a better
image. This DV Codec Resolution affects
only the preview quality.
Capture Settings Capture With Preview
Rename file name
every capture execution
If checked, video images will be displayed
in the preview window during capturing
video stream. When you check here,
it will be a heavy load on your PC.
If you have problems of dropping frames
or sounds, don’t check this option.
If checked, every time you start and stop
capturing a video, the file rename dialog box
will appear. You can set a file name and location to save the file in. If you don’t check here,
a captured file will be saved automatically
under the name of CAPTIME+(Time)
+Year+(Date).AVI in the folder you set at
“Set Folder Name To Save Capture Files”.
39
Category
Item
DVCAM Settings Check DVCAM Mode
Enable Step Control
By Mouse Wheel
Description
If you click here, this application will detect
whether your DVCAM is in camera mode
or video mode automatically. If your
DVCAM is in video mode, the Camera
Control Bar will disappear. If your DVCAM
is in camera mode, the Camera Control Bar
will appear and the Video Control Bar will
be disabled.
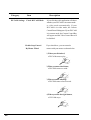
If you check here, you can control a
camera with your mouse as shown below.
1)When you click wheel,
a DVCAM starts to play.
2)When you turn wheel down,
a DVCAM starts to rewind.
3)When you turn wheel up,
a DVCAM starts to fast forward.
4)When you click the right button,
a DVCAM stops.
40
Category
Item
Description
DVCAM Command
Response time
When you control a DVCAM from the PC
consecutively, it takes some time for the
DVCAM to get ready for a next command
from the PC. This time depends on the
DVCAM. If you have trouble in controlling
the DVCAM from the PC consecutively,
change this value to a longer time than 4
seconds. Default time is 4 seconds. For
example, 5 seconds.
DV Export prefix time
When you export an AVI file to a DVCAM,
there is data prefix time from starting to
export the AVI file to recording it onto a DV
tape. The data prefix time results in failing to
record the beginning of the AVI file onto the
DV tape. To avoid this problem, you can set
a time here. During the time you set here, blank
data will be exported to the DVCAM and it
avoids failing to record the beginning of the
AVI file onto the DV tape.
41
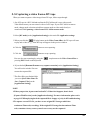
5-4.Capturing a video from a DVCAM in camera mode
When you want to capture a video image from a DVCAM set to camera mode, follow steps
through.
1. Confirm a DVCAM is set to camera mode.
Camera mode means you can capture a video image. If your DVCAM is in video mode,
change mode selection switch from video mode to camera mode slowly. Everytime you change
DVCAM’s Mode Control switch, move this switch to OFF position and confirm that the
RsDvCap’s Camera device name will disappear. After that, you can change this switch to your
choice and the camera device name will appear.
2. Select [DV mode] on the [Application Setting] as shown in 5-3.Application settings.
3. Click the
will appear.
4. Click the
5.Click the
button on the Camera Control bar. A video image from a DVCAM
button to start capturing.
button to stop capturing.
You can also stop capturing by using the
pressing ESC button on the keyboard.
button on the Camera Control Bar or
6. If you checked [Rename file name every capture execution] on the [Application Setting],
You will see the window.You can
rename the captured file.
7.The file will be saved in the folder
you set at [Set Folder Name To Save
Capture Files] on the [Application
Setting].
NOTE
When you preview, it puts some load on PCs. If data loss happens, don't check [Capture
With Preview] on the [Application Setting]. For more information, please refer to page
8-2.When playing back the captured file is choppy or jerky in 8.Troubleshooting.
42
5-5.Capturing a video from a DV tape
When you want to capture a video image from a DV tape, follow steps through.
1. Set a DV tape in a DVCAM and confirm the DVCAM mode is set to video mode.
Video Mode means you can control a video of a DV tape. If your DVCAM is in camera
mode, change mode selection switch from camera mode to video mode slowly as
mentioned 5-4.Capturing a video from a DVCAM in camera mode.
2.Select [DV mode] on the [Application Setting] as shown in 5-3.Application settings.
3.When you click the
DV play button on the Video Control Bar, the DV tape will start
to play and a video image of the DV tape will appear in the preview window.
4.Click the
button to start capturing.
5.Click the
button to stop capturing.
You can also stop capturing by using the
pressing ESC button on the keyboard.
stop button on the Video Control Bar or
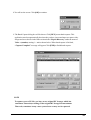
6. If you checked [Rename file name every capture execution] on the [Application Setting],
You will see the window.You can
rename the captured file.
7.The file will be saved in the folder
you set at [Set Folder Name To
Save Capture Files] on the
[Application Setting].
NOTE
1.When you preview, it puts some load on PCs. If data loss happens, don't check
[Capture With Preview] on the [Application Setting]. For more information, please refer
to page 8-2.When playing back the captured file is choppy or jerky in 8.Troubleshooting.
2.To capture correct DV file, you have to use original DV footages which has
continuous Timecode(recording). If the original DV footage has intermittent Time
code, sometimes it may cause system freeze or may not be captured.
43
5-6.DV Batch Capture
Batch capture function saves video images files as your time
scheduling. To batch capture video images from a DV tape,
follow steps through.
1.To show the Batch Capture Window as shown right, select
[Batch Capture List] of the [View] in the system menu.
2.Set a DV tape in a DVCAM and confirm the DVCAM
mode is set to video mode. Video Mode means you can
control a video of a DV tape. If your DVCAM is in camera
mode,change mode selection switch from camera mode to
video mode slowly as mentioned 5-4.Capturing a video
from a DVCAM in camera mode.
3. Click the
DV play button on the Video
Control Bar to play the DV tape.
4. Click the
capturing.
In point button when you want to start
5. Click the
capturing.
Out point button when you want to stop
6. Click the
Add button to add time code to the
window as shown above.
To capture other Video images of the DV tape, repeat the
steps from 4 to 6.
7.Click the
start button to show the Batch
Capture dialog box as shown in the next page.
44
8.You will see the screen. Click [OK] to continue.
9. The Batch Capture dialog box will be shown. Click [RUN] to start batch capture. This
application searches automatically the timecode you have just set and starts to capture video
images and saves the file in the folder written in the “Export Directory” under the name of
Video + (number) starting 1 + .avi as shown below. When batch capture is finished,
“Capture Complete!” message will appear.Click [END] to finish batch capture.
NOTE
To capture correct DV file, you have to use original DV footages which has
continuous Timecode(recording). If the original DV footage has intermittent
Timecode, sometimes it may cause system freeze or may not be captured.
45
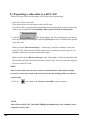
5-7.Exporting a video data to a DVCAM
When you want to export an video data to a DVCAM, follow steps through.
1. Set a DVCAM to video mode.
Video Mode means you can control a video of a DV tape.
If your DVCAM is in camera mode, change mode selection switch from camera mode to video
mode slowly as mentioned 5-4.Capturing a video from a DVCAM in camera mode.
2. Click the
DV Export button. The file select dialog box will appear.
Select an AVI file you want to export, and click [SAVE] button. The AVI data will be exported
to the DVCAM.
When you check “Record on the tape”, “Video image” and “Rec command” will be sent
to the DVCAM. This means the AVI file will be really overwritten to your DV tape. So, you
should be careful not to overwrite important DV tapes.
When you don’t check “Record on the tape”, only “Video image” will be sent to the DVCAM.
This means the AVI file will not be overwritten to your DV tape. You can see the video image on
the screen of the DVCAM.
NOTE
There is time-delay between start of video stream and the DVCAM actually starting
to record. So for a few seconds at the head of video stream, nothing will be recorded on
your DV tape.
3.Click the
stop button in the Camera Control Bar to stop exporting.
NOTE
Only a Microsoft DV AVI 2.0 with DVSD(Digital Simultaneous Voice and Data) can be
exported to a DVCAM.
46
6. How to use RsDvStill
What is the RsDvStill?
This application software has the following functions.
•Preview video data from a DVCAM/a CCD camera.
•Save a still image to a BMP file.
6-1.Main menu
When RsDvStill starts with a DVCAM connected to the PCIFW3U, RsDvStill will detect whether
the DVCAM is in camera mode or in video mode automatically and pauses the DV tape if the
DVCAM is set to video mode and there is a DV tape in the DVCAM.
Preview Window
Thumbnail Window
Slider
Camera Control Button.
NOTE
To capture correct DV file, you have to use original DV footages which has continuous
Timecode(recording). If the original DV footage has intermittent Timecode, sometimes
it may cause system freeze or may not be captured.
47
Category
Description
DV Maker
This list box shows a list of DVCAM manufacturer such as
Sony, JVC, Panasonic, Canon, Sharp, etc. Choose your
DVCAM manufacturer. If you can’t find it, choose OTHER.
Image Size
There are 3 kinds of resolution:720 x 480, 360 x 240, 88 x 60.
This value means raw data from a DVCAM.
Slider Bar
You can select a favorite scene from video capture data by
moving this slider bar. This slider bar is enabled when you click
the Capture button.
You can capture video images for about 1 second by clicking
this button. After clicking this button, preview will be stopped.
You can save a BMP file on the preview window.
The BMP file will be saved and be held at the top of the
thumbnail window.
Video Device
Video Device displays a list of camera device connected to
your PC. If this list box is blank, your camera isn't recognized.
When you use Windows98 SE(Second Edition),
Windows 2000 or Windows Me(Millennium Edition),
“Microsoft DV Camera and VCR” string will appear.
Camera Control Button
,
When a DVCAM is in video mode, you can control a DV tape
as follows.
............Play, Stop
.............Pause
48
,
.............Fast Rewind, Fast Forward or Slow Rewind, Slow Forward
,
..............Previous Frame, Next Frame
Category
Time Code
Description
This box shows the timecode information of your DV tape.
This timecode format is HOUR:MINUTE:SECOND:FRAME.
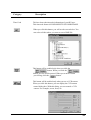
When you click this button, you will see the screen below. You
can select a folder where you want to save a BMP file.
This button will be enabled only when you click the
button. When you click the
button, preview will be paused. When you want to resume
previewing, click the
button.
This button will be enabled only when you use a CCD camera.
When you click this button, you can display the CCD camera
control dialog box. With this dialog, you can control a CCD
camera. For example, zoom, focus, etc.
49
6-2.How to save a BMP file
(1)Save a BMP file from a DV tape
1.Set a DV tape in a DVCAM and confirm the DVCAM mode is set to video mode.
Video Mode means you can control a video of a DV tape. If the DVCAM is in camera mode,
change mode selection switch from camera mode to video mode slowly as mentioned 5-4.
Capturing a video from a DVCAM in camera mode.
2.Starting RsDvStill, your DV tape will be paused and the
Set DV Maker and decide Image Size.
button is disabled.
3.Click the
button. You will see the screen. Select a folder where you want to
save a BMP file and click OK. If you don’t select a folder, a BMP file will be saved in the
folder where this application is installed.
4. Find a favorite scene on the DV tape, using the camera control button.
(TIPS)
When the
button is disabled, click the
button and the
button.
You can preview slowly. When the
button is enabled, click the
button.
After that,click the
button and the
button. You can preview slowly.
5.There are two ways to save a BMP file as follows.
5-1.Click the
button. The BMP file will be saved in the folder under the name
of “Image+ (number) + .BMP” and the BMP file will be held at the top of the
thumbnail window. If you double-click the thumbnail, you can view it with real BMP
file size.
5-2.Click the
button.After capturing, the DV tape will be paused. Then move
the slider to a favorite scene and click the
button. The BMP file will
be held as mentioned above. If you want to resume previewing, click the
button.
50
(2)Save a BMP file from a DVCAM in camera mode or a CCD camera
1.Set a DVCAM to camera mode. Camera mode means you can capture a video image. If your
DVCAM is in video mode, change mode selection switch from video mode to camera mode
slowly as mentioned 5-4.Capturing a video from a DVCAM in camera mode.
When you use a CCD camera, skip this step.
2.Starting RsDvStill, set DV Maker and decide Image Size. When you use a CCD camera,
DV Maker list box is disabled. So, decide Image Size.
3.Click the
button. You will see the screen. Select a folder where you want to
save a BMP file. Then click OK. If you don’t select a folder, a BMP file will be saved in the
folder where this application is installed.
4.There are two ways to save a BMP file as follows.
4-1.Click the
button. The BMP file will be saved in the folder under the name
of Image+ (number) + .BMP and the BMP file will be held at the top of the thumbnail
window. If you double-click the thumbnail, you can view it with real BMP file.
4-2.Click the
button. After capturing, preview will be paused. Then move the
slider to a favorite scene and click the
button. The BMP file will be held
as mentioned above. If you want to resume previewing, click the
button.
NOTE
When you use a CCD camera, the
button is enabled. Using this button,
you can control the CCD camera. For example, zoom, focus, etc.
51
7. How to use CompressAVI
What is CompressAVI application software?
This application software has the following functions.
Convert Microsoft DV-AVI2 format video file to another format video file bi-directionally.
As current existent video editing software don't support MS DV-AVI2 format video file,
you have to convert the format of video file which is captured by RsDvCap before editing.
And after editing, if you want to export it to a DVCAM, you have to re-convert video file to
MS DV-AVI2 format video file.
Please note, file conversion will take a long time, sometimes over a hour.
52
7-1.How to convert the MS DV-AVI2 format into other formats
After you convert the AVI files made by RsDvCap, you can edit it with video editing software.
1.When you start the CompressAVI, you will see the screen below. Click [Execute].
2.Please select “Convert DV-AVI fomat to other video format” and select Resolution.
Click [Next].
53
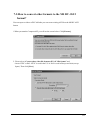
3.Please specify an original video file and a converted video file name.
Click [Next]. (After conversion, an original video file remains in the HDD.)
4.Please choose a conversion filter from the Compression formats list box.
AVI files made by RsDvCap have a MS DV AVI-2 format.
So, select the other compression formats than DV Video Encorder.
54
There are many kinds of compression formats.
(Compression formats appeared in the [Compression formats] list box depend on your system)
Popular compression formats are explained below.
1.Microsoft Video1
It does not take much time to convert because this type will lose quality and cause poor image.
2.Microsoft MPEG4
If you use this type of codec, file size will be compressed to about one-tenth and keep good
quality.
3.Intel Indeo(R) video3.2
This type of codec was invented by Intel.
Compression rate and quality get better than Microsoft Video1
4.Intel Indeo(R) video5
Compression rate will get better under MMX(R) or Pentium(R) II processor.
5.CinePak Codec
It takes much time to convert but this type will keep quality.
6.DV Video Encorder
This type of codec can capture a video from a DVCAM in real time.
RsDvCap uses this type of compression and creates AVI files.
7.Non compression
This type saves data without compression. To make data in [Non compression], it is
necessary to use Windows98 Second Edition, Windows 2000 or Windows ME.
55
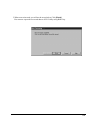
5.Click [Next]. The file conversion starts. It takes much time to convert an AVI file.
Conversion time depends on the type of compression format. Please wait patiently.
6.When conversion ends, you will see the screen below. Click [Finish].
You can now do a video editing with your video editing software.
56
7-2.How to convert other formats to the MS DV-AVI2
format?
You can export a video to a DVCAM after you convert an existing AVI file to the MS DV-AVI2
format.
1.When you start the CompressAVI, you will see the screen below. Click [Execute].
2. Please select “Convert other video file format to DV-AVI file format” and
choose NTSC or PAL. NTSC is used in the U.S.A. PAL is used in Europe and Asia(except
Japan). Then click [Next].
57
3.Please specify an original video file and a converted video file name. Click [Next].
4.Click [Next]. It may take much time to convert an AVI file. Please wait patiently.
58
5.When conversion ends, you will see the screen below. Click [Finish].
You can now export the converted data to a DVCAM by using RsDvCap.
59
8. Troubleshooting
8-1.Camera can not be recognized
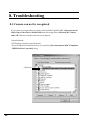
If your camera is recognized by our capture software(RsDvCap,RsDvStill), Camera list box in
RsDvCap or Video Device in RsDvStill shows the string such as Microsoft DV Camera
and VCR. If the box is blank, camera is not recognized.
General Solution:
1.PCI Board is not firmly seated in the slot.
If your PCI Board is installed correctly, you can find a [Texas Instruments OHCI Compliant
IEEE1394 Host Controller] string.
Check here
60
2.If you use Windows98 SE(Second Edition), there have to be a [Microsoft DV Camera and VCR]
string under the “Imaging Device” in the Device Manager. If you can not find it, make sure your
DVCAM is powered on.
If you use Windows2000, there have to be a [Microsoft DV Camera and VCR] string under
the “Imaging Device” in the Device Manager. If you can not find it, make sure your DVCAM is
powered on.
If you use Windows Me(Millennium Edition), there have to be a camera name string under the
“Imaging Device” in the Device Manager. If you can not find it, make sure your DVCAM is
powered on.
61
8-2.When playing back the captured file is choppy or jerky.
The data rate from a DVCAM is 3.6MB/sec. If your HDD sustained data write rate is lower
than 3.6MB/sec, a captured file may get choppy or jerky when you play back the file.
To avoid this trouble, enable DMA function of your HDD, following steps through.
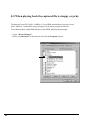
1.Open “Device Manager”.
2.Select your Disk drive as shown below and click the Properties button.
62
3.Click the [Settings] tab and if DMA box is not checked,check here.
But, please note that if your HDD is not Ultra DMA HDD, don’t check here.
To make sure that your HDD is Ultra DMA HDD, refer to your HDD manual.
63
8-3.What kind of Video Editing Software works?
<Video Editing Software>
Microsoft Standard WDM DV filter drivers captures DV data stream and save as an AVI
file which consists with original DV data stream. This DV data stream requires 3.6MB/Sec
and includes 720x480 resolution video data(NTSC). Also, the file size is restricted up to
4GB (about 19 minutes). As this captured DV file has a different file format from AVI file
of Windows3.1/95, you need special Video Editing Software to open and edit it.
If you want to edit video, you have two choices.
1.)You have to use Video Editing Software which can treat MS DV-AVI2 format.
2.)You have to use CompressAVI application and convert MS DV-AVI2 format to other formats
which your Video Editing Software can treat.
You can use bundled VideoStudio without file format conversion. But current
existent Video editing software can not treat MS DV-AVI2 format file. So, you need file
format conversion both before and after editing.
Adobe Premiere5.1
You have to update your Premiere to 5.1c. 5.1c updater is available at www.adobe.com.
Then, please install our Premiere Plug-In included in this package. With the Premiere Plug-In,
your Premiere can treat MS DV-AVI2 format file. For more information, refer to Premiere Plug
-In user’s manual.
MediaStudio Pro 6.0,MGI VideoWaveIII can treat MS DV-AVI2 format.
64
9. Registration and Tech-Support
9-1. How to Register
We highly recommend to register yourself as our customer through our on-line registration.
1. On the Internet, access our site (http://www.ratocsystems.com/english/)
2. Follow window menu guide to register.
3. Fill out and submit the registration form.
9-2. Software Update and Support
-Software UpdateThe latest driver and application software are subject to change for improvement or bug fix.
You can download the latest version from our web site.
(http://www.ratocsystems.com/english/)
-Technical SupportYou can get a Tech support from RATOC at the following.
(Open Monday - Friday,9:30A.M. to 5:00P.M.(PST))
RATOC Systems International,Inc. Tech support
Address: 1933 O’Toole Avenue Suite A109
SanJose, CA 95131, U.S.A.
Phone : (408)955-9400
Fax
: (408)955-9402
E-mail : [email protected]
Web : http://www.ratocsystems.com/english/
NOTE
Please include the following information:
•Our product name, serial number, and product description
•Host Computer Name, Windows version
•Application software/driver version
65
9-3. System Requirements
•One PCI slot
•Windows98 Second Edition/Windows2000/Windows Me
•Pentium II 300MHz or faster
•At least 64 MB memory
•High performance AGP Graphic Board
•High performance Sound Board
•High performance DMA enabled Hard Disk Drive
•Sufficient Hard Disk space for video capture (1 second DV video = 3.6MB)
If your PC can not have sufficient specifications above, Video motion and audio may get choppy.
9-4.Restrictions
•You need to use sufficient Hard Disk space and Hard Disk sustained data write rate for video
capture ( DV data/1 second = 3.6 MB)
•You need to connect the power connector(J2 connector) on the PCIFW3U to a power
connector available in your PC when you connect devices which require power supply.
•Frame drop happens when you capture or export if you use the following DVCAMs made by
CANON and 1394 storage devices simultaneously. The DVCAMs causes such a problem.
-OPTURA, ZR, XL1, VISTURA, ELURA, OPTURA Pi
But, the following DVCAMs or later models do not cause such a problem.
-GL1, ZR10, ELURA2, ELURA2 MC
66
10. Options
Options are available (sold separately) at the web site:
1. http://www.ratocsystems.com/english/
2. http://www.firewireshop.com
-CBFW-466
(4pin-6pin IEEE1394(FireWire) cable(6 feet))
-CBFW-666
(6pin-6pin IEEE1394(FireWire) cable(6 feet))
-CBFW-463
(4pin-6pin IEEE1394(FireWire) cable(3 feet))
-CBFW-663
(6pin-6pin IEEE1394(FireWire) cable(3 feet))
If you have any questions about these options, contact to:
RATOC Systems Insternational, Inc. Tech Support:
TEL : (408)955-9400
FAX: (408)955-9402
E-mail: [email protected]
67
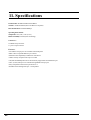
11. Specifications
Product Name :PCIFW3U IEEE1394 PCI Board
Transfer :32 Bit Bus Master(PCI Local Bus 2.2 Compliant)
Data Transfer Rate :100/200/400Mbps
Operating Environment :
Temperature : 0C°(32F°) - 55C°(131F°)
Relative humidity: 20-80%(Non-condensing)
Connectors :
2 x IEEE1394 6p connector
1 x power input connector
Features
*Two IEEE1394 6pin ports are available at backside panel
*IEEE-1394.a compatible PHY chip is on board
*Full backward compatibility to IEEE1394-1995 device
*OHCI 1.0 fully compliant Link chip is on board
*100,200 and 400Mbps data rate is automatically supported at each IEEE1394 port
*Class 1(15W) cable power is available through IEEE1394 6pin port
*Fully compatible with PCI bus specification 2.2
*PCI Bus Power Management spec 1.0 compatible
68
Appendix
Trademarks
-Windows is a registered trademark of Microsoft Corporation.
-Other brand and product names may be registered trademarks or trademarks of their respective holders.
I)FCC Statement
This equipment has been tested and found to comply with the limits for a Class B digital device, pursuant to Part 15 of
the FCC Rules. These limits are designed to provide reasonable protection against harmful interference in a residential
installation. This equipment generates, uses and can radiate radio frequency energy and, if not installed and used in
accordance with the instructions, may cause harmful interference to radio communications. However, there is no guarantee
that interference will not occur in a particular installation. If this equipment does cause harmful interference to radio or
television reception, which can be determined by turning the equipment off and on, the user is encouraged to try to
correct the interference by one or more of the following measures:
(1) Reorient or relocate the receiving antenna.
(2) Increase the separation between the equipment and receiver.
(3) Connect the equipment into an outlet on a circuit different from that to which the receiver is connected.
(4) Consult the dealer or an experienced radio/TV technician for help.
Changes or modifications not expressly approved by the party responsible for compliance may result in this unit not
complying with FCC Rules Part 15.
II)CE Statement
This device complies with EN55022( class B ) and EN55024.
69