1
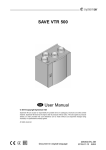
SAVE VSR 300/500
00
00
User Manual
Document in original language
208116-EN
14-02-2013 A002
© 2013 Copyright Systemair AB
Systemair AB can accept no responsibility for possible errors in catalogues,
brochures and other printed material. Systemair AB reserves the right to alter its
products without notice. This also applies to products already on order provided
that such alterations can be made without sub sequential changes being necessary
in specifications already agreed.
All trademarks in this material are property of Systemair AB.
All rights reserved.
Contents
1 Warnings................................................................................................................................... 1
2 Introduction ............................................................................................................................... 1
3 Configuration ............................................................................................................................. 2
3.1 Control panel ................................................................................................................... 2
3.1.1 Display symbols...................................................................................................... 3
3.2 Temperature settings ........................................................................................................ 3
3.3 Manual setting of fan speed .............................................................................................. 4
3.4 Programming the Week schedule ...................................................................................... 4
3.5 Manual and automatic summer mode ................................................................................ 5
4 Maintenance of the unit .............................................................................................................. 6
4.1 Warnings ......................................................................................................................... 6
4.2 Open the side cover ......................................................................................................... 6
4.3 Changing filters ................................................................................................................ 7
4.4 Resetting the filter time ..................................................................................................... 8
4.5 Checking and cleaning the heat exchanger ........................................................................ 8
4.6 Cleaning the fans ............................................................................................................. 9
4.7 Replacing rotor drive belt ..................................................................................................10
4.8 Overheat protection reset button .......................................................................................11
5 Duct system maintenance ..........................................................................................................11
5.1 Cleaning extract louvres and supply air diffusers ................................................................11
5.2 Checking the outdoor air intake .........................................................................................12
5.3 Checking the roof cowl (if fitted).........................................................................................12
5.4 Checking and cleaning the duct system .............................................................................13
6 Trouble shooting ........................................................................................................................14
6.1 Alarm list..........................................................................................................................14
1 Warnings
The following admonitions will be presented in different sections of the document:
Danger
• Make sure that the mains supply to the unit is disconnected before performing any maintenance or
electrical work!
• All electrical connections and maintenance work must be carried out by an authorized installer and
in accordance with local rules and regulations.
Warning
• The system should operate continuously, and only be stopped for maintenance/service.
• The installation of the unit and complete ventilation system must be performed by an authorized
installer and in accordance with local rules and regulations.
• Beware of sharp edges during mounting and maintenance. Use protective gloves.
• All though the Mains supply to the unit has been disconnected there is still risk for injury due to
rotating parts that have not come to a complete standstill.
• Make sure that filters are mounted before starting the unit.
• This product must only be operated by a person which has suitable knowledge or education within
this field or carried out with the supervision of a suitably qualified person.
Caution
• Do not connect tumble dryers to the ventilation system.
• Duct connections/duct ends must be covered during storage and installation.
2 Introduction
The SAVE VSR 300/500 is a heat recovery ventilation unit with a built in rotating highly efficient heat
exchanger. The SAVE VSR 300/500 is suitable for houses with up to 240/360 m2 heated living area. It
supplies filtered outdoor air to residential areas and extract air from bathroom, kitchen and wet rooms.
Both models come with a 1670 W installed re-heater battery.
SAVE VSR 300/500
208116
User Manual
1
Systemair AB
3 Configuration
3.1 Control panel
The control panel is used to make the necessary adjustments.
An external control panel can be connected to the unit. The control panel is delivered with a 12 m cable.
Cables in other lengths can be obtained from the supplier.
The illustration below shows the control panel with a short description.
1
3
2
4
Fig. 1 Control panel
Position
Description
Explanation
1
Display
Shows symbols, menus and settings
2
SELECTION knob
Move through the menu lists or change settings and
values by turning the knob left or right
3
CONFIRM button
Confirm menu choices or settings by pressing the button
4
BACK button
Step back in the menu levels and to abort an initiated
parameter change and restore the original value by
pressing the button
SAVE VSR 300/500
208116
User Manual
2
Systemair AB
3.1.1 Display symbols
Symbol
Description
Explanation
Temp
Illustrates the current set temperature. The temperature
setpoint is set in 6 steps (from completely empty to filled
symbol).
Turn the SELECTION knob to choose temperature.
Press CONFIRM to save the setting.
Fan speed
Illustrates the current fan speed. The fan speed can be
set manually in 4 steps: Off, Low, Nom and High.
Turn the SELECTION knob to choose fan speed.
Press CONFIRM to save the setting.
A.Ventilation off.1
B.Low ventilation: Can be used when leaving the
building for a longer period
C.Nominal ventilation: Will give required air change
under normal conditions.
D.Maximum ventilation: To increase the airflow if
necessary.
1.
Service
Press CONFIRM to access the service menu.
Alarm
Press CONFIRM to access the alarm list.
The fan can be set to OFF by activating MAN fan stop. See service menu description under functions.
Note:
It is not recommended to activate MAN fan stop (set fan to OFF) in standard households.
If MAN fan stop is activated, the unit should be provided with dampers in exhaust and fresh air ducts to
avoid cold draught and risk of condensation when the unit has been stopped.
3.2 Temperature settings
The supply air temperature is set manually in 6 steps in the main menu display by choosing the
temperature symbol. If an electrical or water re-heater is installed the temperature setpoints are:
12.0, 14.5, 17.0, 19.5 and 22.0 °C. Default value is 12.0 °C.
If the re-heater is deactivated, the temperature steps are:
15.0, 16.0, 17.0, 18.0 or 19.0°C. Default value is 15.0 °C.
SAVE VSR 300/500
208116
User Manual
3
Systemair AB
Each temperature step is illustrated by increasing the filling of the temperature symbol.
3.3 Manual setting of fan speed
It is possible, at any time, to manually set the fan speed in the main menu display. By choosing the fan
symbol and confirming, it is possible to increase or decrease the fan speed in the 4 steps: Off, Low,
Nom and High. By doing so, you override the programmed week schedule for the unit until the end
of the present time period in the week program.
Note:
The fan can be set to OFF by activating MAN fan stop. See service menu description under functions.
3.4 Programming the Week schedule
Program how you want the unit to operate according to the week schedule. It’s possible to set 2 periods
per day.
Set the week schedule according to below procedure:
1. Go to the service menu by using the
SELECTION knob.
2. Enter the service level by typing the password,
default 1111.
Password
Password XXXX
Locked YES/NO
Use the SELECTION knob for each digit and
confirm with the CONFIRM button after each set
digit and choose NO for the system not be locked.
3. Go to: Week program
Service
Week program
4. Choose Week program again.
Week program
Week program
4. Set week day and time you want the unit to
be in ON level. Two periods per day can be
programmed. The rest of the time the unit will be in
OFF level.
Week program
5. Go back to the previous dialogue frame with the
BACK button and go down to Fan speed.
Week program
Day:
Per 1:
Per 2:
MON
07:00 16:00
00:00 00:00
Fan speed
SAVE VSR 300/500
208116
User Manual
4
Systemair AB
Fan speed
7. Set which fan speed the fan is supposed to be
running in the ON level, choose between Low,
Nom or High.
On level: low/nom/high
Off level: off/low/nom/high
Set which fan speed the fan is supposed to be
running in the OFF level, choose between OFF,
Low, Nom or High.
Note:
If an electrical re-heater battery is installed and
active and the unit is shut down from the control
panel, for example by choosing OFF. When the
unit is in OFF level in the week program, the fans
will continue to run for 3 minutes, to prevent the
heater from triggering the over heat protection
sensor, before they stop.
8. Step back with the BACK button until you reach
the main menu display
3.5 Manual and automatic summer mode
Manual summer mode occurs if one temperature setpoint step lower than the 12 °C step is selected. The
temperature symbol on the main menu is then completely empty.
Te mp
If the re-heater is active, it will switch off during manual summer mode. Manual summer mode aborts
automatically after two minutes if the supply air temperature is less, or equal to, 5 °C.
If a water heater battery is installed and activated, the manual summer mode is aborted if the outdoor air or
supply air temperature is less, or equal to, 5 °C.
The unit will automatically alternate between winter operation with heat recovery and summer operation
without heat recovery.
SAVE VSR 300/500
208116
User Manual
5
Systemair AB
4 Maintenance of the unit
Maintenance of the SAVE VSR 300/500 should normally be performed 3 - 4 times a year.
4.1 Warnings
Danger
• Make sure that the Mains supply to the unit is disconnected before performing any maintenance or
electrical work!
• All electrical maintenance work must be carried out by an authorized installer and in accordance with
local rules and regulations.
Warning
• The system should operate continuously, and only be stopped for maintenance/service
• Beware of sharp edges during maintenance. Use protective gloves.
• Make sure that filters are mounted before starting the unit
4.2 Open the side cover
Danger
• Make sure that the Mains supply to the unit is disconnected before performing any maintenance or
electrical work!
Loosen the four knobs and loosen the Philips screw to open the side cover.
Fig. 2 Open the side cover
SAVE VSR 300/500
208116
User Manual
6
Systemair AB
4.3 Changing filters
Danger
Make sure that the Mains supply to the unit is disconnected before performing any maintenance or
electrical work!
Fig. 3 Supply and extract air filters
The filters are to be changed every 6/9/12/15 months, default value is 12 months. When the filters have
been changed the filter timer must be reset. See chapter 4.4.
The factory installed filters are of filter quality F7 for the supply air and G3 for the extract air filter. The filters
need to be replaced when polluted. New sets of filters can be acquired from your installer or wholesaler.
Filter quality G3 can be installed for supply air filtering.
The filter type is labelled on the top of the filter.
Caution
If the filter types are changed, the heat recovery system may need re-configuration to function optimally.
If type G3 filters are used instead of F7, the system curve for Supply Fan (SF) must be changed:
For G3 type filter: 11–20, for F7 type filter: 1–10. See Installation and Service Instruction.
1. Stop the unit by disconnecting the mains.
2. Open and remove the side cover. See chapter 4.2.
3. Pull out the filters towards you. Some force may be needed.
4. Insert the new filters. Make sure that the correct filter types are inserted. See note above.
5. Replace and lock the side cover and connect the unit to mains.
SAVE VSR 300/500
208116
User Manual
7
Systemair AB
4.4 Resetting the filter time
1. Go to the service menu by using the selection
knob.
2. Enter the service level by typing the password.
Service
—>Password
Locked YES/NO
Use the SELECTION knob for each digit and
confirm with the CONFIRM button after each set
digit and choose "NO" for the system not be locked.
3. Go to: Filter period, press CONFIRM.
Filter period
Choose: Reset: YES with the SELECTION
knob and then CONFIRM.
Change, if necessary, Time to replace
X month, to the time of your choice with the
SELECTION knob and then press CONFIRM.
Time to replace:
6/9/12/15 month
Reset NO/YES
Press the BACK button until you reach the main
menu.
4.5 Checking and cleaning the heat exchanger
Danger
Make sure that the Mains supply to the unit is disconnected before performing any maintenance or
electrical work!
Fig. 4 Heat exchanger
Even if the required maintenance is carried out, dust will build up in the exchanger block. It is therefore of
vital importance for the upkeep of a high efficiency that the exchanger block is removed from the unit and
cleaned periodically as illustrated below. Clean the heat exchanger at least every 3 years or when required.
1. Stop the unit by disconnecting the mains.
2. Open and remove the side cover. See figure 4.2.
3. Disconnect the rotor power supply and the rotor sensor. Both cables are found beside the rotor.
SAVE VSR 300/500
208116
User Manual
8
Systemair AB
4. Pull out the rotor towards you. Some force may be needed.
5. Clean the rotor.
Wash in hot soapy water. Do not use detergent containing ammonia. Rinse using, for instance, a
shower handle or carefully with compressed air.
Warning
Ensure the rotor motor is not exposed to moisture
6. Remount the rotor. Don’t forget to reconnect the rotor power and sensor cables.
7. Replace and lock the side cover and connect the unit to mains.
4.6 Cleaning the fans
Danger
• Make sure that the Mains supply to the unit is disconnected before performing any maintenance or
electrical work!
Fig. 5 Extract and supply air fans
The motor bearings are life time lubricated and maintenance free.
Even if the required maintenance, such as changing of filters is carried out, dust and grease may slowly
build up inside the fans. This will reduce the efficiency.
The fans may be cleaned as illustrated in below procedure.
1. Stop the unit by disconnecting the mains.
2. Open and remove the side cover. See chapter 4.2.
3. Disconnect the fan power cables. The cables are found beside the fans.
4. Loosen the mounting screws (1) and pull the fans towards you. Some force may be needed.
SAVE VSR 300/500
208116
User Manual
9
Systemair AB
1
5. Clean the fans with a cloth or a soft brush. Do not use water. White spirit can be used to remove
obstinate deposits.
Allow the fans to dry properly before remounting.
6. Remount the fans. Don’t forget to reconnect the fan power cables.
7. Replace and lock the side cover and connect the unit to mains.
4.7 Replacing rotor drive belt
Danger
• Make sure that the Mains supply to the unit is disconnected before performing any maintenance or
electrical work!
If the alarm Rotor is raised, see chapter 6.1, the rotor drive belt may be damaged or broken.
1
Fig. 6 Rotor drive belt
The rotor drive belt (1) can be acquired from your installer or wholesaler.
The replacement drive belt is adjustable and delivered with a nipple attached in one end.
1. Stop the unit by disconnecting the mains.
2. Open and remove the side cover. See chapter 4.2.
3. Remove the broken drive belt.
4. Use tape to attach the drive belt to the rotating heat exchanger, and rotate the exchanger by hand
to get hold of the drive belt.
5. Remove the tape and put the ”empty” end on to the nipple. Press the ends firmly towards each other
and tighten the nipple.
SAVE VSR 300/500
208116
User Manual
10
Systemair AB
6. Pull the drive belt on to the belt pulley and rotate the exchanger by hand. Check that the belt pulley
rotates.
Note:
If the drive belt slips, the drive belt may be too long and needs to be shortened. Cut the drive belt 5
mm and go to step 5.
7. Replace and lock the side cover and connect the unit to mains.
8. Check that the alarm has ceased on the Control Display.
Note:
If the alarm remains, contact the installer.
4.8 Overheat protection reset button
If the supply air temperature is low, it can indicate that the over heat protection is triggered. The overheat
protection can be reset by pressing the reset button.
The button is placed on the top cover of the unit.
1
1. Reset button
5 Duct system maintenance
5.1 Cleaning extract louvres and supply air diffusers
The system supplies fresh air to your home and extracts the used indoor air via the duct system and
diffusers/louvres. Diffusers and louvres are mounted in ceilings/walls in bedrooms, living room, wet rooms,
WC etc. Remove diffusers and louvres and wash in hot soapy water as required (diffusers/louvres must
not be exchanged). Cleaning of diffusers/louvres can be done as necessary.
Fig. 7 Diffusers and louvres
SAVE VSR 300/500
208116
User Manual
11
Systemair AB
5.2 Checking the outdoor air intake
Leaves and pollution could plug up the air intake grille and reduce the capacity. Check the air intake grille,
and clean as necessary. It is recommended to do this at least twice a year.
Fig. 8 Intake grill
5.3 Checking the roof cowl (if fitted)
The roof cowl (if fitted) connected to the exhaust air duct needs to be checked at least twice a year and
cleaned if necessary.
SAVE VSR 300/500
208116
User Manual
12
Systemair AB
5.4 Checking and cleaning the duct system
Dust and grease deposits may build up in the duct system, even if required maintenance such as changing
of filters is being carried out. This will reduce the efficiency of the installation.
The duct runs should therefore be cleaned/changed when necessary. Steel ducts can be cleaned by
pulling a brush soaked in hot soapy water, through the duct via diffuser/louvre openings or special
inspection hatches in the duct system (if fitted).
It is recommended to do this every 5 years and is normally carried out by authorized companies
specialized in this area.
Fig. 9 Cleaning duct system
SAVE VSR 300/500
208116
User Manual
13
Systemair AB
6 Trouble shooting
A warning triangle with text in the display indicates an alarm. Turn menu selector to the warning triangle
and press confirm twice to view the alarm.
Danger
Make sure that the mains supply to the unit is disconnected before performing any maintenance
or electrical work on the unit!
6.1 Alarm list
Alarm
Explanation
Do the following
Fan
Indicates error on either supply
or extract air fan.
The alarm is displayed in the
control panel.
Contact your installation
company or place of purchase.
EMT/Frost
Indicates triggered frost
protection (in case of installed
water heating battery) or
triggered overheat protection
(in case of installed electric
re-heater battery).
A triggered frost protection alarm
results in the following:
• Both fans stop.
• Outdoor and exhaust air
dampers closed.
• Water valve opens completely
(10 V signal goes out to the
actuator).
The unit will restart once the
water temperature reaches +5°C
above the set frost protection
temperature.
A triggered over heat protection
gives an alarm in the control
panel.
Reset by pressing the red button
placed on the top cover of the
unit. 4.8
If the problem continues contact
your installation company or
place of purchase.
Rotor
Indicates a rotor malfunction.
The alarm is displayed in the
control panel.
The rotating heat exchanger has
stopped. Check the rotor belt.
See chapter 4.7.
If the heat exchanger is still
rotating, the rotor sensor may be
faulty.
Contact your installation
company or place of purchase.
SAVE VSR 300/500
208116
User Manual
14
Systemair AB
Alarm
Explanation
Do the following
Pb Fail
Error in connection with relay
card for the electrical re-heater (if
installed and activated).
The alarm is displayed in the
control panel.
ET2 may be triggered due to high
temperature.
Temp
Malfunction in one or more of the
temperature sensors.
The heater will not be activated.
For triggered ET2, wait 10–15
min. If the error remains, contact
your installation company or
place of purchase.
The alarm is displayed in the
control panel.
Contact your installation
company or place of purchase.
Filter
Time for filter change.
The alarm is displayed in the
control panel.
Change filter according to the
instructions in chapter 4.3.
SAVE VSR 300/500
208116
User Manual
15
Systemair AB
lastpage
Systemair AB reserves the right to make changes and improvements to the contents
of this manual without prior notice.
Systemair AB
Industrivägen 3
SE-739 30 Skinnskatteberg, Sweden
Phone +46 222 440 00
Fax +46 222 440 99
www.systemair.com
208116