1
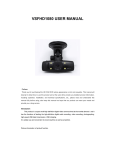
Congratulations on Purchasing your Geco Mark II Welcome to the Geco Family! Please read this manual before you start using your Geco. Customer Support Visit www.gecocam.com or email [email protected] for technical support. Find Us Online Like us on Facebook: www.facebook.com/GecoCam Follow us on Twitter: @GecoCam Subscribe to our YouTube Channel: www.youtube.com/GecoCam Included Geco Mark II 8GB Micro SD Card Micro USB Cable Wall Charger Memory Foam strips Waterproof Case rated up to 30m Tripod mount Multi-Sized High Tensile Elastics Geco Specs Weight: approximately 20 grams Dimensions: 70mm x 29mm x 16mm Video format: .mov Video encoding: H.264 Memory: Micro SD card Resolution: 1080P @30fps 720P @60fps 720P @30fps Battery: Li-Poly Battery Life: Approximately 60 minutes in 720P@30fps Approximately 45 minutes in 720@60fps Approximately 45 minutes in 1080p@30fps Plug and Play Viewing angle: 100 degrees Compatible with Windows and Mac OSX Overview On/Off & Record Button Reset Button Multi Mount Clips LED Lens Micro USB Port Micro SD Slot Microphone Getting Started Charging Your Geco should be charged before operation. Upon purchase of your Geco Mark II, Plug it in to your computer using the micro USB or alternatively use the wall plug. Subsequently, charging is very simple and can be done using either of the two accessories. When the battery is low, the LED will pulse blue slowly before switching off. While charging, the LED will pulse blue. Once fully charged, the LED will be solid blue. Using the micro USB cable: Ensure the Geco is switched off prior to charging Plug the USB end of the cable into your computer’s USB port Next, plug the micro USB end of the cable into the micro USB slot on the back of the Geco Using the wall charger: Connect the charger to an electrical outlet Plug the USB end of the micro USB cable into the adaptor included Plug in the micro USB end of the cable into the micro USB port at the back of the Geco It should be borne in mind that shooting in 1080P is more demanding on the components of the GECO and thus full charge is highly recommended for recording in full HD. Recommended charging time is 45 minutes. Mounting Mounting the Geco will vary depending on the size of the arm of the glasses to which they will be attached. Smaller/thinner arms will require the memory foam strips to be used. Bigger/Thicker arm: Choose the size of high tensile elastics that is suitable to your glasses Take two of the elastics and stretch them diagonally across the hooks on the inside of the Geco. They should form an “X” shape. Push the right hand arm of your glasses through the elastic hold, letting the arm be restrained by both elastics. Adjust the position of the GECO along the arm until such time as it is most comfortable. Mounting Smaller/Thinner arm: Use a strip of memory foam included Stick the adhesive side onto the camera covering the area in between the hooks on the inside of the Geco Choose the size of high tensile elastics that is suitable to your glasses Take two of the elastics and stretch them diagonally across the hooks on the inside of the Geco. They should form an “X” shape. Push the right hand arm of your glasses through the elastic hold, enabling the arm to be restrained by both elastics while being held firmly against the middle of the memory foam strip. Adjust the position of the Geco along the arm until such time as it is most comfortable. *This method is also used for vibration dampening Waterproof Case When using waterproof case it is advisable to use 720P@30fps Goggles: Choose the size of high tensile elastics that is suitable to your glasses Take two of the elastics and stretch them diagonally across the hooks on the inside of the Geco. They should form an “X” shape. Push the right side of the strap of your goggles through the elastic hold, ensuring the strap is restrained by both elastics. Adjust the position of the Geco along the arm until such time as it is most comfortable. Resolution Settings After connecting your Geco to the computer by USB and using it in removable disk mode, you should see a file named Setting.txt in the root directory. It is automatically generated by the camera. Please follow these guidelines to change your recording quality between 720p@60fps, 720p@30fps and 1080p@30fps. 1. Double Click to open this file: 2. Edit the contents on this page: a. Change the "N" in "Update: N “ to "Y" so it looks like example: Resolution Settings The default quality is 1080p@30fps denoted by “0” b. Change the "0" to "1" for 720P@60fps: c. Change the "0" to "2" for 720P@30fps: Note: Change only the specified part, otherwise the settings will not take effect. Resolution Settings 3. Save and Exit the file: 4. Remove device: Safely remove your device from your PC Power on your Geco and the settings will take effect. Operation 1. Powering up your Geco and initiating simple recording: a. Pushing the Power/ Record button, switches the camera on and initiates recording. This is a tactile button so it stays pushed in when the camera is recording. b. The blue LED on the camera will come on, at the same time the light will alternate between red and blue for 6 seconds to notify you that it is powered on and is starting to record. c. If the camera is left to record for 30 minutes, the Geco will save the video, start a new video file and continue recording. d. To stop recording click the button again, the blue LED will pulse for three seconds, the Geco will save the file and turn off. 2. Recording While Charging: a. The Geco has an option where you can record while you are charging the camera for longer periods of recording.(useful as a traffic cam) b. Connect the camera to the charger while the Geco is off then press the Power/Record button to start recording. Operation 3. Live Stream/ Webcam Mode: a. Confirm that your Geco is turned off. b. Remove the micro SD card from the Geco c. Connect the Geco to the computer via USB cable, this will initiate the live stream/ webcam mode. 4. Using Removable Disk Mode: a. Confirm that Your Geco is turned off. b. Connect the Geco to the computer while the micro SD card is inside the camera. c. This will initiate Removable Disk Mode, You will be able to view all your videos that you have recorded in the DCIM folder. Operation Other Status Indications: Low power: The LED will flash blue and the camera will turn off automatically after 10 seconds, The Geco will save your current recording before turning off The Storage Space is Full: The LED will flash red and blue for 15 seconds before it automatically turns off. Troubleshooting The Geco was created with simplicity in mind and thus instead of countless troubleshooting techniques, we incorporated a single hard reset button located on the underside of your Geco. To initiate reset make sure your Geco is powered on, then use a thin object to click and hold the tactile button for 5 seconds within the reset hole, this will do a factory reset of your Geco. The Geco, like any high definition camera, the Geco is susceptible to overheating and with the use of the waterproof case even more so, to prevent this please use a lower resolution such as 720p@30fps in high temperature environments as this puts less strain on the camera’s components. WARRANTY Your camera is guaranteed against manufacturing defects for a period of (1) one year from date of purchase. Geco Cam (Pty) Ltd’s sole obligation in an event that such defects occur during the period, is to repair or replace the defective product at the discretion of Geco Cam (Pty) Ltd. Damage that is the result of use, negligence, accident or normal wear and tear is not covered by this warranty. Geco Cam (Pty) Ltd assumes no liability for any loss, injury, unlawful actions and in no event will Geco Cam (Pty) Ltd be liable for incidental or consequential damages resulting from the use of this product or any of its parts. As the use of the waterproof housing relies on the user to make sure no leakage occurs, this product is not covered for water damage.