1
Contents
Section 1 - Introduction .................................................................................................. 3
Section 2 - Connecting your Wireless Print Server ....................................................... 4
Diagnostic Push Button ................................................................................... 5
LED Indicators ................................................................................................. 5
How to Make Your Wireless Network More Secure ......................................... 7
Section 3 - Configuring your Wireless Print Server ...................................................... 8
Overview ........................................................................................................... 8
Configuration Methods .................................................................................... 8
Using the Windows Wizard ............................................................................. 9
Wireless Configuration .................................................................................. 12
Section 4 - Configuring your Computers .................................................................... 13
Overview .........................................................................................................
Printing Methods ............................................................................................
Windows Peer-to-peer Printing .....................................................................
Windows SMB Printing ..................................................................................
Windows with Server-based Print Queues ...................................................
Windows LPR Printing ...................................................................................
Macintosh (AppleTalk) ...................................................................................
13
13
15
21
23
24
25
Section 5 - BiAdmin Management Utility ..................................................................... 27
Requirements ................................................................................................ 27
Installation ..................................................................................................... 27
Section 6 - Web-Based Management ......................................................................... 41
Overview ......................................................................................................... 41
Preparation .................................................................................................... 41
Section 7 - Special Features ....................................................................................... 51
Overview .........................................................................................................
Internet Printing Protocol (IPP) ......................................................................
IPP Server Configuration ...............................................................................
SNMP .............................................................................................................
51
51
51
60
Section 8 - Troubleshooting ........................................................................................ 61
Overview ......................................................................................................... 61
Section 9 - Network Server Configuration ................................................................... 68
Windows NT Server ....................................................................................... 68
Unix Systems ................................................................................................. 71
Registering your NetComm Product ........................................................................... 72
Warranty Registration Form .......................................................................... 73
Product Warranty ............................................................................................ 75
www.netcomm.com.au
Page 2
Rev. 1 - YML667
NP5000 Wireless Multi-Port Print Server User Guide
Section 1 - Introduction
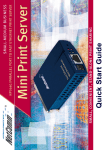
The NetComm Mini Print Server has been designed to provide a simple and efficient
network printing solution and allowing one printer to be shared between multiple
computers. It is packed with features, including:
■ Versatility. The Wireless Print Server supports up to four protocols: TCP/IP, SMB
(Service Message Block), AppleTalk (EtherTalk), and NetBEUI. It features an Ethernet
interface ports and operating system support includes Unix, NetWare (NDPS LPR printing),
and Microsoft Windows.
■ Easy Installation. The Wireless Print Server makes adding printers or plotters to your
network simple. The auto-sensing feature on the LAN interface means that there is no need
to set jumpers or perform software configuration to select the network interface used.
■ Easy Setup. A number of utility programs are supplied to simplify setup. For Windows
95/98/Me/NT/2000/XP users, the BiAdmin program makes it easy to configure the Wireless
Print Server for a variety of network and server configurations.
■ Web-based Interface. The Web-based interface provides an easy method of configuration in
TCP/IP networks to every model.
■ Compact Size. This allows the Wireless Print Server to be used even where space is
limited.
■ Remote Management Tools. A variety of software tools are provided. In most
environments, both the Wireless Print Server and attached bi-directional printers can be
configured remotely.
■ SNMP Support. The Wireless Print Server can act as a SNMP agent, with it own MIB.
This allows TCP/IP users to monitor, configure and troubleshoot the Wireless Print Server
using their existing SNMP management tools.
■ Internet Printing Protocol (IPP) Support. Some Print Server models can act as an IPP
(Internet Printing Protocol) Server, allowing clients, suppliers, colleagues and others to print
to your printer from anywhere on the Internet. Windows IPP Client software is also
supplied.
■ Wireless LAN Support. Wireless stations supporting the IEEE 802.11b standard can
interoperate with the Wireless Print Server. Both LAN and WLAN users can print to the
attached printer.
Rev. 1 - YML667
NP5000 Wireless Multi-Port Print Server User Guide
www.netcomm.com.au
Page 3
Section 2 - Connecting your Wireless Print Server
This section describes how to install the Wireless Print Server in your Local Area Network.
1. Preparation
■ Ensure the power is OFF. Do not connect the Wireless Print Server while power is On.
■ Find the Default Server Name for your Print Server. The Default Server Name is shown
on a sticker on the base of the device. It consists of 8 letters and/or digits. Record this
name; it may be needed during configuration.
2. Connect the Printer
Connect the parallel printer and USB printer cables to the appropriate ports on the Wireless
Print Server unit. Parallel port cables should be less than 3 meters long.
3. Connect the Network Cable
■ Connect the network cable to the proper connector on the Wireless Print Server. The
Wireless Print Server will automatically recognize whichever connector is used.
Note: This will disable the Wireless interface, because the default "Infrastructure
mode" wireless setting can NOT be used with the LAN interface. To use both
the LAN and Wireless interfaces, the Wireless mode must be set to "Adhoc".After configuration, the LAN interface can be disconnected if not
required.For LAN application, the LAN cable need to be inserted before
power ON.
4. Power Up
Plug in the power adapter cable and power up. Start-up will take only a few seconds.
5. Check the LEDs
■ The Red Error LED should flash, then turn Off. When the Red LED goes off and the
Green LED remains lit or flashes, the Wireless Print Server is ready. The Red Error LED
will remain flashing if the Wireless Print Server can't connect to the printer.
www.netcomm.com.au
Page 4
Rev. 1 - YML667
NP5000 Wireless Multi-Port Print Server User Guide
Diagnostic Push Button
The Wireless Print Server is fitted with a Diagnostic Push Button. The button is recessed; a pin
or paper clip can be used to press it. This button has 2 functions:
■ Restore the factory default settings
■ Print a test page containing all current settings.
To restore the factory default settings:
1. Turn the Wireless Print Server OFF.
2. Press and hold the diagnostic button. While pressing the button, switch the Wireless Print
Server ON.
3. If you continue pressing the button for 10 seconds, a diagnostic page will be printed,
showing the new (default) settings.
To generate a Diagnostic print out
1. Ensure that both the Wireless Print Server and the printer attached to port 1 are ON.
2. Press the diagnostic button, and hold it in for 2 seconds.
3. The test page, containing the current settings, will be printed.
Note:
PostScript printers are unable to print this page. If you have a PostScript printer on
Port 1, the test page will not be printed.
LED Indicators
The Mini Print Server has four LED indicators; LAN, WLAN, Status, and Error. The LED
indicator modes are described in the following table:
LED
Status
Description
All LEDs
Off
No power.
Status
Green
Power on.
Error
Red
Hardware error
WLAN
IdleFlashing
Transmitting or receiving data through the Wireless
LAN.
LAN
IdleFlashing
Transmitting or receiving data through the LAN.
Rev. 1 - YML667
NP5000 Wireless Multi-Port Print Server User Guide
www.netcomm.com.au
Page 5
Signal Range
WLAN devices are designed to operate over a radius of 100 meters indoors and 300
metres outdoors. Obstructions such as walls, ceilings, floors, office equipment, and
furniture can reduce this range. The following example or just some factors that affect
the signal range of your Wireless network.
■ Obstructions. The Wireless LAN radio signal can penetrate through ceilings and walls.
However, each wall or ceiling the signal must pass through to reach other WLAN devices
will reduce the effective range your Wireless LAN.
You should also keep the depth of the obstructions to a minimum. Take an example of a wall
that is half a metre thick. For a radio signal going through the wall, at a forty degree angle, it
must pass through almost one metre of material. At a two degree angle, this increases to over
14 metres! Position adaptors and access points so that the signal will travel straight through
a wall or ceiling for better reception.
Position your adaptors and access points above desk height so as to minimise the number
and depth of obstructions and always position your adaptors and access points so that the
signal passes through drywalls or open doorways and not through metallic materials.
■ Antenna Position: Where possible, keep your adaptors and access points at least 1 or 2
metres away from devices that generate strong radio-frequency or electromagnetic signals,
such as microwaves, computer monitors, cellular telephones and electric motors. Use the
utilities included with your product to measure the best reception (signal quality/strength)
achieved when repositioning the antenna.
Should the signal be inadequate in an area where you wish to use your wireless network,
consider adding Access Points to increase the signal strength in that area.
www.netcomm.com.au
Page 6
Rev. 1 - YML667
NP5000 Wireless Multi-Port Print Server User Guide
How to Make Your Wireless Network More Secure
Wireless networks can be vulnerable to an outsider gaining access if the encryption
settings are not set adequately. Some of the default security settings on some wireless
hardware, and in Microsoft Windows, may allow access to your wireless network from
other wireless devices.
The concepts that are presented here are offered only as a guide, and may help make
your wireless network more difficult for an outsider to gain access. For more specific
information about the implementation of these suggestions, you should consult a
trusted security source.
■ Enable Wired Equivalent Privacy (WEP) encryption
The 802.11b standard, which your NetComm WLAN device is based on, permits Wired
Equivalent Privacy (WEP) encryption. Depending on what other hardware you use your
Wireless Print Server with, there are two levels of WEP typically available: 64-bit
encryption (based on a 40-bit encryption key), and 128-bit encryption (based on a 104-bit
key). We strongly recommend that you enable WEP.
■ Change the default Service Set Identifier (SSID) and passwords for your network devices.
Do not change the SSID or password to reflect your name, address, or anything that would
be easy to guess as this could make it easy for an outsider to gain access to your wireless
network.
■ Install Access Points away from windows
If you are installing access points, think about locating them towards the centre of your
home instead of near the windows. Plan your coverage to radiate out to the windows, but
not beyond. If the access points are located near the windows, a stronger signal will be
radiated outside your home making it easier for those outside the building to locate your
network.
■ Check the range of your network
Take a notebook, or a PDA computer, that is equipped with a wireless network PC Card and
go outside your home to survey what range you get when moving around your property or
neighbourhood. You may be surprised how far the signal radiates. If you can connect from
three or four houses away, so can someone else.
■ Use a combination of the previous suggestions.
Rev. 1 - YML667
NP5000 Wireless Multi-Port Print Server User Guide
www.netcomm.com.au
Page 7
Section 3 - Configuring your Wireless Print Server
This section provides an overview of the configuration process for Windows operating systems.
Overview
As the Wireless Print Server is designed to support many different platforms, the configuration
required would depend upon the environment in which it is installed.
■ The Wireless Print Server usually requires configuration, but if there is a DHCP server on
your network, then the device is just plug-and-play. A Windows-based setup Wizard is
provided on the CD-ROM to simplify this task. This configuration is not required if you
are using a Macintosh computer.
■ Computers wishing to use one of the printers attached to the Wireless Print Server will
always require configuration. See Section 4- Configuring your Computer for details.
■ If you wish to use a queue-based printing system using Windows NT Server/Windows 2000/
Windows XP, the Network Server must be configured as detailed in Appendix B - Network
Server Configuration. However, it is not necessary to use a Network Server-based queue;
client computers can print directly to the Wireless Print Server using the Peer-to-peer
Printing when installed with the User setup option on the CD-ROM.
Configuration Methods
The following methods are available to perform the required Print Server configuration:
■
Windows-based Wizard.
■
BiAdmin management utility program.
■
Web-based setup.
Advanced Configuration and Management
The BiAdmin management utility is provided for advanced configuration and management. This
program is installed by default when the Administrator installation option is selected. See
Section 5 for details on using BiAdmin.
Web Based Configuration and Management
The Wireless Print Server can be accessed directly through a web browser for advanced
configuration and management. See Section 6 for details on using Web Based Configuration.
www.netcomm.com.au
Page 8
Rev. 1 - YML667
NP5000 Wireless Multi-Port Print Server User Guide
Using the Windows Wizard
The Windows-based Wizard is supplied on the CD-ROM, and runs on Windows 95, 98, NT4.0,
ME, Windows 2000 and Windows XP.
Using this Wizard is the recommended method to configure the Wireless Print Server. It can be
used configure the Wireless Print Server for your Network environment, even if the Wireless
Print Server does not have a valid IP address.
Procedure
1. Insert the supplied CD-ROM into your drive. If the setup program does not start
automatically, run SETUP.exe in the root folder.
2. On the first screen, shown below, click Setup Wizard.
3. Click Next on the first screen of the Wizard, to view a list of Print Servers on your LAN.
4. Select your new Wireless Print Server , then click Next to continue.
Rev. 1 - YML667
NP5000 Wireless Multi-Port Print Server User Guide
www.netcomm.com.au
Page 9
5. Enter the required data on the following screen.
■ Name of the Wireless Print Server can be changed if you wish.
■ Comment is optional.
■ Select or enter the Workgroup name for this Print Server.
6. Click Next to configure the TCP/IP Screen:
■ Select Obtain IP Address automatically if your LAN has a DHCP Server, otherwise
select Fixed IP Address.
■ For Fixed IP Address, enter an unused address from the range used on your LAN, or
click the Suggest New Values Button.
■ Use the same Network Mask and Gateway as computers on your LAN.
7. On the Wireless Screens, the settings should be set to match your other Wireless Stations.
For details about each setting, refer to the following section on Wireless Configuration.
8. Click Finish to save the data to the Wireless Print Server .
Note:
To install the Wizard on your computer, use the "Installation" option.
www.netcomm.com.au
Page 10
Rev. 1 - YML667
NP5000 Wireless Multi-Port Print Server User Guide
If the desired Print Server is not listed:
■ Check all cables to the Wireless Print Server .
■ Check the Wireless Print Server's LEDs:
■ The Red Error LED should be OFF and the Green Status LED should be ON.
■ Check that your computer and the Wireless Print Server are on the same LAN segment. (If
you don't have a Router or Gateway on your LAN, you only have 1 segment.)
■ Check that your computer has either the TCP/IP or NetBEUI network protocols installed.
See Checking your Network Protocols on page 11 for details.
■ If all else fails, connect your Wireless Print Server by LAN or directly to a computer using a
cross-over cable and change the settings to allow the Wireless Print Server to be accessed on
your Network.
Rev. 1 - YML667
NP5000 Wireless Multi-Port Print Server User Guide
www.netcomm.com.au
Page 11
Wireless Configuration
The Wireless Print Server is a Wireless station, NOT an access point. Like all other
Wireless stations, they have 3 modes:
■ 802.11 Ad Hoc mode - no Access Point is used, Wireless stations communicate directly with
each other. This is the current standard.
■ Ad Hoc mode - no Access Point is used, Wireless stations communicate directly with each
other. This is the older standard, and requires that each Wireless station is set to use the
same Channel. (In 802.11 Ad-hoc mode, a Wireless station will scan all channels to find
compatible ad-hoc groups it can join.)
Note: Of the two (2) Ad-hoc modes, "802.11 Ad Hoc" mode is recommended. If your
Wireless LAN Card doesn't provide "802.11 Ad Hoc" mode, try "Ad Hoc" mode
on the Computer and "802.11 Ad Hoc" on the Wireless Print Server. If this fails,
select "Ad-hoc" mode on the Wireless Print Server.
■ Infrastructure (Default) - all Wireless stations connect to the Access Point. This allows
connection to both other Wireless stations and the wired LAN.
Note:
The Wireless Print Server does NOT allow both a LAN connection and
"Infrastructure" mode. In "Infrastructure" mode, connecting a LAN cable will
disable the Wireless interface. To use the LAN interface, "Ad-hoc" mode must
be used.
Required configuration
Ad-hoc Mode &
802.11 Ad-hoc Mode
Infrastructure Mode
SSID
If 802.11 Ad Hoc mode is configured,
the Wireless Print Server will join any
group with the same SSID. If there's
no Ad Hoc group available on the
environment, the Wireless Print
Server will create the group by the
SSID number value it configured.
Must match the Access Point.
Channel
In Ad Hoc mode, the Wireless Print
Server will join any group with the
same Channel number.In 802.11
Ad Hoc mode, the Wireless Print Server
will scan all Channels to look for
compatible groups it can join. If there
is no existing Hoc group available, the
Wireless Print Server will create the
group using its own Channel number.
Access Point sets the Channel used.
WEP Settings
Must match the other Wireless stations.
www.netcomm.com.au
Page 12
Wireless stations automatically
locate the correct channel.
Must match the Access Point.
Rev. 1 - YML667
NP5000 Wireless Multi-Port Print Server User Guide
Section 4 - Configuring your Computers
This Section details the client configuration required on LAN computers to use the printers
attached to the Wireless Print Server.
Overview
Before performing client configuration, the Wireless Print Server must be installed on your LAN,
and configured as described in the previous sections. Both the Print Server and the attached
printers must be powered ON.
Printing Methods
The Wireless Print Server supports a number of printing methods:
■ Peer-to-peer Printing means that the print jobs are stored (queued) on your computer, and
sent directly to the Wireless Print Server when it is available.
■ Windows SMB printing is a Microsoft standard for using a "Network Printer". No
additional software needs to be installed on your Windows computer, and printing from MSDOS programs is supported. However, because the Wireless Print Server can not store files,
large print jobs may cause problems.
■ Server-based Print Queue means that all print jobs are stored (queued) on the Network
Server (e.g. Windows NT/2000) and then sent to the Wireless Print Server . This allows the
Network Administrator to modify the Print Queue. For example, an important job can be
moved to the head of the queue.
■ AppleTalk is also supported, and normally no configuration of the Wireless Print Server is
required. See the Macintosh section of this section for details of client configuration.
Which printing method should I use?
■ If using Windows 95, 98, NT, Me, 2000, or XP, the easiest method to use is Peer-to-peer
Printing.
■ If using Windows, and you need to print from MS-DOS programs, or you don't wish to
install additional software, use SMB.
SMB is not suitable for large, complex documents. If you need to print large documents, as
well as MS-DOS printing, you should install BOTH Peer-to-peer Printing and SMB
printing. MS-DOS programs can use the SMB printer, Windows programs should use Peerto-peer Printing.
■ If your LAN has Network Servers (e.g. Windows NT, Windows 2000 Server) use the
method advised by your Network Administrator. The Wireless Print Server can print via a
queue located on a Network server, if desired.
■ Unix users - refer to the Unix Manual on the CD-ROM, in the Manual/Unix directory.
■ Macintosh users - refer to the Macintosh section of the User Guide.
Rev. 1 - YML667
NP5000 Wireless Multi-Port Print Server User Guide
www.netcomm.com.au
Page 13
Checking your Network Protocols (Windows 9x)
Your computer must have EITHER the TCP/IP or NetBEUI protocols installed. (All versions of
Windows after Windows 95 have TCP/IP installed by default.)
■ If using the Peer-to-peer Printing, the installation program will check this for you.
■ If using other methods, you must check manually, as follows:
1. Select the Settings -> Control Panel -> Network option on the Start Menu. You should
see a screen like the one following:
■ The highlighted line (TCP/IP -> PCI Fast Ethernet Adapter) indicates that TCP/IP is
installed. Your computer will show the name of the your Network card rather than "PCI
Fast Ethernet Adapter".
■ The line in the list (NetBEUI -> PCI Fast Ethernet Adapter) indicates that the NetBEUI
protocol is also installed on this computer. Your computer will show the name of the
your Network card rather than "PCI Fast Ethernet Adapter".
2. If neither line is present:
■ Install the NetBEUI protocol by selecting Add -> Protocol -> Microsoft -> NetBEUI > OK. You may be prompted for your Windows CD-ROM.
■ If required, you can also install TCP/IP. However, depending on your LAN environment,
TCP/IP may require further configuration.
3. If either protocol is already installed, proceed with installation.
www.netcomm.com.au
Page 14
Rev. 1 - YML667
NP5000 Wireless Multi-Port Print Server User Guide
Windows Peer-to-peer Printing
With this printing method, print jobs are stored (queued) on your computer, and then sent to the
Wireless Print Server when it is available.
Note:
Windows 2000 & XP require no additional software.
For other versions of Windows, the supplied PTP (Peer-to-Peer) Printer Port software must be
installed on each computer.
Windows 2000/XP Setup
The recommended printing method is to use
LPR, as follows:
1. Open your Printers folder, right-click the
desired printer and select Properties.
2. Select the Ports tab and click the Add Port
button.
3. Choose Standard TCP/IP Port, then click
New Port.
4. The Add Standard TCP/IP Printer Port
Wizard will appear. Click next to
continue and when prompted, enter the
IP Address of the Wireless Print Server in
the Printer Name or IP Address field, then
click Next.
Rev. 1 - YML667
NP5000 Wireless Multi-Port Print Server User Guide
www.netcomm.com.au
Page 15
5. On this screen, select Custom, and click
the Settings button.
6. On the Port Settings screen:
■ Choose LPR in the Protocol section
■ Enter a Queue name
■ Ensure the LPR Byte Counting
Enabled setting is Enabled.
■ Click OK to confirm your changes,
then click Next to continue.
7. Follow the prompts to complete the
Wizard.
www.netcomm.com.au
Page 16
Rev. 1 - YML667
NP5000 Wireless Multi-Port Print Server User Guide
Windows 9x/ME Setup
Before performing the following procedure, the Wireless Print Server must be installed on your
LAN, and configured as described in Section 3. Both the Wireless Print Server and the attached
printer should be powered ON.
1. Insert the supplied CD-ROM into your drive. If the setup program does not start, run
SETUP.exe in the root folder.
2. Click Installation button, then select User Install.
3. Follow the prompts to complete the installation of the Peer-to-peer Printer Port Driver.
(Refer to the Windows section of Section 8 - Troubleshooting if there is a problem with the
installation.)
4. The Print Driver Setup will then run.
In future, you can use Start -> Programs -> 802.11 Wireless LAN -> PrintServer Driver
-> Printer Port Setup to run the program again.
Rev. 1 - YML667
NP5000 Wireless Multi-Port Print Server User Guide
www.netcomm.com.au
Page 17
5. After prompting you to check that both the printer and print server are on and the cables
connected correctly, the program will search for Printer Servers on the network, and a screen
like the following will be displayed.
■ If desired, click Refresh.
■ The name of the attached printer will be displayed if possible. If "No printer" is
displayed, check that the printer is properly connected and powered on.
If your Print Server is still not listed:
■ Click the "Refresh" button.
■ Check that both the Wireless Print Server and the printer are properly connected, and
powered on.
■ Check that the Wireless Print Server has been configured. (Use the Setup Wizard on the
CD-ROM.)
■ If using TCP/IP, try installing the NetBEUI protocol. (See the earlier section on
Checking your Network Protocols for details.)
■ Then try again.
6. Select the desired port on the Wireless Print Server , then click Next.
7. If using the Epson Spooler Manager, this program must be disabled, as follows:
a.
b.
c.
d.
Run the Epson Spooler Manager.
Select "Queue Setup" from the menu.
Click "Use Print Manager for this port".
Click "OK" to exit.
www.netcomm.com.au
Page 18
Rev. 1 - YML667
NP5000 Wireless Multi-Port Print Server User Guide
8. The printer port will be created, then a screen like the following will be displayed.
9. Select the correct Windows printer in the Existing Printers list, and click the Connect button.
If the correct printer type is not listed, click "Add New Printer" to run the Windows Add
Printer wizard. Step through the Wizard and install the required printer:
■ Select the correct Printer Manufacturer and Model, or use the "Have Disk" option if
appropriate.
■ We recommend changing the Printer name to indicate which device is on. (e.g. HP2100 on
SCA43600_P1)
■ If prompted about Sharing the printer, do NOT enable Sharing.
■ When the Printer installation is finished, it will be listed in the Configure Printer Port
screen above. Select it and click Connect.
10. Installation is now complete. You can now print using this printer. To install additional
printers, please repeat setps 5 to 9.
■ Use the Start menu to run this program in future. The default installation is Start ->
Programs -> 802.11 Wireless LAN -> PrintServer Driver -> Print Driver Setup.
Management
■ Print jobs can be managed like any Windows printer. Open the Printers folder (Start ->
Settings -> Printers) and double-click any printer to see the current print jobs.
■ If the printer attached to the Wireless Print Server is changed, just run this program again,
and select the correct printer.
■ To delete a port created by this setup program, use the Windows Delete Port facility:
■ Right-click any printer in the Printers folder, and select Properties.
■ Locate the Delete Port button. This button is on the Details or Ports tab, depending on
your version or Windows.
■ If the Wireless Print Server's IP Address is changed, and you can no longer print, delete
the port (see procedure above) and re-install it.
Rev. 1 - YML667
NP5000 Wireless Multi-Port Print Server User Guide
www.netcomm.com.au
Page 19
Advanced Port Options
The options for the Peer-to-peer Printing are accessed via the Port Settings button.
1. Select Start -> Settings -> Printers to open the Printers folder, then right-click on one of
the connected Printers, and select Properties. The Port Settings button is on the Details or
Ports tab, depending on your version of Windows.
2. Click on the Port Settings button to display the following screen:
Items shown on this screen are as follows:
Port
If desired, click Browse to select a different Print Server. If the
selected device has multiple ports, the Select Device Port button
can be used to select the port.The Port Name can not be changed
after installation. This name is shown in the Printer's Properties.
Banner
Check this option to print a banner page before each print job.
■ If using a PostScript Printer, check the PostScript box.
■ The User Name will be printed on the banner page.
Retry Interval
www.netcomm.com.au
Page 20
Sets how often Windows will poll the Wireless Print Server to
establish a connection when the printer is busy. Increase this
value if you get too many warning messages.
Rev. 1 - YML667
NP5000 Wireless Multi-Port Print Server User Guide
Windows SMB Printing
This method requires no additional software to be installed, but the NetBEUI or TCP/IP
protocol must be installed on your computer. Use the following procedure to install the Wireless
Print Server's printer as a Windows SMB network printer:
1. Double-click the Network Neighborhood icon on the desktop.
2. On the View menu, select Details.
3. Locate the desired Print Server , as shown below:
■ If it is the same Workgroup as your computer, it will be listed on screen.
■ If it is in a different workgroup, double-click Entire Network, then double-click the
appropriate Workgroup to open it.
4. Double-click the Wireless Print Server icon to view a Printer icon for each printer port. The
"Comment" field may indicate what type of printer is connected to the port.
5. To install a printer, right-click the desired printer icon, and choose "Install", as shown below.
This will start the Add Printer wizard.
6. Follow the prompts to complete the installation.
■ For information about the question "Do you print from MS-DOS programs?", see
Printing from MS-DOS Programs below.
■ Select the Printer Manufacturer and Model to match the printer connected to this port
on the Wireless Print Server, and complete the Wizard.
Rev. 1 - YML667
NP5000 Wireless Multi-Port Print Server User Guide
www.netcomm.com.au
Page 21
7. This printer will now appear in your Printers folder (Start - Settings - Printers) and can be
used like any other printer. However, SMB printing is not suitable for large complex print
jobs - you should use the Peer-to-peer Printing instead.
Printing from MS-DOS Programs
Windows can redirect print data from a parallel port on your computer (e.g. LPT1) to a network
printer. This redirection is called "Capture Printer Port", and is useful for MS-DOS programs.
The MS-DOS program is configured to use LPT1 (parallel port 1 on the computer), but
Windows "captures" the print data and sends it to the network printer.
Capture Settings
Capture settings can be set by:
■ Saying "Yes" to the prompt "Do you print from MS-DOS programs?" when installing a
Network Printer.
■ OR, using the Capture Printer Port menu option.
This will result in a dialog like the following, where you can select the port on the computer to
be captured. Normally, this will be LPT1 (parallel port 1 on the computer).
The File menu in the Printers folder also has options for Capture Printer Port and End Capture.
www.netcomm.com.au
Page 22
Rev. 1 - YML667
NP5000 Wireless Multi-Port Print Server User Guide
Windows with Server-based Print Queues
With a Server-based Print Queue, the Wireless Print Server is installed on an existing Network
Server (Windows, Unix, or NetWare), and is invisible to your computer.
If your Network Administrator chooses to use this system, the required setup procedure on
each Windows client is as follows:
1. Open your Printers folder, and start the Add Printer Wizard and click Next to continue.
2. When prompted, select Network Printer.
3. When prompted for Network Path or Queue Name, click the Browse button, and locate the
Server and Printer (or Print Queue) which your Network Administrator advised you to use.
4. Click OK, then Next.
5. Select the correct printer Manufacturer and Model, as advised by your Network
Administrator, and click Next.
6. Follow the prompts to complete the Wizard.
The new printer will be listed with any other installed printers, any may be selected when
printing from any Windows application.
Rev. 1 - YML667
NP5000 Wireless Multi-Port Print Server User Guide
www.netcomm.com.au
Page 23
Windows LPR Printing
1. Open your Printers folder, right-click the desired printer and select Properties.
2. When prompted, choose the Ports tab and click the Add Port button.
3. Choose Standard TCP/IP Port, then click New Port.
4. Enter the Printer Name or IP Address, click Next.
5. Enable Custom, and click the Setting button.
6. Choose LPR in the Protocol section, then enter Queue name and enable the LPR Byte
Counting.
7. Follow the prompts to complete the Wizard.
The new printer will be listed with any other installed printers, any may be selected when
printing from any Windows application.
www.netcomm.com.au
Page 24
Rev. 1 - YML667
NP5000 Wireless Multi-Port Print Server User Guide
Macintosh (AppleTalk)
The Wireless Print Server supports AppleTalk (EtherTalk), PAP, ATP, NBP, ZIP and DDP
protocols, enabling Macintosh computers on the network to view and use the Wireless Print
Server as a regular AppleTalk printer.
Normally, no configuration is required.
Software Requirement: System 9.x OS or newer.
AppleTalk Setup
1. Click the apple icon and choose Control Panel - AppleTalk.
2. Ensure that Ethernet is selected under AppleTalk Connection.
3. Click Chooser. The Chooser panel will open.
4. Click on either the LaserWriter 8 icon (recommended) or the LaserWriter 7 icon. LaserWriter
8 makes use of the fonts installed in the printer itself, so the printing response time is
quicker. LaserWriter 7 uses the fonts installed in the computer, which increases network
traffic and takes more printing time.
5. Choose a PostScript printer from the list.
6. Click Create and it will search PPD automatically.
7. Select a printer description from the list.
8. Click Select.
Configuration is now complete.
Printing
Printing with the Wireless Print Server installed in an AppleTalk network is identical to normal
printing. Just select File - Print and choose the desired printer.
Advanced Setup and Management
In a mixed Windows computer/Macintosh environment, you can use BiAdmin to configure the
Wireless Print Server. See Section 5 for details on installing and using BiAdmin. Alternatively
use the Web Based Management detailed in Section 6.
Rev. 1 - YML667
NP5000 Wireless Multi-Port Print Server User Guide
www.netcomm.com.au
Page 25
Macintosh OS X
If using LPR printing, you need to ensure the Wireless Print Server has a valid IP address before
configuring your Mac as follows.
LPR printing Setup
1. Select the Printer List icon.
2. Click the Add Printer button.
3. Choose LPR Printers Using IP.
4. Enter the IP address of the Wireless Print Server in the LPR Printer's Address field, and
enter the Queue Name (e.g. L1, L2, L3).
5. Select the Printer Model from the drop-down list.
6. Click Add.
Configuration is now complete.
www.netcomm.com.au
Page 26
Rev. 1 - YML667
NP5000 Wireless Multi-Port Print Server User Guide
Section 5 - BiAdmin Management Utility
This section describes the installation and operation of the BiAdmin Configuration &
Management program.
Requirements
This program requires:
■ Windows 95, Windows 98 or ME
■ Windows NT 3.51, Windows NT 4.0, Windows 2000 or XP
Additional Recommendations:
■ Screen resolution of 800x600 or greater.
Installation
Use the supplied CD-ROM. This CD-ROM will usually auto-run. If auto-run is disabled on
your computer, run the SETUP.exe program in the root folder.
1
Click on the Installation button and select 2. Administration. BiAdmin is always installed if
the Administrator option is chosen.
2
Start the program by using the icon created by the setup program. Select the connected
protocol and click OK.
Rev. 1 - YML667
NP5000 Wireless Multi-Port Print Server User Guide
www.netcomm.com.au
Page 27
3
When run, the program searches the network for all active Print Server s, then lists them on
screen, as shown by the example screen below.
The left panel displays a list of all Print Servers found on the network. When a Print Server is
selected from the list, its details are displayed in the right panel.
Note:
If the IP address is "Null", please click the Refresh icon to get the value again.
If the desired Print Server is not listed, try the following:
■ Check that the device is installed and ON, then Refresh the list.
■ If the Wireless Print Server is on another LAN segment, use the InitDevice - Attached
Remote menu option to locate and display the Wireless Print Server.
www.netcomm.com.au
Page 28
Rev. 1 - YML667
NP5000 Wireless Multi-Port Print Server User Guide
Icons
Device Status
Menu equivalent: Main - Device Status
All of the settings for the current device are displayed in a read-only scrollable list in the left
panel.You can use the "Save to File" and "Restore to Device" buttons on this screen to save a
copy of the selected device's CONFIG file to your computer, or restore a previously saved file
to the selected Print Server .
Printer Status
Menu equivalent: Main - Printer Status
After selecting this icon, a Detail button will be available to show more information about the
printer. Select the desired port from the drop-down list to display the current status of the
printer attached to the port. Possible states are:
■ Status - On-line, Off-line, or Out of Paper
■ Printing Information - Idle, PrintingIf the printer is Bi-directional, and is not busy, the
Configuration button will be available, allowing you to change the configuration of the
attached printer. This button will be grayed out if the printer does not support this option,
or if the printer is busy printing.
Rev. 1 - YML667
NP5000 Wireless Multi-Port Print Server User Guide
www.netcomm.com.au
Page 29
Configuration
Menu Equivalent: Main - Configure
This option allows you to configure the selected Print Server. See the following section for
details.
Wizard
This Print Server Wizard allows you to do the basic configuration for the selected device. The
screens are similar to the Wizard run from the CD-ROM, as described in Section 3.
Upgrade
Menu Equivalent: Main - Upgrade
This option allows you to upgrade the firmware for the selected Print Server . Before using this
option, you need to obtain the .BIN file for the firmware upgrade, and copy it to the same
directory as BiAdmin.
www.netcomm.com.au
Page 30
Rev. 1 - YML667
NP5000 Wireless Multi-Port Print Server User Guide
Refresh
Menu Equivalent: Main - Refresh
Select this icon to update the Wireless Print Server device listing after changing the name or IP
Address.
Exit
Menu Equivalent: Main - Exit
Exit the BiAdmin program. This does not save any changes you have made; you must Save to
Device on each screen.
Menus
Main Menu
Device Status
Same as Device Icon.
Printer Status
Same as Printer Status Icon.
Configure
Same as Configure Icon.
Upgrade
Same as Upgrade Icon.
Refresh
Same as Refresh Icon.
Exit
Same as Exit Icon.
InitDevice Menu
Reset Device
This will cause the device to reboot. This should be done after
making any configuration changes, or if the device stops
responding after some problems.
Restore to Factory Default
This will restore ALL device values to their factory defaults. To
restore only the current screen, use the Set to Default button on
the screen.
Attached Remote
This is used to connect to a Print Server device on another LAN
segment. You need to know the IP address of the remote Print
Server .If your LAN does not have a Router, you can ignore this
option.
Connected Protocol
This option allows you to designate which LAN protocol will be
used for communication between the selected device and this
application. You should select ONE protocol only.
Diagnostics menu
Print Test Page
Use this option to print a test sheet from the selected Print
Server port. The test print out will include status information.
Rev. 1 - YML667
NP5000 Wireless Multi-Port Print Server User Guide
www.netcomm.com.au
Page 31
Configuration
When the Configuration icon is clicked, or the Configure option on the Main menu is selected, a
tabbed window will open. The tabs available will vary depending on the Wireless Print Server
model selected. The possible tabs are:
■ System
■ TCP/IP
■ AppleTalk
■ NetBEUI
■ Internet Printing
■ Port
■ NetWare
■ SNMP
System Tab
This screen allows you to:
■ Change the name of the Wireless Print Server .
■ Change the "Password" for the Wireless Print Server .
■ Set the Network Protocols used the selected Print Server . (Any protocols not used on your
LAN may be disabled. This may improve performance.)
www.netcomm.com.au
Page 32
Rev. 1 - YML667
NP5000 Wireless Multi-Port Print Server User Guide
TCP/IP Tab
Selecting this tab will allow configuration for the TCP/IP network protocol. The basic options
are:
■ Dynamic IP Address (DHCP) - The IP address is obtained automatically, from a DHCP
Server on your network.
■ Fixed IP Address - You must enter the IP address, Subnet Mask, and Gateway Address.
■ IP Address - Select an unused IP address from the address range used on your LAN.
■ Subnet Mask - Use the same values as computers on your LAN (or on the same LAN
segment, if you have a Router).
■ Gateway - Use the same values as computers on your LAN (or on the same LAN segment,
if you have a Router).
Some Print Server models also support the Auto-IP function. If the Wireless Print Server is
set to Dynamic IP Address, but there's no DHCP server found on the network, the Wireless
Print Server will get an IP from the range of 169.254.1.1 ~ 169.254.254.254 automatically. In
this case, even though the Wireless Print Server was initialized with an Auto-IP, it will
change to DHCP whenever a DHCP server is detected.
The TCP session parameters should only be changed if advised to do so by your Network
Administrator or Print Server Technical Support.
Rev. 1 - YML667
NP5000 Wireless Multi-Port Print Server User Guide
www.netcomm.com.au
Page 33
AppleTalk Tab
Generally, no Print Server configuration is required in order to use AppleTalk.
This screen allows you to:
■ Set the Zone Name field to determine which Apple systems can gain access to this printer.
■ The Printer Type field is used to describe the printer driver used for each port.
■ Set Communication Protocol to ASCII or Binary. This must match the setting on the Apple
computer systems using the Wireless Print Server .
www.netcomm.com.au
Page 34
Rev. 1 - YML667
NP5000 Wireless Multi-Port Print Server User Guide
NetBEUI Tab
This screen allows you to:
■ Choose the Domain name for the selected Wireless Print Server .
■ Set how fast jobs are sent to the printer by using the Response Time field.
■ Set the desired option for the Abort Job if Error Occured setting.
■ YES causes a print job to be terminated if a printing error occurs.
■ NO (default) will try to continue but may cause print errors.
Rev. 1 - YML667
NP5000 Wireless Multi-Port Print Server User Guide
www.netcomm.com.au
Page 35
Internet Printing Tab
The Internet Printing feature allows you to send print jobs to the Wireless Print Server using
Internet E-mail.
Please refer to Section 7 - Special Features for Internet Mail Printing Configuration details.
www.netcomm.com.au
Page 36
Rev. 1 - YML667
NP5000 Wireless Multi-Port Print Server User Guide
Port Tab
This screen has two panels - Physical Port and Logical Port.
Physical Port
The following settings are available:
■ Selected Physical Port - Select the Physical Printer Port you wish to configure.
■ Handshake Signal - Select Busy Only or Busy & Ack for the Physical Port.
■ Printer Type - Select High Speed or Low Speed for the Printer Type.
Logical Port
Logical Ports (printers) can be used in a Unix environment. The following settings are available:
■ Selected Logical Port - Select the Logical Printer Port you wish to configure. (The number of
Logical Port depends on the number of physical port the device has. The Maximum available
number is 8)
■ Map to Physical Port - Select the physical Printer Port which the Logical printer will use.
■ Convert LF to LF+CR - If checked, LF (line feed) characters are changed to CR+LF (carriage
return + line feed).
■ Prefix of Job - The printer control string (in hex) to be sent to the printer before each print
job. This string cannot exceed 15 characters.
■ Suffix of Job - The printer control string (in hex) to be sent to the printer after each print job.
This string cannot exceed 15 characters.
The Get Defaults button will reset all settings to their factory-default values.
Rev. 1 - YML667
NP5000 Wireless Multi-Port Print Server User Guide
www.netcomm.com.au
Page 37
Wireless
This tab allows you to configure the Wireless Settings for your Wireless Print Server. Change
the settings to suit your environment. Generally, you must match the settings of other Wireless
stations. The available settings are described below.
Selected Device
This shows the name of the Print Server.
SSID
■
If using an ESS (Extended Service Set, with multiple
access points) this ID is called an ESSID (Extended
Service Set Identifier).
■
To communicate, all Wireless stations MUST use the
same SSID/ESSID. Change this value, or change the
other Wireless stations, to ensure each Wireless station
has the same value.
■
The default value is "null", so the Wireless station can
join any Ad-hoc group.Note! The SSID is case sensitive.
Channel No
www.netcomm.com.au
Page 38
The effect of this setting depends on the Network Type
setting:
■
In Infrastructure mode, this setting has no effect. The
Channel is selected automatically, to match the Channel
used by the Access Point
■
In Ad hoc mode, all Wireless stations MUST use the
same Channel number.
■
In 802.11 Ad-hoc mode, Wireless stations will scan all
Channels looking for compatible groups to join. The
Rev. 1 - YML667
NP5000 Wireless Multi-Port Print Server User Guide
Channel setting is used as a default Channel.If you
experience interference (shown by lost connections and/
or slow data transfers) you may need to experiment
with different channels.
Network Type
Select the correct value for your Wireless LAN.
■
802.11 Ad-hoc mode is used when there is no Wireless
Access Point, and each Wireless station communicates
directly with other Wireless stations. This is the current
standard, and should be used if possible.
■
Ad-hoc mode is used when there is no Wireless Access
Point, and each Wireless station communicates directly
with other Wireless stations. This is the older standard.
■
Infrastructure mode is used when each Wireless station
connects to the Wireless Access point. This also
provides access to the wired LAN.
WEP Encryption
WEP Disable/Enable
If Disabled (default), data is NOT encrypted before
being transmitted.If Enabled, you must provide either
the 64 Bit key table or the 128 Bit keys. The key is
used to encrypt the data before transmission.
WEP Authentication
Options are "Open System" or "Shared Key".Select the
method (Open System or Shared Key) used by other
Wireless Stations.Shared Key is more secure than Open
System.
64 Bits/128Bits
Select "64Bits" or "128Bits" as required to match other
Wireless stations on your WLAN. Stations which do
not have matching settings will be unable to
communicate.128 bit Keys are more secure than 64 bit
Keys.
Key Table
Enter the key values to match other Wireless stations on
your WLAN.This table is used when Encrypting and
Decrypting data. All stations always transmit data
encrypted using their default key (see below). The key
number (1, 2, 3, 4) is also transmitted. The receiving
station will use the key number (1, 2, 3, 4) to determine
which key value to use for decryption. If the key value
does not match the transmitting station, decryption will
fail. The easiest way to ensure there are no problems is
to have every Station, including the Access Point, use
the same key table (all entries identical). Then, it does
not matter which key is used as the default key.
Rev. 1 - YML667
NP5000 Wireless Multi-Port Print Server User Guide
www.netcomm.com.au
Page 39
Default Key
Select the key you wish to be the default. Transmitted
data is ALWAYS encrypted using the Default Key; the
other Keys are for decryption only.
Wireless Link Info Screen
After clicking the "Link Info" button on the Wireless Screen, a screen like the example below will
be shown.
State
This indicates which access point is currently in use.
Current Channel
The current channel which has been used.
Current TX Rate
The current transmitting speed.
Throughput (Tx )
This will show how much data has been transmitted per
second.
Throughput ( Rx )
This will show how much data has been received per
second.
Link Quality
This indicates the quality of the Wireless connection
Signal Strength
This indicates the strength of the Wireless signal being
received.
The "Link Quality" and "Signal Strength" data is not available if using "Ad-hoc" or "802.11 Adhoc" mode.
www.netcomm.com.au
Page 40
Rev. 1 - YML667
NP5000 Wireless Multi-Port Print Server User Guide
Section 6 - Web-Based Management
This section explains how to use your Web Browser to configure the Wireless Print Server
models
Overview
The Wireless Print Server models incorporate the HTTP server. This allows you to connect to
the Wireless Print Server and configure it using your Web Browser. Most browsers should work,
provided they support tables and forms.
Preparation
Because it supports dynamic IP Address allocation using DHCP, BOOTP, or RARP, the
Wireless Print Server ships with an IP Address of 0.0.0.0. This is NOT a valid IP Address.
Therefore, you must do ONE of the following:
■ Check your DHCP server (if you have one), and determine the IP Address allocated to the
Wireless Print Server .
■ Use the Diagnostic Button (if fitted) to print a report which includes the current IP address.
(Press the Diagnostic Button, and hold it for 2 seconds.)
■ Use the Setup Wizard, BiAdmin or another Print Server utility to allocate a valid IP Address
to the Wireless Print Server .
■ Add an entry to the arp table to associate the hardware address of the Wireless Print Server
with the desired IP address, as follows:
arp -s IP_Address 00:c0:02:xx:xx:xx
(Unix)
arp -s IP_Address 00-c0-02-xx-xx-xx
(Windows)
Where:
IP_Address is the IP Address you wish to assign to the Wireless Print Server .
00:c0:02:xx:xx:xx is the hardware address of the Wireless Print Server .
Example (Unix):
arp -s 192.168.1.5 00:c0:02:12:34:56
Example (Windows):
arp -s 192.168.1.5 00-c0-02-12-34-56
Note:
The hardware address of the Wireless Print Server is shown on a sticker on the
base of the device.
Rev. 1 - YML667
NP5000 Wireless Multi-Port Print Server User Guide
www.netcomm.com.au
Page 41
Connecting to the Wireless Print Server
1. Start your Web Browser.
2. In the Address box, enter HTTP:// followed by the IP Address of the Wireless Print Server.
e.g.http://192.1681.5
3. You will then be prompted for the password. If no password has been set, the Status screen
will appear.
4. Use the menu bar to navigate the different configuration screens. Remember to save each
screen before changing to a different screen.
Configuration Screens
Server Status
This screen shows server system data and the current settings for all of the other screens. It is
read-only; no data can be input on this screen.
www.netcomm.com.au
Page 42
Rev. 1 - YML667
NP5000 Wireless Multi-Port Print Server User Guide
Printer Status
This screen displays the current status of each port. For each port, the following data is listed:
Connected Printer
The model name of the printer connected to the port, if the
printer name is known. (If the printer is not bi-directional, this
information is unavailable.)
Status
The current status of the printer (On-line, Off-line, Out of
paper)
Printing Information
This will show either Idle or Printing.
Configure Server
Print Server Name
Change the default name if you wish. The new name must not
contain any spaces or blanks.
Password
Enter the device password, and again in the Verify field. Once a
password is entered, it is required in order to gain access and
change the configuration.
Enable Protocols
Non-TCP/IP may be disabled if they are not required on your
LAN. The available protocols depend on the Wireless Print
Server model.
Rev. 1 - YML667
NP5000 Wireless Multi-Port Print Server User Guide
www.netcomm.com.au
Page 43
AppleTalk
AppleTalk zone
This determines which Apple systems can gain access to this
printer.
Printer Object Type
These are text fields, used to describe the printer driver used for
each port. The Wireless Print Server is designed to work with
LaserWriter (or 100% compatible) printers.
Communication Protocol
Sets whether the port uses ASCII or Binary Communication
Protocol. The default is Binary.
www.netcomm.com.au
Page 44
Rev. 1 - YML667
NP5000 Wireless Multi-Port Print Server User Guide
NetBEUI
Domain Name
Enter the designated work group to be serviced by the Wireless
Print Server . This field is not case sensitive, so names with
different case will be considered to be the same name.
Response Time
Set how fast jobs are sent to the printer. The default value of
zero (0) delay should be increased only if your printer cannot
cope with no delays.
Abort Job if Error
YES terminates a print job if a printing error occurs. NO
(default) will try to continue but may cause print errors. If print
errors occur, try setting this value to YES.
Rev. 1 - YML667
NP5000 Wireless Multi-Port Print Server User Guide
www.netcomm.com.au
Page 45
TCP/IP
IP Address
IP Address assigned to this device. If using dynamic IP
Addresses (DHCP, BOOTP, rarp), this should be left at 0.0.0.0.
Subnet Mask
(Network Mask) If the Router (Gateway) Address is 0.0.0.0,
the Subnet Mask should also be left at 0.0.0.0. If you have a
router, enter the Subnet mask for the segment to which the
Wireless Print Server is attached.
Gateway Address
If your network segment has a router or gateways, enter its IP
Address here. Otherwise, leave the address as 0.0.0.0.
Connection
Delay before reconnection attempts
Sets how long the Wireless Print Server should wait before
retrying a TCP/IP connection which is lost. Allowable values are
from 0 to 255 seconds, with 2 as the default.
Number of reconnection attempts
Sets how many attempts at reconnection will be made. After
that, the TCP/IP session will be terminated.Allowable values are
from 0 to 255, with 254 as the default.
www.netcomm.com.au
Page 46
Rev. 1 - YML667
NP5000 Wireless Multi-Port Print Server User Guide
Wireless
Configuration
RegulatoryDomain
It is illegal to use this device in any location outside of the
regulatory domain.
Station name
This is the same as the Device (Host) Name on the WAN screen.
On your PC, some Wireless status screens may display this
name as the Access Point in use.
SSID(ESSID)
To communicate, all Wireless stations MUST use the same
SSID/ESSID.The default value is null.Note! The SSID is case
sensitive.
Channel No.
Select the value you wish to use on your Wireless LAN. If you
experience lost connections and/or slow data transfers you may
need to experiment with different channels to see which is the
best.
Network Type
Select the correct value for your Wireless LAN.
■ 802.11 Ad-hoc mode is used when there is no Wireless
Access Point, and each Wireless station communicates
directly with other Wireless stations. This is the current
standard.
■ Ad-hoc mode is used when there is no Wireless Access
Point, and each Wireless station communicates directly with
other Wireless stations. This is the older standard.
Rev. 1 - YML667
NP5000 Wireless Multi-Port Print Server User Guide
www.netcomm.com.au
Page 47
■ Infrastructure mode is used when each Wireless station
connects to the Wireless Access point. This also provides
access to the wired LAN.
Link Info Button
Click this button will open the sub screen.
WEP Data Privacy
Off
If OFF (default), data is NOT encrypted before being
transmitted.
64 Bit Encryption
If selected, data is encrypted, using the default key, before being
transmitted. The receiving station must be set to 64 Bit
Encryption, and have the same Key value in the same position in
its key table. Otherwise, it will not be able to decrypt the data.
Default KeySelect the key you wish to be the default.
Transmitted data is ALWAYS encrypted using the Default Key;
the other Keys are for decryption only.
Key Table
This table is used when Encrypting and Decrypting data. All
stations, including this Access Point, always transmit data
encrypted using their default key. The key number (1, 2, 3, 4) is
also transmitted. The receiving station will use the key number
(1, 2, 3, 4) to determine which key value to use for decryption. If
the key value does not match the transmitting station,
decryption will fail. The easiest way to ensure there are no
problems is to have every Station, including the Access Point,
use the same key table (all entries identical). Then, it does not
matter which key is used as the default key.
128 Bit Encryption
If selected, data is encrypted using the key before being
transmitted. The receiving station must be set to use 128 Bit
Encryption, and have the same Key value. Otherwise, it will not
be able to decrypt the data.
Key
Enter the key value you wish to use. Other stations must have
the same key
WEP Authentication
www.netcomm.com.au
Page 48
Options are "Open System" or "Shared Key".Some Wireless
cards do not support both methods. Check your Wireless card's
documentation to determine the correct value.Ensure that all
Wireless stations use the same setting as the Access Point.
Rev. 1 - YML667
NP5000 Wireless Multi-Port Print Server User Guide
Logical Printers
Logical Printers (ports) can be used under Unix. For each Logical Printer, the following fields are
available:
Logical Printer(Port)
Select the Logical Printer Port you wish to configure. (L1 to L3
or L1 to L8, depending on your model)Click the Get Data button
to update the display with the current data for the selected
logical printer.
Port
Select the Printer Port which the Logical printer will use.
Pre-string
The printer control string (in hex) to be sent to the printer before
each print job. This string cannot exceed 15 characters.
Post String
The printer control string (in hex) to be sent to the printer after
each print job. This string cannot exceed 15 characters.
Convert LF to CR+LF
If checked, LF (line feed) characters are changed to CR+LF
(carriage return + line feed).
Rev. 1 - YML667
NP5000 Wireless Multi-Port Print Server User Guide
www.netcomm.com.au
Page 49
Internet Printing
See Internet Mail Printing in Section 7 for details of this feature.
www.netcomm.com.au
Page 50
Rev. 1 - YML667
NP5000 Wireless Multi-Port Print Server User Guide
Section 7 - Special Features
This section covers the special features of the Wireless Print Server .
Overview
The Wireless Print Server supports the following three (3) special features:
■ IPP (Internet Printing Protocol).
■ Proprietary Internet Mail Printing system.
■ SNMP (Simple Network Management Protocol).
Internet Printing Protocol (IPP)
IPP (Internet Printing Protocol) is a new standards-based system to allow remote printing from
a computer to any accessible printer. Normally, the printer will be attached to a computer or
other device which functions as an IPP Server.
For client computers, it is necessary to install a compatible IPP Client program. The Client must
also know the IP Address or URL or the IPP Server.
IPP Server Configuration
The Wireless Print Server contains the necessary firmware to act as an IPP Server. No additional
configuration is necessary. However, the following requirements must be met.
■ The Wireless Print Server must have a valid IP Address. For printing via the Internet, the
Wireless Print Server's IP Address must be external (allocated by your ISP), rather than an
IP Address on your local LAN.
■ Any Router, Gateway or Firewall linking your LAN to the Internet must NOT block the
IPP protocol.
■ You must advise clients of the correct URL or IP Address of the IPP Server. To use a URL
rather than an IP Address, you need to register the domain name for the URL.
■ Unless clients are using Windows 2000, you must provide your clients with the supplied
IPP Client software. If it is not convenient to provide the CD-ROM, supply the
IPP_CLIENT.EXE file, located in the IPP folder.
Rev. 1 - YML667
NP5000 Wireless Multi-Port Print Server User Guide
www.netcomm.com.au
Page 51
IPP Client Setup - Windows 95/98/Me/NT 4.0/XP
The IPP Client Software can be installed on any of the following systems:
■ Window 95/98/Me/2000/XP
■ Windows NT 4.0
Installing from the CD-ROM
1. Insert the CD-ROM in your drive. If the program does not start automatically, run the
SETUP program in the top-level folder.
2. Follow the prompts until you reach the Select Installation screen, and select IPP Client.
3. At the next screen, select the Install IPP Client option.
4. Click Next, and step though the remaining screens to complete the installation.
Installing using IPP_CLIENT.EXE
1. Run this program to unzip the included files.
2. The IPP Setup program will then run.
3. Follow the prompts to complete the installation.
IPP Client Configuration (Windows 95/98/ME/2000/XP/NT 4.0)
1. Run the "Add IPP Port" program entry created by the installation. A screen like the
following will be displayed.
2. If Internet access from your location is via a Proxy Server, check Access IPP Server via
Proxy Server, and enter details of your Proxy Server. (This will be the same as your Browser
configuration.)
3. Enter the IP Address or URL of the IPP Server.
4. Click Select Device Port to view the available ports on the IPP Server, and select the
appropriate port. A connection to the IPP Server will be established at this time.
www.netcomm.com.au
Page 52
Rev. 1 - YML667
NP5000 Wireless Multi-Port Print Server User Guide
5. Click Save to create the IPP port on your system. You will see a message confirming that the
port has been created, then the following dialog:
6. Either select an existing printer to use the new port, and click OK.
OR
Click the Add New Printer button to create a new printer to use the IPP port. This will start
the Add Printer wizard. Follow the prompts to complete the process. Ensure that the new
printer uses the IPP port.
Installation is now complete.
■ To create additional IPP Ports, repeat the entire procedure.
■ The Proxy Server and other options are set individually for each IPP Port.
Changing the IPP Port Settings
After the IPP port is created, you can reach the IPP Port screen using the Windows Port
Settings button:
1. Open the Printers folder (Start - Settings - Printers)
2. Right-click the IPP Printer, and select Properties.
3. Locate and click the Port Settings button (Details or Port tab, depending on your version of
Windows).
There are 2 settings - Retry Interval and Retry Count - which can be adjusted if you have
problems connecting to the IPP Server.
■ Retry Interval sets the time interval (in seconds) between connection attempts. Increase
this number if you have a poor connection, or the remote server is very busy.
■ Retry Count sets how many connection attempts will be made. Increase this number if you
have a poor connection, or the remote server is very busy.
Rev. 1 - YML667
NP5000 Wireless Multi-Port Print Server User Guide
www.netcomm.com.au
Page 53
IPP Client Setup - Windows 2000/XP
Windows 2000 has its own IPP Client, and there is no need to install the supplied IPP Client
Software. To use Windows 2000's IPP Client with the Wireless Print Server , follow this
procedure:
1. Start the Add Printer wizard.
2. Select Network Printer, and click "Next" to see the Locate your Printer screen, as shown
below.
3. Select Connect to a printer on the Internet or on your Intranet, and enter the URL of the IPP
Server as follows, where ip_address represents the IP Address of the IPP Server, and 631 is
the port number.
Port 1
Port 2 (if exists)
Port 3 (if exists)
ip_address:631/ipp/P1
ip_address:631/ipp/P2
ip_address:631/ipp/P3
These entries are case sensitive. They must be entered as shown, with "ipp" in lower case,
and P1, P2 and P3 in UPPER case.
4. If the connection can be established, and the printer on that port is on-line, the following
dialog will be displayed.
5. Click "OK", and then select the printer manufacturer and model to match the printer
connected to the port on the IPP Server.
6. Click "Next", and complete the Wizard.
The IPP printer is now ready for use.
www.netcomm.com.au
Page 54
Rev. 1 - YML667
NP5000 Wireless Multi-Port Print Server User Guide
Using IPP Printers
The IPP Printer can be selected and used like any other Windows printer. If the IPP Server is not
on your network, your Internet connection needs to be active.
If you wish to check the availability of the remote IPP Server, you can use the Query IPP
Printer program installed with Add IPP Port.
An IPP Server may be unavailable for any of the following reasons:
■ It is powered off.
■ A printer problem has caused the IPP Server to cease responding, and a restart (reboot) is
required.
■ The Server's IP Address has changed.
■ The Internet connection for the IPP Server is down.
■ Network congestion causes the connection attempt to time out.
If using the supplied IPP Client software, there are 2 settings - Retry Interval and Retry Count which can be adjusted if you have problems connecting to the IPP Server.
See the previous section Changing the IPP Port Settings for details.
Rev. 1 - YML667
NP5000 Wireless Multi-Port Print Server User Guide
www.netcomm.com.au
Page 55
Internet Mail Printing
The Internet Mail Printing System allows users to print data to your printer across the Internet.
Users send the Internet Print Server an E-Mail, with the print job normally sent as an
attachment to the E-Mail. The Wireless Print Server will retrieve the E-Mail and print it.
System Requirements
Mail Server
■ Accessibility. The Mail Server must be accessible by the intended clients or users. Normally,
this means a permanent connection to the Internet.
■ Protocols. The Mail Server must support the POP3 and SMTP protocols. The Internet
Printing System uses these protocols and the most common E-Mail formatting standards:
■ MIME (Multipurpose Internet Mail Extensions)
■ Base64 Encoding (for mail attachments)
Internet Print Server
■ TCIP/IP Protocol. The LAN must use the TCP/IP protocol.
■ Mail Server Access. The Wireless Print Server must be able to access the Mail Server using a
single IP address.
■ Mail Account. The Wireless Print Server must have a Mail Account. Users print by sending
an E-Mail to this mail account.
User (Client) Requirements
■ Internet Connection. Either through a LAN, or dial-up.
■ E-Mail address. This is used to notify the user that their print job has been done, or if there
any problems.
■ Printer Driver. Users must have a printer driver which matches the printer connected to the
remote Internet Print Server .
■ Print Capture Software. To print more than plain text, users require InterNet Printing Port
software to capture the print job and convert it into an E-Mail attachment.
The Internet Printing Port software is available for the following operating systems:
■ Microsoft Windows 95, 98, or ME
■ Microsoft Windows NT 4.0 or Windows 2000
www.netcomm.com.au
Page 56
Rev. 1 - YML667
NP5000 Wireless Multi-Port Print Server User Guide
Internet Mail Printing Configuration
The Wireless Print Server must be configured with the data in the following table.
The supplied BiAdmin utility program, or the Web interface can be used to set the following
entries on the TCP/IP screen.
Mail Server IP Address
The IP Address of the E-Mail Server used by the Wireless Print
Server .
Mail Account
The name of the E-Mail Account used by the Wireless Print
Server .
Mail Account Password
Enter the password for the above Mail Account here.
Check Mail Interval
Sets how often to check for mail.
Redirect Mail Account
Jobs which can not be printed will be sent to this account. If
blank, unprintable jobs will be discarded.
Default Printer Port
Printer number for all Internet print jobs. Only one port can be
selected. Users on the LAN can also use this port.
Printer Model
This text field identifies the printer used for Internet printing.
This value is sent to remote users upon request.
Print every E-Mail
If ON, then all E-Mail received is printed. Otherwise, only EMail from the InterNet Printing Port will be printed.
Print Banner
If YES (default), a banner page is printed to identify the owner
of the print job.
Mail Response when Printed If YES, all print jobs receive an E-Mail response. If NO, only
users who set this option in their InterNet Printing Port software
receive an E-Mail.
You will need to reset your Wireless Print Server for the changes to take effect. Either power off
and then power on the Wireless Print Server device or, in the BiAdmin utility program, select
InitDevice -> Reset Device to reset your Mini Print Server.
User Software
The software provided for remote users (InterNet Printing Port) should be installed by everyone
intending to use Internet printing. Otherwise, remote users can print correctly only if:
■ They send an E-Mail directly to the Wireless Print Server Mail Account, using their normal
E-Mail application.
■ The E-Mail contains plain text only.
■ The Internet Print Server is configured with Print every E-Mail ON.
Installation of the InterNet Printing Port software will create a new printer port. After attaching
the correct printer to this port, users can print to the Internet Printer using any Windows
application.
Rev. 1 - YML667
NP5000 Wireless Multi-Port Print Server User Guide
www.netcomm.com.au
Page 57
Installation - User Software
1. Run the InterNet Printing Port (IPP) installation program SETUP.EXE
2. Default values for the installation are:
■ Directory - C:\Program Files\Internet_Printer
■ Start Menu folder - InterNet Printing Port Driver
3. You will then see the Configure Port screen, as shown in the following screenshot.
4. The following data must be provided.
Port Name
Enter a descriptive name (e.g. "WAN") for the new
printer port.
Remote Printer E-mail Address
The E-Mail address for the Internet printer. Your print
jobs will be sent to this E-Mail address.
Mail Server Nameor IP Address
This is the name or IP Address of your Mail Server. If
you are on a LAN, ask the LAN Administrator. If using a
dial-up connection, use the data provided by your ISP.
Your Internet E-mail Address
The normal address that people use to send you E-mail.
Retry Interval (Seconds)
If unable to connect to the E-Mail server, retry after this
time period (1 to 255 seconds, 30 is usually OK).
Reply Notification Mail
Check to receive an E-Mail when your print job has been
processed.
5. On completion, a new printer port will have been created.
www.netcomm.com.au
Page 58
Rev. 1 - YML667
NP5000 Wireless Multi-Port Print Server User Guide
Using the new Port
The Windows Control Panel is used to connect the correct printer to the InterNet Printing Port.
In Windows 95/NT, the procedure is:
1. Select the Printer which matches the remote printer, then choose Properties.
2. Select the new port as the port for this printer.
■ If you do not have the correct printer driver, or you wish to create another printer using
an existing driver, use the Windows Add Printer facility.
■ Using the Windows Port Settings or Configure Port facility will reveal the same
Configure Port screen shown on the previous page.
■ If you wish to print to multiple Internet Printers, use the Windows Add Port facility to
add a new InterNet Printer port. Ensure that the correct data is entered in each port, and
that each port has a unique name.
Checking the Printer Driver
To make sure that the correct printer driver for the remote printer is installed on your system,
you can use the InterNet Printing Port to send an E-Mail to the Internet Printer. The procedure
is as follows:
1. Connect your default printer to the InterNet Printing Port.
2. Check that "Reply Notification Mail" in the InterNet Printing Port is ON.
3. From Notepad or another text editor, print a short message (e.g. "This is a test print") to the
Internet Printer.
You will receive a reply E-Mail containing the "Printer ID" which will identify the printer
attached to the Wireless Print Server . If this does not match the printer driver you are using,
install the correct printer driver.
Printing through the Internet
1. Create or open the document you wish to print.
2. Select the Printer connected to the InterNet Printing Port.
3. If you do not have a permanent Internet connection, establish a connection now. (Note: The
InterNet Printing Port will NOT establish a dial-up connection, but it will send the E-Mail
the next time you are connected.)
4. Print the document.
5. The InterNet Printing Port will generate an E-Mail and send it to the remote printer. The
document will be encoded and sent as an attachment to the E-Mail. You will see a progress
screen to advise its progress.
6. Close the Internet connection if you opened it in Step 3.
7. If the "Notify after print job" option is set, you will receive an E-Mail when your job is
printed.
Rev. 1 - YML667
NP5000 Wireless Multi-Port Print Server User Guide
www.netcomm.com.au
Page 59
SNMP
The Wireless Print Server supports SNMP (Simple Network Management Protocol). This
allows network supervisors to monitor and control the Wireless Print Server using network
management platforms such as HP OpenView, IBM SystemView, etc.
The appropriate MIB file must be imported into your SNMP management program using the
Import-Compile command. Check your management program for details on this procedure. The
MIB files are provided in the Mib folder on the CD-ROM, as follows:
Mib1p.mib
Single port models.
Mib2p.mib
Models with 2 ports
Configuring the Wireless Print Server for SNMP
Before using a SNMP Management station to manage the Wireless Print Server , the following
settings should be assigned to it, in addition to the IP Address, Gateway Address, and Subnet
Mask.
SNMP Settings
SysContact
Text Field - Name of the contact person.
SysLocation
Text Field - Location of the contact person.
Management Station IP Address(s)
Up to 4 Management Stations can be entered.
Trap Receiving IP Address(s)
Up to 4 Trap Receiving Stations can be entered.
Management Station Settings
For each Management Station, the following fields are available:
Access Permission
Options are:Read OnlyRead/WriteNot Accessible
Community String
Leaving this blank will disable management by this station.
Trap Receiving Station Settings
For each Trap Receiving Station, the following fields are available:
Community String
Leaving this blank will disable management by this station.
Trap Enable
Use this option to Enable/Disable Trap Receiving by this
station.
Trap Severity
In this version, all traps are level 1.
www.netcomm.com.au
Page 60
Rev. 1 - YML667
NP5000 Wireless Multi-Port Print Server User Guide
Section 8 - Troubleshooting
This section describes some problem situations, which may arise, and the solutions to them.
Overview
If you encounter printing difficulties, please refer to the appropriate section.
If, after following the advice in these documents, the Wireless Print Server still does not function
properly, please do not hesitate to contact NetComm’s Customer Support Department.
Email:
[email protected]
Fax:
(02) 9424-2010
Web:
www.netcomm.com.au
Rev. 1 - YML667
NP5000 Wireless Multi-Port Print Server User Guide
www.netcomm.com.au
Page 61
Hardware & LAN Problems
Problem No. 1
All the Wireless Print Server's LEDs are off.
Solution No. 1
Check the power supply or power connection.
Problem No. 2
The Wireless Print Server unit can not be found on the LAN, so
configuration is not possible.
Solution No. 2
If using 10/100BaseT:
■ Check the Hub. The link LED for the port to which the
Wireless Print Server is connected should be ON. If it is Off,
there is a problem in the network cable.
■ On the Wireless Print Server , check the LED(s) next to the
connector. If the LED is not ON (or neither LED is On, if
there are 2), the network connection is not working.Check
the Ethernet cable and connectors. If they seem OK, set the
DIP Switches of the Wireless Print Server to match your
LAN environment.
If using TCP/IP:
■ Ensure that there are no routers between the Wireless Print
Server and the computer used for configuration.
■ Ensure that the computer used for configuration has the
TCP/IP network protocol installed. Test its network
connection by seeing if you can locate other LAN devices
from the computer. (e.g. Use Network Neighborhood and try
to browser the network.)
Problem No. 3
I am using DHCP, and getting an IP Address conflict involving
the Wireless Print Server .
Solution No. 3
If the Wireless Print Server is left on, but the DHCP server is
turned off, then the Wireless Print Server will retain its IP
Address without the DHCP Server being aware of it. Simply
reset the Wireless Print Server so it will obtain a new IP
Address.This problem would also arise if you assigned static IP
Address, which is within the range used by the DHCP server. If
so, use another address which is NOT within the range used by
the DHCP server.
www.netcomm.com.au
Page 62
Rev. 1 - YML667
NP5000 Wireless Multi-Port Print Server User Guide
AppleTalk (Macintosh)
Problem No. 1
Why do I get an incorrect printout?
Solution No. 1
Some possible reasons are:
■ You may have chosen Binary encoding to print the file. Try
to use ASCII encoding.
■ Some of the fonts, which are in your print file may not be
supported by the printer. Try selecting LaserWriter 7 instead
of LaserWriter 8.
Problem No. 2
Can't find the Wireless Print Server's name in the Chooser.
Solution No. 2
Try the following:
1. Make sure that AppleTalk is on (the button next to Active is
highlighted in the Chooser).
2. Make sure the printer has been on and in the READY state
for a few minutes.
3. Make sure the printer has not been renamed since its last
appearance in the Chooser.
4. If the printer resides on a network with multiple zones, make
sure the correct zone is selected from the AppleTalk Zones
box in the Chooser.
Problem No. 3
My document didn't print to the right printer.
Solution No. 3
Check the following:
■ Another Print Server with the same name may have received
your print job. Use the PSTOOL to reconfigure your Print
Server name and ensure all Print Server s have unique names.
■ Make sure your application output encode is set to ASCII.
If not, change it to ASCII.
Problem No. 4
My file doesn't print with the correct fonts.
Solution No. 4
Try changing your printer driver to LaserWriter 7.
Problem No. 5
My EPS file doesn't print with the correct fonts.
Solution No. 5
This is a problem that occurs in some application programs. Try
downloading the fonts contained in the EPS file before printing
the saved EPS file.
Problem No. 6
I can't select the "Remaining from:" item in the print dialog box.
Solution No. 6
If you have selected the Layout value, "2 Up", or "4 Up", you
cannot access the Remaining from item. Choose other selections.
Rev. 1 - YML667
NP5000 Wireless Multi-Port Print Server User Guide
www.netcomm.com.au
Page 63
Problem No. 7
A cover page prints either on the first or the last page of the
document.
Solution No. 7
Select one of these solutions:
■ Turn the cover page feature off.
■ Insert extra page breaks in your document to avoid the cover
page printing on the first or last page of your document.
■ Install the Apple LaserWriter 7 driver. You are having trouble
printing with the Apple LaserWriter 8 driver.
Problem No. 8
Why do I have trouble printing with the LaserWriter 8?
Solution No. 8
Your application software may not be compatible with the
LaserWriter 8 driver or your system may not meet the
requirements of the LaserWriter 8 driver. Use the Apple
LaserWriter 7 driver instead.
Problem No. 9
The colors on my printed output do not match the colors on my
computer screen.
Solution No. 9
When the printer receives a color file, it tries to match the
printed output color to the screen color. Sometimes the printer
cannot match up the colors as closely as wanted. To alleviate this
problem, perform the following steps:
■ Choose "Calibrated Color/Grayscale" in the Print pop-up
menu in the Print Options dialog box. The printer will make
adjustments to match the colors.
■ Check your monitor to make sure all settings (for example,
brightness) are adjusted correctly.
Problem No. 10
When I send a print job, I get a PostScript Command error or no
print out.
Solution No. 10
Check the communication protocols. The computer, Print Server
and printer must all be configured to the same communication
protocol.(either Binary or ASCII).To configure your system:
1. Choose which protocol you are going to use. You should
check your printer; it may not give you a choice.
2. Set your printer to the correct protocol.
3. Use the computer's Print submenu to configure your
computer to use the protocol you have chosen.
4. Configure the Wireless Print Server to use the same protocol
as the printer and computer.
www.netcomm.com.au
Page 64
Rev. 1 - YML667
NP5000 Wireless Multi-Port Print Server User Guide
Windows Printing Problems
Problem No. 1
When I tried to install the Printing software for Peer-to-Peer
printing, I received an error message and the installation was
aborted.
Solution No. 1
This may be caused by an existing installation of the printer port
software. Before attempting another installation:
■ Remove the existing installation
■ Restart your computerTo remove an existing printer port
installation:
1. Open Start - Settings - Control Panel - Add/Remove
Programs
2. Look for an entry with a name like "Shared Port", "Shared
Printer Port", " Print Server Driver" or " Print Server Port".
3. Select this item, click "Add/Remove", and confirm the
deletion.
Problem No. 2
On Windows 95, I installed the Print Port Driver for Peer-toPeer Printing, but when I selected a port on a Print Server and
clicked "Add", the printer was not installed.
Solution No. 2
Try installing the Printer using the standard Windows tools, as
follows:
1. Start the Add Printer Wizard.
2. Select Network Printer when prompted "How is the printer
attached to your Computer?", and click Next.
3. When prompted for the Network Path or Queue, enter a
dummy value such as shown below. (Do NOT select Yes for
"Do you print for MS-DOS programs?")
4. The printer wizard will display a message stating that "The
Network Printer is off-line". This is OK. Continue the Add
Printer Wizard until finished.
5. Go to the Printers folder (Control Panel-Printers). The
printer icon will be grayed out indicating the printer is not
ready.
6. Right-click the Printer, and select Properties. Then select the
Details tab, as shown below.
7. Click the Add Port button. On the resulting screen, select
Other, then Printer Server, as the port to add, as shown
below.
Rev. 1 - YML667
NP5000 Wireless Multi-Port Print Server User Guide
www.netcomm.com.au
Page 65
8. Click OK to see the Print Port Configuration screen, as
shown below.
9. Click the Browse Device button, select the desired Print
Server , and click OK.
10. Click OK to return to the Printers folders, and right-click on
the Printer. Ensure that the Work off-line option is NOT
checked. The Printer should no longer be grayed out, and is
ready for use.
Problem No. 3
I connected and configured a WPS (Windows Printing System)
printer as described, but I can't get the print job to print.
Solution No. 3
Printer drivers for WPS printers poll the printer before sending
print data. Since the printer is networked, the printer is not
found and no data is sent. The solution is to add your printer as
a network printer as described in Solution 2 above.Note: The
screens shown in Solution 2 are from Windows 95. Other
versions of Windows may look slightly different, but the process
is identical. If using Window NT or 2000, do NOT enable
Sharing for the printer.
Problem No. 4
When printing from some software applications such as Power
Point, it takes a long time and the print out is incorrect.
Solution No. 4
The problem is due to the printer, which is being configured to
Start printing after the first page is spooled. To change this
setting:· Go to Control Panel - Printers and click on your printer.·
Then select File - Properties - Details.
■ When the Details screen appears, click the Spool Settings
button.
■ When the Spool Settings dialogue box appears, choose Start
printing after last page is spooled and click OK.
Problem No. 5
A printing device connected to the Wireless Print Server port
cannot print or prints garbage.
Solution No. 5
Check the following:
■ Cable connection between Print Server and printer.
■ Printer driver in the application program or Windows
matches the printer.
Problem No. 6
The Configuration button on the Printer Status screen in
BiAdmin is grayed out, even though my printer is bi-directional.
Solution No. 6
The button is unavailable if the printer is busy. You must wait
until the printer is idle.
www.netcomm.com.au
Page 66
Rev. 1 - YML667
NP5000 Wireless Multi-Port Print Server User Guide
Problem No. 7
When I send a print job, cannot print or prints garbage.
Solution No. 7
The problem may be due to the printer, if the printer you used is
an old model with low speed, the following steps may solve this
problem:Try the following:
■ Open the BiAdmin Utility.
■ Click the Printer Status icon.
■ Change the Printer Type setting to Low Speed or set the
Handshake Signal setting to Ack & Busy.
Rev. 1 - YML667
NP5000 Wireless Multi-Port Print Server User Guide
www.netcomm.com.au
Page 67
Section 9 - Network Server Configuration
Windows NT Server
Preparing for TCP/IP Printing
If using Windows NT 3.51 or Windows NT 4.0, Microsoft TCP/IP Printing Support must be
installed.
■ If it is already installed, proceed to Adding a TCP/IP Remote Printer.
■ Otherwise, the procedure to install TCP/IP printing support is as follows.
Windows NT 3.51
1. Start the Network option in Control Panel. When the Network Settings dialog box appears,
click the Add Software button to display the Add Network Software dialog box.
2. Select TCP/IP Protocol And Related Components in the Network Software list box, and
then click the Continue button.
3. In the Windows NT TCP/IP Installation Options dialog box, check the TCP/IP Network
Printing Support option.
4. Click the OK button. Windows NT Setup will display a message asking for the full path to
the Windows NT distribution files. Provide the appropriate location and click the Continue
button. All necessary files will be copied to your hard disk.
5. If you did not check the Enable Automatic DHCP Configuration option in the Windows NT
TCP/IP Installation Options dialog box, you must complete all the required TCP/IP
configuration procedures manually.
6. After you finish configuring TCP/IP, the Network Settings dialog box will reappear, click the
Close button and then restart your computer for the changes to take effect.
Windows NT 4.0
1. Go to Start-Settings-Control Panel-Network.
2. Click the Service option and ensure that Microsoft TCP/IP Printing is enabled. If it is not
enabled, select the Add option and enable it as usual.
3. If you added services in step 2, reboot the computer for the changes to take affect.
Adding a TCP/IP Remote Printer
Windows 3.51
1. From the Printer menu in Print Manager, select Create Printer.
2. In the resulting dialog box, enter data as follows:
www.netcomm.com.au
Page 68
Rev. 1 - YML667
NP5000 Wireless Multi-Port Print Server User Guide
Printer Name
Enter a name (up to 32 characters). This name appears in
the title bar of the printer window.
Driver
Select the appropriate driver for the attached printer.
Description
Enter a printer description for other network users to
reference.
Print To
Select Other.
3. A Print Destinations dialog box will appear after selecting Other. In the Available Print
Monitor list, select LPR Port, then OK.
4. An Add LPR compatible printer window will appear. Enter data in the fields as follows:
Name Or Address
Of Host Providing LPD
Enter the IP address of the Wireless Print Server .
Name Of Printer On
That Machine
Enter the appropriate logical printer number. (e.g. L1)
5. When the Create Printer dialog box reappears, check the Share This Printer On The Network
option.
6. The resource name shown in the Share Name box can be changed if you wish. In the Location
box, you can enter information concerning the printer location. Network users will see this
information when browsing to find this printer.
7. Complete any other configuration information in the Create Printer dialog box, save and exit.
Client computers can now be configured as described in Section 4 - Client Configuration.
Windows NT 4.0
1. Go to Start-Settings-Printer and invoke the Add Printer wizard.
2. When prompted with This printer will be managed by, select My Computer and click Next.
3. Select Add Port…, then select LPR Port and click New Port.
4. In the Name of Address of server providing lpd: Dialog box, enter the Wireless Print Server's
IP address.
5. In the Name of printer or print queue on that server dialog box, enter the appropriate logical
printer number (L1..L3, or L1..L8, depending on the model) as previously configured on the
Wireless Print Server .
6. Click OK. When returned to the Printer Ports window, simply select Close and then install
your printer driver as usual.
7. When prompted whether or not the printer will be shared, select the Sharing radio button.
8. In the Shared dialog box, enter the shared printer name. (The shared name is how other users
will see this printer.) Click OK to save and exit.
Client computers can now be configured as described in Section 4 - Configuring your Computer.
Rev. 1 - YML667
NP5000 Wireless Multi-Port Print Server User Guide
www.netcomm.com.au
Page 69
Windows 2000 Server
1. Start the Add Printer Wizard, select Network Printer, then click Next to browse for the
Wireless Print Server .
2. Locate and double-click the Wireless Print Server , select the desired port, and click Next.
3. Click "OK", and select the correct Manufacturer and Model for this printer.
4. Follow the prompts to complete the installation.
5. In the Printers folder, right-click the new printer, and select Sharing.
·
Select "Shared As:" and enter an appropriate name for this printer. Users will see this name
when browsing for the printer during installation.
·
If desired, click "Additional Drivers" and install printer drivers for other versions of
Windows, such as Windows 98. This will assist users during the installation process.
6. Click OK to close this Window. Configuration is now complete.
Client computers can now be configured as described in Section 4 - Configuring your
Computers.
www.netcomm.com.au
Page 70
Rev. 1 - YML667
NP5000 Wireless Multi-Port Print Server User Guide
Unix Systems
Your Print Server can be configured using FTP, and it supports the following Unix printing
methods:
■ LPD
■ FTP
■ Direct Socket Interface
For full details on using Unix systems with your Print Server , refer to the Unix manual in the /
Manual/Unix directory on the CD-ROM.
Rev. 1 - YML667
NP5000 Wireless Multi-Port Print Server User Guide
www.netcomm.com.au
Page 71
Registering your NetComm Product
To ensure that the conditions of your warranty are complied with, please go to the NetComm
web site for quick and easy registration of your product at
www.netcomm.com.au
Alternatively, you can complete the Warranty Registration Form on the following page and mail
it to NetComm Limited, PO Box 1200, Lane Cove NSW 2066.
Trademarks and Notices
NetComm™ is a trademark of NetComm Limited. Windows® is a registered trademark of
Microsoft Corporation. Other brand and product names are trademarks or registered trademarks
of their respective holders. Information is subject to change without notice. All rights reserved.
Please note that the images used in this document may vary slightly from those of the actual
product. Specifications are accurate at the time of the preparation of this document but are
subject to change without notice.
www.netcomm.com.au
Page 72
Rev. 1 - YML667
NP5000 Wireless Multi-Port Print Server User Guide
Cut along the line
Warranty Registration Form
Date of Purchase
….......…………...........……….................................
Name
….......…………...........……….................................
Company
….......…………...........……….................................
Address
….......…………...........……….................................
…………………….........……...........
Tel No (
) ..............……….….
E-mail
Post Code
Fax No (
)
.....………....……….
....………...……….
….......…………...........……….................................
The following information is vital for your warranty
Please make sure it’s correct and complete.
Serial No
….......…………...........……….................................
Model
….......…………...........……….................................
!
Make sure
you fill this
section in!
Product Type:
PC Card
External
Internal
Other
I intend to use this product at:
Home
School/College/University
Business
Government Office
Dealer’s Name
….......…………...........……….................................
Dealer’s Address
….......…………...........……….................................
…………………….........……...........
Tel No (
) ..............……….….
Post Code
Fax No (
)
.....………....……….
....………...……….
How did you find out about our products?
…………………….............................………………………………………....…………
…………………….............................………………………………………....…………
Product Warranty
The warranty is granted on the following conditions:
1. This warranty extends to the original purchaser (you) and is not transferable;
2. This warranty shall not apply to software programs, batteries, power supplies, cables or
other accessories supplied in or with the product;
3. The customer complies with all of the terms of any relevant agreement with NetComm and
any other reasonable requirements of NetComm including producing such evidence of
purchase as NetComm may require;
4. The cost of transporting product to and from NetComm’s nominated premises is your
responsibility; and,
5. NetComm does not have any liability or responsibility under this warranty where any cost,
loss, injury or damage of any kind, whether direct, indirect, consequential, incidental or
otherwise arises out of events beyond NetComm’s reasonable control. This includes but is
not limited to: acts of God, war, riot, embargoes, acts of civil or military authorities, fire,
floods, electricity outages, lightning, power surges, or shortages of materials or labour.
6. The customer is responsible for the security of their computer and network at all times.
Security features may be disabled within the factory default settings. NetComm recommends
that you enable these features to enhance your security.
The warranty is automatically voided if:
1. You, or someone else, use the product, or attempts to use it, other than as specified by
NetComm;
2. The fault or defect in your product is the result of a voltage surge subjected to the product
either by the way of power supply or communication line, whether caused by thunderstorm
activity or any other cause(s);
3. The fault is the result of accidental damage or damage in transit, including but not limited to
liquid spillage;
4. Your product has been used for any purposes other than that for which it is sold, or in any
way other than in strict accordance with the user manual supplied;
5. Your product has been repaired or modified or attempted to be repaired or modified, other
than by a qualified person at a service centre authorised by NetComm; and,
6. The serial number has been defaced or altered in any way or if the serial number plate has
been removed.
Limitations of Warranty
The Trade Practices Act 1974 and corresponding State and Territory Fair Trading Acts or
legalisation of another Government (“the relevant acts”) in certain circumstances imply
mandatory conditions and warranties which cannot be excluded. This warranty is in addition to
and not in replacement for such conditions and warranties.
To the extent permitted by the Relevant Acts, in relation to your product and any other materials
provided with the product (“the Goods”) the liability of NetComm under the Relevant Acts is
limited to, at the option of NetComm to:
■
Replacement of the Goods; or
■
Repair of the Goods; or
■
Payment of the cost of replacing the Goods; or
■
Payment of the cost of having the Goods repaired.
All NetComm ACN 002 490 486 products have a standard 12 months warranty from date of
purchase. However some products have an extended warranty option (refer to packaging). To
be eligible for the extended warranty you must supply the requested warranty information to
NetComm within 30 days of the original purchase by registering on-line via the NetComm web
site at www.netcomm.com.au.
NetComm reserves the right to request proof of purchase upon any warranty claim.
Rev. 1 - YML667
NP5000 Wireless Multi-Port Print Server User Guide
www.netcomm.com.au
Page 75