1
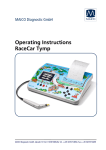
Operating Instructions Race Car Tympanometer 4.2 Preparing the patient Explain to the patient that the measurement is painless and that nothing enters the auditory canal. The patient does not have to respond when there are loud test sounds or when the pressure in the auditory canal changes. In no case should the patient swallow, chew or move during the measurement. 4.3 Preparing the measurement The LCD shows the empty measurement screen for the right ear and the control light of the probe turns red. To measure the left ear, change the side by pressing the L/R key or the probe button M . Then the selected test ear shown in the middle-top of the LCD will change from Right to Left and the control light of the probe will turn blue. Switch off the reflex measurement by pressing the Reflex key 3 . The word Tympanometry must appear at the right top of the display. Make sure the auditory canal is clear. Choose an ear tip according to the size of the auditory canal and put it firmly onto the probe tip (see Figure 9 in chapter 3.7). 4.4 Measuring the tympanogram Take hold of the top of the outer ear and pull it back. Insert the probe with the ear tip into the auditory canal until the control light of the probe is green indicating the start of the test. Do not move the probe until the green light goes out; the patient must not swallow or speak during the measurement. During the test the LCD will display the tympanogram on the left side as the test is running and then the values will appear on the right side. After about 4-5 seconds the test is completed Figure 13 and the green light turns off. Measurement screen (only tympanogram) Now you can remove the probe from the ear. Impedance 3 Right Tympanometer Status READY ml Ear Volume 2 Compliance 1 Pressure 0 -600 -300 300 daPa Gradient Scale If an error occurs during the measurement the test will stop. If leakage occurs, the control light of the probe turns yellow and Leaking will appear under Status. If the probe is blocked, the control light of the probe turns yellow and Blocked will appear under Status. Please proceed as described in chapter 3.6 “Getting familiar with the probe.” To measure the other ear, change the side by pressing the L/R key or the probe buttonand repeat the measuring procedure described above with the other ear. 14