1
Step 2. After entering the correct login detail, the browser will
Step 2. Go to the 'TCP/IP' menu and click <Addressing> to alter
Step 2. forward the webpage to the setup page. Users can begin
Step 2. the IP configuration for the AP.
Step 2. configuring the Access Point. For detail information, refer to
Step 2. the user manual.
Step 3. Go to the 'IEEE 802.11' menu and click
Step 2. <Communication> to set wireless parameters for the AP.
Quick Setup via Web-Based UI
Step 4. After pressing <Save> on each page, the interface will be
Follow the following steps for quick setup of your wireless AP. Click
Step 2. bought back to Start Page. The changes will be highlighted
<Save> at the bottom of each configuration interface to save
Step 2. in red. Press <Restart> to apply the changes.
changes. For details on parameters, please consult the User
Manual document.
Step1. Go to the 'General' menu and click <Operational Mode> to
Step1. select a mode for the AP.
6
5
Antenna Alignment
For configuring a pair of APs for dynamic or static bridging with
high grain directional antenna, please follow the steps below.
Step 1. Connect each bridge to a computer via Ethernet and
Step 1. configure the data rate of each AP to the lowest value,
Step 1. 1Mbps.
Step 2. Fix the alignment of the antenna on one side. Run 'PING'
Step 1. function in DOS environment between the two APs.
Step 1. Response time from the 'PING' will indicate the optimal
Step 1. alignment.
Step 3. Increase the data rate of both bridges until the maximum
Step 1. limit is reached for a stable connection. The data rate will
Step 1. be limited by distance and the gain of the antenna.
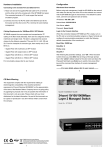
Quick Installation Guide
Wireless LAN Outdoor AP/Bridge
Model No.: SP915-1000
P/N 2300-0507
7
Web: www.micronet.com.tw
Introduction
Installation
Micronet proudly introduces SP915-1000, high power outdoor
Step 1. Attach a RJ-45
Access Point. It is compliant with IEEE 802.11b for providing speed
Step 1. Ethernet cable as
of up to 11Mbps.The AP includes a Web-Based User Interface for
Step 1. follows on the 'Power &
easy management of your wireless network. Security is intact with
Step 1. Data Out' port.
WEP, WPA and 802.1x for preventing unauthorized access in
wireless environment. SP915-1000 combining with high power
antenna (SP920MA-12) is ideal for distant inter-building connection.
Step 2. Attach a RJ-45
Package Contents
Step 1. Ethernet cable from the
Please verify the following items are in the package:
Step 1. PC to the 'Data In' port.
• SP915-1000 Wireless LAN Outdoor AP/Bridge
• Quick Installation Guide
• Manual CD
• 1.2M 10/100Base-T/TX Ethernet Cable
• 25M Waterproof 10/100Base-T/TX Ethernet Cable
Step 3. The connector below is
Step 1. for connecting antenna
• Wall-Mounting Kit
Step 1. with an N-type cable.
• AC Power Cord
• Power Injector
(Note: Antenna is sold separately and not an item included in the
SP915-1000 package.)
1
Configuration
2
Step 3. Select 'Use the following IP Address' button and then
Follow the steps below to configure and set up WLAN Access Point.
Step 3. enter the IP address and subnet mask. Ensure the IP
Step 3. address and subnet mask are on the same subnet as the
IP Address Configuration
Step 3. Access Point. Click on <OK> button to save the setting.
PC/Notebook must belong in the same IP range and subnet.
Default Values
Follow the steps below to configure IP settings for LAN PC.
IP Address
192.168.0.1
Subnet Mask
255.255.255.0
Step 1. In the control panel, double
Username
root
Step 1. click on Network Connections.
Password
root
Step 1. Double click on the local area
Step 1. connection (e.g. LAN).
Web-based User Interface
Step 1. The following screen will
SP915-1000 is embedded with web-based management user
Step 1. appear.
interface and provides a series of web pages, which display the
configuration and status of the system. After configuration of IP,
the management interface can be access by entering the IP
address of the AP into the browser.
Step 2. Select 'Internet Protocol
Step 1. Login page will
Step 1. (TCP/IP)', and then click on
Step 1. appear to prompt
Step 1. the 'Properties' button. The
Step 1. users to enter the
Step 1. screen will appear to allow
Step 1. username and
Step 1. entry of TCP/IP settings.
Step 1. password.
3
4