1
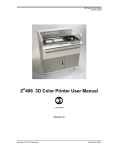
Z402C System User Manual November 2001 ZTM402C 3D Color Printer User Manual Z Corporation Software Version 5.1.40 Copyright©2001 Z Corporation Part Number 09501 Z402C System User Manual Z Corporation Table of Contents: 1 YOUR Z402C SYSTEM ................................................................................................5 1.1 1.1.1 OVERVIEW ..................................................................................................................5 1.1.2 HOW IT WORKS 1.2 2 INTRODUCTION ....................................................................................................5 ......................................................................................................6 PRINTING A PART OVERVIEW............................................................................9 1.2.1 STEP 1: IMPORTING THE FILE ..................................................................................9 1.2.2 STEP 2: PREPARING THE 3D PRINTER 1.2.3 STEP 3: PRINTING THE PART ...............................................................9 ...............................................................................9 THE ZCORP SYSTEM SOFTWARE..........................................................................10 2.1 RECOMMENDED SYSTEM.................................................................................10 2.2 INSTALLING THE ZCORP SYSTEM SOFTWARE 2.3 MAIN WINDOW....................................................................................................11 2.4 TOOLBAR ............................................................................................................12 2.5 OPENING A FILE ................................................................................................12 2.6 NAVIGATING THROUGH THE BUILD AREA .....................................................14 2.6.1 .........................................10 VIEWING CROSS SECTIONS OF THE BUILD..........................................................14 2.7 TRANSFORMING THE PART .............................................................................15 2.8 GETTING INFORMATION ABOUT THE BUILD 2.9 SAVING YOUR WORK ........................................................................................19 .............................................18 2.10 3D PRINT SETUP ................................................................................................19 2.10.1 RECOMMENDED SETUP PROCEDURE* ................................................................20 2.10.2 CHANGING POWDER PARAMETERS .....................................................................20 2.11 SETTING USER PREFERENCES.......................................................................21 2.12 SERVICE MENUS................................................................................................23 3 PREPARING THE Z402C SYSTEM TO PRINT.........................................................24 3.1 HARDWARE CONTROLS ...................................................................................24 3.2 PREPARING THE 3D PRINTER..........................................................................24 3.2.1 FILLING THE FEED BOX WITH POWDER................................................................25 3.2.2 RINSING THE CARWASH .........................................................................................27 3.2.3 CHECKING FLUID LEVELS 3.2.4 CHECKING OVERFLOW VACUUM BAG ..................................................................28 3.2.5 PUTTING THE MACHINE ONLINE ............................................................................28 www.zcorp-users.com ..................................................................................27 1 Z Corporation Z402C System User Manual 4 PRINTING THE PART 5 POST PROCESSING THE PART.............................................................................. 32 5.1 REMOVING THE FINISHED PART..................................................................... 32 5.2 DEPOWDERING THE PART............................................................................... 33 5.3 DRYING THE PART ............................................................................................ 33 5.4 INFILTRATING THE PART.................................................................................. 34 5.4.1 6 7 8 9 ........................................................................................... 29 TO INFILTRATE THE PART USING RESIN: .............................................................34 ADVANCED USER FEATURES................................................................................ 35 6.1 ORIENTATION FOR SPEED............................................................................... 35 6.2 ORIENTATION FOR STRENGTH ....................................................................... 35 6.3 ORIENTATION TO PREVENT WARPING .......................................................... 35 MAINTENANCE ......................................................................................................... 36 7.1 CHANGING THE COLOR PRINT HEAD ........................................................ 36 7.2 CHANGING MONOCHROME PRINT HEADS .................................................... 41 7.3 FLUSHING THE BINDER .................................................................................... 44 7.4 GREASING THE FAST AXIS 7.5 CHANGING BETWEEN COLOR AND MONOCHROME ADAPTERS ............... 46 7.6 LOGGING YOUR BUILDS................................................................................... 48 .......................................................................... 45 TROUBLESHOOTING ............................................................................................... 49 8.1 THE BINDER SOLUTION IS BEING APPLIED IN ERRATIC STRIPES............. 49 8.2 THE SYSTEM SOFTWARE FREEZES DURING USE ...................................... 49 8.3 THIN PLANAR PARTS ARE WARPING 8.4 NOTHING HAPPENS WHEN I TRY TO PRINT 8.5 MY STARCH-BASED PARTS ARE UNUSUALLY “CAKEY” .............................. 50 8.6 PARTS ARE UNUSUALLY WEAK OR CRUMBLY ............................................. 50 8.7 PRINTER LOOKS LIKE IT IS PRINTING, BUT IS NOT LAYING DOWN BINDER50 ......................................................... 49 .............................................. 49 Z402C SYSTEM DETAILS......................................................................................... 51 9.1 DESCRIPTION OF REAR I/O PANEL................................................................. 51 9.2 SYMBOLS USED................................................................................................. 52 9.3 SYSTEM SPECIFICATIONS ............................................................................... 53 9.4 MATERIAL STORAGE PRECAUTIONS ............................................................. 54 10 INDEX......................................................................................................................... 55 2 Z Corp Service (781)852-5050/(877)88-ZCORP Z402C System User Manual Z Corporation Table of Figures Figure 1. The Printing Process............................................................................................................... 6 Figure 2: The Z402C System Shelling and Infrastructure Features....................................................... 7 Figure 3: Illustration of Z402C System Print Orientations ..................................................................... 8 Figure 4: The Main System Software Window ..................................................................................... 11 Figure 5: Carwash Detail ..................................................................................................................... 27 www.zcorp-users.com 3 Z Corporation Z402C System User Manual The Z Corporation Rapid Prototyping System is manufactured under patent license to be used for the fabrication of appearance parts and facsimile prototypes. Other uses may be restricted; contact Z Corporation for further information. Our equipment is designed to be used by design engineers and other professionals in the production of early-stage 3D appearance parts. Our equipment is not to be used to produce, either directly or indirectly, medical or other products that may require precise dimensions or tolerances to ensure the safe and effective operation of such products. You agree to indemnify, defend and hold Z Corporation and its officers, directors and employees harmless from and against any and all claims, losses, damages, costs and expenses resulting from any use of our equipment other than for the production of early-stage appearance parts. 4 Z Corp Service (781)852-5050/(877)88-ZCORP Z402C System User Manual Z Corporation 1 YOUR Z402C SYSTEM 1.1 INTRODUCTION 1.1.1 OVERVIEW This Z402C 3D Color Printer Manual will speed you along the path towards quickly and inexpensively building parts. The manual contains the following sections: 1. Introduction. This section will give you an overview of the principles behind the Z402C System, familiarize you with the terminology we will use to describe the Z402C System and introduce you to some of the features of this manual. This section concludes with an outline of the three quick and easy steps to printing parts. 2. Z Corporation System Software. This section will guide you through the features of the Z Corporation System Software. 3. Preparing the Z402C System to Print. This section will guide you through putting powder, binder solution and washer fluid in the Z402C 3D Printer, and preparing the system to print a part. 4. Printing a Part. This section describes the steps of actually printing the part. 5. Post Processing a Part. This section guides you through removing your printed part, removing any excess powder and infiltrating the part with resin to improve strength and finish. 6. Advanced User Features. This section will help you get the maximum performance out of your Z402C System. 7. Maintenance. This section contains instructions for keeping your Z402C 3D Printer in proper condition through regular preventative maintenance. 8. Troubleshooting. This section offers some troubleshooting tips. 9. Index. www.zcorp-users.com 5 Z Corporation 1.1.2 Z402C System User Manual HOW IT WORKS The Z402C System is based on the Massachusetts Institute of Technology’s patented 3DP (3D Printing) technology. The System Software first converts a three-dimensional design built using 3D CAD (and saved in VRML or STL format) into cross-sections or slices that can be between 0.003” – 0.009” thick. The Z402C 3D Printer then prints these cross-sections one after another from the bottom of the part to the top. Inside the Z402C 3D Printer there are two pistons (see Figure 1.) The feed piston is represented in the diagrams below on the left and is shown in the ‘down’ position filled with powder. The build piston is the piston on the right, shown below in the ‘up’ position. Also represented in the diagrams is the roller (drawn as a circle) and the print assembly (drawn as a square.) On the Z402C printer, the roller and the print assembly are mounted together on the gantry which moves horizontally across the build area. To begin the 3D printing process, the Z402C System first spreads a layer of zpTM series powder in the same thickness as the cross section to be printed. The Z402C print heads then apply a binder solution to the powder causing the powder particles to bind to one another and to the printed crosssection one level below. The feed piston comes up one layer and the build piston drops one layer. The Z402C System then spreads a new layer of powder and repeats the process, and in a short time the entire part is printed. Step 1: As the gantry traverses left to right, the roller collects powder. Step 2: The roller spreads a thin layer of powder over the build piston. Step 4: As the gantry traverses right to left, the print head prints the part cross-section. Step 3: The roller discharges excess powder down the powder overflow chute. Step 5: The feed piston moves up one layer, the build piston moves down one layer, and the process is repeated. Figure 1. The Printing Process 6 Z Corp Service (781)852-5050/(877)88-ZCORP Z402C System User Manual Z Corporation The Z402C System employs several techniques to quickly build parts. First, binder solution is applied in a higher concentration around the edges of the part, creating a strong “shell” around the exterior of the part. Within parts, the Z402C Printer builds an infrastructure by printing strong scaffolding within part walls with a higher concentration of binder solution. The remaining interior areas are printed with a lower saturation, which gives them stability, but prevents over saturation, which can lead to part distortion. Interior infrastructure printed at a higher saturation Other interior areas printed at lower saturation Exterior walls printed at higher saturation. Figure 2: The Z402C System Shelling and Infrastructure Features After printing, the part is removed from the powder bed, depowdered and dried. The part can then be infiltrated with wax, resin, or other materials to increase strength and durability. You will have the part in your hands and can start improving your design within the same day—usually within hours. Because the powder layers support the structures being printed above, the Z402C System prints parts without support structures and can print parts with complex geometries. There are several important features of the Z402C System that will help you print the best parts for your intended purpose. Part Placement. The System Software will automatically place the parts within the build box to maximize build speed, the most important criteria for the majority of our users. The software positions the parts with the smallest dimension in the z (vertical) axis. In addition to part placement, the following other characteristics should be considered. Strength. The ultimate strength of the part will be somewhat affected by its orientation within the build box. The part will be strongest along the y-axis and the x-axis and less strong along the z-axis. This is because the cross sections are printed in continuous strips along the y or the “fast” axis (the print heads direction of travel), bands across the x or the “slow” axis (the gantry direction of travel) and laminated layers along the z-axis. (See figure 3 below.) This discussion only applies to untreated parts; once parts are infiltrated, they uniformly take on the strength characteristics of the infiltration material. www.zcorp-users.com 7 Z Corporation Z402C System User Manual z-axis Less Strong x-axis Strong y-axis Strong Figure 3: Illustration of Z402C System Print Orientations Accuracy. The accuracy of the system depends on the materials you choose. You can employ the anisotropic scaling feature in the software to adjust for expected shrinkage and bring your parts into true scale. For more information, please see Section 2.10.1 Changing Powder Parameters. 8 Z Corp Service (781)852-5050/(877)88-ZCORP Z402C System User Manual 1.2 Z Corporation PRINTING A PART OVERVIEW Printing a part using the Z402C 3D Printer is fast, easy, clean and fully compatible with an office environment. This manual will show tips on how to print the most challenging parts, but for most purposes printing a part is as simple as 1-2-3. 1.2.1 STEP 1: IMPORTING THE FILE OPENING A FILE – Upon launching the Z Corporation System Software, you will be presented with the ‘Open’ dialog box. Select the file you wish to print. The ZCorp System Software allows you to open a variety of monochrome and color file formats including STL, PLY, SFX, VRML (WRL), BLD, ZEC, ZBD and ZCP files. The System Software also allows you to move and scale your part, or pick a color for monochrome (STL) files before printing. 1.2.2 STEP 2: PREPARING THE 3D PRINTER Carefully following the steps outlined in Chapter 3, you can prepare the 3D printer in less than ten minutes. You will put powder in the feed piston, and ensure fluid levels are correct and that the powder overflow bin is empty. 1.2.3 STEP 3: PRINTING THE PART The Z402C 3D Printer prints most parts in minutes and prints even the largest parts in a few hours. You may then remove the part, depowder any excess powder and, if desired, dry and infiltrate the part with wax or other materials to give the part the desired strength and finish. The post-processing phase takes less than ten minutes for small parts and only an hour or so for the most massive parts. Once you have completed these steps you are ready to start using parts to improve design, communicate with other departments and reduce the time it takes you to get new products to market. www.zcorp-users.com 9 Z Corporation Z402C System User Manual 2 THE ZCORP SYSTEM SOFTWARE 2.1 RECOMMENDED SYSTEM Before you can begin building parts, you must install the Z Corp System Software on your computer. The system that we recommend for best performance with our System includes: 2.2 • Personal computer using a 600 MHz Pentium III chip, AMD Athlon, or higher • Microsoft Windows* NT 4.0 or Windows 2000 Professional operating system • 256 MB of RAM or more • True Color Graphics • 1024 X 768 pixels (or better) • Graphics card accelerated for OpenGL • Virtual Memory of 1 GB INSTALLING THE ZCORP SYSTEM SOFTWARE 1. Close any open applications on your computer, make sure Windows NT 4.0, or 2000 Professional system is running and insert the CD into your CD-ROM drive. 2. If the installer does not start automatically, double-click on your CD-ROM drive and then doubleclick on the ‘Setup.exe’ icon. This will start the setup sequence. If you have not closed all active programs, the setup will give you an opportunity to do so. 3. Read the licensing agreement carefully. 4. Select destination directory. The program will prompt you for a selection and will offer C:\Program Files\Z Corporation as the default directory. Choose your installation preference: typical, compact or custom. Once you have made your selection, it may take several minutes for installation to occur. When complete, you will be returned to your main window. If you encounter any problems during installation, please contact the Z Corporation Service Department at (781)852-5050, (877) 88-ZCORP, or via email at [email protected] 1 WARNING: To avoid problems that may occur during printing, ensure that all screen savers and your power management software are turned off on the computer driving the Z402C Printer. Most screen savers and power management software can be turned off in the main Windows screen settings. For additional instructions on how to disable your hardware and software power management, please consult your computer hardware owner’s manual. *Microsoft Windows is a registered trademark of Microsoft Corporation. 10 Z Corp Service (781)852-5050/(877)88-ZCORP Z402C System User Manual 2.3 Z Corporation MAIN WINDOW Task Bar Top View Cross-Sectional View Front View Layer Count Height from base of Build Box Figure 4: The Main System Software Window The System Software provides three views of the part in the Main Window. • The top view presents the view of the part in the x-y plane from the top. • The front view presents the view of the part in the x-z plane from the front of the build area. The horizontal yellow line in the side view marks the level of the cross-sectional layer being displayed in the cross-sectional view. • The cross-sectional view displays exactly what the Z402C System will print in that layer. Different window views can be resized for user convenience. To resize a window, place the pointer over the border between views, left-click on the border and drag to create your preferred window size. www.zcorp-users.com 11 Z Corporation 2.4 Z402C System User Manual TOOLBAR Save New Mirror 3D Print Open 3D Print Setup Copy Rotate 2.5 One Layer Up Translate Import Ten Layers Up Justify Scale Selection List Ten Layers Down One Layer Down About OPENING A FILE Open. When you initially open the System Software, you will be presented with an Open dialog box. Select the file you wish to open. You may open zbd, stl, bld, ply, zcp, sfx, zec, or wrl files. The print volume when using the Z402C System in color is 6 x 9 x 8 inches (155 x 225 x 200 mm.) When using the Z402C System in monochrome, the build are is 8 x 10 x 8 (200 x 250 x 200 mm.) File Formats: zbd files are build files created by the Z Corp System Software. stl files are monochrome 3D model files exported by several 3D CAD packages. zcp files are Z Corporation color files. ply files are color 3D model files exported by several 3D CAD packages. zec files are files created by the previous version of the Z402C System Software. bld files are build files created by the previous version of the Z402 System Software. 12 sfx files are color 3D model files exported by SolidView/Pro. wrl (also known as VRML) files are color files that are exported by many 3D CAD packages. Z Corp Service (781)852-5050/(877)88-ZCORP Z402C System User Manual Z Corporation When importing VRML files you will be asked to input mesh resolution and texture threshold settings. Mesh resolution is the number of facets in your graphic primitive file. A graphic primitive file is composed of facets that are made up of cones, cylinders, and spheres as opposed to triangles. The default is set at ‘40’. Setting the number higher will increase the number of facets making your file larger; lowering this number will reduce the number of facets. Texture threshold pertains to scan data and FEA files. A value of ‘0’ will render every color, thus, producing a large file. Increasing the number will produce coarser rendering. Choose Units. A dialog box will prompt you to choose units (inches, centimeters, millimeters or meters.) If you are using more than one type of powder, you can also choose the powder type. The System Software will select as a default the largest units that will fit the part into the build volume. After you select the units, the System Software will place the object into the build area in the way that will minimize print time if you have chosen this option under the ‘Preferences’ menu. For more information see Section 2.11. Import. You may import multiple files into a single build—each subsequent file will be placed within the build area such that the objects will not overlap. To insert additional files, choose ‘Import’ under the File menu. You may import stl, ply, zcp, sfx, or wrl (VRML) files. If the model has many facets, the fast rendering option will be offered if you have chosen this option under the ‘Preferences’ menu. This may also be selected later under the ‘View’ menu. www.zcorp-users.com 13 Z Corporation Z402C System User Manual If the imported file is rendered dark and no slices show in the cross sectional view, the back faces of the file are showing. The part will not print properly in this orientation. To correct the file, invert all normals. This feature is found under the Edit menu. Normals Inverted Normals Corrected 2.6 NAVIGATING THROUGH THE BUILD AREA 2.6.1 VIEWING CROSS SECTIONS OF THE BUILD The System Software offers you several ways to view cross sections: To do this: Menu Command Toolbar Keyboard Shortcut Move up one level Select ‘One Layer Up’ from the View menu ‘a’ Move down one level Select ‘One Layer Down’ from the View menu ‘z’ Move up ten levels Select ‘Ten Layers Up’ from the View menu Shift ‘a’ Move down ten levels Select ‘Ten Layers Down’ from the View menu Shift ‘z’ 14 Z Corp Service (781)852-5050/(877)88-ZCORP Z402C System User Manual Z Corporation TECHNICAL TIPS…. When setting up your build area with multiple parts, place larger, bulkier parts towards the bottom of the build box. 2.7 TRANSFORMING THE PART First select your part(s). To select parts within the build area, click on the part with the left mouse button. An yellow rectangle will appear around the part. To select multiple parts, hold down the Shift key and select the parts you wish to modify. To de-select a single part, hold down the shift key and click on the image of the part. To de-select all parts, click on an open area. • Once opened or imported, parts can be translated, rotated or scaled by percentage or through anisotropic scaling factors, and colored within the print area. • To translate or move your parts within the build area: Select parts within the print area, click on the selected area and move with the mouse. You may also select parts using the ‘Entity Selection’ option under the Edit menu. Click on the part you wish to select. To choose multiple parts, hold the Shift key and click on additional parts. There is also an icon on the toolbar for this function. www.zcorp-users.com 15 Z Corporation 16 Z402C System User Manual • You may move the object more precisely by choosing ‘Translate’ from the Transform menu. • To rotate the part, select the part and choose ‘Rotate’ from the Transform menu. In the dialog box, specify the plane and degree of rotation you desire. • You may also rotate using ‘Rotate in Active View’. Choose the part you would like to rotate in the view box you would like view window you would like to rotate in (top view, or front view.) The yellow box surrounding the part will be highlighted in a brighter yellow box in the view that you have chosen. Then choose one of the following options under the ‘Rotate in Active View’ menu. • To mirror a part, select the part and make a copy. With the copied part selected, choose ‘Mirror’ under the translate menu. Choose the orientation you would like to mirror. • To scale the part, select the part and choose ‘Scale’ from the Transform menu. In the dialog box, you are given several options. You may scale the object relative to the dimensions in the imported file and the units you initially selected by entering a percentage in the ‘Relative’ box. Remember to limit your selection to the maximum limits of the build area 6 x 9 x 8 inches (150 x 225 x 200 mm) in color and 8 x 10 x 8 inches (200 x 250 x 200 mm) in monochrome . Z Corp Service (781)852-5050/(877)88-ZCORP Z402C System User Manual Z Corporation • To justify the part, select the part and choose ‘Justify’ from the Transform menu. You may justify the part to the left, right, front, back or bottom of the build box. Justifying the part, lets the software move the part to the edge of the build box optimizing your build area. PLEASE NOTE: In the process of changing the location or orientation of a part, you may find that parts overlap in the build box or exceed the boundaries of the build box. If parts exceed the boundaries of the build box, the System Software will alert you with an error message and the part in question will be outlined in red. To fix the problem, select the part and either move it within the build box or use the ‘Justify’ feature to bring the part completely within the build box. If parts overlap with each other in the build box, you will NOT receive an error message; carefully inspect the build box by checking the layers of the build. This is done by pressing the A or Z key to up each layer. Then correct part overlaps before printing. You may also add monochrome stl part. a color to your Selecting the part. 1. Choose Color option under the Edit menu. 2. Pick a color from the color pallet. 3. Click ‘OK’. The part will be colored by an outer shell as with all Z Corp. color parts. PLEASE NOTE: Only monochrome files (STL) may be colored. If you select a color part, the software will remind you that the color feature is only available for monochrome files. www.zcorp-users.com 17 Z Corporation Z402C System User Manual • To change anisotropic scaling factors for a specified part, choose the part and select the ‘Anisotropic Scaling’ option under the ‘Transform’ menu. Enter your custom anisotropic scaling factors for the x, y, and z axes. Click ‘OK’. These anisotropic scaling factors will only affect the selected part(s). • To change anisotropic scaling factors to affect the entire build, change the powder parameters under the ‘3D Print Setup’ menu. For more information, see Section 2.10.1, Changing Powder Parameters. Please refer to the Powder Fact Sheet provided with your case of powder for recommended anisotropic scaling factors. 2.8 GETTING INFORMATION ABOUT THE BUILD The System Software allows you to estimate the time required to print your build in color and monochrome mode, the number of pixels the part will use and other statistics. Select ‘Print Time Estimator’ from the File Menu. The System Software will return a dialog box with the estimated build time. To calculate the surface area and volume of the build, select ‘Calculate Part Statistics’ from the View menu. 18 Z Corp Service (781)852-5050/(877)88-ZCORP Z402C System User Manual 2.9 Z Corporation SAVING YOUR WORK After you have imported the files, oriented parts and have set up your build to print, save your work by selecting ‘Save As’ from the File menu. After you choose a name for your build, select ‘Save’ and your work will be saved as a *.zbd file. A build file contains all of the modifications that you have made to the parts and the settings you have selected from the build. If you reopen and work on an existing build file, you can save your changes to the *.zbd file by either selecting ‘Save’ from the File menu or choosing the save icon from the tool bar. 2.10 3D PRINT SETUP The ‘3D Print Setup’ dialog box allows you to select a printer, choose a powder type, and change powder parameters. This dialog box is found under the ‘File’ menu. It is also located as an icon on your task bar. www.zcorp-users.com 19 Z Corporation Z402C System User Manual 2.10.1 RECOMMENDED SETUP PROCEDURE* 1) Select the Printer that you will be using. Choose ‘Select Printer’. You may choose any printer that is connected by serial port. If the Printer is busy or offline, the option to select this printer will not be available. 2) ‘Save Printer as Default’ enables you to save the chosen printer so that the software remembers to use the settings for this printer when the software is reopened. 3) Choose ‘Powder Type’ by clicking on the list box. Save this powder type as the default powder so that the printer will remember to use this powder for every print job unless manually changed. If you would like to use a powder that is not the default, you may manually change powder type by choosing from the ‘Powder’ list box. PLEASE NOTE: *This is the recommended 3D Print Setup procedure. It is chronologically structured to prevent any changes in values once they have been entered. 2.10.2 CHANGING POWDER PARAMETERS The saturation settings for plaster-based powder are constant for all parts. Please refer to the Powder Fact Sheet for recommended saturation values. The default saturation values suggested by the software for starch-based powder are designed to successfully print a majority of parts. You may, from time to time, choose to override these saturation levels. Please refer to the Powder Fact Sheet for recommended saturation values. In general, bulkier parts will print more successfully with a lower setting and delicate parts will print better with a higher setting. To change Powder Parameters for the chosen powder: 1. Click on the ‘Override…’ button. 2. Choose the unit of measure for layer thickness. 20 Z Corp Service (781)852-5050/(877)88-ZCORP Z402C System User Manual Z Corporation 3. Choose a given layer thickness or to put in your own layer thickness, choose ‘Other.’ 4. Shell Saturation values may be changed based on three factors – Binder/Volume Ratio (%), Saturation Level (%), and Saturation. When changing any value corresponding to Shell Saturation, the relative Core Saturation will also be changed. 5. Input the core saturation manually if needed. 6. Input Anisotropic Scaling factors for the chosen powder. These values may then be saved as default values in the ‘3D Print Setup’ dialog box. This scaling will affect all parts in the build. You may choose to assign anisotropic scaling factors for each model by using the ‘Anisotropic Scaling’ option under the Transform menu. Anisotropic scaling operates as a simple multiplier. The shrinkage or expansion you experience may differ from the norm because of humidity and temperature variations between operating environments. The anisotropic scaling factors allow the printer to compensate for these differences. 2.11 SETTING USER PREFERENCES You can change the default settings for several software features by selecting ‘Preferences’ from the Edit menu. • Units. You may choose to have the measurements for your parts displayed in either inches or millimeters. This will change the way part dimensions and layer thickness are displayed, but it will not change the underlying dimensions on the part. You will still need to choose the proper units when opening or importing a new file. • Save slice data in ZBD files. When a build file (ZBD) is saved, the slice information is discarded and the part is resliced every time the file is opened. This is generally the best strategy for saving files; the file size is significantly smaller, and because it is smaller, it will reopen faster. However, once the file is opened, you will have to wait while the file reslices. If you wish to save slice data, check this box. www.zcorp-users.com 21 Z Corporation • Z402C System User Manual Orient imported parts for the fastest print times. When this box is checked, parts are always rotated so that the smallest dimension of the part occurs in the Z direction. Since build times are largely determined by the height of the part, this arrangement produces the fastest build times. But if you are importing several parts that need to be placed in a predetermined arrangement to each other, you can uncheck this box and prevent the software from rotating the part. • Offer fast rendering for parts larger than [ 100 ] thousand facets. Large parts with many facets can be slow to draw on the screen. It is often convenient to draw the parts using "Fast Rendering," which can be selected from the View menu. When an file is larger than a certain threshold, before drawing the part for the first time, the software will ask you if you prefer to use fast rendering. You can still choose to use photo-realistic rendering. If you have a very fast video display you may want to set the threshold higher, or even uncheck the box. If your computer is slow to draw and refresh the screen, you can set the threshold lower. • Warn if entity is outside the build box. If your part is outside the build area the boundary surrounding the part will be red. The software also shows a dialog box reminding you that your part is outside the printable area. You may turn this warning off by unchecking this feature. 22 Z Corp Service (781)852-5050/(877)88-ZCORP Z402C System User Manual Z Corporation 2.12 SERVICE MENUS The System Software allows you to draw information from the Z Corporation 3D Printer and activate some printer functions. • Get Piston Levels. (Shortcut Key: F1) To check the available powder in the Feed Piston and the remaining room in the Build Box, Select ‘Get Piston Levels’. • Squirt Squeegee. This feature applies to only the Z406 3D Printer. • Prime Print Heads. (Shortcut Key: F3) This feature allows you to service the print head if it is not printing well. • Toggle Roller on/off. (Shortcut Key: F4) This allows you to activate the roller independently for easy cleaning. • Toggle Vacuum hi/low. (Shortcut Key: F5) This feature applies to the Z402 and Z402C 3D Printers. • Change Print Heads. This feature allows you to change the print heads, as described in detail in Section 7.1 and 7.2. • Flush Binder. This feature allows you to cycle fluid through the plumbing system, which is useful in changing the binder color, as described in detail in Section 7.3. • Report Capabilities. This feature allows you to view the capabilities of the Z Corporation Printer connected to your computer. • Stripe Test. This feature allows you to test the printing status of your print heads. This feature applies to the all Z Corp Color 3D Printers. • Upload New Firmware and Upload New Printer Configuration. This feature allows you to upgrade the firmware that is in your 3D Printer. The Service Department will provide you with required upgrades and instructions. www.zcorp-users.com 23 Z Corporation 3 Z402C System User Manual PREPARING THE Z402C SYSTEM TO PRINT 3.1 HARDWARE CONTROLS The front control panel on the Z402C 3D Printer has the following features: Online Button. Enables and disables local control of the printer. Feed Up/Down Buttons. Allows users to raise or lower the Feed Box. A light tap raises or lowers one layer thickness; holding down causes continuous motion. Spread Button. This button allows you to move the gantry from left to right. Moving the gantry left to right allows you to spread powder over the Build Box. Holding down this button will result in continuous spreading of powder. 3.2 Build Up/Down Buttons. Allows users to raise or lower the Build Box. A light tap raises or lowers one layer thickness; holding down causes continuous motion. PREPARING THE 3D PRINTER If the machine is off, switch it on by pressing and releasing the Power ON/OFF Switch. The red power light and yellow error light will turn on. Then, the Gantry will move slowly as it orients itself. We recommend that you leave the machine on at all times—the printer will go into a low power ‘sleep’ mode after 90 minutes. In sleep mode the machine will exercise the print heads and other functions during periods of inactivity to prevent clogging. 1. Wait for the green Online light indicating that the power-up procedure has completed. The power up process should take just a few minutes. 2. Take the machine offline by pressing and releasing the Online Button. 3. Open the clear Top Cover to gain access to the build area. TECHNICAL TIPS…. LEAVE THE MACHINE ON! 24 This allows the printer to perform a periodic self maintenance. Z Corp Service (781)852-5050/(877)88-ZCORP Z402C System User Manual Z Corporation 3.2.1 FILLING THE FEED BOX WITH POWDER 1. Press and hold the Feed Down button until the piston reaches the bottom of the Feed Box. The piston will stop when it reaches the bottom. 2. Open a bag of fresh powder and carefully place the bag upside down in Feed Box with the edges of the open end of the bag touching or slightly below the powder level. 3. Carefully withdraw the bag from the Feed Box, allowing the powder to flow out. Twisting the bag slowly as it is withdrawn helps powder to emerge smoothly. 4. Grip the Powder Scoop and using a stabbing motion, insert it repeatedly a few inches into the loose powder to compact it. Continue for about a 10-15 seconds until the powder feels firm. 5. For each powder bag added to the Feed Box, repeat steps 2, 3 and 4. 6. When Feed Box is filled to top, take the Tamper and slowly press it onto the powder surface. Be careful not to “slap” the Tamper into the Feed Box, which will produce airborne particles. About 10-15 pounds of force will give a smooth, flat, and compact surface. Failure to firmly pack Feed Box will affect part quality. 7. Vacuum up any powder spilled on the Top Deck. www.zcorp-users.com 25 Z Corporation Z402C System User Manual 8. Raise or lower the build piston until it is approximately one inch from the top. Pour powder into the build piston and tamp down until the powder is even. 9. Close the cover and move the gantry left by pressing the spread button. 10. Raise the build piston until the level of powder is approximately an eighth of an inch above the Top Deck. 11. Press and hold the Spread Button until a uniform bed of powder is formed in the Build Box. Make sure powder is even throughout the Build Box. TECHNICAL TIPS…. Keep powder containers closed when not in use to keep powder dry. Scoop powder carefully to minimize airborne powder. Make sure that you carefully vacuum up excess powder. It only takes a minute, and the tidier the machine is, the less often it will need maintenance! WARNING: Use only powder supplied by Z Corporation. Use of any other material may impact the performance and/or safety of your Z402C System and will void warranty of equipment. 26 Z Corp Service (781)852-5050/(877)88-ZCORP Z402C System User Manual 3.2.2 Z Corporation RINSING THE CARWASH The Carwash cleans the nozzle array of the Print Head during printing. Rinse the Carwash before and after each build. Squeegee Figure 5: Carwash Detail To clean the Carwash: 1. Take the machine Offline. 2. Open the Top Cover. 3. Manually pull the print head forward, out of its parked position. 4. Rinse the Carwash, especially the Squeegee, with distilled water. This will dissolve any dried deposits of powder. Never dry out the carwash area. 5. If there is any powder inside the gantry along the path of the print head, vacuum or wipe it up. 6. Push the print head back to the parked position. Close the clear Top Cover. 3.2.3 CHECKING FLUID LEVELS 1. Open the doors at the bottom front of the machine. 2. Check the jugs on the left side. If the binder waste bottle on the left is threefourths full, empty it out. Binder waste should be treated in accordance with local regulations. If the binder supply jug is approaching the bottom rim of the bottle, replace it by unscrewing the top from the empty bottle and refastening the top to a full binder solution bottle.2 3. Close the doors on the front of the machine. Do not run the printer with the doors open. 2 Store binder in a cool, dry place away from the sun. Keep tightly capped. Keep away from heat. Gloves and safety glasses are recommended to avoid direct contact. www.zcorp-users.com 27 Z Corporation 3.2.4 Z402C System User Manual CHECKING OVERFLOW VACUUM BAG Check the Powder Overflow Bag at the right side of the machine. This bag must be replaced approximately once per complete build volume. To replace the Powder Overflow Bag: 1. Pivot down the slotted Bag Support Rails that seal the Powder Overflow Bag against the Powder Chute. 2. Slide the bag out of the machine. 3. Vacuum off the Filter in the back of the Powder Overflow Box. 4. Slide a fresh bag into the Bag Support Rails and push it up against the top face of the Powder Overflow Box so that the end of the Powder Chute passes into the bag. 5. Puff out the bag manually so that it will inflate easily when the door is sealed. 6. Close the front doors and latch them securely. The right front door forms the seal on the Powder Overflow Box, and the overflow vacuum system will not work properly if the door is not closed. 3.2.5 PUTTING THE MACHINE ONLINE Press the ‘Online’ button. The green ‘Online’ Indicator Light will illuminate. The Z402C 3D Printer is now ready to print. TECHNICAL TIPS…. Keep the Machine Clean! Make sure that you have enough powder to complete the build. It is wise to always begin a build with a full feed box. CHECK THE OVERFLOW BIN! If the overflow bag becomes full, powder will back up through the system and cause errors with your Printer. CHECK FLUID LEVELS! Make sure you have enough fluid to complete the build. Make sure the waste bottle is empty. Keep your Z402C 3D Printer as clean as possible. The cleaner it is, the better it will function. 28 Z Corp Service (781)852-5050/(877)88-ZCORP Z402C System User Manual 4 Z Corporation PRINTING THE PART Before printing, double check the settings for your print job by choosing the ‘3D Print Setup’ option under the File menu. Make sure the software has chosen the correct COM port. You also want to make sure powder type and parameters are correct. For more information about changing this set-up, see Section 2.10, 3D Print Setup. www.zcorp-users.com 29 Z Corporation Z402C System User Manual 1. Select ‘3D Print’ from the file menu or the 3D Print icon on the toolbar. The first dialog box reminds you of the pre-print checklist. Be sure to complete all steps described in Section 3. 2. Select either entire build or the specific range of layers that you would like to print. If you wish to only print a particular crosssectional slice of your part, enter the range of layers that you wish to print. If you wish to use the delay timer feature, check the appropriate box. You will then be asked to enter how many hours in the future you wish your build to begin. PLEASE NOTE: Be sure your computer’s clock is set correctly. The timer will calculate start time based on this clock. 3. If the Warning Window appears, recheck either the powder available in the feed piston or the build piston as instructed. After you correct the problem, choose ‘’Remeasure.” You may chose to print even when this warning is given by pressing ‘Go Ahead’. 4. The Z402C System will commence printing your part. During printing, the Z402C System Software will display the progress of the print and will monitor the key operating characteristics of the Z402C Printer. 30 Z Corp Service (781)852-5050/(877)88-ZCORP Z402C System User Manual Z Corporation 5. After completion of your build, the System Software will display a dialog box containing information about print time, time completed, and number of pixels used. www.zcorp-users.com 31 Z Corporation Z402C System User Manual 5 POST PROCESSING THE PART 5.1 REMOVING THE FINISHED PART After the build is complete, remove the finished parts from the build box as follows: 1. Wait approximately ten to fifteen minutes to ensure that the uppermost layers of the starch based model have had a chance to dry. With plaster-based models, the models will be easiest to remove from the powder bed if left in the bed for an 30-60 minutes after printing before removing the model from the build bed. Depending on wall thickness, plaster-based models may take up to four hours to achieve full strength. 2. Take the machine offline by pressing the Online Button. 3. Move the Gantry to the Feed (left) end of the deck by pressing the Spread Button. 4. Lift the Top Cover. 5. Vacuum up any powder spilled on the deck. 6. Place a tray on the deck to the right of the Build Box. 7. Take a moment to look at the computer screen and determine exactly where parts lie in the build box. 8. Without raising the build piston, begin vacuuming powder out of the build box. Hold the end of the hose on a 20° to 30° degree angle over the powder so the hose inlet is 1/4” to 3/8” above the surface of the powder. This generates enough of a draft to lift loose powder without shifting parts. 9. Vacuum powder away from the buried parts, and clean powder out of the margins against the walls of the Build Box. 10. To gain access to the sides of the parts, raise the Build Piston by holding down the Build Up button. WARNING: When performing any vacuuming operation, use the vacuum provided as part of the Z402C System. Vacuuming powder can generate static electricity, and use of a non-grounded vacuum will create static charges, which may affect the operation of the Z402C System and harm the operator. 32 Z Corp Service (781)852-5050/(877)88-ZCORP Z402C System User Manual 5.2 Z Corporation DEPOWDERING THE PART 1. Place parts inside depowdering unit. 2. Using the compressed air system included in the Depowdering Station, remove any excess powder that remains in any concave surfaces. TECHNICAL TIPS…. The air pressure on your Depowdering Station is adjustable. For bulky parts, turn the air pressure up. For more delicate parts, turn the air pressure down. 5.3 DRYING THE PART To infiltrate parts with wax, the parts must be hot and dry. Preheat part at 165 degrees Fahrenheit in the Automated Waxer or in a drying oven, remembering that drying time and part wall thickness are directly related. If the average wall thickness is ¼”, then the part should be in the drying oven for fifteen minutes. If average wall thickness is ½” inch, the part should be in the drying oven for ½ hour. Use the chart below as a guide. Average Wall Thickness Drying Time 1/8 inch 8 minutes 1/4 inch 15 minutes 1/2 inch 30 minutes 1 inch or greater 60 minutes For instructions on how to use the Automated Waxer, please refer to the Waxer User Manual. www.zcorp-users.com 33 Z Corporation 5.4 Z402C System User Manual INFILTRATING THE PART The parts can be infiltrated with a variety of materials to produce a range of material properties. As an early stage design tool, it may not be necessary to infiltrate the parts at all. If you wish to use the parts for focus groups or to send to vendors, you may wish to infiltrate with resin, a two-part epoxy or other material for greater durability and longer life. For information on other possible infiltration materials call us at Z Corporation, or visit our website at www.zcorp-users.com 5.4.1 TO INFILTRATE THE PART USING RESIN: 1. Read and understand the Safety Information on the resin container label. 2. Dry the part as outlined in Section 5.3, Drying the Part. 3. In a well-ventilated area, place the part on waxed paper or on another non-stick surface. 4. Wear gloves to prevent the resin (and other things) from sticking to your fingers! 5. Apply a thin coat of resin to the entire part by gently squeezing the bottle and letting the resin drip onto the part. 6. Once the entire part is coated, let it dry for 45 minutes to one hour. To stop the part from sticking to the wax paper, pick it up and move it every ten minutes until dry. 7. Once the part is dry, it can be sanded to improve the surface finish (250 grit sandpaper works best). This operation should be performed while wearing a dust mask. 8. To further improve the surface finish, the part can be waxed or painted. To wax a part infiltrated with resin, the part must be heated at 165 degrees Fahrenheit for one to three minutes before waxing. PLEASE NOTE: Carefully read the Material Safety Data Sheet for resin before use. 34 Z Corp Service (781)852-5050/(877)88-ZCORP Z402C System User Manual 6 6.1 Z Corporation ADVANCED USER FEATURES ORIENTATION FOR SPEED Parts oriented with their largest dimension along the y or “fast” axis (print heads direction of travel), next longest along the x or “slow” axis (gantry direction of travel) and shortest dimension along the zaxis will print the fastest. Because speed is the most important feature for the majority of our customers, the System Software will automatically position parts with the shortest dimension along the z-axis unless this feature is disabled in the ‘User Preferences Dialog Box’ (See section 2.11). 6.2 ORIENTATION FOR STRENGTH In Section 1.1.2, How it Works, we explain that part features that lie in the x-y plane will be stronger than those aligned along the z-axis. If a part has a particularly delicate feature, especially one shaped like a thin rod, you might find aligning that feature in the x-y plane to be most successful. 6.3 ORIENTATION TO PREVENT WARPING Very thin planar part features printed in starch-based powder may warp if they dry unevenly or are excessively heated (this problem will not occur with plaster-based powder). Thin, planar features aligned along the z-axis will dry more evenly than those with thin planar features that lie flat along the top of the build box. Also, be careful when drying parts with thin planar features in the drying oven. We find that thoughtful positioning and limited drying time effectively control warping in starch-based powder. www.zcorp-users.com 35 Z Corporation Z402C System User Manual 7 MAINTENANCE Maintenance Steps 7.1 Frequency 1. Change Print Heads When Needed 2. Flush Binder Bi-Weekly 3. Lubricate Fast Axis Weekly 4. Vacuum Filter After Every Build 5. Clean Carwash Before and After Each Build CHANGING THE COLOR PRINT HEAD WARNING: Do NOT touch or contaminate the gold contacts on either the print heads or the carriage with your fingers. Avoid spilling binder on the contacts. If you do get binder or anything else on the gold contacts, clean them with an alcohol swab. If the print becomes faint or begins to print unevenly replace the print head as follows: 1. Make sure the printer is online and the top cover is closed. From the ‘Service’ menu, select ‘Change Print Head’. 2. The front panel lights will flash rapidly and the gantry and print head will move into position. 36 Z Corp Service (781)852-5050/(877)88-ZCORP Z402C System User Manual Z Corporation 3. Although there are no serial numbers available with the color print head used on the Z402C System, we recommend that you input a series of six numbers in the Serial Number box. These numbers will be used when logging all builds printed with this set of print heads. (We recommend using the date as the series of numbers.) The software will not accept letters or symbols. 4. Wait for the printer to finish moving and the front panel lights to change to slowly blinking. This indicates that it is safe to remove the print head from the carriage. 5. Open the top cover of the printer and place the new cartridge on the top deck of the printer near the carriage. 6. The Z402C 3D Printer uses a Canon BC-21e color BJ print head. Remove the print head from the packaging. Remove the two gray ink cartridges labeled BCI-21 Color and BCI-21 Black by pulling on the tabs at top of ink cartridge. These should be discarded. They are not used by the Z402C 3D Printer. www.zcorp-users.com 37 Z Corporation Z402C System User Manual 7. Lift the green lever and remove the old print head from the carriage. 8. Lay it on the deck next to the new print head. 9. Slide the color binder reservoir out from the old print head by pulling on the groove at the top of the binder reservoir. 10. Immediately insert the color reservoir into the left side channel of the new print head. The reservoir should snap into place. 38 Z Corp Service (781)852-5050/(877)88-ZCORP Z402C System User Manual Z Corporation 11. Repeat the same procedure, placing the clear binder reservoir into the right side channel of the new print head. Discard the old print head. PLEASE NOTE: Make sure hoses are not twisted. If the hoses bind up, they may pull on the carriage and cause premature print head failure. 12. Remove the orange tab and tape from the bottom of the print head and discard. 13. Activate enclosed swab by removing the cap and crushing the plastic casing. 14. Wipe the contact on the carriage. www.zcorp-users.com 39 Z Corporation Z402C System User Manual 15. Wipe the contacts on the print head. PLEASE NOTE: Check again that the hoses are not twisted. If the hoses bind up, they may pull on the carriage and cause premature print head failure. 16. Wait a few seconds for the alcohol to dry. Then, insert the new print head into the carriage, checking to make sure the tubes are not twisted. Lower the green lever to latch the print head in. 17. Close the cover and press the ‘Feed Up’ button once. The printer will rezero, and fill and prime the print head automatically. After this fill cycle, the machine will shut itself off and restart. The cycle is complete when the machine comes online. Press the ‘Done’ button on the System Software dialog box. 18. Run a stripe test to ensure that all the jets and colors are operating properly. Spread an even layer of powder onto the build piston. Then select the ‘Stripe Test’ option in the ‘Service’ menu. 40 Z Corp Service (781)852-5050/(877)88-ZCORP Z402C System User Manual Z Corporation 19. If the stripe test does not print well all colors will not look like a solid stripe. Choose the ‘Prime Print Head’ option under the Service menu and then run the stripe test again. 7.2 CHANGING MONOCHROME PRINT HEADS WARNING: Do NOT touch or contaminate the gold contacts on either the print heads or the carriage with your fingers. Avoid spilling binder on the contacts. If you do get binder or anything else on the gold contacts, clean them with an alcohol swab. 1. The Printer should be online. From the ‘Service’ menu, select ‘Change Print Head’. 2. Type in the number found on your print head into the serial number box. This number will be used to create a file name for automatic data logging. 3. Make sure the Printer is online and the top cover is closed. Press the ‘Start’ dialog box button to begin the process. The front panel lights will flash rapidly and the gantry and print head will move into position. www.zcorp-users.com 41 Z Corporation Z402C System User Manual 4. Wait for the Printer to finish moving and the front panel lights to change to slowly blinking. This indicates that it is safe to remove the print head from the carriage. 5. Remove the cap from the new print head. The print head is filled with clear binder for storage. Open the top cover of the Printer and place the new cartridge on the top deck of the Printer near the carriage. 6. Remove the old print head by lifting up on the green lever. Take out the print head and unscrew the blue retaining ring. Lift the feed tubes out of the print head. 7. Without removing the fluid from the new print head, insert the feed tube into the new print head. Orient the fitting as shown; try to avoid tangling the feed and return tubes. Make sure the metal insert is secure on the print head, then slide the retaining ring down and gently screw it on. 8. Clean contacts on both the print head and the carriage with the alcohol swab provided with your print head. 42 Z Corp Service (781)852-5050/(877)88-ZCORP Z402C System User Manual Z Corporation 9. Remove the orange cap and tape from the face of the print head. 10. Insert the print head into the carriage. Lower the green lever to secure the print head. 11. Close the top cover and press the ‘Feed Up’ button once. The Printer will rezero, then fill and prime the print head automatically. After this fill cycle, the Printer will shut itself off and restart. Once the Printer has come back Online, press ‘Done’ on the System Software dialog box. www.zcorp-users.com 43 Z Corporation 7.3 Z402C System User Manual FLUSHING THE BINDER If you will not be using your Z402C 3D Printer for more than two weeks, it is good practice to flush the binder out of the fluid system with distilled water as follows: 1. Pour all the primary colored binders back into their original containers. 2. Pour distilled water into the color binder reservoirs. 3. Then change the gallon of clear binder with distilled water. NOTE: If you will continue to use the printer in monochrome mode, you do not need to replace the gallon of clear binder with distilled water. Replace the gallon only if the printer will not be in use 44 Z Corp Service (781)852-5050/(877)88-ZCORP Z402C System User Manual Z Corporation 4. With the printer online. Choose the ‘Flush Binder’ option under the ‘Service’ menu. 5. Press and hold the ‘Feed Up’ and ‘Build Up’ button down together for approximately 30 seconds. Once you hear a beep, remove your fingers from the buttons. The Printer will flush the binder automatically. Flush the binder for approximately five minutes. Then press ‘Online’ to complete the flush process. REMEMBER: When printer is ready to be used again, refill the binder reservoirs with Z Corporation binder and repeat the “flush” system process. 7.4 GREASING THE FAST AXIS Over the coarse of printing, powder may adhere to the fast axis causing friction in the movement of the carriage. Greasing the fast axis weekly will ensure the fast axis does not dry out and enable smooth movement of the carriage. 1. Turn power off. 2. Remove print cartridge from the print head holder by lifting green lever and removing print cartridge. Do not remove feed line from cartridge. 3. Push green lever back down to the secure position. www.zcorp-users.com 45 Z Corporation Z402C System User Manual 4. Note the small circle in the center of the gray plate in the print head holder. Insert head of grease tube into hole and apply one quick squeeze of grease found in your tool box. 5. Move print assembly back and forth on gantry to evenly distribute grease. You will be able to see the grease on the print assembly (fast axis) rail. 6. Replace print cartridge in the print head holder and secure by depressing green lever. 7.5 CHANGING BETWEEN COLOR AND MONOCHROME ADAPTERS 1. Shut off the printer. PLEASE NOTE: If printer will not be used in color mode for a while, flush the colored binder lines with distilled water before shutting off machine. For more information, see Section 7.3, Flushing Binder. 2. Disconnect both screws from the color or monochrome adapter. (Color adapter shown in picture.) 3. Remove the print head from the carriage. 46 Z Corp Service (781)852-5050/(877)88-ZCORP Z402C System User Manual Z Corporation 4. Take the color (or monochrome) print head and store in a resealable bag. (Color print head shown in picture.) 5. Take your monochrome (or color) adapter and insert the two screws into the printer assembly. (Monochrome adapter shown in picture.) PLEASE NOTE: Do not overtighten the screws. 6. Insert a NEW print head into the carriage and secure by pushing down on the green lever. 7. Turn the power on and hold down the ‘Online’ button until the carriage moves. The printer will emit two beeps and followed by another two beeps when changing from color to monochrome. If changing from monochrome to color, the printer will emit two beeps followed by three beeps. 6. In the ZCorp System Software, choose “Change Print Head” under the Service Menu. Enter the serial number and click “Start.” Without changing the print heads again, click “Done.” This will create a new log file for the new print head. www.zcorp-users.com 47 Z Corporation 7.6 Z402C System User Manual LOGGING YOUR BUILDS Automatic logging saves build job statistics to a text file when enabled. To record build date, time, volume and other important information about your builds check the ‘Use Log File’ option in the 3D Print dialog box. Build Date Time Job Pixels Fed Prime DSize DSDEV Error Max Min Pre Vol Area Shell Core Thickness 9/17/2001 9/17/2001 9/17/2001 9/17/2001 9/17/2001 9/18/2001 9/18/2001 9/19/2001 9/19/2001 9/19/2001 9/19/2001 9/21/2001 9/21/2001 9/22/2001 87 2 84 96 46 84 107 105 2 45 86 140 140 910 3.78e+008 1.96e+006 3.77e+008 1.86e+008 6.14e+006 3.78e+008 4.88e+008 1.87e+008 1.12e+006 9.95e+007 1.26e+008 6.49e+008 6.49e+008 1.52e+009 50.00 1.50 47.00 19.00 7.00 48.50 63.00 34.50 0.00 34.50 26.50 71.00 70.50 251.00 14.00 2.00 12.00 12.00 12.00 14.00 14.00 36.00 1.75 51.25 38.00 18.00 18.00 54.00 80 81 85 81 75 88 91 79 79 77 75 88 87 87 77 75 78 75 74 77 79 74 74 74 74 79 79 81 77 75 77 75 74 77 79 74 74 74 77 79 80 80 5.37 5.37 5.37 2.36 15.04 5.21 5.21 1.77 1.48 1.48 0.19 9.87 9.87 39.46 66.72 66.72 66.72 23.68 106.05 65.39 65.39 8.24 27.82 27.82 7.94 100.03 100.03 400.13 2.25 2.25 2.25 2.25 2.25 2.25 3.00 2.25 2.00 2.00 2.25 2.25 2.25 2.25 1.00 1.00 1.00 1.00 1.00 1.00 1.33 1.00 1.00 1.00 1.00 1.00 1.00 1.00 0.0040 0.0040 0.0040 0.0040 0.0040 0.0040 0.0040 0.0040 0.0040 0.0040 0.0040 0.0040 0.0040 0.0040 132.49 0.00 117.11 82.05 0.00 120.74 120.74 115.86 0.00 0.00 0.00 102.23 101.50 261.53 39.91 0.00 18.67 11.66 0.00 24.68 23.19 18.43 0.00 0.00 0.00 23.96 11.43 467.51 13 0 0 0 0 13 0 0 0 0 0 0 0 0 Name TNO_Color_Pallette_8.13.00.ply TNO_Color_Pallette_8.13.00.ply TNO_Color_Pallette_8.13.00.ply GREEN.ply Porsche_Color1 FANCY.ply TNO_Color_Pallette_8.13.00.ply TNO_Color_Pallette_8.13.00.ply grey_cylinder.ply Chain.stl Chain.stl bool5.ply 2_TNO_Color_Palette.zec 2_TNO_Color_Palette.zec 2_TNO_Color_Palette.zec Above is an example of the log file for the Z402C Printer. There is a log file for each COM port or connection used. The log files can be found in the directory “C:\Z402 Records\Print Logs”. They are tab delimited files for easy import into a spreadsheet. The columns are as follows: Build Date: Time: Job Pixels: The desktop computer’s date when the job was started. Time to complete printing in minutes. Total number of pixels fired during the job Note: pixels are not logged for print head purging between jobs. Fed: Approximately how much binder was fed during the job, in milliliters. Prime Approximately how much binder was used for pressure priming the print heads. Dsize Does not apply. DSDEV Does not apply. Error If the job was terminated with an error code, it will be recorded here. Max The maximum head temperature during the last layer of the build. Min The minimum head temperature during the last layer of the build Pre The print head temperature just before printing a stripe. Vol Part volume Area Total printed area Shell Shell saturation Core Core saturation Thickness Layer thickness Name File name for the job. In the Z402C Printer a new log file is started for each print head. The serial number inputted into the ‘Change Print Head’ dialog is used as part of the file name. 48 Z Corp Service (781)852-5050/(877)88-ZCORP Z402C System User Manual 8 Z Corporation TROUBLESHOOTING 8.1 THE BINDER SOLUTION IS BEING APPLIED IN ERRATIC STRIPES If the binder appears to be applied in fragmented stripes, check the following: 1. Rinse the squeegee clear of any debris. 2. Make sure binder supply is full. If this does not correct the problem, your print heads may be worn out. Replace the print heads as outlined above in Section 7.1 and 7.2. 8.2 THE SYSTEM SOFTWARE FREEZES DURING USE Exit the System Software by pressing Ctrl-Alt-Delete and choosing End Task from the Task Manager, then restart the software. 8.3 THIN PLANAR PARTS ARE WARPING In general, warping is caused by uneven drying of parts. By adjusting print orientation and drying time, warping can be minimized. You can take steps to ensure that drying is occurring evenly by: 8.4 • Reorienting your part within the build box. If a thin planar surface of a part lies flat along the top of the build box, the broad exposed area may dry unevenly and bow towards the top. Reorient the part so that the thin planar surface lies perpendicular to the top of the build box. • Ensure that you are not over-drying the part. Reduce drying time to a minimum. Refer to the guide in Section 5.3, Drying the Parts to select a drying time. • Decreasing the layer thickness without proportionally changing the minimum and maximum saturations will over-saturate the part causing it to warp and may also cause individual layers to curl during printing. NOTHING HAPPENS WHEN I TRY TO PRINT • Is the serial cord connected properly? Remove the cord and carefully reinstall ensuring that you tighten the screws only after making sure that it is tight in the socket. Do NOT over tighten the screws. www.zcorp-users.com 49 Z Corporation • Z402C System User Manual Are any of the lights on the control panel illuminated? If the error and power light come on but nothing happens after that, shut the machine off and turn it back on again. The machine should come online. But if it does not, please call the Service Department. 8.5 MY STARCH-BASED PARTS ARE UNUSUALLY “CAKEY” • Is the saturation too high? If your parts (especially bulky parts) are unusually difficult to depowder, too much moisture has moved from the part into the immediately surrounding powder. You may have the saturation levels set too high for this type of part. Using a lower maximum setting will fix this problem. • Was the part left in the bed too long? If the part is delicate and requires a higher maximum setting, it will be helpful to remove the part from the bed as soon as possible after the completion of the build. Using the delay timer feature will allow you to cause the build to end at a convenient time. 8.6 PARTS ARE UNUSUALLY WEAK OR CRUMBLY • Is the data file known to be without errors? If the *.stl file is not near perfect you will have problems printing the part. Open the file in the Z Corp. System Software and inspect it layer by layer to ensure there are no gaps and the part does not overlap other parts. • Is there enough binder in the feed bottles? When you start the build, a reminder box will pop up asking you to check if there is enough binder in the feed bottles. If you plan to start a large build make sure binder bottles are full. • Are the parts dry? If plaster parts are not yet dry they may seem weak or crumbly. Allow more time for the part to dry, or put it in an oven for 30 minutes at 120-140F. For plaster parts, this may be done even before depowdering. 8.7 PRINTER LOOKS LIKE IT IS PRINTING, BUT IS NOT LAYING DOWN BINDER As you begin printing, carefully watch the Z402C Printer to see if it is printing normally. It may be that the print head are not properly seated in the carriage. This can cause a bad connection with the temperature sensor and the print head will overheat. Prolonged periods of attempting to print without binder flow will damage the print head. You will need to replace the print head. 50 Z Corp Service (781)852-5050/(877)88-ZCORP Z402C System User Manual Z Corporation 9 Z402C SYSTEM DETAILS 9.1 DESCRIPTION OF REAR I/O PANEL Power Input Main Power Fuse Diagnostic Video Connector Diagnostic Keyboard Connector Serial Input Connection Serial Port Connection: This is an RS-232 serial port for data transfer to and from the Z402C System Software. The Z402C System uses 115k baud and has the same pin out as a standard PC compatible computer. The connection to the Windows computer running the Z402C System Software requires a 9 pin to 9 pin null modem cable (also known as a ‘laplink’ cable). This cable is supplied with your Z402C System; if a replacement is required, order Z Corporation part #10267. Diagnostic Connections (Video and keyboard): These connections are used while servicing your Z402C System. Nothing should be connected to them in normal operation. The diagnostic video connection is standard VGA output video. The keyboard connection is PS/2 style compatible. www.zcorp-users.com 51 Z Corporation 9.2 Z402C System User Manual SYMBOLS USED The following symbols are used on the Z402C 3D Printer: This is the international symbol for ‘standby power’. It is used on the Z402C 3D Printer power switch. The Z402C 3D Printer is partially powered as soon as you plug it in. The power switch is momentary contact and toggles the machine from idle mode to full power on mode. This is the international symbol for ‘warning’ or ‘caution’. It indicates the need to consult your manual for further information. This symbol is in two places on the Z402C 3D Printer. 1. It is used on the rear, lower left to call your attention to the fact that only authorized personnel should open the Z402C 3D Printer rear cover. None of the normal operation and maintenance procedures described in this manual require you to remove this cover. 2. It is used on the front cover next to the handle to call your attention to the fact that you should be careful not to drop the cover when closing it. Due to the weight of the cover and the force of the air springs, it is possible to pinch or strain a finger or hand if it were to get caught between the bottom of the cover and the front slow axis rail. 52 Z Corp Service (781)852-5050/(877)88-ZCORP Z402C System User Manual 9.3 Z Corporation SYSTEM SPECIFICATIONS Z402C 3D Printer Dimensions: 29 x 36 x 42 inches high (74 x 91 x 107cm high) Z402C 3D Printer Weight: 300 lbs. (136 kg) Power Requirements and Operating Conditions at Site of Installation: • Power Requirements: 115 or 230V (2.5 or 2 amps) • Operating Conditions: 68 to 85ºF, 20 to 50% Relative Humidity, non-condensing. Lithium Battery: Internal to the Z402C 3D Printer is a lithium coin cell type battery. This may be any one of the following: Type: CR2032, either Maxell, Panasonic, Renata, Sanyo or Sony. PLEASE NOTE: This battery is not in a user accessible area and is not user replaceable. The expected lifetime of the battery is in excess of five years. Replacement will be handled by your Z Corporation customer service representative. FCC Notice: Note: this equipment has been tested and found to comply with the limits for a Class A digital device, pursuant to part 15 of the FCC rules. These limits are designed to provide reasonable protection against harmful interference when the equipment is operated in a commercial environment. This equipment generates, uses, and can radiate radio frequency energy and, if not installed and used in accordance with the instruction manual, may cause harmful interferance to radio communications. Operation of this equipment in a residential area is likely to cause harmful interference in which case the user will be required to correct the interference at his own expense. CENELEC Class A Warning: Note: this equipment has been tested and found to comply with the limits for a Class A digital device, pursuant to EN 55022. Class A devices are for office and light industrial environments, and are not generally suitable for home use. WARNING: This is a Class A product. In a domestic environment this product may cause radio interference in which case the user may be required to take adequate measures. www.zcorp-users.com 53 Z Corporation 9.4 Z402C System User Manual MATERIAL STORAGE PRECAUTIONS Binder Solution: Store in cool, dry place, away from sun. Keep tightly capped. Powder: Store powder on pallets in a cool, dry, ventilated area away from sources of heat, moisture, and incompatible materials. Keep containers tightly closed. Wax: Keep containers closed when not in use. Store in a cool, dry, well ventilated area. Resin: To extend shelf life store in cool (less than 5 degrees Celsius), dry, and dark place. Shelf life for resin is 6 months. 54 Z Corp Service (781)852-5050/(877)88-ZCORP Z402C System User Manual 10 Z Corporation INDEX 3 3D Print Setup, 19 J Justify, 17 L A Logging Your Build, 48 Anisotropic Scaling, 21 For Specified Part, 18 B BLD Build Files, 12 M Massachusetts Institute of Technology, 6 Material Storage, 54 O C Cakey Parts, 50 Changing Adapters, 46 Changing Color Print head, 36 Changing Monochrome Print Heads, 41 Changing Powder Parameters, 20 Checking Fluid Levels, 27 Choosing a Layer Thickness, 21 Color, 17 Control Panel, 24 Opening a File, 12 P Part infiltration, 34 PLY Files, 12 Post Processing, 32 Powder Overflow Bag, 28 Prime Print Heads., 23 D Delay Timer, 30 Depowdering Parts, 33 Drying the Parts, 33 Removing finished parts, 32 Report Capabilities, 23 Rinsing the Carwash, 27 Rotate, 16 E Estimating Time to Build, 18, 19 F Filling the Feed Box with Powder, 25, 26 Flush Binder, 23 Flushing the Binder, 44 G Get Piston Levels, 23 Greasing the Fast Axis, 45 I Importing a File, 13 www.zcorp-users.com R S Saturation Values, 21 Save Powder Type as Default, 20 Save Printer as Default, 20 Scale, 16 Select Parts, 15 SFX Files, 12 Shelling, 7 Speed, 35 Spread Button, 32 Squirt Squeegee, 23 STL Files, 12 Strength, 35 Stripe Test, 23 Striping of Binder Solution, 49 System Specifications, 53 55 Z Corporation Z402C System User Manual T Toggle Roller on/off, 23 Translate, 15, 16 Troubleshooting, 49 U Upload New Firmware, 23 Upload New Printer Configuration, 23 User Preferences, 21 V Viewing Cross Section, 14 VRML Files, 12 Importing, 13 Mesh Resolution, 13 Texture Threshold, 13 W Warping, 35, 49 Weak Parts, 50 WRL Files, 12 56 Z Z Corp System Software, 10 3D Print Setup, 19 Color Monochrome Parts, 17 Cross Section, 14 Estimating Build Time, 18, 19 Fast Rendering, 22 Import, 13 Justify, 17 Logging Your Build, 48 Main Window, 11 Mirror, 16 Opening a File, 12 Orient Parts for Fastest Print Times, 22 Part Statistics, 18 Powder Parameters, 20 Rotate, 16 Save Slice Data, 21 Scale, 16 Select Parts, 15 Translate, 15, 16 Unit of Measure, 13, 21 User Preferences, 21 Installation, 10 ZBD Build Files, 12 ZCP Files, 12 ZEC Files, 12 Z Corp Service (781)852-5050/(877)88-ZCORP