1
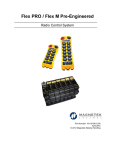
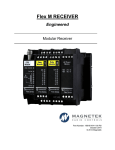
Magnetek Material Handling IMPULSE®•Link 5 Instruction Manual Part Number: 144-18171 R0.7 March 2014 ©Copyright 2014 Magnetek Material Handling Table of Contents Service Contact Information ...................................................................................................................... 3 Preface and Safety ...................................................................................................................................... 4 Product Safety Information........................................................................................................................ 4 Product Warranty Information ................................................................................................................... 4 DANGER, WARNING, CAUTION, and NOTE Statements ....................................................................... 5 1. Introduction ............................................................................................................................................. 7 1.1. Overview ............................................................................................................................................ 7 1.1.1. Supported Drives:........................................................................................................................ 7 1.2. System Requirements ........................................................................................................................ 7 2. Installation ........................................................................................................................................... 7 3. Navigation ............................................................................................................................................ 9 3.1. File Tab ............................................................................................................................................ 10 3.2. Parameters/DataLogger Tab............................................................................................................ 11 3.2.1. Parameter Tab .......................................................................................................................... 11 3.2.2. DataLogger Tab ........................................................................................................................ 12 3.3. Parameter File Display ..................................................................................................................... 13 3.3.1. Parameter Value Text Color...................................................................................................... 13 3.4. DataLogger Parameter Files Sets .................................................................................................... 13 3.5. Events .............................................................................................................................................. 14 3.6. Runs ................................................................................................................................................. 15 3.7. Alarms .............................................................................................................................................. 16 3.8. Faults................................................................................................................................................ 17 3.9. Trend Data ....................................................................................................................................... 18 3.10. Trend Navigation ............................................................................................................................ 20 3.10.1. Trend File Information ............................................................................................................. 20 3.10.2. Signal Name Select ................................................................................................................. 21 3.10.3. Mouse Tooltips ........................................................................................................................ 22 3.10.4. Signal Names – Analog ........................................................................................................... 22 3.10.5. Signal Names – Digital ............................................................................................................ 23 3.10.6. Time ........................................................................................................................................ 23 3.10.7. Trackball .................................................................................................................................. 23 3.10.8. Scrollbar Navigation ................................................................................................................ 24 3.10.9. Sliding the Scrollbar ................................................................................................................ 24 3.10.10. Zoom ..................................................................................................................................... 25 3.10.11. Printing .................................................................................................................................. 27 3.11. Update Firmware ............................................................................................................................ 33 3.12. Help Tab ......................................................................................................................................... 33 4. DataLogger Maintenance.................................................................................................................. 34 4.1. Updating DataLogger Firmware ....................................................................................................... 34 5. Software Updates .............................................................................................................................. 36 Magnetek Material Handling IMPULSE®•LINK 5 Instruction Manual March 2014 Page 2 of 38 Service Contact Information For questions regarding service or technical information contact: 1-866-MAG-SERV (1-866-624-7378) Magnetek Material Handling N49 W13650 Campbell Drive Menomonee Falls, WI 53051 Telephone: 800-288-8178 Website: E-mail: www.magnetek.com [email protected] Fax Numbers: Main: 800-298-3503 Sales: 262-783-3510 Service: 262-783-3508 Magnetek, Inc. has additional satellite locations for Canada and the United States. For more information, please visit http://www.magnetek.com. ©2014 MAGNETEK All rights reserved. This notice applies to all copyrighted materials included with this product, including, but not limited to, this manual and software embodied within the product. This manual is intended for the sole use of the person(s) to whom it was provided, and any unauthorized distribution of the manual or dispersal of its contents is strictly forbidden. This manual may not be reproduced in whole or in part by any means whatsoever without the expressed written permission of MAGNETEK. Magnetek Material Handling IMPULSE®•LINK 5 Instruction Manual March 2014 Page 3 of 38 Preface and Safety ©2014 MAGNETEK All rights reserved. This notice applies to all copyrighted materials included with this product, including, but not limited to, this manual. This manual is intended for the sole use of the persons to whom it was provided, and any unauthorized distribution of the manual or dispersal of its contents is strictly forbidden. This manual may not be reproduced in whole or in part by any means whatsoever without the expressed written permission of Magnetek. IMPULSE®•Link 5 Software is copyrighted by Magnetek. All rights reserved. Product Safety Information Magnetek, Inc. (Magnetek) offers a broad range of radio remote control products, control products and adjustable frequency drives, industrial braking systems, and power delivery products for material handling applications. This manual has been prepared by Magnetek to provide information and recommendations for the installation, use, operation and service of Magnetek’s material handling products and systems (Magnetek Products). Anyone who uses, operates, maintains, services, installs or owns Magnetek Products should know, understand and follow the instructions and safety recommendations in this manual for Magnetek Products. The recommendations in this manual do not take precedence over any of the following requirements relating to cranes, hoists, lifting devices or other equipment which use or include Magnetek Products: Instructions, manuals, and safety warnings of the manufacturers of the equipment where the Magnetek Products are used, Plant safety rules and procedures of the employers and the owners of the facilities where the Magnetek Products are being used, Regulations issued by the Occupational Health and Safety Administration (OSHA), Applicable local, state, provincial, or federal codes, ordinances, standards and requirements, or Safety standards and practices for the industries in which Magnetek Products are used. This manual does not include or address the specific instructions and safety warnings of these manufacturers or any of the other requirements listed above. It is the responsibility of the owners, users and operators of the Magnetek Products to know, understand and follow all of these requirements. It is the responsibility of the employer to make its employees aware of all of the above listed requirements and to make certain that all operators are properly trained. No one should use Magnetek Products prior to becoming familiar with and being trained in these requirements and the instructions and safety recommendations for this manual. Product Warranty Information Magnetek, hereafter referred to as Company, assumes no responsibility for improper programming of a device (such as a drive or radio) by untrained personnel. A device should only be programmed by a trained technician who has read and understands the contents of the relevant manual(s). Improper programming of a device can lead to unexpected, undesirable, or unsafe operation or performance of the device. This may result in damage to equipment or personal injury. Company shall not be liable for economic loss, property damage, or other consequential damages or physical injury sustained by the purchaser or by any third party as a result of such programming. Company neither assumes nor authorizes any other person to assume for Company any other liability in connection with the sale or use of this product. For information on Magnetek’s product warranties by product type, please visit www.magnetek.com. Magnetek Material Handling IMPULSE®•LINK 5 Instruction Manual March 2014 Page 4 of 38 DANGER, WARNING, CAUTION, and NOTE Statements Read and understand this manual before installing, operating, or servicing this product. Install the product according to this manual and local codes. The following conventions indicate safety messages in this manual. Failure to heed these messages could cause fatal injury or damage products and related equipment and systems. DANGER DANGER indicates an imminently hazardous situation which, if not avoided, will result in death or serious injury. This signal word is to be limited to the most extreme situations. WARNING WARNING indicates a potentially hazardous situation which, if not avoided, could result in death or serious injury. CAUTION CAUTION indicates a potentially hazardous situation which, if not avoided, could result in minor or moderate injury. It may also be used to alert against unsafe practices. NOTE: A NOTE statement is used to notify people of installation, operation, programming, or maintenance information that is important, but not hazard-related. WARNING 1. Read this user manual in its entirety before installing IMPULSE®•LINK 5 Software or operating the IMPULSE®•G+/VG+ Series 4, IMPULSE®•G+/VG+ Series 3, and/or the IMPULSE®•G+ Mini. 2. DO NOT connect or disconnect wiring, or perform signal checks while the electrical power is turned ON. 3. Improper programming of a drive through the use of this software can lead to unexpected, undesirable, or unsafe operation or performance of the drive. Failure to observe these and other precautions indicated in this manual will expose the user to high voltages, resulting in serious injury or death. Damage to equipment may also occur. Magnetek Material Handling IMPULSE®•LINK 5 Instruction Manual March 2014 Page 5 of 38 CAUTION No patent liability is assumed with respect to the use of the information contained herein. Moreover, Magnetek is constantly improving its high quality product; therefore, the information contained in this manual is subject to change without notice. Every precaution has been taken in the preparation of this document. Nevertheless, Magnetek assumes no responsibility for errors or omissions. Neither is any liability assumed for damages resulting from the use of the information contained in this publication. Magnetek Material Handling IMPULSE®•LINK 5 Instruction Manual March 2014 Page 6 of 38 1. Introduction 1.1. Overview The IMPULSE®•Link 5 program is a user-friendly, interactive software designed for use with the DataLogger Series 4 (DLS4) to view parameters, drive events, and review analog and digital inputs. 1.1.1. Supported Drives: IMPULSE®•Link 5 supports the following Magnetek drives when used with the DataLogger Series 4: IMPULSE®•G+/VG+ Series 4 IMPULSE®•G+/VG+ Series 3 IMPULSE®•G+ Mini 1.2. System Requirements The following are the minimum system requirements for a PC using the IMPULSE®•Link 5 software: 1. 2. 3. 4. 5. 6. 1.5 GHz processor or better 2 GB RAM (minimum); 4 GB (recommended) Minimum of 300 MB free hard-disk space available Vista, Windows 7, or Windows 8 operating system. 32 bit or 64 bit Available USB port 2. Installation The IMPULSE®•Link 5 installer is located on the USB flash drive with the DataLogger Series 4 kit. The IMPULSE®•Link 5 viewer is also available for download on the Magnetek Material Handling website: http://www.magnetek.com/en/Material%20Handling/Downloads.aspx NOTE: Administrative privileges are required to install and/or update the IMPULSE®•Link 5 software. Please make sure to log onto an administrator account before installation. To install IMPULSE®•Link 5 on a PC, do the following: Connect the USB flash drive to an available USB port on the PC. Run the ImpulseLink5_Install.exe. Select the default choices during installation. Magnetek Material Handling IMPULSE®•LINK 5 Instruction Manual March 2014 Page 7 of 38 Figure 1: Setup Status A Windows Security warning will pop up during the initial installation, with the message that IMPULSE®•Link 5 would like to install device drivers from Texas Instruments, Inc. Figure 2: Windows Security Warning The driver software is for the DataLogger Series 4. It is not required for installing or running IMPULSE®•Link 5; however, failure to install the driver will result in not being able to update the DataLogger firmware. NOTE: To ensure full functionality, select “Install” and proceed with the installation. Magnetek Material Handling IMPULSE®•LINK 5 Instruction Manual March 2014 Page 8 of 38 3. Navigation The navigation toolbar allows access to features and functions for uploading parameter files, viewing drive events, and/or viewing trend data. The following is a brief summary of the functions that can be accessed from the navigation toolbar. NOTE: IMPULSE®•Link 5 will default to the Parameters tab on startup if a DataLogger is not connected to the PC. Once a DataLogger is connected, the IMPULSE®•Link 5 will automatically switch to the DataLogger tab, and the Workspace will populate with the files currently loaded on the DLS4. Figure 3: The IMPULSE®•Link 5 on startup (DataLogger not connected) Magnetek Material Handling IMPULSE®•LINK 5 Instruction Manual March 2014 Page 9 of 38 3.1. File Tab Figure 4: The File Tab Open – Opens parameter, DataLogger, or Trend files (Alt-F-O). Close – Closes the active parameter, DataLogger, or Trend file (Alt-F-C). Recent – Displays files that have been recently accessed (Alt-F-R). This is shown by default. Print – Prints the active parameter, Events, or Trend file selected (Alt-F-P). Exit – Closes this program (Alt-F-E). NOTE: The following icons can be used to open and close files when the File tab is not active: Figure 5: Open and Close Icons Open – Opens parameter, DataLogger, or Trend files (Alt-1). Close – Closes the active parameter, DataLogger, or Trend file (Alt-2). Magnetek Material Handling IMPULSE®•LINK 5 Instruction Manual March 2014 Page 10 of 38 3.2. Parameters/DataLogger Tab The Parameter and DataLogger tabs allow the opening, closing, and printing of parameters, DataLogger files, or Trend files. The DataLogger Tab is the default tab when a DataLogger is connected. 3.2.1. Parameter Tab Figure 6: The Parameter Tab Open – Opens parameter, DataLogger, or Trend files (Alt-P-O). Close – Closes an active parameter, DataLogger, or Trend file (Alt-P-C). Print – Prints the active parameter set (Alt-P-P or Ctrl-P). Magnetek Material Handling IMPULSE®•LINK 5 Instruction Manual March 2014 Page 11 of 38 3.2.2. DataLogger Tab The DataLogger tab is used to manage DataLogger drive events and trend files as well as update DataLogger firmware. These events and trends can be viewed when the Parameters or DataLogger tab is selected. Figure 7: The DataLogger Tab and Workspace Open – Opens a parameter, Drive Event, or Trend file (Alt-D-O). Close – Closes an active parameter, Drive Events, or Trend file (Alt-D-C). Select New Trend – Opens window to select a different trend file (Alt-D-S). Print – Print the active data shown in the View Window when a trend is selected (Alt-D-P). Backup Device – Backs up data from the DLS4 to a location on the PC (determined by the user) (Alt-DB). Update Firmware – Used to update the DataLogger Series 4 firmware (Alt-D-U). Workspace – Displays data loaded when the DataLogger is connected to the PC’s USB port. Status – Displays the IMPULSE®•Link 5 status. View Window – Displays a list of parameters (shown), Drive Events, or Trend files. Magnetek Material Handling IMPULSE®•LINK 5 Instruction Manual March 2014 Page 12 of 38 3.3. Parameter File Display Parameter files (PrmSetxx.parx) can be viewed by choosing a file from the workspace tree or browsing for a parameter file stored on a PC. 3.3.1. Parameter Value Text Color Parameters may be displayed with color coding. Various colors are used to identify a condition that may require further action. The table below displays the colors used, their meanings, and their descriptions. Table 1: Parameter Value Text Color Color Blue Gray Meaning Modified Constant Read-Only Description A parameter with blue text indicates the value is different than its default setting. A parameter that is grayed-out is a parameter that cannot be modified, or the Access Level of the current parameter set is lower than what is needed for that specific parameter (i.e. changing the parameter from the drive keypad would not be allowed with the current access level). 3.4. DataLogger Parameter Files Sets The DataLogger Series 4 can store up to 11 parameter sets. These sets are stored in “slots” numbered from 0 to 10 and are located in the internal memory with the files names PrmSet00.parx to PrmSet10.parx. When the DLS4 is connected to the PC, the software will associate these parameter files with the model of drive in the Workspace. Parameter Set 00 contains the parameter file from the most recent drive the DataLogger was connected to. The name of these files can be changed in the DLS4 (see Section 10.4: Rename Parameter Data in the DataLogger Series 4 Instruction Manual) and will appear in the Workspace shown in Figure 8. Figure 8: DataLogger Parameter File Sets Magnetek Material Handling IMPULSE®•LINK 5 Instruction Manual March 2014 Page 13 of 38 3.5. Events Events are used to view Run History, Fault History, and Alarm History for a particular drive. When an event is recorded, the DLS4 will gather information about the state of the drive at the time the event was recorded. The DataLogger Series 4 can log: 5000 Run Events 400 Alarm Events 400 Fault Events Approximately 300 hours of monitor data (U01-01 – U01-12, plus up to 10 selectable monitors) 11 parameter sets The information for Runs, Alarms, and Faults can be viewed by selecting Events under the drive in the Workspace tree, as shown in Figure 9. Figure 9: Events Magnetek Material Handling IMPULSE®•LINK 5 Instruction Manual March 2014 Page 14 of 38 3.6. Runs When the DLS4 detects a run, it increments the run counter and begins to take average and peak values of the Monitors being logged. It also logs how long the run remains active. When the run has ended, this information is written to the internal memory. If the run ended due to a fault, the reference to that fault gets linked with the particular run. A reference to the last alarm (if any) that occurred during the run is also stored. The DLS4 records numerous pieces of data at the end of the run event. Each of these can be turned ON or OFF for viewing purposes. For example, when “Model” is deselected, it will not be displayed in the Events window. Table 2 shows the various data that is collected. Table 2: Run Data Name Run # Date Time Direction Duration (sec) Avg VDC Peak VDC Avg Amps Peak Amps Avg Speed Peak Speed Peak Mtr Speed1 Avg Mtr Speed1 Avg Mtr Torque1 Peak Mtr Torque1 Heatsink (°C) Last Alarm Last Fault Model Control Motion Firmware 1 Description Displays the number of runs recorded by the DLS4. Displays the date the run event ended [Day/Month/Year]. Displays the time the run event ended [Hour:Minute:Second]. Displays “FWD” or “REV”. Displays the amount of time the run command was active. Displays the average DC Bus Voltage during the run. Displays the peak DC Bus Voltage during the run. Displays the average output current to the motor. Displays the peak output current to the motor. Displays the average output frequency of the drive. Displays the peak output frequency of the drive. Displays the peak speed of the motor. Displays the average speed of the motor. Displays the average torque applied to the motor during the run. Displays the peak torque in the motor. Displays the heat sink temperature when the run event ended. Displays the last Alarm recorded. Displays the last Fault recorded. Displays the model number of the drive. Displays the Control Method (A1-02) of the drive. Displays the Motion (A1-03) of the drive. Displays the firmware (U1-14) of the drive. Only valid when the control method is Open Loop Vector for the G+ Mini, Series 4, and Series 3, or Flux Vector for the Series 4 and Series 3 drives. Magnetek Material Handling IMPULSE®•LINK 5 Instruction Manual March 2014 Page 15 of 38 3.7. Alarms If an Alarm is detected during a run, it will be logged under the Alarms tab. Each data point can be turned ON or OFF for viewing purposes. For example, when “Model” is deselected, it will not be displayed in the Events window. Table 3 shows the various data that is collected. Table 3: Alarm Data Name Alarm # Alarm Date Time Assoc. Run # Model Control Motion Firmware Description Displays the alarm number in the DLS4. Displays the name of the alarm posted at the end of the run event. Displays the date the alarm occurred [Day/Month/Year]. Displays the time the alarm occurred [Hour:Minute:Second]. Displays the associated run number that the alarm occurred in. Displays the model number of the drive. Displays the Control Method (A1-02) of the drive. Displays the Motion (A1-03) of the drive. Displays the firmware (U1-14) of the drive. Magnetek Material Handling IMPULSE®•LINK 5 Instruction Manual March 2014 Page 16 of 38 3.8. Faults If a Fault is detected during a run, it will be logged under the Faults tab. Each data point can be turned ON or OFF for viewing purposes. For example, when “Model” is deselected, it will not be displayed in the Events window. Table 4 shows the various data that is collected. Table 4: Fault Data Name Fault # Date Time Assoc. Run # Fault Fref (Hz) Fout (Hz) Iout (A) Motor Speed (Hz) Vout (VAC) DCBus (VDC) Power Out (HP) 1 T-ref (%)1 Input Terminal sts Output Terminal sts Inverter sts Elapsed Time (Hr) Heatsink (°C) Model Control Motion Firmware 1 Description Displays the number of the fault stored in the DLS4. Displays the date the fault occurred [Day/Month/Year]. Displays the time the fault occurred [Hour:Minute:Second]. Displays the associated run number that the fault occurred in. Displays the name of the fault. Displays the frequency reference (U1-01) at the time of the fault. Displays the output frequency (U1-02) at the time of the fault. Displays the output current (U1-03) at the time of the fault. Displays the motor speed at the time of the fault. Displays the output voltage (U1-04) at the time of the fault. Displays the voltage on the DC Bus at the time of the fault. Displays the output power (U1-05) at the time of the fault. Displays the torque reference (U1-09) at the time of the fault. Displays the status of the input terminals (U1-10) at the time of the fault. Displays the status of the output terminals (U1-11) at the time of the fault. Displays the status of the drive (U1-12) at the time of the fault. Displays the time since the last fault was recorded. Displays the heat sink temperature at the time of the fault. Displays the model number of the drive. Displays the Control Method (A1-02) of the drive. Displays the Motion (A1-03) of the drive. Displays the firmware (U1-14) of the drive. Only valid when the control method is Open Loop Vector for the G+ Mini, Series 4, and Series 3, or Flux Vector for the Series 4 and Series 3 drives. Magnetek Material Handling IMPULSE®•LINK 5 Instruction Manual March 2014 Page 17 of 38 3.9. Trend Data Drive status information can be charted using the Trend feature of IMPULSE®•Link 5. This data can be quickly viewed and used to analyze drive issues during operation (such as motor overload). Trend files are automatically generated on power-up, and at the start of every hour. To view a trend, leftclick on the Trend folder under the drive in question, which will open the Date dialog box. Figure 10: Trends Figure 11: Date Dialog Box Magnetek Material Handling IMPULSE®•LINK 5 Instruction Manual March 2014 Page 18 of 38 The Date dialog box is used to navigate to the time of the trend to view. Click on a date to show all trends for that day. Figure 12: Selecting the Date All the trends for this date will be shown under “Available Times” on the right. Click on the date/time to highlight the trend to view and then choose “Load”. Figure 13: Selecting the Desired Trend NOTE: This may take several seconds to open depending on the trend length. NOTE: Trends can also be found in the “Trend” folder in the DataLogger Series 4 internal memory. See the DataLogger Series 4 manual Section 4 for file format. Magnetek Material Handling IMPULSE®•LINK 5 Instruction Manual March 2014 Page 19 of 38 3.10. Trend Navigation Trend view will display both analog and digital signals, from the drive as well as signal names and ranges. These signals can be selected in the Signal Selection pane. Figure 14: Trend Navigation Overview The following sections explain the various areas of the Trend display in greater detail. 3.10.1. Trend File Information The trend file data displays information about the trend file being viewed. Figure 15: Trend File Information NOTE: The “Date” format is based on the PC’s settings. Magnetek Material Handling IMPULSE®•LINK 5 Instruction Manual March 2014 Page 20 of 38 3.10.2. Signal Name Select Analog and digital signals can be selected or deselected from the Signal Name Select pane. The following shows the default selections when a trend is first viewed. Figure 16: Signal Name Select Pane Magnetek Material Handling IMPULSE®•LINK 5 Instruction Manual March 2014 Page 21 of 38 3.10.3. Mouse Tooltips Hovering the mouse pointer over a signal in the Signal Name Select pane will display additional information about that signal, such as the monitor name or meaning, terminal number, and programmed parameter value. Figure 17: Mouse Tooltip Examples 3.10.4. Signal Names – Analog When an analog signal is selected, the trend will populate the graph with this data and display the signal name with the upper and lower limits for that monitor. The color of the name is the same as the color of the data graphed. Figure 18: Analog Signal Names Magnetek Material Handling IMPULSE®•LINK 5 Instruction Manual March 2014 Page 22 of 38 3.10.5. Signal Names – Digital When a Multi-Function Digital Input (MFDI) or Multi-Function Digital Output (MFDO) signal is selected, the trend will populate the graph and display the signal name. A one (1) or a zero (0) is used to identify whether the input/output is closed or open. The color of the name is the same as the color of the data graphed. Figure 19: Digital Signal Names 3.10.6. Time Time is displayed on the bottom in HH:MM:SS using 24 hour format. 3.10.7. Trackball The trackball displays values for each of the analog signals when the mouse pointer is hovered over the area where the analog signals are shown. The information shown are the values recorded by the DLS4 for each signal. The colors of the names are the same as the color of the signal in the graph. Figure 20: Trackball Details Magnetek Material Handling IMPULSE®•LINK 5 Instruction Manual March 2014 Page 23 of 38 3.10.8. Scrollbar Navigation IMPULSE®•Link 5 provides a proportional scrollbar to navigate through a trend file. The scrollbar is used to zoom in/out or move from the beginning/end of the trend file. 3.10.9. Sliding the Scrollbar Navigation from the beginning to the end of a trend file is done by left-clicking on the scrollbar and sliding the scrollbar left or right. Figure 21: Sliding the Scrollbar Magnetek Material Handling IMPULSE®•LINK 5 Instruction Manual March 2014 Page 24 of 38 3.10.10. Zoom Zooming in or out on a trend can be done with the scrollbar, mouse, or mouse wheel. 1. Scrollbar: Left-click on the outside edge of the scrollbar, then drag to expand or contract view. Below is an example of zooming out. The cursor turns into a double-sided arrow. Figure 22: Using the Scrollbar 2. Mouse wheel: Position the mouse over the desired area on the trend to zoom in/out from. Use the mouse wheel to zoom in or out on the trend at that position on the graph. 3. Mouse: With the mouse, left-click and hold on the desired area of the graph and then drag mouse to zoom in. Magnetek Material Handling IMPULSE®•LINK 5 Instruction Manual March 2014 Page 25 of 38 Figure 23: Zooming In via Mouse Figure 24: Final View After Zooming In via Mouse Magnetek Material Handling IMPULSE®•LINK 5 Instruction Manual March 2014 Page 26 of 38 3.10.11. Printing IMPULSE®•Link 5 can print parameter sets, event information, and trending data. 3.10.11.1 Parameter Data In order to print parameter data, go to the Parameters tab and select the parameter set to be printed from the Workspace. Figure 25: Selecting the Parameter Set Click the Print icon, which will bring up the IMPULSE®•Link 5’s print dialog. Figure 26: Print Preview of the Parameter Set Magnetek Material Handling IMPULSE®•LINK 5 Instruction Manual March 2014 Page 27 of 38 The initial “Print” data is controlled by the Parameter view. Changing the view in the Parameter tab from "All" to the desired view (parameter groups, modified parameters, etc.) will change the data available for printing. Figure 27: Selecting a Specific Parameter Group Figure 28: Print Preview of Parameter Group Data Magnetek Material Handling IMPULSE®•LINK 5 Instruction Manual March 2014 Page 28 of 38 To print up a few select parameters, shift-click the desired block of rows to print, or ctrl-click to select noncontiguous rows. If a parameter was selected in error, simply ctrl-click that parameter to remove it from the selected parameters (it should no longer be highlighted). Then click on the Print icon to open up the print dialog and click on the "Selected" option before printing. Figure 29: Highlighting Select Parameters Figure 30: Print Selected 3.10.11.2 Events In order to print Event data, go to the DataLogger tab and select the Event set to be printed from the workspace. Figure 31: Selecting an Event Magnetek Material Handling IMPULSE®•LINK 5 Instruction Manual March 2014 Page 29 of 38 Click the Print icon, which will bring up the IMPULSE®•Link 5’s print dialog. Figure 32: Print Preview of the Event Users can use the pull-down menu in the print dialog to specify which data to print: Events (which will print the entire series of Runs, Alarms, and Faults), Runs, Alarms, and Faults. Figure 33: Selecting the Event Data Magnetek Material Handling IMPULSE®•LINK 5 Instruction Manual March 2014 Page 30 of 38 To select particular data rows, shift-click the desired block of rows to print, or ctrl-click to select noncontiguous rows. If a parameter was selected in error, simply ctrl-click that parameter to remove it from the selected parameters (it should no longer be highlighted). This can be done in any combination of Run, Alarm, and Fault rows - simply select the required data in the Runs tab, and then click on the Alarms tab and/or Faults tab and repeat as necessary. Then click on the Print icon to open up the print dialog and click on the "Selected" option before printing. Figure 34: Selecting Specific Runs, Alarms, and/or Faults Figure 35: Print Preview of Selected Data NOTE: The selection options for the Events under the DataLogger tab do not control what will print. Magnetek Material Handling IMPULSE®•LINK 5 Instruction Manual March 2014 Page 31 of 38 3.10.11.3 Trends In order to print Trend data, go to the DataLogger tab and select the Trend to be printed from the workspace. Figure 36: Selecting the Trend Click the Print icon, which will bring up the IMPULSE®•Link 5’s print dialog. Figure 37: Printing the Trend The printed data is based on the view in the main window, so be sure to adjust the view as necessary before printing (zooming on the desired data, adding and removing signals as necessary, etc.). Magnetek Material Handling IMPULSE®•LINK 5 Instruction Manual March 2014 Page 32 of 38 3.11. Update Firmware IMPULSE®•Link 5 can update the firmware in the DLS4 to incorporate any new features and enhancements to the DLS4. Refer to Chapter 4: DataLogger Maintenance for more details. 3.12. Help Tab The Help tab contains information about IMPULSE®•Link 5, as well as resources for the user. Figure 38: The Help Tab About - Launches the "IMPULSE®•Link 5" screen, which includes information regarding the version, the build, and the copyright date. Figure 39: About IMPULSE®•Link 5 Help - Launches the IMPULSE®•Link Help File, which contains information about communication profiles, troubleshooting codes, an index of errors, faults, and alarms, etc. Magnetek Material Handling IMPULSE®•LINK 5 Instruction Manual March 2014 Page 33 of 38 Figure 40: IMPULSE®•Link Help File – Main Page User Manual - Downloads the IMPULSE®•Link 5 manual from the internet, provided the PC is connected. Drive Manuals - Launches the PC's default browser (or opens a new tab) and opens Magnetek Material Handling's "Product Manuals" webpage (http://www.magnetekmh.com/Material%20Handling/Product%20Manuals.aspx), provided the PC is connected to the internet. Magnetek Website - Launches the PC's default browser (or opens a new tab) and opens Magnetek Material Handling's main website (http://www.magnetekmh.com/), provided the PC is connected to the internet. Contact Us - Creates a new email message, using the PC's default email client, which is addressed to the IMPULSE®•Link 5 Feedback team. 4. DataLogger Maintenance 4.1. Updating DataLogger Firmware IMPULSE®•Link 5 can update the firmware in the DLS4 to incorporate any new features and enhancements to the DLS4. When the IMPULSE®•Link 5 software is updated, the newest version of firmware for the DLS4 will be automatically installed on PC. If the IMPULSE®•Link 5 cannot download the newest version of the firmware for some reason (if the PC is not connected to the internet, for example), the firmware may be manually downloaded from the Magnetek Material Handling website at http://www.magnetek.com/en/Material%20Handling/Downloads.aspx. Magnetek Material Handling IMPULSE®•LINK 5 Instruction Manual March 2014 Page 34 of 38 Once the firmware is saved to the PC, do the following: Connect the DataLogger Series 4 to the PC using the 6’ USB cable. Press the DLS4 keypad’s F1 and F2 keys simultaneously until the “READY FOR UPDATE” message appears. Figure 41: DataLogger Series 4 Screen – Ready for Update Go to the DataLogger tab. Click on the “Update Firmware” icon in IMPULSE®•Link 5. Figure 42: The Update Firmware Icon After the software is updated, the firmware revision will be displayed on the main screen of the DLS4. Figure 43: DataLogger Series 4 Main Screen Magnetek Material Handling IMPULSE®•LINK 5 Instruction Manual March 2014 Page 35 of 38 5. Software Updates Additional features and enhancements may be released without notice. If the PC does not have internet access, the software may be obtained from the Magnetek Material Handling website at http://www.magnetek.com/en/Material%20Handling/Downloads.aspx and then uploaded to the PC (without internet connection) via a mass storage device. If the PC does have internet access, the IMPULSE®•Link 5 software will automatically check for updates when launched. If the PC is connected to the internet, IMPULSE®•Link 5 will prompt the user to install the update. If the user chooses to install the update immediately, the Web Update Check Client will launch. Magnetek Material Handling IMPULSE®•LINK 5 Instruction Manual March 2014 Page 36 of 38 Magnetek Material Handling IMPULSE®•LINK 5 Instruction Manual March 2014 Page 37 of 38 Once IMPULSE®•Link 5 is done installing the update, it will automatically re-launch. Magnetek Material Handling IMPULSE®•LINK 5 Instruction Manual March 2014 Page 38 of 38