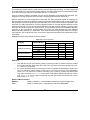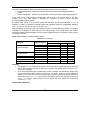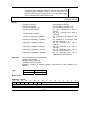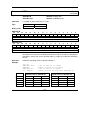
1
MotionChip™ II TML Programming User Manual Preliminary © Technosoft 2006 TECHNOSOFT MotionChip™ II TML Programming P091.055.MCII.TML.UM.0806 Technosoft S.A. Buchaux 38 CH-2022 BEVAIX Switzerland Tel.: +41 (0) 32 732 5500 Fax: +41 (0) 32 732 5504 [email protected] www.technosoftmotion.com/ Read This First Whilst Technosoft believes that the information and guidance given in this manual is correct, all parties must rely upon their own skill and judgment when making use of it. Technosoft does not assume any liability to anyone for any loss or damage caused by any error or omission in the work, whether such error or omission is the result of negligence or any other cause. Any and all such liability is disclaimed. All rights reserved. No part or parts of this document may be reproduced or transmitted in any form or by any means, electrical or mechanical including photocopying, recording or by any information-retrieval system without permission in writing from Technosoft S.A. About This Manual This book presents the Technosoft Motion Language (in short TML) and how to use it for the programming of drives built around MotionChip II. The book includes the following information: • • • • • TML basic concepts Motion programming Functional description of the TML instructions Communication channels and protocols Detailed description of each TML instruction including: syntax, binary code and examples. Scope of This Manual The TML programming of drives based on MotionChip II involves 2 steps: Step 1 - Parameters setup Step 2 - Motion programming The goal of first step is to set the TML parameters in accordance with the user application data. This step is described in the user manual MotionChip II Configuration Setup. This manual describes the second step – Motion programming. Both steps can be performed using IPM Motion Studio – a development platform offering easyto-use graphical programming for devices based on MotionChip II. The output from IPM Motion Studio is a TML program, which can be downloaded into the non-volatile memory of the drive and can be started automatically after power on. Depending on your application configuration, you have the following options for splitting the tasks between your host and your drive based on MotionChip II: 1. Host control is absent. The complete motion application is programmed in the drive using TML 2. Host control is done via I/O handshake. The host commands are set via digital or analogue signals. The drive answers also using digital signals 3. Minimal host control via a communication channel. The host control is reduced at calling motion functions implemented in the drive non-volatile memory and requesting © Technosoft 2006 III MotionChip II TML Programming status information. The motion functions from the drive memory can be developed separately using IPM Motion Studio 4. Extended host control via a communication channel. The host sends all the TML commands needed to program the motion, but does not perform the drive setup. This is done via a TML program executed automatically after power-on. The TML program can be developed using IPM Motion Studio. 5. Full host control via a communication channel. In this case the host performs both the drive setup and the motion programming. There is no TML program stored in the drive. You need this manual only if you plan to use options 4 or 5. The options 1 to 3 can be handled using IPM Motion Studio platform and its user-friendly, graphical programming. Remarks: • • The 3rd option requires the host to handle a limited number of TML instructions, typically just for calling functions and asking/getting status data. You can quickly find the code of these instructions and how to pack them into communication messages by using the IPM Motion Studio tool Binary Code Viewer. Option 5 requires a good understanding of how to determine the TML parameters values. This information is presented in the user manual MotionChip II Configuration Setup. Notational Conventions This document uses the following conventions: • TML – Technosoft Motion Language • Program examples are shown with a special font. Here is an example: ENIO#36; //Configure dual function pin as I/O line 36 user_1 = IN#36; //Read I/O line 36 data into variable user_1 Related Documentation from Technosoft MotionChip II Configuration Setup (part no. P091.055.MCII.STP.UM.xxxx) describes the MotionChip II operation and how to setup its registers and parameters starting from the user application data. This is a technical reference manual for all the MotionChip II registers, parameters and variables. MotionChip II Data sheet (part no. P091.055. MCII-QFP100.DST.xxxx) presents the MotionChip II features and specifications, and how to interface it with typical external devices IPM Motion Studio User Manual (part no. P091.088.E075.UM.xxxx) describes how to use the IPM Motion Studio – the complete development platform for MotionChip II including: motion system setup & tuning wizard, motion sequence programming wizard, testing and debugging tools like: data logging, watch, control panels, on-line viewers of TML registers, parameters and variables, etc. © Technosoft 2006 IV MotionChip II TML Programming If you Need Assistance … If you want to … Contact Technosoft at … Visit Technosoft online World Wide Web: http://www.technosoftmotion.com/ Receive general information or assistance World Wide Web: http://www.technosoftmotion.com/ Email: [email protected] Ask questions about product operation or report suspected problems Fax: (41) 32 732 55 04 Email: [email protected] Make suggestions about or report errors in documentation Mail: Technosoft SA Buchaux 38 CH 2022 Bevaix-NE Switzerland Trademarks MotionChip is a trademark of Technosoft SA. © Technosoft 2006 V MotionChip II TML Programming This page is empty © Technosoft 2006 VI MotionChip II TML Programming Contents 1. TML Basic Concepts ........................................................................................................... 1 TML Overview............................................................................................................................... 1 TML Environment ......................................................................................................................... 1 Program Execution ....................................................................................................................... 2 TML Program Structure ................................................................................................................ 3 TML Instruction Coding................................................................................................................. 5 TML Data ...................................................................................................................................... 5 1.1.1. TML Registers................................................................................................................. 7 1.1.2. TML Parameters ............................................................................................................. 8 1.1.3. TML Variables ................................................................................................................. 9 1.1.4. User variables ................................................................................................................. 9 TML Development tools.............................................................................................................. 10 Memory Map ............................................................................................................................... 10 AUTORUN mode ........................................................................................................................ 14 2. TML description................................................................................................................. 19 Motion programming and control................................................................................................ 19 2.1.1. Position Profile Modes .................................................................................................. 20 2.1.2. Speed Profile Modes..................................................................................................... 25 2.1.3. Position/Speed/Torque/Voltage Contouring Modes ..................................................... 26 2.1.4. External Position/Speed/Torque/Voltage Modes .......................................................... 30 2.1.5. Position/Speed Pulse & Direction Modes ..................................................................... 33 2.1.6. Electronic Gearing Modes............................................................................................. 35 2.1.7. Electronic Camming Modes .......................................................................................... 40 2.1.8. Motor Commands. Stop Modes .................................................................................... 46 2.1.9. Torque/Voltage Test Modes.......................................................................................... 50 2.1.10. Motion Mode Changing............................................................................................... 51 Program flow control................................................................................................................... 53 2.1.11. Events ......................................................................................................................... 53 2.1.12. GOTO, CALL............................................................................................................... 59 2.1.13. Interrupts ..................................................................................................................... 60 I/O Programming ........................................................................................................................ 63 2.1.14. General I/O.................................................................................................................. 63 2.1.15. Captures...................................................................................................................... 64 2.1.16. Limit switches.............................................................................................................. 65 © Technosoft 2006 VII MotionChip II TML Programming Assignment & Data Transfer....................................................................................................... 67 2.1.17. Setup 16-bit variable ................................................................................................... 67 2.1.18. Setup 32-bit variable ................................................................................................... 68 Arithmetic & Logic Operations .................................................................................................... 72 Multi-axis control ......................................................................................................................... 75 2.1.19. Axis ID. Group ID ........................................................................................................ 75 2.1.20. Data transfers between axes ...................................................................................... 75 2.1.21. Remote control............................................................................................................ 77 Miscellaneous commands .......................................................................................................... 78 Internal units and scaling factors ................................................................................................ 79 3. Communication Channels and Protocols ....................................................................... 85 Communication channels ........................................................................................................... 85 Communication protocols ........................................................................................................... 86 3.1.1. Axis Identification in a Multiple-axis Network................................................................ 86 3.1.2. Serial communication protocol...................................................................................... 89 3.1.3. CAN-bus Communication Protocol ............................................................................... 94 4. TML instruction set ........................................................................................................... 99 TML instruction set description................................................................................................. 106 © Technosoft 2006 VIII MotionChip II TML Programming Figures Figure 1.1 Typical structure of a TML Program 4 Figure 1.2. Memory map MotionChip II based on TMS320LF2407A 13 Figure 1.3. Memory map MotionChip II based on TMS320LF2406 14 Figure 2.1. Position profile parameters 20 Figure 2.2. Position profile. On-the-fly change of motion parameters 22 Figure 2.3. Position profile. Automatic elimination of round-off errors 24 Figure 2.4. Speed profile parameters 25 Figure 2.5. Reference generation in contouring modes 27 Figure 2.6. Reference profile in test modes 50 Figure 2.7. Electrical angle setup in test modes with brushless AC motors 51 Figure 3.1. Serial RS-232 communication between a host and the MotionChip II 85 Figure 3.2. Multi-drop network using serial RS-485 communication 85 Figure 3.3. Multi-drop network using CAN-bus communication 86 Figure 3.4. Multi-drop network using CAN-bus communication with host connected through RS86 232 to an axis used as communication relay Figure 3.5. Message Structure 88 Figure 3.6. Serial communication message format 89 Figure 3.7. Serial message contents when TML instruction “kpp = 5” is sent 90 Figure 3.8. Serial message contents for “Give Me Data” value of kpp 91 Figure 3.9. Serial message contents for “Take Data” value of kpp 91 Figure 3.10. CAN message structure 94 Figure 3.11. CAN message contents when TML instruction “kpp = 0x1234” is sent 95 Figure 3.12. CAN message contents when TML instruction “?POSERR” is sent 96 Figure 3.13. CAN message contents for “Take Data” value of POSERR 97 © Technosoft 2006 IX MotionChip II TML Programming Tables Table 1.1. Type of TML commands ................................................................................................. 2 Table 1.2. TML data type ................................................................................................................. 9 Table 2.1. Motion modes................................................................................................................ 19 Table 2.2. Position Profile - Motion Modes .................................................................................... 20 Table 2.3. Round-off error example. Options and expected errors. .............................................. 23 Table 2.4. Speed Profile - Motion Modes....................................................................................... 25 Table 2.5. Contouring Modes ......................................................................................................... 28 Table 2.6. External Modes ............................................................................................................. 31 Table 2.7. Pulse & Direction Modes............................................................................................... 34 Table 2.8. Electronic Gearing Slave - Motion Modes..................................................................... 37 Table 2.9. Electronic Cam Slave - Motion Modes .......................................................................... 43 Table 2.10. Stop Modes ................................................................................................................. 48 Table 2.11. Programmable Event Triggers .................................................................................... 53 Table 2.12. TML Interrupt Conditions............................................................................................. 61 Table 3.1. Axis ID values................................................................................................................ 87 Table 3.2. Definition of the groups ................................................................................................. 88 Table 4.1. Motion mode setting group............................................................................................ 99 Table 4.2. Event group ................................................................................................................. 100 Table 4.3. Program flow (decision) group .................................................................................... 101 Table 4.4. I/O group ..................................................................................................................... 101 Table 4.5. Assignment group ....................................................................................................... 102 Table 4.6. Arithmetic & Logic group ............................................................................................. 103 Table 4.7. Configuration and Command group ............................................................................ 103 Table 4.8. Communication & Multiple axis group......................................................................... 104 Table 4.9. Miscellaneous group ................................................................................................... 105 Table 4.10. On line group............................................................................................................. 105 Table 4.11. TML Instructions Code Symbols ............................................................................... 106 © Technosoft 2006 X MotionChip II TML Programming 1. TML Basic Concepts 1.1 TML Overview The Technosoft Motion Language (TML) is a high-level language allowing you to: • • Setup a drive built with MotionChip II for a given application Program and execute motion sequences The setup part consists in assigning the right values for the TML registers and parameters. Through this process you can: • • • Describe your application configuration (as motor and sensors type) Select specific operation settings (as motor start mode, PWM mode, sampling rates, etc.) Setup the controllers’ parameters (current, speed, position), etc. The next part is for motion programming. Here the TML allows you to: • • • • Set various motion modes (profiles, contouring, electronic gearing or camming, etc.) Change the motion modes and/or the motion parameters on-the-fly Execute homing sequences Control the program flow through: o Conditional jumps and calls of TML functions o TML interrupts generated on pre-defined or programmable conditions (protections triggered, detection of transitions on limit switch or capture inputs, etc.) o Waits for programmed events to occur • • • • • Handle digital I/O and analogue input signals Execute arithmetic and logic operations Perform data transfers between axes Control motion of an axis from another one via motion commands sent between axes Send commands to a group of axes (multicast). This includes the possibility to start simultaneously motion sequences on all the axes from the group Due to a powerful instruction set, the motion programming in TML is quick and easy even for complex motion applications. The result is a high-level motor-independent program which once conceived may be used in other applications too. 1.2 TML Environment The TML environment includes three basic components: 1. “TML processor” 2. Trajectory generator 3. Motor control kernel The software-implemented “TML processor” represents the core of the TML environment. It decodes and executes the TML commands. Like any processor, it includes specific elements as program counter, stack, ALU, interrupt management and registers. © Technosoft 2006 1 MotionChip II TML Programming The trajectory generator computes the position, speed, torque or voltage reference at each sampling step, depending on the selected motion mode. The motor-control kernel implements the control loops including: the acquisition of the feedback sensors, the controllers, the PWM commands, the protections, etc. When the “motion processor” executes a motion command, it translates them into actions upon the trajectory generator and/or the motor control kernel. 1.3 Program Execution The TML programs are executed sequentially, one instruction after the other. A 16-bit instruction pointer (IP) controls the program flow. As the binary code of a TML instruction may have up to 5 words, during its execution the IP is increased accordingly. When the execution of a TML instruction ends, the IP always points to the next TML instruction, or more exactly to the first word of its binary code. The sequential execution may be interrupted by one of the following causes: • • • • • • • A TML command received through a communication channel (on-line commands); A branch to the interrupt service routine (ISR) when a TML interrupt occurs; The need to send the master position to the slave axes when the current axis is set as master for electronic gearing or camming A GOTO or CALL instruction; A return from a TML function – RET or from a TML interrupt – RETI; During the execution of the instructions: WAIT! (wait event), SEG (new contour segment) and data transfers between axes of type local_variable = [x]remote_variable, which all keep the IP unchanged (i.e. loop on the same instruction) until a specific condition is achieved After execution of the END instruction. The on-line commands have the highest priority and act like interrupts: when an on-line command is received through any communication channel, it starts to be executed immediately after the current TML instruction is completed. If an on-line command is received during a wait loop, e.g. when WAIT! or SEG commands are processed, the wait loop is temporary suspended, to permit the execution of the on-line command. The TML works with 3 types of commands, presented in Table 1.1. Table 1.1 Type of TML commands TML Command Type Immediate Sequential On-line © Technosoft 2006 Execution From a TML program Send via communication √ √ - √ √ 2 MotionChip II TML Programming The immediate commands may be send via a communication channel, or can reside a TML program. These commands don’t require any wait loops to complete. Their execution is straightforward and can’t be interrupted by other TML commands. The sequential commands require a wait loop to complete i.e. will not permit IP to advance until the wait condition becomes true. In this category enter commands like: WAIT!; // Wait a programmed event to occur SEG Time, Increment; // Set a contour segment with parameters Time and Increment to be executed when the previous one ends local_variable = [x]remote_variable; from axis x and put it in local_variable // Get value of remote_variable The sequential commands can reside only in a TML program saved in the local memory. Remark: If a sequential command is sent via a communication channel, it is immediately executed as if the wait loop condition is always true. The on-line commands may be sent only via a communication channel. These commands can’t be included in a TML program. The on-line commands do not have an associated mnemonic and syntax rules as they are do not need to be recognized by the TML compiler. Remark: Some of the on-line commands are implemented in debugging tools like the Command Interpreter from IPM Motion Studio, which was specifically designed to allow sending commands via a communication channel. In this manual, these commands are presented with a “mnemonic” like that used in the Command Interpreter. 1.4 TML Program Structure The main section of a TML program starts with the instruction BEGIN and ends with the instruction END. It is divided into two parts: • • Setup part Motion programming part The setup part starts after BEGIN and lasts until the ENDINIT instruction, meaning “END of INITitialization”. This part of the TML program consists mainly of assignment instructions, which shall set the TML registers and the TML parameters in accordance with your application data. When the ENDINIT command is executed, key features of the TML environment are initialized according with the setup data. After the ENDINIT execution, the basic configuration involving the motor and sensors types or the sampling rates, cannot be changed unless a reset is performed. Remark: The MotionChip II Configuration Setup user manual specifies which TML parameters may not change after execution of the ENDINIT instruction The motion programming part starts after the ENDINIT instruction until the END instruction. All the TML programs (the main section) should end with the TML instruction END. When END instruction is encountered, the sequential execution of a TML program is stopped. © Technosoft 2006 3 MotionChip II TML Programming Apart from the main section, a TML program also includes the TML interrupt vectors table, the interrupt service routines (ISRs) for the TML interrupts and the TML functions. A typical structure for a TML program is presented in Figure 1.1 BEGIN; ... // TML program start // Setup part of the main section ... ENDINIT; ... // end of initialization // Motion programming part of the main section ... END; // end of the main section InterruptTable: // start of the interrupt vectors table @Int0_Axis_disable_ISR; @Int1_PDPINT_ISR; @Int2_Software_Protection_ISR; @Int3_Control_Error_ISR; @Int4_Communication_Error_ISR; @Int5_Wrap_Around_ISR; @Int6_Limit_Switch_Positive_ISR; @Int7_Limit_Switch_Negative_ISR; @Int8_Capture_ISR; @Int9_Motion_Complete_ISR; @Int10_Update_Contour_Segment_ISR; @Int11_Event_Reach_ISR; Int0_Axis_disable_ISR: // Int0_Axis_disable_ISR body ... RETI; // RETurn from TML ISR ... Int11_Event_Reach_ISR: // Int11_Event_Reach_ISR body ... RETI; // RETurn from TML ISR Function1: // Start of the first TML function named Function1 ... RET; // RETurn from TML function named Function 1 ... FunctionX: // Start of the last TML function named FunctionX ... RET; // RETurn from the last TML function named Function X Figure 1.1 Typical structure of a TML Program © Technosoft 2006 4 MotionChip II TML Programming 1.5 TML Instruction Coding The TML instruction code consists of 1 to 5, 16-bit words. The first word is the operation code. The rest of words (if present) represent the instruction data words. The operation code is divided into two fields: Bits 15-9 represent the code for the operation category. For example all TML instructions that perform addition of two integer variables share the same operation category code. The remaining bits 8-0 represent the operand ID that is specific for each instruction. Operation Code Data (1) … Data (4) Operation Code Structure Operation Category Operand ID 15 ……………………9 8 ……………………….. 0 1.6 TML Data The TML works with the following categories of data: • TML registers • TML parameters • TML variables • User variables All TML data are identified by their name. The names of the TML registers, parameters or variables are predefined and do not require to be declared. The names of the user variables are at your choice. You need to declare the user variables before using them. The TML uses the following data types: • int 16-bit signed integer • • uint fixed 16-bit unsigned integer 32-bit fixed-point data with the 16MSB for the integer part and the 16LSB for the factionary part. • long 32-bit signed integer • ulong 32-bit unsigned integer The data type uint or ulong are reserved for the TML predefined data. The user-defined variables are always signed. Hence you may declare them of type: int, fixed or long. Remark: An unsigned TML data means that in the MotionChip II firmware its value is interpreted as unsigned. Typical examples: register values, time-related variables, protection limits for signals that may have only positive values like temperature or supply voltage, etc. However, the same © Technosoft 2006 5 MotionChip II TML Programming data will interpreted as signed if it is used in a TML instruction whose operands are treated as signed values. Each TML data has an associated address. This represents the address of the data memory location where the TML data exists. In TML the data components may be addressed in 2 ways: • direct, using their name in the TML instruction mnemonic Example: CPOS = 2000; // write 2000 in CPOS parameter (command position) • indirect, using a pointer variable. The pointer value is the address of the data component to work with Example: user_var = 0x29E; // write hexadecimal value 0x29E representing CPOS address in // the user-defined pointer variable user_var (user_var),dm = 2000; // write 2000 in the data memory address pointed by // user_var i.e. in the CPOS parameter Remark: direct addressing may be used with all TML data having addresses between 0x200 and 0x3FF. This covers most of the TML data including the user-defined variables. There are however some TML data with extended addresses placed outside this range typically between 0x800 and 0x9FF. These variables shall be addressed either using the indirect addressing presented above or by using another direct addressing mode specifically foreseen for writing values in the variables with extended addresses: • direct with extended address, using the TML data name Example: CPOS,dm = 2000; // write 2000 in CPOS using direct mode with extended address In the TML instructions the operands (variables) are grouped into 2 categories: • V16. In this category enter all the 16-bit data from all the categories: TML registers, TML parameters, TML variables, and user parameters. From the execution point of view, the TML makes no difference between them • V32. In this category enter all the 32-bit data either long or fixed from all the categories: TML registers, TML parameters, TML variables, and user parameters. From the execution point of view, the TML makes no difference between them Remarks: • It is possible to address only the high or low part of a 32-bit data, using the suffix (H) or (L) after the variable name. Examples: CPOS(L) = 0x4321; // write hexadecimal value 0x4321 in low part of CPOS CPOS(H) = 0x8765; // write hexadecimal value 0x8765 in high part of CPOS // following the last 2 commands, CPOS = 0x87654321 © Technosoft 2006 6 MotionChip II TML Programming • • The TML compiler always checks the data type. It returns an error if an operand has an incompatible data type or if the operands are not of the same type A write operation using indirect addressing is performed on one or two words function of the data type. If the data is a 16-bit integer, the write is done at the specified address. If the data is fixed or long the write is performed at the specified address and the next one. A fixed data is recognized by the presence of the do, for example: 2. or 1.5. A long variable is automatically recognized when it’s size is outside the 16-bit integer range or in case of smaller values by the presence of the suffix L, for example: 200L or –1L. Examples: user_var = 0x29E; // write CPOS address in pointer variable user_var (user_var),dm = 1000000; // write 1000000 (0xF4240) in the CPOS parameter i.e // 0x4240 at address 0x29E and 0xF at next address 0x29F (user_var),dm = -1;// write -1 (0xFFFF) in CPOS(L). CPOS(H) remains unchanged (user_var),dm = -1L;// write –1 seen as a long variable (0xFFFFFFFF) in CPOS i.e. // CPOS(L) = 0xFFFF and CPOS(H) = 0xFFFF user_var = 0x2A0; // write CSPD address in pointer variable user_var (user_var),dm = 1.5; // write 1.5 (0x18000) in the CSPD parameter i.e // 0x8000 at address 0x2A0 and 0x1 at next address 0x2A1 • In an indirect addressing, if the pointer variable if followed by + sign, it is automatically incremented by 1 or 2 depending on the data type: 1 for integer, 2 for fixed or long data. Examples: user_var = 0x29E; // write CPOS address in pointer variable user_var (user_var+),dm = 1000L; // write 1000 seen as long in CPOS, then increment // user_var by 2 (user_var+),dm = 1000; // write 1000 seen as int at address 0x29A (0x29E+2) , // then increment user_var by 1 1.6.1 TML Registers There are 3 categories of TML registers: • • • Configuration registers Command registers Status registers The configuration registers contain essential configuration information like motor and sensors type, or basic operation settings like PWM mode, motor start method, etc. The configuration registers must be set up during the setup part before the ENDINIT instruction The command registers hold configuration settings that can be changed during motion. These settings refer to the activation/deactivation of software protections, to the use of TML interrupts and to communication options. © Technosoft 2006 7 MotionChip II TML Programming The status registers provide information about: communication, active motion mode and control loops, system protections, TML interrupts. The status registers can be used to detect events and to make decisions in a TML program. Configuration registers (R/W): SCR – System Configuration Register. It’s used to define the basic application configuration: motor and sensors types, presence of brake circuit. OSR – Operating Settings Register. Used to define specific system operating settings, as: current offset detection mode, Brushless AC motor start procedure, PWM special features. Command registers (R/W): CCR – Communication Control Register. Contains settings for SPI. ICR – Interrupt Control Register. Used to disable/enable TML interrupts. PCR.5-0 – Protections Control Register. Used to activate different protections in the system, as: 2 maximum current, I t, over- and under-voltage and over-temperature. Status registers (RO): AAR - Axis Address Register. Keeps the Axis ID and the group ID. CBR – CAN Baud rate Register. Keeps the current settings for CAN-bus baud-rate. CER – Communication Error Register. Contains error flags for the communication channels. CSR – Communication Status Register. Contains status flags for the communication channels. ISR - Interrupt Status Register. Contains interrupt flags set by the TML interrupt conditions. MCR – Motion Command Register. Contains information about the motion modes: reference mode, active control loops, positioning type - absolute or relative, etc. MSR – Motion Status Register. It’s used internally by the TML kernel; the register bits give indications about motion progress and specific motion events as software protections, control error, wrap-around, limit switches, captures, contour segments, events, axis status, etc. PCR.13-8 - Protections Control Register. Used to examine the status of different protections in 2 the system, as: over-current, I t, over- and under-voltage and TEMP1, TEMP2 inputs over limits. The TML registers have reserved mnemonics, but no especially dedicated instructions. Hence, in a TML program, registers are treated like any other TML parameter or variable. The configuration and command registers can be read or written. The status registers can only be read. 1.6.2 TML Parameters The TML parameters allow you to setup the parameters of the TML environment according with your application data. Though most of the TML parameters have their own address, there are some that share the same memory address. They are used in application configurations that exclude each other, and thus are not needed at the same time. © Technosoft 2006 8 MotionChip II TML Programming Some TML parameters must be setup during the initialization phase. They are used to define the real-time kernel, including the PWM frequency and the control loops sampling periods, and should not be changed after the execution of the ENDINIT command. The other parameters can be initialized, used and changed any time, before or after the ENDINIT command. 1.6.3 TML Variables The TML variables provide you status information about the TML environment like the motor position, speed and current, the position, speed and current commands, etc. These values may be used to take decisions in the motion program or for analysis and debug. The TML variables are read-only (RO). Modifying their value during motion execution may cause an improper operation of the motion system. There are however, specific situations when some TML variables may also be written (R/W variables). Most of the TML variables are internally initialized after power-on, or during the setup phase at the execution of the ENDINIT command. Activating the on-chip logger module, real-time data tracking can also be implemented for any of these variables. 1.6.4 User variables Besides the TML pre-defined variables, you can also define your own user variables. You can use your variables in any TML instruction accepting variables of the same type. The user variables type can be: integer, fixed (point) or long (integer) (see Table 1.2). Table 1.2. TML data type Type Int Format Signed integer Representation 16 bits Long Signed long integer 32 bits Fixed (Integer part).(fractional part ) 32 bits Range -32768 ¸ 32767 (0x8000 ¸ 0x7FFF) -2147483648 ¸ 2147483647 (0x80000000 ¸ 0x7FFFFFFF) -32768.999969 ¸ 32767.999969 (0xFFFF.FFFF ¸ 0x7FFF.FFFF) The address of the user variables is automatically set in order of declaration starting with 0x03B0. First integer variable takes address 0x3B0, next one 0x3B1, etc. An int variable takes one memory location. A long or fixed variable takes 2 consecutive memory locations. In this case the variable address is the lowerst one. Example: int user_var1; long user_var2; fixed user_var3; int user_var4; // user_var1 address is 0x3B0 // user_var2 address is 0x3B1 // user_var3 address is 0c3B3 // user_var4 address is 0x3B5 Remark: you have to declare a user variable before using it first time. © Technosoft 2006 9 MotionChip II TML Programming 1.7 TML Development tools As mentioned earlier, a TML program has 2 parts: the setup and the motion programming. You should always start with the setup part. This consists in assigning the right values for the TML registers and parameters according with your application data: motor and sensors type, operating conditions, controller settings, etc. Once the setup process is completed, you can start programming your application motion. You can do these steps either by writing directly the TML program by using a higher-level tool like IPM Motion Studio which generates automatically the TML program starting from your input data. IPM Motion Studio is an integrated development platform specifically designed to help you develop and test motion applications in TML. It comes with a user-friendly interface allowing you to introduce your motor data, select different operation options for the drive and perform a series of validation tests including identification of the motor parameters, operation conditions and the controllers tuning. Based on this information the IPM Motion Studio automatically generates the TML instructions needed to set the right values into the TML registers and parameters. For the motion programming, IPM Motion Studio offers the Motion wizard – a collection of userfriendly dialogues through which you can quickly define your motion application. The Motion wizard automatically generates TML source code (TML instructions) based on your inputs. IPM Motion Studio is a complete development platform. Embedded code development tools allow you to further edit or directly compile, link and generate executable code to be downloaded to the drive. Finally, advanced graphics tools – like data logger, control panel and view/watch of TML parameters, registers and memory – can be used to analyze the behavior of the motion system. 1.8 Memory Map The MotionChip II works with 2 separate address spaces: one for TML programs and the other for data memory. Each space accommodates a total of 64K 16-bit word. The first 16K of the TML program space (0 to 3FFFh) are reserved and can’t be used. The next 16K, from 4000h to 7FFFh are mapped to a serial SPI-connected EEROM with the maximum size 32K bytes (seen as 16K 16-bit words). This space can be used to store TML programs, cam tables or other user data in a non-volatile memory. The recommended way to organize the EEPROM memory space is: • • • TML program at the beginning of the EEPROM memory, starting with first address 4000h. Cam tables, after the TML program Other data until the end of the EEPROM Remarks: • If the MotionChip II is set in AUTORUN mode, it checks the contents of the first EEPROM location at address 4000h. If the data read matches with the binary code of the TML instruction BEGIN (the first instruction in a TML program), then the instruction pointer IP is set to 4000h and the TML program from the EEPROM is executed © Technosoft 2006 10 MotionChip II TML Programming • The overall dimension of a TML program includes apart from the main section, the TML interrupt vectors table, the interrupt service routines (ISRs) for the TML interrupts and the TML functions • IPM Motion Studio, uses the last 68 words of the EEPROM space/read some data about the drive like: product ID, firmware ID, etc. The next 2K of the TML program space from 8000h to 87FFh represents the Motion Chip II internal SRAM memory. From it, the first 200h, from 8000h to 81FFh are reserved for the internal use. The rest from 8200h to 87FFh may be used to temporary store TML programs. The MotionChip II firmware can be programmed on two versions of DSP made by Texas Instruments: TMS320LF2407A or TMS320LF2406A. The TMS320LF2406A has no external interface, hence only the internal SRAM may be used as TML program memory in the address range 8200h to 87FFh. The remaining TML program memory space from 8800h to FFFFh is invalid. The TMS320LF2407A offers the possibility to connect an external SRAM, which can be mapped in the last 32K more exactly in the address range 8800h to FFFFh (all TML program memory accesses in the address range 0x8000 to 0x87FF are using the internal SRAM). By connecting a 32Kx16 external SRAM, the total TML program space in SRAM memory becomes from 8200h to FFFFh. The data memory space is used to store the TML data (registers, parameters, variables), the cam tables during runtime (after being copied from the EEPROM memory) and for data acquisitions. The TML data are stored in reserved area, while the others are using the same Motion Chip II internal SRAM memory. In the data memory space, the internal SRAM is mapped at a different address range 800h to FFFh From this the first 200h, from 800h to 9FFh (corresponding to 8000h to 81FFh in TML program memory space) are reserved for the internal use. The rest from A00h to FFFh corresponding to 8200h to 87FFh in the TML program memory space) may be used for data acquisitions and/or to store cam tables during runtime. As this space is available in both the TML program space and the data space it is the user responsibility to decide how to split it between the two and to avoid overlapping them. In the case of TMS320LF2407A, if an external SRAM is connected it can be mapped both on the TML program space and in the data space. Typically, the external SRAM is mapped at the same addresses in both the TML program and the data space. Therefore the data memory extends with the external SRAM space from 0x8000 to 0xFFFF. The recommended way to organize the SRAM memory (both for TML programs and data) is: A) For MotionChip II based on TMS320LF2406A: • Data acquisitions at the beginning of the internal SRAM memory, starting from address A00h • Cam tables, only if used, after the data acquisitions until the end of the internal SRAM. Typically, you should start by checking if or how much space you need to reserve for cam tables, and use the rest of the SRAM for data acquisitions © Technosoft 2006 11 MotionChip II TML Programming Remark: You may also store TML programs in the internal SRAM memory. However, this will further reduce the limited space available for data acquisitions and cam tables. Therefore it is highly preferable to store the TML programs in the EEPROM space. Typically, you may want to use the SRAM memory instead of the EEPROM memory for TML programs only during the application development in order to speed-up testing due to a faster access B) For MotionChip II based on TMS320LF2407A: • Data acquisitions at the beginning of the external SRAM memory not overlapped with the internal SRAM, starting from address 8000h • TML programs (for faster testing instead of using the EEPROM) • Cam tables, only if used, after the data acquisitions until the end of the internal SRAM. Remarks: • In IPM Motion Studio, if you chose to download and execute a TML program from the SRAM memory the default start address proposed is C000h i.e. half of the overall external SRAM space • Data acquisitions may start directly from address 8000h, if this is the beginning of the external SRAM. When used as data memory, the external SRAM is also visible in the range 8000h to 87FFh. When used as program memory, the same address range is mapped into the internal SRAM. However, if you plan to examine the memory contents using an IPM Motion Studio tool like View | Memory, be aware that the values displayed in the range 8000h to 87FFh do not represent the data acquisition results but the internal SRAM values. © Technosoft 2006 12 MotionChip II TML Programming 4000h TML program space E2ROM memory (SPI-connected) A00h 7FFFh Data memory space Internal SRAM memory Internal SRAM memory FFFh 8000h 8200h TML Program space Internal SRAM memory External SRAM memory Data memory space External SRAM memory 87FFh 8800h TML Program space External SRAM memory FFFFh FFFFh Figure 1.2. Memory map MotionChip II based on TMS320LF2407A © Technosoft 2006 13 MotionChip II TML Programming 4000h TML program space E2ROM memory (SPI-connected) 7FFFh A00h Data memory space Internal SRAM memory Internal SRAM memory FFFh 8200h TML Program space Internal SRAM memory 87FFh Figure 1.3. Memory map MotionChip II based on TMS320LF2406 1.9 AUTORUN mode After power on the MotionChip II checks the status of its analogue input ADCIN9. If this input is low, the MotionChip II is set in the AUTORUN mode. In the AUTORUN mode, the MotionChip II, reads the first EEPROM memory location at address 0x4000 and checks if the binary code corresponds to the TML instruction BEGIN. If this condition is true, the TML program saved in the EEPROM memory is executed starting with the next instruction after BEGIN. If analogue input ADCIN9 is high, the MotionChip II enters in the slave mode where it waits to receive commands via a communication channel. Even if there is a valid TML program in the EEPROM, this is not executed. During a TML program execution, the MotionChip II can enter in the slave mode and thus stopping the TML program execution after the execution of the END command or after receiving STOPx (x=0,1,2 or 3) command from an external device, via a communication channel. © Technosoft 2006 14 MotionChip II TML Programming 1.10 Logger feature Step to follow, in order to use the logger features: - Setup the logger header - Setup the logger pointer - If the drive is in Axison state, the data acquisition is done at each current or speed/position loop period, depending by logger configuration The following table presents the map of logger buffer. Data Buffer Logger Header Buffer Logger buffer address Name Description LOG_START_ADDR+0 N_POINTS Number of points left to be acquired. During the acquisition this value is decremented to 0. LOG_START_ADDR+1 INT_CNT Internal sampling counter. It must be initialized with the same value as sampling multiplier LOG_START_ADDR+2 S_MULTPL Sampling multiplier LOG_START_ADDR+3 FREE_LOC The address of next free buffer location. It must be initialized with LOG_START_ADDR + 4 + NO_16B_VARS LOG_START_ADDR+4 ADDR1 1st 16-bit location address which it will be acquired LOG_START_ADDR+5 ADDR2 2nd 16-bit location address which it will be acquired LOG_START_ADDR+6 ADDR3 3rd 16-bit location address which it will be acquired … … … LOG_START_ADDR+3+ NO_16B_VARS ADDRn Last 16-bit location address which it will be acquired LOG_START_ADDR+4+ NO_16B_VARS END_LIST End of address list = 0 value LOG_START_ADDR+5+ NO_16B_VARS 1st 16-bit data acquired - first point LOG_START_ADDR+6+ NO_16B_VARS 2nd 16-bit data acquired - first point … … LOG_START_ADDR+6+ 2 * NO_16B_VARS 1st 16-bit data acquired - second point LOG_START_ADDR+7+ 2 * NO_16B_VARS 2nd 16-bit data acquired - second point … … © Technosoft 2006 15 MotionChip II TML Programming LOG_START_ADDR +4+ Last 16-bit data acquired - last point NO_16B_VARS + (N_POINTS * NO_16B_VARS) Note: 1. The LOG_START_ADDR must have the bits 0 and 1 set to 0, i.e. a value multiple of 4. 2. NO_16B_VARS = number of 16-bit locations which must be acquired. 3. A 32-bit variable can be acquired as 2 x 16-bit variables Address Name Description 0x0365 LOG_PTR Internal pointer to logger buffer. Bits 15-2 = bits 15-2 of LOG_START_ADDR Bits 1-0 = logger active in: 01 – Speed/ Position control loop 10 – Current control loop Example for the acquisition of APOS and ATIME variables in speed/position loop period. The acquisition buffer starts at the address 0x0A00. Data Buffer Logger Header Buffer Address: data (hex) Name Description 0A00: 012C N_POINTS Acquisition of 300 points 0A01: 0004 INT_CNT Internal counter. It must be initialized with the same value as sampling multiplier. 0A02: 0004 S_MULTPL Sampling multiplier = 4, i.e. 1 acquisition point at 4 samplings 0A03: 0A09 FREE_LOC The address of next free buffer location 0A04: 0228 ADDR1 The address of APOS variable (32-bits) - low part 0A05: 0229 ADDR2 The address of APOS variable (32-bits) - high part 0A06: 02C0 ADDR3 The address of ATIME variable (32-bits) - low part 0A07: 02C1 ADDR4 The address of ATIME variable (32-bits) - high part 0A08: 0000 END_LIST End of address list = 0 value 0A09: xxxx Acquired value – APOS(L) – first point 0A0A: xxxx Acquired value – APOS(H) – first point 0A0B: xxxx Acquired value – ATIME(L) – first point © Technosoft 2006 16 MotionChip II TML Programming 0A0C: xxxx Acquired value – ATIME(H) – first point 0A0D: xxxx Acquired value – APOS(L) – second point 0A0E: xxxx Acquired value – APOS(L) – second point 0A0F: xxxx Acquired value – ATIME(L) – second point 0A10: xxxx Acquired value – ATIME(H) – second point … … 0EB8: xxxx Acquired value – ATIME(H) – last point Address: data (hex) Name Description 0365: 0A01 LOG_PTR Internal pointer to logger buffer. Bits 15-2 = 00001010000000(bin) = bits 15-2 of LOG_START_ADDR Bits 1-0 = 01(bin) = logger active in Speed/ Position control loop When the acquisition is done in speed/ position control loop the acquisition period is: Acquisition period [s] = SLPER [bits] * <Sampling multiplier> [bits] * <PWM period>[s] When the acquisition is done in current control loop the acquisition period is: Acquisition period [s] = CLPER [bits] * <Sampling multiplier> [bits] * <PWM period>[s] Example: • SLPER = 20 • <Sampling multiplier> = 4 • <PWM period> = 50 x 10-6 [s] Acquisition period [s] = 20 x 4 x 50 x 10-6 [s] = 4 x 10⁻³ [s] © Technosoft 2006 17 MotionChip II TML Programming This page is empty © Technosoft 2006 18 MotionChip II TML Programming 2. TML description This chapter describes the TML - Technosoft Motion Language. The TML provides instructions for the following categories of operations: • • • • • • • Motion programming and control Program flow control I/O handling Assignment and data transfer Arithmetic and logic manipulation Data transfer between axes Miscellaneous 2.1 Motion programming and control These instructions allow you to program the MotionChip II built-in motion controller in order to set different motion modes and trajectories. Table 2.1 summarizes all the motion modes supported. These are divided into 2 categories function of how the motion reference is generated: • • Motion modes with reference provided by an external device via an analog input, pulse & direction signals, a master encoder or via a communication channel Motion modes with reference computed by the internal reference generator. In this category enter all the other motion modes Table 2.1. Motion modes Motion Modes Position Control Type Speed Torque – – Voltage – Position profiles √ Speed profiles Contouring (point to point with linear interpolation) External reference read from the analogue input REFERENCE or set by an external device via a communication channel Pulse and direction Electronic Gearing/Camming – master Electronic Gearing – slave Electronic Camming – slave Stop Test (limited ramp) – √ – – √ √ √ √ √ √ √ SL √ SL √ FL √ SL √ √ √ √ √ – √ – – – – – – – – – © Technosoft 2006 19 – √ √ √ – – √ FL √ FL MotionChip II TML Programming 2.1.1 Position Profile Modes In the position profile modes, the motor is controlled in position. You specify the position to reach (relative or absolute), the acceleration/deceleration rate and the slew (travel) speed. The reference generator computes the position trajectory, which results with a trapezoidal or triangular speed profile. During motion, you can change on the fly all the profile parameters (see par. 2.1.10) Target position position time Slew speed speed time acceleration acc time dec Figure 2.1. Position profile parameters Once programmed, the motion profile parameters are memorized. If you intend to use the same values as previously defined for the acceleration rate, the slew speed, the position increment or position to reach you don’t need to set these again, each time you program a new position profile. Depending on the control structure used, four position profile modes are possible: Table 2.2. Position Profile - Motion Modes Position Profile Motion Modes PP3 PP2 PP1 PP0 © Technosoft 2006 Position √ √ √ √ Controlled Loops Speed √ √ – – 20 Torque √ – √ – MotionChip II TML Programming The selection of one of the above position profile modes, must match with the setup data. For example, you can choose to perform a position control with or without closing the speed loop and with torque/current loop closed. In the first case, the position controller provides a speed command for the speed controller who on its turn provides a current command for the current controller. In this case, you should use the TML instruction MODE PP3. In the second case, the position controller provides directly the current command for the current controller and you should use the TML instruction MODE PP1. As the tuning for the position controller is different in the 2 cases, it is not possible to switch on the fly between MODE PP3 and MODE PP1. During the setup phase you have to chose one option and set the parameters accordingly. Then during the motion programming, you need to use the appropriate motion mode. Remarks: • • As in most applications the current/torque control is needed, the IPM Motion Studio does not cover the setup options where current loop is not closed. Therefore, using IPM Motion Studio, you can chose only between 2 options: position loop with speed loop and current loop (MODE PP3) and position loop without speed loop and with current loop (MODE PP1). Closing all the loops offers a good control of the motor speed while closing only position and current loop may provide better performances for high-dynamic applications requiring quick positioning moves. When position loop is closed without the speed loop (MODE PP1) you can increase the position loop bandwidth 2-3 times more compared with the case when all the 3 loops are closed (MODE PP3). Related TML Parameters CPOS CSPD CACC Command position (long) – desired position (absolute or relative) in 1 position units Command speed (fixed) – desired slew speed in speed units Command acceleration (fixed) – desired acceleration / deceleration in acceleration units Related TML Variables TPOS TSPD TACC APOS Target position (long) – position reference computed by the reference generator at each slow loop (position/speed loop) sampling period when a position profile mode is performed. Measured in position units Target speed (fixed) – speed reference computed by the reference generator at each slow loop sampling period when a position profile mode is performed. Measured in speed units Target acceleration (fixed) – acceleration/deceleration reference computed by the reference generator at each slow loop sampling period when a position profile mode is performed. Measured in acceleration units Actual position (long) – motor position measured in position units 1 See par. 2.8 for details about the MCII internal units and their correspondence with the International Standard (IS) units © Technosoft 2006 21 MotionChip II TML Programming ASPD Actual speed (fixed) – motor speed measured in speed units Related TML Instructions Command position is relative Command position is absolute Set position profile mode x (x = 0, 1, 2, 3) Generate new trajectory starting from the actual values of position and speed reference (i.e. don’t update the reference values with motor position and speed) TUM0 Generate new trajectory starting from the actual values of motor position and speed (i.e. update the reference values with motor position and speed) UPD Update motion mode and parameters. Start motion STOP0, STOP1, STOP2 or STOP3 – Stop motion using methods 0 to 3 CPR CPA MODE PPx TUM1 In all position profile modes, the motion parameters CPOS, CSPD, CACC can be changed any time during motion. The reference generator automatically re-computes the position trajectory in order to reach the new commanded position, using the new values for slew speed and acceleration. Figure 2.2 shows an example where slew speed and acceleration rate are changed, while the commanded position is kept the same. 172 CSPD = 8 CACC = 2 UPD CPOS = 172 CSPD = 4 CACC = 1 UPD Figure 2.2. Position profile. On-the-fly change of motion parameters There is no restriction for the commanded position. If during motion, a new position command is issued that requires reversing the motor, the reference generator does automatically the following operations: • stops the motor with the programmed deceleration rate © Technosoft 2006 22 MotionChip II TML Programming • • accelerates the motor in the opposite direction till the slew speed is reached, or till the motor has to decelerate stops the motor on the commanded position In position profile modes, the reference generator automatically eliminates the round-off errors, which may appear when the commanded position cannot be reached with the programmed slew speed and acceleration/deceleration rate. This situation is illustrated by the example below. Example: The commanded position is 258 counts, with the slew speed 18 counts/sampling and the acceleration rate 4 counts/sampling2. To reach the slew speed, two options are available: • Accelerate to 16 in 4 steps, then from 16 to 18 in a 5th step. Acceleration space is 49 counts • Accelerate from 0 to 2 in 1st step, then from 2 to 18 in 4 steps. Acceleration space is 41 counts For the deceleration phase, the options and spaces are the same. But, no matter which option is used for the acceleration and deceleration phases, the space that remains to be done at constant speed is not a multiple of 18, i.e. the position increment at each step. So, when to start the deceleration phase? Table 2.3 presents the possible options, and the expected errors. Table 2.3. Round-off error example. Options and expected errors. Acceleration Space Deceleration Space [counts] [counts] 49 counts 49 counts 49 counts 41 counts 41 counts 49 counts 41 counts 41 counts Space to do at constant speed [counts] 258 – 2 * 49 = 160 counts 258 – 49 – 41 = 168 counts 258 – 41 – 49 = 168 counts 258 – 2 * 41 = 176 counts Time to go at constant speed Deceleration starts after [sampling steps] [samplings] 5 + 8 = 13 5 + 9 = 14 5 + 9 = 14 5 + 10 = 15 5 + 9 = 14 5 + 10 = 15 5 + 9 = 14 5 + 10 = 15 160/18 = 8.8 168/18 = 9.3 168/18 = 9.3 176/18 = 9.7 Target position Error [counts] - 16 +2 -6 + 12 -6 +12 -14 +4 TML comes with a different approach. It monitors the round-off errors and automatically eliminates them by introducing, during deceleration phase, short periods where the target speed is kept constant. Hence, the target position is always reached precisely, without any errors. © Technosoft 2006 23 MotionChip II TML Programming CPOS=258 CSPD=18 CACC=4 Figure 2.3. Position profile. Automatic elimination of round-off errors Figure 2.3 shows the target speed generated by TML for the above example. During the deceleration phase, the target speed: • decelerates from 18 to 6 in 3 steps (target position advances by 36 counts) • is kept constant for 1 step (target position advances by 6 counts) • decelerates from 6 to 2 in one step (target position advances by 4 counts) • decelerates from 2 to 0 in the last step (target position advances by 1 count) Hence the deceleration space is 47 counts, which, added to 49 counts for acceleration phase and to the 162 counts for constant speed, gives exactly the 258-count commanded position. Programming Example CACC = 1.5; CSPD = 20.; CPOS = 20000; CPA; MODE PP3; TUM1; UPD; !MC; WAIT!; // // // // // // // // // // command acceleration = 1.5 encoder counts/sampling2 command speed = 20 counts/sampling command position = 20000 counts command position is absolute set position profile mode 3 keep the position and speed reference update - start the motion set event on motion complete wait for the event to occur Remarks: • • Once a position profile is started, you can find when the motion is completed, by setting an event on motion complete and waiting until this event occurs (see for details par. 2.2) The TML instruction TUM1 must always be executed AFTER setting the motion mode and BEFORE executing the UPD command. When a motion mode command is executed it includes the TUM0 command. However, as the new motion mode becomes active only after the UPD command, if TUM1 command is set, it overwrites TUM0 set together with the motion mode © Technosoft 2006 24 MotionChip II TML Programming 2.1.2 Speed Profile Modes In the speed profile, the motor is controlled in speed. You specify the acceleration/deceleration rate and the jog speed. The speed sign specifies the direction. The motor accelerates until the jog speed is reached. During motion, you can change on the fly the jog speed and the acceleration/deceleration rate. Use a stop command to stop the motion. Jog Speed speed time acceleration acc time Figure 2.4. Speed profile parameters Depending on the control structure used, two speed profile modes are possible: Table 2.4. Speed Profile - Motion Modes Speed Profile Motion Modes SP1 SP0 Position – – Controlled Loops Speed √ √ Torque √ – Like in the position profile modes, the selection of one of the above speed profile modes, must match with the setup data. Remarks: • • As in most applications the current/torque control is needed, the IPM Motion Studio does not cover the setup options where current loop is not closed. Therefore, using IPM Motion Studio, you have only one option: speed loop with current loop closed (MODE SP1). You can switch on the fly between a position control mode closing all the loops like MODE PP3 and a speed control mode closing speed and current loops like MODE SP1. However if you use a position control mode closing only position and current loop like MODE PP1, because in this case the speed loop is disabled switching between the position and speed control may create problems and therefore it is not recommended Related TML Parameters CSPD CACC © Technosoft 2006 Command speed (fixed) – desired jog speed in speed units. Sign gives direction. Command acceleration (fixed) – desired acceleration / deceleration in acceleration units 25 MotionChip II TML Programming Related TML Variables Target position (long) – position reference computed by the reference generator at each slow loop (position/speed loop) sampling period, while performing a speed profile. TPOS is computed by integrating the speed profile. Measured in position units Target speed (fixed) – speed reference computed by the reference generator at each slow loop sampling period, while performing a speed profile. Measured in speed units Target acceleration (fixed) – acceleration/deceleration reference computed by the reference generator at each slow loop sampling period, while performing a speed profile. Measured in acceleration units Actual position (long) – motor position measured in position units Actual speed (fixed) – motor speed measured in speed units TPOS TSPD TACC APOS ASPD Related TML Instructions Set speed profile mode x (x = 0, 1). Generate new trajectory starting from the actual values of position and speed reference (i.e. don’t update the reference values with motor position and speed) TUM0 Generate new trajectory starting from the actual values of motor position and speed (i.e. update the reference values with motor position and speed) UPD Update motion mode and parameters. Start motion STOP0, STOP1, STOP2 or STOP3 – Stop motion using methods 0 to 3. MODE SPx TUM1 Programming Example CACC = 1; CSPD = -25.5; MODE SP1; UPD; 2.1.3 // // // // // command acceleration = 1.0 counts/sampling2 command speed = -25.5 counts/sampling negative command speed = negative direction set speed profile mode 1 update - start the motion Position/Speed/Torque/Voltage Contouring Modes In contouring mode, you can program an arbitrary profile whose contour is described by a succession of linear segments. Depending on the reference type, four options are available: • Position contouring - the motor is controlled in position. The arbitrary profile represents a position reference • Speed contouring – the motor is controlled in speed. The arbitrary profile represents a speed reference • Torque contouring – the motor is controlled in torque. The arbitrary profile represents a current reference • Voltage contouring – the motor is controlled in voltage. The arbitrary profile represents a voltage reference © Technosoft 2006 26 MotionChip II TML Programming The position contouring and the speed contouring have been foreseen for normal operation. You may use them together with the position profile and the speed profile to generate the desired position or speed trajectory. You can switch between these four motion modes at any moment. The torque contouring and the voltage contouring have been foreseen only for setup tests. The torque contouring may be used, for example, to check the response of the current controllers to other input signals than the step signal used in the Current Controller Tuning Test. The voltage contouring may be used, for example, to check the motors behavior under a constant voltage or any other voltage shape. A contouring segment has 2 parameters: the time and the reference increment. The time parameter represents the segment duration expressed in time units i.e. in number of slow (position/speed) loop sampling periods. The reference increment represents the amount of reference variation per time unit i.e. per sampling period. 24 20 16 12 8 4 0 0 2 4 6 8 10 12 14 Figure 2.5. Reference generation in contouring modes Example: A position contouring segment starts at position 0 and reaches position 2000 encoder counts in 1 second. Considering a slow-loop sampling period 1ms, the contouring segment data are: Time = 1000 (1000 x 1ms = 1s) Reference increment per sampling = 2 (1000 x 2 = 2000) In position or speed contouring, the starting point is either the current value of the target position/speed (if TUM1 command is set between the motion mode setting and the UPD command), or the actual value of the motor position/speed (if TUM1 is omitted) In torque/voltage contouring, the starting value is set by the user in the high part of the TML parameter EREF i.e. in EREF(H). After reset, the default value of EREF(H) is zero. © Technosoft 2006 27 MotionChip II TML Programming The contouring modes require a local memory where to place the sequence of contour segments to be executed. First, the contouring mode must be set and the first segment should be provided. Then the contouring mode can be activated with the UPD command. Once a contouring mode is activated, the rest of the segments are automatically executed. The sequence of contour segments must end with a segment where the time interval is 0. When a sequence of contour segments is executed, the TML instruction pointer IP advances as the segments are executed. When the reference generator starts working with a new segment, at TML program level the IP advances to the execution of the next contour segment instruction. The execution of a TML instruction for a contour segment means to copy the segment data into a local buffer and then wait (i.e. loop on the same instruction) until the previous segment, currently under execution at reference generator level will end. This procedure permits to immediately start the execution of the next contour segment when the current one ends because the next segment data are already available in a local buffer. Each time the reference generator starts to execute a new segment, the IP advances to the next contour segment and its data are transferred into the local buffer. Table 2.5 presents the possible contouring modes. Table 2.5. Contouring Modes Category Controlled Loops Position Speed Torque √ √ √ – √ √ – √ √ – – √ – √ √ – – √ – – √ – – – Motion Modes Position Contouring Speed Contouring Torque Contouring Voltage Contouring PC3 PC2 PC1 PC0 SC1 SC0 TC VC Remarks: • • The selection of one of the above position contouring modes or speed contouring modes must match with the setup data like in the case of position and speed profiles (see par. 2.1.1 and 2.1.2 for details) As in most applications the current/torque control is needed, the IPM Motion Studio does not cover the setup options where current loop is not closed. Therefore, using IPM Motion Studio, you can choose for position contouring only 2 options: position loop with speed loop and current loop (MODE PC3) and position loop without speed loop and with current loop (MODE PC1), and for speed contouring only the option with both speed and current loop closed (MODE SP1) Related TML Parameters REF0(H) Time © Technosoft 2006 Starting value (int) – torque/voltage contouring in torque/voltage units Value or variable (uint) – segment time interval in time units 28 MotionChip II TML Programming Increment Value or variable (fixed) – segment reference increment per time unit measured in: • speed units for a position contouring segment • acceleration units for a speed contouring segment • current units / time units for torque contouring • voltage units / time units for voltage contouring Related TML Variables TPOS TSPD TACC IQREF UQREF APOS ASPD IQ Target position (long) – position reference computed by the reference generator at each slow loop (position/speed loop) sampling period when position or speed contouring is performed. During speed contouring, TPOS is computed by integrating TSPD. Measured in position units Target speed (fixed) – speed reference computed by the reference generator at each slow loop sampling period when position or speed contouring is performed. Measured in speed units Target acceleration (fixed) – acceleration/deceleration reference computed by the reference generator at each slow loop sampling period when position or speed contouring is performed. Measured in acceleration units Current reference – computed by the reference generator at each slow loop sampling period when torque contouring is performed. Measured in current units Voltage reference – computed by the reference generator at each slow loop sampling period when voltage contouring is performed. Measured in voltage command units Actual position (long) – motor position measured in position units Actual speed (fixed) – motor speed measured in speed units Motor current – measured in current units Related TML Instructions Set position contouring mode x (x = 0, 1, 2, 3) Set speed contouring mode x (x = 0, 1) Set torque contouring Set voltage contouring. Voltage reference represents motor voltage for DC motor, and quadrature component (Q-axis) of the voltage vector for AC motors SEG Time, Increment Set a contour segment with parameters Time and Increment TUM1 Generate new trajectory starting from the actual values of position and speed reference (i.e. don’t update the reference values with motor position and speed) TUM0 Generate new trajectory starting from the actual values of motor position and speed (i.e. update the reference values with motor position and speed) UPD Update motion mode and parameters. Start motion STOP0, STOP1, STOP2 or STOP3 – Stop motion using methods 0 to 3 MODE PCx MODE SCx MODE TC MODE VC © Technosoft 2006 29 MotionChip II TML Programming Programming Example (see Figure 2.5) MODE PC3; SEG 2, 4.; UPD; SEG 4, SEG 4, SEG 2, SEG 0, 2.; 1.; 0.; 0.; // // // // // // // // set position contouring mode 3 set 1st segment. Increment position reference with 4 counts/sampling in the next 2 samplings update – start motion set 2nd segment set 3rd segment set 4th segment end contour sequence Remarks: • At the end of a contouring sequence, the last reference value is kept constant • The TML parameter REF0, used to set the initial value for the torque or voltage contouring mode is also used (under the name EREF) in the external mode as reference set on-line via a communication channel by an external device (see par 2.1.4) • The SEG 0,0 command signals the end of a contouring sequence, time value being zero. • The TML command SEG is a sequential command. This means that SEG command must be executed only as part of a TML program and not as a command sent on-line via a communication channel. If a host sends contouring segments on-line, each time a segment command is received, it starts to be executed immediately, canceling previous segment processing. Therefore the generated trajectory is incorrect. 2.1.4 External Position/Speed/Torque/Voltage Modes In the external modes, you can drive your motor using a reference provided by an external device, in one of the following ways: • • As an analogue signal connected to a dedicated analogue input of the MotionChip II named REFERENCE (10-bit resolution) As a continuously updated data sent by the external device via a communication channel into the dedicated TML variable EREF In both cases, depending on the reference type, you can have: • • • • Position external modes, where the motor is controlled in position and the external reference is interpreted as a position reference Speed external modes, where the motor is controlled in speed and the external reference is interpreted as a speed reference Torque external modes, where the motor is controlled in torque and the external reference is interpreted as a current reference. Voltage external modes, where the motor is controlled in voltage and the external reference is interpreted as a voltage reference. The position and speed external modes have been foreseen for normal operation. With the torque external mode you can set your drive as a torque amplifier. The voltage external mode is foreseen for test purposes. © Technosoft 2006 30 MotionChip II TML Programming The torque and voltage external modes with analogue reference have two options: • torque/voltage slow – reference is read at each slow-loop (position/speed) sampling period • torque/voltage fast – reference is read at each fast-loop (torque/current) sampling period In the torque and voltage external modes with reference set via communication in the TML variable EREF, only slow option is available i.e. reference is read at each slow-loop (position/speed) sampling period. By default, after power on, the external mode with reference set via communication in EREF is enabled. In order to activate the external mode with reference read from a dedicated analogue input, you need to execute the TML command EXTREF 1. Before enabling an external mode with analogue reference, during the setup phase, you need to establish how to interpret a value read from the analogue input. Put in other words, you need to set the associated TML parameters in order to get the desired range for a position, speed, current or voltage command. Table 2.6 presents the possible external modes. Table 2.6 External Modes Category Position External Speed External Torque External Slow Torque External Fast Voltage External Slow Voltage External Fast Motion Modes PE3 PE2 PE1 PE0 SE1 SE0 TES TEF VES VEF Controlled Loops Position Speed Torque √ √ √ – √ √ – √ √ – – √ – √ √ – – √ – – √ – – √ – – – – – – Remarks: • • The selection of one of the above position external modes or speed external modes must match with the setup data like in the case of position and speed profiles (see par. 2.1.1 and 2.1.2 for details) As in most applications the current/torque control is needed, the IPM Motion Studio does not cover the setup options where current loop is not closed. Therefore, using IPM Motion Studio, you can choose for position external only 2 options: position loop with speed loop and current loop (MODE PE3) and position loop without speed loop and with current loop (MODE PE1), and for speed external only the option with both speed and current loop closed (MODE SE1) Related TML Parameters © Technosoft 2006 31 MotionChip II TML Programming 32-bit TML parameter needed only for the external modes with reference set on-line via a communication channel. EREF is where the external device must write the reference. Depending on the reference type, EREF is seen as a: EREF 32-bit long value representing the position reference in position units for the external position modes 32-bit fixed value representing the speed reference in speed units for the external speed modes 16-bit integer value read from EREF(H) representing the current or voltage reference in current units or voltage units for the external torque or voltage modes Examples: EREF = 2000; // External position mode. Reference is set to 2000 position units EREF = 1.5; // External speed mode. Reference is set to 1.5 speed units EREF(H) = 5000; // External torque mode. Reference is set to 5000 current units CADIN, SFTDIN, AD5OFF 16-bit TML parameters needed only for the external modes with analogue reference. Are used to define the desired range for the position, speed, current or voltage command that corresponds to the analogue input range. For details regarding how to set these parameters see MotionChip II Configuration Setup user manual Related TML Variables AD5 TPOS TSPD TACC IQREF © Technosoft 2006 16-bit unsigned integer value representing the value read from the analogue input REFERENCE. The output of the 10-bit A/D converter is set in the 10 MSB (most significant bits) of the AD5 Target position (long) – position reference updated at each slow loop (position/speed loop) sampling period, when position external mode is performed. TPOS is set function of the analogue input value or with the EREF value. Measured in position units Target speed (fixed) – speed reference updated at each slow loop sampling period when position or speed external mode is performed. TSPD is set function of the analogue input value or with the EREF value during external speed mode and is computed from TPOS in external position mode. Measured in speed units Target acceleration (fixed) – acceleration or deceleration reference computed by the reference generator at each slow loop sampling period from the position or speed external references. Measured in acceleration units Current reference – updated at each fast or slow loop function of the analogue input value or set with EREF value, when torque external mode is performed. Measured in current units 32 MotionChip II TML Programming Voltage reference – updated at each fast or slow loop function of the analogue input value or set with EREF value, when voltage external mode is performed. Measured in voltage command units Actual position (long) – motor position measured in position units Actual speed (fixed) – motor speed measured in speed units Motor current – measured in current units UQREF APOS ASPD IQ Related TML Instructions MODE PEx Set external position mode x (x = 3, 2, 1, 0) MODE SEx Set external speed mode x (x = 1, 0) MODE TES Set external torque mode slow MODE TEF Set external torque mode fast MODE VES Set external voltage mode slow MODE VES Set external voltage mode fast EXTREF 0 Set external reference type: provided on-line in EREF via communication EXTREF 1 Set external reference type: read from analog input EXTREF 2 Set external reference type: read from second encoder input UPD Update motion mode and parameters. Start motion STOP0, STOP1, STOP2 or STOP3 – Stop motion using methods 0 to 3 Programming Example EXTREF 1; MODE SE1; UPD; // external reference read from analog input // set speed external mode 1 // update – activate new mode Remarks: TML instruction EXTREF 2 sets a third way of providing an external reference: using nd incremental encoder signals connected to the MotionChip II 2 encoder inputs. This external mode is used only for electronic gearing and camming modes and will be presented later on TML instructions EXTREF 0, 1 or 2 are exclusive. After power on, EXTREF 0 is set by default. After an EXTREF 1 command, EXTREF 0 is disabled and all the external reference modes are read from the analogue input 2.1.5 Position/Speed Pulse & Direction Modes In the pulse & direction modes, you can drive your motor using a "Pulse & Direction" command provided by an external device. The "Pulse & Direction" command consists of 2 digital signals that must be connected to especially dedicated inputs: • • Pulse – a sequence of pulses. Each pulse represents a position unit. The sum of the pulses indicates the position displacement to be performed. The variation of number of pulses per time unit represents a speed reference. Direction - a digital signal, which indicates the reference sign. Depending on Direction value the pulses are counted up or down © Technosoft 2006 33 MotionChip II TML Programming Hence the pulse and direction signals can be interpreted either as a position reference or as a speed reference. Depending on the reference type you can have: • Position pulse & direction modes, where the motor is controlled in position. • Speed pulse & direction modes, where the motor is controlled in speed. Table 2.7 presents the possible pulse & direction modes. Table 2.7 Pulse & Direction Modes Category Motion Modes Position Pulse & Direction Speed Pulse & Direction PPD3 PPD2 PPD1 PPD0 SPD1 SPD0 Controlled Loops Position Speed Torque √ √ √ – √ √ – √ √ – – √ – √ √ – – √ Remarks: • • The selection of one of the above position pulse & direction modes or speed pulse & direction modes must match with the setup data like in the case of position and speed profiles (see par. 2.1.1 and 2.1.2 for details) As in most applications the current/torque control is needed, the IPM Motion Studio does not cover the setup options where current loop is not closed. Therefore, using IPM Motion Studio, you can choose for position pulse & direction only 2 options: position loop with speed loop and current loop (MODE PPD3) and position loop without speed loop and with current loop (MODE PPD1), and for speed pulse & direction only the option with both speed and current loop closed (MODE SPD1) Related TML Variables TPOS TSPD TACC © Technosoft 2006 Target position (long) – position reference computed by the reference generator at each slow loop (position/speed loop) sampling period when position or speed pulse & direction modes are performed. Measured in position units Target speed (fixed) – speed reference computed by the reference generator at each slow loop sampling period when position or speed pulse & direction modes are performed. Measured in speed units Target acceleration (fixed) – acceleration/deceleration reference computed by the reference generator at each slow loop sampling period when position or speed pulse & direction modes are performed. Measured in acceleration units 34 MotionChip II TML Programming Actual position (long) – motor position measured in position units Actual speed (fixed) – motor speed measured in speed units APOS ASPD Related TML Instructions MODE PPDx Set position pulse & direction mode x (x = 3, 2, 1, 0) MODE SPDx Set speed pulse & direction mode x (x = 1, 0) UPD Update motion mode and parameters. Start motion STOP0, STOP1, STOP2 or STOP3 – Stop motion using methods 0 to 3 Programming Example MODE PPD3; UPD; 2.1.6 // set pulse & dir mode 3 // update – activate new mode. Motion starts // when external device provides pulses Electronic Gearing Modes In the electronic gearing modes, one drive is set as master and other drives are set as slaves. The slaves follow the master position with a programmable ratio. The slaves can get the master position in two ways: • The master sends its position via a communication channel. This option requires having the drives connected on a CAN-bus or RS-485 network. The master sends either the motor position (if OSR.15 = 0 i.e. bit 15 from OSR register is 0) or the position reference (if OSR.15 =1), once at each slow loop (speed/position loop) sampling time interval • The signals of the encoder connected to the master drive are also connected to the 2nd encoder input of the slave drives. In both cases the slaves perform a position control. They compute the master position increment and multiply it with their programmed gear ratio. The result represents the increment of the reference position for the slaves, which is added to previous reference position to obtain the new reference position for the slaves. Remarks: You need to program a drive as master in electronic gearing only if the master position is sent via a communication channel. If actual position is sent, the master can work in any motion mode. If target position is sent, the master should work in a mode that generates a target position By default the slow loop sampling period is set at 1ms. If you intend to use the RS-485 to send a master position, be aware that the transmission time for this operation at maximum baudrate of 115200 is close to 1ms and therefore occupies almost the entire communication bandwidth. One way to reduce the overall communication charge is to increase with 50-100% the slow-loop sampling period Master mode © Technosoft 2006 35 MotionChip II TML Programming The master mode can be enabled with the TML command SGM followed by an UPD (update) and can be disabled by the TML command RGM followed by an UPD. In both cases, this has no effect on the motion executed by the master. When a drive is set as master, it starts sending its actual position APOS or its target position TPOS to the axis or the group of axes specified in the TML parameter SLAVEID. This contains either the axis ID of one slave or the value of a group ID+256 i.e. the group of slaves to which the master should send its position. Before enabling the master operation for electronic gearing, you need to initialize the slaves with the master position by setting the master to send its (actual or target/reference) position to the slaves in the dedicated TML parameter MPOS0. This initialization is necessary to make sure that the slaves got the latest master position before entering in the slave mode. Examples: [255]MPOS0 = APOS; // set MPOS0 on slave axis 255 with actual position of the master [255]MPOS0 = TPOS; // set MPOS0 on slave axis 255 with target position of the master [G2]MPOS0 = TPOS; // set MPOS0 on all slave axes from group 2 with target position of // the master Remark: Make sure when the master position initialization is performed that all slave drives are powered and in communication. Otherwise the initialization with master position will fail. Slave mode When a drive should work as slave for electronic gearing, the following settings must be checked or performed before enabling the electronic gearing slave mode: 1) Set gear ratio. This is specified via 3 TML variables: GEAR, GEARSLAVE and GEARMASTER GEARSLAVE and GEARMASTER represent the numerator and denominator of the Slave / Master ratio. GEARSLAVE is a signed integer, while GEARMASTER is an unsigned integer. GEARSLAVE sign indicates the direction of movement: positive – same as the master, negative – reversed to the master. GEAR is a fixed value containing the result of the gear ratio i.e. the result of the division GEARSLAVE / GEARMASTER. In order to eliminate any cumulative errors the electronic gearing slave mode includes an automatic compensation of the round off errors when the gear ratio has an irrational value like: Slave = 1, Master = 3, giving a ratio of 1/3 = 0.33333 which can’t be represented exactly. Example: in order to implement a gear ratio of 2/3, you need to set: GEARSLAVE = 2; GEARMASTER = 3; GEAR= 0.66667; // gear ratio numerator // gear ratio denominator // gear ratio value 2) Enable master position calculation from 2nd encoder inputs, if the master position is provided via its encoder signals. This operation is done with TML instruction EXTREF 2. The initial value of the master position is set by default to 0. It may be changed to a different value by writing the desired value in data memory at location 0x81C. This operation can be performed by the following TML code: © Technosoft 2006 36 MotionChip II TML Programming user_var = 0x81C; master // set user variable user_var with 0x81C - the address of the // position computed from 2nd encoder inputs user_var),dm = initial_value; // write initial_value in data memory (dm) at // address pointed by user_var i.e. in the master position Remarks: The initial master value is a 32-bit long integer value. However, if the initial value to write is small enough to be represented as a 16-bit integer (i.e. between –32768 and +32767) add after the initial value an L (for example: 200L) to indicate that this value is a long not an integer. This will initialize the 16MSB part too (i.e. the next memory location 0x81D) Initialization of the drives for reading the master position from the 2nd encoder inputs requires one speed/position sampling period (typically 1ms). After EXTREF 2 command do not enable immediately the slave operation. Introduce a wait time of 1 speed/position sampling period (see for details par. 2.2) 3) Set master resolution e.g. the number of encoder counts per one revolution of the master motor. The slaves need the master resolution to compute correctly the master position and speed (i.e. position increment). This operation can be performed by the following TML code: user_var = 0x81A; master // set user variable user_var with 0x81A - the address of the // resolution parameter user_var),dm = resolution_value; // write resolution_value in data memory (dm) at // address pointed by user_var i.e. in the master resolution Remark: The master resolution is a 32-bit long integer value. If master position is not cyclic (i.e. the resolution is equal with the whole 32-bit range of position), set master resolution to 0x80000001. When this value is used, no modulo operation is performed on the position counted nd from the 2 encoder inputs. 4) Enable synchronization with the master if the master position is provided via communication. When the synchronization is enabled, the slave performs a slight adjustment of the moments when the speed/position loop control is performed to synchronize them with the moments when the master sends its position. This allows the slaves to always have a new master position before starting to use it. In order to: Enable the synchronization with the master, set TML variable EFLEVEL = 0; Disable the synchronization with the master, set TML variable EFLEVEL = 0xFFFF; Remark: The synchronization must be enabled only after the master starts sending its position and must be disabled before or immediately after the master stops sending its position. Do not leave a slave with the synchronization enabled while the master is disabled. During this period the motor control performance is slightly degraded 5) Enable operation in one of the electronic gearing slave modes. Depending on the control structure, the following four motion modes are possible for the slaves. Table 2.8. Electronic Gearing Slave - Motion Modes © Technosoft 2006 37 MotionChip II TML Programming Electronic Gearing Slave Motion Modes GS3 GS2 GS1 GS0 Controlled Loops Torqu Position Speed e √ √ √ – √ √ – √ √ – – √ Remarks: • • The selection of one of the above electronic gearing modes must match with the setup data like in the case of position and speed profiles As in most applications the current/torque control is needed, the IPM Motion Studio does not cover the setup options where current loop is not closed. Therefore, using IPM Motion Studio, you can chose only between 2 options: position loop with speed loop and current loop (MODE GS3) and position loop without speed loop and with current loop (MODE GS1). Related TML Parameters SLAVEID MREF MPOS0 GEAR GEARMASTER GEARSLAVE MASTERRES APOS2 MSPD EFLEVEL the axis or group ID to which the master sends its position. When group ID is used, the SLAVEID is set with group ID value + 256 (int) Slave location where the master sends its position (long). Measured in master position units Slave location where the previous master position is stored (long). The master increment is computed on each slave axis as MREF – MPOS0. Measured in master position units Slave(s) gear ratio value (fixed). Negative values means opposite direction Denominator of gear ratio (uint) Numerator of gear ratio (int). Negative values means opposite direction Master resolution used by slave(s) (long) Set at extended address 0x81A. Can be read/written using indirect addressing commands. Measured in master position units nd Master position computed from 2 encoder inputs on slave axes (long). Set at extended address 0x81C. Can be read/written using indirect addressing commands. Measured in master position units Master speed computed from 2nd encoder inputs on slave axes (long). Set at extended address 0x820. Can be read/written using indirect addressing commands. Measured in master speed units Set to 0 enables and set to 0xFFFF disables the synchronization of the slave(s) with the master when master position is sent via communication (int) Related TML Variables TPOS © Technosoft 2006 Target position (long) – position reference computed by the reference generator at each slow loop (position/speed loop) sampling period when 38 MotionChip II TML Programming TSPD TACC APOS ASPD electronic gearing slave modes are performed. Measured in position units Target speed (fixed) – speed reference computed by the reference generator at each slow loop sampling period when electronic gearing slave modes are performed. Measured in speed units Target acceleration (fixed) – acceleration/deceleration reference computed by the reference generator at each slow loop sampling period when electronic gearing slave modes are performed. Measured in acceleration units Actual position (long) – motor position measured in position units Actual speed (fixed) – motor speed measured in speed units Related TML Instructions SGM Set electronic gearing master mode RGM Reset electronic gearing master mode EXTREF 0 Receive master position via a communication channel EXTREF 2 Read master position from second encoder input MODE GSx Set electronic gear slave mode x (x = 3, 2, 1, 0) TUM1 Generate new trajectory starting from the actual values of position and speed reference (i.e. don’t update the reference values with motor position and speed) TUM0 Generate new trajectory starting from the actual values of motor position and speed (i.e. update the reference values with motor position and speed) UPD Update motion mode and parameters. Start motion STOP0, STOP1, STOP2 or STOP3 – Stop motion using methods 0 to 3 Programming Example // On slave axis (Axis GEAR = 0.66667; GEARMASTER = 3; GEARSLAVE = 2; EXTREF 0; ID = 1): // set gear ratio value // set gear ration denominator // set gear ratio numarator //receive master position via a //communication channel EIR = 0x081A; // set EIR variable with address of MASTERRES (EIR),dm = 2000L; // set MASTERRES = 2000 MODE GS3; //set gear slave mode 3 TUM1; // keep the position and speed reference (optional) UPD; // update – activate gear slave mode. Slave starts // following the master position // On master axis: SLAVEID 1; // slave axis has Axis ID = 1 SGM; // set electronic gearing master mode SRB OSR,0xFFFF,0x8000; // send target position [1]MPOS0 = TPOS; // set master target position on slave axis UPD; // update – activate new mode. Master starts // sending its position © Technosoft 2006 39 MotionChip II TML Programming Remark: When a drive is set in an electronic gearing slave mode, it starts to add the position increment (computed from the master position increment and the gear ratio) to its current position. Hence electronic gearing mode is a relative move, which on each slave starts from its current position. If needed, the slave position may be modified before enabling the slave operation using the SAP 0 TML command (see par. 2.1.10 for details) 2.1.7 Electronic Camming Modes In the electronic camming mode, one drive is set as master and other drives are set as slaves. The slaves execute a cam profile function of the master position. A cam table describes the cam profile. The cam table consists of 2 columns of points: X for the master and Y for the slave. The slaves can get the master position in two ways: • The master sends its position via a communication channel. This option requires having the drives connected on a CAN-bus or RS-485 network. The master sends either the motor position (if OSR.15 = 0 i.e. bit 15 from OSR register is 0) or the position reference (if OSR.15 =1), once at each slow loop (speed/position loop) sampling time interval • The signals of the encoder connected to the master drive are also connected to the 2nd encoder input of the slave drives. In both cases the slaves perform a position control. The master position represents the input in the cam table. The output of the cam table is the slave position reference. Between the cam table points, linear interpolation is performed. Remarks: You need to program a drive as master in electronic camming only if the master position is sent via a communication channel. If actual position is sent, the master can work in any motion mode. If target position is sent, the master should work in a mode that generates a target position By default the slow loop sampling period is set at 1ms. If you intend to use the RS-485 to send a master position, be aware that the transmission time for this operation at maximum baudrate of 115200 is close to 1ms and therefore occupies almost the entire communication bandwidth. One way to reduce the overall communication charge is to increase with 50-100% the slow-loop sampling period Master mode The master mode is the same as for electronic gearing. It can be enabled with the TML command SGM followed by an UPD (update) and can be disabled by the TML command RGM followed by an UPD. In both cases, this has no effect on the motion executed by the master. No other initialization is needed for electronic camming. When a drive is set as master, it starts sending its actual position APOS or its target position TPOS to the axis or the group of axes specified in the TML parameter SLAVEID. This contains either the axis ID of one slave or the value of a group ID+256 i.e. the group of slaves to which the master should send its position Slave mode © Technosoft 2006 40 MotionChip II TML Programming When a drive should work as slave for electronic camming, the following settings must be checked or performed before enabling the electronic camming slave mode: 1) Load a previously defined cam table into SRAM program memory. The cam table contains equally spaced values for X at: 1, 2, 4, 8, 16, 32, 64 or 128. Between the points of the table, linear interpolation is performed. It is not mandatory to define the cam table for 360 degrees of the master. You may also define shorter cam tables, which for example may be active between angles 120 and 200 degrees of the master. In this case, the slave position remains unchanged outside the active area of the cam. You can continuously run the master in any direction with the slaves performing a glitch free transition when the cam table is restarted. A cam table has the following format: • 1st word (1 word = 16-bit data): Bits 15-13 – the power of 2 of the interpolation step. For example, if these bits have the binary value 010 (2), the interpolation step is 22 = 4, hence the master X values are spaced from 4 to 4: 0, 4, 8, 12, etc. Bits 12-0 – the length -1 of the table. The length represents the number of points • • • • 2nd and 3rd words: the master start position (long), expressed in master position units. 2nd word contains the low part, 3rd word the high part 4th and 5th words: Reserved. Must be set to 0 Next pairs of 2 words: the slave Y positions (long), expressed in position units. The 1st word from the pair contains the low part and the 2nd word from the pair the high part Last word: the cam table checksum, representing the sum modulo 65536 of all the cam table data except the checksum word itself Once define, a cam table must be downloaded into the EEPROM memory of the drive. Before enabling an electronic camming slave mode, the cam table must be copied from the EEPROM into the SRAM program memory. This operation can be done using the TML command: INITCAM LoadAddress, RunAddress where LoadAddress is the EEPROM memory address where the cam table was loaded and RunAddress is the SRAM program memory address where to copy the cam table. After the execution of this command the TML variable CAMSTART takes the value of the RunAddress. Remarks: • • • When electronic camming slave mode is performed, only the cam table from the SRAM program memory is used to compute the slave position It is possible to download in the EEPROM memory several cam tables. You can use INITCAM command to copy one or all of them into the SRAM program memory. In the last case, in order to switch between several cam tables all you need to do is to change the value of the TML parameter CAMSTART which points to the beginning of the cam table to be used when electronic camming slave mode is activated LoadAddress and RunAddress values be expressed as decimal values © Technosoft 2006 41 MotionChip II TML Programming In IPM Motion Studio, you can quickly create or import a cam table using its menu command Tools | Edit CAM files. For example, you can specify your cam table in a simple text file as 2 columns of values (expressed in master and slave position units): first column for the X points, next one for the Y points. Using the Import feature, IPM Motion Studio translates your data into the cam table format mentioned above (files with extension .cam). You can create as many cam tables as you like. Then using the menu command Project | Settings - General tab, you can choose from the list of all cam tables defined, the cam(s) to be used in your application, named active cams. Using menu command Application | Download CAM, you can download the active cams into the EEPROM and finally in the Motion Wizard, the electronic camming dialogue, you can select from the Use Table list of active cams, which one to be used. Following this selection the TML instruction INITCAM is generated with LoadAddress and RunAddress values automatically computed by IPM Motion Studio Remarks: • Some applications may require starting the electronic cam from the Y position corresponding to the current position of the master. You can find the Y position (cam table output) before activation of the electronic camming slave mode (in order to move the motors to this position) in the following way: • Activate a position profile mode, for example to keep the current position Set TML parameter GEAR = 0, then wait one slow loop sampling period (see par 2.2) Read the Y position from TML variable EREF In order to stop computing Y when electronic cam slave mode is not active, set GEAR to a non-zero value, for example: GEAR=0.5. TML parameter GEAR is also used in electronic gearing slave mode to keep the gear ratio value. You can define a cam offset for each slave in order to shift the cam profile versus the master position. Let’s take for example a cam table defined between master angles: 100 to 250 degrees. If you define a 50 degrees cam offset, the cam profile will execute between master angles: 150 and 300 degrees. The following relation exists between: the master position (MREF), the cam offset (CAMOFF), the cam table X input (MPOS0) and the master resolution (MASTERRES): MPOS0 = (MREF – CAMOFF) % MASTERRES 2) Enable master position calculation from 2nd encoder inputs, if the master position is provided via its encoder signals. This operation is done with TML instruction EXTREF 2. The initial value of the master position is set by default to 0. It may be changed to a different value by writing the desired value in data memory at location 0x81C. This operation can be performed by the following TML code: user_var = 0x81C; master // set user variable user_var with 0x81C - the address of the nd // position computed from 2 encoder inputs user_var),dm = initial_value; // write initial_value in data memory (dm) at // address pointed by user_var i.e. in the master position © Technosoft 2006 42 MotionChip II TML Programming Remarks: • The initial master value is a 32-bit long integer value. However, if the initial value to write is small enough to be represented as a 16-bit integer (i.e. between –32768 and +32767) add after the initial value an L (for example: 200L) to indicate that this value is a long not an integer. This will initialize the 16MSB part too (i.e. the next memory location 0x81D) • Initialization of the drives for reading the master position from the 2nd encoder inputs requires one speed/position sampling period (typically 1ms). After EXTREF 2 command do not enable immediately the slave operation. Introduce a wait time of 1 speed/position sampling period (see for details par. 2.2 ) 3) Set master resolution e.g. the number of encoder counts per one revolution of the master motor. The slaves need the master resolution to compute correctly the master position and speed (i.e. position increment). This operation can be performed by the following TML code: user_var = 0x81A; master // set user variable user_var with 0x81A - the address of the // resolution parameter user_var),dm = resolution_value; // write resolution_value in data memory (dm) at // address pointed by user_var i.e. in the master resolution Remark: The master resolution is a 32-bit long integer value. If master position is not cyclic (i.e. the resolution is equal with the whole 32-bit range of position), set master resolution to 0x80000001. When this value is used, no modulo operation is performed on the position counted from the 2nd encoder inputs. 4) Enable synchronization with the master if the master position is provided via communication. When the synchronization is enabled, the slave performs a slight adjustment of the moments when the speed/position loop control is performed to synchronize them with the moments when the master sends its position. This allows the slaves to always have a new master position before starting to use it. In order to: Enable the synchronization with the master, set TML variable EFLEVEL = 0; Disable the synchronization with the master, set TML variable EFLEVEL = 0xFFFF; Remark: The synchronization must be enabled only after the master starts sending its position and must be disabled before or immediately after the master stops sending its position. Do not leave a slave with the synchronization enabled while the master is disabled. During this period the motor control performance is slightly degraded 5) Enable operation in one of the electronic camming slave modes. Depending on the control structure, the following four motion modes are possible for the slaves. Table 2.9. Electronic Cam Slave - Motion Modes Electronic Cam Slave Motion Modes © Technosoft 2006 Controlled Loops Position Speed Torqu e 43 MotionChip II TML Programming √ √ √ √ CS3 CS2 CS1 CS0 √ √ – – √ – √ – Remarks: • • The selection of one of the above electronic camming modes must match with the setup data like in the case of position and speed profiles (see par. 2.1.1 and 2.1.2 for details) As in most applications the current/torque control is needed, the IPM Motion Studio does not cover the setup options where current loop is not closed. Therefore, using IPM Motion Studio, you can chose only between 2 options: position loop with speed loop and current loop (MODE CS3) and position loop without speed loop and with current loop (MODE CS1). Related TML Parameters SLAVEID MREF CAMOFF MASTERRES APOS2 MSPD EFLEVEL the axis or group ID to which the master sends its position. When group ID is used, the SLAVEID is set with group ID value + 256 (int) Slave location where the master sends its position (long). Measured in master position units Cam offset (long). The cam table X input MPOS0 is computed by subtracting cam offset from the master position. Measured in master position units Master resolution used by slave(s) (long) Set at extended address 0x81A. Can be read/written using indirect addressing commands. Measured in master position units nd Master position computed from 2 encoder inputs on slave axes (long). Set at extended address 0x81C. Can be read/written using indirect addressing commands. Measured in master position units Master speed computed from 2nd encoder inputs on slave axes (long). Set at extended address 0x820. Can be read/written using indirect addressing commands. Measured in master speed units Set to 0 enables and set to 0xFFFF disables the synchronization of the slave(s) with the master when master position is sent via communication (int) Related TML Variables MPOS0 Cam table X input (long). MPOS0 = (MREF – CAMOFF) % MASTERRES. Measured in master position units. CAMSTART SRAM program memory start address for a cam table. When several cam tables are used, switching between them resumes to set CAMSTART to the right address i.e. the beginning of next the cam table to use. CAMSTART is automatically set by the INITCAM command, which copies the cam table from the EEPROM to the SRAM memory TPOS Target position (long) – position reference computed by the reference generator at each slow loop (position/speed loop) sampling period when © Technosoft 2006 44 MotionChip II TML Programming TSPD TACC APOS ASPD electronic camming slave modes are performed. Measured in position units Target speed (fixed) – speed reference computed by the reference generator at each slow loop sampling period when electronic camming slave modes are performed. Measured in speed units Target acceleration (fixed) – acceleration/deceleration reference computed by the reference generator at each slow loop sampling period when electronic camming slave modes are performed. Measured in acceleration units Actual position (long) – motor position measured in position units Actual speed (fixed) – motor speed measured in speed units Related TML Instructions SGM Set electronic camming master mode RGM Reset electronic camming master mode 2 INITCAM LoadAddress, RunAddress Copy cam table from E ROM starting with LoadAddress into SRAM starting at RunAddress EXTREF 0 Receive master position via a communication channel EXTREF 2 Read master position from second encoder input MODE CSx Set electronic camming slave mode x (x = 3, 2, 1, 0) TUM1 Generate new trajectory starting from the actual values of position and speed reference (i.e. don’t update the reference values with motor position and speed) TUM0 Generate new trajectory starting from the actual values of motor position and speed (i.e. update the reference values with motor position and speed) UPD Update motion mode and parameters. Start motion STOP0, STOP1, STOP2 or STOP3 – Stop motion using methods 0 to 3 Programming Example // On slave axis (Axis ID = 1): INITCAM 0x4500,0xE500;// copy cam table from E2ROM at address // 0x4500 to SRAM at address 0xE500 EXTREF 0; // receive master position via a //communication channel EIR = 0x081A; // set EIR variable with address of MASTERRES (EIR),dm = 2000L;// set MASTERRES = 2000 MODE CS3; // set cam slave mode 3 UPD; // update – activate cam slave mode. Slave // starts following the master position // On master axis: SLAVEID 1; // slave axis has Axis ID = 1 SGM; // set electronic camming master mode UPD; // update – activate new mode. Master starts // sending its actual position (APOS) In the electronic camming mode, the slave computes a position increment, which is added to its current position. © Technosoft 2006 45 MotionChip II TML Programming When the master moves in the positive direction, the slave position increment is: • • • • DY = Y – Y_1, if in the cam, where Y = f(X) is the actual cam table output and Y_1 = f(X_1) is the previous cam table output. In the cam condition is when both X and X_1 inputs are between the minimum (Xmin) and maximum (Xmax) input values DY = Y – Ymin, on cam entry, where Y = f(X) is the actual cam table output and Ymin = f(Xmin) is the first cam table output point. On cam entry condition is when actual X is inside cam table i.e. X > Xmin, but the previous X_1 was outside the cam table i.e. X_1 < Xmin DY = Ymax – Y_1, on cam exit, where Ymax = f(Xmax) is the last cam table output point and Y_1 = f(X_1) is the previous cam table output. On cam exit condition is when actual X is outside cam table i.e. X > Xmax, but previous X_1 was inside the cam i.e. X_1 < Xmax DY = Ymax – Y_1 + Y – Ymin, if in the cam with master rollover, where Y = f(X) is the actual cam table output, Y_1 = f(X_1) is the previous cam table output, Ymax = f(Xmax) is the last cam table output point, Ymin = f(Xmin) is the first cam table output point. In the cam with master rollover condition is when both X and X_1 inputs are inside the cam table, but X < X_1 because the master position has rolled over When the master moves in the negative direction, the slave position increment is: • • • • DY = Y – Y_1, if in the cam, where Y = f(X) is the actual cam table output and Y_1 = f(X_1) is the previous cam table output. In the cam condition is when both X and X_1 inputs are between the minimum (Xmin) and maximum (Xmax) input values DY = Ymin – Y_1, on cam exit, where Ymin = f(Xmin) is the first cam table output point and Y_1 = f(X_1) is the previous cam table output. On cam exit condition is when actual X is outside cam table i.e. X < Xmin, but the previous X_1 was inside the cam table i.e. X_1 > Xmin DY = Y – Ymax, on cam entry, where Y = f(X) is the actual cam table output and Ymax = f(Xmax) is the last cam table output point. On cam entry condition is when actual X is inside cam table i.e. X < Xmax, but previous X_1 was outside the cam i.e. X_1 > Xmax DY = Ymin – Y_1 + Y – Ymax, if in the cam with master rollover, where Y = f(X) is the actual cam table output, Y_1 = f(X_1) is the previous cam table output, Ymax = f(Xmax) is the last cam table output point, Ymin = f(Xmin) is the first cam table output point. In the cam with master rollover condition is when both X and X_1 inputs are inside the cam table but X > X_1 because the master position has rolled over If needed, the slave position may be modified before enabling the slave operation using the SAP 0 TML command (see par. 2.1.8 for details) 2.1.8 Motor Commands. Stop Modes You can apply one of following commands to the motor: • • Activate/deactivate the control loops and the power stage PWM output commands (AXISON / AXISOFF) Stop the motor in one of the four possible modes: STOP3, STOP2, STOP1, STOP0 © Technosoft 2006 46 MotionChip II TML Programming • • Issue an update command, immediate (UPD) or when a previously programmed event occurs (UPD!) Change the values of the motor position and the position reference The AXISON command activates the control loops and the PWM output commands. After power on, the AXISON command has to be executed at least once, after the ENDINIT (end of initialization) command. During operation, AXISON command may be used to restore the normal drive operation following an AXISOFF command. Typically, the AXISON command can be used in the error treatment routines, to restore the normal operation after the error cause was detected and eliminated. At first AXISON after power on, the reference generator starts from the initial conditions. However, when AXISON is set after an AXISOFF command, the reference generator resumes its calculations from the same conditions left when the AXISOFF command was executed. If the values for the speed reference were high when the AXISOFF command was issued, at next AXISON command, a still motor may suddenly face a large speed reference. This may lead to a high reaction, which may stress the motion system mechanical parts. In order to avoid this situation, it is recommended to reprogram the (remaining) motion, without using TUM1 (i.e. updating the target position and target speed with the actual values of the position and speed), and only then set the AXISON command. Example: A motor controlled in speed, was stopped with an AXISOFF command. In order to resume the normal operation, the TML program can be: CACC = 0.5; // only if you want to change the previous acceleration value CSPD = 100; // only if you want to change the previous speed value MODE SP1; // set again the speed profile mode 1 UPD; // update motion mode & parameters. Motion is prepared but will not start // as the drive continues to be in the AXISOFF condition AXISON; // motion starts. The initial value for target speed is 0 because was // updated with the actual motor speed which is 0 because the motor is still Remarks: • During AXISON condition, the Motion Status Register bit 13 is set (MSR.13 = 1) • In IPM Motion Studio, the AXISON command is automatically included in the motion programs, after the drive setup parameters and before the motion sequences you program using the Motion Wizard. Therefore it is not necessary to include it at the beginning of a motion programming sequence The AXISOFF command deactivates the control loops, the reference generator and the PWM output commands (all the switching devices are off). However, all the measurements remain active and therefore the motor currents, speed, position as well as the supply voltage continue to be updated and monitored. If the AXISOFF command is applied during motion, it leaves the motor free running. Typically, the AXISOFF command is used when an error condition is detected, for example when a protection is triggered. Remark: The AXISOFF command is automatically generated when the Enable input goes from enabled to disabled status. If the Enable input returns to the enabled status, no other command (like AXISON) is automatically generated. However, if needed, you can generate automatically the © Technosoft 2006 47 MotionChip II TML Programming AXISON command when Enable input returns to the enable status, by setting the AXISON command in the TML interrupt service routine called each time when the Enable input status changes. The TML offers you 4 ways to stop a motor. Table 2.10 presents these stop modes. Table 2.10. Stop Modes Stop Modes STOP3 STOP2 STOP1 STOP0 Action Set speed control and decelerate with the rate set in TML parameter CACC until speed is 0 Set speed control and force speed reference to 0 Set torque control and force current reference to 0 Set voltage control and force motor voltage to 0 Select STOP3 to stop the motor smoothly, with a deceleration rat set in TML parameter CACC. When this command is executed, the drive is automatically set in speed profile mode (MODE SP1) with jog speed command = 0. When the speed reference arrives at zero, the motion complete condition is set Select STOP2 to stop very abruptly the motor. When this command is executed, the drive is automatically set in speed external mode (MODE SE1) with on-line speed reference set to 0. Remark: STOP3 or STOP2 modes may not work correctly if in the setup data you have set your drive for position control without closing the speed loop. In this case, you’ll close the speed loop using a speed controller whose parameters have not been properly set. Select STOP1 to stop the motor when the drive performs torque control. When this command is executed, the drive is set in torque external mode (MODE TES) with on-line current reference set to 0. Select STOP0 to stop the motor when the drive performs voltage control. When this command is executed, the drive is set in voltage external mode (MODE VES) with on-line voltage reference set to 0. STOP0 is foreseen only for test purposes. During normal operation, the drive performs at least torque control. Voltage control may occur only during setup tests or if you have specifically set the drive in voltage contouring, voltage external or voltage test modes. Remarks: • In order to restart after a STOPx (x = 0,1,2,3) command, the motion mode has to be set again, even if it is not changed. Setting a motion mode disables the stop mode and allows the motor to move • STOPx (x = 0,1,2,3) commands always set TUM0 mode to perform an update of the target/reference position and speed with the actual motor position and speed • When a host sends via a communication channel a STOPx command, this stops the execution of any TML program from the local memory, in order to avoid the risk of overwriting the STOPx command from the TML program • Use with caution STOP2, STOP1 and STOP0 commands. These cause abrupt stops that may generate an important energy towards the supply. If the power supply can’t absorb © Technosoft 2006 48 MotionChip II TML Programming the energy generated by the motor, it is necessary to foresee an adequate surge capacitor in parallel with the drive supply to limit the over voltage. When an immediate update command UPD is executed, the last motion mode programmed together with the latest motion parameters are taken into consideration. During motion execution, you can freely change the motion mode and/or its parameters. These changes will have no effect until an update command is executed. If you intend to perform an update when a specific condition occurs, you can set an event which monitors the condition, followed by an update on event command UPD!. When the monitored condition occurs, the update will be automatically performed. Once you have set an update on event UPD!, you can either wait for the monitored event to occur, or perform other operations. The TML command SAP offers you the possibility to set / change the referential for position measurement by changing simultaneously the motor position APOS and the target position TPOS values, while keeping the same position error. You can specify the new position either as an immediate value or via a 32-bit long variable. SAP command can be executed at any moment during motion. When SAP command is executed, the following operations are performed: • Under TUM1, i.e. if TUM1 command has been executed after the last motion mode setting and before the last UPD, the target/reference position TPOS is set equal with the new position value and the actual motor position APOS is set equal with the new position reference minus the position error (POSERR) TPOS = new_value; APOS = TPOS – POSERR; • Under TUM0, i.e. if TUM1 command has not been executed after the last motion mode setting and before the last UPD, the actual motor position APOS is set equal with the new position value and the target/reference position TPOS is set equal with the new position plus the position error (POSERR) APOS = new_value; TPOS = APOS + POSERR; The TML command STA sets the target position equal with the actual position: TPOS = APOS. Remark: The target position update with the actual position is automatically performed each time a new motion mode is set without TUM1. Together with the target position the target speed is also updated with the actual speed Related Instructions AXISON AXISOFF STOPx UPD UPD! SAP V32 © Technosoft 2006 Set axis ON. Activate control loops and PWM commands Set axis OFF. Deactivate control loops and PWM commands Set stop mode x (x = 3, 2, 1, 0) Update immediate motion mode and parameters. Start motion Update the motion mode and parameters a programmed event occurs Set V32 in the actual or target position. V32 is either a 32-bit immediate value or a long TML data (user variable) containing the value to set 49 MotionChip II TML Programming Set target position TPOS equal with the actual position APOS STA Programming Example CACC = 1.5; CSPD = 20.; CPOS = 20000; CPR; MODE PP3; TUM1; UPD; ... STOP3; !MC; WAIT!; SAP 0; ... MODE PP3; UPD; 2.1.9 // // // // // // // // command acceleration = 1.5 encoder counts/sampling2 command speed = 20 counts/sampling command position = 2000 counts command position is relative set position profile mode 3 keep the position and speed reference update - start the motion // // // // // stop smoothly with CACC = 1.5 set event on motion complete wait for the event to occur STOP3 disables TUM1. Hence APOS = 0 and TPOS = APOS + POSERR // set again the position profile mode 3 // update – restart motion after a STOP command Torque/Voltage Test Modes The torque and voltage test modes have been designed to facilitate the testing during the setup phase. In these test modes, either a voltage or a torque (current) command can be set using a test reference consisting of a limited ramp (see Figure 2.6). For AC motors (like for example the brushless motors), the test mode offers also the possibility to rotate a voltage or current reference vector with a programmable speed (see Figure 2.7). As a result, these motors can be moved in an “open-loop” mode without using the position sensor. The main advantage of this test mode is the possibility to conduct in a safe way a series of tests, which can offer important information about the motor parameters, drive status and the integrity of the its connections. Figure 2.6. Reference profile in test modes © Technosoft 2006 50 MotionChip II TML Programming Figure 2.7. Electrical angle setup in test modes with brushless AC motors Remark: The Motion test is a special test mode to be used only in some special cases for drives setup. The Motion Test mode is not supposed to be used during normal operation Related Parameters maximum value of the test reference in torque or voltage units (int) reference increment at each slow-loop sampling period (int) initial value for the electrical angle in electrical angle units (int) electrical angle increment at each fast-loop sampling period (int) REFTST RINCTST THTST TINCTST Related Instructions MODE TT MODE VT UPD Set torque test mode Set voltage test mode Update motion mode and parameters. Start motion 2.1.10 Motion Mode Changing The TML allows switching all motion modes on the fly, except for the test modes. This feature is especially useful for position/speed control applications, where the target reference is provided by the internal trajectory generator using position/speed profile modes, position/speed contouring modes, electronic gearing, electronic cam and stop modes. On the fly changes of the motion modes are possible because the target reference is updated each time the motion mode changes. Whenever a new motion mode is set, the target position and the target speed reference are set to the actual values of the motor position and motor speed i.e. TPOS = APOS and TSPD = ASPD. This default target update mode (TUM0) is particularly useful to perform precise relative positioning triggered by an external event, because the input data for the relative position profile computation are the real motor position and speed. There are however situations when the target reference update is not desired. In these cases you can overwrite the default target update mode by adding the TML instruction TUM1 between the motion mode setting and the update commands. © Technosoft 2006 51 MotionChip II TML Programming The TUM1 command is particularly useful for open-loop applications, where there is no position/speed feedback. Here using TUM1 the target reference is preserved when motion modes are changed. As in the speed profile or speed contouring modes, the trajectory generator computes the target position by integrating the target speed, it is possible to do on the fly transitions from these modes to position profile or position contouring modes, even in the absence of motor feedback, under TUM1. © Technosoft 2006 52 MotionChip II TML Programming 2.2 Program flow control In the TML you can control the program flow in 3 ways: • • • By setting an event to be monitored and waiting the event occurrence Through conditional or unconditional GOTO and CALL instructions Through the TML interrupts which can be triggered in certain conditions 2.2.1 Events You can define an event (a condition) to be monitored and to perform one of the following actions: • • • Change the motion mode and/or the motion parameters, when the programmed event occurs Stop the motion with one of the 4 possible stop modes, when the programmed event occurs Wait for the program event to occur Remark: Only a single event can be monitored at a time. The programmed event is automatically erased if the event is reached or if a new event is programmed. There are 18 events, which can be programmed, one at a time, for monitoring. Table 2.11 presents them. Table 2.11. Programmable Event Triggers No. 1 7 Mnemonic !MC !APU value32 !APU var32 !APO value32 !APO var32 !RPU value32 !RPU var32 !RPO value32 !RPO var32 !SU value32 !SU var32 !SO value32 !SO var32 8 !RT value32 !RT var32 9 !AT value32 !AT var32 !RU value32 !RU var32 !RO value32 !RO var32 !CAP 2 3 4 5 6 10 11 12 © Technosoft 2006 Event Description When the actual motion is completed When the actual (motor) absolute position is equal or under a 32-bit long value or the value of a long variable When the actual (motor) absolute position is equal or over a 32bit long value or the value of a long variable When the actual (motor) relative position is equal or under a 32bit long value or the value of a long variable When the actual (motor) relative position is equal or over a 32bit long value or the value of a long variable; When the actual (motor) speed is equal or under a 32-bit fixed value or the value of a fixed variable When the actual (motor) speed is equal or over a 32-bit fixed value or the value of a fixed variable After a wait time (measured from the event setting) equal with a 32-bit long value or the value of a long variable. The time unit is the slow-loop sampling period When absolute time is equal with a 32-bit long value or the value of a long variable. The time unit is the slow-loop sampling period When position or speed or torque or voltage target reference is equal or under a 32-bit value or the value of a long/fixed variable When position or speed or torque or voltage target reference is equal or over a 32-bit value or the value of a long/fixed variable When the selected capture input is triggered 53 MotionChip II TML Programming 13 14 15 16 !LSP !LSN !IN#n 0 !IN#n 1 !VU var32a, !VU var32a, !VO var32a, !VO var32a, 17 18 value32 var32b value32 var32b When positive limit switch input (LSP) is triggered When negative limit switch input (LSN) is triggered When digital input #n goes low; When digital input #n goes high; When value of the long/fixed variable var32a is equal or under a 32-bit long/fixed value or the value of long/fixed variable var32b When value of the long/fixed variable var32a is equal or over a 32-bit long/fixed value or the value of long/fixed variable var32b You can combine the events with the motion programming in order to define the moment when a new motion mode and/or motion parameters must be updated (i.e. enabled) as the moment when a programmed event will occur. This involves the following operations: • • • • Definition of an event Programming of a new motion mode and/or new motion parameters Setting of an update on event (UPD!) command or one of the stop modes on event: STOP0!, STOP1!, STOP2! Or STOP3! Wait for the event to occur (WAIT!) Remarks: • After you have programmed a new motion mode and/or new motion parameters with an update on event or a stop on event, it is recommended to introduce a wait until the programmed event occurs. Otherwise, the TML program will continue with the next instructions that may override the event set for monitoring. • If the TML command WAIT! is executed and the programmed event doesn’t occur, the TML program will remain in a loop. In order to get it out of the loop, you can send via a communication channel a GOTO command to a preset location, which will move the program execution outside the wait loop • The TML command WAIT! is a sequential command. This means that the WAIT! command must be executed only as part of a TML program and not as a command sent on-line via a communication channel. If a host sends a WAIT! command on-line, the wait condition is disregarded Programming Examples: 1) !IN#4 0 CPOS=2000; CPR; MODE PP3 UPD!; WAIT!; // set event when input IO#4 goes low // command position is 2000 // command position is relative // set position profile mode 3 // when the event will occur, execute the move // wait the event to occur 2) !CAP; STOP3!; WAIT!; // set event when a capture input is triggered // smooth stop when event occurs // wait the event to occur © Technosoft 2006 54 MotionChip II TML Programming 3) !RT 100; WAIT!; // set a wait time event of 100 slow-loop periods // i.e. 100 ms for the default sampling values // wait the event to occur 2.2.1.1 When the actual motion is completed The motion complete condition is set in the following conditions: • • During position profiles execution, when the target position reference (computed by the reference generator, at each step) reaches the commanded position During a STOP3 command, when the target speed (computed by the reference generator) reaches zero By setting a motion complete event and waiting for its occurrence, you can start the next move after the actual profile generation is completed. Remark: One way to execute successive position profiles where each move waits the previous one to finish is to start the first move, and then program all the other moves with update on event (UPD!) where the selected event is: when the actual motion is completed. 2.2.1.2 Function of motor position The monitored events are: when the absolute or the relative actual (motor) position is equal or over/under a 32-bit long value or the value of a long variable. The comparison value is expressed in position units Remark: The motor relative position is defined as the motor displacement from the beginning of the actual movement. For example if a position profile was started with the absolute motor position 50000 counts, when the absolute motor position reaches 60000 counts, the relative motor position is 10000 counts. 2.2.1.3 Function of motor speed The monitored events are when the actual (motor) speed is equal or over/under a 32-bit fixed value or the value of a fixed variable. The comparison value is expressed in speed units 2.2.1.4 After a wait time The monitored event is when a 32-bit relative time counter is equal with a 32-bit long value or the value of a long variable. The comparison value is expressed in time units, i.e. in slow-loop sampling periods. When the wait time event is set, the 32-bit relative time counter is reset and restarts counting from zero. Remark: After setting a wait time event, in order to effectively execute the time delay, you need to wait for the event to occur, using for example the wait on event command WAIT! © Technosoft 2006 55 MotionChip II TML Programming It is also possible to set an event when a 32-bit absolute time counter is equal with a 32-bit long value or the value of a long variable. Like in the relative case, the comparison value is expressed in time units Remark: • • Both the relative and the absolute time counters are started ONLY after the execution of the ENDINIT (end of initialization) command. Therefore you should not set wait events or absolute time events before executing this command In the case of an absolute time event, be aware that the 32-bit absolute time counter rolls over when it reaches the maximum value of 232-1 2.2.1.5 Function of reference The monitored event is when TML variable TREF is equal or over/under with a 32-bit value or the value of a 32-bit variable. The TML variable TREF represents: • • • • The position reference, when position control is performed The speed reference, when speed control is performed The current/torque reference, when torque control is performed The voltage reference, when voltage control is performed Depending on the reference type selection, the comparison value is a: • • • • 32-bit long integer value for position reference, expressed in position units 32-bit fixed value for speed reference, expressed in speed units 32-bit long integer value where the current reference is in the 16MSB part and the 16LSB part is 0, where the 16MSB value is expressed in current units 32-bit long integer value where the voltage reference is in the 16MSB part and the 16LSB part is 0, where the 16 MSB value is expressed in voltage command units Remarks: • • Setting an event based on the position or speed reference is particularly useful for open loop operation where motor position and speed is not available It is the user responsibility to know in which mode the drive operates when this event is set and to set the comparison value accordingly. 2.2.1.6 Function of inputs status You can define events function of the following inputs status: • • • Capture inputs Limit switch inputs General purpose digital inputs © Technosoft 2006 56 MotionChip II TML Programming Capture inputs The MotionChip II has two capture inputs: IN#5/Z1/CAPI and IN#34/H2/Z2/2CAPI. These can be programmed to sense either a low to high or high to low transition. Typically, on the IN#5/Z1/CAPI input is connected the motor encoder index and on the IN#34/H2/Z2/2CAPI input is connected the master encoder index (when available) When the programmed transition occurs on IN#5/Z1/CAPI input, the actual (motor) position is captured and stored in a dedicated variable named CAPPOS. When the programmed transition occurs on IN#34/H2/Z2/2CAPI input, the master position APOS2 is captured and stored in a dedicated variable named CAPPOS2. When the position sensor is an incremental encoder, the captured position is very accurate as the whole process is done in less than 200 ns. The master position can be captured only in the following conditions: • The encoder signals from the master are connected to the 2nd encoder inputs • The drive is set as slave either in electronic gearing or electronic camming with the option to read the master position from 2nd encoder inputs In order to set an event on a capture input, you need to: 1) Enable the capture input for the detection of a low->high or a high-> low transition. The TML instructions for enabling the capture inputs are: • To enable detection of a high to low transition ENCAPI0; EN2CAPI0; • //Activate CAPI input to detect a falling transition //Activate 2CAPI input to detect a falling transition To enable detection of a low -> high transition ENCAPI1; EN2CAPI1; //Activate CAPI input to detect a rising transition //Activate 2CAPI input to detect a rising transition 2) Set a capture event, with the TML instruction: !CAP; 3) Wait for the event to occur, with the TML instruction: WAIT!; Remarks: • • If both capture inputs are activated in the same time, the capture event is set by the capture input that is triggered first. A capture input is automatically disabled, after the programmed transition was detected. In order to reuse a capture input, you need to enable it again. If you have a capture input enabled, and you want to disable it, before sensing the transition, use the following TML instructions: DISCAPI; DIS2CAPI; © Technosoft 2006 //Deactivate CAPI input. Set CAPI pin as digital input. //Deactivate 2CAPI input. Set 2CAPI pin as digital input. 57 MotionChip II TML Programming Limit switch inputs The MotionChip II has two limits switch inputs: IN#2/LSP and IN#24/LSN, first for the positive direction and the second for negative direction. Their goal is to protect against accidental moves outside the working area. Limit switches working mode is presented in detail par. 2.3.3 Like the capture inputs, the limit switch inputs can be programmed to sense either a low to high or high to low transition. When the programmed transition occurs, the actual (motor) position is captured and stored in the dedicated variable named CAPPOS. The position capture is done with a maximum delay of 5 μs. In many applications, in order to determine the working area, the initialization procedure requires to move the motor until one or both limit switches are reached. You can program events on both positive or negative limit switches to detect when then these have been reached. In order to set an event on a limit switch input, you need to: 1) Enable the limit switch input capability to detect a low->high or a high-> low transition. The TML instructions for enabling transition detection on the limit switch inputs are: • To enable detection of a high to low transition ENLSP0; ENLSN0; • //Activate LSP input capability to detect a falling transition //Activate LSN input capability to detect a falling transition To enable detection of a low -> high transition ENLSP1; ENLSN1; //Activate LSP input capability to detect a rising transition //Activate LSN input capability to detect a rising transition 2) Set a limit switch event, with the TML instructions: !LSP; !LSN; // set event when transition is detected on positive limit switch // set event when transition is detected on negative limit switch 3) Wait for the event to occur, with the TML instruction: WAIT!; Remarks: • • Both limit switch inputs can be set in the same time to detect transitions, as each input has its own event and TML interrupt A limit switch input capability to detect transitions is automatically disabled, after the programmed transition was detected. In order to reuse it, you need to enable it again. If you have a limit switch input enabled to detect transitions, and you want to disable this capability, before sensing the transition, use the following TML instructions: DISLSP; DISLSN; //Deactivate LSP input capability to detect transitions //Deactivate LSN input capability to detect transitions Remark: The main task of the limit switches is to protect against accidental moves outside the working area, by blocking moves in the wrong direction. For their main task, the limit switches are active on level, i.e. as long as a limit switch is activated, it will stop any move in the wrong © Technosoft 2006 58 MotionChip II TML Programming direction. This task is always performed, independently of the fact if the limit switch is enabled or not to detect transitions. General purpose digital inputs You can program an event on any general-purpose digital input. The event can be set when the input goes high (after a low to high transition) or low (after a high to low transition) In order to set an event when the digital input IN#n goes high, use: !IN#n 1; //set event when input #n goes high In order to set an event when the digital input IN#n goes low, use: !IN#n 0; //set event when input # goes low where number “n” is the input number. 2.2.1.7 Function of a variable value You can set an event function of the value of a selected variable. The selected variable for this event can be any 32-bit TML variable. The monitored events are: • When variable var_name is equal or over a 32-bit value or the value of variable !VU var_name, value; // set event when var_name is equal or under value !VU var_name, variable;//set event when var_name is equal or under variable • When variable var_name is equal or over a 32-bit value or the value of variable !VO var_name, value; // set event when var_name is equal or over value !VO var_name, variable;//set event when var_name is equal or over variable 2.2.2 GOTO, CALL The TML offers the possibility to make unconditional or conditional jumps to a specific label and also unconditional or conditional calls of TML subroutines/functions. The conditional instructions test the value of a variable for the following conditions: < 0, <= 0, >0, >=0, =0, |= 0. The GOTO or CALL is executed only if the test condition is true. In all the cases, the jump location is defined via a label. A label can be any user-defined string of up to 32 characters, which starts from the first column of a text line and ends with a colon (:). A label contains the TML program address of the next TML instruction. In the case of the CALL instructions, the label name represents the TML subroutine called. This is because, in TML a subroutine or function is defined as follows: TML_subroutine_name: // Label with subroutine name. This is the subroutine start point ... // TML instructions. The subroutine body RET; // Return from subroutine. Subroutine exit point © Technosoft 2006 59 MotionChip II TML Programming Programming Examples GOTO GOTO GOTO GOTO CALL CALL CALL CALL label1, var1, LT; label2, var1, LEQ; label3, var1, GT; label4; fct1, var2, GEQ; fct1, var2, EQ; fct1, var2, NEQ; fct1; // // // // // // // // jump to label1 if var1 < 0 jump to label2 if var1 <= 0 jump to label3 if var1 > 0 unconditional jump to label4 call function fct1, if var2 >= 0 call function fct1, if var2 = 0 call function fct1, if var2 != 0 unconditional call of function fct1 fct1: ... ... RET; Remarks: • • • • All labels mentioned in the GOTO or CALL instructions must exist i.e. must be defined somewhere in the TML program The variable tested in the conditional GOTO and CALL can be of any type, 16 or 32-bit When you call a TML subroutine, the return address pointed by the IP (instruction pointer) is saved into the TML stack. When RET is executed, the IP is set with the last value from the TML stack, hence the TML program execution continues with the next instruction after the CALL. The TML stack dimension is 12 words. Each CALL and TML interrupt uses one word of the TML stack. The body of the TML subroutines, must be placed outside the main TML program i.e. after the END instruction (see Figure 1.1) 2.2.3 Interrupts The TML interrupts offer the possibility of selecting up to 12 interrupt conditions that can be monitored in the same time. Unlike the events, where the programmed event is expected to occur and is waited for, the TML interrupts’ main goal is to provide a way of reacting to unexpected events as are most of the conditions in Table 2.12 The TML interrupt mechanism is the following: • • • • • Conditions that may generate TML interrupts are continuously monitored When an interrupt condition occurs, a flag (bit) is set in the Interrupt status register (ISR) If the interrupt condition is enabled i.e. the same bit (as position) is set in the Interrupt control register (ICR) and also if the interrupts are globally enabled (EINT instruction was executed), the interrupt condition is qualified and it generates an interrupt The interrupt causes a jump to the associated interrupt service routine. On entry in this routine, the TML interrupts are globally disabled (DINT) and the interrupt flag is reset The interrupt service routine ends with the TML instruction RETI, which returns to normal program execution and in the same time globally enables the TML interrupts (EINT) The interrupt service routines (ISR) of the TML interrupts are similar with the TML subroutines: the starting point is a label and the ending point is the TML instruction RETI (return from interrupt). The use of the TML interrupts requires defining an interrupt table. This starts with a © Technosoft 2006 60 MotionChip II TML Programming label whose value must be assigned in the dedicated TML variable INITABLE, and then is followed by the values of the labels (i.e. the starting points) of all the ISR. Like the TML functions, the TML interrupt service routines must be positioned after the end of the main program (see the programming example below). Table 2.12. TML Interrupt Conditions TML Interrupt No. 0 1 2 3 4 5 6 7 8 9 10 11 Condition Description When ENABLE input changes. Both transitions are monitored When power-stage hardware protection is triggered When at least one software-monitored protection: over-current, I2t, over temperature motor, over temperature drive, over-voltage or under-voltage is triggered When control error protection is triggered i.e. the difference between the target reference and actual feedback value goes over a programmed limit When a communication error occurs When 32-bit actual (motor) position wraps-around When positive limit switch input (LSP) has detected a programmed transition When negative limit switch input (LSN) has detected a programmed transition When a capture input (CAPI or 2CAPI) has detected a programmed transition When motion is completed When a new contour segment can be provided When a programmed event has occurred Remarks: 1. By default, during the execution of the ISR, the TML interrupts are disabled. If you want to enable in this period some of the TML interrupts, set accordingly the interrupt mask in the ICR register and insert the EINT instruction that enables globally the interrupts 2. The interrupt conditions set the flags in the ISR register independently of the fact that the interrupts are disabled or enabled. If an interrupt flag is set while the interrupt is disabled, the flag remains set. If later on, the interrupt is enabled, due to the flag set by a previous condition, a TML interrupt is generated. In order to avoid this situation, before enabling an interrupt, it is recommended to reset the corresponding interrupt flag. 3. Use only the TML instruction SRB to set/reset bits in the interrupt control (ICR) and the interrupt status (ISR) registers. TML command SRB provides a safe mechanism which avoids errors when data of these registers is simultaneously modified by the user and internally due to a change in a monitored condition Related TML Parameters INITABLE Must be initialized with the start address of the interrupt table Related TML Instructions EINT Globally enables the TML interrupts. Sets ICR.15 = 1 DINT Globally disables the TML interrupts. Sets ICR.15 = 0 SRB ICR, ANDm, ORm Individually enable/disable TML interrupts, by setting/resetting bits from ICR register according with AND mask ANDm and OR mask ORm SRB ISR, ANDm, 0; Reset interrupt flags in the ISR register according with AND mask ANDm © Technosoft 2006 61 MotionChip II TML Programming Return from a TML interrupt service routine RETI Programming Example BEGIN; // TML program start ... INTTABLE = InterruptTable; // set interrupt table start address SRB ICR, 4095, 4; // unmask INT2 Software Protection ... ENDINIT; // end of initialization ... EINT; // globally enable the TML interrupts ... END; // end of the main section InterruptTable: // start of the interrupt table @Int0_Axis_disable_ISR; @Int1_PDPINT_ISR; @Int2_Software_Protection_ISR; @Int3_Control_Error_ISR; @Int4_Communication_Error_ISR; @Int5_Wrap_Around_ISR; @Int6_Limit_Switch_Positive_ISR; @Int7_Limit_Switch_Negative_ISR; @Int8_Capture_ISR; @Int9_Motion_Complete_ISR; @Int10_Update_Contour_Segment_ISR; @Int11_Event_Reach_ISR; Int0_Axis_disable_ISR: // Int0_Axis_disable_ISR body ... RETI; // RETurn from TML ISR ... Int2_Software_Protection_ISR;: // Int11_Event_Reach_ISR body AXISOFF; // set axis OFF if a protection is triggered RETI; // RETurn from TML ISR ... Int11_Event_Reach_ISR: // Int11_Event_Reach_ISR body ... RETI; // RETurn from TML ISR © Technosoft 2006 62 MotionChip II TML Programming 2.3 2.3.1 I/O Programming General I/O The MotionChip II has a total of 40 pins that can be set as I/O lines. These pins are numbered from #0 to #39. All of them share the I/O function with an alternate function like: PWM output command, receive and transmit for serial and CAN-bus communication, encoder inputs, etc. Most of the 40 pins are set by default for the alternate functions and cannot be used as generalpurpose I/O. Some of the remaining I/O lines are used for special functions like the Enable input and the Ready or Error output. Finally only 8 I/O lines remain available and may be used as general-purpose I/O. By default 4 are set as general-purpose inputs and the other 4 as generalpurpose outputs. The 4 general-purpose inputs are: #36, #37, #38 and #39. You can read their status with the TML command: // read input #n in the user variable user_var user_var = IN#n; where user_var is a 16-bit integer user defined variable and n is the input number: 36 to 39. If the input is low (0 logic), user_var is set to 0, else user_var is set to a non-zero value. Programming Example user_var = IN#36; // read input #36 in user_var GOTO label1, user_var, NEQ; // go to label1 if input #36 is high (1 logic) user_var = IN#39; // read input #39 in user_var GOTO label2, user_var, EQ; // go to label2 if input #39 is low (0 logic) The 4 general-purpose outputs are: #28, #29, #30, #31. You can set them high (1 logic) or low (0 logic) with the following commands: ROUT#n; SOUT#n; // Set low the output line #n // Set high the output line #n where n is the output number: 28-31. You can also read simultaneously the 4 general-purpose inputs and set simultaneously the 4 general-purpose outputs, with the TML instructions: user_var = INPORT, 0xF; OUTPORT user_var; // user_var (bits 3-0) = status of IN#39, 38, 37, 36 // OUT#28,29,30,31 = user_var (bits 3-0) In the first TML instruction, the status of the 4 inputs is saved in the 4LSB of the 16-bit user variable, while the 12MSB are set to 0. If an input line is low, the corresponding bit in the user variable is zero. If an input line is high, the corresponding bit in the user variable is one. The correspondence with the input lines is the following: IN#36 -> bit 0, IN#37 -> bit 1, IN#38 -> bit 2, IN#39 -> bit 3 of the user variable In the second TML instruction, you can set the 4 outputs according with the 4LSB from the user variable. The 12MSB of the user variable must be set to zero. If a bit in the user variable is zero, the corresponding output line is set low. If a bit in the user variable is one, the corresponding output line is set high. The correspondence with the output lines is the following: © Technosoft 2006 63 MotionChip II TML Programming User variable Bit 0 -> OUT#28, bit 1 -> OUT#29, bit 2 -> OUT#30, bit 3 -> OUT#31 Remark: When reading inputs or setting outputs keep in mind that the I/O status refers to the MotionChip II pin. If your drive has either the inputs or outputs inverted, you must reverse the logic levels presented above. For example, if the general-purpose outputs are inverted, the OUTPORT command with the 4LSB bits at zero, sets the 4 output lines high. The command SOUT#n will set low the output line #n and the command ROUT#n, will set the same output high. If you application require more inputs or more outputs you have the possibility to change some of the general-purpose outputs into inputs and vice versa, using the following commands: SETIO#n OUT; SETIO#n IN; //Set the I/O line #n as an input //Set the I/O line #n as an output where n is the I/O number. Remark: An I/O line status change must be done only after carefully checking if your drive was designed to support it. You can further extend the number of I/O in some special situations, by enabling the I/O function for some pins set by default with the alternate function. For example if your drive was designed to control only DC motors and uses just 4 PWM output commands, the remaining PWM output commands may be transformed into general-purpose I/O. This can be done with the command: ENIO#n; // Enable the use of pin #n as an I/O line The reverse is also possible i.e. to disable the I/O function and activate the alternate function DISIO#n; // Disable the use of pin #n as an I/O line Remark: Enabling or disabling I/O lines must be done only after carefully checking if your drive was designed to support it 2.3.2 Captures The MotionChip II has two capture inputs: IN#5/Z1/CAPI and IN#34/H2/Z2/2CAPI. These can be programmed to sense either a low to high or high to low transition. Typically, on the IN#5/Z1/CAPI input is connected the motor encoder index and on the IN#34/H2/Z2/2CAPI input is connected the master encoder index (when available) When the programmed transition occurs on IN#5/Z1/CAPI input, the actual (motor) position is captured and stored in a dedicated variable named CAPPOS. When the programmed transition occurs on IN#34/H2/Z2/2CAPI input, the master position APOS2 is captured and stored in a dedicated variable named CAPPOS2. When the position sensor is an incremental encoder, the captured position is very accurate as the whole process is done in less than 200 ns. The master position can be captured only in the following conditions: • The encoder signals from the master are connected to the 2nd encoder inputs • The drive is set as slave either in electronic gearing or electronic camming with the option to read the master position from 2nd encoder inputs You can set either an event or a TML interrupt on a capture input. In both cases you need to: © Technosoft 2006 64 MotionChip II TML Programming 1) Enable the capture input for the detection of a low->high or a high-> low transition. The TML instructions for enabling the capture inputs are: • To enable detection of a high to low transition ENCAPI0; EN2CAPI0; • 2) //Activate CAPI input to detect a falling transition //Activate 2CAPI input to detect a falling transition To enable detection of a low -> high transition ENCAPI1; //Activate CAPI input to detect a rising transition EN2CAPI1; //Activate 2CAPI input to detect a rising transition Set: • A capture event with !CAP, then wait until the event occurs with WAIT!;, or • Enable the TML capture interrupt with SRB ICR 0xFFFF,0x100; which sets ICR.8 =1. Remarks: • • If both capture inputs are activated in the same time, the capture event and the TML capture interrupt flag is set by the capture input that is triggered first. A capture input is automatically disabled, after the programmed transition was detected. In order to reuse a capture input, you need to enable it again. If you have a capture input enabled, and you want to disable it, before sensing the transition, use the following TML instructions: DISCAPI; DIS2CAPI; 2.3.3 //Deactivate CAPI input. Set CAPI pin as digital input. //Deactivate 2CAPI input. Set 2CAPI pin as digital input. Limit switches The MotionChip II has two limits switch inputs: IN#2/LSP and IN#24/LSN, first for the positive direction and the second for negative direction. Their goal is to protect against accidental moves outside the working area. The limit switch inputs are active on level, more exactly when the input level is high. When a limit switch input is active, it stops the motor when it attempts to move towards the protected direction but allows the motor to move in the opposite direction. Therefore, with the positive limit switch active, movement is possible only in the negative direction; with the negative limit switch active, movement is possible only in the positive direction. Like the capture inputs, the limit switch inputs can be programmed to sense either a low to high or high to low transition. When the programmed transition occurs, the actual (motor) position is captured and stored in the dedicated variable named CAPPOS. The position capture is done with a maximum delay of 5 μs. In many applications, in order to determine the working area, the initialization procedure requires to move the motor until one or both limit switches are reached. You can set for each limit switch input, either an event or a TML interrupt to detect when it has been reached. In order to set an event or a TML interrupt on a limit switch input, you need to: © Technosoft 2006 65 MotionChip II TML Programming 1) Enable the limit switch input capability to detect a low->high or a high-> low transition. The TML instructions for enabling transition detection on the limit switch inputs are: • To enable detection of a high to low transition ENLSP0; ENLSN0; • //Activate LSP input capability to detect a falling transition //Activate LSN input capability yo detect a falling transition To enable detection of a low -> high transition ENLSP1; ENLSN1; //Activate LSP input capability to detect a rising transition //Activate LSN input capability to detect a rising transition 2) Set • A limit switch event, with the TML instructions: !LSP or !LSN, then wait until the event occurs with WAIT!;, or • Enable LSP or LSN TML interrupt with SRB ICR 0xFFFF,0x40; which sets ICR.6 =1 or with SRB ICR 0xFFFF,0x80; which sets ICR.7 =1 Remarks: • • Both limit switch inputs can be set in the same time to detect transitions, as each input has its own event and TML interrupt A limit switch input capability to detect transitions is automatically disabled, after the programmed transition was detected. In order to reuse it, you need to enable it again. If you have a limit switch input enabled to detect transitions, and you want to disable this capability, before sensing the transition, use the following TML instructions: DISLSP; DISLSN; //Deactivate LSP input capability to detect transitions //Deactivate LSN input capability to detect transitions Remarks: • • The main task of the limit switches i.e. to protect against accidental moves outside the working area is performed, independently of the fact if the limit switches are enabled or not to detect transitions You can disable the limit switches by executing the following TML code, once at the beginning of the TML program: user_var = 0x0832; (user_var),dm = 1; // Set variable user_var with value 0x0832 // Write 1 at data memory address 0x0832 Following this command, the active levels on limit switch inputs will no longer block the movement in the wrong direction. The capability to detect transitions remains unchanged • You can read the status of the limit switches inputs like any other general purpose inputs using the TML instructions: var = IN#2; var = IN#24; © Technosoft 2006 // read status of the positive limit switch input // read status of the negative limit switch input 66 MotionChip II TML Programming 2.4 2.4.1 Assignment & Data Transfer Setup 16-bit variable The TML instructions presented in this paragraph help you to program assignment operations involving the transfer of a 16-bit value from a source to a 16-bit destination. The source can be: • A 16-bit immediate value • A 16-bit TML data: TML register, parameter, variable or user variable (direct or negate) • The high or low part of a 32-bit TML data: TML parameter, variable or user variable • A memory location indicated through a pointer variable The destination can be: • A 16-bit TML data: TML register, TML parameter or user variable • A memory location indicated through a pointer variable Programming Examples 1) Source: 16-bit immediate value, Destination: 16-bit TML data. The immediate value can be decimal or hexadecimal user_var = 100; user_var = 0x100; // set user variable user_var with value 100 // set user variable user_var with value 0x100 (256) 2) Source: 16-bit TML data, Destination: 16-bit TML data. var_dest = var_source; // copy value of var_source in var_dest var_dest = -var_source;// copy negate value of var_source in var_dest 3) Source: high or low part of a 32-bit TML data, Destination: 16-bit TML data. The 32-bit TML data can be either long or fixed int_var = long_var(L); int_var = fixed_var(H); // copy low part of long_var in int_var // copy high part of fixed_var in int_var 4) Source: a memory location indicated through a pointer variable, Destination: 16-bit TML data. The memory location can be of 3 types: SRAM data memory (dm), SRAM memory for TML programs (pm), EEPROM SPI-connected memory for TML programs (spi). If the pointer variable is followed by a + sign, after the assignment, the pointer variable is incremented by 1 p_var = 0x4500; // set 0x4500 in pointer variable p_var var1 = (p_var),spi; // var1 = value of the EEPROM memory location 0x4500 var1 = (p_var+),spi; // var1 = value of the EEPROM memory location 0x4500 // p_var = 0x4501 p_var = 0x8200; // set 0x8200 in pointer variable p_var var1 = (p_var),pm; // var1 = value of the SRAM program memory location 0x8200 var1 = (p_var+),pm; // var1 = value of the SRAM program memory location 0x8200 // p_var = 0x8201 p_var = 0xA00; // set 0xA00 in pointer variable p_var © Technosoft 2006 67 MotionChip II TML Programming var1 = (p_var),dm; // var1 = value of the SRAM data memory location 0xA00 var1 = (p_var+),dm; // var1 = value of the SRAM data memory location 0xA00 // p_var = 0xA01 Remark: Check the memory map (par. 1.8 ) for the valid address ranges of the 3 memory types: EEPROM memory for TML programs, SRAM memory for TML programs, SRAM data memory. 5) Source: 16-bit immediate value (decimal or hexadecimal) or 16-bit TML data. Destination: a memory location indicated through a pointer variable. The memory location can be of 3 types: SRAM data memory (dm), SRAM memory for TML programs (pm), EEPROM SPI-connected memory for TML programs (spi). If the pointer variable is followed by a + sign, after the assignment, the pointer variable is incremented by 1 p_var = 0x4500; // set 0x4500 in pointer variable p_var (p_var),spi = -5; // write value –5 in the EEPROM memory location 0x4500 (p_var+),spi = var1; // write var1 value in the EEPROM memory location 0x4500 // p_var = 0x4501 p_var = 0x8200; // set 0x8200 in pointer variable p_var (p_var),pm = 0x10; // write value 0x10 in SRAM program memory location 0x8200 (p_var+),pm = var1; // write var1 value in SRAM program memory location 0x8200 // p_var = 0x8201 p_var = 0xA00; // set 0xA00 in pointer variable p_var (p_var),dm = 50; // write value 50 in the SRAM data memory location 0xA00 (p_var+),dm = var1; // write var1 value in the SRAM data memory location 0xA00 // p_var = 0xA01 Remark: When the source is either an immediate value or another TML data and the destination is a TML data, the destination address must be between 0x200 and 0x3FF. This happens for most of the TML data, including all the user-defined variables, which take addresses between 0x3B0 to 0x3FF. There are however a limited number of TML parameters and variables having an extended address situated between 0x800 and 0x9FF. For these TML data, you should use either indirect addressing via a pointer variable, or the following commands that support extended addressing: int_var,dm = 100; // write 100 in int_var using extended addressing int_var,dm = 0x100; // with 0x100(256) in int_var using extended addressing var_dest,dm = var_source; // copy value of var_source in var_dest using // extended addressing 2.4.2 Setup 32-bit variable The TML instructions presented in this paragraph help you to program assignment operations involving the transfer of a 16 or 32-bit value from a source to a 32-bit destination. The source can be: • A 32-bit immediate value © Technosoft 2006 68 MotionChip II TML Programming • • A 32-bit TML data: TML parameter, variable or user variable (direct or negate) A 16-bit immediate value or a 16-bit TML data: TML register, parameter, variable or user variable to be set in the high or low part of the destination: a 32-bit TML data • A 16-bit TML data: TML register, parameter, variable or user variable left shifted by 0 to 16 • A memory location indicated through a pointer variable The destination can be: • A 32-bit TML data: TML parameter or user variable • A memory location indicated through a pointer variable Programming Examples 1) Source: 32-bit immediate value, Destination: 32-bit TML data. The immediate value can be decimal or hexadecimal. The destination can be either a long or a fixed variable long_var = 100000; long_var = 0x100000; fixed_var = 1.5; fixed_var = 0x14000; // set user variable long_var with value 100000 // set user variable long_var with value 0x100000 // set user variable fixed_var with value 1.5 (0x18000) // set user variable fixed_var with value 1.25 (0x14000) 2) Source: 32-bit TML data, Destination: 32-bit TML data. var_dest = var_source; // copy value of var_source in var_dest var_dest = -var_source;// copy negate value of var_source in var_dest Remark: source and destination must be of the same type i.e. both long or both fixed 3) Source: 16-bit immediate value (decimal or hexadecimal) or 16-bit TML data, Destination: high or low part of a 32-bit TML data. The 32-bit TML data can be either long or fixed long_var(L) = -1; fixed_var(H) = 0x2000; long_var(L) = int_var; fixed_var(H) = int_var; // write value –1 (0xFFFF) into low part of long_var // write value 0x2000 into high part of fixed_var // copy int_var into low part of long_var // copy int_var into high part of fixed_var 4) Source: 16-bit TML data left shifted 0 to 16. Destination: 32-bit TML data. The 32-bit TML data can be either long or fixed long_var = int_var << 0; // copy int_var left shifted by 0 into long_var fixed_var(H) = int_var << 16;// copy int_var left shifted by 16 fixed_var Remarks: • • The left shift operation is done with sign extension. If you intend to copy the value of an integer TML data into a long TML data preserving the sign use this operation with left shift 0 If you intend to copy the value of a 16-bit unsigned data into a 32-bit long variable, assign the 16-bit data in low part of the long variable and set the high part with zero. Examples: var = 0xFFFF; // As integer, var = 1, as unsigned integer var = 65535 lvar = var << 0; // lvar = -1 (0xFFFFFFFF), the 16MSB of lvar are all set to 1 the © Technosoft 2006 69 MotionChip II TML Programming lvar(L) = var; lvar(H) = 0; // sign bit of var // lvar(L) = 0xFFFF // lvar(H) = 0. lvar = 65535 (0x0000FFFF) 5) Source: a memory location indicated through a pointer variable, Destination: 32-bit TML data. The memory location can be of 3 types: SRAM data memory (dm), SRAM memory for TML programs (pm), EEPROM SPI-connected memory for TML programs (spi). If the pointer variable is followed by a + sign, after the assignment, the pointer variable is incremented by 2. The destination can be either a long or a fixed TML data p_var = 0x4500; // set 0x4500 in pointer variable p_var var1 = (p_var),spi; // var1 = value of the EEPROM memory location 0x4500 var1 = (p_var+),spi; // var1 = value of the EEPROM memory location 0x4500 // p_var = 0x4502 p_var = 0x8200; // set 0x8200 in pointer variable p_var var1 = (p_var),pm; // var1 = value of the SRAM program memory location 0x8200 var1 = (p_var+),pm; // var1 = value of the SRAM program memory location 0x8200 // p_var = 0x8202 p_var = 0xA00; // set 0xA00 in pointer variable p_var var1 = (p_var),dm; // var1 = value of the SRAM data memory location 0xA00 var1 = (p_var+),dm; // var1 = value of the SRAM data memory location 0xA00 // p_var = 0xA02 Remark: Check the memory map (par. 1.8) for the valid address ranges of the 3 memory types: EEPROM memory for TML programs, SRAM memory for TML programs, SRAM data memory. 6) Source: 32-bit immediate value (decimal or hexadecimal) or a 32-bit TML data. Destination: a memory location indicated through a pointer variable. The memory location can be of 3 types: SRAM data memory (dm), SRAM memory for TML programs (pm), EEPROM SPI-connected memory for TML programs (spi). If the pointer variable is followed by a + sign, after the assignment, the pointer variable is incremented by 2 p_var = 0x4500; // set 0x4500 in pointer variable p_var (p_var),spi = 200000; // write 200000 in the EEPROM memory location 0x4500 (p_var+),spi = var1; // write var1 value in the EEPROM memory location 0x4500 // p_var = 0x4502 p_var = 0x8200; // set 0x8200 in pointer variable p_var (p_var),pm = 3.5; // write value 3.5 in SRAM program memory location 0x8200 (p_var+),pm = var1; // write var1 value in SRAM program memory location 0x8200 // p_var = 0x8202 p_var = 0xA00; // set 0xA00 in pointer variable p_var (p_var),dm = -1L; // write –1 (0xFFFFFFFF) in the SRAM data memory 0xA00 (p_var+),dm = var1; // write var1 value in the SRAM data memory location 0xA00 // p_var = 0xA02 When this operation is performed having as source an immediate value, the TML compiler checks the type and the dimension of the immediate value and based on this generates the binary code for a 16-bit or a 32-bit data transfer. Therefore if the immediate value has a decimal point, it is © Technosoft 2006 70 MotionChip II TML Programming automatically considered as a fixed value. If the immediate value is outside the 16-bit integer range (-32768 to +32767), it is automatically considered as a long value. However, if the immediate value is inside the integer range, in order to execute a 32-bit data transfer it is necessary to add the suffix L after the value, for example: 200L or –1L. Examples: user_var = 0x29E; // write CPOS address in pointer variable user_var (user_var),dm = 1000000; // write 1000000 (0xF4240) in the CPOS parameter i.e // 0x4240 at address 0x29E and 0xF at next address 0x29F (user_var+),dm = -1;// write -1 (0xFFFF) in CPOS(L). CPOS(H) remains unchanged // CPOS value is (0xFFFFF) i.e. 1048575, user_var is // incremented by 1 user_var = 0x29E; // write again CPOS address in pointer variable user_var (user_var+),dm = -1L;// write –1L long value (0xFFFFFFFF) in CPOS i.e. // CPOS(L) = 0xFFFF and CPOS(H) = 0xFFFF, user_var is // incremented by 2 user_var = 0x2A0; // write CSPD address in pointer variable user_var (user_var),dm = 1.5; // write 1.5 (0x18000) in the CSPD parameter i.e // 0x8000 at address 0x2A0 and 0x1 at next address 0x2A1 Remark: When the source is either an immediate value or another TML data and the destination is a TML data, the destination address must be between 0x200 and 0x3FF. This happens for most of the TML data, including all the user-defined variables, which take addresses between 0x3B0 to 0x3FF. There are however a limited number of TML parameters and variables having an extended address situated between 0x800 and 0x9FF. For these TML data, you should use either indirect addressing via a pointer variable, or the following commands that support extended addressing: long_var,dm = 100000; // write 100000 in long_var using extended addressing long_var,dm = 0x100000;// with 0x100000 in TMLparam using extended addressing var_dest,dm = var_source; // copy value of var_source in var_dest using // extended addressing © Technosoft 2006 71 MotionChip II TML Programming 2.5 Arithmetic & Logic Operations The TML offers the possibility to perform the following operations with the TML data: • • • • • Addition Subtraction Multiplication Left and right shift Logic AND and OR In all the cases, except the multiplication, the result of the operation is saved into the left side operand. For the multiplication, the result is saved in a dedicated 48-bit register named PROD. For all the operations, except the logic AND and OR, the left side operand can be any 16 or 32-bit TML data. The logic AND and OR are performed only with 16-bit data. Addition: The right-side operand is added to the left-side operand The left side operand can be: • • A 16-bit TML data: TML parameter or user variable A 32-bit TML data: TML parameter or user variable The right side operand can be: • • • • A 16-bit immediate value A 16-bit TML data: TML parameter, variable or user variable A 32-bit immediate value, if the left side operand is a 32-bit TML data A 32-bit TML data: TML parameter, variable or user variable, if the left side operand is a 32-bit data too Programming Examples int_var += 10; // int_var1 = int_var1 + 10 int_var += int_var2; // int_var = int_var + int_var2 long_var += -100; // long_var = long_var + (-100) = long_var – 100 long_var += long_var2; // long_var = long_var + long_var2 fixed_var += 10.; // fixed_var = fixed_var + 10.0 fixed_var += fixed_var2; // fixed_var = fixed_var + fixed_var2 Subtraction: The right-side operand is subtracted from the left-side operand The left side operand can be: • • A 16-bit TML data: TML parameter or user variable A 32-bit TML data: TML parameter or user variable The right side operand can be: • • • A 16-bit immediate value A 16-bit TML data: TML parameter, variable or user variable A 32-bit immediate value, if the left side operand is a 32-bit TML data © Technosoft 2006 72 MotionChip II TML Programming • A 32-bit TML data: TML parameter, variable or user variable, if the left side operand is a 32-bit data too Programming Examples int_var -= 10; // int_var1 = int_var1 - 10 int_var -= int_var2; // int_var = int_var - int_var2 long_var -= -100; // long_var = long_var - (-100) = long_var + 100 long_var -= long_var2; // long_var = long_var - long_var2 fixed_var -= 10.; // fixed_var = fixed_var - 10.0 fixed_var -= fixed_var2; // fixed_var = fixed_var - fixed_var2 Multiplication: The 2 operands are multiplied and the result is saved in a dedicated 48-bit register named PROD. The result of the multiplication can be left or right-shifted with 0 to 15 bits, before being stored in the PROD register. At right shifts, high order bits are sign-extended and the low order bits are lost. At left shifts, high order bits are lost and the low order bits are zeroed. The result is preserved in the PROD register until the next multiplication. The first (left) operand can be: • • A 16-bit TML data: TML parameter, variable or user variable A 32-bit TML data: TML parameter, variable or user variable The second (right) operand can be: • • A 16-bit immediate value A 16-bit TML data: TML parameter, variable or user variable Programming Examples long_var * -200 << 0; fixed_var * 10 << 5; int_var1 * int_var2 >> 1; long_var * int_var >> 2; long_var = PROD; long_var = PROD(H); // PROD = long_var * (-200) // PROD = fixed_var * 10 * 25 i.e. fixed_var *320 // PROD = (int_var1 * int_var2) / 2 // PROD = (long_var * int_var) / 4 // save 32LSB of PROD in long_var // save 32MSB of PROD in long_var i.e. bits 47-15 Left and right shift: The operand is left or right shifted with 0 to 15. The result is saved in the same operand. At right shifts, high order bits are sign-extended and the low order bits are lost. At left shifts, high order bits are lost and the low order bits are zeroed. The right shift is performed with sign-extension. The operand can be: • • • A 16-bit TML data: TML parameter, variable or user variable A 32-bit TML data: TML parameter, variable or user variable The 48-bit PROD register with the result of the last multiplication © Technosoft 2006 73 MotionChip II TML Programming Programming Examples long_var << 3; int_var = -16; int_var >> 3; PROD << 1; // // // // long_var = long_var * 8 int_var = -16 (0xFFF0) int_var = int_var / 8 = -2 (0xFFFE) PROD = PROD * 2 Logic AND and OR: A logic AND is performed between the operand and a 16-bit data (the AND mask), followed by a logic OR between the result and another 16-bit data (the OR mask). The operand is a 16-bit TML data: TML register, TML parameter or user variable The AND and OR masks are 16-bit immediate values, decimal or hexadecimal. Programming Examples int_var = 13; SRB int_var, 0xFFFE, 0x2; // int_var = 13 (0xD) // set int_var bit 0 = 0 and bit 1 = 1 // int_var = 12 (0xC) The SRB instruction modifies the TML data in specific conditions that avoid the interference with changes done in parallel by the MotionChip II firmware. This is particularly useful for the TML registers, which have bits that can be manipulated both at firmware level and at TML level by the user. A typical example is the interrupt flag register (IFR) where the interrupt flags set and reset by both the firmware and the user. The SRB instruction allows you to set/reset bits in a “safe” way without the risk of altering the settings done in parallel by the firmware. Remark: In the SRB instruction, the address of the operand must be between 0x200 and 0x3FF. This happens for most of the TML data, including all the user-defined variables, which take addresses between 0x3B0 to 0x3FF. There are however a limited number of TML parameters and variables having an extended address situated between 0x800 and 0x9FF. For these TML data, you should use the SRBL instruction, for setting and resetting bits: SRBL TMLvar, 0xFFFE, 0x2; © Technosoft 2006 // set bit 0 = 0 and bit 1 = 1 in TMLvar with // extended address 74 MotionChip II TML Programming 2.6 Multi-axis control This group of instructions includes: • • Data transfer operations between drives connected in a network Remote control commands through which a drive which acts like a host, effectively controls one or more drives operation 2.6.1 Axis ID. Group ID In multiple-axis configurations, each axis (drive) needs to be identified through a unique number – the axis ID. This is a number between 1 and 255. The axis ID is initially set at power on by reading the MotionChip II analogue input lines ADCIN10 to ADCIN14, as follows: • • Axis ID = 255 if all the analogue inputs ADCIN10 to ADCIN14 are high; Axis ID = 1 to 31, if at least one of the ADCIN10 to ADCIN14 inputs is low. The axis ID value depends on the analogue inputs combination (see Table 3.1) Later on, you can change the axis ID to any of the 255 possible values, using the TML instruction AXISID, followed by an integer value between 1 and 255. Apart from the Axis ID, each drive has also a group ID. The group ID represents a way to identify a group of drives, for a multicast transmission. Each drive can be programmed to be member of one or several of the 8 possible groups. When a TML command is sent to a group, all the axes members of this group, will receive the command. For example, if the drive is member of group 1 and group 3, he will receive all the messages that in the group ID include group 1 and group 3. This feature allows a host to send a command simultaneously to several axes, for example to start or stop the axes motion in the same time. The group ID is like the axis ID an 8-bit value. A TML command can be sent to 8 different groups. Each group is defined as having one of the 8 bits of the group ID value set to 1 (see Table 3.2) The group ID of an axis can have any value between 0 and 255. If for example the group ID is 11 (1011b) this means that the axis will receive all messages sent to groups 1, 2 and 4. You can set a drive to be member of one group using the TML instruction GROUPID, followed by an integer value between 1 and 8. You can add/remove an axis to group using the TML instructions ADDGRID / REMGRID followed by an integer value between 1 and 8. Remark: By default all the drives are set as members of group 1. 2.6.2 Data transfers between axes There are 2 categories of data transfer operations between axes: 1. Read data from a remote axis. A variable or a memory location from the remote axis is saved into a local variable 2. Write data to a remote axis. A variable or a memory location of a remote axis or group of axes is written with the value of a local variable In a read data from a remote axis operation: © Technosoft 2006 75 MotionChip II TML Programming • The source is placed on a remote axis and can be: • A 16-bit TML data: TML register, parameter, variable or user variable A memory location indicated through a pointer variable The destination is placed on the local axis and can be: A 16-bit TML data: TML register, parameter or user variable Programming Examples 1) Source: remote 16-bit TML data, Destination: local 16-bit TML data. local_var = [2]remote_var; // set local_var with value of remote_var from axis 2 Remark: If remote_var is a user variable, it has to be declared in the local axis too. Moreover, for correct operation, remote_var must have the same address in both axes, which means that it must be declared on each axis on the same position. Typically, when working with data transfers between axes, it is advisable to establish a block of user variables that may be the source, destination or pointer of data transfers, and to declare these data on all the axes as the first user variables. This way you can be sure that these variables have the same address on all the axes. 2) Source: remote memory location pointed by a remote pointer variable, Destination: 16-bit TML data. The remote memory location can be of 3 types: SRAM data memory (dm), SRAM memory for TML programs (pm), EEPROM SPI-connected memory for TML programs (spi). If the pointer variable is followed by a + sign, after the assignment, the pointer variable is incremented by 1 if the destination is a 16-bit integer or by 2 if the destination is a 32-bit long or fixed local_var = [2](p_var),spi; // local_var = value of EEPROM program memory // location from axis 2, pointed by p_var from axis 2 long_var = [3](p_var+),dm; // local long_var = value of SRAM data memory // locations from axis 3, pointed by p_var from axis 3 // p_var is incremented by 2 int_var = [4](p_var+),pm; // local int_var = value of SRAM program memory // location from axis 4, pointed by p_var from axis 4; // p_var is incremented by 1 Remark: When the remote source is a TML data, its address must be between 0x200 and 0x3FF. This happens for most of the TML data, including all the user-defined variables, which take addresses between 0x3B0 to 0x3FF. There are however a limited number of TML parameters and variables having an extended address situated between 0x800 and 0x9FF. For these TML data, you should use either indirect addressing via a pointer variable, or the following command that supports extended addressing: // set local_var with value of remote_var // from axis 2 using extended addressing local_var = [2]remote_var,dm; In a write data to a remote axis or group of axes operation: • The source is placed on the local drive and can be: A 16-bit TML data: TML register, parameter, variable or user variable © Technosoft 2006 76 MotionChip II TML Programming • The destination is placed on the remote axis or group of axes and can be: A 16-bit TML data: TML register, parameter or user variable A memory location indicated through a pointer variable Programming Examples 1) Source: local 16-bit TML data, Destination: remote 16-bit TML data. [2]remote_var = local_var; // set remote_var from axis 2 with local_var value [G2]remote_var = local_var; // set remote_var from group 2 with local_var value 2) Source: 16-bit TML data, Destination: remote memory location pointed by a remote pointer variable. The remote memory location can be of 3 types: SRAM data memory (dm), SRAM memory for TML programs (pm), EEPROM SPI-connected memory for TML programs (spi). If the pointer variable is followed by a + sign, after the assignment, the pointer variable is incremented by 1 if the source is a 16-bit integer or by 2 if the source is a 32-bit long or fixed [2](p_var),spi = local_var; // set local_var value in EEPROM program memory // location from axis 2, pointed by p_var from axis 2 [G3](p_var+),dm = long_var; // set local long_var value in SRAM data memory // location from group 3 of axes, each location being // pointed its own p_var, which is incremented by 2 [4](p_var+),pm = int_var; // set local int_var value in SRAM program memory // location from axis 4, pointed by p_var from axis 4; // p_var is incremented by 1 Remark: When the remote destination is a TML data, its address must be between 0x200 and 0x3FF. This happens for most of the TML data, including all the user-defined variables, which take addresses between 0x3B0 to 0x3FF. There are however a limited number of TML parameters and variables having an extended address situated between 0x800 and 0x9FF. For these TML data, you should use either indirect addressing via a pointer variable, or the following command that supports extended addressing: [G2]remote_var,dm = local_var; // set remote_var from group 2 with // local_var value, using extended addressing 2.6.3 Remote control The TML includes 2 powerful instructions through which you can program a drive to issue TML commands to another drive or group of drives. You can include these instructions in the TML program of a drive, which can act like a host and can effectively control the operation of the other drives from the network. These TML instructions are: [axis]{TML command;}; [group]{TML command;}; where TML command can be any single axis TML instructions whose instruction code can be represented in maximum 4 words (1 operation code + 3 data words). A single axis TML instruction is defined as an instruction which does not transfer data or send TML commands to other axes i.e. it is not one of the TML instructions presented in this paragraph. © Technosoft 2006 77 MotionChip II TML Programming Remark: Most of the TML instructions, enter in the category of those that can be sent to another axis or group of axes. Programming Examples [G1]{CPOS=2000;}; [G1]{UPD}; [5]{STOP3;}; 2.7 // send a new CPOS command to all axes from group 1 // send an UPDate command to all the axes from group 1 // all axes from group 1 will start to move simultaneously // send an STOP3 command to axis 5 Miscellaneous commands In this category enter the following TML instructions: NOP; // No operation BEGIN; // first instruction in the main section of a TML program. END; // marks the end of a TML program SCIBR value; // change RS-232/RS-485 baudrate. Value specifies the new baudrate as // follows: 0 – 9600, 1 – 19200, 2 – 38400, 3 – 56000, 4 – 115200 SPIBR value; // change SPI baudrate with the EEPROM. Value specifies the new // baudrate as: 0 for 1 MHz, 2 for 2MHz, 3 for 5MHz CANBR value; // change CANbus baudrate Value specifies the new baudrates as: // 0xF36C for 125 kHz, 0x736C for 250 kHz, 0x3273 for 500 kHz, // 0x412A for 800 kHz and 0x1273 for 1MHz CHECKSUM, dm start, stop, user_var; // compute the sum modulo 65535 of // SRAM data memory locations from addresses start to stop CHECKSUM, pm start, stop, user_var; // compute the sum modulo 65535 of // SRAM TML program memory locations from addresses start to stop CHECKSUM, spi start, stop, user_var; // compute the sum modulo 65535 of // EEPROM TML program memory locations from addresses start to stop Remarks: 1. It is mandatory to end the main section of a TML program with an END command. This stops the execution of the TML program resident in the memory. All ML subroutines and interrupt service routines should be added after the END command. IPM Motion Studio automatically handles these requirements when it generates the TML program to compile and download into the drive. 2. The END commands is also useful when you intend to change the TML program from the EEPROM of a drive set in AUTORUN mode (i.e. which starts to execute automatically after reset the TML program from the EEPROM memory) you should do the following: • Send to the drive the command END, to stop the current program execution. In order to disable the power stage, send also an AXISOFF command • Download the new program • Reset the drive. The new program will start to execute 3. When a drive is set in AUTORUN mode, it checks the first EEPROM memory location at address 0x4000 to contain the binary code of the TML instruction BEGIN. If this is true, the drive continues to execute the next TML instructions from the EEPROM, otherwise it © Technosoft 2006 78 MotionChip II TML Programming puts the drive in a wait. Therefore, for correct operation in AUTORUN mode, it is important to have the TML program downloaded in EEPROM starting with first address 0x4000 and having the first TML instruction BEGIN. 2.8 Internal units and scaling factors This paragraph describes the MotionChip II internal units (IU) and their correspondence with the international standard units (SI). The values you set in the TML parameters must be always in internal units. As the TML parameters may represent various signals: position, speed, current, voltage, etc. in order to correctly identify each category of internal units, these have been named after their category. For example the position units are the internal units for position, the speed units are the internal units for speed, etc. Position units In the TML environment the internal position units (IU) are encoder counts. The correspondence with the international standard (SI) units is: Position[rad] = 2×π ⋅ Position[i.u.] 4 × No _ encoder _ lines where: No_encoder_lines – is the number of encoder lines per revolution Speed units In TML environment the internal speed units (IU) are encoder counts/slow loop sampling period i.e. the position variation over one position/speed loop sampling period The correspondence with the international standard (SI) units is: Speed[rad / s] = 2×π ⋅ Speed[i.u.] 4 × No _ encoder _ lines × Ts _ S where: No_encoder_lines – is the number of encoder lines per revolution Ts_S – is the slow loop sampling period [s] Acceleration units In TML environment the internal acceleration units (IU) are encoder counts/slow loop sampling^2 The correspondence with the international standard (SI) units is: Acceleration[rad / s^2] = 2× π ⋅ Acceleration[i.u.] 4 × No _ encoder _ lines × Ts _ S^2 where: No_encoder_lines – is the number of encoder lines per revolution © Technosoft 2006 79 MotionChip II TML Programming Ts_S – is the speed loop sampling period [s] Current units The correspondence with the international standard (SI) units is: Current[ A ] = 2 Im axPS ⋅ Current[i.u.] 65472 where: ImaxPS – is the power stage peak current i.e. the maximum measurable current [A] Typically, a motor phase current is measured through transducers that provide a voltage proportional with the current value. This is connected to a MotionChip II analogue input. The currents are both positive and negative, therefore the current transducer output is offset by half in order to get zero current at half A/D input scale. The power stage peak current is the current corresponding to half of the maximum value for the analogue input i.e. half of 3.3V. After A/D conversion 3.3V is 65472. Voltage command units The significance of the voltage commands as well as the scaling factors, depend on the motor technology and the control method used. For a brushed DC motor the voltage command is the voltage to apply between the motor phases. For a brushless DC motor (BLDC) i.e. a brushless motor with trapezoidal control (more exactly with commutation on Hall sensors causing trapezoidal BEMF), the voltage command is the voltage to apply between 2 of the 3 motor phases. These are the 2 phases that are supplied at one moment. For a brushless AC motor (PMSM) i.e. a brushless motor with sinusoidal control (field oriented vector control generating sinusoidal currents and voltages), the voltage commands are the amplitude of the sinusoidal phase voltages. For the brushed DC and brushless DC motors, the correspondence with the international standard (SI) units is: Voltage command [ V ] = Vdc ⋅ Voltage command [i.u.] 32767 where: Vdc – is the rated DC-link/supply voltage [V] In MotionChip II, the output voltage of each inverter is leg is set via a command in the range (32767, + 32767). The minimum value means that that lower transistor is all the time ON and upped one is OFF, hence the inverter output voltage is 0. The maximum value means that the upper transistor is all the time ON and the lower one is OFF, hence the inverter output voltage is equal with the DC link/supply voltage (minus a slight voltage drop). © Technosoft 2006 80 MotionChip II TML Programming In the case of a brushed DC or brushless DC motor, a voltage command for of let’s say 16384 (half of positive scale), means that on one leg the command is +16384 and on the other leg it is negated that is –16384. This means that one motor leg is connected to a potential of ¾ of the DC link/supply voltage, while the other motor leg is connected to ¼ of the DC-link/supply voltage. The difference i.e. the motor voltage is half of the inverter supply. For the brushless AC motor, the correspondence with the international standard (SI) units is: Voltage command [ V ] = 1.1 × Vdc ⋅ Voltage command [i.u.] 65534 In the case of a brushless AC motor, the voltage commands are sinusoidal with mid point and amplitude equal with ½ of the DC-link/supply voltage. The 1.1 factor comes from a MotionChip II advanced PWM control technique which add another 10% on the voltages applied on the motor DC-link/supply voltage units The correspondence with the international standard (SI) units for DC-link/supply voltage is: Voltage [ V ] = VdcMaxMeas urable ⋅ Voltage[i.u.] 65472 where: VdcMaxMeasurable – is the maximum measurable DC-link/supply voltage [V] Typically, the DC-link/supply voltage is measured through a voltage divisor connected to an analogue input of the MotionChip II. The maximum measurable DC-link/supply voltage is the DClink/supply voltage that corresponds to the MotionChip II maximum value for the analogue input i.e. 3.3V, which after A/D conversion is 65472. Time units In TML environment the internal time units (IU) are expressed in slow loop sampling periods. The correspondence with the international standard (SI) units is: Time[s] = Ts _ S ⋅ Time[i.u.] where: Ts_S – is the speed loop sampling period For example, if Ts_S is 1ms, one second is 1000 in internal time units. Current increment units The correspondence with the international standard (SI) units for current increment is: Current Increment[A/s] = 2ImaxPS ⋅ Current Increment[i.u.] 65472 × Ts_S where: ImaxPS – is the power stage maximum current [A] Ts_S – is the speed loop sampling period [s] © Technosoft 2006 81 MotionChip II TML Programming Voltage (command) increment units Like in the case of the voltage command units, the correspondence with the international standard (SI) units of the voltage increment units depends on the on the motor technology and the control method used. For the brushed DC and brushless DC motors, the correspondence with the international standard (SI) units is: Voltage I ncrement[ V / s] = Vdc 32767 × Ts _ S Voltage Increment[i.u.] For the brushless AC motor, the correspondence with the international standard (SI) units is: Voltage increment [ V / s] = 1.1 × Vdc 65534 × Ts _ S Voltage increment [i.u.] where: Vdc – is the DC-link/supply voltage [V] Ts_S – is the speed loop sampling period [s] Electrical angle units The correspondence with the international standard (SI) units is: Electrical angle[rad] = π 32768 Electrical angle[i.u.] The electrical angle is the mechanical angle divided by the number of pole pairs. For example when a brushless motor with 2 pairs does half of revolution (i.e. 180 mechanical degrees) this corresponds to 360 electrical degrees Electrical angle increment units The correspondence with the international standard (SI) units is: Motor speed [rad / s] = π 32767 × Ts _ C × pp Electrical angle increment[i.u.] where: pp – is the number of pair poles Ts_C – is the current loop sampling period [s] Temperature units The correspondence with the international standard (SI) units is: Temperature [°C] = 3.3V TempSensorGain[ V / o C] × 65472 (Temperature [i.u.] - TempOffset[i.u.]) where: TemperatureSensorGain – expresses the sensor output voltage variation when the temperature modifies with one degree Celsius. © Technosoft 2006 82 MotionChip II TML Programming TempOffset – is the temperature sensor voltage output at 0°C expressed in internal units [V] TempOutput At0oC[ V ] = 3 .3 ⋅ TempOffset [i.u.] 65472 Master Position units When the master position is sent via a communication channel, the master position units depend on the type of position sensor present on the master axis. When the master position is an encoder the correspondence with the international standard (SI) units is: Master _ position[rad] = 2× π 4 × No _ encoder _ lines Master _ position[i.u.] where: No_encoder_lines – is the master number of encoder lines per revolution Master Speed units The master speed is computed in internal units (IU) as master position units /slow loop sampling period i.e. the master position variation over one position/speed loop sampling period. When the master position is an encoder, the correspondence with the international standard (SI) units is: Master _ speed[rad / s] = 2×π 4 × No _ encoder _ lines × Ts _ S Master _ speed[i.u.] where: No_encoder_lines – is the master number of encoder lines per revolution Ts_S – is the slave slow loop sampling period [s] © Technosoft 2006 83 MotionChip II TML Programming 3. Communication Channels and Protocols 3.1 Communication channels Rx PC or Host RS-232 transceiver Gnd Tx SCIRx SCITx MCII Drive The Motion Chip II accepts two types of communication channels: • Serial RS-232 or RS-485 • CAN-bus The serial RS-232 communication channel can be used to connect a host with a single MotionChip II based drive (see Figure 3.1). The serial RS-485 and the CAN-bus communication channels can be used to create a distributed control network with a host and up to 255 MotionChip II based drives (see Figure 3.2 and Figure 3.3). When CAN-bus communication is used, any MotionChip II based drive from the network may also be connected through RS-232 with a host (see Figure 3.4). In this structure, the axis connected to the host, apart from executing the commands received from host or other axes acts also as a retransmission relay which: • Receives through RS-232, commands from host for another axis and retransmits them to the destination through CAN-bus • Receives through CAN-bus data requested by host from another axis and retransmits them to the host through RS-232 This flexibility enables a host to program and monitor a CAN-bus network using only one RS-232 connection, without the need to have a CAN-bus interface. In this case the CAN-bus protocol is completely transparent for the host. Figure 3.1. Serial RS-232 communication between a host and the MotionChip II N MCII Drive MCII Drive MCII Drive 2 SCITx SCIRx Host IO#17/485TxEn 1 RS485 transceiver RS485 transceiver RS485 transceiver 485A (R+=T+) 485B (R-=T-) Figure 3.2. Multi-drop network using serial RS-485 communication © Technosoft 2006 85 MotionChip II TML Programming MCII Drive MCII Drive N CANTx CANRx Host 2 MCII Drive 1 CAN transceiver CAN transceiver CAN transceiver CAN LO CAN HI Figure 3.3. Multi-drop network using CAN-bus communication MCII Drive SCITx N CANTX RS232 transceiver 2 MCII Drive MCII Drive 1 SCIRx CANRX PC or Host Rx Gnd Tx CAN transceiver CAN transceiver CAN transceiver CAN LO CAN HI Figure 3.4.Multi-drop network using CAN-bus communication with host connected through RS-232 to an axis used as communication relay 3.2 3.2.1 Communication protocols Axis Identification in a Multiple-axis Network In multiple-axis configurations, each axis (drive) needs to be identified through a unique number – the axis ID. This is a number between 1 and 255. The axis ID is initially set at power on by reading the MotionChip II analogue input lines ADCIN10 to ADCIN14, as follows: • • Axis ID = 255 if all the analogue inputs ADCIN10 to ADCIN14 are high; Axis ID = 1 to 31, if at least one of the ADCIN10 to ADCIN14 inputs is low. The axis ID value depends on the analogue inputs combination (see Table 3.1) © Technosoft 2006 86 MotionChip II TML Programming Later on, you can change the axis ID to any of the 255 possible values, using the TML instruction AXISID, followed by an integer value between 1 and 255. Table 3.1 Axis ID values ADCIN10 HIGH HIGH HIGH HIGH HIGH HIGH HIGH HIGH HIGH HIGH HIGH HIGH HIGH HIGH HIGH HIGH LOW LOW LOW LOW LOW LOW LOW LOW LOW LOW LOW LOW LOW LOW LOW LOW ADCIN11 HIGH HIGH HIGH HIGH HIGH HIGH HIGH HIGH LOW LOW LOW LOW LOW LOW LOW LOW HIGH HIGH HIGH HIGH HIGH HIGH HIGH HIGH LOW LOW LOW LOW LOW LOW LOW LOW ADCIN12 HIGH HIGH HIGH LOW LOW LOW LOW LOW HIGH HIGH HIGH HIGH LOW LOW LOW LOW HIGH HIGH HIGH HIGH LOW LOW LOW LOW HIGH HIGH HIGH HIGH LOW LOW LOW LOW ADCIN13 HIGH HIGH LOW HIGH HIGH HIGH LOW LOW HIGH HIGH LOW LOW HIGH HIGH LOW LOW HIGH HIGH LOW LOW HIGH HIGH LOW LOW HIGH HIGH LOW LOW HIGH HIGH LOW LOW ADCIN14 HIGH LOW HIGH LOW HIGH LOW HIGH LOW HIGH LOW HIGH LOW HIGH LOW HIGH LOW HIGH LOW HIGH LOW HIGH LOW HIGH LOW HIGH LOW HIGH LOW HIGH LOW HIGH LOW AXISID 255 1 2 3 4 5 6 7 8 9 10 11 12 13 14 15 16 17 18 19 20 21 22 23 24 25 26 27 28 29 30 31 Apart from the Axis ID, each drive has also a group ID. The group ID represents a way to identify a group of drives, for a multicast transmission. Each drive can be programmed to be member of one or several of the 8 possible groups. When a TML command is sent to a group, all the axes members of this group, will receive the command. For example, if the drive is member of group 1 and group 3, he will receive all the messages that in the group ID include group 1 and group 3. This feature allows a host to send a command simultaneously to several axes, for example to start or stop the axes motion in the same time. The group ID is like the axis ID an 8-bit value. A TML command can be sent to 8 different groups. Each group is defined as having one of the 8 bits of the group ID value set to 1 (see Table 3.2) © Technosoft 2006 87 MotionChip II TML Programming Table 3.2. Definition of the groups Group No. 1 2 3 4 5 6 7 8 Group ID value 1 ( 0000 0001b ) 2 ( 0000 0010b ) 4 ( 0000 0100b ) 8 ( 0000 1000b ) 16 ( 0001 0000b ) 32 ( 0010 0000b ) 64 ( 0100 0000b ) 128 (1000 0000b ) The group ID of an axis can have any value between 0 and 255. If for example the group ID is 11 (1011b) this means that the axis will receive all messages sent to groups 1, 2 and 4. You can set a drive to be member of one group using the TML instruction GROUPID, followed by an integer value between 1 and 8. You can add/remove an axis to group using the TML instructions ADDGRID / REMGRID followed by an integer value between 1 and 8. Remark: By default all the drives are set as members of group 1. When a TML Instruction is send through the serial or CAN-bus channel, the message consists of the axis or group ID followed by the instruction code (see Figure 3.5.). . Axis/Group ID Operation Code Data (1) … Data (4) Figure 3.5. Message Structure In a serial or CAN message, the axis or group ID is 16-bit word with the following structure: 15 0 14 0 13 0 12 G 11 ID7 7 10 ID6 6 9 ID5 5 8 ID4 4 7 ID3 3 6 ID2 2 5 ID1 1 4 ID0 0 3 0 2 0 1 0 0 H Where: • Bit 0 – HOST bit. In a network configuration the HOST bit indicates the destination axis for messages received by the relay axis: 0 – relay axis, 1 – host. Messages received by the relay axis with HOST bit set to 1, will be retransmitted through RS-232 to the host. Messages received by the relay axis with HOST bit set to 0, will be interpreted as commands for this axis and will be executed. On RS-485, the host and the drives have different axis ID, the HOST bit has as no significance and must be set to 0. • Bits 11-8 – ID7-ID0: the 8-bit value of an axis or group ID • Bit 12 – GROUP bit: 0 – ID7-ID0 value is an axis ID, 1 – ID7-ID0 value is a group ID © Technosoft 2006 88 MotionChip II TML Programming 3.2.2 Serial communication protocol Serial settings and message packaging The RS-232/RS-485 serial communication is done using 8 data bits, 2 stop bits, no parity at the following baud rates: 9600 (default after reset), 19200, 38400, 56600 and 115200. The messages exchanged through serial communication are packed in the following format: Byte 1: Message length Byte 2: Axis/Group ID – high byte Byte 3: Axis/Group ID – low byte Byte 4: Operation code – high byte Byte 5: Operation code – low byte Byte 6: Data (1) – high byte Byte 7: Data (1) – low byte Byte 8: Data (2) – high byte … Byte13: Data (4) – low byte Last byte: Checksum Figure 3.6. Serial communication message format The message length byte contains the total number of bytes of the message minus 2. Put in other words, the length byte value is the number of bytes of the: axis/group ID (2bytes), the operation code (2 bytes) and the data words (variable from 0 to 8 bytes). The checksum byte is the sum modulo 256 of all the bytes of the message except the checksum byte itself. Message types on serial communication The serial communication protocol is based on two types of messages: • Type A: Messages that don’t require an answer (a return message). In this category enter for example the messages containing commands for parameter settings, commands that start or stop motion execution, etc. • Type B: Messages that require an answer. In this category enter the messages containing commands that ask to return data, for example the value of TML parameters, registers, or variables. The type B message has two components: • A request message sent through the TML command “Give Me Data”. • An answer message sent through the TML command “Take Data” The “Give Me Data” request message includes the following information: “Give Me Data” Message Contents Axis ID (destination axis) Operation Code: B004h for 16-bit data B005h for 32-bit data Data(1): Sender Axis ID Data(2): Requested Data Address © Technosoft 2006 89 MotionChip II TML Programming The “Take Data” answer message includes the following information: Axis ID (destination axis) Operation Code: B404h for 16-bit data B405h for 32-bit data Data(1): Sender Axis ID Data(2): Requested Data Address Data(3): Data Requested 16LSB Data(4): Data Requested 16MSB (for 32-bit data) Example 1: A host is connected to a drive via RS-232 and sends a type A message with the TML instruction “kpp = 5” (set proportional part of the position controller with value 5). The axis ID of host and of the drive are 255 = 0FFh. The TML instruction code is: Operation Code = 205Eh Data (1) = 0005h The serial message package must have the following contents: Byte 1: 06h – length: ID=2,Opcode=2,Data=2 Byte 2: 0Fh – high byte of ID = 0FF0h Byte 3: F0h – low byte of ID = 0FF0h Byte 4: 20h – high byte of OpCode = 205Eh Byte 5: 5Eh – low byte of OpCode = 205Eh Byte 6: 00h – high byte of Data(1) = 0005h Byte 7: 05h – low byte of Data(1) = 0005h) Byte 8: 88h – checksum Figure 3.7. Serial message contents when TML instruction “kpp = 5” is sent The host receives from the drive a byte 0x4F as confirmation that the message was received OK. Remarks: 1. If the host wants to sent the same TML instruction “kpp = 5” to another drive with axis ID=1, drive connected via CAN-bus with the drive having axis ID=255, the destination ID becomes 0010h instead of 0FF0h. Hence the modifications are: byte 2: 00h, byte 3: 10h, checksum byte adjusted accordingly ( 99h ). 2. If the host is connected via RS-485 with a drive, the two devices must have different axis ID values. For example if the host ID = 255 and the drive ID = 1, the message is the same as in the previous remark. Example 2: A host is connected to a drive via RS-232 and wants to get the value of the kpp parameter from the drive. The ID of host and drive are 255 = 0FFh. Let’s suppose that the kpp value returned by the drive is 288 (120h). The host has to send a “Give Me Data” TML command with the following instruction code: © Technosoft 2006 90 MotionChip II TML Programming Operation Code = B004h ( 16-bit value) Data(1) = 0FF1h (sender ID = destination ID + HOST bit set) Data(2) = 025Eh (kpp variable address) The” Take Data” answer will have the following instruction code: Operation Code = B404h ( 16-bit value) Data(1) = 0FF0h (sender ID) Data(2) = 025Eh (kpp variable address) Data(3) = 0120h (kpp variable value) The serial message send by the host with “Give Me Data” TML command must have the following contents: Byte 1: 08h – length ID=2,Opcode=2,Data=4 Byte 2: 0Fh – high byte of ID = 0FF0h Byte 3: F0h – low byte of ID = 0FF0h Byte 4: B0h – high byte of OpCode = B004h Byte 5: 04h – low byte of OpCode = B004h Byte 6: 0Fh – high byte of Data(1) = 0FF1h Byte 7: F1h – low byte of Data(1) = 0FF1h Byte 8: 02h – high byte of Data(2) = 025Eh Byte 9: 5Eh – low byte of Data(2) = 025Eh Byte 8: 1Bh – checksum Figure 3.8. Serial message contents for “Give Me Data” value of kpp The host receives from the drive a byte 0x4F as confirmation that the message was received OK. The serial message received by the host with “Take Data” TML command must have the following contents: Byte 1: 0Ah – length ID=2,Opcode=2,Data=6 Byte 2: 0Fh – high byte of ID = 0FF1h Byte 3: F1h – low byte of ID = 0FF1h Byte 4: B4h – high byte of OpCode = B404h Byte 5: 04h – low byte of OpCode = B404h Byte 6: 0Fh – high byte of Data(1) = 0FF0h Byte 7: F0h – low byte of Data(1) = 0FF0h Byte 8: 02h – high byte of Data(2) = 025Eh Byte 9: 5Eh – low byte of Data(2) = 025Eh Byte 10: 01h – high byte of Data(3) = 0120h Byte 11: 20h – low byte of Data(3) = 0120h Byte 12: 42h – checksum Figure 3.9. Serial message contents for “Take Data” value of kpp © Technosoft 2006 91 MotionChip II TML Programming Remarks: 1. If the host wants to get the value of the kpp parameter from another drive with axis ID=1, connected via CAN-bus with the drive having axis ID=255, the destination ID becomes 0010h in instead of 0FF0h in the “Give Me Data” message. “Take Data” message also will have 0010h in instead of 0FF0h as sender ID. Hence the modifications are: • “Give Me Data”: byte 2: 00h, byte 3: 10h, checksum byte adjusted accordingly; • “Take Data”: byte 6: 00h, byte 7: 10h, checksum byte adjusted accordingly; 2. If the host is connected via RS-485 with a drive, the 2 devices must have different axis ID values. For example if the host ID = 255 and the drive ID = 1, the modifications compared with the above examples are: • “Give Me Data”: byte 2: 00h, byte 3: 10h, byte 7: F0h (in sender ID the host bit = 0) and the checksum byte adjusted accordingly; • “Take Data”: byte 3: F0h, byte 6: 00h, byte 7: 10h and the checksum byte adjusted accordingly. RS-232 communication protocol The RS-232 protocol is full duplex, allowing simultaneous transmission in both directions. After each command (Type A or B) sent by the host, the drive will confirm the reception by sending one acknowledge-Ok byte. This byte is: ‘O’ (ASCII code of capital letter “o”, 0x4F). If the host receives the ‘O’ byte, this means that the drive has received correctly (checksum verification was passed) the last message sent, and now is ready to receive the next message. Remark: If the destination axis for the message is not the axis connected with the host via RS232 (e.g. the relay axis), but another axis connected with the relay axis via CAN-bus, the reception of the acknowledge-Ok byte from the relay axis doesn’t mean that the message was received by the destination axis, but just by the relay axis. Depending on the CAN-bus baud rate and the amount of traffic on this bus, the host may need to consider introducing a delay before sending the next message to an axis connected on the CAN-bus. This delay must provide the relay axis the time necessary to retransmit the message via CAN-bus. If any error occurs during the message reception, for example the checksum computed by the drive axis doesn’t match with the one sent by the host, the drive will not send the acknowledge-Ok byte. If the host doesn’t receive any acknowledge byte for at least 2ms after the end of the checksum byte transmission, this means that at some point during the last message transmission, one byte was lost and the synchronization between the host and the relay axis is gone. In order to restore the synchronization the host should do the following: 1. Send a SYNC byte having value 0x0D (higher values are also accepted) 2. Wait a programmed timeout (typically 2ms) period for an answer; 3. If the drive sends back the same SYNC byte, the synchronization is restored and the host can send again the last message, else go to step 1 Repeat steps 1 to 3 until the drive answers with a SYNC byte or until 15 SYNC bytes are sent. If after 15 SYNC bytes the drive still doesn’t answer, then there is a serious communication problem and the serial link must be checked. When a host sends a type A message through RS-232 it has to: • Send the message; • Wait the acknowledge-OK byte ‘O’ from the drive; © Technosoft 2006 92 MotionChip II TML Programming When a host sends a type B message through RS-232 it has to: • Send a message with “Give Me Data” command; • Wait the acknowledge-OK byte ‘O’ from the drive connected via RS-232 (relay axis); • Wait the response message from the drive to which the message is addressed. The answer contains the command “Take Data”. When the relay axis returns a “Take Data” message it doesn’t expect to receive an acknowledge byte from the host. It is the host task to monitor the communication. If the host gets the response message with a wrong checksum, it is the host duty to send again the “Give Me Data” request. RS-485 communication protocol The RS-485 protocol is half duplex. If two devices start by mistake to transmit in the same time, both transmissions are corrupted. Therefore for a correct operation, in an RS-485 network it is mandatory to have a master, which controls the transmission. This means that only the master can initiate a transmission, while all the other devices from the network may transmit only when the master asks them to provide some data. Usually you should set as master your host. After each command (Type A or B) sent by the host to one drive, the drive will confirm the reception by sending one acknowledge-Ok byte. This byte is: ‘O’ (ASCII code of capital letter “o”, 0x4F). If the host receives the ‘O’ byte, this means that the drive has received correctly (checksum verification was passed) the last message sent, and now is ready to receive the next message. The acknowledge-Ok byte is not sent when the host broadcasts a message to a group of drives. If any error occurs during the message reception, for example if the checksum computed by the drive axis doesn’t match with the one sent by the host, the drive will not send the acknowledge-Ok byte. If the host doesn’t receive any acknowledge byte for at least 2ms after the end of the checksum byte transmission, this means that at some point during the last message transmission, one byte was lost and the synchronization between the host and the relay axis is gone. In order to restore the synchronization the host should do the following: 1. Send a 15 SYNC byte having value 0x0D (higher values are also accepted) 2. Wait a programmed timeout (typically 2ms) period for an answer; 3. If the drive sends back the same SYNC byte, the synchronization is restored and the host can send again the last message, else go to step 1 If the drive still doesn’t answer, then there is a serious communication problem and the serial link must be checked When a host sends a type A message through RS-485 it has to: • Send the message; • Wait the acknowledge-OK byte ‘O’ from the drive, only if the message destination was a single drive; When a host sends a type B message through RS-485 it has to: • Send a message with “Give Me Data” command; • Wait the acknowledge-OK byte ‘O’ from the drive; • Wait the response message from the drive, which contains the command “Take Data”. Remark: it is not possible to send a “Give Me Data” command to a group of axes. © Technosoft 2006 93 MotionChip II TML Programming When the drive returns a “Take Data” message it doesn’t expect to receive an acknowledge byte from the host. It is the host task to monitor the communication. If the host gets the response message with a wrong checksum, it is the host duty to send again the “Give Me Data” request. 3.2.3 CAN-bus Communication Protocol CAN-bus communication settings and message packaging The Technosoft drives implements the CAN 2.0B protocol that uses 29 bits for the identifier. Below you can see how the information to be sent is packed in a CAN-bus message: CAN message identifier: 28 0 Operation Code (7MSB) Group bit Axis/Group ID 0 0 0 Host bit Operation code (9LSB) CAN message data bytes: CAN Message Data Byte No. 0 1 2 3 4 5 6 7 TML Data Word Data word (1) – low byte Data word (1) – high byte Data word (2) – low byte Data word (2) – high byte Data word (3) – low byte Data word (3) – high byte Data word (4) – low byte Data word (4) – high byte Figure 3.10. CAN message structure Where G is the group bit and H is the host bit. The CAN-bus communication offers the possibility to work on a semi-duplex network like in a fullduplex one. The CAN controller automatically solves the conflicts that occur while two axes try to transmit messages in the same time. In an RS-485 network, such an event usually corrupts both messages, while in a CAN-bus the higher priority message always wins. The lower priority message is automatically sent after the transmission of the first message ends. Hence, in a CANbus network, all the limitations mentioned for RS-485 are eliminated. Message types on CAN-bus communication The CAN-bus communication protocol is based on two types of messages: • • Type A: Messages that don’t require an answer (a return message). In this category enter for example the messages containing commands for parameter settings, commands that start or stop motion execution, etc. Type B: Messages that require an answer. In this category enter the messages containing commands that ask to return data, for example the value of TML parameters, registers, or variables. © Technosoft 2006 94 MotionChip II TML Programming The type B message has two components: • A request message sent through the TML command “Give Me Data”. • An answer message sent through the TML command “Take Data” The “Give Me Data” request message includes the following information: CAN Identifier: Operation Code and Axis ID (destination axis) Data word (1): Sender Axis ID Data word (2): Request Data Address The Operation Code for the “Give Me Data” request is B004h for 16-bit data and B005h for 32-bit data. The “Take Data” answer message includes the following information: CAN Identifier: Operation Code and Axis ID (destination axis) Data word (1): Sender Axis ID Data word (2): Request Data Address Data word (3): Data Requested 16 LSB Data word (4): Data Requested 16 MSB (for 32-bit data) The Operation Code for the “Take Data” request is B404h for 16-bit data and B405h for 32-bit data. Example 1: A host is directly connected on a CAN-bus network with Technosoft drives and wants to send to the drive with the axis ID=5 the TML instruction “kpp = 0x1234” (set proportional part of the position controller with value 1234 hexa). The code of the TML instruction is: Operation Code = 205Eh Data word (1) = 1234h The CAN Message Identifier have the following content: 28 Operation Code Group (7MSB of bit 205Eh) 0010000 0 Axis/Group ID 0 0 0 0 Host bit Operation code (9LSB of 205Eh) 00000101 0 0 0 0 001011110 0400A05Eh Consequently, the CAN message for “kpp = 0x1234” is: Identifier Byte 0 Byte 1 Value 0400A05E 34 12 Description CAN Message Identifier low byte of Data word (1) = 1234h high byte of Data word (1) = 1234h Figure 3.11. CAN message contents when TML instruction “kpp = 0x1234” is sent © Technosoft 2006 95 MotionChip II TML Programming Example 2: A host is directly connected on a CAN-bus network of Technosoft drives and wants to get the value of the position error from the drive with the axis ID=5. The host ID=3. The position error is a 16-bit TML variable named POSERR situated at the memory address 0x022A The code of the TML instruction for “Give Me Data” is: Operation Code = B004h Data word (1) = 0031h Data word (2) = 022Ah The CAN Message Identifier for request command “Give Me Data” have the following content: 28 0 Operation Code Group (7MSB of bit B004h) 1011000 0 Axis/Group ID 0 0 0 Host bit 00000101 0 0 0 0 Operation code (9LSB of B004h) 0 0 0 0 0 0 1 0 0 1600A004h Consequently, the CAN message for the TML instruction “?POSERR” (e.g. “Give Me Data of POSERR) is: Identifier Byte 0 Byte 1 Byte 2 Byte 3 Value 1600A004 31 00 2A 02 Description CAN Message Identifier low byte of Data word (1) = 0031h high byte of Data word (1) = 0031h low byte of Data word (2) = 022Ah high byte of Data word (2) = 022Ah Figure 3.12. CAN message contents when TML instruction “?POSERR” is sent Supposing that the position error value is 2, the code of the TML instruction ”Take Data” is: Operation Code = B404h Data word (1) = 0050h Data word (2) = 022Ah Data word (3) = 0002h The CAN message Identifier for command “Take Data” will have the following content: 28 0 Operation Code Group (7MSB of bit B004h) 1011010 0 © Technosoft 2006 Axis/Group ID 0 0 0 Host bit 00000011 0 0 0 1 96 Operation code (9LSB of B004h) 000000100 16806204h MotionChip II TML Programming Consequently, the CAN message for the answer to the “?POSERR” request is: Identifier Byte 0 Byte 1 Byte 2 Byte 3 Byte 4 Byte 5 Value 16806204 50 00 2A 02 02 00 Description CAN Message Identifier low byte of Data word (1) = 0050h high byte of Data word (1) = 0050h low byte of Data word (2) = 022Ah high byte of Data word (2) = 022Ah low byte of Data word (2) = 0002h high byte of Data word (2) = 0002h Figure 3.13. CAN message contents for “Take Data” value of POSERR Remark: A “Give Me Data” command can’t be sent to a group of axes. © Technosoft 2006 97 MotionChip II TML Programming This page is empty © Technosoft 2006 98 MotionChip II TML Programming 4. TML instruction set The chapter describes the complete set of TML instructions, grouped by functionality. In each group the instructions are ordered alphabetically, mnemonic, syntax and description are given for each instruction. TML instructions are divided in groups as follows: • Motion mode setting group (Table 4.1) • Event group (Table 4.2) • Program flow (decision) group (Table 4.3) • I/O group (Table 4.4) • Assignment group (Table 4.5) • Arithmetic and logic group (Table 4.6) • Configuration and command group (Table 4.7) • Multiple axis group (Table 4.8) • Miscellaneous group (Table 4.9). • On-line group (Table 4.10) Table 4.1. Motion mode setting group Mnemonic Syntax Description MODE MODE CS0 MODE CS1 MODE CS2 MODE CS3 MODE GS0 MODE GS1 MODE GS2 MODE GS3 MODE PC0 MODE PC1 MODE PC2 MODE PC3 MODE PE0 MODE PE1 MODE PE2 MODE PE3 MODE PP0 MODE PP1 MODE PP2 MODE PP3 Set MODE Cam Slave 0 () Set MODE Cam Slave 1 (T) Set MODE Cam Slave 2 (S) Set MODE Cam Slave 3 (S, T) Set MODE Gear Slave 0 ( ) Set MODE Gear Slave 1 (T) Set MODE Gear Slave 2 (S) Set MODE Gear Slave 3 (S,T) MODE Position Contouring 0 ( ) MODE Position Contouring 1 (T) MODE Position Contouring 2 (S) MODE Position Contouring 3 (S,T) MODE Position External 0 ( ) MODE Position External 1 (T) MODE Position External 2 (S) MODE Position External 3 (S,T) MODE Position Profile 0 ( ) MODE Position Profile 1 (T) MODE Position Profile 2 (S) MODE Position Profile 3 (S,T) © Technosoft 2006 99 MotionChip II TML Programming MODE PPD0 MODE PPD1 MODE PPD2 MODE PPD3 MODE SC0 MODE SC1 MODE SE0 MODE SE1 MODE SP0 MODE SP1 MODE SPD0 MODE SPD1 MODE TC MODE TEF MODE TES MODE TT MODE VC MODE VEF MODE VES MODE VT MODE Position Pulse & Dir 0 ( ) MODE Position Pulse & Dir 1 (T) MODE Position Pulse & Dir 2 (S) MODE Position Pulse & Dir 3 (S,T) MODE Speed Contouring 0 ( ) MODE Speed Contouring 1 (T) MODE Speed External 0 ( ) MODE Speed External 1 (T) MODE Speed Profile 0 ( ) MODE Speed Profile 1 (T) MODE Speed Pulse & Dir 0 ( ) MODE Speed Pulse & Dir 1 (T) MODE Torque Contouring MODE Torque External Fast loop MODE Torque External Slow loop MODE Torque Test MODE Voltage Contouring MODE Voltage External Fast loop MODE Voltage External Slow loop MODE Voltage Test Table 4.2. Event group Mnemonic Syntax Description !APO !APO V32 !APO val32 !APU V32 !APU val32 !AT V32 !AT val32 !CAP !IN#n 0 !IN#n 1 !LSN !LSP !MC !RO V32 !RO val32 !RPO V32 !RPO val32 !RPU V32 !RPU val32 ! if Relative Position Over V32 ! if Relative Position Over val32 ! if Relative Position Under V32 ! if Relative Position Under val32 ! if Absolute Time >= V32 ! if Absolute Time >= val32 ! if Capture triggered ! if Input #n is 0 ! if Input #n is 1 ! if Limit Switch Negative active ! if Limit Switch Positive active !(set event) if Motion Complete ! if Reference Over V32 ! if Reference Over val32 ! if Relative Position Over V32 ! if Relative Position Over val32 ! if Relative Position Under V32 ! if Relative Position Under val32 !APU !AT !CAP !IN !LSN !LSP !MC !RO !RPO !RPU © Technosoft 2006 100 MotionChip II TML Programming !RT !RU !SO !SU !VO !VU WAIT! !RT V32 !RT val32 !RU V32 !RU val32 !SO V32 !SO val32 !SU V32 !SU val32 !VO V32A, V32B !VO V32A, val32 !VU V32A, V32B !VU V32A, val32 WAIT! ! if Relative Time >= V32 ! if Relative Time >= val32 ! if Reference Under V32 ! if Reference Under val32 ! if Speed Over V32 ! if Speed Over val32 ! if Speed Under V32 ! if Speed Under val32 ! if V32A Over V32B ! if V32A Over val32 ! if V32A Under V32B ! if V32A Under val32 Wait until event occurs Table 4.3. Program flow (decision) group Mnemonic Syntax Description CALL CALL Label CALL Label, V16, Flag CALL Label, V32, Flag GOTO Label GOTO Label, V16, Flag GOTO Label, V32, Flag RET RETI Unconditional CALL of a function CALL function if V16 Flag 0 CALL function if V32 Flag 0 Unconditional GOTO to label GOTO label if V16 Flag 0 GOTO label if V32 Flag 0 Return from TML function Return from TML Interrupt Service Routine GOTO RET RETI Table 4.4. I/O group Mnemonic Syntax Description DIS2CAPI DISCAPI DISIO#n DISLSN DISLSP EN2CAPI0 EN2CAPI1 ENCAPI0 ENCAPI1 ENIO#n DIS2CAPI DISCAPI DISIO#n DISLSN DISLSP EN2CAPI0 EN2CAPI1 ENCAPI0 ENCAPI1 ENIO#n Disable 2nd CAPI capture input Disable CAPI capture input Disable IO#n Disable LSN limit switch Disable LSP limit switch Enable 2nd CAPI capture for 1->0 Enable 2nd CAPI capture for 0->1 Enable CAPI capture for 1->0 Enable CAPI capture for 0->1 Enable IO#n ENLSN0 ENLSN1 ENLSP0 ENLSN0 ENLSN1 ENLSP0 Enable LSN limit switch for 1->0 Enable LSN limit switch for 0->1 Enable LSP limit switch for 1->0 © Technosoft 2006 101 MotionChip II TML Programming ENLSP1 OUTPORT ROUT#n SETIO#n SOUT#n = ENLSP1 OUTPORT V16 ROUT#n SETIO#n IN SETIO#n OUT SOUT#n V16D = IN#n V16D = IN1/IN2,ANDm V16D = INPUT1, ANDm V16D = INPUT2, ANDm V16D = INPORT#n V16D = INPORT,ANDm Enable LSP limit switch for 0->1 Set OUT#28-31 with V16 value (4LSB) Reset IO#n output to 0 Set IO#n as input Set IO#n as output Set IO#n output to 1 Read input #n Read IN#4 to IN#11 with ANDm Read IN#25 to IN#32 with ANDm Read IN#33 to IN#39 with ANDm Read one input from IN#33 to 39 Read IN#36-39 in V16D (4LSB) Table 4.5. Assignment group Mnemonic Syntax Description = (V16D), TM = V16S (V16D), TM = V32S (V16D), TM = val16 (V16D), TM = val32 (V16D+), TM = V16S (V16D+), TM = V32S (V16D+), TM = val16 (V16D+), TM = val32 V16 = label V16 = val16 V16D = (V16S), TM V16D = (V16S+), TM V16D = V16S V16D = -V16S V16D = V32S(H) V16D = V32S(L) V16D, dm = V16S V16D, dm = val16 V32 = val32 V32(H) = val16 V32(L) = val16 V32D = (V16S), TM V32D = (V16S+), TM V32D = V32S V32D = -V32S V32D =V16S << N (V16D) from TM = V16S (V16D) from TM = V32S (V16D) from TM = val16 (V16D) from TM = val32 (V16D) from TM = V16S then V16D += 1 (V16D) from TM = V32S then V16D += 2 (V16D) from TM = val16 then V16D += 1 (V16D) from TM = val32 then V16D += 2 V16 = address of a TML label V16 = val16 V16D = (&V16S) from TM V16D = (&V16S) from TM then V16S += 1 V16D = V16S V16D = -V16S V16D = V32S(H) V16D = V32S(L) V16D from dm = V16S (la) V16 from dm = val16 (la) V32 = val32 V32(H) = val16 V32(H) = val16 V32D = (V16S) from TM V32D = (V16S) from TM then V16D += 2 V32D = V32S V32D = -V32S V32D = V16S left-shifted by N © Technosoft 2006 102 MotionChip II TML Programming V32D(H) = V16S V32D(L) = V16S V32D, dm = V32S V32D, dm = val32 V32D(H) = V16 V32D(L) = V16 V32D from dm = V32S (la) V32 from dm = val32 (la) Table 4.6. Arithmetic & Logic group Mnemonic Syntax Description += V16 += val16 V16D += V16S V32 += val32 V32D += V32S V16 -= val16 V16D -= V16S V32 -= val32 V32D -= V32S V16 * val16 << N V16 * val16 >> N V16A * V16B << N V16A * V16B >> N V32 * V16 << N V32 * V16 >> N V32 * val16 << N V32 * val16 >> N PROD <<= N V16 <<= N V32 <<= N PROD >>= N V16 >>= N V32 >>= N SRB V16,ANDm,ORm SRBL V16,ANDm,ORm Add val16 to V16 Add V16S to V16D Add val32 to V32 Add V32S to V32D Subtract val16 from V16 Subtract V16S from V16D Subtract val32 from V32 Subtract V32S from V32D PROD = (V16 * val16) >> N PROD = (V16 * val16) >> N PROD = (V16A * V16B) << N PROD = (V16A * V16B) >> N PROD = (V32 * V16) << N PROD = (V32 * V16) >> N PROD = (V32 * val16) << N PROD = (V32 * val16) >> N Left shift PROD by N Left shift V16 by N Left shift V32 by N Right shift PROD by N Right shift V16 by N Right shift V32 by N Set / Reset Bits of a V16 Set / Reset Bits of a V16 (la) -= * <<= >>= SRB Table 4.7. Configuration and Command group Mnemonic Syntax Description AXISOFF AXISON CPA CPR DINT EINT AXISOFF AXISON CPA CPR DINT EINT AXIS is OFF (deactivate control) AXIS is ON (activate control) Command Position is Absolute Command Position is Relative Disable TML Interrupts Enable TML Interrupts © Technosoft 2006 103 MotionChip II TML Programming ENDINIT EXTREF RAOU RESET RGM SAOU SAP SEG SGM STA STOP0 STOP0! STOP1 STOP1! STOP2 STOP2! STOP3 STOP3! TUM0 TUM1 UPD UPD! ENDINIT EXTREF 0 EXTREF 1 EXTREF 2 RAOU RESET RGM SAOU SAP V32 SAP val32 SEG D_time, D_ref SEG V16, V32 SGM STA STOP0 STOP0! STOP1 STOP1! STOP2 STOP2! STOP3 STOP3! TUM0 TUM1 UPD UPD! END of Initialization External Reference read from variable EREF updated on-line External Reference read from REFERENCE input External Reference read from second encoder input Reset Automatic Origin Update RESET DSP controller Reset axis as Gear/Cam Master Set Automatic Origin Update Set Actual Position = V32 Set Actual Position = val32 Segment D_time, D_ref Segment V16, V32 Set axis as Gear/Cam Master Set Target position = Actual position STOP motion in mode 0 STOP0 when ! (event occurs) STOP motion in mode 1 STOP1 when ! (event occurs) STOP motion in mode 2 STOP2 when ! (event occurs) STOP motion in mode 3 STOP3 when ! (event occurs) Set Target Update Mode 0 Set Target Update Mode 1 Update motion immediate Update when ! (event occurs) Table 4.8. Communication & Multiple axis group Mnemonic Syntax Description = [A/G] { Instr1; Instr2; …} [A/G] (V16D),TM = V16S [A/G] (V16D),TM = V32S [A/G] (V16D+),TM = V16S [A/G] (V16D+),TM = V32S [A/G] V16D = V16S [A/G] V16D,dm = V16S [A/G] V32D = V32S [A/G] V32D,dm = V32S V16D = [A] (V16S),TM V16D = [A] (V16S+),TM V16D = [A] V16S Send a series of TML instructions to [A/G] [A/G] (V16D),TM = local V16S [A/G] (V16D),TM = local V32S [A/G] (V16D),TM = local V16S then V16D += 1 [A/G] (V16D),TM = local V32S then V16D += 2 [A/G] V16D = local V16S [A/G] V16D,dm = local V16S (la) [A/G] V32D = local V32S [A/G] V32D,dm= local V32S (la) Local V16D = [A] (V16S), dm Local V16D = [A] (V16S), dm then V16S += 1 Local V16D = [A] V16S © Technosoft 2006 104 MotionChip II TML Programming ADDGRID AXISID CANBR GROUPID REMGRID V16D = [A] V16S,dm V32D = [A] V32S,dm V32D = [A] (V16S),TM V32D = [A] (V16S+),TM V32D = [A] V32S ADDGRID V16 ADDGRID val16 AXISID val16 AXISID V16 CANBR val16 GROUPID val16 REMGRID V16 REMGRID val16 Local V16D = [A] V16S, dm (la) Local V32D = [A] V32S, dm (la) Local V32D = [A] (V16S),TM Local V32D = [A] (V16S),TM then V16S += 2 Local V32D = [A] V32S Add Group ID = V16 Add Group ID = val16 AXIS ID = val16 AXIS ID = V16 Set CAN-bus Baud-Rate GROUP ID = val16 Remove Group ID = V16 Remove Group ID = val16 Table 4.9. Miscellaneous group Mnemonic Syntax BEGIN BEGIN BEGIN of a TML program CHECKSUM, TM Start, Stop, V16D=Checksum between Start and Stop addresses from TM V16D Copy CAM table from SPI (addrS address) to RAM (addrD INITCAM addrS, addrD address) END END of a TML program NOP No Operation SCIBR V16 Set SCI Baud Rate SCIBR val16 Set SCI Baud Rate SPIBR V16 Set SPI Baud Rate SPIBR val16 Set SPI Baud Rate CHECKSUM INITCAM END NOP SCIBR SPIBR Description Table 4.10 On line group Mnemonic Syntax Description ? ?V16 ?V32 GiveMeData - 16-bit from SRAM data memory GiveMeData - 32-bit from SRAM data memory GiveMeData - 16-bit from SRAM program memory GiveMaData - 32-bit from SRAM program memory GiveMeData - 16-bit from EEPROM program memory GiveMeData - 32-bit from EEPROM program memory TakeData requested with GiveMeData - 16-bit data TakeData requested with GiveMeData - 32-bit data Get a 16-bit TML data (address range 200-3FFh) Get a 32-bit TML data (address range 200-3FFh) Take the 16-bit TML data requested with Get a 16-bit TML Take the 32-bit TML data requested with Get a 32-bit TML © Technosoft 2006 105 MotionChip II TML Programming Take a 32-bit TML data (address range 200-3FFh) Get version Answer to Get version 4.1 TML instruction set description This paragraph presents for each TML instruction: mnemonic, arguments, binary code and programming examples. TML instructions are ordered alphabetically. Instructions descriptions may contain specific symbols. Their significance is presented in Table 4.11. The information is grouped as follows: • instruction name • syntax • operands • type • binary code • description • execution • example Table 4.11 TML Instructions Code Symbols Symbols Description &Label Address of TML program label &V16 Address of a 16-bit integer variable &V32 Address of a 32-bit long or fixed variable (V16) Memory location at address equal with V16 value (la) Long addressing. Source/destination operand provided with 16-bit address. Some TML instructions using 9-bit short addressing are doubled with their long addressing equivalent 9LSB(&V16) The 9 LSB (less significant bits) of the address of a 16-bit integer 9LSB(&V32) The 9 LSB (less significant bits) of the address of a 32-bit long or fixed A Axis ID A/G Axis ID or Group ID ANDdis 16-bit AND mask. See Table MCRx & AND/OR masks for DISIO#n and Table MCRx & PxDIR addresses ANDen 16-bit AND mask. See Table MCRx & AND/OR masks for ENIO#n and Table MCRx & PxDIR addresses ANDin 16-bit AND mask. See Table AND/OR masks for SETIO#n IN ANDm 16-bit user-defined AND mask ANDout 16-bit AND mask. See Table AND/OR masks for SETIO#n OUT ANDrst 16-bit AND mask. See Table AND/OR masks for ROUT#n © Technosoft 2006 106 MotionChip II TML Programming ANDset 16-bit AND mask. See Table AND/OR masks for SOUT#n Bit_mask 16-bit AND mask. See Tables PxDIR & Bit_mask for V16=IN#n and D_ref 32-bit fixed value D_time 16-bit value table MCRx & PxDIR addresses Flag Condition Flag for GOTO/CALL LengthMLI Length of a TML instruction code in words – 1 MCRx See Tables MCRx & AND/OR masks for ENIO#n / DISIO#n and Table MCRx & PxDIR addresses ORdis 16-bit OR mask. See Table MCRx & AND/OR masks for DISIO#n and Table MCRx & PxDIR addresses ORen 16-bit OR mask. See Table MCRx & AND/OR masks for ENIO#n and Table MCRx & PxDIR addresses ORin 16-bit OR mask.. See Table AND/OR masks for SETIO#n IN ORm 16-bit user-defined OR mask ORout 16-bit OR mask. See Table AND/OR masks for SETIO#n OUT ORrst 16-bit OR mask. See Table AND/OR masks for ROUT#n ORset 16-bit OR mask. See Table AND/OR masks for SOUT#n PxDIR See Table PxDIR & Bit_msk for V16=IN#n and Table MCRx & PxDIR addresses PM Data memory space: 200 – 3FFh/800 – 9FFh (internal), 8000 – FFFFh (external) DM Program memory space: 8000 – FFFFh (external) SPI SPI-E2ROM memory space: 4000h – 7FFFh (external) TM Type of memory. When used in syntax TM should be replaced by DM or PM or SPI. When used in code, see Table TM values. VAR16 16-bit integer variable VAR16D 16-bit integer variable used as destination VAR16S 16-bit integer variable used as source VAR32 32-bit long or fixed variable VAR32(L) 16LSB of a 32-bit long or fixed variable (seen as a 16-bit integer) VAR32(H) 16MSB of a 32-bit long or fixed variable (seen as a 16-bit integer) VAR32D 32-bit long or fixed variable used as destination VAR32S 32-bit long or fixed variable used as source value16 16-bit integer value value32 32-bit long or fixed value value32(L) 16LSB of a 32-bit long or fixed value value32(H) 16MSB of a 32-bit long or fixed value © Technosoft 2006 107 MotionChip II TML Programming Name ? Get data - On line commands send by a host + the answers (On-line group) Syntax ?VAR16 ?VAR32 Operands GiveMeData - 16-bit from SRAM data memory GiveMeData - 32-bit from SRAM data memory GiveMeData - 16-bit from SRAM program memory GiveMaData - 32-bit from SRAM program memory GiveMeData - 16-bit from EEPROM program memory GiveMeData - 32-bit from EEPROM program memory TakeData requested with GiveMeData - 16-bit data TakeData requested with GiveMeData - 32-bit data Get a 16-bit TML data (address range 200-3FFh) Get a 32-bit TML data (address range 200-3FFh) Take the 16-bit TML data requested with Get a 16-bit TML Take the 32-bit TML data requested with Get a 32-bit TML Get version Answer to Get version request VAR16: integer variable VAR32: long/fixed variable Type TML program – On-line X Binary code ?VAR16 – GiveMeData – 16-bit from SRAM data memory 15 14 13 12 11 10 9 8 7 6 5 4 3 2 1 0 1 1 0 0 0 0 0 0 0 0 0 1 Expeditor AxisID Data memory address from where to read data requested (&VAR16) ?VAR32 - GiveMeData – 32-bit from SRAM data memory 15 14 13 12 11 10 9 8 7 6 5 4 3 2 1 0 1 1 0 0 0 0 0 0 0 0 0 1 Expeditor AxisID Data memory address from where to read data requested (&VAR32 ) © Technosoft 2006 108 1 0 0 0 1 0 0 1 MotionChip II TML Programming GiveMeData – 16-bit from SRAM TML program memory 15 14 13 12 11 10 9 8 7 6 5 4 3 2 1 0 1 1 0 0 0 0 0 0 0 0 0 0 Expeditor AxisID SRAM program memory address from where to read data requested GiveMeData – 32-bit from SRAM TML program memory 15 14 13 12 11 10 9 8 7 6 5 4 3 2 1 0 1 1 0 0 0 0 0 0 0 0 0 0 Expeditor AxisID SRAM program memory address from where to read data requested GiveMeData – 16-bit from EEPROM TML program memory 15 14 13 12 11 10 9 8 7 6 5 4 3 2 1 0 1 1 0 0 0 0 0 0 0 0 1 0 Expeditor AxisID EEPROM program memory address from where to read data requested GiveMeData – 32-bit from EEPROM TML program memory 15 14 13 12 11 10 9 8 7 6 5 4 3 2 1 0 1 1 0 0 0 0 0 0 0 0 1 0 Expeditor AxisID EEPROM program memory address from where to read data requested 1 0 0 0 1 0 0 1 1 0 0 0 1 0 0 1 TakeData requested with GiveMeData – 16-bit data 15 14 13 12 11 10 9 8 7 6 5 4 3 2 1 1 0 1 1 0 1 0 0 0 0 0 0 0 1 0 Expeditor AxisID SRAM data, SRAM program or EEPROM memory address of data requested Data requested TakeData requested with GiveMeData – 32-bit data 15 14 13 12 11 10 9 8 7 6 5 4 3 2 1 1 0 1 1 0 1 0 0 0 0 0 0 0 1 0 Expeditor AxisID SRAM data, SRAM program or EEPROM memory address of data requested Data requested – 16LSB Data requested – 16MSB Get a 16-bit TML data (the TML data address must be in range 200-3FFh) 15 14 13 12 11 10 9 8 7 6 5 4 3 2 (9LSBs of &VAR16D) 1 0 1 0 0 0 0 Expeditor AxisID 1 0 0 0 1 0 Get a 32-bit TML data (the TML data address must be in range 200-3FFh) © Technosoft 2006 109 MotionChip II TML Programming 15 1 14 0 13 1 12 0 11 0 10 1 9 8 7 6 5 4 3 2 (9LSBs of &VAR32D) 0 Expeditor AxisID Take the 16-bit TML data requested with Get 16-bit TML data 15 14 13 12 11 10 9 8 7 6 5 4 3 2 (9LSBs of &VAR16D) 1 0 1 0 1 0 0 Expeditor AxisID Data requested Take the 32-bit TML data requested with Get 32-bit TML data 15 14 13 12 11 10 9 8 7 6 5 4 3 2 (9LSBs of &VAR32D) 1 0 1 0 1 1 0 Expeditor AxisID Data requested – 16 LSB Data requested – 16 MSB Get version 15 14 13 1 1 0 12 1 11 1 10 0 9 8 7 6 0 0 0 0 Expeditor AxisID 4 0 0 1 0 1 0 3 0 2 0 1 0 0 1 9 8 7 6 5 4 3 0 0 0 0 0 0 0 Expeditor AxisID ASCII code of first 2 digits of the firmware ID ASCII code of last digit + revision letter of the firmware ID 2 0 1 0 0 1 Answer to get version request 15 14 13 12 11 10 1 1 0 1 1 0 5 0 1 Description These instructions allow a host to interrogate a MotionChip II based drive in order to find the contents of any TML data as well as the value of any memory location from the TML program space (EEPROM or SRAM) or from the SRAM data space. The Get version command offers the possibility to check find which is the firmware version of the drive. The firmware version has the form: FxyzA, where xyz is the firmware number (3 digits) and A is a letter for the revision Execution Return the answer messages © Technosoft 2006 110 MotionChip II TML Programming Name Set event when motor absolute position is over a given value (Event group) !APO Syntax ! if AbsPositionOver value32 ! if AbsPositionOver VAR32 !APO value32 !APO VAR32 Operands VAR32: long variable value32: 32-bit long immediate value TML program X Type On-line X Binary code !APO value32 15 14 13 0 1 1 0 0 0 12 1 0 11 0 0 10 0 0 9 8 7 6 0 0 1 0 1 0 0 0 LOWORD(value32) HIWORD(value32) 5 0 1 4 1 0 3 0 1 2 0 0 1 1 0 0 0 0 !APO VAR32 15 14 13 0 1 1 0 0 0 12 1 0 11 0 0 10 0 0 9 0 1 5 0 1 4 1 0 3 0 1 2 0 0 1 1 0 0 0 0 8 7 1 1 0 0 &VAR32 6 0 0 Description Program the detection of the event when the motor position is greater than the specified value. An update on event command (UPD!) must be used in these cases, in order to activate an update operation when the monitored event occurs. Execution Activate the setting of an event when motor position >= value32 or VAR32, respectively. The bits 14 and 11 of the TML motion status register (MSR) are reset. This operation erases a previous programmed event that has occurred. Example CACC = 1.5; CSPD MODE UPD; CSPD !APO = 20; SP1; = 40; 60000; UPD!; © Technosoft 2006 //Acceleration command for speed profile //(counts/sampling2) //Speed command (counts/sampling) //Set Speed Profile Mode 1 //Update immediate //New speed command (counts/sampling) //Set event when absolute position >= 60000 //(counts) //Update on event 111 MotionChip II TML Programming Name Set event when motor absolute position is under a given value (Event group) !APU Syntax ! if AbsPositionUnder value32 ! if AbsPositionUnder VAR32 !APU value32 !APU VAR32 Operands VAR32: long variable value32: 32-bit long immediate value TML program X Type On-line X Binary code !APU value32 15 14 13 0 1 1 0 0 0 12 1 0 11 0 0 10 0 0 9 8 7 6 0 0 1 0 1 0 0 0 LOWORD(value32) HIWORD(value32) 5 0 1 4 0 0 3 0 1 2 0 0 1 1 0 0 1 0 !APU VAR32 15 14 13 0 1 1 0 0 0 12 1 0 11 0 0 10 0 0 9 0 1 5 0 1 4 0 0 3 0 1 2 0 0 1 1 0 0 1 0 8 7 1 1 0 0 &VAR32 6 0 0 Description Program the detection of the event when the motor position is smaller than the specified value. An update on event command (UPD!) must be used in these cases, in order to activate an update operation when the monitored event occurs. Execution Activate the setting of an event when motor position <= value32 or VAR32, respectively. The bits 15 and 14 of the TML motion status register (MSR) are reset. This operation erases a previous programmed event that has occurred. Example CACC = 1.5; CSPD MODE UPD; CSPD !APU = -20; SP1; = -40; -60000; //Acceleration command for speed profile //(counts/sampling2) //Speed command (counts/sampling) //Set Speed Profile Mode 1 //Update immediate //New speed command (counts/sampling) //Set event when absolute position =< 60000 UPD!; © Technosoft 2006 //(counts) //Update on event 112 MotionChip II TML Programming - Name Set event when absolute time is greater than a given value (Event group) !AT Syntax ! if AbsoluteTime >= value32 ! if AbsoluteTime >= VAR32 !AT value32 !AT VAR32 Operands VAR32: long variable value32: 32-bit long immediate value TML program X Type On-line X Binary code !AT value32 15 14 13 0 1 1 0 0 0 12 1 0 11 0 0 10 0 0 9 8 7 6 0 0 1 0 1 0 1 1 LOWORD(value32) HIWORD(value32) !AT VAR32 15 14 13 0 1 1 0 0 0 12 1 0 11 0 0 10 0 0 9 0 1 Description 5 0 0 4 1 0 3 1 0 2 0 0 1 0 0 0 0 0 8 7 6 5 4 3 2 1 0 1 1 0 0 1 1 0 0 0 0 1 1 0 0 0 0 0 0 &VAR32 Program the detection of the event when the system absolute time is greater than the specified value. An update on event command (UPD!) must be used in these cases, in order to activate an update operation when the monitored event occurs. Execution Activate the setting of an event when system absolute time >= value32 OR VAR32, respectively. The bits 15 and 14 of the TML motion status register (MSR) are reset. This operation erases a previous programmed event that has occurred. Example CACC = 1.5; CSPD = 20; MODE SP1; UPD; CSPD = 40; !AT 10000; UPD!; © Technosoft 2006 //Acceleration command for speed profile //(counts/sampling2) //Speed command (counts/sampling) //Set Speed Profile Mode 1 //Update immediate //New speed command (counts/sampling) //Set event when absolute time is bigger //than 10000 samplings //Update on event 113 MotionChip II TML Programming Name Set event when a capture is triggered !CAP (Event group) Syntax ! if CAPture triggered !CAP Operands – TML program X Type On-line X Binary code 15 0 14 1 13 1 12 1 11 0 10 0 9 0 8 0 7 0 6 0 5 0 4 0 3 1 2 1 1 1 0 0 Description Program the detection of the event when one of the external captures (from encoder index – CAPI, or from second encoder – 2CAPI) was detected and triggered by the DSP. An update on event command (UPD!) must be used in these cases, in order to activate an update operation, when the monitored event occurs. Execution Activate the setting of an event when an external capture was triggered. The bits 15 and 14 of the TML motion status register (MSR) are reset. This operation erases a previous programmed event that has occurred. Example CACC = 1.5; CSPD = 20; MODE SP1; UPD; ENCAPI0; CSPD = 40; !CAP; UPD!; © Technosoft 2006 //Acceleration command for speed profile //(counts/sampling2) //Speed command (counts/sampling) //Set Speed Profile Mode 1 //Update immediate //Activate CAPI input to trigger a falling //transitions. //New speed command (counts/sampling) //Set event when capture is triggered //Update on event 114 MotionChip II TML Programming Name Set event when data from input #n is 0 or 1 !IN#n (Event group) Syntax ! if Input#n is 0 ! if Input#n is 1 !IN#n 0 !IN#n 1 Operands n: bit-port number (0<=n<=39) TML program X Type On-line X Binary code !IN#n 0 15 14 0 1 13 1 12 1 11 0 10 0 9 0 8 7 0 1 PxDATDIR Bit_mask 6 1 5 0 4 1 3 1 2 0 1 1 0 1 !IN#n 1 15 14 0 1 13 1 12 1 11 0 10 0 9 0 8 7 0 1 PxDATDIR Bit_ mask 6 1 5 0 4 1 3 1 2 0 1 1 0 0 Description Program the detection of the event once the data read from input bit-port #n becomes 0, respectively 1. An update on event command (UPD!) must be used in these cases, in order to activate an update operation when the monitored event occurs. Execution Activate the setting of an event, when the data read from input bit-port #n becomes 0 (!IN#n 0) or 1 (!IN#n 1), respectively. The bits 15 and 14 of the TML motion status register (MSR) are reset. This operation erases a previous programmed event that has occurred. Example CACC = 1.5; CSPD = 20; MODE SP1; UPD; CSPD = 40; !IN#38 1; UPD!; © Technosoft 2006 //Acceleration command for speed profile //(counts/sampling2) //Speed command (counts/sampling) //Set Speed Profile Mode 1 //Update immediate //New speed command (counts/sampling) //Set event if INput#38 is high //Update on event 115 MotionChip II TML Programming #n #20 #21 #22 #23 #24 #25 #26 #27 #28 #29 #30 #31 #32 #33 #34 #35 #36 #37 #38 #39 PxDAT & Bit_mask for !IN#n 0 and !IN#n 1 #n #0 #1 #2 #3 #4 #5 #6 #7 #8 #9 #10 #11 #12 #13 #14 #15 #16 #17 #18 #19 © Technosoft 2006 PxDATDIR 0x7098 0x7098 0x7098 0x7098 0x7098 0x7098 0x7098 0x7098 0x709A 0x709A 0x709A 0x709A 0x709A 0x709A 0x709A 0x709A 0x709C 0x709C 0x709C 0x709C Bit_mask 0x0001 0x0002 0x0004 0x0008 0x0010 0x0020 0x0040 0x0080 0x0001 0x0002 0x0004 0x0008 0x0010 0x0020 0x0040 0x0080 0x0001 0x0002 0x0004 0x0008 116 PxDATDIR 0x709C 0x709C 0x709C 0x709C 0x709E 0x7095 0x7095 0x7095 0x7095 0x7095 0x7095 0x7095 0x7095 0x7096 0x7096 0x7096 0x7096 0x7096 0x7096 0x7096 Bit_mask 0x0010 0x0020 0x0040 0x0080 0x0001 0x0001 0x0002 0x0004 0x0008 0x0010 0x0020 0x0040 0x0080 0x0001 0x0002 0x0004 0x0008 0x0010 0x0020 0x0040 MotionChip II TML Programming Name Set event when negative limit switch becomes active !LSN (Event group) Syntax ! if LimitSwitchNegative active !LSN Operands – TML program X Type On-line X Binary code 15 0 14 1 13 1 12 1 11 0 10 0 9 0 8 0 7 0 6 0 5 0 4 0 3 1 2 1 1 0 0 0 Description Program the detection of the event once the negative limit switch is reached and becomes active. An update on event command (UPD!) must be used in these cases, in order to activate an update operation when the monitored event occurs. Execution Activate the setting of an event when the negative limit switch becomes active. The bits 15 and 14 of the TML motion status register (MSR) are reset. This operation erases a previous programmed event that has occurred. Example CACC = 1.5; CSPD = -20; MODE SP1; UPD; ENLSN1; edge CSPD = 20; !LSN; UPD!; © Technosoft 2006 //Acceleration command for speed profile //(counts/sampling2) //Speed command (counts/sampling) //Set Speed Profile Mode 1 //Update immediate //Negative Limit Switch triggers rising //New speed command (counts/sampling) //Set event if Negative Limit Switch is //reached //Update on event 117 MotionChip II TML Programming Name Set event when positive limit switch becomes active !LSP (Event group) Syntax ! if LimitSwitchPositive active !LSP Operands – TML program X Type On-line X Binary code 15 0 14 1 13 1 12 1 11 0 10 0 9 0 8 0 7 0 6 0 5 0 4 0 3 1 2 1 1 0 0 1 Description Program the detection of the event once the positive limit switch is reached and becomes active. An update on event command (UPD!) must be used in these cases, in order to activate an update operation when the monitored event occurs. Execution Activate the setting of an event when the positive limit switch becomes active. The bits 15 and 14 of the TML motion status register (MSR) are reset. This operation erases a previous programmed event that has occurred. Example CACC = 1.5; CSPD = 20; MODE SP1; UPD; ENLSP1; CSPD = -20; !LSP; UPD!; © Technosoft 2006 //Acceleration command for speed //profile (counts/sampling2) //Speed command (counts/sampling) //Set Speed Profile Mode 1 //Update immediate //Positive Limit Switch triggers //rising edge //New speed command (counts/sampling) //Set event if Positive LimitSwitch is //reached //Update on event 118 MotionChip II TML Programming Name Set event when the actual motion is completed !MC (Event group) Syntax !(set event) if MotionComplete !MC Operands – TML program X Type On-line X Binary code 15 0 14 1 13 1 12 1 11 0 10 0 9 0 8 0 7 0 6 0 5 0 4 0 3 1 2 1 1 1 0 1 Description Program the detection of the event once the actual motion sequence is completed. An update on event command (UPD!) must be used in these cases, in order to activate an update operation when the monitored event occurs. Execution Activate the setting of an event when the actual motion sequence is completed. The bits 15 and 14 of the TML motion status register (MSR) are reset. This operation erases a previous programmed event that has occurred. Example CACC = 1.5; CSPD = 40; CPOS = 50000; CPA; MODE PP3; UPD; CPOS = 100000; !MC; UPD!; © Technosoft 2006 //Acceleration command for position //profile (counts/sampling2) //Speed command for position profile //(counts/sampling) //Position command (counts) //Position command is Absolute //Set Position Profile Mode 3 //Update immediate //New position command (counts); //Set event when MotionComplete //Update on event 119 MotionChip II TML Programming Name Set event when the reference is grater than a given value (Event group) !RO Syntax ! if ReferenceOver value32 ! if ReferenceOver VAR32 !RO value32 !RO VAR32 Operands VAR32: long variable value32: 32-bit long immediate value TML program X Type On-line X Binary code !RO value32 15 14 13 0 1 1 0 0 0 12 1 0 11 0 0 10 0 0 9 8 7 6 0 0 1 0 1 0 1 0 LOWORD(value32) HIWORD(value32) 5 0 1 4 1 0 3 0 1 2 0 1 1 0 1 0 0 0 !RO VAR32 15 14 13 0 1 1 0 0 0 12 1 0 11 0 0 10 0 0 9 0 1 5 0 1 4 1 0 3 0 1 2 0 1 1 0 1 0 0 0 8 7 1 1 0 1 &VAR32 6 0 0 Description Program the detection of the event when the reference value is greater than the specified value. An update on event command (UPD!) must be used in these cases, in order to activate an update operation when the monitored event occurs. The reference value can be: • a position reference • a speed reference • a torque reference • a voltage reference Execution Activate the setting of an event when the reference value is >= value32 or VAR32, respectively. The bits 15 and 14 of the TML motion status register (MSR) are reset. This operation erases a previous programmed event that has occurred. © Technosoft 2006 120 MotionChip II TML Programming Examples : a) In case of a position reference: CACC = 1.5; CSPD = 20; CPOS = 100000; CPA; MODE PP3; UPD; CSPD = 40; !RO 20000; UPD!; b) In case of a speed reference: CACC = 0.005; CSPD = 20; MODE SP1; UPD; CACC = 0.5; !RO 10.; UPD!; c) //Acceleration command for position //profile (counts/sampling2) //Speed command for position profile //(counts/sampling) //Position command (counts) //Position command is Absolute //Set Position Profile Mode 3 //Update immediate //New speed command for position //profile (counts/sampling) //Set event if Reference >= 20000 //(counts) - position reference //Update on event //Acceleration command for speed //profile (counts/sampling2) //Speed command (counts/sampling) //Set Speed Profile Mode 1 //Update immediate //New acceleration command for speed //profile (counts/sampling2) //Set event if Reference >= 10. //(counts/sampling) - speed reference //Update on event In case of a torque reference: MODE TT; REFTST = 3968; RINCTST = 10; UPD; CACC = 0.005; CSPD = 20; MODE SP1; !RO 2500; UPD!; © Technosoft 2006 //Set Torque Test Mode //Reference saturation value in test //mode //Reference increment value in test //mode //Update immediate //Acceleration command for speed //profile (counts/sampling2) //Speed command (counts/sampling) //Set Speed Profile Mode 1 //Set event if Reference >= 2500 //(bits) – torque reference //Update on event 121 MotionChip II TML Programming d) In case of a voltage reference: MODE VT; REFTST = 19353; RINCTST = 194; UPD; CACC = 0.05; CSPD = 20; CPOS = 80000; CPA; MODE PP3; !RO 15000; UPD!; © Technosoft 2006 //Set Voltage Test Mode //Reference saturation value in test //mode //Reference increment value in test //mode //Update immediate //Acceleration command for position //profile (counts/sampling2) //Speed command for position profile //(counts/sampling) //Position command (counts) //Position command is Absolute //Set Position Profile Mode 3 //Set event if Reference >= 15000 //(bits) – voltage reference //Update on event 122 MotionChip II TML Programming Name Set event when the relative position is greater than a given value (Event group) !RPO Syntax ! if RelPositionOver value32 ! if RelPositionOver VAR32 !RPO value32 !RPO VAR32 Operands VAR32: long variable value32: 32-bit long immediate value TML program X Type On-line X Binary code !RPO value32 15 14 13 0 1 1 0 0 0 12 1 0 11 0 0 10 0 0 9 8 7 6 0 0 1 0 1 0 1 0 LOWORD(value32) HIWORD(value32) 5 0 1 4 1 1 3 0 1 2 1 0 1 0 1 0 0 0 !RPO VAR32 15 14 13 0 1 1 0 0 0 12 1 0 11 0 0 10 0 0 9 0 1 5 0 1 4 1 1 3 0 1 2 1 0 1 0 1 0 0 0 8 7 1 1 0 1 &VAR32 6 0 0 Description Program the detection of the event when the relative position value is greater than the specified value. An update on event command (UPD!) must be used in these cases, in order to activate an update operation when the monitored event occurs. Execution Activate the setting of an event when the relative position value is >= value32 or VAR32, respectively. The bits 15 and 14 of the TML motion status register (MSR) are reset. This operation erases a previous programmed event that has occurred. Example CACC = 0.5; CSPD = 20; CPOS = 100000; CPR; MODE PP3; © Technosoft 2006 //Acceleration command for position //profile (counts/sampling2) //Speed command for position profile //(counts/sampling) //Position command (counts0 //Position command is Relative //Set Position Profile Mode 3 123 MotionChip II TML Programming UPD; CSPD = 40; !RPO 60000; UPD!; © Technosoft 2006 //Update immediate //New speed command (counts/sampling) //Set event when relative position //>= 60000 (counts) //Update on event 124 MotionChip II TML Programming Name Set event when the relative position is smaller than a given value (Event group) !RPU Syntax ! if RelPositionUnder value32 ! if RelPositionUnder VAR32 !RPU value32 !RPU VAR32 Operands VAR32: long variable value32: 32-bit long immediate value TML program X Type On-line X Binary code !RPU value32 15 14 13 0 1 1 0 0 0 12 1 0 11 0 0 10 0 0 9 8 7 6 0 0 1 0 1 0 1 0 LOWORD(value32) HIWORD(value32) 5 0 1 4 0 1 3 0 1 2 1 0 1 0 1 0 1 0 !RPU VAR32 15 14 13 0 1 1 0 0 0 12 1 0 11 0 0 10 0 0 9 0 1 5 0 1 4 0 1 3 0 1 2 1 0 1 0 1 0 1 0 8 7 1 1 0 1 &VAR32 6 0 0 Description Program the detection of the event when the relative position value is smaller than the specified value. An update on event command (UPD!) must be used in these cases, in order to activate an update operation when the monitored event occurs. Execution Activate the setting of an event, when the relative position value is <= value32 or VAR32, respectively. The bits 15 and 14 of the TML motion status register (MSR) are reset. This operation erases a previous programmed event that has occurred. Example CACC CSPD CPOS CPR; MODE UPD; CSPD !RPU © Technosoft 2006 = 0.5; //Set acceleration command = -20; //Set speed command = -100000; //Position command (counts) //Position command is Relative PP3; //Set Position Profile Mode 3 //Update immediate = -40; //New speed command (counts/sampling) -60000; //Set event when relative position =< -60000 125 MotionChip II TML Programming UPD!; © Technosoft 2006 //Update on event 126 MotionChip II TML Programming Name Set event when relative time is greater than a given value (Event group) !RT Syntax ! if RelativeTime >= value32 ! if RelativeTime >= VAR32 !RT value32 !RT VAR32 Operands VAR32: long variable value32: 32-bit long immediate value TML program X Type On-line X Binary code !RT value32 15 14 13 0 1 1 0 0 0 12 1 0 11 0 0 10 0 0 9 8 7 6 0 0 1 0 1 0 1 1 LOWORD(value32) HIWORD(value32) 5 1 0 4 1 0 3 1 0 2 0 0 1 0 1 0 1 0 !RT VAR32 15 14 13 0 1 1 0 0 0 12 1 0 11 0 0 10 0 0 9 0 1 5 1 0 4 1 0 3 1 0 2 0 0 1 0 1 0 1 0 8 7 1 1 0 1 &VAR32 6 0 1 Description Program the detection of the event when the system relative time is greater than the specified value. An update on event command (UPD!) must be used in these cases, in order to activate an update operation when the monitored event occurs. Execution Activate the setting of an event when system relative time >= value32 or VAR32, respectively. The bits 15 and 14 of the TML motion status register (MSR) are reset. This operation erases a previous programmed event that has occurred. Example CACC = 0.5; CSPD = 20; CPOS = 100000; CPR; MODE PP3; UPD; CSPD = 30; !RT 2000; UPD!; © Technosoft 2006 //Set acceleration command) //Set speed command //Position command (counts) //Position command is Relative //Set Position Profile Mode 3 //Update immediate //New speed command //Set event if Relative Time >= 2000 //Update on event 127 MotionChip II TML Programming Name Set event when the reference is smaller than a given value (Event group) !RU Syntax ! if ReferenceUnder value32 ! if ReferenceUnder VAR32 !RU value32 !RU VAR32 Operands VAR32: long variable value32: 32-bit long immediate value TML program X Type On-line X Binary code !RU value32 15 14 13 0 1 1 0 0 0 12 1 0 11 0 0 10 0 0 9 8 7 6 0 0 1 0 1 0 1 0 LOWORD(value32) HIWORD(value32) 5 0 1 4 0 0 3 0 1 2 0 1 1 0 1 0 1 0 !RU VAR32 15 14 13 0 1 1 0 0 0 12 1 0 11 0 0 10 0 0 9 0 1 5 0 1 4 0 0 3 0 1 2 0 1 1 0 1 0 1 0 8 7 1 1 0 1 &VAR32 6 0 0 Description Program the detection of the event when the reference value is smaller than the specified value. An update on event command (UPD!) must be used in these cases, in order to activate an update operation when the monitored event occurs. The reference value can be: • a position reference • a speed reference • a torque reference • a voltage reference Execution Activate the setting of an event when the reference value is <= value32 or VAR32, respectively. The bits 15 and 14 of the TML motion status register (MSR) are reset. This operation erases a previous programmed event that has occurred. © Technosoft 2006 128 MotionChip II TML Programming Examples : a) In case of a position reference: CACC = 1.5; CSPD = -20; CPOS = -100000; CPR; MODE PP3; UPD; CSPD = -40; !RU -20000; UPD!; b) In case of a speed reference: CACC = 0.005; CSPD = -20; MODE SP1; UPD; CACC = 0.5; !RU -10.; UPD!; c) //Acceleration command for speed //profile counts/sampling2) //Speed command (counts/sampling) //Set Speed Profile Mode 1 //Update immediate //New acceleration command for speed //profile (counts/sampling2) //Set event if Reference <=-10. //(counts/sampling) - speed reference //Update on event In case of a torque reference: MODE TT; REFTST = -3968; RINCTST = -10; UPD; CACC = 0.005; CSPD = -20; MODE SP1; !RU -2500; UPD!; d) //Acceleration command for position //profile (counts/sampling2) //Speed command for position //profile (counts/sampling) //Position command (counts) //Position command is Relative //Set Position Profile Mode 3 //Update immediate //New speed command for position //profile (counts/sampling) //Set event if Reference <= -20000 //(counts) - position reference //Update on event //Set Torque Test Mode //Reference saturation value in test //mode //Reference increment value in test //mode //Update immediate //Acceleration command for speed //profile (counts/sampling2) //Speed command (counts/sampling) //Set Speed Profile Mode 1 //Set event if Reference <= -2500 //(bits) – torque reference //Update on event In case of a voltage reference: MODE VT; REFTST = -19353; © Technosoft 2006 //Set Voltage Test Mode //Reference saturation value in test //mode 129 MotionChip II TML Programming RINCTST = -194; UPD; CACC = 0.05; CSPD = 20; CPOS = 80000; CPA; MODE PP3; !RU -15000; UPD!; © Technosoft 2006 //Reference increment value in test //mode //Update immediate //Acceleration command for position //profile (counts/sampling2) //Speed command for position profile //(counts/sampling) //Position command (counts) //Position command is Absolute //Set Position Profile Mode 3 //Set event if Reference <= -15000 //(bits) – voltage reference //Update on event 130 MotionChip II TML Programming Name Set event when speed is over a given value !SO (Event group) Syntax ! if SpeedOver value32 ! if SpeedOver VAR32 !SO value32 !SO VAR32 Operands VAR32: fixed variable value32: 32-bit fixed immediate value TML program X Type On-line X Binary code !SO value32 15 14 13 0 1 1 0 0 0 12 1 0 11 0 0 10 0 0 9 8 7 6 0 0 1 0 1 0 0 0 LOWORD(value32) HIWORD(value32) 5 0 1 4 1 0 3 0 1 2 1 1 1 1 0 0 0 0 !SO VAR32 15 14 13 0 1 1 0 0 0 12 1 0 11 0 0 10 0 0 9 0 1 5 0 1 4 1 0 3 0 1 2 1 1 1 1 0 0 0 0 8 7 1 1 0 0 &VAR32 6 0 0 Description Program the detection of the event when the motor speed is bigger than the specified value. An update on event command (UPD!) must be used in these cases, in order to activate an update operation when the monitored event occurs. Execution Activate the setting of an event when motor speed >= value32 or VAR32, respectively. The bits 15 and 14 of the TML motion status register (MSR) are reset. This operation erases a previous programmed event that has occurred. Example CACC = 0.005; CSPD = 20; CPOS = 100000; CPA; MODE PP3; UPD; CACC = 1; !SO 15; UPD!; © Technosoft 2006 //Set acceleration command //Set speed command //Position command (counts) //Position command is Absolute //Set Position Profile Mode 3 //Update immediate //Set new acceleration //Set event if speed >= 15 //Update on event 131 MotionChip II TML Programming Name Set event when speed is under a given value !SU (Event group) Syntax ! if SpeedUnder value32 ! if SpeedUnder VAR32 !SU value32 !SU VAR32 Operands VAR32: fixed variable value32: 32-bit fixed immediate value TML program X Type On-line X Binary code !SU value32 15 14 13 0 1 1 0 0 0 12 1 0 11 0 0 10 0 0 9 8 7 6 0 0 1 0 1 0 0 0 LOWORD(value32) HIWORD(value32) 5 0 1 4 0 0 3 0 1 2 1 1 1 1 0 0 1 0 !SU VAR32 15 14 13 0 1 1 0 0 0 12 1 0 11 0 0 10 0 0 9 0 1 5 0 1 4 0 0 3 0 1 2 1 1 1 1 0 0 1 0 8 7 1 1 0 0 &VAR32 6 0 0 Description Program the detection of the event when the motor speed is smaller than the specified value. An update on event command (UPD!) must be used in these cases, in order to activate an update operation when the monitored event occurs. Execution Activate the setting of an event when motor speed <= value32 or VAR32, respectively. The bits 15 and 14 of the TML motion status register (MSR) are reset. This operation erases a previous programmed event that has occurred. Example CACC = 0.005; CSPD = -20; CPOS = -100000; CPA; MODE PP3; UPD; CACC = 1; !SU -15; UPD!; © Technosoft 2006 //Set acceleration command //Set speed command //Position command (counts) //Position command is Absolute //Set Position Profile Mode 3 //Update immediate //Set new acceleration //Set event if speed <= -15 //Update on event 132 MotionChip II TML Programming Name !VO Set event when a selected variable is equal or over a given value (Event group) Syntax !VO VAR32A, value32 !VO VAR32A, VAR32B Operands ! if Var32AOver value32 ! if Var32AOver VAR32B VAR32A: long variable VAR32B: long variable value32: 32-bit long immediate value TML program X Type On-line X Binary code !VO VAR32A, value32 15 14 13 12 0 1 1 1 11 0 10 0 8 7 6 0 1 0 &VAR32A LOWORD(value32) HIWORD(value32) 5 0 4 1 3 0 2 0 1 0 0 0 !VO VAR32A, VAR32B 15 14 13 12 0 1 1 1 11 0 10 0 9 0 5 0 4 1 3 0 2 0 1 0 0 0 9 0 8 7 1 1 &VAR32A &VAR32B 6 0 Description Program the detection of the event when the selected variable (any 32-bit TML variable) is greater than the specified value or the value of another 32-bit variable. An update on event command (UPD!) must be used in these cases, in order to activate an update operation when the monitored event occurs. Execution Activate the setting of an event when the selected variable (VAR32A) >= value32, or VAR32B, respectively. The bits 15 and 14 of the TML motion status register (MSR) are reset. This operation erases a previous programmed event that has occurred. Example CACC = 0.5; //Set acceleration command CSPD = 20; //Set speed command CPOS = 100000; //Position command (counts) CPA; //Position command is Absolute MODE PP3; //Set Position Profile Mode 3 UPD; //Update immediate CSPD = 30; //Set new speed command !VO APOS, 50000;//Set event when APOS is equal or over 50000 UPD!; //Update on event © Technosoft 2006 133 MotionChip II TML Programming Name !VU Set event when a selected variable is equal or under a given value (Event group) Syntax !VU VAR32A, value32 !VU VAR32A, VAR32B Operands ! if Var32AUnder value32 ! if Var32AUnder VAR32B VAR32A: long variable VAR32B: long variable value32: 32-bit long immediate value TML program X Type On-line X Binary code !VU VAR32A, value32 15 14 13 12 0 1 1 1 11 0 10 0 8 7 6 0 1 0 &VAR32A LOWORD(value32) HIWORD(value32) 5 0 4 0 3 0 2 0 1 0 0 1 !VU VAR32A, VAR32B 15 14 13 12 0 1 1 1 11 0 10 0 9 0 5 0 4 0 3 0 2 0 1 0 0 1 9 0 8 7 1 1 &VAR32A &VAR32B 6 0 Description Program the detection of the event when the selected variable (any 32-bit TML variable) is smaller than the specified value or the value of another 32-bit variable. An update on event command (UPD!) must be used in these cases, in order to activate an update operation when the monitored event occurs. Execution Activate the setting of an event when the selected variable (VAR32A) <= value32 or VAR32B, respectively. The bits 15 and 14 of the TML motion status register (MSR) are reset. This operation erases a previous programmed event that has occurred. Example CACC = 0.5; CSPD = 20; CPOS = -50000; © Technosoft 2006 //Acceleration command for //position profile (counts/sampling2) //Speed command for position //profile (counts/sampling) //Position command (counts) 134 MotionChip II TML Programming CPA; MODE PP3; UPD; CSPD = 30; !VU APOS, -10000; UPD!; © Technosoft 2006 //Position command is Absolute //Set Position Profile Mode 3 //Update immediate //New speed command for position //profile (counts/sampling2) //Set event when APOS is equal or //under -10000 (counts) //Update on event 135 MotionChip II TML Programming Name = Assignment instruction for 16 bits TML variables (Assignment group) Syntax VAR16D = label VAR16D = value16 VAR16D = VAR16S VAR16D = VAR32S(L) VAR16D = VAR32S(H) VAR16D, dm = value16 VAR16D, dm = VAR16S VAR16D = (VAR16S), TypeMem VAR16D = (VAR16S+), TypeMem (VAR16D), TypeMem = value16 (VAR16D), TypeMem = VAR16S (VAR16D+), TypeMem = value16 (VAR16D+), TypeMem = VAR16S VAR32D(L) = value16 VAR32D(L) = VAR16S VAR32D(H) = value16 VAR32D(H) = VAR16S set VAR16D to value of a label set VAR16D to value16 set VAR16D to VAR16S value set VAR16D to VAR32S(L) value set VAR16D to VAR32S(H) value set VAR16D from dm to value16 set VAR16D from dm to VAR16S set VAR16D to &(VAR16S) from TM set VAR16D to &(VAR16S) from TM, then VAR16S += 1 set &(VAR16D) from TM to value16 set &(VAR16D) from TM to VAR16S set &(VAR16D) from TM to value16, then VAR16D += 1 set &(VAR16D) from TM to VAR16S, then VAR16D += 1 set VAR32D low word to value16 set VAR32D (L) to VAR16 value set VAR32D high word to value16 set VAR32D (H) to VAR16 value Legend: D (destination), S (source). Operands label: 16-bit address of a TML instruction label value16: 16-bit integer immediate value VAR16x: integer variable VAR32x(L): the low word of VAR32x long variable VAR32x(H): the high word of VAR32x long variable Dm: data memory operand TypeMem: memory operand. (VAR16x): contents of variable VAR16x, representing a 16-bit address of another variable Type © Technosoft 2006 TML program X On-line X 136 MotionChip II TML Programming Binary code VAR16D = label 15 14 13 0 0 1 12 0 11 0 10 0 9 0 8 7 6 5 4 3 2 (9LSBs of &VAR16D) 1 0 6 5 4 3 2 (9LSBs of &VAR16D) 1 0 6 5 4 3 2 (9LSBs of &VAR16D) 1 0 6 5 4 3 2 (9LSBs of &VAR16D) 1 0 6 5 4 3 2 (9LSBs of &VAR16D) 1 0 &label VAR16D = value16 15 14 13 12 0 0 1 0 11 0 10 0 9 0 8 7 value16 VAR16D = VAR16S 15 14 13 12 0 0 1 0 11 1 10 0 9 0 8 7 &VAR16S VAR16D = VAR32S(L) 15 14 13 12 0 0 1 0 11 1 10 0 9 0 8 7 &VAR32S VAR16D = VAR32S(H) 15 14 13 12 0 0 1 0 11 1 10 0 9 0 8 7 &VAR32S + 1 VAR16D,dm = value16 15 14 13 12 1 0 0 1 11 0 10 0 9 0 8 7 0 0 &VAR16D value16 6 0 5 0 4 0 3 0 2 1 1 0 0 0 VAR16D, dm = VAR16S 15 14 13 12 11 1 0 0 1 0 10 0 9 0 8 7 0 0 &VAR16D &VAR16S 6 0 5 0 4 1 3 0 2 1 1 0 0 0 VAR16D = (VAR16S), TypeMem 15 14 13 12 11 10 1 0 0 1 0 0 9 0 8 7 1 1 &VAR16S &VAR16D 6 0 5 0 4 0 1 0 0 0 3 2 TypeMem VAR16D = (VAR16S+), TypeMem © Technosoft 2006 137 MotionChip II TML Programming 15 1 14 0 13 0 12 1 11 0 10 0 9 0 8 7 1 0 &VAR16S &VAR16D 6 0 5 0 4 0 3 2 TypeMem 1 0 0 0 (VAR16D), TypeMem = value16 15 14 13 12 11 10 1 0 0 1 0 0 9 0 8 7 0 1 &VAR16D value16 6 0 5 1 4 0 3 2 TypeMem 1 0 0 0 (VAR16D), TypeMem = VAR16S 15 14 13 12 11 10 1 0 0 1 0 0 9 0 8 7 0 1 &VAR16D &VAR16S 6 0 5 1 4 1 3 2 TypeMem 1 0 0 0 (VAR16D+), TypeMem = value16 15 14 13 12 11 10 1 0 0 1 0 0 9 0 8 7 0 0 &VAR16D value16 6 0 5 1 4 0 3 2 TypeMem 1 0 0 0 (VAR16D+), TypeMem = VAR16S 15 14 13 12 11 10 1 0 0 1 0 0 9 0 8 7 0 0 &VAR16D &VAR16S 6 0 5 1 4 1 3 2 TypeMem 1 0 0 0 VAR32D(L) = value16 15 14 13 12 0 0 1 0 9 0 11 0 10 0 8 7 6 5 4 3 2 (9LSBs of &VAR32D) 1 0 6 5 4 3 2 (9LSBs of &VAR32D) 1 0 6 5 4 3 2 (9LSBs of &VAR32D+1) 1 0 6 1 0 value16 VAR32D(L) = VAR16S 15 14 13 12 0 0 1 0 11 1 10 0 9 0 8 7 &VAR16S VAR32D(H) = value16 15 14 13 12 0 0 1 0 11 0 10 0 9 0 8 7 value16 VAR32D(H) = VAR16S 15 14 13 12 © Technosoft 2006 11 10 9 8 7 138 5 4 3 2 MotionChip II TML Programming 0 0 1 0 1 0 (9LSBs of &VAR32D+1) 0 &VAR16S Description This command allows you to generate assignment TML instruction for a specified 16-bit variable. All possible 16-bit assignment instruction forms are covered. Execution TypeMem DM 01 PM 00 SPI 10 (destination variable) = source value Example1 int Var1; Label1 … ... Var1 = Label1; Before instruction Label1 0x1234 Var1 x After instruction Label1 0x1234 Var1 0x1234 Example2 int Var1; ... Var1 = 26438; Before instruction Var1 x After instruction Var1 26438 Example3 int Var1, Var2; ... Var2 = Var1; Before instruction Var2 0x56AB Var1 x After instruction Var2 0x56AB Var1 0x56AB Example4 int Var1; long Var3; ... Var1 = Var3(L); Before instruction Var3 0x56ABCD98 Var1 x After instruction Var3 0x56ABCD98 Var1 0xCD98 Example5 int Var1; © Technosoft 2006 139 MotionChip II TML Programming long Var3; ... Var1 = Var3(H); Before instruction Var3 0x56ABCD98 Var1 x After instruction Var3 0x56ABCD98 Var1 0x56AB Example6 int Var1; ... Var1, dm = 3321; Before instruction Var1 x After instruction Var1 3321 Example7 int Var1, Var2; ... Var1, dm = Var2; Before instruction Var1 0x0A01 Var2 x After instruction Var1 0x0A01 Var2 0x0A01 Example8 int Var1, pVar2; ... Var1 = (pVar2), dm; Before instruction pVar2 0x0A01 Data memory 0x0A01 0x1234 Var1 x After instruction pVar2 0x0A01 Data memory 0x0A01 0x1234 Var1 0x1234 Example9 int Var1, pVar2; ... Var1 = (pVar2+), dm; Before instruction pVar2 0x0A01 Data memory 0x0A01 0x1234 Var1 x After instruction pVar2 0x0A02 Data memory 0x0A01 0x1234 Var1 0x1234 Example10 int pVar1; © Technosoft 2006 140 MotionChip II TML Programming ... (pVar1), spi = 0x5422; Before instruction pVar1 0x5100 SPI memory 0x5100 x After instruction pVar1 SPI memory 0x5100 0x5100 0x5422 Example11 int pVar1; ... (pVar1+), spi = 0x5422; Before instruction pVar1 0x5100 SPI data memory 0x5100 x After instruction pVar1 SPI data memory 0x5100 0x5101 0x5422 Example12 int pVar1, Var2; ... (pVar1), pm = Var2; Before instruction pVar1 0x8200 Var2 0xA987 program memory 0x8200 x After instruction pVar1 Var2 program memory 0x8200 0x8200 0xA987 0xA987 Example13 int pVar1, Var2; ... (pVar1+), pm = Var2; Before instruction pVar1 0x8200 Var2 0xA987 program memory 0x8200 x After instruction pVar1 Var2 program memory 0x8200 0x8201 0xA987 0xA987 Example14 long Var5; ... Var5(H) = 0xAA55 ; Before instruction Var5 0x12344321 After instruction Var5 0xAA554321 Example15 long Var5; © Technosoft 2006 141 MotionChip II TML Programming ... Var5(L) = 0xAA55; Before instruction Var5 0x12344321 After instruction Var5 0x1234AA55 Example16 int Var1; long Var5; ... Var5(H) = Var1; Before instruction Var1 0x7711 Var5 0x12344321 After instruction Var1 0x7711 Var5 0x77114321 Example17 int Var1; long Var5; ... Var5(L) = Var1; Before instruction Var1 0x7711 Var5 0x12344321 © Technosoft 2006 142 After instruction Var1 0x7711 Var5 0x12347711 MotionChip II TML Programming Name Assignment instruction for 16 bits TML variables = (IO group) Syntax read input #n into VAR16D read inputs IN#25 to IN#32 into VAR16D with ANDm read input IN#33 to IN#39 into VAR16D with ANDm read IN#36 to IN#39 into VAR16D with 0xF as ANDm VAR16D = IN#n VAR16D = INPUT1, ANDm VAR16D = INPUT2, ANDm VAR16D = INPORT, 0xF Operands Var16D: integer variable IN#n : the source is input bit-port number n (0=<n<=39) INPUT1: the source is 8 input lines status of IO inputs #25 to #32 INPUT2: the source is 8 input lines status of IO inputs #33 to #39 ANDm: a 16-bit mask used to indicate which bits are read from the input ports INPORT: the source is 4 input lines status of IO inputs #39, #38, #37 and #36 The variable VAR16D must be a valid variable name, defined in the current TML application. The selection of the IN#n line is specific for each Technosoft drive. TML program X Type On-line X Binary code VAR16D = IN#n 15 14 13 0 1 1 12 0 11 0 10 0 9 0 0 0 0 0 VAR16D = INPUT1, ANDm 15 14 13 12 11 0 1 1 0 0 0 1 1 1 0 0 0 0 0 0 10 0 0 0 9 0 0 0 VAR16D = INPUT2, ANDm 15 14 13 12 11 0 1 1 0 0 0 1 1 1 0 0 0 0 0 0 10 0 0 0 9 0 0 0 0 0 0 © Technosoft 2006 8 7 6 PxDATDIR 0 8 7 0 0 1 8 7 0 0 1 143 5 4 3 2 (9LSBs of &VAR16D) 1 0 1 0 Bit_mask 6 5 4 3 2 (9LSBs of &VAR16D) 0 0 1 0 1 ANDm 6 5 4 3 2 (9LSBs of &VAR16D) 0 0 1 0 1 ANDm 0 1 1 1 0 0 MotionChip II TML Programming VAR16D = INPORT, ANDm 15 14 13 12 11 0 1 1 0 1 10 0 9 0 8 7 6 5 4 3 2 (9LSBs of &VAR16D) 1 0 ANDm Description variable. Assign the value (status) of input #n or groups of input to the 16-bit destination Execution (destination variable) = source input (input lines) status PxDATDIR & Bit_mask #n #0 #1 #2 #3 #4 #5 #6 #7 #8 #9 #10 #11 #12 #13 #14 #15 #16 #17 #18 #19 PxDATDIR 0x7098 0x7098 0x7098 0x7098 0x7098 0x7098 0x7098 0x7098 0x709A 0x709A 0x709A 0x709A 0x709A 0x709A 0x709A 0x709A 0x709C 0x709C 0x709C 0x709C #n #20 #21 #22 #23 #24 #25 #26 #27 #28 #29 #30 #31 #32 #33 #34 #35 #36 #37 #38 #39 Bit_mask 0x0001 0x0002 0x0004 0x0008 0x0010 0x0020 0x0040 0x0080 0x0001 0x0002 0x0004 0x0008 0x0010 0x0020 0x0040 0x0080 0x0001 0x0002 0x0004 0x0008 PxDATDIR 0x709C 0x709C 0x709C 0x709C 0x709E 0x7095 0x7095 0x7095 0x7095 0x7095 0x7095 0x7095 0x7095 0x7096 0x7096 0x7096 0x7096 0x7096 0x7096 0x7096 Bit_mask 0x0010 0x0020 0x0040 0x0080 0x0001 0x0001 0x0002 0x0004 0x0008 0x0010 0x0020 0x0040 0x0080 0x0001 0x0002 0x0004 0x0008 0x0010 0x0020 0x0040 Example1 int Var1; … Var1 = IN#14; Before instruction IN#14 logic 1 state Var1 x After instruction IN#14 logic 1 state Var1 0x0040 Bit#6 of Var1 has logic value of IN#14. Remaining bits are set © Technosoft 2006 144 MotionChip II TML Programming to 0. Example2 int Var1; … Var1 = INPUT1, 0x00E7; Before instruction IN# 32 31 30 29 28 27 26 25 Logic 0 1 1 0 1 1 0 1 state After instruction IN# 32 31 30 29 28 27 26 25 Logic 0 1 1 0 1 1 0 1 state Var1 Var1 x 0x0065 IN# 32 31 30 29 28 27 26 25 Port state And_Mas k Var1 0 1 1 0 1 1 0 1 1 1 1 0 0 1 1 1 0 1 1 0 0 1 0 1 Bitwise operation Example3 int Var1; … Var1 = INPUT2, 0x00E7; Before instruction IN# 39 38 37 36 35 34 33 Input 1 0 0 1 1 0 1 state After instruction IN# 39 38 37 36 35 34 33 Input 1 0 0 1 1 0 1 state Var1 Var1 x 0x0045 IN# 39 38 37 36 35 34 33 Input state And_Mas k Var1 1 0 0 1 1 0 1 1 1 0 0 1 1 1 1 0 0 0 1 0 1 Bitwise operation Example4 int Var1; … Var1 = INPORT, 0xF; © Technosoft 2006 Before instruction IN# 39 38 37 36 Input state 1 0 1 1 After instruction IN# Logic state Var1 Var1 x 145 39 38 37 36 1 0 1 1 0x000B MotionChip II TML Programming The inputs status (IN#39 to IN#36) is saved in the 4LSB of the variable while the 12MSB are set to 0. If an input line is low, the corresponding bit in the variable is zero. If an input line is high, the corresponding bit in the variable is one. Name Assignment instruction for 32 bits TML variables = (Assignment group) Syntax VAR32D = value32 VAR32D = VAR32S VAR32D = VAR16S << N VAR32D, DM = value32 VAR32D, DM = VAR32S VAR32D = (VAR16S), TypeMem VAR32D = (VAR16S+), TypeMem (VAR16D), TypeMem = value32 (VAR16D), TypeMem = VAR32S (VAR16D+), TypeMem = value32 (VAR16D+), TypeMem = VAR32S Operands set VAR32D to value32 set VAR32D to VAR32S value set VAR32D to VAR16S << N set long VAR32D from DM to value32 set long VAR32D from DM to VAR32S set VAR32D to &(VAR16S) from TM set VAR32D to &(VAR16S) from TM, then VAR16S += 2 set &( VAR16D) from TM to value32 set &( VAR16D) from TM to VAR32S set &( VAR16D) from TM to value32, then VAR16D += 2 set &( VAR16D) from TM to VAR32S, then VAR16D += 2 value32: 32-bit long immediate value VAR32x: long variable DM: data memory operand TypeMem: memory operand (VAR16x): contents of variable VAR16x, representing a 16-bit address of a variable Type TML program X On-line X Binary code VAR32D = value32 15 14 13 12 0 0 1 0 © Technosoft 2006 11 0 10 1 9 8 7 6 5 4 3 2 (9LSBs of &VAR32D) 0 LOWORD(value32) HIWORD(value32) 146 1 0 MotionChip II TML Programming VAR32D = VAR32S 15 14 13 12 0 0 1 0 11 1 10 1 9 0 8 7 6 5 4 3 2 (9LSBs of &VAR32D) 1 0 &VAR32S VAR32D =VAR16S << N 15 14 13 12 11 1 0 0 0 1 10 0 9 0 VAR32D, dm = value32 15 14 13 12 11 1 0 0 1 0 9 0 VAR32D, dm = VAR32S 15 14 13 12 11 1 0 0 1 0 6 1 5 1 4 3 2 1 N (0≤N≤16) 0 10 0 8 7 6 0 0 0 &VAR32D LOWORD(value32) HIWORD(value32) 5 0 4 0 3 0 2 1 1 0 0 1 10 0 9 0 8 7 0 0 &VAR32D &VAR32S 6 0 5 0 4 1 3 0 2 1 1 0 0 1 VAR32D = (VAR16S), TypeMem 15 14 13 12 11 10 1 0 0 1 0 0 9 0 8 7 1 1 &VAR16S &VAR32D 6 0 5 0 4 0 3 2 TypeMem 1 0 0 1 VAR32D = (VAR16S+), TypeMem 15 14 13 12 11 10 1 0 0 1 0 0 9 0 8 7 1 0 &VAR16S &VAR32D 6 0 5 0 4 0 3 2 TypeMem 1 0 0 1 (VAR16D), TypeMem = value32 15 14 13 12 11 10 1 0 0 1 0 0 9 0 8 7 6 0 1 0 &VAR16D LOWORD(value32) HIWORD(value32) 5 1 4 0 3 2 TypeMem 1 0 0 1 9 5 4 1 0 (VAR16D), TypeMem = VAR32S 15 14 13 12 11 10 © Technosoft 2006 8 7 1 0 &VAR32D &VAR16S 8 7 147 6 3 2 MotionChip II TML Programming 1 0 0 1 0 0 1 1 TypeMem 0 1 8 7 6 0 0 0 &VAR16D LOWORD(value32) HIWORD(value32) 5 1 4 0 3 2 TypeMem 1 0 0 1 9 0 5 1 4 1 3 2 TypeMem 1 0 0 1 0 0 (VAR16D+), TypeMem = value32 15 14 13 12 11 10 1 0 0 1 0 0 9 0 (VAR16D+), TypeMem = VAR32S 15 14 13 12 11 10 1 0 0 1 0 0 0 1 &VAR16D &VAR32S 8 7 0 0 &VAR16D &VAR32S 6 0 Description Assign the 32-bit value of the source operand to the 32-bit destination variable Execution (destination variable) = source value TypeMem DM 01 PM 00 SPI 10 Example1 long Var1; ... Var1 = 0x1122AABB; Before instruction Var1 x After instruction Var1 0x1122AABB Example2 long Var1, Var2; ... Var1 = Var2; Before instruction Var2 0xAABC1234 Var1 x After instruction Var2 0xAABC1234 Var1 0xAABC1234 Example3 int Var1; long Var2; ... © Technosoft 2006 148 MotionChip II TML Programming Var2 = Var1 << 4; Before instruction Var1 0x9876 Var2 x After instruction Var1 0x9876 Var2 0x00098760 Example4 long Var1; ... Var1, dm = 0x1122AABB; Before instruction Var1 x After instruction Var1 0x1122AABB Example5 long Var1, Var2; ... Var1, dm = Var2; Before instruction Var2 0xAABC1234 Var1 x After instruction Var2 0xAABC1234 Var1 0xAABC1234 Example6 long Var1; int pVar2; ... Var1 = (pVar2), dm; Before instruction pVar2 0x96AB Data memory 0x96AB 0x1234 0x96AC 0xABCD Var1 x After instruction pVar2 0x96AB Data memory 0x96AB 0x1234 0x96AC 0xABCD Var1 0xABCD1234 Example7 long Var1; int pVar2; ... Var1 = (pVar2+), dm; Before instruction pVar2 0x0A02 Data memory 0x0A02 0x1234 0x0A03 0xABCD Var1 x © Technosoft 2006 149 After instruction pVar2 0x0A04 Data memory 0x0A02 0x1234 0x0A03 0xABCD Var1 0xABCD1234 MotionChip II TML Programming Example8 int pVar1; ... (pVar1), spi = 0x5422AFCD; Before instruction pVar1 0x5100 SPI memory 0x5100 x 0x5101 x After instruction pVar1 SPI memory 0x5100 0x5101 0x5100 0xAFCD 0x5422 Example9 int pVar1; long Var2; ... (pVar1), pm = Var2; Before instruction pVar1 0x8200 Var2 0xA98711EF program memory 0x8200 x 0x8201 x After instruction pVar1 Var2 program memory 0x8200 0x8201 0x8200 0xA98711EF 0x11EF 0xA987 Example10 int pVar1; ... (pVar1+), pm = 0x5422AFCD; Before instruction pVar1 0x8200 program memory 0x8200 x 0x8201 x After instruction pVar1 0x8202 program memory 0x8200 0xAFCD 0x8201 0x5422 Example11 int pVar1; long Var2; ... (pVar1+), pm = Var2; Before instruction pVar1 0x8200 Var2 0xA98711EF program memory 0x8200 x © Technosoft 2006 150 After instruction pVar1 0x8202 Var2 0xA98711EF program memory 0x8200 0x11EF MotionChip II TML Programming 0x8201 © Technosoft 2006 x 0x8201 151 0xA987 MotionChip II TML Programming Name = Assignment instruction for a 16 bits TML local variable with data from another axis – multiple axis instruction (get data from another axis) (Multiple axis group) Syntax local VAR16D = [Axis] VAR16S local VAR16D = [Axis] VAR16S, DM local VAR16D = [Axis] &(VAR16S), TM local VAR16D = [Axis] &(VAR16S), TM, then V16S+=1 VAR16D = [Axis] VAR16S VAR16D = [Axis] VAR16S, DM VAR16D = [Axis] (VAR16S), TypeMem VAR16D = [Axis] (VAR16S+), TypeMem Operands VAR16x: integer variable Axis: 8-bit ID for source axis DM: data memory operand TypeMem: memory operand. One of dm (0x1), pm (0x0) or spi (0x2) values (VAR16x): contents of variable VAR16x, representing a 16-bit address of a variable Type TML program X On-line – Binary code VAR16D = [Axis] VAR16S 15 14 13 12 11 1 1 1 0 0 0 0 0 0 10 0 VAR16D = [Axis] VAR16S, dm 15 14 13 12 11 10 1 0 0 1 1 1 0 0 0 0 9 0 7 6 Axis &VAR16D 9 0 VAR16D = [Axis] (VAR16S), TypeMem 15 14 13 12 11 10 9 1 0 0 1 1 1 0 0 0 0 0 © Technosoft 2006 8 8 0 7 0 5 4 3 2 (9LSBs of &VAR16S) 0 0 6 0 5 0 4 0 6 0 5 0 4 0 Axis &VAR16S &VAR16D 8 1 7 1 Axis &VAR16S &VAR16D 152 3 0 0 2 1 0 3 2 TypeMem 0 0 1 0 0 0 1 0 0 0 0 0 1 0 0 0 0 0 MotionChip II TML Programming VAR16D = [Axis] (VAR16S+), TypeMem 15 14 13 12 11 10 9 1 0 0 1 1 1 0 0 0 0 0 8 1 7 0 Axis &VAR16S &VAR16D 6 0 5 0 4 0 3 2 TypeMem 0 0 1 0 0 0 0 0 Description Bring the 16-bit value of the source operand from an external axis and assign it to the 16-bit destination local variable. Execution (local 16-bit destination variable) = external source 16-bit value, from another axis TypeMem DM 01 PM 00 SPI 10 Example1 int VarLoc, VarExt; ... VarLoc = [15]VarExt; Before instruction VarLoc on local axis VarExt on axis 15 x 0x1234 After instruction VarLoc on local axis VarExt on axis 15 0x1234 0x1234 After instruction VarLoc on local axis VarExt on axis 15 0x1234 0x1234 Example2 int VarLoc, VarExt; ... VarLoc = [15]VarExt, dm; Before instruction VarLoc on local axis VarExt on axis 15 x 0x1234 Example3 int VarLoc, pVarExt; ... VarLoc = [15](pVarExt), dm; Before instruction pVarExt on axis 15 At dm address 0x1234 on axis 15 VarLoc on local axis 0x1234 0xFEDC x After instruction pVarExt on axis 15 At dm address 0x1234 on axis 15 VarLoc on local axis 0x1234 0xFEDC 0xFEDC Example4 © Technosoft 2006 153 MotionChip II TML Programming int VarLoc, pVarExt; ... VarLoc = [15](pVarExt+), dm; Before instruction pVarExt on axis 15 At dm address 0x1234 on axis 15 VarLoc on local axis © Technosoft 2006 0x1234 0xFEDC x 154 After instruction pVarExt on axis 15 At dm address 0x1234 on axis 15 VarLoc on local axis 0x1235 0xFEDD 0xFEDC MotionChip II TML Programming Name = Assignment instruction for a 32 bits TML local variable with data from another axis – multiple axis instruction (get data from another axis)) (Multiple axis group) Syntax local VAR32D = [A] VAR32S local VAR32D = [A] VAR32S, DM local VAR32D = [A] &(VAR16S), TM local VAR32D = [A] &(VAR16S), TM, then V16S+=2 VAR32D = [Axis] VAR32S VAR32D = [Axis] VAR32S, DM VAR32D = [Axis] (VAR16S), TypeMem VAR32D = [Axis] (VAR16S+), TypeMem Operands VAR32x: long variable VAR32x Axis: 8-bit ID for source axis DM: data memory operand TypeMem: memory operand. One of dm (0x1), pm (0x0) or spi (0x2) values (VAR16x): contents of variable VAR16x, representing a 16-bit address of a variable Type TML program X On-line – Binary code VAR32D = [Axis] VAR32S 15 14 13 12 11 1 1 1 0 0 0 0 0 0 10 1 VAR32D = [Axis] VAR32S, dm 15 14 13 12 11 10 1 0 0 1 1 1 0 0 0 0 9 0 8 7 6 Axis &VAR32D 9 0 VAR32D = [Axis] (VAR16S), TypeMem 15 14 13 12 11 10 9 1 0 0 1 1 1 0 0 0 0 0 8 0 7 0 5 4 3 2 (9LSBs of &VAR32S) 0 0 6 0 5 0 4 0 6 0 5 0 4 0 Axis & VAR32S & VAR32D 8 1 7 1 Axis & VAR16S & VAR32D 3 0 0 2 1 0 3 2 TypeMem 0 0 1 0 0 0 1 0 0 0 1 0 1 0 0 0 1 0 VAR32D = [Axis] (VAR16S+), TypeMem © Technosoft 2006 155 MotionChip II TML Programming 15 1 0 14 0 0 13 0 0 12 1 0 11 1 10 1 9 0 8 1 7 0 Axis & VAR16S & VAR32D 6 0 5 0 4 0 3 2 TypeMem 0 0 1 0 0 0 1 0 Description Bring the 32-bit value of the source operand from an external axis and assign it to the 32-bit destination local variable Execution (local 32-bit destination variable) = external source 32-bit value, from another axis TypeMem DM 01 PM 00 SPI 10 Example1 long VarLoc, VarExt; … VarLoc = [15]VarExt; Before instruction VarLoc on local axis VarExt on axis 15 x 0x1234ABCD After instruction VarLoc on local axis VarExt on axis 15 0x1234ABCD 0x1234ABCD After instruction VarLoc on local axis VarExt on axis 15 0xF0E1A2B3 0xF0E1A2B3 Example2 long VarLoc, VarExt; ... VarLoc = [15]VarExt, dm; Before instruction VarLoc on local axis VarExt on axis 15 x 0xF0E1A2B3 Example3 long VarLoc; int pVarExt; ... VarLoc = [15](pVarExt), dm; Before instruction pVarExt on axis 15 At dm address 0x1234 on axis 15 At dm address 0x1235 on axis 15 VarLoc on local axis Example4 After instruction pVarExt on axis 15 At dm address 0x1234 on axis 15 At dm address 0x1235 on axis 15 VarLoc on local axis 0x1234 0xFEDC 0x2233 x 0x1234 0xFEDC 0x2233 0x2233FEDC long VarLoc; © Technosoft 2006 156 MotionChip II TML Programming int pVarExt; ... VarLoc = [15](pVarExt+), dm; Before instruction pVarExt on axis 15 At dm address 0x1234 on axis 15 At dm address 0x1235 on axis 15 VarLoc on local axis © Technosoft 2006 After instruction pVarExt on axis 15 At dm address 0x1234 on axis 15 At dm address 0x1235 on axis 15 VarLoc on local axis 0x1234 0xFEDC 0x2233 x 157 0x1236 0xFEDF 0x2233 0x2233FEDC MotionChip II TML Programming Name = Assignment instruction for a 16 bits TML external variable with data sent from the local axis – multiple axis instruction (send data to another axis) (Multiple axis group) Syntax [Axis/Group] VAR16D = VAR16S [Axis/Group] VAR16D,dm = VAR16S [Axis/Group] (VAR16D), TypeMem = VAR16S [Axis/Group] (VAR16D+), TypeMem = VAR16S Operands [A/G] VAR16D = local VAR16S [A/G] VAR16D, dm = local VAR16S [A/G] &(VAR16D), TM = local VAR16S [A/G] &(VAR16D), TM = local VAR16S, then V16D+=1 VAR16x: integer variable Axis/Group: 8-bit ID for source axis or group of axes dm: data memory operand TypeMem: memory operand. One of dm (0x1), pm (0x0) or spi (0x2) values (VAR16x): contents of variable VAR16x, representing a 16-bit address of a variable Type TML program X On-line – Binary code [Axis/Group] VAR16D = VAR16S 15 14 13 12 11 10 1 0 1 1 1 0 0 0 0 0 9 0 [Axis/Group] VAR16D,dm = VAR16S 15 14 13 12 11 10 9 1 0 0 1 1 0 0 0 0 0 0 8 7 6 Axis/Group &VAR16S 8 7 0 0 Axis/Group &VAR16D &VAR16S [Axis/Group] (VAR16D), TypeMem = VAR16S 15 14 13 12 11 10 9 8 7 1 0 0 1 1 0 0 0 1 Axis/Group 0 0 0 0 &VAR16D &VAR16S 5 4 3 2 (9LSBs of &VAR16D) 0 0 6 0 5 0 4 1 6 0 5 1 4 1 3 0 0 2 1 0 3 2 TypeMem 0 0 1 0 0 0 1 0 0 0 0 0 1 0 0 0 0 0 [Axis/Group] (VAR16D+), TypeMem = VAR16S © Technosoft 2006 158 MotionChip II TML Programming 15 1 0 14 0 0 13 0 0 12 1 0 11 1 10 0 9 0 8 7 0 0 Axis/Group &VAR16D &VAR16S 6 0 5 1 4 1 3 2 TypeMem 0 0 1 0 0 0 0 0 Description Send the 16-bit local value of the source operand to an external axis and assign it to the 16-bit destination external variable Execution (external 16-bit destination variable from another axis) = local source 16-bit value TypeMem DM 01 PM 00 SPI 10 Example1 int VarLoc, VarExt; ... [G8]VarExt = VarLoc; Before instruction VarLoc on local axis VarExt on all axes belonging to group 8 0x1234 x After instruction VarLoc on local axis VarExt on all axes from group 8 0x1234 0x1234 After instruction VarLoc on local axis VarExt on axis 15 0x1234 0x1234 Example2 int VarLoc, VarExt; ... [15]VarExt, dm = VarLoc; Before instruction VarLoc on local axis VarExt on axis 15 Example3 0x1234 x int VarLoc, pVarExt; ... [G8](pVarExt), dm = VarLoc; Before instruction VarLoc on local axis pVarExt on all axes belonging to group 8 At dm address 0x1234 on all axes belonging to group 8 © Technosoft 2006 0xFEDC 0x1234 x 159 After instruction VarLoc on local axis pVarExt on all axes belonging to group 8 At dm address 0x1234 on all axes belonging to group 8 0xFEDC 0x1234 0xFEDC MotionChip II TML Programming Example4 int VarLoc, pVarExt; ... [G8](pVarExt+), dm = VarLoc; Before instruction VarLoc on local axis pVarExt on all axes belonging to group 8 At dm address 0x1234 on all axes belonging to group 8 © Technosoft 2006 0xFEDC 0x1234 x 160 After instruction VarLoc on local axis pVarExt on all axes belonging to group 8 At dm address 0x1234 on all axes belonging to group 8 0xFEDC 0x1235 0xFEDC MotionChip II TML Programming Name = Assignment instruction for a 32 bits TML external variable with data sent from the local axis – multiple axis instruction (send data to another axis) (Communication & Multiple axis group) Syntax [A/G] long VAR32D = local VAR32S [A/G] long VAR32D, DM = local VAR32S = [A/G] &(VAR16D), TM = local VAR32S = [A/G] &(VAR16D), TM = local VAR32S, then V1DS+=2 [Axis/Group] VAR32D = VAR32S [Axis/Group] VAR32D, DM = VAR32S [Axis/Group] VAR32S [Axis/Group] VAR32S Operands (VAR16D), TypeMem (VAR16D+), TypeMem VAR32x: long variable VAR32x Axis: 8-bit ID for source axis or group of axes dm: data memory operand TypeMem: memory operand (VAR16x): contents of variable VAR16x, representing a 16-bit address of a variable Type TML program X On-line – Binary code [Axis/Group] VAR32D = VAR32S 15 14 13 12 11 10 1 0 1 1 1 1 0 0 0 0 9 0 [Axis/Group] VAR32D, dm = VAR32S 15 14 13 12 11 10 9 1 0 0 1 1 0 0 0 0 0 0 8 7 Axis/Group &VAR32S 8 7 0 0 Axis/Group & VAR32D & VAR32S [Axis/Group] (VAR16D), TypeMem = VAR32S 15 14 13 12 11 10 9 8 7 1 0 0 1 1 0 0 0 1 Axis/Group 0 0 0 0 & VAR16D & VAR32S © Technosoft 2006 6 161 5 4 3 2 (9LSBs of &VAR32D) 0 0 6 0 5 0 4 1 6 0 5 1 4 1 3 0 0 2 1 0 3 2 TypeMem 0 0 1 0 0 0 1 0 0 0 1 0 1 0 0 0 1 0 MotionChip II TML Programming [Axis/Group] (VAR16D+), TypeMem = VAR32S 15 14 13 12 11 10 9 8 7 1 0 0 1 1 0 0 0 0 Axis/Group 0 0 0 0 & VAR16D & VAR32S Description 6 0 5 1 4 1 3 2 TypeMem 0 0 1 0 0 0 1 0 Send the 32-bit local value of the source operand to an external axis and assign it to the 32-bit destination external variable TypeMem DM 01 PM 00 SPI 10 Execution (external 32-bit destination variable from another axis) = local source 32-bit value Example1 long VarLoc, VarExt; ... [15]VarExt = VarLoc; Before instruction VarLoc on local axis VarExt on axis 15 0x1234ABCD x After instruction VarLoc on local axis VarExt on axis 15 0x1234ABCD 0x1234ABCD After instruction VarLoc on local axis VarExt on axis 15 0xF0E1A2B3 0xF0E1A2B3 Example2 long VarLoc, VarExt; ... [15]VarExt, dm = VarLoc; Before instruction VarLoc on local axis VarExt on axis 15 0xF0E1A2B3 x Example3 long VarLoc; int pVarExt; ... [15](pVarExt), dm = VarLoc; Before instruction VarLoc on local axis pVarExt on axis 15 At dm address 0x1234 on axis 15 At dm address 0x1235 on axis 15 Example4 © Technosoft 2006 After instruction VarLoc on local axis pVarExt on axis 15 At dm address 0x1234 on axis 15 At dm address 0x1235 on axis 15 0x2233FEDC 0x1234 x x 162 0x2233FEDC 0x1234 0xFEDC 0x2233 MotionChip II TML Programming long VarLoc; int pVarExt; ... [15](pVarExt+), dm = VarLoc; Before instruction VarLoc on local axis pVarExt on axis 15 At dm address 0x1234 on axis 15 At dm address 0x1235 on axis 15 © Technosoft 2006 After instruction VarLoc on local axis pVarExt on axis 15 At dm address 0x1234 on axis 15 At dm address 0x1235 on axis 15 0x2233FEDC 0x1234 x x 163 0x2233FEDC 0x1236 0xFEDC 0x2233 MotionChip II TML Programming Name Get data from memory (16-bit/32-bit) with direct addressing (On-line group) – Syntax – Operands – TML program – Type On-line X Binary code 15 1 14 0 Description 13 0 12 1 11 0 10 0 9 8 7 6 0 0 0 0 Destination Address 16-bit value 5 0 4 0 3 2 TypeMem 1 0 0 0 The instructions request, via a communication channel, from a remote drive the value contained in the memory location(s) with address specified directly in the code. The address can be in data memory, program memory or SPI memory. TypeMem DM 01 PM 00 SPI 10 Execution Request from the remote drive, the remote drive sends the value requested. © Technosoft 2006 164 MotionChip II TML Programming Name Get data from memory (16-bit/32-bit) with indirect addressing (On-line group) – Syntax – Operands – TML program – Type On-line X Binary code 15 1 14 0 13 0 12 1 11 0 10 0 9 8 7 6 0 0 1 0 Destination Address LOWORD(value32) HIWORD(value32) 5 0 4 0 3 2 TypeMem 1 0 0 0 The instructions request, via a communication channel, from a remote drive the value contained in the memory location(s) with address specified in VAR16 variable. The address contained in VAR16 can be in data memory, program memory or SPI memory. Description TypeMem DM 01 PM 00 SPI 10 Execution Request from the remote drive, the remote drive sends the requested value. © Technosoft 2006 165 MotionChip II TML Programming Name Send a TML instruction to another axis (Communication & Multiple axis group) – Syntax [Axis/Group] {TML Instruction;} Operands Axis/Group ID: the ID of the destination axis or group TML Instruction: any of the single axis TML instruction codes, to be send to the destination axis/group TML program X Type On-line X Binary code 15 1 0 14 0 0 13 0 0 Description 12 11 1 0 A/G 10 1 9 0 8 7 6 5 4 3 length(MLI) – 1 Axis/Group 0 TML instruction word 1 (operation code) TML instruction word 2 (data) … TML instruction word (length(MLI)) (data) 2 0 1 0 0 0 This multiple axis operation allows one to send TML commands from one axis to another one. When this code is encountered, the TML instruction included in it is sent to the destination axis, and will be executed as an on-line TML command received by that axis. Execution TML instruction Local axis communication channel Destination axis (Axis/Group) Send the “TML Instruction” through the multiple-axis communication channel. Example [G8] {STOP3;}//Send to all axes that belong to group 8 the command //to execute a motion stop of type 3. © Technosoft 2006 166 MotionChip II TML Programming Name Set inverse value for TML variables =- (Assignment group) Syntax set VAR16D to –VAR16S value set VAR32D to –VAR32S value VAR16D = -VAR16S VAR32D = -VAR32S Operands VAR16x: integer variable VAR32x: long variable VAR32x TML program X Type On-line – Binary code VAR16D = -VAR16S 15 14 13 12 0 0 1 1 11 0 10 0 9 0 8 7 6 5 4 3 2 (9LSBs of &VAR16D) 1 0 6 5 4 3 2 (9LSBs of &VAR32D) 1 0 &VAR16S VAR32D = -VAR32S 15 14 13 12 0 0 1 1 11 0 10 1 9 0 8 7 &VAR32S Description Assign to the variable its inverse value Execution variable = - variable Example int Var1; long Var2; ... Var1 = - Var1; Var2 = - Var1; Before instruction Var1 1256 Var2 -22450 © Technosoft 2006 After instruction Var1 -1256 Var2 1256 167 MotionChip II TML Programming Name += Add a value to a TML variable (Arithmetic&Logic group) Syntax add to VAR16 value16 add to VAR16D VAR16S value add to VAR32 value32 add to VAR32D VAR32S value VAR16 += value16 VAR16D += VAR16S VAR32 += value32 VAR32D += VAR32S Operands VAR16x: integer variable VAR32x: long variable value16: 16-bit immediate integer value value32: 32-bit immediate long value TML program X Type On-line X Binary code VAR16 += value16 15 14 13 12 0 0 1 1 11 1 10 0 9 0 8 7 6 5 4 3 2 (9LSBs of &VAR16) 1 0 6 5 4 3 2 (9LSBs of &VAR16D) 1 0 value16 VAR16D += VAR16S 15 14 13 12 0 1 0 0 11 0 10 0 9 0 8 7 &VAR16S VAR32 += value32 15 14 13 12 0 0 1 1 11 1 10 1 9 8 7 6 5 4 3 2 (9LSBs of &VAR32) 0 LOWORD(value32) HIWORD(value32) 1 0 VAR32D += VAR32S 15 14 13 12 0 1 0 0 11 0 10 1 9 0 1 0 8 7 6 5 4 3 2 (9LSBs of &VAR32D) &VAR32S Description Add to the destination variable the value of the source variable or value. Store the result in the destination variable. Execution destination variable = destination variable + source variable / value © Technosoft 2006 168 MotionChip II TML Programming Example int Var1, Var2, Var3; long Var10, Var11, Var12; ... Var1 += 125; Var3 += Var2; Var10 += 128000; Var12 += Var11; Before instruction Var1 1256 Var2 -22450 Var3 22500 Var10 -1201 Var11 25 Var12 12500 © Technosoft 2006 After instruction Var1 1381 Var2 -22450 Var3 50 Var10 126799 Var11 25 Var12 12525 169 MotionChip II TML Programming Name Subtract a value from a TML variable -= (Arithmetic&Logic group) Syntax subtract from VAR16 value16 subtract from VAR16D VAR16S value subtract from VAR32 value32 subtract from VAR32D VAR32S value VAR16 -= value16 VAR16D -= VAR16S VAR32 -= value32 VAR32D -= VAR32S Operands VAR16x: integer variable VAR32x: long variable value16: 16-bit immediate integer value value32: 32-bit immediate long value TML program X Type On-line X Binary code VAR16 -= value16 15 14 13 12 0 1 0 0 11 1 10 0 9 0 8 7 6 5 4 3 2 (9LSBs of &VAR16) 1 0 6 5 4 3 2 (9LSBs of &VAR16D) 1 0 value16 VAR16D -= VAR16S 15 14 13 12 0 1 0 1 11 0 10 0 9 0 8 7 &VAR16S VAR32 -= value32 15 14 13 12 0 1 0 0 11 1 10 1 9 8 7 6 5 4 3 2 (9LSBs of &VAR32) 0 LOWORD(value32) HIWORD(value32) 1 0 VAR32D -= VAR32S 15 14 13 12 0 1 0 1 11 0 10 1 9 0 1 0 8 7 6 5 4 3 2 (9LSBs of &VAR32D) &VAR32S Description Subtract from the destination variable the value of the source variable or value. Store the result in the destination variable. Execution destination variable = destination variable – source variable / value © Technosoft 2006 170 MotionChip II TML Programming Example int Var1, Var2, Var3; long Var10, Var11, Var12; ... Var1 -= 125; Var3 -= Var2; Var10 -= 128000; Var12 -= Var11; Before instruction Var1 1256 Var2 -22450 Var3 22500 Var10 -1201 Var11 25 Var12 12500 © Technosoft 2006 After instruction Var1 1131 Var2 -22450 Var3 44950 Var10 -129201 Var11 25 Var12 12475 171 MotionChip II TML Programming Name * Multiplication operation (Arithmetic&Logic group) Syntax PROD = (VAR16*value16) >> N PROD = (VAR16*value16) << N PROD = (VAR16A*VAR16B) >> N PROD = (VAR16A*VAR16B) << N PROD = (VAR32*value16) >> N PROD = (VAR32*value16) << N PROD = (VAR32*VAR16) >> N PROD = (VAR32*VAR16) << N VAR16 * VALUE16 >> N VAR16 * VALUE16 << N VAR16A * VAR16B >> N VAR16A * VAR16B << N VAR32 * VALUE16 >> N VAR32 * VALUE16 << N VAR32 * VAR16 >> N VAR32 * VAR16 << N Operands VAR16x: integer variable VAR32x: long variable value16: 16-bit immediate integer value value32: 32-bit immediate long value N: result shift factor Type TML program X On-line X Binary code VAR16 * VALUE16 >> N 15 14 13 12 11 1 0 0 0 1 10 1 9 0 8 7 0 0 &VAR16 VALUE16 6 0 5 0 4 0 3 2 1 N (0≤N≤15) 0 VAR16 * VALUE16 << N 15 14 13 12 11 1 0 0 0 1 10 1 9 0 8 7 0 0 &VAR16 VALUE16 6 0 5 1 4 0 3 2 1 N (0≤N≤15) 0 VAR16A * VAR16B >> N 15 14 13 12 11 1 0 0 0 1 10 1 9 0 8 7 0 1 &VAR16A &VAR16B 6 0 5 0 4 0 3 2 1 N (0≤N≤15) 0 © Technosoft 2006 172 MotionChip II TML Programming VAR16A * VAR16B << N 15 14 13 12 11 1 0 0 0 1 10 1 9 0 8 7 0 1 &VAR16A &VAR16B 6 0 5 1 4 0 3 2 1 N (0≤N≤15) 0 VAR32 * VALUE16 >> N 15 14 13 12 11 1 0 0 0 1 10 1 9 0 8 7 1 0 &VAR32 VALUE16 6 0 5 0 4 0 3 2 1 N (0≤N≤15) 0 VAR32 * VALUE16 << N 15 14 13 12 11 1 0 0 0 1 10 1 9 0 8 7 1 0 &VAR32 VALUE16 6 0 5 1 4 0 3 2 1 N (0≤N≤15) 0 VAR32 * VAR16 >> N 15 14 13 12 1 0 0 0 11 1 10 1 9 0 8 7 1 1 &VAR32 &VAR16 6 0 5 0 4 0 3 2 1 N (0≤N≤15) 0 VAR32 * VAR16 << N 15 14 13 12 1 0 0 0 11 1 10 1 9 0 8 7 1 1 &VAR32 &VAR16 6 0 5 1 4 0 3 2 1 N (0≤N≤15) 0 Description Multiply two values and store the result (eventually shifted) in the PROD (product) register of the TML environment. Execution PROD register = (first operand * second operand) shifted to left or right with a specified number of bits Example1 int Var1; long var2; ... Var1 * 0x125; Var2 = PROD; Before instruction Var1 0x1256 PROD x Var2 x © Technosoft 2006 After instruction Var1 0x1256 PROD 0x00000014FC6E Var2 0x0014FC6E 173 MotionChip II TML Programming Example2 int Var1; long Var2; ... Var1 * 0x125 << 12; Var2 = PROD(H); Before instruction Var1 0x1256 PROD x Var2 X After instruction Var1 0x1256 PROD 0x00014FC6E000 Var2 0x00014FC6 Example3 int Var2, Var3; long Var4; ... Var2 * Var3 >> 4; Var4 = PROD; Before instruction Var2 0x1256 Var3 0x125 PROD x Far4 x After instruction Var2 0x1256 Var3 0x125 PROD 0x000000014FC6 Var4 0x00014FC6 Example4 int Var2, Var3; long Var7; ... Var2 * Var3 << 8; Var7 = PROD(H); Before instruction Var2 0x1256 Var3 0x125 PROD x Var7 x After instruction Var2 0x1256 Var3 0x125 PROD 0x000014FC6E00 Var7 0x000014FC Example5 long Var1, Var2; ... Var1 * 0x125; Var2 = PROD; Before instruction Var1 0x001256AB PROD x Var2 x © Technosoft 2006 174 After instruction Var1 0x1256 PROD 0x000014FD31B7 Var2 0x14FD31B7 MotionChip II TML Programming Example6 long Var1, Var2; ... Var1 * 0x125 << 12; Var2 = PROD(H); Before instruction Var1 0x001256AB PROD x Var2 x After instruction Var1 0x001256AB PROD 0x014FD31B7000 Var2 0x014FD31B Example7 long Var2, Var9; int Var3; ... Var2 * Var3 >> 4; Var9 = PROD(H); Before instruction Var2 0x001256AB Var3 0x125 PROD x Var9 x After instruction Var2 0x001256AB Var3 0x125 PROD 0x0000014FD31B Var9 0x0000014F Example8 long Var2, Var9; int Var3; ... Var2 * Var3 << 8; Var9 = PROD; Before instruction Var2 0x001256AB Var3 0x125 PROD x Var9 X © Technosoft 2006 175 After instruction Var2 0x001256AB Var3 0x125 PROD 0x0014FD31B700 Var9 0xFD31B700 MotionChip II TML Programming Name >>= Shift right (Arithmetic & Logic group) Syntax shift VAR16 right by N shift VAR32 right by N shift PROD (product reg.) right by N VAR16 >>= N VAR32 >>= N PROD >>= N Operands VAR16: integer variable VAR32: long variable PROD: product register N: shift factor TML program X Type On-line X Binary code VAR16 >>= N 15 14 13 1 0 0 12 0 11 1 10 0 9 0 8 7 0 0 &VAR16 6 0 5 0 4 0 3 2 1 N (0≤N≤15) 0 VAR32 >>= N 15 14 13 1 0 0 12 0 11 1 10 0 9 0 8 7 1 0 &VAR32 6 0 5 0 4 0 3 2 1 N (0≤N≤15) 0 PROD >>= N 15 14 13 1 0 0 12 0 11 1 10 0 9 0 6 0 5 0 4 0 3 2 1 N (0≤N≤15) 0 8 0 7 1 Description Right shift the source operand with the specified number of bits (N). Fill the most significant bits with the sign bit (sign extension mode applied, all values are considered as signed values). Execution Value = Value shifted to right with N bits Example1 int Var1; ... Var1 >>= 4; Before instruction Var1 0x1256 © Technosoft 2006 After instruction Var1 0x0125 176 MotionChip II TML Programming Example2 long Var1; … Var1 >>= 12; Before instruction Var1 0x1256ABAB Example3 PROD >>= 4; Before instruction PROD 0x12560000ABCD © Technosoft 2006 After instruction Var1 0x0001256A 177 After instruction PROD 0x012560000ABC MotionChip II TML Programming Name <<= Shift left (Arithmetic & Logic group) Syntax shift VAR16 left by N shift VAR32 left by N shift PROD (product reg.) right by N VAR16 <<= N VAR32 <<= N PROD <<= N Operands VAR16: integer variable VAR32: long variable PROD: product register N: shift factor TML program X Type On-line X Binary code VAR16 <<= N 15 14 13 1 0 0 12 0 11 1 10 0 9 0 8 7 0 0 &VAR16 6 0 5 1 4 0 3 2 1 N (0<N<15) 0 VAR32 <<= N 15 14 13 1 0 0 12 0 11 1 10 0 9 0 8 7 1 0 &VAR32 6 0 5 1 4 0 3 2 1 N (0<N<15) 0 PROD <<= N 15 14 13 1 0 0 12 0 11 1 10 0 9 0 6 0 5 1 4 0 3 2 1 N (0<N<15) 0 8 0 7 1 Description Left shift the source operand, with the specified number of bits (N). Fill the least significant bits with 0. Execution Value = Value shifted to left with N bits Example1 int Var1; … Var1 <<= 4; Before instruction Var1 0x1256 © Technosoft 2006 After instruction Var1 0x2560 178 MotionChip II TML Programming Example2 long Var1; … Var1 <<= 12; Before instruction Var1 0x1256ABAB After instruction Var1 0x6AABAB000 Example3 PROD <<= 4; Before instruction PROD 0x12560000ABCD © Technosoft 2006 179 After instruction PROD 0x2560000ABCD0 MotionChip II TML Programming Name Add group ID ADDGRID (Multiple axis group) Syntax Add value16 to GROUP ID Add value of VAR16 to GROUP ID ADDGRID value16 ADDGRID VAR16 Operands value16: 16-bit integer immediate value VAR16: integer variable TML program X Type On-line X Binary code ADDGRID value16 15 14 13 12 0 0 0 0 11 1 10 0 9 0 8 7 0 0 Value16 6 1 5 0 4 0 3 0 2 0 1 0 0 0 ADDGRID VAR16 15 14 13 12 0 0 0 0 11 1 10 0 9 0 8 7 1 0 &VAR16 6 1 5 0 4 0 3 0 2 0 1 0 0 0 Description In multiple axis structures, this command allows one to add a new group ID to the local axis. After the execution of this command, the new group ID value is recognized by the axis and is used by the communication drivers in order to accept or reject messages addressed to groups of axes. Only the lower 8 bits of the value16 or VAR16 parameters are used for group coding. Each bit corresponds to a group. Up to 8 groups (1 to 8) can be defined/added/removed in a multiple axis structure. An axis can belong to any of the groups. A multiple-axis message can be addressed to one axis or to a group of axes. Execution Group_ID = Group_ID + value16 (or value of VAR16). Example GROUPID ADDGRID 1; 2; ADDGRID 4; ... [G4] {STOP3;} © Technosoft 2006 //local axis belongs to group //from now on, the local axis //to groups 1 and 2 GROUPID = //from now on, the local axis //to groups 1, 2 and 4 //(GROUPID 11) 1 belongs 3) belongs //send stop motion command to all axes //belonging to group 4 180 MotionChip II TML Programming Name Set axis ID value AXISID (Multiple axis group) Syntax Set AXIS ID address Set AXIS ID with value of VAR16 AXISID value16 AXISID VAR16 Operands value16: 16-bit integer immediate value VAR16: integer variable TML program X Type On-line X Binary code AXISID value16 15 14 13 0 0 0 12 0 11 1 10 0 9 0 8 7 0 0 Value16 6 0 5 0 4 0 3 0 2 0 1 0 0 1 AXISID VAR16 15 14 13 0 0 0 12 0 11 1 10 0 9 0 8 7 1 0 &VAR16 6 0 5 0 4 0 3 0 2 0 1 0 0 1 Description In multiple axis structures, these commands allows changing the ID of the axis. After the execution of these commands, the new ID value is recognized by the axis. The ID value16 or the ID value of VAR16 has the range from 0 to 255. Execution Axis_ID is set to value16 or value of VAR16. Example AXISID 10; // from now on, the local axis ID is 10 ... [10] {AXISID 9;} // change the ID of axis 10 to 9 (this //instruction is send and executed on //the actual axis 10) ... [9] {CSPD = 30;} // send a command to axis 9 (previous axis //10) © Technosoft 2006 181 MotionChip II TML Programming Name Set the axis OFF AXISOFF (Configuration and command group) Syntax AXIS is OFF (deactivate control) AXISOFF Operands – TML program X Type On-line X Binary code 15 0 14 0 13 0 12 0 11 0 10 0 9 0 8 0 7 0 6 0 5 0 4 0 3 0 2 0 1 1 0 0 Description This command deactivates the control loops (current, speed and position) and the reference generator module. The PWM outputs are also deactivated (put in the high impedance status). The real-time kernel continues to be active, both slow and high frequency sampling loops are active. Only acquisition of measured data (currents, position, Vdc, etc) continues to be performed. Execution Sets the axis OFF, and deactivates the control. Example BEGIN; #include “dc_epc.ini” //includes the setup file ENDINIT; //end of setup file Loop: AXISON; //start program MODE SP1 ; //work mode ; CSPD = 20.; //setup reference speed UPD; //update !RT 1000; //Set event if RelativeTime >= 1000 WAIT!; //WAIT until event occurs AXISOFF; //deactivate the control !RT 20000; //Set event if RelativeTime >= 20000 WAIT!; //WAIT until event occurs GOTO loop; // restart the motion END; //end of program © Technosoft 2006 182 MotionChip II TML Programming Name Set the axis ON AXISON (Configuration and command group) Syntax AXIS is ON (activate control) AXISON Operands – TML program X Type On-line X Binary code 15 0 14 0 13 0 12 0 11 0 10 0 9 0 8 1 7 0 6 0 5 0 4 0 3 0 2 0 1 1 0 0 Description This command activates the control loops (current, speed and position) and the reference generator module. The PWM outputs are also activated. Execution Sets the axis ON, and activates the control. Example BEGIN; #include “dc_epc.ini” //includes the setup file ENDINIT; //end of setup file Loop: AXISON; //start program MODE SP1 ; //work mode ; CSPD = 20.; //setup reference speed UPD; //update !RT 1000; //Set event if RelativeTime >= 1000 WAIT!; //WAIT until event occurs AXISOFF; //deactivate the control !RT 20000; //Set event if RelativeTime >= 20000 WAIT!; //WAIT until event occurs GOTO loop; // restart the motion END; //end of program © Technosoft 2006 183 MotionChip II TML Programming Name Begin a TML program sequence BEGIN (Miscellaneous group) Syntax Beginning of a TML program BEGIN Operands – TML program X Type On-line – Binary code 15 0 14 1 13 1 12 0 11 0 10 1 9 0 8 0 7 1 6 0 5 0 4 1 3 1 2 1 1 0 0 0 Description This command is used at the beginning of an independent sequence of TML instructions. The TML instruction decoding section will recognize the BEGIN instruction as the first valid instruction of a TML program. Execution Begin a sequence of TML instructions. Example BEGIN; #include “dc_epc.ini” //includes the setup file ENDINIT; //end of setup file Loop: AXISON; //start program MODE SP1 ; //work mode ; CSPD = 20.; //setup reference speed UPD; //update END; //end of program © Technosoft 2006 184 MotionChip II TML Programming Name Call a TML function CALL (Decision group) Syntax Unconditional CALL of a TML function CALL if VAR16 Flag 0 CALL if VAR32 Flag 0 CALL Label CALL Label, VAR16, Flag CALL Label, VAR32, Flag Operands Label: 16-bit program memory address VAR16: integer variable VAR32: long variable Flag: one of ‘=’, ‘!=’, ‘>’, ‘>=’, ‘<’, ‘<=’ relational factors. TML program X Type On-line X Binary code CALL Label 15 14 13 0 1 1 11 0 10 1 9 0 8 7 0 0 &Label 6 0 5 0 4 0 3 0 2 0 1 0 0 1 CALL Label, VAR16, Flag 15 14 13 12 11 0 1 1 1 0 10 1 9 0 8 7 0 &VAR16 &Label 6 5 4 Flag 3 2 1 0 1 CALL Label, VAR32, Flag 15 14 13 12 11 0 1 1 1 0 10 1 9 0 8 7 1 &VAR32 &Label 6 5 4 Flag 3 2 1 0 1 Description 12 1 This instruction allows the execution of a TML function (subroutine). A TML function starts with a label and ends with RET instruction. The function can contain any TML instruction. When a conditional CALL instruction is encountered, the condition is checked and, if it is true (i.e. the tested variable is in the specified relation with 0), a call of to the specified label is executed. If condition is false, the next TML instruction is executed. Specific sequences can be called from different points of the TML program. Use a RET instruction to end the execution of a function and to continue the TML sequence following the CALL instruction. © Technosoft 2006 185 MotionChip II TML Programming Execution Calls a TML function (subroutine) located at the address Label. Unconditional call. IP -> TOS Label -> IP Conditional call. If VarXX Flag 0 then IP -> TOS Label -> IP The label must be an existing label name, defined in the TML program (a 16-bit program memory address), otherwise an error will occur. The variable must be an existing TML variable name (an integer or long variable), defined in the TML program, otherwise an error will occur. The flag imposes the test condition for the variable var. In case of a conditional decision instruction (CALL Label, VAR16/32, Flag) the variable specified is compared to 0, using one of the following test conditions: variable.EQ.0 // variable = 0 (EQUAL) variable.NEQ.0 // variable != 0 (NON EQUAL) variable.LT.0 // variable < 0 (LESS THAN) variable.LEQ.0 // variable <= 0 (LESS OR EQUAL) variable.GT.0 // variable > 0 (GREATER THAN) variable.GEQ.0 // variable >= 0 (GREATER OR EQUAL) The CALL instruction is executed only if the test condition is satisfied. Flag 0x0090 0x0088 0x00C 0 NEQ 0x00A0 GT 0x0084 GEQ 0x0082 LT LEQ EQ Example1 CALL fct1, i_var1, GEQ; //call function fct1, if i_var1 >= 0 CALL fct1, i_var1, EQ; //call function fct1, if i_var1 = 0 CALL fct1, i_var1, NEQ; //call function fct1, if i_var1 != 0 CALL fct1; //unconditional call of function fct1 fct1: ... ... RET; Example2 int my_pos; © Technosoft 2006 186 MotionChip II TML Programming my_pos = 2000; CALL MOVEP; // execute a first motion of 2000 //counts My_pos = 4000; CALL MOVEP, ASPD, GT; // execute a second motion of 4000 //counts, if motor speed > 0 ... MOVEP: // function to move up to a specified position CACC = 1.5; // acceleration = 1.5counts/sampling2 CSPD = -20.; // slew speed = -20counts/sampling CPOS = my_pos; // position command (input argument) UPD; // start the motion RET; // exit from function MOVEP ... END; © Technosoft 2006 187 MotionChip II TML Programming Name Set the baud rate CANBR (Multiple axis group) Syntax Set the baud rate for CAN-bus CANBR value16 Operands value16: 16-bit integer immediate value TML program X Type On-line X Binary code 15 0 14 0 Description 13 0 12 0 11 1 10 0 9 0 8 7 0 0 Value16 6 0 5 0 4 0 3 0 2 1 1 0 0 0 This command is used to setup the baud rate for CAN communication parameters channel. It also sets the CBR register. Baud rate [kb] 125 250 500 800 1000 Value 16 0xF36C 0x736C 0x3273 0x412A 0x1273 Execution CBR register = value16. Program the CAN controller accordingly. Example In order to configure the baud rate at 1 Mb for the CAN communication channel use the following assignment instruction: CANBR 0x1273; © Technosoft 2006 188 MotionChip II TML Programming CHECKSUM Assignment instruction for a 16 bits TML variable with the result Name of the checksum operation (Miscellaneous group) Syntax CHECKSUM, TypeMem Start, Stop, V16D V16D=Checksum data from TM Start address to TM Stop address-1 Operands TypeMem: memory operand. Start: Start addresses from TypeMem Stop: Stop addresses from TypeMem VAR16D: integer variable (destination) TML program X Type On-line X Binary code CHECKSUM, TypeMem Start, Stop, V16D 15 14 13 12 11 10 9 8 7 6 5 TypeMem 1 1 0 1 1 0 0 1 0 & VAR16D Start address Stop address 4 0 3 0 2 0 1 0 0 0 Description The selected 16-bit variable is assigned with checksum operation performed on the all memory locations situated in TypeMem between Start address and Stop address –1. Execution (16-bit destination variable) = checksum of data located in TypeMem between Start address and Stop address - 1. TypeMem DM 01 PM 00 SPI 10 Example int Var1; … CHECKSUM, SPI 0x5000, 0x5007, VAR1; Before instruction Var1 TypeMem start address © Technosoft 2006 After instruction Var1 TypeMem start address x 0xB004 189 0xD45F 0xB004 MotionChip II TML Programming 0x5000 TypeMem 0x5001 TypeMem 0x5002 TypeMem 0x5003 TypeMem 0x5004 TypeMem 0x5005 TypeMem 0x5006 TypeMem 0x5007 © Technosoft 2006 address 0x0FF1 address 0x0366 address 0x0404 address 0x0C09 address 0x0010 address 0x00E7 address 0x0008 0x5000 TypeMem 0x5001 TypeMem 0x5002 TypeMem 0x5003 TypeMem 0x5004 TypeMem 0x5005 TypeMem 0x5006 TypeMem 0x5007 190 address 0x0FF1 address 0x0366 address 0x0404 address 0x0C09 address 0x0010 address 0x00E7 address 0x0008 MotionChip II TML Programming Name Absolute command position CPA (Configuration and command group) Syntax Command Position is Absolute CPA Operands – TML program X Type On-line X Binary code 15 0 1 0 14 1 1 0 13 0 1 1 12 1 1 0 11 1 1 0 10 0 1 0 9 0 1 0 8 1 1 0 7 0 1 0 6 0 1 0 5 0 1 0 4 0 1 0 3 1 1 0 2 0 1 0 1 0 1 0 0 1 1 0 Description After the execution of this instruction, all position commands will be considered as absolute values. So, position references will be compared with the absolute position of the motor (stored in the APOS variable). Execution Subsequent position commands are considered as absolute. Example ... CACC = 1.5; CSPD = 40; CPOS = 50000; CPA; MODE PP3; UPD; © Technosoft 2006 //Acceleration command for position profile //(counts/sampling2) //Speed command for position profile //(counts/sampling) //Position command (counts) //Position command is Absolute //Set Position Profile Mode 3 //Update immediate 191 MotionChip II TML Programming Name Relative command position CPR (Configuration and command group) Syntax Command Position is Relative CPR Operands – TML program X Type On-line X Binary code 15 0 1 0 14 1 1 0 13 0 0 0 12 1 1 0 11 1 1 0 10 0 1 0 9 0 1 0 8 1 1 0 7 0 1 0 6 0 1 0 5 0 1 0 4 0 1 0 3 1 1 0 2 0 1 0 1 0 1 0 0 1 1 0 Description After the execution of this instruction, all position commands will be considered as relative values. Depending on the target update mode setting (using instructions TUM0 or TUM1), the position value will be relative to the actual and respectively target motor position. Execution Subsequent position commands are considered as relative. Example ... CACC = 0.5; CSPD = 20; CPOS = 40000; CPA; MODE PP3; UPD; CPOS = 80000; CPR; TUM0; !IN#38 1; UPD!; WAIT!; © Technosoft 2006 //Acceleration command for position //profile (counts/sampling2) //Speed command for position profile //(counts/sampling) //Position command (counts) //Position command is Absolute //Set Position Profile Mode 3 //Update immediate //New Position command (counts) //Position command is Relative //Target update mode 0 //Set event if INput#38 is high //Update on event //WAIT until event occurs 192 MotionChip II TML Programming Name Disable TML interrupts DINT (Configuration and command group) Syntax Disable TML INTerrupts DINT Operands – TML program X Type On-line X Binary code 15 0 14 0 13 0 12 0 11 0 10 1 9 0 8 0 7 0 6 0 5 0 4 1 3 0 2 0 1 0 0 0 Description After the execution of this instruction, further TML interrupts are disabled. Use the EINT instruction to re-enable TML interrupts. Execution Disable TML interrupts. © Technosoft 2006 193 MotionChip II TML Programming Name Disable Index2 capture DIS2CAPI (I/O group) Syntax DISable 2nd CAPture Index DIS2CAPI Operands – TML program X Type On-line X Binary code 15 0 14 0 Description 13 0 12 0 11 0 10 1 9 0 8 0 7 1 6 0 5 1 4 0 3 0 2 0 1 0 0 0 After the execution of this instruction the index2 capture connected to 2CAPI pin is disabled. Use the EN2CAPI0 or EN2CAPI1 instructions to re-enable this capture. In the disabled mode, the index2 capture is reprogrammed and can be used as a general purpose I/O pin. By default, it is re-programmed as an input pin. Index2Capture captures the master position. The master position can be captured only in the following conditions: • The encoder signals from the master system are connected to the 2nd encoder input of the drive • The drive is set as slave either in electronic gearing or electronic camming with option Read master position from 2nd encoder input activated In order to enable the index2 capture input, specify the type of transition to look for: index2 Capture transition low->high or index2 Capture transition high-> low. Normally, you don’t need to disable the index2 capture input as this is automatically done when the programmed transition occurs. Use Disable only if you want to disable on purpose the index2 capture input, before sensing the transition. Execution Disable index2 input capture. © Technosoft 2006 194 MotionChip II TML Programming Name Disable index capture DISCAPI (I/O group) Syntax DISable CAPture Index DISCAPI Operands – TML program X Type On-line X Binary code 15 0 14 0 13 0 12 0 11 0 10 1 9 0 8 0 7 1 6 0 5 0 4 0 3 0 2 0 1 0 0 1 Description After the execution of this instruction, the index capture, connected to CAPI pin, is disabled. Use the ENCAPI0 or ENCAPI1 instructions to re-enable this capture. In the disabled mode, the index capture is reprogrammed and can be used as a general purpose I/O pin. By default, it is re-programmed as an input pin. Index capture captures the motor position. In order to enable a capture input, specify the type of transition to look for: Capture transition low->high or Capture transition high-> low. Normally, you don’t need to disable a capture input as this is automatically done when the programmed transition occurs. Use Disable only if you want to disable on purpose a capture input, before sensing the transition. Execution Disable index input capture. © Technosoft 2006 195 MotionChip II TML Programming Name Disable input bit-port DISIO (I/O group) Syntax DISable IO#n DISIO#n Operands n: the input/output bit-port number (0<=n<=39) TML program X Type On-line X Binary code 15 0 14 1 13 0 12 1 11 1 10 1 9 0 8 7 0 0 MCRx ANDdis ORdis 6 0 5 0 4 0 3 0 2 0 1 0 0 0 Description After the execution of this instruction, the I/O bit-port #n is disabled. Use the ENIO#n instruction to re-enable this I/O bit-port. In the disabled mode, the associated pin is reprogrammed and can be used for its primary function on the DSP. Execution Disable I/O bit-port number n (0<=n<=39). © Technosoft 2006 196 MotionChip II TML Programming MCRx & AND/OR masks for DISIO#n #n MCRx ANDdis ORdis #0 0x7090 0xFFFF 0x0001 #1 0x7090 0xFFFF 0x0002 #2 0x7090 0xFFFF 0x0004 #3 0x7090 0xFFFF 0x0008 #4 0x7090 0xFFFF 0x0010 #5 0x7090 0xFFFF 0x0020 #6 0x7090 0xFFFF 0x0040 #7 0x7090 0xFFFF 0x0080 #8 0x7090 0xFFFF 0x0100 #9 0x7090 0xFFFF 0x0200 #10 0x7090 0xFFFF 0x0400 #11 0x7090 0xFFFF 0x0800 #12 0x7090 0xFFFF 0x1000 #13 0x7090 0xFFFF 0x2000 #14 0x7090 0xFFFF 0x4000 #15 0x7090 0xFFFF 0x8000 #16 0x7092 0xFFFF 0x0001 #17 0x7092 0xFFFF 0x0002 #18 0x7092 0xFFFF 0x0004 #19 0x7092 0xFFFF 0x0008 © Technosoft 2006 197 #n MCRx #20 0x7092 ANDdis 0xFFFF ORdis 0x0010 #21 0x7092 0xFFFF 0x0020 #22 0x7092 0xFFFF 0x0040 #23 0x7092 0xFFFF 0x0080 #24 0x7092 0xFFFF 0x0100 #25 0x7094 0xFFFF 0x0001 #26 0x7094 0xFFFF 0x0002 #27 0x7094 0xFFFF 0x0004 #28 0x7094 0xFFFF 0x0008 #29 0x7094 0xFFFF 0x0010 #30 0x7094 0xFFFF 0x0020 #31 0x7094 0xFFFF 0x0040 #32 0x7094 0xFFFF 0x0080 #33 0x7094 0xFFFF 0x0100 #34 0x7094 0xFFFF 0x0200 #35 0x7094 0xFFFF 0x0400 #36 0x7094 0xFFFF 0x0800 #37 0x7094 0xFFFF 0x1000 #38 0x7094 0xFFFF 0x2000 #39 0x7094 0xFFFF 0x0000 MotionChip II TML Programming Name Disable negative limit switch DISLSN (I/O group) Syntax DISable Limit Switch Negative DISLSN Operands – TML program X Type On-line X Binary code 15 0 0 1 0 14 1 1 1 0 13 0 1 1 0 12 1 1 1 0 11 1 0 1 0 10 1 0 1 0 9 0 0 1 0 8 0 0 1 0 7 0 0 1 0 6 0 1 1 0 5 0 1 1 0 4 0 1 1 0 3 0 0 1 0 2 0 0 1 0 1 0 0 1 0 0 0 1 0 0 Description After the execution of this instruction, the negative limit switch is deactivated. Use the ENLSN0 or ENLSN1 instructions to re-enable the negative limit switch detection. In the disabled mode, the negative limit switch pin is re-programmed and can be used as an input pin, usable to get the status of the limit switch signal. Use the LSN variable in order to examine the status of this pin. Execution Disable negative limit switch. © Technosoft 2006 198 MotionChip II TML Programming Name Disable positive limit switch DISLSP (I/O group) Syntax DISable Limit Switch Positive DISLSP Operands – TML program X Type On-line X Binary code 15 0 0 1 0 14 1 1 1 0 13 0 1 1 0 12 1 1 1 0 11 1 0 1 0 10 1 0 1 0 9 0 0 1 0 8 0 0 1 0 7 0 0 1 0 6 0 1 1 0 5 0 1 1 0 4 0 1 1 0 3 0 0 1 0 2 0 0 1 0 1 0 0 1 0 0 0 0 0 0 Description After the execution of this instruction, the positive limit switch is deactivated. Use the ENLSP0 or ENLSP1 instructions to re-enable the positive limit switch detection. In the disabled mode, the positive limit switch pin is re-programmed and can be used as an input pin, usable to get the status of the limit switch signal. Use the LSP variable in order to examine the status of this pin. Execution Disable positive limit switch. © Technosoft 2006 199 MotionChip II TML Programming Name Enable TML interrupts EINT (Configuration and command group) Syntax Enable TML INTerrupts EINT Operands – TML program X Type On-line X Binary code 15 0 14 0 13 0 12 0 11 0 10 1 9 0 8 1 7 0 6 0 5 0 4 1 3 0 2 0 1 0 0 0 Description After the execution of this instruction, the TML interrupts will be enabled. If an interrupt flag is set by a specific event, and the corresponding interrupt enable bit from the ICR register is active, the corresponding TML interrupt service routine will be called and executed. The TML interrupts can be de-activated using the DINT instruction. Execution Enable TML interrupts. © Technosoft 2006 200 MotionChip II TML Programming Name Enable index2 capture on falling-edge front EN2CAPI0 (I/O group) Syntax Enable 2ndCAPture Index 1->0 EN2CAPI0 Operands – TML program X Type On-line X Binary code 15 0 14 0 Description 13 0 12 0 11 0 10 1 9 0 8 0 7 0 6 0 5 1 4 0 3 0 2 0 1 0 0 0 After the execution of this instruction, the DSP will detect the first transition from 1 to 0 on the index2 capture input (pin 2CAPI) for drives where the second encoder input is available. Index2 Capture captures the master position. The master position can be captured only in the following conditions: • The encoder signals from the master are connected to the second encoder input of the drive • The drive is set as slave either in electronic gearing or electronic camming with option Read master position from second encoder input activated When the programmed transition occurs, the following happens: • The value of the master position will be stored in the CAPPOS2 system variable; • An event is detected, and the update event and the wait event bits of the MSR register are set if a capture triggered (!CAP) instruction was executed prior the occurrence of the capture; • If an update on event was programmed, a motion update is performed; • The corresponding status bit in the MSR register (Bit 8, position capture) is set • The corresponding interrupt bit in the ISR register (Bit 8, position capture) is set, and will determine the execution of the associated interrupt service routine if the corresponding mask bit from the ICR register is set. • The DSP index capture pin is programmed as a general input data pin(bit-port #34 in TML). A capture input is automatically disabled after the programmed transition was detected and the position was captured. In order to reuse a capture input, you need to enable it again. Execution Enable index2 capture on falling-edge front (transition from 1 to 0). © Technosoft 2006 201 MotionChip II TML Programming Example CACC = 0.5; CSPD = 20; MODE SP1; UPD; EN2CAPI0; CSPD = 30; !CAP; UPD!; © Technosoft 2006 //Acceleration command for speed profile //(counts/sampling2) //Speed command (counts/sampling) //Set Speed Profile Mode 1 //Update immediate //Activate 2CAPI input to trigger a falling //transition //New acceleration command for speed profile //(counts/sampling2) //Set event if CAPture is triggered //Update on event 202 MotionChip II TML Programming Name Enable index2 capture on rising-edge front EN2CAPI1 (I/O group) Syntax Enable 2ndCAPture Index 0->1 EN2CAPI1 Operands – TML program X Type On-line X Binary code 15 0 14 0 Description 13 0 12 0 11 0 10 1 9 0 8 1 7 0 6 0 5 1 4 0 3 0 2 0 1 0 0 0 After the execution of this instruction, the DSP will detect the first transition from 0 to 1 on the index2 capture input (pin 2CAPI) for drives where the second encoder input is available. Index2 Capture captures the master position. The master position can be captured only in the following conditions: • The encoder signals from the master are connected to the second encoder input of the drive • The drive is set as slave in electronic gearing or electronic camming with option Read master position from second encoder input activated When the programmed transition occurs, the following happens: • The value of the master position will be stored in the CAPPOS2 system variable; • An event is detected, and the update event and the wait event bits of the MSR register are set if a capture triggered (!CAP) instruction was executed prior the occurrence of the capture; • If an update on event was programmed, a motion update is performed; • The corresponding status bit in the MSR register (Bit 8, position capture) is set • The corresponding interrupt bit in the ISR register (Bit 8, position capture) is set, and will determine the execution of the associated interrupt service routine if the corresponding mask bit from the ICR register is set. • The DSP index capture pin is programmed as a general input data pin(bit-port #34 in TML). A capture input is automatically disabled after the programmed transition was detected and the position was captured. In order to reuse a capture input, you need to enable it again. © Technosoft 2006 203 MotionChip II TML Programming Execution Enable index2 capture on rising-edge front (transition from 0 to 1). Example CACC = 0.5; CSPD = 20; MODE SP1; UPD; EN2CAPI1; CSPD = 30; !CAP; UPD!; © Technosoft 2006 //Acceleration command for speed profile //(counts/sampling2) //Speed command (counts/sampling) //Set Speed Profile Mode 1 //Update immediate //Activate 2CAPI input to trigger a rising //transitions. //New acceleration command for speed profile //(counts/sampling2) //Set event if CAPture is triggered //Update on event 204 MotionChip II TML Programming Name Enable index capture on falling-edge front ENCAPI0 (I/O group) Syntax Enable CAPture Index 1->0 ENCAPI0 Operands – TML program X Type On-line X Binary code 15 0 14 0 Description 13 0 12 0 11 0 10 1 9 0 8 0 7 0 6 0 5 0 4 0 3 0 2 0 1 0 0 1 After the execution of this instruction, the DSP will detect the first transition from 1 to 0 on the index capture input (CAPI pin). Index capture captures the motor actual position. On capture, the following happens: • the value of the motor position will be stored in the CAPPOS system variable; • an event is detected, and the update event and the wait event bits of the MSR register are set if a capture triggered (!CAP) instruction was executed prior the occurrence of the capture; • if an update on event was programmed, a motion update is performed; • the corresponding status bit in the MSR register (Bit 8, position capture) is set • the corresponding interrupt bit in the ISR register (Bit 8, position capture) is set, and will determine the execution of the associated interrupt service routine if the corresponding mask bit from the ICR register is set. • the DSP index capture pin is programmed as a general input data pin(bit-port #5 in TML). Execution Enable index capture on falling-edge front (transition from 1 to 0). Example CACC = 0.5; CSPD = 20; MODE SP1; UPD; ENCAPI0; CSPD = 50; !CAP; © Technosoft 2006 //Acceleration command for speed profile //(counts/sampling2) //Speed command (counts/sampling) //Set Speed Profile Mode 1 //Update immediate //Activate CAPI input to trigger a falling //transitions. //New acceleration command for speed profile //(counts/sampling2) //Set event if CAPture is triggered 205 MotionChip II TML Programming UPD!; Name //Update on event Enable index capture on rising-edge front ENCAPI1 (I/O group) Syntax Enable CAPture Index 0->1 ENCAPI1 Operands – TML program X Type On-line X Binary code 15 0 14 0 Description 13 0 12 0 11 0 10 1 9 0 8 1 7 0 6 0 5 0 4 0 3 0 2 0 1 0 0 1 After the execution of this instruction, the DSP will detect the first transition from 0 to 1 on the index capture input (CAPI pin). Index capture captures the motor actual position. On capture, the following happens: • The value of the motor position will be stored in the CAPPOS system variable; • An event is detected, and the update event and the wait event bits of the MSR register are set if a capture triggered (!CAP) instruction was executed prior the occurrence of the capture; • If an update on event was programmed, a motion update is performed; • The corresponding status bit in the MSR register (Bit 8, position capture) is set • The corresponding interrupt bit in the ISR register (Bit 8, position capture) is set, and will determine the execution of the associated interrupt service routine if the corresponding mask bit from the ICR register is set. • The DSP index capture pin is programmed as a general input data pin (bit-port #5 in TML). Execution Enable index capture on rising-edge front (transition from 0 to 1). Example CACC = 0.5; CSPD = 20; MODE SP1; UPD; ENCAPI1; CSPD = 50; !CAP; © Technosoft 2006 //Set acceleration command //Ser speed command (counts/sampling) //Set Speed Profile Mode 1 //Update immediate //Activate CAPI input to trigger a rising //transitions. //Set new acceleration command //Set event if CAPture is triggered 206 MotionChip II TML Programming UPD!; © Technosoft 2006 //Update on event 207 MotionChip II TML Programming Name End of TML program END (Miscellaneous group) Syntax END of a TML program END Operands – TML program X Type On-line X Binary code 15 0 14 0 Description 13 0 12 0 11 0 10 0 9 0 8 0 7 0 6 0 5 0 4 0 3 0 2 0 1 0 0 1 The END instruction will indicate the end of a TML program sequence. After the execution of this instruction, the TML kernel will enter in a wait loop, and no other TML instruction is executed (this stops the execution of the motion program resident in the drive memory). A RESET, a TML interrupt or an on-line GOTO or CALL instructions are needed to change this status, and to start the execution of another TML program sequence. Please note that after the execution of the END instruction, the control, PWM outputs and real-time section of the system continue to operate as before the execution of this instruction. Use commands as AXISOFF in order to stop the controllers and to de-activate the PWM outputs. Remarks: 1. It is mandatory to end the motion program (main routine) with an END command. All the TML subroutines and interrupt service routines should be added after the END command. 2. If you intend to change the program of a drive set for stand-alone operation (e.g. which starts to execute automatically after reset the TML program from the E2ROM memory) you should do the following: a. Send to the drive the command END, to stop the current program execution. In order to disable the power stage, send also an AXISOFF command b. Compile the new program c. Download the new program d. Reset the drive. The new program will start to execute Execution End a TML program. © Technosoft 2006 208 MotionChip II TML Programming Name End of the initialization part of a TML program (Configuration and command group) ENDINIT Syntax END of INITialization ENDINIT Operands – TML program X Type On-line – Binary code 15 0 14 0 Description 13 0 12 0 11 0 10 0 9 0 8 0 7 0 6 0 5 1 4 0 3 0 2 0 1 0 0 0 The ENDINIT instruction will indicate the end of the initialization part of the TML program. This instruction must be preceded by all the initializations (TML instructions) needed to setup the motion system configuration structure and parameters. When executed, this instruction uses these parameters and settings in order to setup the operating environment of the motion system (real-time sampling periods, PWM parameters, sensor-related parameters, etc.). The following settings must be done before executing the ENDINIT instruction. Category Registers Parameters Name SCR OSR PWMPER DBT CLPER SLPER Remarks Remarks: 1. Only one ENDINIT instruction may be executed in a TML program. 2. The ENDINIT instruction activates the real-time interrupts and the measurement from A/D channels, but no PWM outputs or controllers. Use the AXISON command in order to activate them, too. The AXISON command must be executed after the ENDINIT command! Execution End the initialization part of the TML program. © Technosoft 2006 209 MotionChip II TML Programming Name Enable input bit-port ENIO (I/O group) Syntax Enable IO#n ENIO#n Operands n: the input/output bit-port number (0<=n<=39) TML program X Type On-line X Binary code 15 0 14 1 Description 13 0 12 1 11 1 10 1 9 0 8 7 0 0 MCRx ANDen ORen 6 0 5 0 4 0 3 0 2 0 1 0 0 0 After the execution of this instruction, the I/O bit-port #n is enabled. Use the DISIO#n instruction to disable this I/O bit-port. In the enabled mode, the associated pin is programmed and can be used as a general-purpose I/O bit. The ENIO#n instruction does not change the bit-port type (input or output). By default, after reset, the bit-port is set as an input port. Use the SETIO#n OUT instruction to change it to an output bit-port or, alternatively, the SETIO#n IN to change it to an input bit-port. Execution Enable the use of the IO#n signal as an I/O line (0<=n<=39). Example ENIO#5 © Technosoft 2006 // enable port 5 210 MotionChip II TML Programming MCRx & AND/OR masks for ENIO#n #n #0 #1 #2 #3 #4 #5 #6 #7 #8 #9 #10 #11 #12 #13 #14 #15 #16 #17 #18 #19 MCRx 0x7090 0x7090 0x7090 0x7090 0x7090 0x7090 0x7090 0x7090 0x7090 0x7090 0x7090 0x7090 0x7090 0x7090 0x7090 0x7090 0x7092 0x7092 0x7092 0x7092 © Technosoft 2006 ANDen 0xFFFE 0xFFFD 0xFFFB 0xFFF7 0xFFEF 0xFFDF 0xFFBF 0xFF7F 0xFEFF 0xFDFF 0xFBFF 0xF7FF 0xEFFF 0xDFFF 0xBFFF 0x7FFF 0xFFFE 0xFFFD 0xFFFB 0xFFF7 #n #20 #21 #22 #23 #24 #25 #26 #27 #28 #29 #30 #31 #32 #33 #34 #35 #36 #37 #38 #39 ORen 0x0000 0x0000 0x0000 0x0000 0x0000 0x0000 0x0000 0x0000 0x0000 0x0000 0x0000 0x0000 0x0000 0x0000 0x0000 0x0000 0x0000 0x0000 0x0000 0x0000 211 MCRx 0x7092 0x7092 0x7092 0x7092 0x7092 0x7094 0x7094 0x7094 0x7094 0x7094 0x7094 0x7094 0x7094 0x7094 0x7094 0x7094 0x7094 0x7094 0x7094 0x7094 ANDen 0xFFEF 0xFFDF 0xFFBF 0xFF7F 0xFEFF 0xFFFE 0xFFFD 0xFFFB 0xFFF7 0xFFEF 0xFFDF 0xFFBF 0xFF7F 0xFEFF 0xFDFF 0xFBFF 0xF7FF 0xEFFF 0xDFFF 0xFFFF ORen 0x0000 0x0000 0x0000 0x0000 0x0000 0x0000 0x0000 0x0000 0x0000 0x0000 0x0000 0x0000 0x0000 0x0000 0x0000 0x0000 0x0000 0x0000 0x0000 0x0000 MotionChip II TML Programming Name Enable falling-edge front detection on negative limit switch (I/O group) ENLSN0 Syntax Enable Limit Switch Negative 1->0 ENLSN0 Operands – TML program X Type On-line X Binary code 15 0 0 1 1 14 1 1 1 0 Description 13 0 1 1 0 12 1 1 1 0 11 1 0 1 0 10 1 0 1 0 9 0 0 1 0 8 0 0 1 0 7 0 0 1 0 6 0 1 1 0 5 0 1 1 0 4 0 1 1 0 3 0 0 1 0 2 0 0 0 0 1 0 0 1 0 0 0 1 1 1 After the execution of this instruction, the DSP will detect the first transition from 1 to 0 on the negative limit switch input. In this case, the following happens: • the update event and the wait event bits of the MSR register are set if a negative limit switch triggered (!LSN) instruction was executed prior the occurrence of the transition; • if an update on event was programmed, a motion update is performed; • the corresponding status bit in the MSR register (Bit 7) is set; • the corresponding interrupt bit in the ISR register (Bit 7) is set, and will determine the execution of the associated interrupt service routine if the corresponding mask bit from the ICR register is set; • the negative limit switch pin is reprogrammed in the disabled mode and can be used as an input pin, usable to get the status of the limit switch signal. Use the DISLSN instruction to disable this function. Use the LSN variable in order to examine the status of the negative limit switch pin. Execution Enable falling-edge front detection on negative limit switch. Example CACC = 1.5; CSPD = -20; MODE SP1; UPD; ENLSN0; CSPD = 20; !LSN; UPD!; © Technosoft 2006 //Set acceleration command //Speed command (counts/sampling) //Set Speed Profile Mode 1 //Update immediate //Negative Limit Switch triggers falling edge //Set new speed command (counts/sampling) //Set event if Negative LimitSwitch is reached //Update on event 212 MotionChip II TML Programming Name Enable rising-edge front detection on negative limit switch (I/O group) ENLSN1 Syntax Enable Limit Switch Negative 0->1 ENLSN1 Operands – TML program X Type On-line X Binary code 15 0 0 1 1 14 1 1 1 0 Description 13 0 1 1 0 12 1 1 1 0 11 1 0 1 0 10 1 0 1 0 9 0 0 1 0 8 0 0 1 0 7 0 0 1 0 6 0 1 1 0 5 0 1 1 0 4 0 1 1 0 3 0 0 1 0 2 0 0 1 1 1 0 0 1 0 0 0 1 1 1 After the execution of this instruction, the DSP will detect the first transition from 0 to 1 on the negative limit switch input. In this case, the following happens: • the update event and the wait event bits of the MSR register are set if a negative limit switch triggered (!LSN) instruction was executed prior the occurrence of the transition; • if an update on event was programmed, a motion update is performed; • the corresponding status bit in the MSR register (Bit 7) is set; • the corresponding interrupt bit in the ISR register (Bit 7) is set, and will determine the execution of the associated interrupt service routine if the corresponding mask bit from the ICR register is set; • the negative limit switch pin is reprogrammed in the disabled mode and can be used as an input pin, usable to get the status of the limit switch signal. Use the DISLSN instruction to disable this function. Use the LSN variable in order to examine the status of the negative limit switch pin. Execution Enable rising-edge front detection on negative limit switch. Example CACC = 1.5; CSPD = -20; MODE SP1; UPD; ENLSN1; CSPD = 20; !LSN; UPD!; © Technosoft 2006 //Set acceleration command //Set speed command (counts/sampling) //Set Speed Profile Mode 1 //Update immediate //Negative Limit Switch triggers rising edge //Set new speed command (counts/sampling) //Set event if Negative LimitSwitch is reached //Update on event 213 MotionChip II TML Programming Name Enable falling-edge front detection on positive limit switch (I/O group) ENLSP0 Syntax Enable Limit Switch Positive 1->0 ENLSP0 Operands – TML program X Type On-line X Binary code 15 0 0 1 1 14 1 1 1 0 Description 13 0 1 1 0 12 1 1 1 0 11 1 0 1 0 10 1 0 1 0 9 0 0 1 0 8 0 0 1 0 7 0 0 1 0 6 0 1 1 0 5 0 1 1 0 4 0 1 1 0 3 0 0 1 0 2 0 0 0 0 1 0 0 1 0 0 0 0 1 1 After the execution of this instruction, the DSP will detect the first transition from 1 to 0 on the positive limit switch input. In this case, the following happens: • The update event and the wait event bits of the MSR register are set if a positive limit switch triggered (!LSP) instruction was executed prior the occurrence of the transition; • If an update on event was programmed, a motion update is performed; • The corresponding status bit in the MSR register (Bit 6) is set; • The corresponding interrupt bit in the ISR register (Bit 6) is set, and will determine the execution of the associated interrupt service routine if the corresponding mask bit from the ICR register is set; • The positive limit switch pin is reprogrammed in the disabled mode and can be used as an input pin, usable to get the status of the limit switch signal. Use the DISLSP instruction to disable this function. Use the LSP variable in order to examine the status of the positive limit switch pin. Execution Enable falling-edge front detection on positive limit switch. Example CACC = 1.5; CSPD = 20; MODE SP1; UPD; ENLSP0; CSPD = -20; !LSP; © Technosoft 2006 //Set acceleration command //Set speed command (counts/sampling) //Set Speed Profile Mode 1 //Update immediate //Positive Limit Switch triggers falling edge //Set new speed command (counts/sampling) //Set event if Positive LimitSwitch is reached 214 MotionChip II TML Programming UPD!; © Technosoft 2006 //Update on event 215 MotionChip II TML Programming Name Enable rising-edge front detection on positive limit switch (I/O group) ENLSP1 Syntax Enable Limit Switch Positive 0->1 ENLSP1 Operands – TML program X Type On-line X Binary code 15 0 0 1 1 14 1 1 1 0 Description 13 0 1 1 0 12 1 1 1 0 11 1 0 1 0 10 1 0 1 0 9 0 0 1 0 8 0 0 1 0 7 0 0 1 0 6 0 1 1 0 5 0 1 1 0 4 0 1 1 0 3 0 0 1 0 2 0 0 1 1 1 0 0 1 0 0 0 0 1 1 After the execution of this instruction, the DSP will detect the first transition from 0 to 1 on the positive limit switch input. In this case, the following happens: • the update event and the wait event bits of the MSR register are set if a positive limit switch triggered (!LSP) instruction was executed prior the occurrence of the transition; • if an update on event was programmed, a motion update is performed; • the corresponding status bit in the MSR register (Bit 6) is set; • the corresponding interrupt bit in the ISR register (Bit 6) is set, and will determine the execution of the associated interrupt service routine if the corresponding mask bit from the ICR register is set; • the positive limit switch pin is reprogrammed in the disabled mode and can be used as an input pin, usable to get the status of the limit switch signal. Use the DISLSP instruction to disable this function. Use the LSP variable in order to examine the status of the positive limit switch pin. Execution Enable rising – edge front detection on positive limit switch. Example CACC = 1.5; CSPD = 20; MODE SP1; UPD; ENLSP1; CSPD = -20; !LSP; © Technosoft 2006 //Acceleration command for speed profile //Speed command (counts/sampling) //Set Speed Profile Mode 1 //Update immediate //Positive Limit Switch triggers rising edge //New speed command (counts/sampling) //Set event if Positive LimitSwitch is reached 216 MotionChip II TML Programming UPD!; © Technosoft 2006 //Update on event 217 MotionChip II TML Programming Name Set external reference type (Configuration and command group) EXTREF Syntax Set EXTernal REFerence type EXTREF value Operands value: two bits value TML program X Type On-line X Binary code EXTREF 0 15 14 0 1 1 1 0 0 13 0 1 0 12 1 1 0 11 1 1 0 10 0 1 0 9 0 1 0 8 1 1 0 7 0 0 0 6 0 0 0 5 0 1 0 4 0 1 0 3 1 1 0 2 0 1 0 1 0 1 0 0 1 1 0 EXTREF 1 15 14 0 1 1 1 0 0 13 0 1 0 12 1 1 0 11 1 1 0 10 0 1 0 9 0 1 0 8 1 1 0 7 0 0 0 6 0 1 1 5 0 1 0 4 0 1 0 3 1 1 0 2 0 1 0 1 0 1 0 0 1 1 0 EXTREF 2 15 14 0 1 1 1 0 0 13 0 1 0 12 1 1 0 11 1 1 0 10 0 1 0 9 0 1 0 8 1 1 0 7 0 1 1 6 0 0 0 5 0 1 0 4 0 1 0 3 1 1 0 2 0 1 0 1 0 1 0 0 1 1 0 Description This instruction sets the type of external references depending on the parameter value: • value = 0: external reference read from EREF system variable (integer or long variable) updated on-line • value = 1: external reference read from REFERENCE input • value = 2: external reference read from second encoder input Execution Sets the external reference type based on value’s value (0, 1 or 2) Example EXTREF 1; © Technosoft 2006 // the reference will be read from the analogue //reference A/D channel (REFERENCE input) 218 MotionChip II TML Programming Name Jump to a TML address GOTO (Decision group) Syntax Unconditional GOTO to label GOTO if VAR16 Flag 0 GOTO if VAR32 Flag 0 GOTO Label GOTO Label, VAR16, Flag GOTO Label, VAR32, Flag Operands Label: 16-bit program memory address VAR16: integer variable VAR32: long variable Flag: one of ‘=’, ‘!=’, ‘>’, ‘>=’, ‘<’, ‘<=’ relational factors. TML program X Type On-line X Binary code GOTO Label 15 14 13 0 1 1 12 1 11 0 10 1 9 0 8 7 0 0 &Label 6 0 5 0 4 0 3 0 2 0 1 0 0 0 GOTO Label, VAR16, Flag 15 14 13 12 11 0 1 1 1 0 10 1 9 0 8 7 0 &VAR16 &Label 6 5 4 Flag 3 2 1 0 0 GOTO Label, VAR32, Flag 15 14 13 12 11 0 1 1 1 0 10 1 9 0 8 7 1 &VAR32 &Label 6 5 4 Flag 3 2 1 0 0 Description This instruction allows the jump to a TML instruction located at the address Label. When a conditional GOTO instruction is encountered, the condition is checked and, if it is true (i.e. the tested variable is in the specified relation with 0), a jump to the specified label is executed. If condition is false, the next TML instruction is executed. Execution Jumps to a TML instruction located at the address Label. Unconditional jump. Label -> IP Conditional jump. If VarXX Flag 0 then Label -> IP © Technosoft 2006 219 MotionChip II TML Programming The label must be an existing label name, defined in the TML program (a 16-bit program memory address), otherwise an error will occur. The VAR16/VAR32 must be an existing TML variable name (an integer or long variable), defined in the TML program, otherwise an error will occur. The flag imposes the test condition for the variable VAR16/VAR32. In case of a conditional decision instruction (GOTO Label, VAR16/32, Flag) the variable specified is compared to 0, using one of the following test conditions: variable.EQ.0 // variable = 0 (EQUAL) variable.NEQ.0 // variable != 0 (NON EQUAL) variable.LT.0 // variable < 0 (LESS THAN) variable.LEQ.0 // variable <= 0 (LESS OR EQUAL) variable.GT.0 // variable > 0 (GREATER THAN) variable.GEQ.0 // variable >= 0 (GREATER OR EQUAL) The GOTO instruction is executed only if the test condition is satisfied. Example1 GOTO GOTO GOTO GOTO label1, i_var2, LT; label2, i_var2, LEQ; label3, i_var2, GT; label4; // // // // jump to label1 if i_var2 < 0 jump to label2 if i_var2 <= 0 jump to label3 if i_var2 > 0 unconditional jump to label4 Example2 ... GOTO MOVEP; // jump unconditionally ... GOTO MOVEP, ASPD, GT; // jump if motor speed > 0 ... MOVEP: // program sequence to move to a //specified position CACC = 1.5; // acceleration = 1.5 //(counts/sampling2) CSPD = -20.; // slew speed = -20 (counts/sampling) CPOS = my_pos; // position command UPD; // start motion GOTO Exit; // exit ... Exit: //label © Technosoft 2006 220 MotionChip II TML Programming Name Set group ID value (Multiple axis group) GROUPID Syntax Set GROUP ID address GROUPID value16 Operands value16: 16-bit integer immediate value TML program X Type On-line X Binary code 15 0 14 0 Description 13 0 12 0 11 1 10 0 9 0 8 7 0 0 Value16 6 0 5 0 4 0 3 0 2 0 1 1 0 0 In multiple axis structures, this command allows one to change the group ID of the local axis. After the execution of this command, the new ID value is recognized by the axis and is used by the communication drivers in order to accept or reject messages addressed to groups of axes. Only the lower 8 bits of the value16 parameter are used for group coding. Each bit corresponds to a group. Up to 8 groups can be defined in a multiple axis structure. An axis can belong to any of the 8 groups. A multiple-axis message can be addressed to one or more of the axes. Execution Group_ID = value16. Example GROUPID 1; // local axis belongs to groups 1 GROUPID 3; // from now on, the local axis belongs to group 3 ... [G3] {STOP3;} // stop the motion for all axes belonging to //group 3 © Technosoft 2006 221 MotionChip II TML Programming Name INITCAM Init CAM table for electronic camming mode operation (Miscellaneous group) Syntax INITCAM LoadAddress, RunAddress Operands InitCam table from LoadAddress to RunAddress LoadAddress: SPI drive memory, type E2PROM RunAddress: RAM drive memory TML program X Type On-line – Binary code INITCAM LoadAddress, RunAddress 15 14 13 12 11 10 9 1 1 0 1 1 0 0 Description 8 7 6 0 0 1 Load address Run address 5 0 4 0 3 0 2 0 1 0 0 0 The INITCAM instruction copies the selected CAM Table from the drives’ E2ROM memory to the drives’ RAM memory where the CAM Table must reside while electronic camming is enabled. The LoadAddress represents the address (decimal number) of E2ROM memory where the selected CAM Table was loaded. The RunAddress parameter (decimal number) specifies address in the RAM memory of the Technosoft drive where the CAM profile Table resides at run-time. Note that in order to copy a CAM table using this instruction, the following steps must be done: • The cam must be created or imported before; • The cam must be selected as an active cam; • The cam must be downloaded to the drive. The Download CAM files command downloads into the drives’ E2ROM memory all the active cams selected; • The cam must be selected from the Use Table list of cams available into the E2ROM memory. Execution Copy CAM table from drive’s SPI memory to drive’s RAM memory. Example INITCAM 18864,2560; UPD; © Technosoft 2006 //Copy CAM table from SPI memory //(address 0x49B0) to RAM memory //(address 0xA00) // Update immediate 222 MotionChip II TML Programming Name Set cam slave mode (Motion mode group) MODE CS Syntax Set axis in MODE Camming Slave 0 () Set axis in MODE Camming Slave 1 (T) Set axis in MODE Camming Slave 2 (S) Set axis in MODE Camming Slave 3 (S,T) MODE CS0 MODE CS1 MODE CS2 MODE CS3 Operands – TML program X Type On-line X Binary code MODE CS0 15 14 13 0 1 0 1 0 1 1 0 0 12 1 1 0 11 1 0 0 10 0 1 1 9 0 0 0 8 1 0 0 7 0 1 0 6 0 1 0 5 0 0 0 4 0 0 0 3 1 0 0 2 0 1 1 1 0 1 1 0 1 0 0 MODE CS1 15 14 13 0 1 0 1 0 1 1 0 0 12 1 1 0 11 1 0 0 10 0 1 1 9 0 0 0 8 1 1 1 7 0 1 0 6 0 1 0 5 0 0 0 4 0 0 0 3 1 0 0 2 0 1 1 1 0 1 1 0 1 0 0 MODE CS2 15 14 13 0 1 0 1 0 1 1 0 0 12 1 1 0 11 1 0 0 10 0 1 1 9 0 1 1 8 1 0 0 7 0 1 0 6 0 1 0 5 0 0 0 4 0 0 0 3 1 0 0 2 0 1 1 1 0 1 1 0 1 0 0 MODE CS3 15 14 13 0 1 0 1 0 1 1 0 0 12 1 1 0 11 1 0 0 10 0 1 1 9 0 1 1 8 1 1 1 7 0 1 0 6 0 1 0 5 0 0 0 4 0 0 0 3 1 0 0 2 0 1 1 1 0 1 1 0 1 0 0 Description MODE CS0/CS1/CS2/CS3 instruction set the axis to operate in the slave camming mode. © Technosoft 2006 223 MotionChip II TML Programming In this mode, the reference values received from the master are differentiated and used to obtain the position reference for the slave axis based on the active CAM Table. See Motion Programming chapter for details about camming reference parameters and implementation. Depending on the selected option (CS0, CS1, CS2 or CS3), some of the internal control loops – speed and current – are activated or not (depending on the system structure) – see below table. Note that for all the control loops needed to implement the selected mode (position [, speed] [, current]), one must define the corresponding parameters. The selected motion mode will become effective at the first motion update command (immediate update – UPD, or update on event, UPD!). Execution Sets the slave camming mode operation for the axis (reference type). Four cases are possible: MODE CS0 CS1 CS2 CS3 Position controller √ √ √ √ Speed controller √ √ Current controller √ √ Example EXTREF 0; EIR = 0x081A; (EIR),dm = 2000; EIR = 0x081B; (EIR),dm = 0; MODE CS3; TUM1; UPD; EFLEVEL = 0; © Technosoft 2006 //Set as slave, position mode 3 //Set Target Update Mode 1 //Update immediate //Activate synchronization 224 MotionChip II TML Programming Name Set gear slave mode MODE GS (Motion mode group) Syntax Set axis in MODE Gear Slave 0 () Set axis in MODE Gear Slave 1 (T) Set axis in MODE Gear Slave 2 (S) Set axis in MODE Gear Slave 3 (S,T) MODE GS0 MODE GS1 MODE GS2 MODE GS3 Operands – TML program X Type On-line X Binary code MODE GS0 15 14 13 0 1 0 1 0 1 1 0 0 12 1 1 0 11 1 0 0 10 0 1 1 9 0 0 0 8 1 0 0 7 0 1 0 6 0 1 0 5 0 0 0 4 0 0 0 3 1 0 0 2 0 1 1 1 0 0 0 0 1 1 1 MODE GS1 15 14 13 0 1 0 1 0 1 1 0 0 12 1 1 0 11 1 0 0 10 0 1 1 9 0 0 0 8 1 1 1 7 0 1 0 6 0 1 0 5 0 0 0 4 0 0 0 3 1 0 0 2 0 1 1 1 0 0 0 0 1 1 1 MODE GS2 15 14 13 0 1 0 1 0 1 1 0 0 12 1 1 0 11 1 0 0 10 0 1 1 9 0 1 1 8 1 0 0 7 0 1 0 6 0 1 0 5 0 0 0 4 0 0 0 3 1 0 0 2 0 1 1 1 0 0 0 0 1 1 1 MODE GS3 15 14 13 0 1 0 1 0 1 1 0 0 12 1 1 0 11 1 0 0 10 0 1 1 9 0 1 1 8 1 1 1 7 0 1 0 6 0 1 0 5 0 0 0 4 0 0 0 3 1 0 0 2 0 1 1 1 0 0 0 0 1 1 1 Description MODE GS0/GS1/GS2/GS3 instruction set the axis to operate in the slave gear mode. In this mode, the reference values must be sent from the master and stored into the variable MREF. Multiplied with the parameter GEAR, these values will be used as position reference for the axis. © Technosoft 2006 225 MotionChip II TML Programming See Motion Programming chapter for details about gearing reference parameters and implementation. Depending on the selected option (GS0, GS1, GS2 or GS3), some of the internal control loops – speed and current – are activated or not (depending on the system structure). Note that for all the control loops needed to implement the selected mode (position [, speed] [, current]), one must define the corresponding parameters. The selected motion mode will become effective at the first motion update command (immediate update – UPD, or update on event, UPD!). Execution Sets the slave gear mode operation for the axis (reference type). Four cases are possible: MODE GS0 GS1 GS2 GS3 Position controller √ √ √ √ Speed controller √ √ Current controller √ √ Example GEAR = 2.00000; GEARMASTER = 1; GEARSLAVE = 2; EXTREF 0; EIR = 0x081A; (EIR),dm = 2000; EIR = 0x081B; (EIR),dm = 0; MODE GS3; UPD; EFLEVEL = 0xFFFF; © Technosoft 2006 //Gearing factor for master axis //Gearing factor for slave axis //Set axis as Gear Slave without read //master position from 2nd Encoder Input //Set as slave, position mode 3 //Update immediate (enable gear mode) //Deactivate synchronization 226 MotionChip II TML Programming Name Position contouring motion mode MODE PC (Motion mode group) Syntax MODE Position Contouring 0 ( ) MODE Position Contouring 1 (T) MODE Position Contouring 2 (S) MODE Position Contouring 3 (S,T) MODE PC0 MODE PC1 MODE PC2 MODE PC3 Operands – TML program X Type On-line X Binary code MODE PC0 15 14 13 0 1 0 1 0 1 1 0 0 12 1 1 0 11 1 1 0 10 0 1 1 9 0 0 0 8 1 0 0 7 0 1 0 6 0 1 0 5 0 0 0 4 0 0 0 3 1 0 0 2 0 0 0 1 0 1 1 0 1 0 0 MODE PC1 15 14 13 0 1 0 1 0 1 1 0 0 12 1 1 0 11 1 1 0 10 0 1 1 9 0 0 0 8 1 1 1 7 0 1 0 6 0 1 0 5 0 0 0 4 0 0 0 3 1 0 0 2 0 0 0 1 0 1 1 0 1 0 0 MODE PC2 15 14 13 0 1 0 1 0 1 1 0 0 12 1 1 0 11 1 1 0 10 0 1 1 9 0 1 1 8 1 0 0 7 0 1 0 6 0 1 0 5 0 0 0 4 0 0 0 3 1 0 0 2 0 0 0 1 0 1 1 0 1 0 0 MODE PC3 15 14 13 0 1 0 1 0 1 1 0 0 12 1 1 0 11 1 1 0 10 0 1 1 9 0 1 1 8 1 1 1 7 0 1 0 6 0 1 0 5 0 0 0 4 0 0 0 3 1 0 0 2 0 0 0 1 0 1 1 0 1 0 0 Description MODE PC0/PC1/PC2/PC3 instruction defines the position control operating in the contouring reference motion mode. In this mode, the reference module will perform linear interpolation based on motion segments, described using the SEG instruction. © Technosoft 2006 227 MotionChip II TML Programming The reference will represent a position reference value in position control structures. The reference will be generated in the slow control loop (position/speed loop). See Motion Programming chapter for details about contouring reference parameters and implementation. Depending on the selected option (PC0, PC1, PC2 or PC3), some of the internal control loops – speed and current – are activated or not (depending on the system structure). Note that for all the control loops needed to implement the selected mode (position [, speed] [, current]), one must define the corresponding parameters. The selected motion mode will become effective at the first motion update command (immediate update – UPD, or update on event, UPD!). Execution Sets the position contouring motion mode. Four cases are possible: MODE PC0 PC1 PC2 PC3 Position / User controller √ √ √ √ Speed controller √ √ Current controller √ √ Example MODE PC3; SEG 100U, 5.00000; UPD; SEG 100U, 5.00000; SEG 100U, -20.00000; SEG 100U, 10.00000; SEG 0, 0.; © Technosoft 2006 //Set Position Contouring Mode 3 //Set 1st motion segment. Increment //position reference with 5 counts for //the next 100 sampling periods //Update immediate //Set 2st motion segment. //Set 3st motion segment. //Set 4st motion segment. //End of contouring mode 228 MotionChip II TML Programming Name Position external motion mode MODE PE (Motion mode group) Syntax MODE Position External 0 ( ) MODE Position External 1 (T) MODE Position External 2 (S) MODE Position External 3 (S,T) MODE PE0 MODE PE1 MODE PE2 MODE PE3 Operands – TML program X Type On-line X Binary code MODE PE0 15 14 13 0 1 0 1 0 1 1 0 0 12 1 1 0 11 1 1 0 10 0 1 1 9 0 0 0 8 1 0 0 7 0 1 0 6 0 1 0 5 0 0 0 4 0 0 0 3 1 0 0 2 0 0 0 1 0 0 0 0 1 0 0 MODE PE1 15 14 13 0 1 0 1 0 1 1 0 0 12 1 1 0 11 1 1 0 10 0 1 1 9 0 0 0 8 1 1 1 7 0 1 0 6 0 1 0 5 0 0 0 4 0 0 0 3 1 0 0 2 0 0 0 1 0 0 0 0 1 0 0 MODE PE2 15 14 13 0 1 0 1 0 1 1 0 0 12 1 1 0 11 1 1 0 10 0 1 1 9 0 1 1 8 1 0 0 7 0 1 0 6 0 1 0 5 0 0 0 4 0 0 0 3 1 0 0 2 0 0 0 1 0 0 0 0 1 0 0 MODE PE3 15 14 13 0 1 0 1 0 1 1 0 0 12 1 1 0 11 1 1 0 10 0 1 1 9 0 1 1 8 1 1 1 7 0 1 0 6 0 1 0 5 0 0 0 4 0 0 0 3 1 0 0 2 0 0 0 1 0 0 0 0 1 0 0 Description MODE PE0/PE1/PE2/PE3 instruction defines the position control operating in the external reference motion mode. In this mode, the reference module will use an external reference, as previously defined by the EXTREF instruction. © Technosoft 2006 229 MotionChip II TML Programming The reference will represent a position reference value, in position control structures. The reference will be generated in the slow control loop (position/speed loop). See Motion Programming chapter for details about external reference parameters and implementation. Depending on the selected option (PE0, PE1, PE2 or PE3), some of the internal control loops – speed and current – are activated or not (depending on the system structure). Note that for all the control loops needed to implement the selected mode (position [, speed] [, current]), one must define the corresponding parameters. The selected motion mode will become effective at the first motion update command (immediate update – UPD, or update on event, UPD!). Execution Sets the position external motion mode (reference type). Four cases are possible: MODE PE0 PE1 PE2 PE3 Position controller √ √ √ √ Speed controller √ √ Current controller √ √ Example MODE PE3; TUM1; UPD; © Technosoft 2006 // // // // set position external mode, with speed and current loops active set target update mode 1 update immediate 230 MotionChip II TML Programming Name Position profile motion mode MODE PP (Motion mode group) Syntax MODE Position Profile 0 ( ) MODE Position Profile 1 (T) MODE Position Profile 2 (S) MODE Position Profile 3 (S,T) MODE PP0 MODE PP1 MODE PP2 MODE PP3 Operands – TML program X Type On-line X Binary code MODE PP0 15 14 13 0 1 0 1 0 1 1 0 0 12 1 1 0 11 1 1 0 10 0 1 1 9 0 0 0 8 1 0 0 7 0 1 0 6 0 1 0 5 0 0 0 4 0 0 0 3 1 0 0 2 0 0 0 1 0 0 0 0 1 1 1 MODE PP1 15 14 13 0 1 0 1 0 1 1 0 0 12 1 1 0 11 1 1 0 10 0 1 1 9 0 0 0 8 1 1 1 7 0 1 0 6 0 1 0 5 0 0 0 4 0 0 0 3 1 0 0 2 0 0 0 1 0 0 0 0 1 1 1 MODE PP2 15 14 13 0 1 0 1 0 1 1 0 0 12 1 1 0 11 1 1 0 10 0 1 1 9 0 1 1 8 1 0 0 7 0 1 0 6 0 1 0 5 0 0 0 4 0 0 0 3 1 0 0 2 0 0 0 1 0 0 0 0 1 1 1 MODE PP3 15 14 13 0 1 0 1 0 1 1 0 0 12 1 1 0 11 1 1 0 10 0 1 1 9 0 1 1 8 1 1 1 7 0 1 0 6 0 1 0 5 0 0 0 4 0 0 0 3 1 0 0 2 0 0 0 1 0 0 0 0 1 1 1 Description MODE PP0/PP1/PP2/PP3 instructions define the position control operating in the profile reference motion mode. In this mode, the reference module will generate a position value with a trapezoidal speed profile. © Technosoft 2006 231 MotionChip II TML Programming The reference will represent a position reference value. The reference will be generated in the slow control loop (position/speed loop). See Motion Programming chapter for details about profile reference parameters and implementation. Depending on the selected option (PP0, PP1, PP2 or PP3), some of the internal control loops – speed and current – are activated or not (depending on the system structure) – see below table. Note that for all the control loops needed to implement the selected mode (position [, speed] [, current]), one must define the corresponding parameters. The selected motion mode will become effective at the first motion update command (immediate update – UPD, or update on event, UPD!). Execution Sets the position profile motion mode (reference type). Four cases are possible: MODE Position controller Speed controller Current controller PP0 √ PP1 √ √ PP2 √ √ PP3 √ √ √ Example CACC = 0.5; CSPD = 20; CPOS = 100000; CPA; MODE PP3; TUM1; UPD; © Technosoft 2006 //Acceleration command for position //profile (counts/sampling2) //Speed command for position profile //(counts/sampling) //Position command (counts) //Position command is Absolute //Set Position Profile Mode 3 //Set Target Update Mode 1 //Update immediate 232 MotionChip II TML Programming Name Position pulse&direction motion mode MODE PPD (Motion mode group) Syntax MODE Position External 0 ( ) MODE Position External 1 (T) MODE Position External 2 (S) MODE Position External 3 (S,T) MODE PPD0 MODE PPD1 MODE PPD2 MODE PPD3 Operands – TML program X Type On-line X Binary code MODE PPD0 15 14 13 0 1 0 1 0 1 1 0 0 12 1 1 0 11 1 1 0 10 0 1 1 9 0 0 0 8 1 0 0 7 0 1 0 6 0 1 0 5 0 0 0 4 0 0 0 3 1 0 0 2 0 1 1 1 0 0 0 0 1 0 0 MODE PPD1 15 14 13 0 1 0 1 0 1 1 0 0 12 1 1 0 11 1 1 0 10 0 1 1 9 0 0 0 8 1 1 1 7 0 1 0 6 0 1 0 5 0 0 0 4 0 0 0 3 1 0 0 2 0 1 1 1 0 0 0 0 1 0 0 MODE PPD2 15 14 13 0 1 0 1 0 1 1 0 0 12 1 1 0 11 1 1 0 10 0 1 1 9 0 1 1 8 1 0 0 7 0 1 0 6 0 1 0 5 0 0 0 4 0 0 0 3 1 0 0 2 0 1 1 1 0 0 0 0 1 0 0 MODE PPD3 15 14 13 0 1 0 1 0 1 1 0 0 12 1 1 0 11 1 1 0 10 0 1 1 9 0 1 1 8 1 1 1 7 0 1 0 6 0 1 0 5 0 0 0 4 0 0 0 3 1 0 0 2 0 1 1 1 0 0 0 0 1 0 0 Description MODE PPD0/PPD1/PPD2/PPD3 instruction defines the position control operating in the pulse and direction reference motion mode. In this mode, the reference module will get the reference values from the specific pulse and direction interface of the DSP. © Technosoft 2006 233 MotionChip II TML Programming The reference will represent a position reference value, in position control structures. The reference will be generated in the slow control loop (position/speed loop). See Motion Programming chapter for details about pulse and direction reference parameters and implementation. Depending on the selected option (PPD0, PPD1, PPD2 or PPD3), some of the internal control loops – speed and current – are activated or not (depending on the system structure) – see below table. Note that for all the control loops needed to implement the selected mode (position [, speed] [, current]), one must define the corresponding parameters. The selected motion mode will become effective at the first motion update command (immediate update – UPD, or update on event, UPD!). Execution Sets the position / user pulse & direction motion mode (reference type). Four cases are possible: MODE Position controller PPD0 PPD1 PPD2 PPD3 Speed controller √ √ √ √ Current controller √ √ √ √ Example MODE PPD3; Direction UPD; © Technosoft 2006 //Set Position mode 3 with Pulse //reference //Update immediate 234 MotionChip II TML Programming & Name Speed contouring motion mode MODE SC (Motion mode group) Syntax MODE Speed Contouring 0 ( ) MODE Speed Contouring 1 (T) MODE SC0 MODE SC1 Operands – TML program X Type On-line X Binary code MODE SC0 15 14 13 0 1 0 1 0 1 1 0 0 12 1 1 0 11 1 1 0 10 0 0 0 9 0 1 1 8 1 0 0 7 0 1 0 6 0 1 0 5 0 0 0 4 0 0 0 3 1 0 0 2 0 0 0 1 0 1 1 0 1 0 0 MODE SC1 15 14 13 0 1 0 1 0 1 1 0 0 12 1 1 0 11 1 1 0 10 0 0 0 9 0 1 1 8 1 1 1 7 0 1 0 6 0 1 0 5 0 0 0 4 0 0 0 3 1 0 0 2 0 0 0 1 0 1 1 0 1 0 0 Description MODE SC0/SC1 instruction defines the speed control operating in the contouring reference motion mode. In this mode, the reference module will perform linear interpolation based on motion speed segments described using the SEG instruction. The reference will represent a speed reference value, in speed control structures. The reference is generated in the slow control loop (position/speed loop). See Motion Programming chapter for details about contouring reference parameters and implementation. Depending on the selected option (SC0, SC1), the internal current control loop – is activated/deactivated (depending on the system structure). Note that if the current control loop is needed to implement the selected mode (MODE SC1), one must define the corresponding parameters. The selected motion mode will become effective at the first motion update command (immediate update – UPD, or update on event, UPD!). © Technosoft 2006 235 MotionChip II TML Programming Execution Sets the speed contouring motion mode (reference type). Two cases are possible: MODE SC0 SC1 Current controller √ Example MODE SC1; //Set Speed Contouring Mode 1 TUM1; //Set Target Update Mode 1 SEG 100U, 5.00000; //Set 1st motion segment. Increment //speed reference with 5 counts/sampling //for the next 100 sampling periods UPD; //Update immediate SEG 100U, 5.00000; //Set 2st motion segment. SEG 200U, -10.00000; //Set 3st motion segment. SEG 100U, -10.00000; //Set 4st motion segment. SEG 200U, 10.00000; //Set 5st motion segment. SEG 0, 0.; //End of contouring mode © Technosoft 2006 236 MotionChip II TML Programming Name Speed external motion mode MODE SE (Motion mode group) Syntax MODE Speed External 0 ( ) MODE Speed External 1 (T) MODE SE0 MODE SE1 Operands – TML program X Type On-line X Binary code MODE SE0 15 14 13 0 1 0 1 0 1 1 0 0 12 1 1 0 11 1 0 0 10 0 0 0 9 0 1 1 8 1 0 0 7 0 1 0 6 0 1 0 5 0 0 0 4 0 0 0 3 1 0 0 2 0 0 0 1 0 0 0 0 1 0 0 MODE SE1 15 14 13 0 1 0 1 0 1 1 0 0 12 1 1 0 11 1 0 0 10 0 0 0 9 0 1 1 8 1 1 1 7 0 1 0 6 0 1 0 5 0 0 0 4 0 0 0 3 1 0 0 2 0 0 0 1 0 0 0 0 1 0 0 Description MODE SE0/SE1 instruction defines the speed control operating in the external reference motion mode. In this mode, the reference module will use an external reference, as previously defined by the EXTREF instruction. The reference will represent a speed reference value, in speed control structures. The reference will be generated in the slow control loop (position/speed loop). See Motion Programming chapter for details about external reference parameters and implementation. Depending on the selected option (SE0, SE1), the internal current control loop is activated or not (depending on the system structure). Note that if the current control loop is needed to implement the selected mode (MODE SE1), one must define the corresponding parameters. The selected motion mode will become effective at the first motion update command (immediate update – UPD, or update on event, UPD!). © Technosoft 2006 237 MotionChip II TML Programming Execution Sets the speed external motion mode (reference type). Two cases are possible: MODE SE0 SE1 Current controller – √ Example MODE SE1 ; UPD; © Technosoft 2006 //Set Speed External Mode 1 //Update immediate 238 MotionChip II TML Programming Name Speed profile motion mode MODE SP (Motion mode group) Syntax MODE Speed Profile 0 ( ) MODE Speed Profile 1 (T) MODE SP0 MODE SP1 Operands – TML program X Type On-line X Binary code MODE SP0 15 14 13 0 1 0 1 0 1 1 0 0 12 1 1 0 11 1 1 0 10 0 0 0 9 0 1 1 8 1 0 0 7 0 1 0 6 0 1 0 5 0 0 0 4 0 0 0 3 1 0 0 2 0 0 0 1 0 0 0 0 1 1 1 MODE SP1 15 14 13 0 1 0 1 0 1 1 0 0 12 1 1 0 11 1 1 0 10 0 0 0 9 0 1 1 8 1 1 1 7 0 1 0 6 0 1 0 5 0 0 0 4 0 0 0 3 1 0 0 2 0 0 0 1 0 0 0 0 1 1 1 Description MODE SP0/SP1 instruction defines the speed control operating in the profile reference motion mode. In this mode, the reference module will generate a ramp speed profile. The reference will represent a speed reference value, in speed control structures. The reference is generated in the slow control loop (position/speed loop). See Motion Programming chapter for details about speed profile reference parameters and implementation. Depending on the selected option (SP0, SP1), the internal current control loop is activated or not (depending on the system structure). Note that if the current control loop is needed to implement the selected mode (MODE SP1), one must define the corresponding parameters. The selected motion mode will become effective at the first motion update command (immediate update – UPD, or update on event, UPD!). © Technosoft 2006 239 MotionChip II TML Programming Execution Sets the speed profile motion mode (reference type). Two cases are possible: MODE SP0 SP1 Current controller √ Example: CACC = 0.5; CSPD = -20; MODE SP1; UPD; © Technosoft 2006 //Acceleration command for speed profile //(counts/sampling2) //Speed command (counts/sampling) //Set Speed Profile Mode 1 //Update immediate 240 MotionChip II TML Programming Name Speed pulse & direction motion mode MODE SPD (Motion mode group) Syntax MODE Speed External 0 ( ) MODE Speed External 1 (T) MODE SPD0 MODE SPD1 Operands – TML program X Type On-line X Binary code MODE SPD0 15 14 13 0 1 0 1 0 1 1 0 0 12 1 1 0 11 1 1 0 10 0 0 0 9 0 1 1 8 1 0 0 7 0 1 0 6 0 1 0 5 0 0 0 4 0 0 0 3 1 0 0 2 0 1 1 1 0 0 0 0 1 0 0 MODE SPD1 15 14 13 0 1 0 1 0 1 1 0 0 12 1 1 0 11 1 1 0 10 0 0 0 9 0 1 1 8 1 1 1 7 0 1 0 6 0 1 0 5 0 0 0 4 0 0 0 3 1 0 0 2 0 1 1 1 0 0 0 0 1 0 0 Description MODE SPD0/SPD1 instruction defines the speed control operating in the pulse and direction reference motion mode. In this mode, the reference module will get the reference values from the specific pulse and direction interface of the DSP. The reference will represent a speed reference value, in speed control structures. The reference will be generated in the slow control loop (position/speed loop). See Motion Programming chapter for details about pulse and direction reference parameters and implementation. Depending on the selected option (SPD0, SPD1), the internal current control loop is activated or not (depending on the system structure). Note that if the current control loop is needed to implement the selected mode (MODE SPD1), one must define the corresponding parameters. The selected motion mode will become effective at the first motion update command (immediate update – UPD, or update on event, UPD!). © Technosoft 2006 241 MotionChip II TML Programming Execution Sets the speed pulse & direction motion mode (reference type). Two cases are possible: MODE SPD0 SPD1 Current controller √ Example MODE SPD1; UPD; © Technosoft 2006 //Set Speed mode 1 with Pulse & Direction //reference //Update immediate 242 MotionChip II TML Programming Name Torque contouring motion mode MODE TC (Motion mode group) Syntax MODE Torque Contouring MODE TC Operands – TML program X Type On-line X Binary code 15 0 1 1 14 1 0 0 Description 13 0 1 0 12 1 1 0 11 1 0 0 10 0 0 0 9 0 0 0 8 1 1 1 7 0 1 0 6 0 1 0 5 0 0 0 4 0 0 0 3 1 0 0 2 0 0 0 1 0 1 1 0 1 1 1 MODE TC instruction defines the torque control operating in the contouring reference motion mode. In this mode, the reference module will perform linear interpolation based on motion speed segments, described using the SEG instruction. The reference will represent a torque reference value, in torque control structures. The reference will be generated in the slow control loop (position/speed loop). See Motion Programming chapter for details about contouring reference parameters and implementation. Note that the current control loop is needed to implement the selected mode, thus one must define the corresponding parameters. The selected motion mode will become effective at the first motion update command (immediate update – UPD, or update on event, UPD!). Execution Sets the torque contouring motion mode (reference type). Example MODE TC; REF0 = 0.00000; SEG 200U, 2.00000;; UPD; SEG 100U, -1.00000; SEG 200U, 0.00000; SEG 100U, -1.00000; © Technosoft 2006 //Set Torque Contouring Mode 1 //Initial reference //Set 1st motion segment. Increment //torque reference with 2 bits for the //next 200 sampling periods //Update immediate //Set 2st motion segment. //Set 3st motion segment. //Set 4st motion segment. 243 MotionChip II TML Programming SEG 0, 0.; © Technosoft 2006 //End of contouring mode 244 MotionChip II TML Programming Name Torque external motion mode MODE TEF, TES (Motion mode group) Syntax MODE Torque External Fast MODE Torque External Slow MODE TEF MODE TES Operands – TML program X Type On-line X Binary code MODE TEF 15 14 13 0 1 0 1 0 1 1 0 0 12 1 1 0 11 1 0 0 10 0 0 0 9 0 0 0 8 1 1 1 7 0 1 0 6 0 1 0 5 0 1 1 4 0 0 0 3 1 0 0 2 0 0 0 1 0 0 0 0 1 0 0 MODE TES 15 14 13 0 1 0 1 0 1 1 0 0 12 1 1 0 11 1 0 0 10 0 0 0 9 0 0 0 8 1 1 1 7 0 1 0 6 0 1 0 5 0 0 0 4 0 0 0 3 1 0 0 2 0 0 0 1 0 0 0 0 1 0 0 Description MODE TEF/TES instruction defines the torque control operating in the external reference motion mode. If MODE TEF is set, the reference module will always use only the analogue reference input. In MODE TES there are also possible the other external modes as previously defined by the EXTREF instruction. The reference will represent a torque reference value, in torque control structures. See Motion Programming chapter for details about external reference parameters and implementation. Depending on the selected option (TEF or TES), the reference is generated in the fast control loop or in the slow control loop. This is based to the fact that normally, an external torque reference needs to be updated in the fast control loop (where the current controllers are activated). Note that the current control loop is needed to implement the selected mode, thus one must define the corresponding parameters. The selected motion mode will become effective at the first motion update command (immediate update – UPD, or update on event, UPD!). © Technosoft 2006 245 MotionChip II TML Programming Execution Sets the torque external motion mode (reference type). Two cases are possible: MODE TEF TES Reference location In the fast loop In the slow loop Example MODE TEF; UPD; © Technosoft 2006 //Set Torque External reference in //fast loop //Update immediate 246 MotionChip II TML Programming Name Torque test motion mode MODE TT (Motion mode group) Syntax MODE Torque Test MODE TT Operands – TML program X Type On-line X Binary code 15 0 1 1 14 1 0 0 Description 13 0 1 0 12 1 1 0 11 1 0 0 10 0 0 0 9 0 0 0 8 1 1 1 7 0 1 0 6 0 1 0 5 0 0 0 4 0 0 0 3 1 1 1 2 0 0 0 1 0 0 0 0 1 0 0 MODE TT instruction defines the torque test operating motion mode. In this mode, the reference module will use the values of specific variables, allowing the generation of a saturated ramp or a constant value for the amplitude of the torque / current and for the electric angle of the motor. Thus, one can apply a constant or a rotating current vector to the motor, for test or control loops tuning purposes. The reference will be generated in the slow control loop (position/speed loop). See Motion Programming chapter for details about test reference parameters and implementation. Note that the current control loop is needed to implement the selected mode, thus one must define the corresponding parameters. The selected motion mode will become effective at the first motion update command (immediate update – UPD, or update on event, UPD!). Execution Sets the torque test motion mode (reference type). Example MODE TT; REFTST = 40; RINCTST = 1; UPD; © Technosoft 2006 //Set Torque Test Mode //Reference saturation value in test mode //(bits) //Reference increment value in test mode //(bits/sampling) //Update immediate 247 MotionChip II TML Programming Name Voltage contouring motion mode MODE VC (Motion mode group) Syntax MODE Voltage Contouring MODE VC Operands – TML program X Type On-line X Binary code 15 0 1 1 14 1 0 0 Description 13 0 1 0 12 1 1 0 11 1 0 0 10 0 0 0 9 0 0 0 8 1 0 0 7 0 1 0 6 0 1 0 5 0 0 0 4 0 0 0 3 1 0 0 2 0 0 0 1 0 1 1 0 1 1 1 MODE VC instruction defines the voltage control operating in the contouring reference motion mode. In this mode, the reference module will perform linear interpolation based on motion speed segments described using the SEG instruction. The reference will represent a voltage reference value, in voltage control structures. The reference will be generated in the slow control loop (position/speed loop). See Motion Programming chapter for details about contouring reference parameters and implementation. Note that no control loop is needed to implement the selected mode. The selected motion mode will become effective at the first motion update command (immediate update – UPD, or update on event, UPD!). Execution Sets the voltage contouring motion mode (reference type). Example MODE VC; REF0 = 0.00000; SEG 100U, 12.00000; UPD; SEG 100U, 3.00000; SEG 100U, -15.00000; SEG 0, 0.; © Technosoft 2006 //Set Voltage Contouring //Initial reference //Set 1st motion segment. Increment //voltage reference with 12 bits for //the next 100 sampling periods //Update immediate //Set 2st motion segment. //Set 3st motion segment. //End of contouring mode 248 MotionChip II TML Programming © Technosoft 2006 249 MotionChip II TML Programming Name Voltage external motion mode MODE VEF, VES (Motion mode group) Syntax MODE Voltage External Fast MODE Voltage External Slow MODE VEF MODE VES Operands – TML program X Type On-line X Binary code MODE VEF 15 14 13 0 1 0 1 0 1 1 0 0 12 1 1 0 11 1 0 0 10 0 0 0 9 0 0 0 8 1 0 0 7 0 1 0 6 0 1 0 5 0 1 1 4 0 0 0 3 1 0 0 2 0 0 0 1 0 0 0 0 1 0 0 MODE VES 15 14 13 0 1 0 1 0 1 1 0 0 12 1 1 0 11 1 0 0 10 0 0 0 9 0 0 0 8 1 0 0 7 0 1 0 6 0 1 0 5 0 0 0 4 0 0 0 3 1 0 0 2 0 0 0 1 0 0 0 0 1 0 0 Description MODE VEF/VES instructions define the voltage control operating in the external reference motion mode. If MODE VEF is set, the reference module will always use only the analogue reference input. In MODE VES there are also possible the other external modes as previously defined by the EXTREF instruction. The reference will represent a voltage reference value, in voltage control structures. See Motion Programming chapter for details about external reference parameters and implementation. Depending on the selected option (VEF or VES), the reference is generated in the fast control loop or in the slow control loop. Note that no control loop is needed to implement the selected mode. The selected motion mode will become effective at the first motion update command (immediate update – UPD, or update on event, UPD!). © Technosoft 2006 250 MotionChip II TML Programming Execution Sets the voltage external motion mode (reference type). Two cases are possible: MODE VEF VES Reference location In the fast loop In the slow loop Example MODE VES; UPD; © Technosoft 2006 //MODE Voltage External reference in slow loop //Update immediate 251 MotionChip II TML Programming Name Voltage test motion mode MODE VT (Motion mode group) Syntax MODE Vorque Test MODE VT Operands – TML program X Type On-line X Binary code 15 0 1 1 14 1 0 0 Description 13 0 1 0 12 1 1 0 11 1 0 0 10 0 0 0 9 0 0 0 8 1 0 0 7 0 1 0 6 0 1 0 5 0 0 0 4 0 0 0 3 1 1 1 2 0 0 0 1 0 0 0 0 1 0 0 MODE VT instruction defines the voltage test operating motion mode. In this mode, the reference module will use the values of specific variables, allowing the generation of a saturated ramp or a constant value for the amplitude of the voltage and for the electric angle of the motor. Thus, one can apply a constant or a rotating voltage vector to the motor, for test purposes. The reference will be generated in the slow control loop (position/speed loop). See Motion Programming chapter for details about test reference parameters and implementation. Note that no control loop is needed to implement the selected mode. The selected motion mode will become effective at the first motion update command (immediate update – UPD, or update on event, UPD!). Execution Sets the voltage test motion mode (reference type). Example MODE VT; REFTST = 15; RINCTST = 4; UPD; © Technosoft 2006 //Set Voltage Test Mode //Reference saturation value in test mode //(bits) //Reference increment value in test mode //(bits/sampling) //Update immediate 252 MotionChip II TML Programming Name No operation NOP (Miscellaneous group) Syntax No Operation NOP Operands – TML program X Type On-line X Binary code 15 0 14 0 13 0 12 0 11 0 10 0 9 0 8 0 7 0 6 0 5 0 4 0 3 0 2 0 1 0 0 0 Description NOP instruction can be used to introduce a delay between two instructions. It also can be used as a labeled instruction for GOTO instructions. Execution No operation is executed. The TML program will continue with the next instruction. Example CACC = 0.5; CSPD = -20; MODE SP1; UPD; CSPD = 30.; update UPD; LOOP: NOP; GOTO LOOP; © Technosoft 2006 //Acceleration command for speed profile //(counts/sampling2) //Speed command (counts/sampling) //Set Speed Profile Mode 1 //Update immediate // New jog speed command for the next // on-the-fly change of jog speed, during //motion // no operation // infinite loop, exit only by RESET or a //TML interrupt 253 MotionChip II TML Programming Name Output to user port OUTPORT (I/O group) Syntax OUTput VAR16 value to IOPORT OUTPORT VAR16 Operands VAR16: integer variable TML program X Type On-line X Binary code 15 0 14 1 Description 13 1 12 0 11 1 10 1 9 0 8 7 6 5 4 3 2 (9LSBs of &VAR16) 1 0 The OUTPORT instruction sends a 16-bit value to the user output port. VAR16 variable can be any of the TML or user variables. See details about user output I/O port according to the drive. Execution The 16-bit value of Var16 is send to the user output port. Example int Var1; Var1 = 0x1255; OUTPORT Var1; © Technosoft 2006 // setup Var1 variable // output Var1 value to user port 254 MotionChip II TML Programming Name Reset automatic origin update (Configuration and command group) RAOU Syntax Reset Automatic Origin Update RAOU Operands – TML program X Type On-line X Binary code 15 0 1 0 14 1 1 0 13 0 1 0 12 1 0 0 11 1 1 0 10 0 1 0 9 0 1 0 8 1 1 0 7 0 1 0 6 0 1 0 5 0 1 0 4 0 1 0 3 1 1 0 2 0 1 0 1 0 1 0 0 1 1 0 Description The RAOU instruction resets the automatic origin update mode. In this case, the variable POS0 is not changed at event occurrence, and needs to be initialized by the user. For successive motions, the event tests for relative position will be based on the same value of the POS0 parameter. Use instruction SAOU in order to automatically update variable POS0 after each detected event. Execution Resets the automatic origin update. Example CACC = 0.5; CSPD = 20; CPOS CPA; MODE UPD; RAOU POS0 UPD; CSPD = 80000; PP3; ; = APOS; = 40; !RPO 20000; UPD!; © Technosoft 2006 //Acceleration command for position profile //(counts/sampling2) //Speed command for position profile //(counts/sampling) //Position command (counts) //Position command is Absolute //Set Position Profile Mode 3 //Update immediate // Reset automatic update mode //Store the actual position as reference //Update immediate //New speed command for position profile //(counts/sampling) //Set event when relative position >= 20000 //(bits) //Update on event 255 MotionChip II TML Programming Name Remove group ID REMGRID (Multiple axis group) Syntax Remove value16 from GROUP ID Remove value of VAR16 from GROUP ID REMGRID value16 REMGRID VAR16 Operands value16: 16-bit integer immediate value VAR16: integer variable TML program X Type On-line X Binary code REMGRID value16 15 14 13 12 0 0 0 0 11 1 10 0 9 0 8 7 0 1 Value16 6 0 5 0 4 0 3 0 2 0 1 0 0 0 REMGRID VAR16 15 14 13 12 0 0 0 0 11 1 10 0 9 0 8 7 1 1 &VAR16 6 0 5 0 4 0 3 0 2 0 1 0 0 0 Description In multiple axis structures, this command allows one to remove a group ID of the local axis. After the execution of this command, the group ID value removed is no more recognized by the axis and the communication drivers will reject messages addressed to the removed group ID. Only the lower 8 bits of the value16 or VAR16 parameters are used for group coding. Each bit corresponds to a group. Up to 8 groups can be defined/added/removed in a multiple axis structure. An axis can belong to any of the 8 groups. A multiple-axis message can be addressed to one axis or to a group of axes. Execution Delete Group_ID with the specified value from the Group_Ids of the local axis. Example GROUPID ADDGRID ADDGRID REMGRID © Technosoft 2006 1; 2; 5; 2; //local axis belongs to groups //local axis belongs to groups //local axis belongs to groups //from now on, the local axis //groups 1 and 5 256 1 1 and 2 1, 2 and 5 belongs only MotionChip II TML Programming Name Reset the DSP processor (Configuration and command group) RESET Syntax Reset DSP processor RESET Operands – TML program X Type On-line X Binary code 15 0 14 0 13 0 12 0 11 0 10 1 9 0 8 0 7 0 6 0 5 0 4 0 3 0 2 0 1 1 0 0 Description The RESET instruction resets the DSP processor. After this instruction the complete TML environment is reinitialized. The following basic initializations are performed: • The TML registers and parameters are initialized with their default values; • Based on these values, and some hardware tests, the basic hardware initializations are also performed; • The TML environment detects if an external memory is installed on the SPI interface, by identifying a valid TML command at the start address of this memory; • If such a program is detected, it is executed; otherwise, an infinite loop is executed and only an on-line TML command will change this status. Execute such a command in order to exit from a malfunctioning situation, when the system does not operate correspondingly. This instruction can be used also from a TML interrupt or when detecting an error in the motion system operation (protections, control error, etc.). Execution Resets the DSP processor. Example CACC = 0.5; CSPD = 20; CPOS = 70000; CPA; MODE PP3; UPD; !MC; WAIT!; RESET; © Technosoft 2006 //Acceleration command for position profile //(counts/sampling2) //Speed command for position profile //(counts/sampling) //Position command (counts) //Position command is Absolute //Set Position Profile Mode 3 //Update immediate //Set event when MotionComplete //WAIT until event occurs //After motion complete, reset the system 257 MotionChip II TML Programming Name Return from a TML function RET (Decision group) Syntax Unconditional RETurn from a TML function RET Operands – TML program X Type On-line – Binary code 15 0 14 0 13 0 12 0 11 0 10 1 9 0 8 0 7 0 6 0 5 0 4 0 3 0 2 1 1 0 0 0 Description This instruction allows the return from a TML function (subroutine). Specific sequences can be called from different points of the TML program. The RET instruction may be used to end the execution of a function and to continue the TML sequence following the CALL instruction. Execution Returns from a TML function. TOS -> IP Example int my_pos; my_pos = 2000; CALL MOVEP; //Execute a first motion of 2000 //counts my_pos = 4000; CALL MOVEP, ASPD, GT; //Execute a second motion of 4000 //counts, if motor speed > 0 . . . MOVEP: © Technosoft 2006 //Function to move up to a specified //position CACC = 1.5; //Acceleration command for position //profile (counts/sampling2) CSPD = -20; //Speed command for position profile ( //counts/sampling) CPOS = my_pos; //Position command (counts) UPD; //Update immediate RET; //Exit from function MOVEP 258 MotionChip II TML Programming Name Return from a TML interrupt function RETI (Decision group) Syntax RETurn from a TML Interrupt function RETI Operands – TML program X Type On-line – Binary code 15 0 14 0 13 0 12 0 11 0 10 1 9 0 8 1 7 0 6 0 5 0 4 0 3 0 2 1 1 0 0 0 Description This instruction allows the return from a TML interrupt service routine. When a TML interrupt service routine is entered, a specific TML sequence is executed. The return from interrupt instruction will be used to end the execution of the interrupt function and to continue the TML sequence that was interrupted. Execution Returns from a TML interrupt function. Enables TML interrupts (they were disabled at the start of the TML interrupt service routine); TOS -> IP; Example // test TML interrupts int u_var, dt ; fixed dp; BEGIN; INTTABLE = InterruptTable; ENDINIT; AXISON; SAP 0; u_var = 19; // // // // // SRB ICR, 4095, 4095; CACC = 0.5; CSPD = 30.; SP1 UPD; EINT ; lb1 : GOTO lb1, u_var, GT; // set interrupt masks // set acceleration // set speed //Set Speed Profile Mode 1 // start the motion // enable interrupts © Technosoft 2006 start the TML program locate the interrupt vector global system settings activate control set actual position value // loop while u_var > 0 259 MotionChip II TML Programming My_flag = u_var; // this instruction is executed //after an interrupt // again in the infinite loop if //u_var > 0 // end the TML program after //motion complete GOTO lb1, u_var, GT; END; Int0_Disable: // [level 0: disable] interrupt //function u_var = 100; RETI; Int1_PDPINT: // [level 1: PDPINT] interrupt //function u_var = 101; RETI; Int2_SoftProtection: // [level 2: Software //protection] interrupt function u_var = 102; RETI; Int3_ControlError: u_var = 103; RETI; Int4_CommError: u_var = 104; RETI; Int5_WrapAround: // [level 3: Control error] //interrupt function // [level 4: Communication error] //interrupt function // [level 5: Wrap Around] interrupt //function u_var = 105; RETI; Int6_LimitSwitchP: // [level 6: Positive limit //switch] interrupt function u_var = 106; RETI; Int7_LimitSwitchM: // [level 7: Negative limit //switch] interrupt function u_var = 107; RETI; Int8_Capture: // [level 8: Capture] interrupt //function CPOS = CAPPOS; UPD; u_var = 108; RETI; Int9_MotionComplete: // [level 9: Motion complete] //interrupt function UPD; u_var = -109 ; RETI ; © Technosoft 2006 260 MotionChip II TML Programming Int10_UpdateContourSeg: dp = -dp; SEG dt, dp; u_var = 110; RETI; Int11_EventReached: //[level 10: Update contour //segment] interrupt function // [level 11: Event reached] //interrupt function CPOS = -20000; UPD; u_var = 111; RETI; IntVect: // interrupt vector table @Int0_Disable; // pointer to level 0 interrupt @Int1_PDPINT; // pointer to level 1 interrupt @Int2_SoftProtection; // pointer to level 2 interrupt @Int3_ControlError; // pointer to level 3 interrupt @Int4_CommError; // pointer to level 4 interrupt @Int5_WrapAround; // pointer to level 5 interrupt @Int6_LimitSwitchP; // pointer to level 6 interrupt @Int7_LimitSwitchM; // pointer to level 7 interrupt @Int8_Capture; // pointer to level 8 interrupt @Int9_MotionComplete; // pointer to level 9 interrupt @Int10_UpdateContourSeg; // pt. To level 10 interrupt @Int11_EventReached; // pointer to level 11 interrupt © Technosoft 2006 261 MotionChip II TML Programming Name Reset gear/cam master mode RGM (Configuration and Command group) Syntax Reset axis as Gear/Cam Master RGM Operands – TML program X Type On-line X Binary code 15 0 1 0 14 1 1 0 Description 13 0 1 0 12 1 1 0 11 1 0 0 10 0 1 0 9 0 1 0 8 1 1 0 7 0 1 0 6 0 1 0 5 0 1 0 4 0 1 0 3 1 1 0 2 0 1 0 1 0 1 0 0 1 1 0 RGM instruction resets the axis from the electronic gearing/camming master operation mode. In this mode, the reference values will be generated only locally. The axis does not send its position information to the slave axes, but use it only locally. See Motion Programming chapter for details about gearing reference parameters and implementation. Execution Resets the axis from the gear/cam master operation mode. Example RGM; © Technosoft 2006 //exit from master mode; enter in local mode 262 MotionChip II TML Programming Name Reset output bit-port ROUT (I/O group) Syntax Reset OUT#n to low state (0) ROUT#n Operands n: number of output bit-port 0<=n<=39) TML program X Type On-line X Binary code 15 0 14 1 13 0 12 1 11 1 10 1 9 0 8 7 0 0 PxDATDIR ANDrst ORrst 6 0 5 0 4 0 3 0 2 0 1 0 0 0 Description ROUT#n instruction resets the output status of the bit-port (IO line) number n. Note that the bit-port must be defined as an output port (using the SETIO#n OUT instruction). Execution Resets the output bit-port number n. Example SETIO#13 OUT; ROUT#13; © Technosoft 2006 //Set IO line 13 as output //Reset the IO line 13 263 MotionChip II TML Programming AND/OR masks for ROUT#n PxDATDIR #n ANDrst ORrst 0X7098 #0 0xFFFE 0x0000 0X07098 #1 0xFFFD 0x0000 0X7098 #2 0xFFFB 0x0000 0X7098 #3 0xFFF7 0x0000 0X7098 #4 0xFFEF 0x0000 0X7098 #5 0xFFDF 0x0000 0X7098 #6 0xFFBF 0x0000 0X7098 #7 0xFF7F 0x0000 0X709A #8 0xFFFE 0x0000 0X709A #9 0xFFFD 0x0000 0X709A #10 0xFFFB 0x0000 0X709A #11 0xFFF7 0x0000 0X709A #12 0xFFEF 0x0000 0X709A #13 0xFFDF 0x0000 0X709A #14 0xFFBF 0x0000 0X709A #15 0xFF7F 0x0000 0X709C #16 0xFFFE 0x0000 #17 0xFFFD 0x0000 0X709C #18 0xFFFB 0x0000 0X709C #19 0xFFF7 0x0000 0X709C © Technosoft 2006 264 PxDATDIR 0X709C #n #20 0xFFEF 0x0000 0X709C #21 0xFFDF 0x0000 0X709C #22 0xFFBF 0x0000 0X709C #23 0xFF7F 0x0000 0X709E #24 0xFFFE 0x0000 0X7095 #25 0xFFFE 0x0000 0X7095 #26 0xFFFD 0x0000 0X7095 #27 0xFFFB 0x0000 0X7095 #28 0xFFF7 0x0000 0X7095 #29 0xFFEF 0x0000 0X7095 #30 0xFFDF 0x0000 0X7095 #31 0xFFBF 0x0000 0X7095 #32 0xFF7F 0x0000 0X7096 #33 0xFFFE 0x0000 0X7096 #34 0xFFFD 0x0000 0X7096 #35 0xFFFB 0x0000 0X7096 #36 0xFFF7 0x0000 0X7096 #37 0xFFEF 0x0000 0X7096 #38 0xFFDF 0x0000 0X7096 #39 0xFFBF 0x0000 ANDrst ORrst MotionChip II TML Programming Name Set automatic origin update (Configuration and command group) SAOU Syntax Reset Automatic Origin Update SAOU Operands – TML program X Type On-line X Binary code 15 0 1 0 14 1 1 0 13 0 1 0 12 1 1 1 11 1 1 0 10 0 1 0 9 0 1 0 8 1 1 0 7 0 1 0 6 0 1 0 5 0 1 0 4 0 1 0 3 1 1 0 2 0 1 0 1 0 1 0 0 1 1 0 Description The SAOU instruction sets the automatic origin update mode. In this case, the variable POS0 is changed at an UPDATE event occurrence, and needs not to be initialized by the user. For successive motions, the event tests for relative position will be based on the updated values of the POS0 parameter. Use instruction RAOU in order to manually update variable POS0. Execution Sets the automatic origin update. Example CACC = 0.5; CSPD = 20; CPOS CPR; MODE SAOU UPD; CSPD = 90000; PP3; ; = 40; !RPO 20000; UPD!; WAIT!; © Technosoft 2006 //Acceleration command for position profile //(counts/sampling2) //Speed command for position profile //(counts/sampling) //Position command (counts) //Position command is Relative //Set Position Profile Mode 3 //Set automatic update mode //Update immediate //New speed command for position profile //(counts/sampling) //Set event when relative position >= 20000 //i.e. when motor position has done 20000 // counts //Update on event //Wait event to occur 265 MotionChip II TML Programming Name Set actual position SAP (Configuration and command group) Syntax Set Actual Position to value32 Set Actual Position to VAR32 SAP value32 SAP VAR32 Operands value32: 32-bit long immediate value VAR32: long variable TML program X Type On-line X Binary code SAP value32 15 14 13 1 0 0 12 0 11 0 10 1 9 8 7 6 0 0 0 0 LOWORD(value32) HIWORD(value32) SAP VAR32 15 14 13 1 0 0 12 0 11 0 10 0 9 0 Description 8 7 6 5 0 4 0 3 0 2 0 1 0 0 0 5 4 3 2 (9LSBs of &VAR32) 1 0 Sets the value of variable APOS (absolute position) with the value value32 or VAR32. Also corrects the reference value, so that the difference between the position reference and the actual position before the setting will be preserved after the change of the absolute position value. Execution Depending on the target update mode bit: If TUM1 is set: value32: value32 - old reference + old APOS -> new APOS value32 -> new reference VAR32: VAR32 - old reference + old APOS -> new APOS VAR32 -> new reference If TUM0 is set: value32: value32 + old reference – old APOS-> new reference value32 -> new APOS VAR32: VAR32 + old reference – old APOS -> new reference VAR32 -> new APOS © Technosoft 2006 266 MotionChip II TML Programming Example CACC = 1.5; CSPD = 20; MODE SP1; UPD; SAP 0; !APO 60000; UPD!; © Technosoft 2006 //Acceleration command for speed profile //(counts/sampling2) //Speed command (counts/sampling) //Set Speed Profile Mode 1 //Update immediate //Set the actual position to 0 (counts) //Set event when absolute position >= 60000 //(counts) //Update on event 267 MotionChip II TML Programming Name Set SCI serial communication baud rate (Miscellaneous group) SCIBR Syntax Set SCI Baud Rate to value16 Set SCI Baud Rate to VAR16 SCIBR value16 SCIBR VAR16 Operands value16: 16-bit integer immediate value. (0<=value32<=4) VAR16: integer variable TML program X Type On-line X Binary code SCIBR value16 15 14 13 12 0 0 0 0 11 1 10 0 9 0 8 7 0 0 Value16 6 0 5 1 4 0 3 0 2 0 1 0 0 0 SCIBR VAR16 15 14 13 12 0 0 0 0 11 1 10 0 9 0 8 7 1 0 &VAR16 6 0 5 1 4 0 3 0 2 0 1 0 0 0 Description Sets the value of SCI serial communication baud rate, based on the value of the input parameter value16. Baud rates range from 9600 to 115200 baud. The default baud rate value of the drive is 9600. Execution Sets the SCI serial communication baud rate, based on value16 value: Value16 0 1 2 3 4 SCI baud rate 9600 19200 38400 56600 115200 Example SCIBR 4; © Technosoft 2006 // sets the SCI baud rate to 115200 baud 268 MotionChip II TML Programming Name Define a segment for contouring motion mode (Configuration and command group) SEG Syntax SEGment D_time, D_ref SEGment VAR16, VAR32 SEG D_time, D_ref SEG VAR16, VAR32 Operands D_time: 16-bit integer immediate value D_ref: 32-bit long immediate value VAR32: long variable VAR16: integer variable TML program X Type On-line – Binary code SEG D_time, D_ref 15 14 13 12 0 1 1 1 11 1 10 0 9 0 SEG VAR16, VAR32 15 14 13 12 0 1 1 1 11 1 10 1 9 0 8 7 6 0 0 0 D_time LOWORD(D_ref) HIWORD(D_ref) 8 7 6 5 0 4 0 3 0 2 0 1 0 0 0 5 4 3 2 (9LSBs of &VAR16) 1 0 &VAR32 Description The SEG instruction is used in the contouring mode to generate the reference, describing one of the segments of the contour. Its parameters represent the number of sampling periods over which that segment will be generated, respectively the value of reference increment added to the actual value of the reference at each sampling moment. The reference is updated in the slow sampling interrupt routine (position/speed control loop). See Motion Programming chapter for details about contouring reference mode and its parameters. Execution Generate a segment for the next D_time [VAR16] time samplings, at each sampling increment the reference with D_ref [VAR32]. Example MODE PC3; SEG 100U, 5.00000;; UPD; SEG 100U, 5.00000; SEG 100U, -20.00000; SEG 100U, 10.00000; SEG 0, 0.; © Technosoft 2006 //Set Position Contouring Mode 3 //Set 1st motion segment. //Update immediate //Set 2st motion segment. //Set 3st motion segment. //Set 4st motion segment. //End of contouring mode. 269 MotionChip II TML Programming Name Set bit-port as input or output port SETIO (I/O group) Syntax SETIO#n as Input port SETIO#n as OUTput port SETIO#n IN SETIO#n OUT Operands n: number of output bit-port 0<=n<=39) TML program X Type On-line X Binary code SETIO#n IN 15 14 13 0 1 0 12 1 11 1 10 1 9 0 8 7 0 0 PxDATDIR ANDin ORin 6 0 5 0 4 0 3 0 2 0 1 0 0 0 SETIO#n OUT 15 14 13 0 1 0 12 1 11 1 10 1 9 0 8 7 0 0 PxDATDIR ANDout ORout 6 0 5 0 4 0 3 0 2 0 1 0 0 0 Description SETIO#n instruction defines the operating mode of bit-port number #n. Each of the bit-ports can thus be individually defined and used as an input (in assignment instructions having the source operant IN#n) or output (in instruction SOUT#n) bit-port. Execution Define the operating mode for bit-port number n. Example int v1; SETIO#13 OUT; ROUT#13; SETIO#14 IN; v1 = IN#14; //Set IO line 13 as output //Reset IO line 13 as output //Set IO line 14 as input //Read I/O line 14 data into variable v1 AND/OR masks for SETIO#n IN PxDATDIR #n AND/OR masks for SETIO#n OUT ANDin ORin #n ANDout ORout 0X7098 #0 0xFEFF 0x0000 #0 0xFFFF 0x0100 0X7098 #1 0xFDFF 0x0000 #1 0xFFFF 0x0200 0X7098 #2 0xFBFF 0x0000 #2 0xFFFF 0x0400 0X7098 #3 0xF7FF 0x0000 #3 0xFFFF 0x0800 © Technosoft 2006 270 MotionChip II TML Programming AND/OR masks for SETIO#n IN AND/OR masks for SETIO#n OUT PxDATDIR #n ANDin ORin #n ANDout ORout 0X7098 #4 0xEFFF 0x0000 #4 0xFFFF 0x1000 0X7098 #5 0xDFFF 0x0000 #5 0xFFFF 0x2000 0X7098 #6 0xBFFF 0x0000 #6 0xFFFF 0x4000 0X7098 #7 0x7FFF 0x0000 #7 0xFFFF 0x8000 0X709A #8 0xFEFF 0x0000 #8 0xFFFF 0x0100 0X709A #9 0xFDFF 0x0000 #9 0xFFFF 0x0200 0X709A #10 0xFBFF 0x0000 #10 0xFFFF 0x0400 0X709A #11 0xF7FF 0x0000 #11 0xFFFF 0x0800 0X709A #12 0xEFFF 0x0000 #12 0xFFFF 0x1000 0x2000 0X709A #13 0xDFFF 0x0000 #13 0xFFFF 0X709A #14 0xBFFF 0x0000 #14 0xFFFF 0x4000 0X709A #15 0x7FFF 0x0000 #15 0xFFFF 0x8000 0X709C #16 0xFEFF 0x0000 #16 0xFFFF 0x0100 0X709C #17 0xFDFF 0x0000 #17 0xFFFF 0x0200 0X709C #18 0xFBFF 0x0000 #18 0xFFFF 0x0400 0X709C #19 0xF7FF 0x0000 #19 0xFFFF 0x0800 0X709C #20 0xEFFF 0x0000 #20 0xFFFF 0x1000 0X709C #21 0xDFFF 0x0000 #21 0xFFFF 0x2000 0X709C #22 0xBFFF 0x0000 #22 0xFFFF 0x4000 0X709C #23 0x7FFF 0x0000 #23 0xFFFF 0x8000 0X709E #24 0xFEFF 0x0000 #24 0xFFFF 0x0100 0X7095 #25 0xFEFF 0x0000 #25 0xFFFF 0x0100 0X7095 #26 0xFDFF 0x0000 #26 0xFFFF 0x0200 0X7095 #27 0xFBFF 0x0000 #27 0xFFFF 0x0400 0X7095 #28 0xF7FF 0x0000 #28 0xFFFF 0x0800 0X7095 #29 0xEFFF 0x0000 #29 0xFFFF 0x1000 0X7095 #30 0xDFFF 0x0000 #30 0xFFFF 0x2000 0X7095 #31 0xBFFF 0x0000 #31 0xFFFF 0x4000 0X7095 #32 0x7FFF 0x0000 #32 0xFFFF 0x8000 0X7096 #33 0xFEFF 0x0000 #33 0xFFFF 0x0100 0X7096 #34 0xFDFF 0x0000 #34 0xFFFF 0x0200 0X7096 #35 0xFBFF 0x0000 #35 0xFFFF 0x0400 0X7096 #36 0xF7FF 0x0000 #36 0xFFFF 0x0800 0X7096 #37 0xEFFF 0x0000 #37 0xFFFF 0x1000 0X7096 #38 0xDFFF 0x0000 #38 0xFFFF 0x2000 0X7096 #39 0xBFFF 0x0000 #39 0xFFFF 0x4000 © Technosoft 2006 271 MotionChip II TML Programming Name Set gear master mode SGM (Configuration and Command group) Syntax Set axis as Gear/Cam Master SGM Operands – TML program X Type On-line X Binary code 15 0 1 0 14 1 1 0 Description 13 0 1 0 12 1 1 0 11 1 1 1 10 0 1 0 9 0 1 0 8 1 1 0 7 0 1 0 6 0 1 0 5 0 1 0 4 0 1 0 3 1 1 0 2 0 1 0 1 0 1 0 0 1 1 0 SGM instruction sets the axis in the gear/cam master operation mode. In those modes, the position reference values computed for the master axis (the local axis) will also be sent to the slave axes. The master will use the SLAVEID parameter in order to generate the address of slave axes toward which the gearing/camming value is sent. Depending on the “Electronic gearing/camming mode” bit of OSR register (bit 15), the value sent to the slaves is the master actual position – APOS (if bit 15 of OSR is 0), or the master target position – TPOS (if bit 15 of OSR is 1). See Motion Programming chapter for details about gearing reference parameters and implementation. Execution Sets the axis in the gear/cam master operation mode. Example SLAVEID = 2; //ID of the slave axis referenced SGM; //Enable Master in Electronic Gearing mode SRB OSR,0xFFFF,0x8000; //Set OSR register, 15 bit to send //reference position to slave axis 2 UPD; //Update immediate © Technosoft 2006 272 MotionChip II TML Programming Name Set output bit-port SOUT (I/O group) Syntax Set OUT#n to high state (1) SOUT#n Operands n: number of output bit-port 0<=n<=39) TML program X Type On-line X Binary code 15 0 14 1 13 0 12 1 11 1 10 1 9 0 8 7 0 0 PxDATDIR ANDset ORset 6 0 5 0 4 0 3 0 2 0 1 0 0 0 Execution Sets the output bit-port number n to high state. Description SOUT#n instruction sets the output status of the bit-port number n. Note that the bit-port must be defined as an output port (using the SETIO#n OUT instruction). Example SETIO#13 OUT; //Set IO line 13 as output SOUT#13; //Set High to I/O line 13 © Technosoft 2006 273 MotionChip II TML Programming AND/OR masks for SOUT#n PxDATDIR #n ANDset ORset 0X7098 0X7098 0X7098 0X7098 0X7098 0X7098 0X7098 0X7098 0X709A 0X709A 0X709A 0X709A 0X709A 0X709A 0X709A 0X709A 0X709C 0X709C 0X709C 0X709C #0 #1 #2 #3 #4 #5 #6 #7 #8 #9 #10 #11 #12 #13 #14 #15 #16 #17 #18 #19 0xFFFF 0xFFFF 0xFFFF 0xFFFF 0xFFFF 0xFFFF 0xFFFF 0xFFFF 0xFFFF 0xFFFF 0xFFFF 0xFFFF 0xFFFF 0xFFFF 0xFFFF 0xFFFF 0xFFFF 0xFFFF 0xFFFF 0xFFFF © Technosoft 2006 PxDATDIR 0X709C 0X709C 0X709C 0X709C 0X709E 0X7095 0X7095 0X7095 0X7095 0X7095 0X7095 0X7095 0x0001 0x0002 0x0004 0x0008 0x0010 0x0020 0x0040 0x0080 0x0001 0x0002 0x0004 0x0008 0x0010 0x0020 0x0040 0x0080 0x0001 0x0002 0x0004 0x0008 0X7095 0X7096 0X7096 0X7096 0X7096 0X7096 0X7096 0X7096 274 #n #20 #21 #22 #23 #24 #25 #26 #27 #28 #29 #30 #31 #32 #33 #34 #35 #36 #37 #38 #39 ANDset 0xFFFF 0xFFFF 0xFFFF 0xFFFF 0xFFFF 0xFFFF 0xFFFF 0xFFFF 0xFFFF 0xFFFF 0xFFFF 0xFFFF 0xFFFF 0xFFFF 0xFFFF 0xFFFF 0xFFFF 0xFFFF 0xFFFF 0xFFFF ORset 0x0010 0x0020 0x0040 0x0080 0x0001 0x0001 0x0002 0x0004 0x0008 0x0010 0x0020 0x0040 0x0080 0x0001 0x0002 0x0004 0x0008 0x0010 0x0020 0x0040 MotionChip II TML Programming Name Set SPI serial communication baud rate (Miscellaneous group) SPIBR Syntax Set SPI Baud Rate to value16 Set SPI Baud Rate to VAR16 SPIBR value16 SPIBR VAR16 Operands value16: 16-bit integer immediate value. (0<=value32<=2) VAR16: integer variable TML program X Type On-line X Binary code SPIBR value16 15 14 13 12 0 0 0 0 11 1 10 0 9 0 8 7 0 0 Value16 6 0 5 0 4 1 3 0 2 0 1 0 0 0 SPIBR VAR16 15 14 13 12 0 0 0 0 11 1 10 0 9 0 8 7 1 0 &VAR16 6 0 5 0 4 1 3 0 2 0 1 0 0 0 Description Sets the value of SPI serial communication baud rate, based on the value of the input parameter value16 or VAR16. Baud rates range from 1 to 5 Mbaud. The default baud rate value is 1 Mb. Execution Sets the SPI serial communication baud rate, based on value16 value: Value16 0 1 2 SPI baud rate 1 Mb 2 Mb 5 Mb Example SPIBR 1; © Technosoft 2006 // sets the SPI baud rate to 2 Mbaud 275 MotionChip II TML Programming Name SRB, SRBL Set/reset bits of a variable (Arithmetic & Logic group) Syntax SRB VAR16, ANDmask, ORmask SRBL VAR16, ANDmask, ORmask Operands Set/Reset Bits of VAR16 Set/Reset Bits of VAR16 (long addressing) VAR16: integer variable ANDmask: 16-bit mask for AND operation ORmask: 16-bit mask for OR operation TML program X Type On-line X Binary code SRB VAR16, ANDmask, ORmask 15 14 13 12 11 10 9 0 1 0 1 1 0 0 8 7 6 5 4 3 2 (9LSBs of &VAR16) 1 0 1 0 0 0 ANDm ORm SRBL VAR16, ANDmask, ORmask 15 14 13 12 11 10 9 0 1 0 1 1 1 0 Description 8 7 0 0 &VAR16 ANDm ORm 6 0 5 0 4 0 3 0 2 0 This special instruction allows setting and resetting individually each of the bits of a 16-bit variable. The instruction must be used when needing to perform such operations on TML variables that can be changed during the execution of the real-time motion program. The SRB instruction will perform the modification of the bits of variable VAR16 such that no interference between this modification and possible real-time modification occurs. Execution Reset in VAR16 all the bits that are 0 in the corresponding position of ANDmask. Set in VAR16 all the bits that are 1 in the corresponding position of ORmask. Example int var1; ... SRB var1, 0xFF0F, 0x0003; © Technosoft 2006 276 //Reset bits 4 to 7, set bits 0 //and 1 of var1 MotionChip II TML Programming Name Set target position to actual position (Configuration and command group) STA Syntax Set Target position = Actual position STA Operands – TML program X Type On-line X Binary code 15 0 0 14 0 0 Description 13 1 0 12 0 0 11 1 0 10 1 0 9 0 1 8 0 0 7 1 0 6 0 0 5 1 1 4 1 0 3 0 1 2 0 0 1 1 0 0 0 0 STA instruction sets the value of the target position (the position reference) to the value of the actual motor position. This can be useful for example for actualization of the reference during the execution of a given reference profile, when changing “on-the-fly” the reference value allows one to re-start from a 0-error point, the reference generation and motion execution. Execution APOS -> TPOS Example MODE PC2; TUM1; SEG 100U, 5.00000; UPD; SEG 100U, 5.00000; SEG 100U, -20.00000; SEG 100U, 10.00000; SEG 0, 0.; STA; © Technosoft 2006 //Set Position Contouring Mode 2 //Set target update mode 1 //Set 1st motion segment //Update immediate //Set 2st motion segment. //Set 3st motion segment. //Set 4st motion segment. //End of contouring mode //Set target position value equal to //the actual position value 277 MotionChip II TML Programming Name Stop the motion STOP (Configuration and command group) Syntax STOP motion in mode 0 STOP motion in mode 1 STOP motion in mode 2 STOP motion in mode 3 STOP0 STOP1 STOP2 STOP3 Operands – TML program X Type On-line X Binary code STOP0 15 14 0 0 13 0 12 0 11 0 10 0 9 0 8 1 7 0 6 0 5 0 4 0 3 0 2 1 1 0 0 0 STOP1 15 14 0 0 13 0 12 0 11 0 10 0 9 0 8 1 7 0 6 1 5 0 4 0 3 0 2 1 1 0 0 0 STOP2 15 14 0 0 13 0 12 0 11 0 10 0 9 0 8 1 7 1 6 0 5 0 4 0 3 0 2 1 1 0 0 0 STOP3 15 14 0 0 13 0 12 0 11 0 10 0 9 0 8 1 7 1 6 1 5 0 4 0 3 0 2 1 1 0 0 0 Description STOP[0/1/2/3] instruction imposes a motor stop. Four different stop modes can be used, as presented in the table bellow. Execution Stops the motion by applying a specific reference. When a STOP instruction sent on-line is executed it will also contain an END instruction after the initialization of the stop mode! The END instruction will stop the execution of any current TML program! If a STOP instruction is executed from a TML program, it will only stop the motor. © Technosoft 2006 278 MotionChip II TML Programming Four cases are possible: Stop STOP0 STOP1 STOP2 STOP3 Stop method Impose a voltage reference equal to 0 to the motor Impose a current reference equal to 0 to the motor Impose a speed reference equal to 0 to the motor Impose a speed reference equal to 0 to the motor, using the profiles acceleration value to brake Example CACC = 1.5; //Acceleration command for position //profile (counts/sampling2) CSPD = -20; //Speed command for position profile //(counts/sampling) CPOS = -100000; //Position command (counts) CPR; //Position command is Relative MODE PP3; //Set Position Profile Mode 3 UPD; //Update immediate CSPD = -40; //New speed command for position profile //(counts/sampling) !RU -20000; //Set event if Reference =< -20000 //(counts) WAIT!; //Wait until event occurs STOP0; //Apply 0 voltage reference to the motor © Technosoft 2006 279 MotionChip II TML Programming Name Stop the motion on event (Configuration and command group) STOP! Syntax STOP motion in mode 0 on event STOP motion in mode 1 on event STOP motion in mode 2 on event STOP motion in mode 3 on event STOP0! STOP1! STOP2! STOP3! Operands – TML program X Type On-line X Binary code STOP0! 15 14 0 0 13 0 12 0 11 0 10 0 9 0 8 0 7 0 6 0 5 0 4 0 3 0 2 1 1 0 0 0 STOP1! 15 14 0 0 13 0 12 0 11 0 10 0 9 0 8 0 7 0 6 1 5 0 4 0 3 0 2 1 1 0 0 0 STOP2! 15 14 0 0 13 0 12 0 11 0 10 0 9 0 8 0 7 1 6 0 5 0 4 0 3 0 2 1 1 0 0 0 STOP3! 15 14 0 0 13 0 12 0 11 0 10 0 9 0 8 0 7 1 6 1 5 0 4 0 3 0 2 1 1 0 0 0 Description STOP[0/1/2/3]! Instruction imposes a motor stop when an event occurs during the motion. Four different stop modes can be used, as presented in the table bellow. Execution Stops the motion by applying a specific reference, at the occurrence of a programmed event. Four cases are possible: Stop STOP0! STOP1! STOP2! STOP3! © Technosoft 2006 Stop method when event occurs Impose a voltage reference equal to 0 to the motor Impose a current reference equal to 0 to the motor Impose a speed reference equal to 0 to the motor Impose a speed reference equal to 0 to the motor, using the profiles acceleration value to brake 280 MotionChip II TML Programming Example: CACC = 1; CSPD = 25.5; MODE SP1; //Acceleration command for speed //(counts/sampling2) // Speed command (counts/sampling) //Set Speed Profile Mode 1 UPD; //Update immediate !SO 10; //Set event if speed (counts/sampling) ... STOP2!; //Stop mode 2 when event occurs WAIT!; //Wait until event occurs © Technosoft 2006 profile 281 >= 10 MotionChip II TML Programming Name Target update mode TUM (Configuration and command group) Syntax Set Target Update Mode 0 Set Target Update Mode 1 TUM0 TUM1 Operands – TML program X Type On-line X Binary code TUM0 15 0 1 0 14 1 0 0 13 0 1 0 12 1 1 0 11 1 1 0 10 0 1 0 9 0 1 0 8 1 1 0 7 0 1 0 6 0 1 0 5 0 1 0 4 0 1 0 3 1 1 0 2 0 1 0 1 0 1 0 0 1 1 0 TUM1 15 0 1 0 14 1 1 1 13 0 1 0 12 1 1 0 11 1 1 0 10 0 1 0 9 0 1 0 8 1 1 0 7 0 1 0 6 0 1 0 5 0 1 0 4 0 1 0 3 1 1 0 2 0 1 0 1 0 1 0 0 1 1 0 Description TUM0 and TUM1 (target update mode 0 or 1) let the user to choose how to consider the origin for relative positioning commands. After a TUM0 command, the origin is considered as the actual motor position (default). This option is useful in applications where, for example, the motor should move a specified distance after it reaches a contact (event that can be signaled by setting an input event). After a TUM1 command, the origin is considered as the target position. In this case, successive relative moves can be commanded and the final target represents the exact sum of the individual commands. In the example below, 2nd update command occurs when the motion commanded by the 1st update is complete, i.e. when target position reaches the command value 3000. Hence, due to TUM1 mode, the next absolute position command is 3000+3000 = 6000. It is important to note that the event motion complete refers to the target position and not to the actual motor position, which follows the target usually with a certain delay. If in the example below, TUM1 command is replaced with TUM0, the next position command will not be 6000, but 6000 – the position error from the moment when target position reaches 3000. © Technosoft 2006 282 MotionChip II TML Programming Another difference between TUM0 and TUM1 modes is related to the treatment of the target speed and position, when the motion mode is changed. Under TUM0 mode, each time the motion mode is changed, the target speed takes the value of the actual motor speed and the target position takes the value of the actual motor position. Under TUM1 mode, the target speed and position remain unchanged providing a smoother, glitch-free transition of the target speed and position, when motion modes are changed. However it should be noted that the target speed and position are computed only in the speed/position profile and speed/position contouring modes. If the system operates in other motion modes, all motion mode changes must be done under TUM0 mode. Execution After a TUM0 command, the origin is considered as the actual motor position (default). After a TUM1 command, the origin is considered as the target position. Example CACC = 0.5; //Acceleration command for position profile CSPD = 10; //Speed command for position profile CPOS = 3000; //Position command CPR; //Position command is Relative MODE PP3; //Set Position Profile Mode 3 TUM1; //Set Target Update Mode 1 UPD; //Update immediate !MC; //Set event when MotionComplete CSPD = 30; //Speed command for position profile CPOS = 3000; //Position command CPR; //Position command is Relative MODE PP3; //Set Position Profile Mode 3 TUM1; //Set Target Update Mode 1 UPD!; //Update on event WAIT!; //WAIT until event occurs © Technosoft 2006 283 MotionChip II TML Programming Name Update the motion immediate UPD (Configuration and command group) Syntax UPDate motion immediate UPD Operands – TML program X Type On-line X Binary code 15 0 14 0 Description 13 0 12 0 11 0 10 0 9 0 8 1 7 0 6 0 5 0 4 0 3 1 2 0 1 0 0 0 All motion parameters are buffered. Consequently, when a motion parameter is changed, the new value is placed into a buffer. This operation doesn’t affect the reference generator, which continues to generate the target reference using the previous motion parameters. In order to activate the new motion parameters an update command must be issued. The update command UPD transfers all motion parameters from buffers into the active registers, which are used for reference computation. The same principle applies also to the MODE commands, which set the motion modes. The update command can be issued at any time. If it is issued during motion, it determines a motion mode and/or motion parameter change on the fly. If it is issued after the motion was completed, it acts like a start motion command. Execution Transfer all motion parameters from buffers into the active registers, which are used for reference computation. Example CACC = 0.5; CSPD = 40; MODE SP1; UPD; CSPD = -40; UPD; © Technosoft 2006 //Acceleration command for speed //profile(counts/sampling2) //Speed command (counts/sampling) //Set Speed Profile Mode 1 //Update immediate //Speed command (counts/sampling) //Update immediate 284 MotionChip II TML Programming Name Update the motion on event UPD! (Configuration and command group) Syntax UPDate motion on event ! UPD! Operands – TML program X Type On-line X Binary code 15 0 14 0 Description 13 0 12 0 11 0 10 0 9 0 8 0 7 0 6 0 5 0 4 0 3 1 2 0 1 0 0 0 All motion parameters are buffered. Consequently, when a motion parameter is changed, the new value is placed into a buffer. This operation doesn’t affect the reference generator, which continues to generate the target reference using the previous motion parameters. In order to activate the new motion parameters an update command must be issued. The update command UPD! Transfers all motion parameters from buffers into the active registers, which are used for reference computation, when one of the possible events occurs in the motion system. There are 18 events, which can be programmed, one at a time, for monitoring: !MC When the actual motion is completed !APO When motor absolute position is equal or over a value or the value of a variable !APU When motor absolute position is equal or under a value or the value of a variable !RPO When motor relative position is equal or over a value or the value of a variable !RPU When motor relative position is equal or under a value or the value of a variable !SO When motor speed is equal or over a value or the value of a variable !SU When motor speed is equal or under a value or the value of a variable !AT After a wait absolute time equal with a value or the value of a variable !RT After a wait relative time equal with a value or the value of a variable !RO When position/speed/torque/voltage reference is equal or over a value or the value of a variable © Technosoft 2006 285 MotionChip II TML Programming When position/speed/torque/voltage reference is equal or under a value or the value of a variable !CAP When the selected capture input is triggered !LSP When the positive limit switch is triggered !LSN When the negative limit switch is triggered !IN#n 1 When a digital input goes high !IN#n 0 When a digital input goes low !VO When value of a variable is equal or over a value or the value of another variable !VU When value of a variable is equal or under a value or the value of another variable Only one event can be monitored at a time. !RU Execution Transfer all motion parameters from buffers into the active registers, which are used for reference computation, when a monitored event occurs. Example CACC = 1.5; CSPD = 20; MODE SP1; UPD; ENLSP1; edge CSPD = -20; !LSP; UPD!; © Technosoft 2006 //Acceleration command for speed profile //(counts/sampling2) //Speed command (counts/sampling) //Set Speed Profile Mode 1 //Update immediate //Positive Limit Switch triggers rising //New speed command (counts/sampling) //Set event if Positive LimitSwitch is //reached //Update on event 286 MotionChip II TML Programming Name Wait a motion event to occur WAIT! (Event group) Syntax WAIT motion event ! WAIT! Operands – TML program X Type On-line – Binary code 15 0 14 0 Description 13 0 12 0 11 0 10 1 9 0 8 0 7 0 6 0 5 0 4 0 3 1 2 0 1 0 0 0 WAIT! holds the execution of the following TML instructions from the TML program sequence, until the monitored event occurs. There are 18 events, which can be programmed, one at a time, for monitoring: !MC When the actual motion is completed !APO When motor absolute position is equal or over a value or the value of a variable !APU When motor absolute position is equal or under a value or the value of a variable !RPO When motor relative position is equal or over a value or the value of a variable !RPU When motor relative position is equal or under a value or the value of a variable !SO When motor speed is equal or over a value or the value of a variable !SU When motor speed is equal or under a value or the value of a variable !AT After a wait absolute time equal with a value or the value of a variable !RT After a wait relative time equal with a value or the value of a variable !RO When position/speed/torque/voltage reference is equal or over a value or the value of a variable !RU When position/speed/torque/voltage reference is equal or under a value or the value of a variable !CAP When the selected capture input is triggered !LSP When the positive limit switch is triggered !LSN When the negative limit switch is triggered !IN#n 1 When a digital input goes high !IN#n 0 When a digital input goes low © Technosoft 2006 287 MotionChip II TML Programming When value of a variable is equal or over a value or the value of another variable !VU When value of a variable is equal or under a value or the value of another variable Only one event can be monitored at a time. !VO Execution Hold up execution of the following instructions until the monitored event occurs. Example: CACC = 1; //Acceleration command for speed profile //(counts/sampling2) CSPD = 25.5; // Speed command (counts/sampling) MODE SP1; //Set Speed Profile Mode 1 UPD; //Update immediate !SO 10; //Set event if speed >= (counts/sampling) . . . STOP2!; //Stop mode 2 when event occurs WAIT!; //Wait until event occurs © Technosoft 2006 288 10 MotionChip II TML Programming This page is empty © Technosoft 2006 289 MotionChip II TML Programming