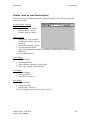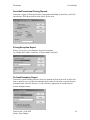
1
CHECKMATE BACK OFFICE USER MANUAL 1997 Lynx Business Systems (Australia). All Rights Reserved. Unauthorized copying or duplication of the contents of this document in whole or in part is strictly prohibited. All registered trademarks are hereby acknowledged Checkmate User Manual CONTENTS CHAPTER 1 BACK OFFICE................................................................................................................ 4 INTRODUCTION ..................................................................................................................................... 4 BACK OFFICE ARCHITECTURE ............................................................................................................... 4 CHAPTER 2 CONTROLS..................................................................................................................... 5 SYSTEM................................................................................................................................................ 7 Work Station Data Paths ................................................................................................................. 7 Rebuild PLU Database .................................................................................................................... 7 Database Utilities............................................................................................................................ 7 Printer Setup ................................................................................................................................... 8 Modem/PDE/Scanner Setup............................................................................................................. 8 ADMINISTRATION ................................................................................................................................. 9 Site Setup ........................................................................................................................................ 9 Coupon Voucher Types.................................................................................................................... 9 Discount Types.............................................................................................................................. 10 EFTPos Card Types ...................................................................................................................... 10 User Maintenance ......................................................................................................................... 11 Print Pass Cards ........................................................................................................................... 11 Message Server ............................................................................................................................. 12 POS ................................................................................................................................................... 12 Lane Configuration ....................................................................................................................... 12 Idle Message Setup........................................................................................................................ 13 Receipt Header/Footer Format ...................................................................................................... 14 Keyboard Mapping........................................................................................................................ 14 CHAPTER 3 END OF DAY................................................................................................................. 16 CHAPTER 4 HOST.............................................................................................................................. 18 RECEIVE HOST SUPPORT ..................................................................................................................... 20 PROCESS HOST INFORMATION ............................................................................................................. 21 CHAPTER 5 INVENTORY ................................................................................................................. 24 INVENTORY ........................................................................................................................................ 26 Inventory Master – Top Half.......................................................................................................... 27 Inventory Master – Bottom Half..................................................................................................... 28 General Tab .................................................................................................................................. 28 Pricing Tab ................................................................................................................................... 28 Rules Tab ...................................................................................................................................... 29 Purchasing Tab ............................................................................................................................. 29 APN/PLU Tab ............................................................................................................................... 30 Labels Tab .................................................................................................................................... 30 Multipacks Tab.............................................................................................................................. 31 Item Quick Add.............................................................................................................................. 32 Send Changes to Point Of Sale....................................................................................................... 32 Group Price Changes .................................................................................................................... 33 Group Override Changes............................................................................................................... 34 Departments.................................................................................................................................. 35 Sub-Departments........................................................................................................................... 35 Product Groups............................................................................................................................. 36 Vendors......................................................................................................................................... 36 Last Revised: 19/06/2003 Author: Peter Sharper 2 Checkmate User Manual Fast Delete Items........................................................................................................................... 37 Recycle Item Numbers ................................................................................................................... 38 PURCHASING ...................................................................................................................................... 38 Purchase Orders ........................................................................................................................... 38 Process Receivables – Invoice Entry .............................................................................................. 39 Generate Automatic Purchase Orders............................................................................................ 40 Recalculate Reorder Levels............................................................................................................ 40 STOCK T AKE ...................................................................................................................................... 40 Stock Level Adjustments................................................................................................................. 40 Process PDE Stocktake.................................................................................................................. 41 Process Manual Stocktake ............................................................................................................. 41 PDE................................................................................................................................................... 42 Import Data from PDE .................................................................................................................. 42 Shelf Verify.................................................................................................................................... 42 Activate Lines................................................................................................................................ 43 CHAPTER 6 REPORTING ................................................................................................................. 44 REAL TIME ......................................................................................................................................... 46 Gross Profit Reports...................................................................................................................... 46 Specific Product Analysis .............................................................................................................. 47 Sales Exception Report .................................................................................................................. 47 Top 100 Product Ranking .............................................................................................................. 48 Tracking Flag Hit Rate Report....................................................................................................... 48 Finalise Totals by Lane/Cashier Report ......................................................................................... 49 Electronic Journal Selection.......................................................................................................... 50 Lane/Cashier Statistics .................................................................................................................. 50 Cashier Status ............................................................................................................................... 51 Hourly Activity .............................................................................................................................. 51 Real time date availability ............................................................................................................. 52 END OF DAY ....................................................................................................................................... 52 Reprint Logs.................................................................................................................................. 52 Review EFTPos Log ...................................................................................................................... 52 Un-archive Sales Journal .............................................................................................................. 53 RECONCILIATION ................................................................................................................................ 53 Finaliser Journals ......................................................................................................................... 53 Back Office Loans and Pickup Journal........................................................................................... 54 Daily Reconciliation...................................................................................................................... 54 Banking Summary ......................................................................................................................... 55 Reconciliation Analysis ................................................................................................................. 55 Reconciliation Summary ................................................................................................................ 55 SALES ................................................................................................................................................ 56 INVENTORY ........................................................................................................................................ 58 APPENDIX ........................................................................................................................................... 63 SEARCHING .....................................................................................ERROR! BOOKMARK NOT DEFINED. Description Search........................................................................................................................ 65 Permuted Search ........................................................................................................................... 65 SEND CHANGES/COMMAND TO POS.................................................................................................... 67 Send Command ............................................................................................................................. 67 Send Changes................................................................................................................................ 67 GLOSSARY ......................................................................................ERROR! BOOKMARK NOT DEFINED. USEFUL HINTS .................................................................................ERROR! BOOKMARK NOT DEFINED. Last Revised: 19/06/2003 Author: Peter Sharper 3 Checkmate User Manual Chapter 1 Back Office Introduction Back Office is the hub of all operations of the Checkmate system. Back Office Architecture The back office architecture is accessed by five function buttons. From here you can access ‘System Control’, ‘Reports and enquires’, ‘Host Support’, ‘Inventory Inventory Maintenance’ and ‘End of Day’ routines. The status bar displays Network Disk usage and Local Disk usage. Back Office Functionality Current Time and Date Status Bar Last Revised: 19/06/2003 Author: Peter Sharper Exit and Clipboard 4 Checkmate User Manual ` Chapter 2 Controls The purpose of the controls window is for your Checkmate technician to configure your system. This chapter is separated into options you can use, and those for technician use only. Due to the technical nature of some options you can seriously alter your system by incorrectly altering them. Take note at the start of each section to see if it is safe to use without a Checkmate technician. Click Here Last Revised: 19/06/2003 Author: Peter Sharper 5 Checkmate User Manual List of Buttons Work Station Data Paths – Checkmate technician use only. This is a list of paths to directories used by CheckMate. Repair Damaged Database – Checkmate technician use only. Printer Setup – Checkmate technician use only. These values configure your printers for CheckMate. Modem setup – Checkmate technician use only. These values handle CheckMate’s interaction with your modem, scanner & PDE. User Administration – From here you can add, modify or delete users for Point of Sale. Message Server Administration – This is where you configure your message server for sending remote messages to the Point of Sale. Site Administration – From here you can customise Checkmate Back Office to your store, add passwords, configure End of Day and set up purchase orders. Keyboard Mapper – Allows you to modify your keyboard layout or add new keys & functions. Idle Message Setup – You can set your screen saver message here. Lane Configuration – Contains individual configurations for each POS terminal. Send Command to Point of Sale – Relays changes made on Back Office to the POS terminals. Last Revised: 19/06/2003 Author: Peter Sharper 6 Checkmate User Manual System Work Station Data Paths This Section is only to be used by or on direct advice from a Checkmate technician. Access Work Station Data Paths Step 1: System/Workstation Data Paths or by quick button. Shared Database Directory: Path to shared directory location. Shared Message Directory: Path to shared message files location. Host Download Directory: Path to where the host puts all downloads. Local Application Directory: Path where the directory Checkmate is located. Back Office Snapshot Directory: Path where the backups are located. Rebuild PLU Database This Section is only to be used by or on direct advice from a Checkmate technician. Access Rebuild PLU Database 1. System/Rebuild PLU Database Database Utilities This Section is only to be used by or on direct advice from a Checkmate technician. We strongly suggest that you backup your databases whenever they are altered, doing so will reduce the need for database repairs. If repairing a database ensure no users are logged into Point of Sale, and all other Back Office functions should be closed before starting. Access Database Utilities 1. System/Database Utilities or by quick button. Last Revised: 19/06/2003 Author: Peter Sharper 7 Checkmate User Manual Printer Setup If installing a new Back Office printer, the printer must be installed onto the computer first (usually by cd-rom included with printer). It can then be selected from the Printer Setup window. If unsure how to install a printer please seek advice from a Checkmate Technician. Access Printer Setup 1. System/Printer Setup Modem/PDE/Scanner Setup This Section is only to be used by or on direct advice from a Checkmate technician. Configuration options for Com (Communication) Devices. Each device can be configured by selecting the different tabs. Access Modem/PDE/Scanner Setup 1. System/ [option] Setup or quick button. Script File: The location of the script file. Port Number: The com port number for the coms device. Data bits: The number of data bits for the coms device. Parity: Set the parity level for the coms device. Stops Bits: Setting for the coms device. DTR enabled: Enable or disable DTR. RTS enabled: Enable or disable RTS. Protocol: Set protocol for the coms device. Speed: Set the baud rate for the coms device. Last Revised: 19/06/2003 Author: Peter Sharper 8 Checkmate User Manual Administration Site Setup In site setup up, there are two tabs that should only be altered with assistance from a Checkmate technician. Access Site Setup 1. Administration/Site Setup Personalisation Tab 1. Enter Site Name and ABN number. 2. Change Site Name by selecting different fonts, size, bold or italic. 3. Additional text usually has site address and support phone number. General Tab This Section is only to be used by or on direct advice from a Checkmate technician. End of Day Tab This Section is only to be used by or on direct advice from a Checkmate technician. Purchase Orders Tab Supply & Delivery information for generating purchase orders. Coupon Voucher Types From here you can add, modify or remove all store coupons and vouchers. Access Coupon Voucher Types 1. Step 1: Administration/Coupon Voucher Types. Add Coupon Voucher 1. Enter coupon type in text box. 2. Select if change should be given on a purchase that doesn’t use the full amount of a coupon. 3. Press Add. Coupon should appear. Modify Coupon Voucher 1. Select coupon type. 2. Modify coupon type or allow change selection. 3. Press Modify. Last Revised: 19/06/2003 Author: Peter Sharper 9 Checkmate User Manual Remove Coupon Voucher 1. Select coupon type. 2. Press Remove. 3. Confirm if you want to remove coupon. Discount Types From here you can add, modify or remove all store discounts. Access Discount Types 1. Administration/Discount Types. Add Discount Voucher 1. Enter discount type in text box. 2. Enter discount value in percentage. 3. Press Add. Discount should appear. Modify Discount Voucher 1. Select discount type. 2. Modify discount type or allow discount amount. 3. Press Modify. Remove Discount Voucher 1. Select discount type. 2. Press remove. 3. Confirm if you want to remove discount. EFTPos Card Types From here you can add, modify or remove all EFT card names. Access EFT Card Types 1. Administration/EFT Card Types. Add EFT Card Name 1. Enter card name in text box. 2. Select card type. 3. Press Add. Card name should appear. Modify EFT Card Name 1. Select card name. 2. Modify card name or card type. 3. Press Modify. Remove Discount Voucher 1. Select card name. Last Revised: 19/06/2003 Author: Peter Sharper 10 Checkmate User Manual 2. Press remove. 3. Confirm if you want to remove discount. User Maintenance From here you can add, modify or remove User accounts, passwords and access levels. Access User Maintenance 1. Administration/User Maintenance. Add User Maintenance 1. Enter user logon id in text box. 2. Enter full name in text box. 3. Enter pin number in text box. (1 – 4 numbers, Cannot Start with 0) 4. Select user type. 5. Press Add. User should appear. Modify User 1. Select user. 2. Modify details. 3. Press Modify. Remove User 1. Select user. 2. Press remove. 3. Confirm if you want to remove discount. Log User Out 1. Select user. 2. Press log user out. User should be logged out. Print Pass Cards From here you can print pass cards for each user. The print out will include the persons name and a barcode used to login. Access Print Pass Cards 1. Administration/Print [option] Pass Cards. User Cards Tab 1. Select one or more users. 2. Press Print. Pass cards are printed. Supervisory Cards Tab This function will print three supervisor pass cards for each different password that has been defined, along with a list of the lanes that it will work on. Last Revised: 19/06/2003 Author: Peter Sharper 11 Checkmate User Manual 1. Press Print. Pass cards are printed. Training Cards Tab This function will print three training pass cards. You may prefer to control training mode by assigning training mode security levels to new operators in the User Administration screen. 1. Press Print. Message Server The Message Server is a program which runs a lot like an e-mail server on the Internet; it allows the sending of messages through the Network. This can be handy if you have to pass a message onto one of your staff, if you don't have the time to run around your shop. You can send a message through this server directly to their POS. Access Message Server 1. Administration/Message Server. Status - This send a query to the Message Server, if it is working the server will reply with an OK message Start – Straightforward – Starts the server. Stop – Straightforward – Stops the server and removes message queue. POS Lane Configuration The Lane Configuration Tool holds the setup information for your lanes. It is recommended that if you are unaware of what an option does, don’t change it. This menu contains all the configuration data for your lanes’, if the data is incorrect the lane will not operate. Remember to update changes to POS when done. Access Lane Configuration Step 1: POS/Lane Configuration Printer/Scanner/Scale/EFTPos/Pod Tab This Section is only to be used by or on direct advice from a Checkmate technician. This will set up the Printer for the lane which is selected. 1. Select Lane number. 2. Select [device] type. 3. Enter port, data bits, parity, stop bits, DTR enable, RTS enable, protocol and speed. Last Revised: 19/06/2003 Author: Peter Sharper 12 Checkmate User Manual Security Tab From here you can set the supervisor and shutdown passwords. 1. Enter Supervisor/Shutdown password. Templates Tab Using the templates that you have already designed and saved, you can select to use them from this screen. 1. Use the drop down menu to select template. 2. If template needs to be edited, press Edit. Rounding Tab The rounding of cash and vouchers are easily configured from this tab. EFTPos & Cheques are not rounded. Press update when you have finished your changes. Misc Tab By selecting the check boxes on this screen, you can optimise cashiers display for monochrome, cheque and voucher validation, allow change or cash out on cheques, opening of cash draw on cashier log out or change, prevent discounts being applied to items already reduced and change between a single or dual cashier draw. Receipts Printing of receipts can be set to during sale, at end of sale and on request only. Receipt mode can be set to thirty or forty columns. Idle Message Setup During the working hours of the day, it may not be required to have all the lanes open at once, while the lanes aren't being used you can display a message across the screen. (E.g. Welcome to My Store, Please come again Soon) Access Idle Message Setup 1. POS/Idle Message Setup Recall Settings From: Get all ready set settings from another POS. Apply: Everything is OK, click to save settings. Message Display Style: Choose the style of message. None means no message, static means message doesn’t move and scrolling means message will scroll along the screen. Simulation: Simulates what will appear on the POS monitor. Last Revised: 19/06/2003 Author: Peter Sharper 13 Checkmate User Manual Delays: Select the delay for the text. Commencement delay means the time the POS has to be idle until the message appears, and Inter-character delay means how many milliseconds between each character. Apply To The Following Lanes: Highlight the lanes which you want the settings to take effect. New Idle Message Setup 1. Select lanes that are being changed. 2. Select Message Display Style. 3. Enter Message in text box. 4. Select Commencement Delay value. 5. Select Inter-character delay value. 6. Press Simulate to see preview. Press Close. 7. If correct press Apply. Idle Message from another lane 1. Select lane from ‘recall settings from’. 2. Make any changes as required. 3. Press Simulate to see preview. Press Close. 4. If correct press Apply. Receipt Header/Footer Format The receipt header and footer designer is like any other editor. Some differences are that you can insert some predefined values, and the capability to preview what the receipt will look like. Each receipt has allowed 15 lines to be designed by you. Access Receipt Header/Footer Designer 1. POS/Receipt Header/Footer Designer Keyboard Mapping This Section is only to be used by or on direct advice from a Checkmate technician. Last Revised: 19/06/2003 Author: Peter Sharper 14 Checkmate User Manual Keyboard mapping is required by the POS. To understand what this does you have to understand basically how a keyboard works. Every key on the keyboard has its own unique (ASCII) code. When you press a key the computer is sent the unique code, and interprets this code to know what key you pressed. With this menu you can set up your POS keyboards, add remove or change keys and add your most common items to a “quick-key”. To change keys it’s recommended you refer to a keyboard template (contact Lynx if required) which is a printout displaying what code each key will send. Access Keyboard Mapping 1. POS/Keyboard Mapping Scan Code: This is the code (refer to template) ie. Code 97 on your template will be Scan Code 97 in the menu. Function: If you click on this box a drop down box will appear with the functions you can assign the key. Supervisor: Wether Supervisor access is necessary to use this key. Data: Additional data to be sent with the keypress, ie. If Function is FAST_PLU then the data would be the item number of the product you want the key to sell. Last Revised: 19/06/2003 Author: Peter Sharper 15 Checkmate User Manual Chapter 3 End of Day To finalise your store for the day, an End of Day is required. This processes the information from POS and checks that no information was missed during the day of trade then collates the information in the sales database and prepares the database for the next day of trade. It also updates the History files to allow reports to be generated. An End of Day should be run at the completion of each day. However if you do forget to process an End of Day it can be processed at a later date. To process a previous EOD set the EOD date back to the relevant date then run your EOD. There is a time-limit on how long an EOD can be delayed, this is user configurable but the default is 7 days, after that you will lose any data that has not been finalised. Day procedure. Click Here This will bring up End of day Window. Last Revised: 19/06/2003 Author: Peter Sharper 16 Checkmate User Manual Requirements for End of Day • • • • Ensure no cashiers are logged onto the tills out the front. During EOD your system is not active, POS will not work and your store cannot trade, run EOD outside of trading hours. Back Office work completed, you will not be able to use your system while your End of Day is running. End of Day can’t be done on a Back Office, it is run from the server. The EOD button on your Back Office will be disabled, if you click on End of Day and nothing happens, your on the wrong computer. If you need to find out which computer is your Server, please have a look at ‘A brief run down of your system’. Perform End of Day 1. 2. 3. 4. Click on Night time button. A box will appear, enter current trading day and then next trading day. Press continue End of day will proceed. The end of day log will appear in a window as the process runs. Print End of day log Click on Printer button. Last Revised: 19/06/2003 Author: Peter Sharper 17 Checkmate User Manual Chapter 4 Host The Host window is where you receive and process the Host information. Your host file consists of the information relating to the changes to items within your store, this information which will be downloaded on a weekly base and imported into your store. Click Here Through the quick buttons you can download and process the host files. Last Revised: 19/06/2003 Author: Peter Sharper 18 Checkmate User Manual List of Buttons Host: Dials in and receives host file Fault Button: This button is only to be used under direct instruction from an Checkmate technician. Fault Button: This button is only to be used under direct instruction from an Checkmate technician. Keyboard: Brings up edit host file window. Exit Keyboard: Exits edit host file window. Toggle Current Item: Firstly select the item you wish to toggle for processing or not, and click this button cycle through a tick or a cross. Accept all items in this section: If you wish to select all items for import in each individual section, click this button to put the green tick infront of every change. Reject all items in this section: If you wish to reject all items for import in each individual section, click this button to put the red cross infront of every change, please keep in mind doing this may be in breach of your franchise agreement. Toggle bookmark on selected item: A host file can be extremely large and contain over 3000 changers in one section alone, you may wish to view3 each of these and make sure you wish to take them, since this is a lengthy process you can set a bookmark and recall back to it at a later time. Go to next bookmark: If you use a bookmark during the editing of your hostfile, use this button to automatically go to the next bookmark inside of the hostfile. Go to previous bookmark: If you use a bookmark during the editing of your hostfile, use this button to automatically go to the previous bookmark inside of the hostfile. Last Revised: 19/06/2003 Author: Peter Sharper 19 Checkmate User Manual Print current section: If you wish to have a paper copy of all the changes within a section, click this button to send the information to the printer. Process immediately: You have two ways of processing your hostfile, one being letting it all process over night with the end of day procedure, or if needs be you can process the hostfile information during the day while your store is still trading. Host Information The file is a text based document, tailor made to suit your store’s items. Inside this file you will have the following information: • Deletions: Items that are to be range coded for DELETE, and set to Inactive in store and warehouse. • Price Changes: This is where prices on certain items both being buy and sell pricing will be raised. • Advertised Promotions: These are promotions which are franchise specific. • Price Decreases: This is where prices on certain items both being the buy and sell pricing, will be lowered. • Temporary Price Reductions: TPR promotions are a requirement by most franchises, these are monthly promos. • First time buys: Any new item to your store, which you haven’t purchased within 6 months, will be added from this section. • New Lines: New lines are a way of keeping your host file up to date, if a new item is added, it will be sent to your store weather it’s active or inactive inorder to keep an up to date file. • Other changes: Other changes is basically anything which doesn’t fall into the above categories, anything from description changes, to status changes will be found inside here, you will need to accept all of these. Receive Host Support At the end of day the Back office will start importing the information into your stores database files. Please keep in mind when we say importing we do not mean into your back office inventory file and not into the point of sale. This is done later once you have edited your host file. 1. Click Host Button on main. 2. The check mate terminal will appear. 3. Click on the phone button. This will then start the automatic procedure of dialling in and retrieving your host file (You will be able to view the process on your screen). Last Revised: 19/06/2003 Author: Peter Sharper 20 Checkmate User Manual 4. Once this process is finished, a pop up screen should appear saying ‘1 host support file successfully imported’. Click OK if everything looks correct. 5. Click Exit Button. Process Host information 1. Click keyboard button. 2. From this screen we first check that all the information has been received. Click on each tab (price changes etc) and have a look quick look at the changes. 3. If you require a printed copy of what was in the host click on one tab at a time and click the printer icon section. 4. You have the option of rejecting any changes you feel appropriate. Ensure this is done before printing labels or talkers. 5. To reject a change from any field. Click on the item you wish to reject. Then go to the toggle button and click. It will put a red cross next to the item. Click it again and it will be active again with a green tick. 6. To reject an entire field, click on the appropriate field, for example TPR’s, then click on the big red cross. All the items in that field will now have a red cross next to them. If you want to activate them again click the big green cross. All items in that field will now have a green tick next to them. After any adjustments, exit from screen and go into labels. a. You must print out price changes, price decreases and first time labels. b. You must put up all the increase labels before the end of day is run. c. Put price decrease to one side, ready to be tomorrow. d. Put first time buy tickets up at your leisure. 7. Close out of labels and talkers and return to Host Support screen. 8. At the bottom of this screen is an option to suspend changes. Price changes and price decreases come through from the host suspended (they have an X in this box). a. For (increases) price changes you must take the X out of the box after you put up your increase labels. The changes will take place at the end of day. (If you are not going to get your increase labels up on the shelf, you can leave them suspended until you have). b. Price decreases must be released the day before you put the labels up (X is to be removed from box). 9. You can suspend promotions and TPR’s for one day only. They will be automatically released with end of day (apart from items you have rejected). 10. Deletions, first time buys, new lines and other changes will be updated automatically during the end of day process. Last Revised: 19/06/2003 Author: Peter Sharper 21 Checkmate User Manual Processing Hostfile There are two ways to process your hostfile within CheckMATE and make it scan at the Point of sale, you will have to work out which one suits your store better, please make sure you have printed all the pending host changes, and get the labels ready. As once they are processed they disappear out of the pending host changes section. Process with End of Day By far the easiest way to process your hostfile, this way will not tie up your computers during the day, unlike the process immediately which can take a little while depending on the size of your host file. Once you have edited your host file, and everything looks all good. You will then notice down in the bottom left hand corner of the screen, a check box with a cross in it by default labeled: ‘Suspend Tonight’s Application until Further Notice’. Once you remove the cross from this box, the program will then process any changes which have the green approved tick next to it. Any items with a cross next to them have either been rejected by yourself, or have the ‘Disable Host Modification of Buy or Sell’ crossed in the inventory maintenance under the Rules tab. Now it is just a matter of waiting to process your End of Day procedures, and leaving them to process the information over night. By the morning, the Server and BackOffice will have the new changes, and be awaiting the correct date to tick over inorder to start using these changes. Most people do it this way as it requires the least amount of effort on your behalf, and it doesn’t tie the system up during the day, while it is going through the lengthy process of importing a large host file into the database format. Process during day Usually people don’t like using this one, as it can take a long time depending on your computer hardware speed, and it ties the system up during the day when you could be doing work on your BackOffice. However if any problems arise upon importing the host file, you have the ability to process the hostfile immediately during the day time, and get it scanning immediately without the need of any End of Day. By using the process immediately button, See above Button List. You have to firstly take the cross out of the ‘Suspend Tonight’s Application until Further Notice’ and from there then click on the ‘Process Immediately’. You will then see a progress bar appear on the screen, giving your a percentage value of how further it has left to go. You can now see all the new information on your Server/Back Office, but we need to get the information scanning at point of sale. Last Revised: 19/06/2003 Author: Peter Sharper 22 Checkmate User Manual Send Changes to the Point of Sale Sending changes to Point of Sale only need to be done when host file is processed during day. To access the ‘Send Changes to Point of Sale’ screen follow the below steps: • Go to Inventory • Inventory menu tab • Send changes to the Point of Sale When you access this screen, any pricing changes that you have not sent instantly to the Point of Sale, changes done since your last End of Day, and hostfile changes will be displayed in this window. To send them all in one go to the Point of Sale simply click on ‘Send’ a graph bar will then be displayed showing the percentage it is up to. Downloading a previous hostfile From time to time operator error will happen, it could be the host file was erased before being processed, or possibly the operator left everything with a red cross and the host file was processed. When this happens, it is usually easier to dial into your host supplier and download the previous hostfile, from CheckMATE we have allowed to dial in and download the last downloaded host file, there is one more file before that which your support staff can access, however you shouldn’t need to. Keep in mind though however as you download a host file, they all move along the cue, so be careful not to move the file you want to the end and it then gets removed. To access the setup to switch between current hostfile and previous hostfile download follow from the main CheckMATE window: • • • Controls System (Up the Top) Modem Setup... Here you will notice a box with the label: ‘SCRIPT FILE’ next to it on the left, you will then notice that to the right of this box there is a ‘SELECT button. The two files which should appear are as follows: • • To download the current host file highlight ‘FALHOST.SCR’ and click ‘OK’. To download the previous host file highlight ‘LASTWEEK.SCR’ and click ‘OK’. NOTE: The next thing you must not forget to do, if you are downloading the previous host file, DO NOT forget to change it back to the ‘FALHOST.SCR’. Otherwise next week when it comes to download your hostfile, you will be downloading the previous hostfile, and thus receiving the wrong one. Last Revised: 19/06/2003 Author: Peter Sharper 23 Checkmate User Manual Chapter 5 Inventory The Inventory Maintenance window is where you maintain your inventory database file. It contains functions relevant to Inventory, Purchasing and Stocktaking. Click Here Last Revised: 19/06/2003 Author: Peter Sharper 24 Checkmate User Manual List of Buttons Inventory Master Screen – Control Centre for all Inventory Maintenance Item Quick Add – Add items to the inventory database. Group Price – View and modify item groups & ranges. Vendor – From here you can add and modify your vendors. Generate Automatic Purchase – Automated Ordering System Purchase Orders and Receivables – Add and modify vendor invoices. Send Changes to Point of Sale – Sends any changes made to inventory to point of sale. Reports Screen – Reports screen. (Same as Reports from Main Menu) Exit – This will step you back to the Back Office Main Menu. Last Revised: 19/06/2003 Author: Peter Sharper 25 Checkmate User Manual Inventory From this window you can set all the options for each individual item, or change the options for a whole set of. To access the ‘Inventory Master file’ Window, click on quick button or select Inventory/Inventory Master from Menu bar. Click Here Inventory Master Screen is split up into two sections Top and Bottom. Top Half Bottom Half Last Revised: 19/06/2003 Author: Peter Sharper 26 Checkmate User Manual Inventory Master – Top Half The Item / APN / Vendor Reference No. – Enter either of the three in the top box, click on Retrieve and the item will appear on the screen Description – When you select your item, a description of the item will appear here Allocate Next – When there is no Item Number assigned to an Item, you have to assign your own. Clicking here will automatically assign an Item Number to an Item Desc Search –Quick Search by item Description (ie. Coca (Cola), see Desc Search T i l Permuted Search – Advanced & MultipleField Search engine, see Permuted Search Update Update a singular item Range Update Make changes to a range of items. Update POS Immediately – Changes are made on the computer you make them on. They must then be sent to your POS. Click here to update the POS terminals immediately after changing. Last Revised: 19/06/2003 Author: Peter Sharper Sales History Brings up sales history for an item. Labels & Talkers See Separate section 27 Checkmate User Manual Inventory Master – Bottom Half The bottom half is spit into 7 pages that are accessible from the different tabs. General Tab This tab brings up all the general information about an item. From here you can check if an items information is correct, and if not change it. You can also alter the status of an item and if necessary change the WET and GST rate for an item. Pricing Tab Store Override – Store set sale price. Advertised – These prices are controlled by suppliers. Monthly – These prices are controlled by suppliers Usual Price – This is the usual price the item is sold for History Buttons Click here for a history report for the different fields Last Revised: 19/06/2003 Author: Peter Sharper Current Price – This is the current price the item is being sold for. Extend button – Extend the promotion by the a week, four weeks or by a month G.P – This gives a quick comparison between Actual and Target GP. 28 Checkmate User Manual Rules Tab Rules allow you to decide buy & sell price priorities for specials. Default will sell at the lowest marked price. Buy Price Priority Rules – Set by selecting one toggle button. Set Price Priority Rules – Set by selecting on toggle button. Host Modification Rules – set one or both check boxes. Purchasing Tab Preferred/Alternate vendors – Set using drop down list. Purchase options – Set using one or more check boxes. Unit Stock values - Set stock limits. Last Revised: 19/06/2003 Author: Peter Sharper Reordering - Set order limits 29 Checkmate User Manual APN/PLU Tab This screen is used for assigning and un-assigning APN and PLU numbers to a selected item. In most cases the items will come with their own APN / PLU number when the host file is downloaded from FAL. From here you can remove APN / PLU numbers, add new ones, or add multiple numbers. Note that for items without an APN, you will have to assign a PLU number to the item. This can be done from clicking on Allocate New PLU, select the range for the PLU number, then click on Calculate. Labels Tab From here you can set number of shelf labels to be printed, shelf label format, and shelf location for easy reference. Last Revised: 19/06/2003 Author: Peter Sharper 30 Checkmate User Manual Multi-packs Tab From here you can view child items, or can create new child items, or add existing child items and remove child item. As for the example in the figure below, you can double click using the mouse on a child item to find out its pack quantity, pack buy/sell price, and actual and target GP percentages. By clicking on Create new child item, the input box will appear. From here you can change pack quantity, usual sell price, GST rate and current GP percentage. When pressing Add Child button, this new item will be added to inventory. Last Revised: 19/06/2003 Author: Peter Sharper 31 Checkmate User Manual By clicking on Add existing child item, an Inventory item search box will appear, from here you can find the child item and then it can be added. Item Quick Add From the Inventory Maintenance window you can select Inventory/Item quick add from the menu bar, or click on the ‘Item quick add’ quick button. You can add a new item or edit an existing one. Add – Press to add item, set or unset check box to change Update POS. Item Search – you can search for an item to edit by selecting one of these options. Send Changes to Point Of Sale Each time you make a change to an item, you have the option of sending changes to point of sale immediately or hold the change. To send all held changes, select ‘Inventory’ from menu bar and then select ‘Send Changes to Point of Sale’. This will bring up this screen. From here select the change you want to send using the arrow keys and then press ‘Send’. This will send change to point of sale. Last Revised: 19/06/2003 Author: Peter Sharper 32 Checkmate User Manual Group Price Changes From this window you can change the usual buy and usual sell for a group of items. The top screen is used to find all the items you want to change. Search for group 1. Fill in relevant search fields. 2. Press Search. This will bring up all records of items that match you selection criteria. Note: In the Partial Description search field wildcards can be used with the * key. Eg. Searching for Bacardi Breezers by description Breezer will not work as the item does not begin with the word Breezer, however searching for *Breezer will return any items with Breezer anywhere in the description. This type of wildcard search can be slower than a normal search. The search records are colour coded to represent different things. Colour scheme (Background/Letters) Grey/Green: Item has been edited Grey/Red: Item not active Grey/Black: Item active and not been edited Red/White: Actual GP is negative Grey/Yellow: Actual GP is lower than recommended GP, but no below zero Green/White: Actual GP is higher than Recommended GP Change Usual Buy/Sell 1. Use mouse to select usual buy/sell of an item. 2. Using the number pad enter new price. 3. Press Enter 4. Using the colour scheme you can visually see what affect you change has done. 5. When happy with changes press ‘update changes’ main inventory file (server). If you select ‘Update POS Immediately’ check box, it will change PLU as well. Last Revised: 19/06/2003 Author: Peter Sharper 33 Checkmate User Manual Automatic Edit This will do automatic edits to the list of records. 1. Press ‘Automatic Edit’ 2. Select ‘Update Usual BUY Price’ and/or ‘Update Usual Sell Price’ using check boxes. 3. Select options using toggle buttons. If a percentage value is needed, enter in text box. 4. Select/unselect check box to ‘skip edited rows’ or ‘Do not alter if current sell is higher’ 5. Press ‘Update’. Group Override Changes Go to Inventory Dropdown Menu/Group Override Changes From this window you can override the sell price for a group of items for a period of time. Search for group 1. Fill in relevant search fields. 2. Press Search. Override Sell 1. Enter a dollar amount in Override Sell Box. 2. Enter a date value in ‘Override From/Override To’ 3. Press Update Changes. Last Revised: 19/06/2003 Author: Peter Sharper 34 Checkmate User Manual Departments This will display the master list of departments. From this window you can add or modify departments. Access Departments 1. Select ‘Inventory’ from menu bar. Select ‘departments’. Add Departments 1. Enter department field values in text boxes. 2. Press Add Department. 3. If department number is unique, department will be added, if not an error dialog box will appear advising of this. Modify Departments 1. Use mouse to select department. 2. Modify field values into text boxes. 3. Press Modify Department. Sub-Departments From this window you can add or modify sub-departments. Access Sub-Departments Step 1: Select ‘Inventory’ from menu bar. Select ‘sub departments’. Open Sub-Department Step 1: From the drop down list select department using mouse. Step 2: This will display the master list of sub-departments. Last Revised: 19/06/2003 Author: Peter Sharper 35 Checkmate User Manual Add Sub-Departments 1. Enter sub-departments field values in text boxes. 2. Press Add Sub-Dept button. 3. If sub-department number is unique, sub-department will be added, if not an error dialog box will appear advising of this. Modify Sub-Departments 1. Use mouse to select sub-department. 2. Modify field values into text boxes. 3. Press Modify sub-department. Product Groups From this window you can add or modify product groups. Access Product Groups 1. Select ‘Inventory’ from menu bar. Select ‘Product Groups’. Add Product Groups 1. Enter product group field values in text boxes. 2. Press Add Group button. 3. If product group number is unique, product will be added, if not an error dialog box will appear advising of this. Modify Product Groups 1. Use mouse to select product group. 2. Modify field values into text boxes. 3. Press Modify group. Vendors From this window you can add or modify vendors, as well as look at current deals. Access Vendors 1. Select ‘Inventory’ from menu bar. Select ‘Vendor’. Open Vendors 1. From the drop down list select vendor using mouse. 2. This will display the master information on the vendor. Last Revised: 19/06/2003 Author: Peter Sharper 36 Checkmate User Manual Add Vendors 1. Enter vendor field values in text boxes. 2. Press Add vendor button. 3. If vendor number is unique, vendor will be added, if not an error dialog box will appear advising of this. Modify Vendors 1. Modify field values into text boxes. 2. Press Modify vendor. View Current Deals 1. Use mouse to press ‘Current Deals’ tab. Fast Delete Items From this window you can delete items from list. Access Fast Delete Items 1. Select ‘Inventory’ from menu bar. Select ‘Fast Delete Items’. Add items to List 1. Retrieve item using item No/APN-PLU/Vendor Ref. 2. Press Add to list. 3. Item added to list. Add items to list via Description search 1. Press Description search. 2. Start typing item description (Again wildcards can be used with the * key). At any time select item from list and press select. 3. Item added to list. Add items to list via Permuted Search 1. Press permuted search. 2. Fill in relevant search fields. 3. Press Search. 4. For all items that you don’t want added to list, change status to reject. 5. Press close. 6. This will add all non rejected items to fast delete list. 4. From this list you can add more items or clear items from list. 5. When list is complete, press update. 6. Items are deleted. Last Revised: 19/06/2003 Author: Peter Sharper 37 Checkmate User Manual Recycle Item Numbers The running of this utility is optional and only needs to be used if item numbers belonging to deleted lines need to be re-used for new lines. Please note that this utility removes all history associated with the item number being recycled. To recycle an item number three conditions must be met: Item must be inactive in store and warehouse, current item status has not changed for at least the number of weeks specified and item range code is set to delete. Access Recycle Item Numbers 1. Select ‘Inventory’ from menu bar. Select ‘Recycle Item Numbers’. Recycle Item Numbers 1. Press Recycle 2. If they is item numbers that quality to be recycled. Press ok confirmation screen. Purchasing Purchase Orders Views All Pending & Completed Purchase Orders & Invoices Access Purchase Orders 1. Select ‘Purchasing’ from menu bar. Select ‘Purchase Orders’. Last Revised: 19/06/2003 Author: Peter Sharper 38 Checkmate User Manual Process Receivables – Invoice Entry From here you can add new invoices or modify old invoices. Create New Invoice 1. Press New Invoices. 2. Enter Vendor Name 3. Enter Invoice Date 4. Enter Purchase order number if applicable 5. Enter Vendor invoice number 6. Enter Invoice Total amount including GST, excluding freight and administration. 7. Enter fees and freight amount per carton including GST. 8. Select check box if invoice will include GST in the line total cost. 9. Press Proceed. Enter New Invoice 1. Enter vendor reference of first item on invoice. Press Enter. 2. Enter carton quantity. Press Enter. 3. Enter price for items. Press Enter. 4. If the buy price for an item has changed you will be asked if you want to change its sell price and that of the child items. A separate box will appear displaying the child items. Make changes and then accept. 5. Repeat steps until all items are completed. Commit Invoice 1. Press Save. 2. Press Commit. 3. Press Yes to accept order. Last Revised: 19/06/2003 Author: Peter Sharper 39 Checkmate User Manual Generate Automatic Purchase Orders Will automatically generate purchase orders based on your minimum and maximum stock levels. These levels can be set individually from the inventory master menu or can be done automatically (see Recalculate Reorder Levels). To Access Automatic Orders 1. Click on Purchasing/Generate Automatic Purchase Orders 2. Select Specific Vendor, Entire Inventory or a Permuted Search item list. 3. Select Scope 4. Select to Print or Not Print Report 5. Click on Generate Order Recalculate Reorder Levels Will automatically generate reorder levels for your inventory. Reorder levels can be applied to a list of items from the permuted search or for your entire inventory. If using the option to Set to a specific number of days stock requirements or reorder days stock requirements ensure you have enough history to accurately calculate necessary stock levels. To Access Recalculate Reorder Levels 1. Click on Purchasing/Recalculate Reorder Levels 2. Select from Permuted Search list or from Entire Inventory 3. Select wether to modify Min or Max level, or both. 4. Select Calculation Method 5. Click Begin Recalc Stock Take Stock Level Adjustments This is best used when a manual stock take is done. Going through each item you can change its stock quantity. Access Stock Level Adjustments 1. Stocktake/Stock Level Adjustments 2. Search for item or add Item, APN/PLU, vendor reference. 3. Press Retrieve. This will bring up stock on hand value for item. 4. Enter Adjustment quantity. 5. Select reduce, increase or exact. 6. Press adjust. Change log appears. Last Revised: 19/06/2003 Author: Peter Sharper 40 Checkmate User Manual Process PDE Stocktake Access Stock Level Adjustments 1. Inventory/stocktake/process PDE stocktake. 2. Enter password. Import PDE file 1. Make sure PDE is connected to computer. 2. Press PDE import. 3. Select Stocktake on PDE import type. 4. Select Import. 5. Save File. Process PDE stocktake 1. Select either add/overwrite/remove stock. 2. Press process. 3. Select PDE file to access. Press ok. 4. Product lines processed changes to show progress. 5. Press Yes/No to delete from. Process Manual Stocktake Access Manual Stocktake 1. Inventory/stocktake/process manual stocktake. 2. Enter password Create new stocktake list 1. Press New 2. Enter stock take file name. Naming convention is [stk(date).stk]. e.g. stk010102.stk. Add section to stocktake list From this screen we will choose what stock will be included into the stocktake. 1. 2. 3. 4. 5. Click on Auto generate button. Use the filter items to select item/items to stocktake. Use the section grouping to group stock take items. Press Generate. These stock items will be added to stocktake list. Last Revised: 19/06/2003 Author: Peter Sharper 41 Checkmate User Manual Print Stocktake list 1. Click on print button. 2. Select stock count sheets from report type. 3. Select either entire stocktake or current section. Enter Stocktake figures 1. Double click on section name. 2. Enter stock amount for each item and press enter. Commit Stocktake 1. Press Commit button. 2. Select commit method. 3. Press Commit to inventory Button. 4. When finished the total of records processed will be displayed. Press ok. PDE Import Data from PDE Access Import Data from PDE 1. Inventory/PDE/Import Data from PDE Import PDE file 1. Make sure PDE is connected to computer. 2. Press PDE import. 3. Select PDE import type. 4. Select Import. 5. Save file. Shelf Verify You can use shelf verification to check on item discrepancies, and print a list out of them. This information is very useful in keeping actually shelf prices current with registry prices. Access Shelf Verify 1. PDE/Shelf Verify. Process File 1. Press Process File 2. Select weather to compare against usual or current price. 3. Find file to process. 4. Press ok. Last Revised: 19/06/2003 Author: Peter Sharper 42 Checkmate User Manual Filter List 1. From drop down list select filter. This will change the list below. Print Preview 1. Process File 2. Filter File 3. Press Print Preview Activate Lines You can use activate lines window to select a PDE file and to active lines or set tracking flags. Access Activate Lines 1. PDE/Activate Lines Look at File 1. Press Select File 2. Pick File. Press ok. 3. Press Filter. Select Filter 4. Window lists items set to current filter. Activate inactive lines 1. Select File 2. Select filter to look at items 3. Press Activate inactive lines Last Revised: 19/06/2003 Author: Peter Sharper 43 Checkmate User Manual Chapter 6 Reporting The Reports and Enquires Window is where you can query all the history and real-time data from your store to generate informative reports. You can call up reports on Real Time data, EOD, Reconciliation, Sales & Inventory Click Here Last Revised: 19/06/2003 Author: Peter Sharper 44 Checkmate User Manual List of Buttons Real Time Department GP Analysis – Displays all the department sales for one day, and the information on the GP. Real Time Finaliser Status – Displays the data from a POS terminal on a selected date. (Subject to Real Time Data Availability) Real Time Cashier Statistics – Displays all actions taken by a selected Cashier Hourly Activity - Displays information on the total number of items, customers and sales going through the POS terminal as well as averages. Real Time Data Availability – Displays the total amount of data available (number of transactions) for one day. Loan and Pickups – Used for transferring money to or from a register. Reconciliation – Allows comparison between $ sold and $ in till, by cashier or lane. Bank Summary – Report of the total amount of money which went through your store for the selected date. Department Period Analysis – Displays information on sales from a selected department for a selected period of time. Department Comparison – Display information on sales for all the departments and allow comparisons the different departments. Price Exception Report – Allows you to query your databases for price exceptions.. (eg. Display Beer where Usual Buy is Greater than Usual Sell) Last Revised: 19/06/2003 Author: Peter Sharper 45 Checkmate User Manual Real Time This report window is used for displaying recent sales; it will also display information on the GP% rate. Gross Profit Reports Gross Profit reports can be broken down into department, sub-department, product group, vendor, cashier, lane, tracking flag and Item. Access Gross Profit Reports 1. Real Time/GP/Department or Press Real Time GP analysis quick button. Generate Report 1. Choose the date range. Data from the date range will be used for report. 2. Choose Report Type, and if necessary Filter type. 3. Select a toggle button which will be used to base your report on. 4. Press Generate report button. Graph Report 1. Generate Report. 2. Press Graph button. 3. Select column to graph on. Press Graph. 4. Select type of graph, print if need be. Save Report 1. Generate Report. 2. Press save button. 3. Select drive to save to. Print Report 1. Generate Report. 2. Press print button. 3. Select printer. Press ok. 4. Review Report, and then press print. Press ok. Last Revised: 19/06/2003 Author: Peter Sharper 46 Checkmate User Manual Specific Product Analysis Specific Product Analysis report is a report on an individual item over a period of time. The report includes buy price, sell price, quantity sold, hits, dollar sales, dollar cost, gross profit dollar value, gross profit percentage and recommended percentage. Access Specific Product Analysis 1. Real Time/Specific Product Analysis. Generate Report 1. Choose the date range. Data from the date range will be used for report. 2. Select item by using Item number, apn/plu number, vendor reference, description search or permuted search. 3. Press generate report button. Save Report 1. Generate Report. 2. Press save button. 3. Select drive to save to. Print Report 1. Generate Report. 2. Press print button. 3. Select printer. Press ok. 4. Review Report, and then press print. Press ok. Sales Exception Report Sales exception report is used to look at transactions types, discounts and other functions cashiers use. Access Exception Report 1. Real Time/Sales exception report. Generate Report 1. Choose the date range. Data from the date range will be used for report. Last Revised: 19/06/2003 Author: Peter Sharper 47 Checkmate User Manual 2. Choose all cashiers or choose a particular cashier. 3. Choose transaction type. 4. Press Preview. Print Report 1. Generate report. 2. Press print button. Top 100 Product Ranking Tracking Flag Hit Rate Report Access Tracking Flag Hit Rate Report 1. Real Time/Tracking Flag Hit Rate report. Generate Report 1. Choose the date. 2. Press generate report button. Graph Report 1. Generate Report. 2. Press Graph button. 3. Select column to graph on. Press Graph. 4. Select type of graph, print if need be. Save Report 1. Generate Report. 2. Press save button. 3. Select drive to save to. Print Report 1. Generate Report. 2. Press print button. 3. Select printer. Press ok. 4. Review Report, and then press print. Press ok. Last Revised: 19/06/2003 Author: Peter Sharper 48 Checkmate User Manual Finalise Totals by Lane/Cashier Report In this section we cover finalising totals by lane and cashier. The steps are exactly the same as each other. Access Finalise Totals by Lane/Cashier Report 1. Real Time/Access Finalise totals by lane or. Access Finalise totals by cashier. Generate report 1. Select Date. You can check available report dates, by press the clock. 2. Select all lane/cashiers or one. 3. If you would like a break down of sub payment methods leave summary unchecked, if not check summary check box. 4. Press generate button. Graph Report 1. Generate Report. 2. Press Graph button. 3. Select column to graph on. Press Graph. 4. Select type of graph, print if need be. Save Report 1. Generate Report. 2. Press save button. 3. Select drive to save to. Print Report 1. Generate Report. 2. Press print button. 3. Select printer. Press ok. 4. Review Report, and then press print. Press ok. Last Revised: 19/06/2003 Author: Peter Sharper 49 Checkmate User Manual Electronic Journal Selection Searches through the electronic journal displaying details of all transactions in real time. Access Electronic Journal Selection 1. Real Time/Electronic Journal Selection or [ctrl] J. Generate report 1. Select Date, cashier, lane. 2. If searching using sale range, check box, and enter sale range in dollar values. 3. If searching using time range, check box, and enter time using 24hour time. 4. Select sale type. 5. Press Search. Looking at transaction 1. Double click on a transaction to bring up the transaction window. 2. Use arrow keys to scroll current sale lines; insert brings you to previous transaction; delete brings you to next transactions; and esc to exit. Save Report 1. Generate Report. 2. Press save button. 3. Select drive to save to. Print Report 1. Generate Report. 2. Press print button. 3. Select printer. Press ok. 4. Review Report, and then press print. Press ok 5. Lane/Cashier Statistics Reports All Lane or Cashier statistics for Access Lane/Cashier Statistics 1. Real Time/Electronic Journal Selection. Generate report 1. Select Report Date. 2. Press generate report button. Last Revised: 19/06/2003 Author: Peter Sharper 50 Checkmate User Manual Graph Report 1. Generate Report. 2. Press Graph button. 3. Select column to graph on. Press Graph. 4. Select type of graph, print if need be. Save Report 1. Generate Report. 2. Press save button. 3. Select drive to save to. Print Report 1. Generate Report. 2. Press print button. 3. Select printer. Press ok. 4. Review Report, and then press print. Press ok. Cashier Status Reports which cashiers are logged into the system and the lane number. Access Cashier Status 1. Real Time/Cashier status Hourly Activity This report looks at a date, and then gives a breakdown of sales, items and customers for each hour of the day. Access Cashier Status 1. Real Time/Hourly Activity. Generate Report 1. Select Date. 2. Press Generate report. Graph Report 1. Generate Report. 2. Press Graph button. 3. Select column to graph on. Press Graph. 4. Select type of graph, print if need be. Last Revised: 19/06/2003 Author: Peter Sharper 51 Checkmate User Manual Save Report 1. Generate Report. 2. Press save button. 3. Select drive to save to. Print Report 1. Generate Report. 2. Press print button. 3. Select printer. Press ok. 4. Review Report, and then press print. Press ok. Real time date availability Reports the availability of transaction data for real-time reports. 1. Access Real Time Date availability End of Day Reprint Logs All of these reprints are derived from the log entries for that day. The three main log reprints are end of day, host import and host application. All of the windows are the same. Access Logs 1. End of Day/Reprint [option] log. Generate reprint 1. Select date. 2. Select type of log file. 3. Press Preview. Print log 1. Generate log. 2. Press print button. Review EFTPos Log This will reprint the EFTPos log file for that day. Access EFTPos log 1. End of Day/Review EFTPos Log. Last Revised: 19/06/2003 Author: Peter Sharper 52 Checkmate User Manual Generate log 1. Select Date. 2. Press Generate button. Print log 1. Generate log. 2. Press print button. Un-archive Sales Journal This will unzip your archived sales journal for you to save. Access Un-archive Sales Journal 1. End of Day/Unarchive sales journal. Using Un-archive Sales Journal 1. Enter Sales Journal Date. Press ok. 2. Save archive. Press ok. Reconciliation Finaliser Journals When a cashier accidentally enters a sale as a wrong transaction type this can be rectified by using the finaliser journal. Access Finaliser Journals 1. Reconciliation/Finaliser Journals Create Journal 1. Enter Date. 2. Enter Cashier, lane. 3. Enter amount. 4. Select Transaction type to deduct from. 5. Select Transaction type to add to. 6. Add any comment if need be. 7. Press Create. Last Revised: 19/06/2003 Author: Peter Sharper 53 Checkmate User Manual Back Office Loans and Pickup Journal Records cash transfers to or from a lane. Access Back Office Loans and Pickup Journal 1. Reconciliation/Back Office Loans and Pickups Create Journal 1. Enter Trading date. 2. Select Cashier and Lane. 3. Select pickup or Loan. 4. Enter amount. 5. Press Create. Daily Reconciliation Used to compare the money in a lane with the transaction data collected by the lane. If a lane/cashier has a green tick, this means that it has been reconciled. Access Daily Reconciliation 1. Reconciliation/Daily Reconciliation. Reconcile Lane/Cashier 1. Select Reconcile Lane or Cashier. 2. Select Date. 3. Select Reconciling Area. 4. Enter opening cash balance. 5. Enter amounts as counted. 6. Press Reconcile. 7. Press Close, this will prompt you to save. Save all figures where correct. Print Reconciliation 1. Enter Date. 2. Select Reconciling Area. 3. Press Print. Last Revised: 19/06/2003 Author: Peter Sharper 54 Checkmate User Manual Banking Summary From here you can preview or print all reconciliation banking summaries. Access Banking Summary 1. Reconciliation/ Banking summary Generate or Print Report 1. Enter dates to summarise on. 2. Select cashier or lane. 3. Select report type. 4. Press print or preview. Reconciliation Analysis The Reconciliation analysis report compares daily reconciliation over a period of time for one lane/cashier. 1. Select time period to report over. 2. Select either lane or cashier. 3. Select variation type. 4. Press generate report button. Reconciliation Comparison The Reconciliation comparison report compares daily reconciliation over a period of time for more than one lane/cashier. 1. 2. 3. 4. Select time period to report over. Select either lane or cashier. Select variation type. Press Generate report button. Last Revised: 19/06/2003 Author: Peter Sharper 55 Checkmate User Manual Sales Period Analysis Generates reports from history for a designated period, the report can be generated at an Item, Department, Sub-Department, Product Group, Vendor, Cashier and Lane levels. Can also report on any finaliser journals for the period. Comparative Analysis Generates reports at Item, Department, Sub-Department, Product Group, Vendor, Cashier and Lane levels, can be structured Daily, Weekly, Monthly or Yearly and is used to compare sales for different periods. Last Revised: 19/06/2003 Author: Peter Sharper 56 Checkmate User Manual Aged Sales Report Generates reports from history along with data on previous months sales. Permuted Sales Report Generates reports based on a user defined permuted search item list. Promotional Sales Report Generates reports from history on all items sold on promotion for a period, and can be refined by department, sub-department and vendor. Last Revised: 19/06/2003 Author: Peter Sharper 57 Checkmate User Manual Item Sales Ranking Generates a report from sales history displaying your best or worst performing items based on GP%, GP$, Sales $ or Quantity Sold. The report can be further refined by department, sub-department or vendor. Multi-pack Splits Sales Generates a report for a period detailing multipack quantities & sales. Last Revised: 19/06/2003 Author: Peter Sharper 58 Checkmate User Manual Inventory Master Listings Department Master List will display recommended GP for all departments, as well as a break down of gross profit, recommended gross profit, host department number and subdepartment number at sub-department level. Vendor Master List provides vendor number, name, address, phone, fax, and contact for all vendors. Product Group Master List displays product group number, description, and recommended gross profit percent for each product group. Item Promotion History This will show all promotional history on a selected item. It reports on Promotional number, buy start, buy end, buy dollar value, quantity bought, sell from date, sell to date, sell dollar value, and quantity sold for each promotion. Last Revised: 19/06/2003 Author: Peter Sharper 59 Checkmate User Manual Store Price Book By using the permuted search features in this report generator, you can produce a report detailing user-defined items. Item number, description, size, apn, usual buy price, usual sell price, last modified date and vendor for each item will be displayed. Low Margin Items Report Generates a report for items within a specific GP% range. Last Revised: 19/06/2003 Author: Peter Sharper 60 Checkmate User Manual Stock Valuation Report Generates reports detailing department stock values, or the value of an item within a department. Can also be used to identify redundant stock. Prices on/off Report Generates a report detailing the start or end of any promotions for a given day. Promotional Stock Alerts Generates a report on promotional items to alert you to a low stock level. The report can be refined to display at zero stock, less than minimum stock, less than maximum stock or less than a user-specified amount of stock. Last Revised: 19/06/2003 Author: Peter Sharper 61 Checkmate User Manual Override/Promotional Pricing Reports Generates a report on all items currently on promotion detailing its usual buy, usual sell, and all other TPR/Advertised/Override prices for the item. Pricing Exception Report Allows you to query your databases for price exceptions. (eg. Display Beer where Usual Buy is Greater than Usual Sell) On Hand Exception Report Generates a report detailing all items where the amount of the item in-stock is either less than or equal to zero, less than the minimum stock value for that item or greater than the maximum stock value for the item. Can be refined by department & vendor and can include multipack items. Last Revised: 19/06/2003 Author: Peter Sharper 62 Checkmate User Manual Item Detail Exception Report Generates a report detailing all items that are missing selected fields. The report can be refined by department and vendor. Appendix Range Update Before attempting a range update, it is imperative that you understand the process involved. Range update is an extremely useful tool in processing changes to multiple items HOWEVER you must be careful as incorrect operation could cause massive alterations to your stores database files. If your unsure of how to work this utility we recommend calling Lynx support staff for assistance. There are a few steps to the process • • • Your template item Your Permuted search range The selection criteria Your Template Item A template item is an item from your database that is used to base changed to other items from. An item has multiple fields (details), your template item should contain the detail(s) that you wish to apply to your range of items. Simply select the item in your Inventory Master window as normal then click on Range Update. Last Revised: 19/06/2003 Author: Peter Sharper 63 Checkmate User Manual Your Permuted Search Range The next step is to choose the list of items that you want to update. Click on the permuted search button inside the range update window. Refine the search as necessary, items can be rejected from the list by right-clicking on them. When satisfied with the list of items to be changed close the permuted search. The Selection Criteria You now have a list of fields (item details) to choose from, select the fields that you want to copy from your template item to the rest of your item list. For example: Selecting Usual Sell, Vendor and Maximum Stock fields will copy those details from the template item to all other items in your list. All items in your list will then have the same Usual Sell, Vendor and Maximum Stock as your template item. Remember to send the changed to POS for them to have effect at your lanes. Last Revised: 19/06/2003 Author: Peter Sharper 64 Checkmate User Manual Searching Description Search The Description Search window is a great way of finding items quickly; there are four main options in this window. There are two ways to search for an item. Quick Search: Looks for any items that are in your inventory that starts with the letters you have inputted into the text box. Extended Search: Looks for any items that are in you inventory that contains the combination of letters you have inputted into the text box. Incremental Button: This will toggle your search results including and excluding inactive items. Select an item: With the item highlighted click select or double click the item with your mouse. Permuted Search The Permuted Search window is a more advanced search engine, giving you more options to search by. To refine your search results you can use one or many of the options. Partial Desc: Enter partial description. Search will be refined to searching for items that start with the description. Eg EM = EMU. Range Code: Enter the range code. Search will be refined to searching for items that are in the range code. Click ‘SHOW’ to show the range codes. Unit Size: Enter Size. Search will be refined to searching for items of that particular size. EG 375 = 375ML Last Revised: 19/06/2003 Author: Peter Sharper 65 Checkmate User Manual Item No Range, APN Range: Enter the range of an item. Search will be refined to searching for items that are in the range. Eg 900000 – 9999999 will display the items which have an item number between. Same rules apply for APN range. Department: Select a department. Search will be refined to searching for items that are in that department. Eg BEER will display items in the BEER department. Sub Department: Select a department within a department. Search will be refined to searching for items that are in the sub department. Eg BEER – MID STRENGTH will select the MID STRENGTH department within the BEER department. Product Group: Select a group of products. Search will be refined to searching for items that are in the product group. Eg CIGARS will show us a list of all the CIGARS in the store. Vendor: Select the vendor. Search will be refined to searching for items that come from the vendor. Eg ALM will show all items that come from ALM. Promotion No: Enter promotion Number. Search will be refined to searching for items that have the promotion number. Tax Code: Enter tax code. Search will be refined to searching for items in that tax code. Track Flag: Select tracking flag. Search will be refined to searching for item in that tracking flag code. Shelf location: Enter shelf location. Search will be refined to searching for items that are in the shelf location entered. Last Modified: Enter Last Modified Date. Search will be refined to searching for items that have been last modified on that date. Eg 12/03/03. Will show all items that where last modified on the 12th of March 2003. Scaleable: Select Scaleable. Search will be refined to all items that can have to be weighted. Current Promos only: Select Current Promos only. Search will be refined to all items that are on current promos. Active Lines only: Select active lines only. Search will be refined to all items that are active. Inactive lines only: Select active lines only. Search will be refined to all items that are no active. Last Revised: 19/06/2003 Author: Peter Sharper 66 Checkmate User Manual Show Multipack Items: Select show multipack items. Search will extend to add all items in a multipack. Search: Click here to search using selected criteria. Reset Search: Reset all options back to default. Select Item: This will select the item that is highlighted in result list. Toggle All: Will toggle all item status. Send Changes/Command to POS Inventory and control changes are dealt with by different windows. Inventory changes are controlled by the sending changes to POS window, and control changes are controlled by the sending command to POS window. Send Command By selecting a command instruction, you can instruct POS to look at all system configuration changes, send a memo to lane operator, perform an ad-hoc end of day close off, apply mirror database to sales database, wake up and initialize for new day and synchronize POS machines date and time with Back Office. Access Send Command to POS 1. Control/POS/Send Command to POS Send Command 1. Select Command Instruction. 2. Change send option to yes for all lanes that will instruct POS. 3. Press Send. Send Changes Most windows that change details of inventory have a send changes immediately to POS check box, with this checked they is no need to send changes again. But for all the changes that aren’t sent, you can do it from this window. Access Send Changes to POS 1. Inventory/Inventory/Send changes to POS. Send Changes 1. Select change from list 2. Press Send. Last Revised: 19/06/2003 Author: Peter Sharper 67 Checkmate Last Revised: 19/06/2003 Author: Peter Sharper User Manual 68