1
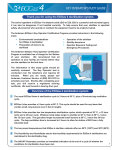
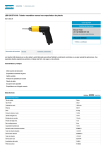
KEY OPERATOR
TRAINING SERIES
ANDERSEN PRODUCTS, LTD
Study guide
4
Key Operator Training Kit
The power of knowledge
the future of gas sterilisation
4
Thank you for using the
EOGas sterilisation system.
APPLIES TO MODEL: AN4000
The active ingredient in the EOGas 4 system is ethylene oxide (EtO). EtO is a powerful anti-microbial
agent; it can also be dangerous if not handled correctly. To help ensure that your steriliser is operated
safely, all personnel who operate or maintain the equipment should be properly trained.
The Andersen EOGas 4 Key Operator Certification Program is available free of charge for the life
time of your steriliser. We recommend that all operators at your facility are trained before they use the
steriliser for the first time.
Certification Program Outline
•
•
•
•
•
•
Preparing for Sterilisation ..............................................Pg 3
The Sterilisation Setup...................................................Pg 5
The Sterilisation Cycle ...................................................Pg 6
Unloading the Steriliser and Determining Sterility .........Pg 9
Safety Precautions ........................................................Pg 10
Study Guide Review ......................................................Pg 12
The information in this study guide should be carefully reviewed. The Key Operator test is conducted
over the telephone and requires 20 minutes. When you are ready, please call Andersen Customer
Service at 01255 428328 to schedule your Key Operator test. Shortly after successfully completing
your test, you will receive a registered training certificate.
We look forward to hearing from you!
Overview of the EOGas 4 ® Sterilisation System.
1
1
The EOGas 4 steriliser offers a total of four different sterilisation cycles using 50ºC (122ºF) and 30ºC
(86ºF) preset temperatures. EtO gas requires more time to properly sterilise when operating at lower
temperatures and more time for the gas to penetrate small lumens.
2
The standard cycle is 3 hours at 50°C, plus a 30-minute bag ventilation (purge) cycle. A second cycle at
50°C runs for 5 hours and should be used for any items that contain small, long lumens over 3 feet in length.
3
EOGas 4 also provides two low, room temperature sterilisation cycles at 30°C, a 12 hour cycle and a 24
hour cycle. These low temperature cycles are best for sensitive items, and the bag ventilation time is
increased to 2 hours.
4
Maintaining a relative humidity above 35% is critical to the success of the EOGas 4 cycle. The AN1071
Humidichip® and AN1072 Humiditube ensure that humidity requirements for EOGas 4 sterilisation are
maintained in the sterilisation bag.
5
The AN1087 Dosimeter® provides an immediate indication at the end of a cycle that adequate time,
temperature, and EtO concentration for sterilisation have been met.
D
E
EOGas 4 Supplies & Parts Index
B
C
F
G
A
H
A:
B:
C:
D:
E:
F:
G:
H:
I:
J:
Operations Display
Keypad Buttons
Door Lock
Cooling Fan Guard with Removable Filter
Power Cord Socket and Switch (on rear)
Emergency Exhaust Port
Sturdy Powder Coated Steel Cabinet
Wrapped Sterilisation Load
Purge Probe
EOGas 4 Cartridge
I
M
EOGas 4 Sterilisation Cabinet
K: Gas Sterilisation Bag
L: Humidichip and Tube
M: Black Velcro Strap
with Buckle
N: Quick Release Connector
J
H
K
I
L
N
Loaded Sterilisation Bag
EOGas 4 Sterilisation Accessories
AN1004 Gas Refill Kits
contain replacement gas
cartridges, liner bags,
Dosimeter ®s, and Humidichip®s
in a convenient
storage/dispenser box.
AN85 Exposure Indicator
Strips change color to provide
immediate assurance of EOGas
exposure at the end of the
sterilisation cycle. They include
convenient self-stick backing that
adheres to conventional paper or cloth wrapping.
AN2203 EZ Test Biological
Indicators reliably verify that
sufficient concentration of EtO
killed one million B. atrophaeus
spores, the spore most
resistant to EtO gas. Biological
indicators are the best method to ensure sterility
after a cycle.
AN1071 Humidichip &
AN1072 Humiditube
These pre-moistened chips
placed inside the tube
ensure that relative humidity
requirements are met during
the sterilisation cycle.
AN1087 Dosimeter Chemical
Integrators present visual
assurance that proper time,
temperature, and EOGas
concentration were reached
during the sterilisation cycle.
,
AN91,92,& 93 AirScan EtO
Monitoring Badges are single
use badges that measure
personnel exposure to airborne
concentrations of EOGas.
Immediate results are provided
with no extra instruments or analysis needed.
® and Humidichip® are trademarks of Andersen Products, Ltd.
2
KEY OPERATOR STUDY GUIDE
1
Preparing for Sterilisation
A. Environmental Considerations
1
35ºC
20ºC
Temperature
- Gas Storage Temperature: Store your EOgas refill kits in a
cool, secure area. We recommend storage below 30°C.
- Operational Temperature: The steriliser must be used in an area
where the temperature is not less than 20°C or more than 35°C.
EtO FACTS: At sea level, ethylene oxide is a liquid below 11°C.
Above 11°C, EtO begins to boil and converts into a gas. EtO
does not become an effective sterilant until it is 20°C. Even
though the EOGas 4 cabinet is heated, make sure that the room
where your EOGas steriliser is installed remains above 20°C.
2
35%
Humidity
Humidity is very important to the EOGas process. Relative
Humidity (RH) must be at least 35% in the room where item
preparation and sterilisation take place. Spores that might be on
the instruments may become desiccated and more resistant to
EOGas if the RH is below 35%.
The simplest way to humidify items prior to sterilisation is to
wash them. Items that cannot be washed (such as laptops,
cameras, and delicate electronics) should be pre-humidified.
Process for Pre-Humidification Using an EOGas 4 Sterilisation
Liner Bag:
- Make sure the steriliser is switched on so that it heats to
50° C (122° F).
- Prepare the items in the load for sterilisation.
Bobbin
- Place the prepared items along with a Humidichip inside a
sterilisation liner bag. Using the Velcro strap, securely close the
neck of the bag aroung the purge bobbin. It is not necessary to
attach the purge probe to the purge tube at this time.
- Place the bag in the steriliser for 2 hours, then remove the bag
from the steriliser for an additional 2 hours to allow for cooling.
DO NOT ACTIVATE THE CARTRIDGE AT ELEVATED
TEMPERATURE.
- After the 2 hours of cooling, the bag may be placed in the
steriliser and the cycle started normally.
3
KEY OPERATOR STUDY GUIDE
B. Four Basic Steps of Pre-cleaning
Follow manufacturer's instructions for cleaning and preparing reusable
devices for EOGas sterilisation whenever possible. In the absence of
manufacturer's instructions, these general steps should be followed:
1
Disassemble
Items containing removable parts such as syringes must be taken
apart before washing, drying, and wrapping them to allow the EtO an
unobstructed path around all parts.
WARNING: Instruments which contain batteries must be taken
apart and the batteries removed and wrapped separately to
protect against a spark occurring and igniting the ethylene
oxide gas.
2
Wash
Presoak the items, if appropriate. Items must be washed
surgically clean prior to sterilisation using detergent and water.
3
Dry
Three accepted ways to dry any item prior to sterilisation with
EOGas 4 are:
1. Towel drying
2. Drain drying (air drying)
3. Compressed air for tubing and long lumens
WARNING: Heat or hot air should not be used to dry an item
prior to sterilising it with EOGas because it may dehydrate or
desiccate bacteria spores making them more resistant to the
ethylene oxide gas.
WARNING: Any water left on items may react with ethylene
oxide. Items must be thoroughly dried.
AN86
4
Wrap
The following types of wrapping material are recommended for
use with EOGas 4:
1. Heat sealed packaging such as Tyvek® / Plastic.
2. Self seal pouches made of paper and film.
3. Cloth, paper, or Central Supply Room (CSR) wrap.
Always follow manufacturer's use and shelf-life guidelines
for all packaging.
HINT: Exposure indicators such as the Andersen AN85 or AN86
are used to seal or label items. Indicators will change color in the
presence of EOGas, helping to later identify items that have been
sterilised. Exposure indicators DO NOT indicate sterility.
4
KEY OPERATOR STUDY GUIDE
2
The Sterilisation Setup
A. Selecting the Cycle Length
Choose the appropriate cycle for the load to be sterilised. The EOGas 4
steriliser offers four different sterilisation cycles:
50º C - 3 Hour sterilisation exposure, 30 minute bag ventilation
50º C - 5 Hour sterilisation exposure, 60 minute bag ventilation
30º C - 12 Hour sterilisation exposure, 120 minute bag ventilation
30º C - 24 Hour sterilisation exposure, 120 minute bag ventilation.
ACTIVATE CARTRIDGE
CLOSE DOOR
SELECT CYCLE LENGTH
5 HOUR
3 HOUR
For most items, the 3 HOUR cycle will be adequate.
The 5 HOUR cycle should be used when sterilising lengths of
tubing greater than 3 feet and with loads containing large
amounts of gas absorbing materials.
For temperature sensitive items, use the 12 or 24 HOUR room
temperature (30º C) mode.
B. Warming Up the Steriliser
EOGAS 4
STERILIZER
START
1
SELF TEST
OK
0 PUMP HOURS
Make sure the EOGas 4 is connected to power, and turn the steriliser
on by pressing the black power switch located on the back of the
cabinet. The initial startup screen will appear.
EOGAS 4
STERILISER
SETUP
22.0ºC
START
ROOM TEMPERATURE
STERILISATION MODE
SETUP
22.0ºC
START
2
The temperature setting can be switched between standard (50ºC)
and room temperature (30ºC) modes using the setup menu. Once
set, press the button to the right of START on the display screen to
initiate the self test.
3
When the warm up screen appears, you can exit or await the target
temperature reading.
EXIT
4
EOGAS 4
WARMUP
31.0ºC
Once warmed up, loading instructions are shown on the screen.
LOAD EOGAS LINER BAG
CLOSE BAG OVER TUBE
PURGE BAG
EXIT
48.0ºC
PURGE
5
KEY OPERATOR STUDY GUIDE
3
The Sterilisation Cycle
A. Loading the Liner Bag and Steriliser
1
WARNING: Use only genuine EOGas 4 products in your
steriliser. Use of other gas sources may result in operator
injury and/or non-sterile loads.
WARNING: Do not reuse sterilisation liner bags. Even a
tiny pinhole in a liner bag can allow gas to escape and
cause cycle failure!
2
3
4
QUICK
CONNECT
BOBBIN
Place prepared items into a new sterilisation liner bag.
WARNING: Liquids, powders, food, and drugs should not be
sterilised in ethylene oxide because it may change their chemical
composition in unpredictable ways. If you have any questions
about whether an item may be sterilised using EOGas, please call
Andersen Customer Service 01255 428328.
2
Insert appropriate controls such as a chemical integrator (Dosimeter)
or a biological indicator (EZ Test) into the least accessible part of the
sterilisation liner bag. Add a Humidichip to the Humiditube and place
into the sterilisation liner bag.
3
Remove one AN1004 EOGas cartridge from the Refill Kit. Remove the
tape and safety trigger guard on the cartridge and place the cartridge
on top of the wrapped items so it can easily be manipulated through
the wall of the bag. Do not activate the cartridge at this time.
4
Insert the purge probe into the sterilisation liner bag with the bobbin
and quick release fitting at the open end. Place the black Velcro® strap
around the sterilisation liner bag and the bobbin of the purge probe,
and pull it snug through its loop to completely close the sterilisation
liner bag. The strap must tightly secure the sterilisation liner bag
around the purge probe bobbin in order to keep gas from escaping.
5 Connect the quick release connector to the purge probe hose if it is
not already connected.
Bobbin
5
HINT: The sterilisation liner bag may be loaded and sealed away
from the steriliser cabinet and connected to the purge tube once
the steriliser has warmed up.
6
KEY OPERATOR STUDY GUIDE
B. Starting the Cycle
With the loaded bag sealed and connected to the purge tube, press
the PURGE button.
LOAD EOGAS LINER BAG
CLOSE BAG OVER TUBE
PURGE BAG
EXIT
48.0º C
PURGE
INITIAL PURGE
00:01:29 REMAINING
EXIT
50.0ºC
The steriliser will purge air out of the sterilisation liner bag for 1 minute
30 seconds until the display reads '00:00:00'. The sterilisation liner bag
should vacuum down as excess air is removed.
After the initial purge has been completed the display instructs the
operator to activate the cartridge, close the door, and select the cycle
length:
ACTIVATE CARTRIDGE
CLOSE DOOR
SELECT CYCLE LENGTH
5 HOUR
3 HOUR
1
or
ACTIVATE CARTRIDGE
CLOSE DOOR
SELECT CYCLE LENGTH
24 HOUR
12 HOUR
Activate the cartridge by pressing the trigger button on the cartridge
through the wall of the closed liner bag. Make sure that the button is
fully depressed.
Note: The EOGas 4 cartridge has the precise amount of EtO
needed to sterilise contents of the EOGas 4 sterilisation bag.
2
Close the door.
3
Select the length of the sterilisation cycle. (3 or 5 hours when in 30ºC
mode) or (12 or 24 hours when in 50ºC mode). The door will lock
automatically.
ACTIVATE CARTRIDGE
If a cycle time is not selected within 5 seconds after closing the
door, a continuous alarm will sound to remind you to choose a
cycle length.
CLOSE DOOR
SELECT CYCLE LENGTH
5 HOUR
3 HOUR
3 HOUR CYCLE
STERILISING
2:59:15 REMAINING
30.0ºC
4
7
or
12 HOUR CYCLE
STERILISING
11:59:15 REMAINING
50.0ºC
After the cycle length is selected, the display counts down time
remaining. The door will remain locked.
KEY OPERATOR STUDY GUIDE
WARNING: Never interrupt a cycle once the gas cartridge has
been activated.
5
Log sterilisation data if required.
C. Additional Aeration
Throughout the entire cycle, the ventilation system is always running to
prevent EtO gas from entering the room. At the end of the sterilisation
cycle, the cabinet ventilation pump and the purge pump will run in 2
minute intervals, purging the liner bag and ventilating the cabinet. This
purge cycle continues for 30 minutes for the 3 hour cycle, 1 hour for the
5 hour cycle, and 2 hours for the 12 or 24 hour cycle.
VENTILATING BAG
00:23:55 REMAINING
50.0ºC
Once the purge cycle is complete, the steriliser will continue to ventilate
and purge the liner bag. A count-up timer will begin on the steriliser
display to keep track of this additional aeration time, and the steriliser
will reset only after the door is opened and the exit button is pressed.
The temperature in the room should continue to remain at least 20°C
during the aeration period.
Some gas absorbent items require additional aeration after the regular
sterilisation/purge cycle and before they can be removed and used.
This extra aeration prevents chemical burns to living tissue that can be
caused by residual EtO absorbed during the sterilisation cycle. AAMI
guidelines state that product aeration should take place inside the
steriliser cabinet.
D. Aeration Guidelines
Some large, gas absorbing items (especially implants, long lengths of
tubing, and devices that will contact blood or living tissue) require
additional aeration time:
1
If the item's manufacturer provides guidelines on aeration required
after EtO sterilisation, always follow those guidelines.
2
Two types of materials that do not require additional aeration are
metal and glass. Items made of these materials do not absorb EtO.
3
If the item's manufacturer does not provide guidelines on aeration
required after EtO sterilisation, the item should remain in the EOGas
steriliser to aerate for an additional 24 hours after the sterilisation
and purge cycles are complete.
8
KEY OPERATOR STUDY GUIDE
4
Unloading The Steriliser And Determining Sterility
A. Unloading the Liner Bag
1
Remove the sterilised items only after the sterilisation cycle, purge
cycle, and any additional aeration have been completed and the
display indicates UNLOAD STERILISER.
UNLOAD STERILISER
00:03:11
EXIT
50.0ºC
HINT: To unload the sterilisation liner bag away from the
steriliser, simply detach the purge probe hose from the bag
using the quick release connector.
2
Remove the sterilised items and examine the Dosimeter. Make sure
the blue line has progressed up to or beyond the triangular mark.
3
Discard the sterilisation bag, Humidichip, and used cartridge with
ordinary trash. Incubate Biological Indicator if using one. Retain
Humiditube to use again.
4
Press EXIT to end the cycle and return the steriliser to the standby
state. Switch the power button to off.
WARNING: Never remove items before the full sterilisation and
purge cycles have completed. The purge cycle is designed to
aerate most products sufficiently to avoid operator exposure to
EOGas and to meet the OSHA short-term exposure level (STEL)
of 5.0 ppm over 15 mins.
B. Important Notes About Indicators
1
Biological Indicators (BI's) such as the AN 2203 EZ Test use live
spores and are the best confirmation of the success or failure of a
sterilisation cycle. Always follow manufacturer's recommendations
when using BIs.
2
Chemical Exposure INTEGRATORS such as the AN87 Dosimeter
provide immediate visual confirmation that time, temperature, and
EOGas concentration were sufficient for sterilisation to occur.
3
Chemical Exposure INDICATORS such as the AN85 or AN86, do not
prove sterilisation. They only change color to show that the items
have been exposed to ethylene oxide.
Please refer to manufacturer's instructions when using sterility
or exposure indicators.
9
KEY OPERATOR STUDY GUIDE
5
Safety Precautions
A. Ethylene Oxide Safety
B
MONITORING
SYSTEM
1
Do not allow open flame or sparks near the steriliser during the
sterilisation cycle. Ethylene oxide gas is highly flammable in
concentrations above 3.0% (30,000 ppm).
2
Never interrupt a cycle in progress. Two consequences of removing
and opening the EOGas bag before the cycle is complete are:
- The load might not be sterile
- The bag may still contain high levels of EOGas and put the
operator at risk of unsafe exposure
3
Sterilisation liner bags should never be reused because they may
have a puncture or tear.
4
Each of the sterilisation cycles ends with a purge cycle that flushes
fresh air around the items in the load.
5
Personnel exposure to ethylene oxide can be monitored by using
personal exposure badges such as the Andersen AN93 AirScan®
Badges. The AN93 AirScan Kit has both STEL (15 min.) and TWA
(8 hour) badges. EtO exposure levels should be checked upon
installation of the steriliser. We recommend that exposure testing
be performed on an annual basis or whenever a steriliser is
relocated. OSHA guidelines for personal monitoring can be found
at www.cdc.gov/niosh/programs/ppt.
6
If a cartridge is accidentally activated outside of the liner bag,
immediately place it in the Zip-Lock Safety Bag and connect the
quick connect fitting to the input on the upper left side of the
steriliser. Ensure the steriliser's ventilation pump is running. See
section 1 of the User's Manual for more detail about this procedure.
7
Always store gas cartridges and refill kits in a secure area that is
kept cool (30ºC or below) and out of direct sunlight.
A
Note: No other container or steriliser may be used with EOGas
sterilising gas.
B. Malfunctions and Power Failures
In the event of a PURGE PUMP FAILURE error message during the
sterilisation cycle, the bag must be manually tended to by a supervisor.
The items in the load should not be considered sterile.
10
KEY OPERATOR STUDY GUIDE
If a PURGE PUMP FAILURE occurs during the purge cycle, the vent
pump will run and items should be aerated for two hours in the steriliser
cabinet with the black Velcro strap removed. The items in the load may
still be considered sterile.
In the event of a VENT PUMP FAILURE error message during the
sterilisation cycle, the purge pump will remove any remaining gas,
and the cycle will be aborted. Items in the load should not be
considered sterile.
If a VENT PUMP FAILURE occurs during the purge cycle, the purge pump
will remove any remaining gas and an error message will display at the
end of the cycle. The items in the load may still be considered sterile.
If a POWER OUTAGE occurs, the steriliser is equipped with a battery
backup that will keep track of elapsed cycle time. If the outage occurs
during the sterilisation cycle, the temperature of the cabinet may drop
too low and the steriliser will display whether or not the cycle has failed.
If it has, the items in the load may not be considered sterile.
If the POWER OUTAGE occurs during the purge cycle, the steriliser will
resume aeration when power returns. Items may still be considered
sterile.
Do not open the door of the steriliser until power is restored and the
vent/purge systems have removed any residual gas from the liner bag.
Call Andersen Customer Service for assistance with any malfunctions,
01255 428328. See section 6 of the User's Guide for more details about
proper troubleshooting procedures.
HINT: In the case of any steriliser malfunction or power failure,
you can determine whether sterilisation was achieved by
examining the indicators included in the load (such as chemical
integrators and biological indicators).
C. Emergency Procedures
11
1
If liquid EOGas comes into contact with a part of the body you must
wash with water thoroughly for at least 15 minutes. Consult the
Material Safety Data Sheet (MSDS) for further information.
2
The Material Safety Data Sheet (MSDS) for EOGas should be readily
available. Do you know where to find your MSDS?
- Operator's Manual
- List of physical and chemical hazards is provided with each EOGas
refill kit.
KEY OPERATOR STUDY GUIDE
In case of emergency, please contact:
Chem-Tel on 001 813 248 0585
Chem-Tel contract number MIS 0000425
5
Study Guide Review
Here is what you should know after reading this study guide:
•
•
•
•
•
•
•
•
•
The minimum temperature needed in the room for the entire sterilisation cycle
The length (in time) of the standard cycle
Why the ventilation system is running during the entire cycle
Why the sterilisation liner bag is purged
The required relative humidity in the room where the items are prepared
How to prepare items for sterilisation
The types of indicators that should be used in the EOGas system
Ethylene oxide safety and precautions
Basic operation of your EOGas steriliser from start to finish
When you feel comfortable with answers to these subjects, please give
Andersen Products a call at 01255 428328 and schedule your Key Operator
Certification exam. The test will take approximately 20 minutes.
Operator training records should be maintained at your facility.
Key Operator Tests will also be kept on file at Andersen Products.
If you would like to have an Andersen representative come to your facility for on site
training, please contact Andersen Products for a quote on this custom service.
Many thanks for using the Andersen EOGas 4 steriliser. Please
do not hesitate to call us if you have any questions in the future.
Andersen Customer Service 01255 428328
www.anderseneurope.com
Nothing in this guide should be taken to amend or supercede the manufacturer’s reprocessing instructions.
11
12
KEY OPERATOR STUDY GUIDE
Other Resources
Andersen Website: www.anderseneurope.com
13
1
MSDS on Ethylene Oxide reference may be found at
http://www.anderseneurope.com/english/images/library/safety/materialsafetydata.pdf
2
OSHA Small Business guide to Ethylene Oxide may be found at
http://www.osha.gov/Publications/ethylene-oxide-final.html
KEY OPERATOR STUDY GUIDE
Questions & Notations
Please use this area to list any questions that you have for your
Andersen Representative regarding your EOGas 4 Steriliser.
14
the future of gas sterilisation
www.anderseneurope.com
Andersen Products Ltd.
Davy Road, Gorse Lane Ind. Est.
Clacton-On-Sea
CO15 4XA, UK
© 2013 ANDERSEN PRODUCTS, LTD. ALL RIGHTS RESERVED. AirScan® is a trademark of AirScan Environmental Technologies, Inc.
,
®, Humidichip®, Seal and Peel® are trademarks of Andersen Products, Ltd.
Ref: EOGas 4 Study Guide 201302