1
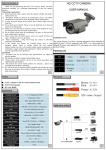
Function Menu
OSD
MENU
LENS
■DC
■VIDEO
EXPOSURE
■SHUTTER
■ACCE
■AGC
■DEFOG
■SENS-UP
■BACKLIGHT
WHITE BAL
■ATW
■INDOOR
■AWC→SET
■OUTDOOR
■MANUAL
■BRIGHTNESS
DAY&NIGHT
■COLOR
■AUTO
■EXT
NR
■2DNR
■3DNR
■SMART NR
■B/W
SPECIAL
■CAM TITLE
■LANGUAGE
■D-EFFECT
■DEFECT
■MOTION
■RS485
■PRIVACY
ADJUST
■SHARPNESS
■NTSC/PAL
■MONITOR
■OSD
■LSC
RESET
■FACTORY
EXIT
How to use the camera
LENS
1.When the SETUP menu screen is displayed, select LENS by
using the UP and Down buttons so that the arrow indicates
LENS
► DC/VIDEO: Select Auto Iris Lens.
EXPOSURE
1.Using this function, you can control screen brightness.
► SHUTTER: MANUAL/AUTO.
* MANUAL
NTSC: 1/30 ~ 1/50000, X2 ~ X30.
PAL: 1/25 ~ 1/50000, X2 ~ X30.
* FLK: Select this when you picture flicker.
* AUTO: Select this mode to control the shutter speed
automatically. Shutter speed is automatically controlled
depending on the brightness of the screen.
► AGC: You can adjust it LOW,MIDDLE and HIGH level. The
higher the gain level, the brighter the screen but the higher the
noise.
► SENSE-UP: When it is night, the camera automatically
detects the light level and maintains a clear picture.
► BRIGHTNESS: You can control the brightness .
► ACCE: If there are bright area and dark area on the screen at
the same time, this function makes both areas to be in clear image
- OFF, LOW, MIDDLE, HIGH 4step.
► DEFOG: Carry out defog function.
- OFF,LOW,MIDDLE,HIGH 4step.
► BACKLIGHT: This function allows you to get a clear
pictures of objects even the objects in strong backlight.
* BLC : GAIN: LOW,MIDDLE,HIGH
AREA: Area set (size & position).
* HSBLC: When it is night, the camera automatically detects
the light level and maintains a clear picture.
*SELECT: AREA 1~AREA 4 *DISPLAY: select area ON/OFF
*LEVEL: Masking level set
*MODE: ALL DAY and NIGHT
*BLACK MASK: Mask ON/OFF
WHITE BAL.
► ATW: Select this when the color temperature is between
2400°K and 11,000°K.
► AWC→SET: To find the optimal setting for the current
luminance environment in this mode, set the point the camera
towards a sheet of white paper and press the SET button. If the
environment changes, readjust it.
► OUTDOOR: Select this when color temperature is around
5,100°K.
5
► INDOOR: Select this when the color temperature is
* SENSITIVITY: When the number is high, the detection 6
sensitivity is increased to recognize even small movement.
around 3,100°K.
* MOTION VIEW: ON/OFF.
► MANUAL: Select this to fine-tune White Balance manually.
►
PRIVACY: Hide an area you want to hide on the screen.
DAY & NIGHT
*
SELECT: AREA1~8
* DISPLAY: Select AREA ON/OFF
You can display pictures in Color or Black and White.
*
COLOR:
1~16
color
step
*
DEFAULT: Factory Reset
► AUTO: Switched Color and B/W automatically.
- DELAY: You can select the duration time about changing the ► LANGUAGE: ENGLISH/CHINESE.
day/night mode.
► DEFECT: CMOS correction to compensate for defects that
► COLOR: The picture is always displayed in color.
can be occur at the low light conditions.
► B/W: The picture is always displayed in B/W.
*LIVE DPC: Auto defect.
*LEVEL: Level of Auto defect.
*STATIC DPC: Manual defect. *LEVEL: Manual defect value.
NR
*START: Start defect.(Close the lens to shield the light, Select
This function reduces the background noise in a low luminance the START ).
*SENS-UP: Sense up value.
environment.
► RS485: This function sets up the camera communication
*2DNR(noise reduction) *3DNR
status when controlling the camera through an external device.
* SMART NR (3DNR+ motion detection)
► VERSION: Version of camera.
SPECIAL
ADJUST
Select a desired mode using the UP and DOWN buttons.
► CAM TITLE: If you enter a title, the title will be appear on ► SHARPNESS: Adjust the sharpness of the image.
► MONITOR: CRT monitor and LCD monitor.
the monitor.
* LCD: Set GAMMA,BLUE GAIN,RED GAIN.
► D-EFFECT
► OSD: TEXT COLOR & OUT LINE A adjustable.
* FREEZE: You can stop the image or reactive it.
► LSC: Lens shading compensation.
* MIRROR
► NTSC/PAL: Select NTSC/PAL.
- MIRROR: you can flip the image horizontally.
- V-FLIP: you can flip the image vertically.
RESET
- ROTATE: you can rotate the image on the screen.
► FACTORY: Resets the camera setting to the factory defaults.
* D-ZOOM
Language
and Communication status is not initialized.
- PIP: PIP display ON/OFF - D-ZOOM: X2.0~X64
- PAN&TILT: Set to change PIP position.
EXIT
* NEG.IMAGE: ON/OFF
Press the ENTER button in the EXIT menu to save the
► MOTION
current settings and exit the MAIN SETUP menu.
* SELECT: Select AREA1~AREA3.
7
8
* DISPLAY: Select AREA ON/OFF.