1
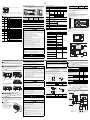
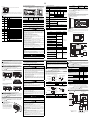
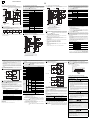
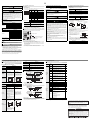
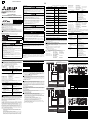
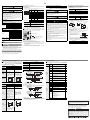
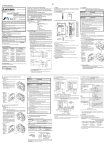
Red Power is on OFF Power is off ON Running OFF Stopped ON When a CPU error occurs. Flicker LED color 100M Green Green ERR Red OPEN FX3GE-24M 130 (5.12”) 105 (4.13”) Approx. 0.60 (1.32lbs) FX3GE-40M 175 (6.89”) 150 (5.90”) Approx. 0.80 (1.76lbs) MASS (Weight): kg (lbs) When a program error occurs. When a normal status. ON When the battery voltage drops. (When the optional battery is installed.) OFF When the battery voltage normal status. (When the optional battery is installed.) 3. Installation (general specifications) As for installation of the input/output extension units/blocks, special adapters and expansion boards, refer to the following manual. Refer to FX3G Series User's Manual - Hardware Edition. INSTALLATION PRECAUTIONS Built-in Ethernet part LED display W: mm (inches) Installation 35-mm-wide DIN rail or Direct (screw) mounting (M4) OFF Red Model name Status Description ON 100Mbps communication OFF 10Mbps communication or not connected ON Data being sent or received. OFF Data is not sent or received. ON Setting errors, hardware errors, etc. Flicker Communication errors OFF Setting normal, communication normal ON TCP/IP: 1 or more connections are established. UDP: 1 or more connections are open. OFF TCP/IP: All connections are unestablished. UDP: All connections are closed. Green Use the product within the generic environment specifications described in section 3.1 of this manual. Never use the product in areas with excessive dust, oily smoke, conductive dusts, corrosive gas (salt air, Cl 2 , H 2 S, SO 2 or NO 2 ), flammable gas, vibration or impacts, or expose it to high temperature, condensation, or rain and wind. If the product is used in such conditions, electric shock, fire, malfunctions, deterioration or damage may occur. Do not touch the conductive parts of the product directly. Doing so may cause device failures or malfunctions. Install the product securely using a DIN rail or mounting screws. Install the product on a flat surface. If the mounting surface is rough, undue force will be applied to the PC board, thereby causing nonconformities. When drilling screw holes or wiring, make sure that cutting and wiring debris do not enter the ventilation slits. Failure to do so may cause fire, equipment failures or malfunctions. Be sure to remove the dust proof sheet from the PLC's ventilation port when installation work is completed. Failure to do so may cause fire, equipment failures or malfunctions. Connect the extension cables, peripheral device cables, input/output cables and battery connecting cable securely to their designated connectors. Loose connections may cause malfunctions. Turn off the power to the PLC before attaching or detaching the following devices. Failure to do so may cause device failures or malfunctions. - Peripheral devices, display modules, and Extension units/blocks - Expansion boards, special adapters, battery and memory cassette Dielectric withstand voltage*2 1.5kV AC for one minute Insulation resistance*2 5M or more by 500V DC megger Grounding Class D grounding (grounding resistance: 100 or less) <Common grounding with a heavy electrical system is not allowed.>*3 3.3 Procedures for installing to and detaching from DIN rail The products can be installed on a DIN46277 rail [35mm (1.38”) wide]. This section explains the installations of the main units. For the input/output extension units/blocks and special adapters, refer to the following manual. Refer to FX3G Series User's Manual - Hardware Edition. 3.3.1 Installation 1) Push out all DIN rail mounting hooks (below fig.A). 1) 1) 1) 1) A A 2) Fit the upper edge of the DIN rail mounting groove (right fig.B) onto the DIN rail. B Working altitude 3) C 3) 3.4 Procedures for installing directly (with M4 screws) The product can be installed directly on the panel (with screws). This section explains the installation of the main units. As for the details of the installation/detaching for input/output extension units/ blocks and special adapters, refer to the following manual. Refer to FX3G Series User's Manual - Hardware Edition. 3.4.1 Mounting hole pitches Refer to the external dimensions (section 2.3) for the product's mounting hole pitch information. As for the details of the mounting hole pitches for extension unit/block and special adapters, refer to the following manual. Refer to FX3G Series User's Manual - Hardware Edition. 3.4.2 Installation 1) Make mounting holes in the mounting surface referring to the external dimensions diagram. 2) Fit the main unit (A in the right figure) based on the holes, and secure it with M4 screws (B in the right figure). The mounting hole pitches and number of screws depend on the product. Refer to the external dimensions diagram (Section 2.3). B A B <2000m*4 *1 The criterion is shown in IEC61131-2. *2 Dielectric withstand voltage and insulation resistance are shown in the following table. Terminal Dielectric strength Insulation resistance Space in enclosure Extension devices can be connected on the left and right sides of the main unit of the PLC. If you intend to add extension devices in the future, keep necessary spaces on the left and right sides. Configuration without extension cable Main units, Input/output extension units/blocks Between power supply terminal (AC power) and ground terminal Between power supply terminal (DC power) and ground terminal Between input terminal (24V DC) and ground terminal Between input terminal (100V AC) and ground terminal*5 Between output terminal (relay) and ground terminal A 1.5kV AC for one minute A 500V AC for one minute 1.5kV AC for one minute Between output terminal (transistor) and ground terminal 500V AC for one minute Between output terminal (triac) and ground terminal*5 1.5kV AC for one minute 10BASE-T/100BASE-TX connector and ground terminal 500V AC for one minute Main unit analog terminal and ground terminal Not allowed A Not allowed A A Not allowed A 500V AC for one minute 5M or more by 500V DC megger Notes Input/output wiring 50 to 100m (164’1” to 328’1”) long will cause almost no problems of noise, but, generally, the wiring length should be less than 20m (65’7”) to ensure the safety. Extension cables are easily affected by noise. Lay the cables at a distance of at least 30 to 50mm (1.19” to 1.97”) away from the PLC output and other power lines. DESIGN PRECAUTIONS <Reference> WIRING PRECAUTIONS Make sure to cut off all phases of the power supply externally before attempting installation or wiring work. Failure to do so may cause electric shock or damage to the product. WIRING PRECAUTIONS Connect the AC power supply to the dedicated terminals specified in this manual. If an AC power supply is connected to a DC input/output terminal or DC power supply terminal, the PLC will burn out. Do not wire vacant terminals externally. Doing so may damage the product. Perform class D grounding (grounding resistance: 100 or less) to the grounding terminal on the FX3GE Series main unit with a wire 2 mm2 or thicker. Do not use common grounding with heavy electrical systems (refer to section 4.3). When drilling screw holes or wiring, make sure cutting or wire debris does not enter the ventilation slits. Failure to do so may cause fire, equipment failures or malfunctions. Make sure to properly wire to the terminal in accordance with the following precautions. Failure to do so may cause electric shock, equipment failures, a short-circuit, wire breakage, malfunctions, or damage to the product. - The disposal size of the cable end should follow the dimensions described in the manual. - Tightening torque should follow the specifications in the manual. - Tighten the screws using a Phillips-head screwdriver No.2 (shaft diameter 6mm (0.24”) or less). Make sure that the screwdriver does not touch the partition part of the terminal block. This section explains the wiring of the terminal type. For the connectors types, refer to the following manual. Refer to FX3G Series User's Manual - Hardware Edition. Cable end treatment and tightening torque 3.2 (0.13") Terminal Solderless screw terminal 6.2 mm (0.24") or less 3.2 (0.13") 6.2 mm (0.24") or less 4.2.1 A ≥ 50mm (1.97") Power supply specifications[Main unit] Specification AC power type FV1.25-B3A FV2-MS3 Certification UL Listed Pressure Bonding Tool YA-1(JST) 3.2 (0.13") Terminal Solderless screw terminal 6.3 mm (0.25") or more 3.2 (0.13") 100 to 240V AC 24V DC Allowable supply voltage range 85 to 264V AC 20.4 to 28.8V DC Rated frequency 50/60Hz Allowable instantaneous power failure time Operation can be continued upon occurrence of instantaneous power failure for 10 ms or less. Power fuse 250V 1A 125V 2.5A FX3GE-40M 250V 3.15A 125V 3.15A 30A max. 5ms or less/100V AC 30A max. 1ms or 50A max. 5ms or less/24 V DC less/200V AC 32W 21W FX3GE-40M 37W 25W 400mA - *1 This item shows values when all 24V DC service power supplies are used in the maximum configuration connectable to the main unit. (The DC power type main unit does not have a 24V DC service power supply.) Power (current) consumption of the input/output extension units/blocks. Refer to FX3G Series User's Manual - Hardware Edition. Power consumption of the special function blocks. Refer to the respective manual. Example of external wiring (AC power type) PLC 100 to 240V AC Main unit <Reference> FV1.25-B3A FX3GE-24M 100 to 240V AC power is supplied to the main unit and input/output extension unit. For the details of wiring work, refer to section 4.1. 6.3 mm (0.25") or more Type No. Operation can be continued upon occurrence of instantaneous power failure for 5 ms or less. FX3GE-24M 24V DC service power supply 4.2.2 Terminal 6.2 mm (0.24") or less DC power type Supply voltage Power consumption*1 Type No. Other equipment A As for the details of the power supply specifications and example of external wiring, refer to the following manual. Refer to FX3G Series User's Manual - Hardware Edition. Terminal 6.2 mm (0.24") or less JAPAN SOLDERLESS TERMINAL MFG CO LTD (JST) Extension cable ·FX0N-65EC ·FX0N-30EC 4.2 Power supply specifications and example of external wiring Rush current When two wires are connected to one terminal Terminal Manufacturer Input/output extension unit Item For the terminals of FX3GE series PLC, M3 screws are used. The electric wire ends should be treated as shown below. Tighten the screws to a torque of 0.5 to 0.8 Nm. Do not tighten terminal screws with a torque outside the above-mentioned range. Failure to do so may cause equipment failures or malfunctions. When one wire is connected to one terminal Simultaneously turn on and off the power supplies of the main unit and extension devices. Even if the AC power supply causes an instantaneous power failure for less than 10 ms, the PLC can continue to operate. Even if the DC power supply causes an instantaneous power failure for less than 5 ms, the PLC can continue to operate. If a long-time power failure or an abnormal voltage drop occurs, the PLC stops, and output is turned off. When the power supply is restored, it will automatically restart (when the RUN input is on). A A 4.1 Wiring JAPAN SOLDERLESS TERMINAL MFG CO LTD (JST) FX3GE Series main unit Other equipment B e tw e en t er mi n al o f s p ec i al adapter and ground terminal Terminal Manufacturer A ≥ 50mm (1.97") A Not allowed Between FX 3G -4EX-BD input terminal (24V DC) and ground terminal 4.1.1 A Configuration in 2 stages with extension cable Expansion boards, Special adapters, Special function blocks Between terminal of expansion board (except FX3G-4EX-BD and FX 3 G - 2E Y T-B D) a nd gro und terminal FX3GE Series main unit 5M or more by 500V DC megger Make sure to have the following safety circuits outside of the PLC to ensure safe system operation even during external power supply problems or PLC failure. Otherwise, malfunctions may cause serious accidents. 1) Most importantly, have the following: an emergency stop circuit, a protection circuit, an interlock circuit for opposite movements (such as normal vs. reverse rotation), and an interlock circuit (to prevent damage to the equipment at the upper and lower positioning limits). 2) Note that when the PLC CPU detects an error, such as a watchdog timer error, during self-diagnosis, all outputs are turned off. Also, when an error that cannot be detected by the PLC CPU occurs in an input/output control block, output control may be disabled. External circuits and mechanisms should be designed to ensure safe machinery operation in such a case. 3) Note that when an error occurs in a relay, triac or transistor output device, the output could be held either on or off. For output signals that may lead to serious accidents, external circuits and mechanisms should be designed to ensure safe machinery operation in such a case. Notes C Between each terminals *2 and ground terminal DESIGN PRECAUTIONS Do not bundle the control line together with or lay it close to the main circuit or power line. As a guideline, lay the control line at least 100mm (3.94") or more away from the main circuit or power line. Noise may cause malfunctions. Install module so that excessive force will not be applied to the built-in programming connectors, power connectors or I/O connectors. Failure to do so may result in wire damage/breakage or PLC failure. 3) Lock the DIN rail mounting hooks (below fig.C) while pressing the PLC against the DIN rail. 500V AC for one minute Install the PLC in an environment conforming to the generic specifications (section 3.1), installation precautions and notes. For more details, refer to FX3G Series User's Manual - Hardware Edition. Installation location in enclosure Working Free from corrosive or flammable gas and excessive conductive dusts atmosphere Make sure to cut off all phases of the power supply externally before attempting installation or wiring work. Failure to do so may cause electric shock or damage to the product. As for the details of the power supply wiring and input/output wiring, refer to the following manual. Refer to FX3G Series User's Manual - Hardware Edition. - By noise simulator at noise voltage of 1,000Vp-p, noise width of 1s, rise time of 1ns and period of 30 to 100Hz Between FX 3G-2EYT-BD output terminal (transistor) and ground terminal 4. Power supply/input/output specifications and external wiring example of the main unit part 9.8 Noise resistance WIRING PRECAUTIONS Affixing The Dust Proof Sheet - 147m/s2 Acceleration, Action time: 11ms, 3 times by half-sine pulse in each direction X, Y, and Z When a dust proof sheet is supplied with units, keep the sheet applied to the ventilation slits during installation and wiring work. To prevent temperature rise, do not install the PLC on a floor, a ceiling or a vertical surface. Install it horizontally on a wall as shown in section 3.2. Keep a space of 50mm (1.97”) or more between the unit main body and another device or structure (part A). Install the unit as far away as possible from highvoltage lines, high-voltage devices and power equipment. The dust proof sheet should be affixed to the ventilation port before beginning the installation and wiring work. For the affixing procedure, refer to the instructions on the dust proof sheet. Be sure to remove the dust proof sheet when the installation and wiring work is completed. 4.9 Shock resistance*1 Notes 3.2.1 57 to 150 When installed 10 to 57 directly 57 to 150 *5 Input/output extension units/blocks only 3.2 Installation location FX2N-16EYT Green ON - *4 The PLC cannot be used at a pressure higher than the atmospheric pressure to avoid damage. FX2N-16EX Green W1: mm (inches) Direct mounting hole pitches Description 10 to 57 When installed on DIN rail Half amplitude Sweep Count (mm) for X, Y, Z: 10 0.035 times (80 min in each direction) 0.075 FX2N-16EYT POW Status Acceleration (m/s2) FX3U-64CCL LED color Frequency (Hz) Each manual For dielectric with stand voltage test and insulation resistance test of each product, refer to the following manual. Refer to FX3G Series User's Manual - Hardware Edition. *3 For common grounding, refer to section 4.3. FX3U-4ADADP LED display SD/RD Vibration resistance*1 Mounting hole pitches PLC part ALM 8 (0.32") 86 (3.39") W1 W 2.2 LED status 5 to 95%RH (no condensation) when operating Insulation resistance Dielectric strength Special function block Ambient 0 to 55C (32 to 131F) when operating and -25 to 75C (-13 to 167F) temperature when stored Ambient humidity 82 (3.23") 90 (3.55") The authentication label for authorized products is affixed to the right side of the product to avoid to be forged. Products that do not have the genuine product certification label or nameplate are not covered by the warranty. ERR Unit: mm (inches) Specification FX2N-16EX 2-4.5 mounting holes Terminal Item FX2N-CNV-BC Genuine product certification label RUN 3.1 Generic specifications For the input/output extension units/blocks, refer to the following manual. Refer to FX3G Series User's Manual - Hardware Edition. Other equipment 2.3 External dimensions and weight Right side Certification UL Listed Pressure Bonding Tool L YA-1(JST) N Breaker (*) Power on PL Input/output extension unit L Emergency MC MC Fuse N MC MC DC power supply (*) Class D grounding See section 4.3 for details. DC AC Power supply for loads connected to PLC output terminals