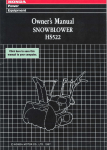
1
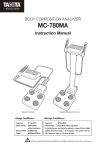
BODY COMPOSITION ANALYZER
BC-418MA CD
INSTRUCTION MANUAL
\
f
Please read this Instruction Manual carefully and keep
it handy for future reference.
1
................................................................................................. 3
Safety Notes................................................................................................. 4
Caution Symbols ........................................................................................ 4
AWARN~NG
............................................................................................. 4
Advantages
ACAUTION
................................................................................................ 4
AMaintenance.......................................................................................... 5
AGeneral Instructions for Accurate Measurement.......... ....5
<Usage Conditions> .............................................................................. 5
<Storage Conditions ........................................................................... 5
>
<Power Source> .....................................................................................
5
.
5 ModeSelection ......................................................................................... 13
Setting the number of printouts. the printout language. and the printout items
13
. . . . . . . . . .S. . .
Setting the Original Mode .................................................................. 14
THE APPLICABILITY OF THE BMR REGRESSION
FORMULA AND ITS DIFFERENCES WITH THE OLD FORMULA- ........41
Applications
This equipment can be used in the screening of certain adult diseases and conditions related body weight and
composition.
It can be used in the monitoring and prevention of conditions caused by excessive deposits of fat tissue, such as
diabetes, hyperlipidemia, cholelithiasis and fatty liver.
It can be used in the monitoring of changes in individuals' body composition, related to differences in the ratio of
fat tissue to lean.
It can be used to assess the effectiveness of individuals' nutrition and exercise programmers, both for health and
physical fitness.
Advantages
BIA is a simple, quick, and non-invasive means of measuring body composition, making it particularly useful
for group screenings.
2. The Tanita BC-418MA Body Composition Analyzer calculates "body fat ratio," "body fat mass," "fat free mass,"
"estimated muscle mass," and "Base Metabolic Rate" using data derived by the DXA method using BIA.
3. Through the use of 8 electrodes, the BC-418MA Body Composition Analyzer makes it possible to show separate
body composition mass for the right arm, the left arm, the trunk, the right leg and the left leg.
-l
'v,
Safety Notes
Caution Symbols
Thank you for purchasing this precision crafted Tanita product. For optimum performance and safety, please familiarize
yourself with the Caution Symbols below. These symbols are designed to alert the user to potential hazards when using this
equipment. Ignoring these Caution Symbols may result in serious injury, or damage to the product.
Please be sure to review before proceeding with the INSTRUCTION MANUAL.
WARNING This symbol indicates the possibility of serious injury if the product i s F
A, CAUTION
A
mishandled or instructions are ignored.
This symbol indicates the possibility of physical injury or equipment
damage if instructions are ignored.
I
This symbol indicates general precautions that should be taken when using
this product.
-
Individuals with a Pacemaker or Other Internal Medical Devices
This equipment sends a weak electrical current through the body during measurement. Individua.
who have internally implanted medical devices, such as Pacemakers, should not use this equipment
due to the risk of malfunction to the device that may be caused by the weak electrical current.
Inserting and Removing the Power Cord
To reduce the risk of electric shock or product damage, never insert or remove the power cord with
wet hands.
Do not under any circumstances dismantle or alter the device, as this could result in electric shock or
injury as well as adversely affect the precision of measurements.
To prevent fire hazard
Use only a correctly wired (100-240VAC) outlet, and do not use a multiple outlet extension cable.
Measurementsfor physically disabled persons
Physically disabled persons should not attempt to take measurements alone, but instead should
have their caretakers assist them in using the device.
ACAUTION
When connecting the BC-418MA to a computer Ensure that the computer conforms to IEC950.
cross contamination
The Body Composition Analyzer should be used with bare feet. Please be sure to clean the scale
platform with appropriate disinfectant after each use. Never pour any liquid directly on the scale
platform, as it may leak and cause internal damage. Use a soft cloth and appropriate ethyl alcohol
to wipe off platform. Do not wipe the platform with strong chemicals.
Interpretation of Results
The data provided by this machine, as well as any supplementary information such as diet or
exercise programs based on this data, should be interpreted by a licensed professional.
Please make sure you place the Weighing Platform on a level and stable surface. If the equipment
is used when the Weighing Platform is unstable because not all feet are on the surface, there may
be a risk of stumbling or inaccurate measurement.
Never jump on the Weighing Platform, there may be a risk of stumbling and malfunction of the
equipment.
When handling printer unit, avoid any sharp edges.
For the BC-418MA; Ensure you use the original AC adapter (MODEL: SA25-0535U). Using an AC
adapter other than the original one may cause malfunction.
Do not insert or remove the plug by the cable.
This equipment incorporates a fuse for electrical equipment (ZA, 125V.) If an AC adapter other
than the original one is used or there is a large surge in electric current, the fuse will blow for
safety purposes. If the fuse has blown, the equipment must be inspected again. The fuse is located
inside the equipment and users cannot disassemble the equipment easily. Therefore, please
contact your nearest Tanita branch office or dealer to change the fuse.
-
/1\ Maintenance
Since this equipment is accurately manufactured and adiusted, please observe the following instructions.
Users must not disassemble or adjust this equipment. This should be done by trained maintenance agents or certification
offices designated under the NAWI directive.
Never disassemble the equipment as this may cause malfunction. Users must not disassemble or adjust this equipment.
Please inspect the equipment in accordance with the regulations in your country.
Unplug the unit from the wall outlet when it will not be in use for long periods of time.
In order to reduce the risk of a short circuit, please keep any liquid or metal objects (paper clips, etc.) away from the printer.
Keep the electrodes clean by wiping them with disinfectant.
Do not drop the unit, and avoid locations with constant vibration.
Do not put this equipment in direct sunlight, close to heaters or near direct draughts from air conditioners.
When transferred to any location where there is a difference of more than 20 degrees centigrade (40 degrees Fahrenheit),
wait 2 hours before using.
When disposing of this unit, please do so in accordance with the prevailing regulations in each country.
A ~ e n e r aInstructions
l
for Accurate Measurement
This equipment sends out a very weak electric current to measure impedance (electrical resistance) of the body. Therefore, in
principle, users need to use this equipment with bare feet. Moreover, since impedance fluctuates in accordance with the
distribution of body fluid, please observe the following instructions for accurate measurement.
.L,/
1
I/
h
To prevent a possible discrepancy in measured values, avoid taking measurements after vigorous exercise until sufficiently rested.
To prevent inaccurately low body fat percentage measurements and other measurement errors, always hold both arms
straight down when taking measurements.
As changes in body water and body temperature can have a major impact on measurements, measurements should be
made every day at the same time under similar conditions (always urinating before taking measurements, etc.) to get a
more accurate picture of the measurements over time.
Ensure that your arms are not touching your side and that the inner thighs are not touching each other during
measurements; if necessary, place a dry towel between your arm and side and/or between your thighs.
Also, make sure the soles of feet are free of excess dirt, as this may also act as a barrier to the mild current.
False results may be reported after excessive food /fluid intake, or after periods of intense exercise.
* For further details, see the Technical Notes on page 36.
This equipment is designed for the majority of the population leading healthy lives with a regular lifestyle. For people
suffering from sickness, or whose lifestyle is very different from the norm, it is recommended that the data from this
product should not be used as an absolute value, but rather as a reference to observe the rate change.
* For further details, see the Technical Notes on page 36.
If there are calluses on the soles of the feet, or an individual is wearing thin nylons, accurate measurement may still be possible. Place
0.5ml of water in the center of each electrode. This will act as a conductant, and may allow the current to pass freely through a thin
barrier.
Measurement is sometimes impossible on a surface that is strongly vibrating. In this case, please move the equipment onto
a surface with little vibration.
Do not take measurements while using transmitters, such as mobile phones, which may affect readings.
Temperature Range for Use : O°C / 3S°C
~elative~urnidihl
: 30% / 80% (without condensation)
I
1
Temperature Range of Environment : -lO°C / 50'C
: 10% / 90% (without condensation)
Range of Relative Humidity
To avoid malfunctions, avoid storing the equipment where there is direct sunlight, significant temperature
changes, the risk of dampness, a large amount of dust, in the vicinity of firer, or where there is the risk of
receiving vibrations or shocks.
1
Value Range
Model Name
Voltage Range
Frequency Range
Electric Current Range
BC-418MA
100-240VAC
50/60Hz
550mA
I
/
I .t'rOdUCr
nssernaly ana Lomponer
Product Structure
Printer Paper
Instruction Manual
(Technical Notes)
Bottom Cover
Bottom Cover
Attachment Screws
% %
Paper Width : 58mm
Paper Roll Diameter : Maximum 55mm
Syringe
>
Column Attachment
Screws
% % S %
m
Rear View of Control Box
/
RS-232C Port
Symbols and their Meanings
@
-@
: Input,
Male
9
: To Turn
off the Unit
: Class I1 Equipment
Output
: Type BF applied
P T
0
:To Turn on the Unit
: Caution
part
Refer to the attached notes.
: Weight Scale
: Clothes Weight Setting
ema ale/
: Male
=
:Direct current
FEED
:Advances the paper
C6
:Conformity with Medical Device
Directive 93/42EEC
0366
TIME SET :Sets the date and time.
: Female
Digital Display
Measurement unit mark [kal
/
Indicates that the device is being
used to measure body weight
Clothes weight mark
L
Indicates that the weight is
shown in kilograms
clothes is being subtracted
Stabilized mark
Gender mark (male)
Indicates that the user is male
f
4
FEMALE /
QTABILm'1ndicates
that the displayed
figure has stabilized
4
cm
ATHLETIC
4
AGE \
\ MAU
Gender mark (female)
Indicates that the user is female
Athlete mark
Indicates that the user is a n
"athlete"
/
bge
\unit
of height (cm)
Indicates that the height is
shown in centimeters.
% FAT
mark
Indicates that the figure shown
is the user's age
Body fat percentage
Indicates that the device i s
ready to begin measurements
Indicates that the figure shown
is the body fat percentage
Membrane Switch
Clothes Weight Setting Key
Weight Only Key
Sets the clothes weight.
Even if the user is dressed, weight minus the weight of
clothes can be measured.
Measures body weight only.
Feed Key
Advances the print paper.
,
ON/OFF Key
Turns the power on or off.
,
%Body Fat Range : 1%-75%
% B O ~Fat
Y increments : 0.1%
Max 200kg
e=d= 0.1kg
Min
2kg
T= -2OOkg
Operation Temperature Range
0 1+35'C
Numerical Keys
Inputs numerical values.
Time Set Key
Sets the date and time.
1
Tanita defies "athlete" as a person involved in intense physical activity of at least 10
hours per week and who has a resting heart rate of approximately 60 beats per minute
or less. Tanita's athlete definition includes "lifetime of fitness" individuals who have
been fit for years but currently exercise less than 10 hours per week.
Body part data display keys
Used to display the measurement
results for the right arm, left arm,
right leg, left leg and trunk
Key
Clears entries.
Tanita's athlete definition does not include "enthusiastic beginners" who are making a
real commitment to exercising at least 10 hours per week but whose bodies have not yet
changed to require the Athlete mode.
Please see Technical Notes booklet for further explanation.
Digital display
,
P T
4
MALE
9
4
FEMALE
4
4
cm
AnlLmC
4
A6E
4
% FAT
Cm
.
Remove the Bottom Cover.
@Insert the one cables from the column into the holes on
the Weighing Platform.
@Tighten the four Column Attachment Screws and attach
the column to the Weighing Platform.
+Connect
the one cables from the column to the Weighing
Platform as shown in the illustration and replace the
Bottom Cover using the two Bottom
Cover Attachment Screws. When
replacing the Bottom Cover, please
place the cables in the right position
s o that they will not get caught
U
between the cover and the Weighing
Platform. This may damage the
cables.
3.Preparatlon for Use
81
Connection and Installation
For accurate measurement, place the Weighing Platform on as flat a surface as possible and adjust the level with the adjustable feet so the bubble
the level gauge is in the center of the frame.
-.
A CAUTION
Make sure you place the Weighing Platform on a stable level surface and adiust the level with the adjustable feet. If the
Weighing Platform i s not stable because not all the feet are on the surface, for example, there i s a risk of stumbling or
inaccurate measurement.
Connection of Plugs
ustable fe
I
1. Insert the plug from the AC adapter into the DC jack on the back of the weighing platform.
2. Connect the cable and the AC adapter and insert the plug on the cable into the wall outlet.
*To avoid electric shock, do not insert or remove the plug with wet hands.
*To avoid electric shock, do not use the equipment near water.
*To avoid measurement error, do not measure while using equipment that generates radio waves,
such as mobile phones.
*Use only the original AC adapter (MODEL: SA25-0535U). Using AC adapters other than the
original one may cause malfunction, smoke or fire.
AWARNING
ACAUT~ON
Loading the Printer Paper Roll
ACAUT~ON
Please change the paper roll when red lines appear along the sides of the paper.
1. Turn the equipment on by pressing the
AGE
ATHLETIC
?6FAT
[ml
key.
"P.Endf' will flash in the middle of the screen.
This means that there is no printer paper.
* When you do not have any printer paper to replace
the old roll, press the [ @] key. "P.EndU will
disappear and you can continue measurement.
2. Remove the Paper Dispenser Cover.
When you lift up the Paper Dispenser Cover from the
back of the Control Box, it can be easily removed.
ms
3. Cut off the end of the printer paper where the
3cm
glue is (about 3 cm) in a straight line.
A
Please make sure to cut off the part with the
glue because the glue may hinder the paper
feeding through the printer.
4. Insert the printer paper into the slit.
The printer paper is automatically rolled up and the
edge of the paper is cut automatically.
Please remove the cut paper.
A
Please make sure you insert the printer paper
straight into the slit.
5. Insert the catches of the Paper Dispenser Cover
into the guide holes.
* If a paper jam occurs, please refer to P. 25.
m
Seiting the date and time
/ 1 \ ~ h e printer function is ON in the display shown below.
1. Push the 1
0 1 key.
The entire display will begin to flash, and then the
clothes weight input screen will appear.
,
8
MALE
FEMALE^
ATHLETIC
777 7
7
7
7 17
7 4
L t
4
)7 R 7
7n
2. Push the [
kg
STABILIZED
cm
AGE
%FAT
ml key.
The date and time input screen will appear.
The upper row of numbers show the year, the middle
row the month and day, and the bottom row the time
(hours and minutes).
* If no changes are to be made, press the [
] key again.
m
3. Input the present date and time. l
Input the appropriate numbers, beginning with the
top row, in the flashing space.
Example: To input May 1, 2002, 6:03 p.m., press in
I
*
If you make an error while inputting a number, press the
[O
l key.
This will return you to the previous input space.
4. Press the [
MALEfj
STABILIZED
FEMALE$
cm
ATHLETIC
AGE
% FAT
a l key.
The date and time are set, and the clock function is
running.
The display will now return to the step prior to
l
entering this mode.
*
The clock function is backed up by the rechargeable battery, -,
but natural electric discharge of the rechargeable batter;
may occur if the device is not in use for an extended period
(more than 2 weeks); this will clear the settings, making it
necessary to reset the date and time.
1
Set the functions (modes) that you want this equipment to start with. The selected modes will be automatically recorded.
l key.
If it is not necessary to change the seitings, the equipment will start up when you simply press the
[m
Setting tke number of printouts, the printout language, and the printout items
~p
Select the number of print outs (0 - 9) and language. (English, French, German, Italian, Spanish)
l
l
I . While holding down the 101 key, press the [Wl
fl
STABILIZED
MALE
FEMALE$
cm
ATHLETIC
AGE
key.
Release the keys after "Prt-l" is displayed on the
screen.
% FAT
m
X(
@
I
r
,
d,' FEMALE^
"'"LL
1
,.-
V
C I ~
AGE
ATHLETIC
&TEEID
% FAT
2. Select the number of print outs
Using the numerical keys, enter the quantity of print
outs desired.
The maximum number is nine.
[ 11-[9] : Quantity of print outs
[OI
: NOprintout
3. Language Selection
If " 0 is selected at step
fi
STABILIZED
MALE
FEMALE^
cm
ATHLETIC
AGE
% FAT
,
STABILIZED
cm
AGE
ATHLETIC
% FAT
2, you cannot preset
the language.
The display will automatically change to the language
selection screen. The currently selected language will
be displayed as a number.
Example: (LNG-1) means English.
Select the language desired using the numerical keys.
[ll :English
[21 :French
131 : German
141 :Italian
151 :Spanish
4. Printing selection
Printing contents are selected from numerical keys.
[Ol :Short
[ 1 l :Long
MALE
nn
0
PT
MALE fj
:4:
kg
Lt.Lt
P sTABlLlzED
FEMALE $
cm
ATHLETIC
AGE
cmm
%FAT
5. The display will automatically change to the
measurement screen after all the input has been
completed.
If further change to the print settings is desired,
please turn off the equipment and follow steps 1 - 4
above.
The equipment will start up with these settings next time you use it.
Setting the Original Mode
This process is utilized to select whether or not you use the target body fat ratio function. (See the printout sample
on page 16.)
I
The target body fat ratio function is deactivated when this product is shipped from factory.
LII~IIIIIIIIIIIIIIIIIIIIIIIIIIIIJ
key while holding down Le
1. Press the
ATHLETIC
key.
AGE
% FAT
[Ol : The target body fat ratio function is deactivated
-
[ 1l : The target body fat ratio function is activated
A
MALE fi
or
ATHLETIC
AGE
70FAT
If the number of print outs is set to " 0 during
the process of "Setting the Number of Print
Outs and Language" on page 13, you cannot
preset this item.
2. After the input i s completed, the display will
automatically change to the measurement
screen.
B
MALE
FEMALE#
ATHLETIC
c
E
lm
B
cm
U
AGEFAT
%
The equipment will start up with these settings next time you use it.
Sample
TANITA
BODY COMPOSITION
ANALYZER
BC-418
BODY TYPE
GENDER
AGE
HEIGHT
WEIGHT
BM1
lady
This section prints the both the
type a n d body]
composition data of the
current user.
@
STANDARD
MALE
34
179 cm
73. 3 kg
23. 9
7 2 9 4 kJ
1713 kcal
13. I W
9 . 6 kg
6 3 . 7 kg
4 6 . 6 k;
FAT MASS
FFhl
TB\\'
DESIRABLE RANGE
FAT%
8-20 %
FAT MASS
5 . 5-15. 9 kg
TARGET B F I is :
Predicted weight :
P r e d i c t e d fat m a s s :
F A T T O GAIN:
20%
79. 6 kg
15. 9 kg
6. 3 kg
Consul
I y p u r p h y s i c i a n
b e f o r e beginning a n y
weight managemen! proram. T n n i t r i s n o t r e s p o n r i b l c Tar d e t e r rnlning your target B F B .
This section calculates the
amount of fat that should be
lost or gained to achieve the
Target BF% (preset by the user
and health care professional).
IMPEDANCE
\\'hole B o d y
R i c h t Leg
l e l t Leg
Rioht Arm
l e f t Arm
Segmental Analysis
R i h t Leg
fat%
Fat M a s s
FFM
Predicted hluscleMass
r:
1
h e measurement data for
each body part - the predicted
muscle mass, the fat mass, and
the body fat percentage - are
rinted out in this portion.
3.4 k;
Left Arm
Fat%
15.4 F
Fat Mass
0.6 kg
FFM
3.5 kg
Predicted MuscleMass
Trunk
Fat%
Fat M a s s
6.0 kg
FFM
31.1 kg
Predicted MuscleMass
<Printing selection and Goal Setter Mode>
I Goal Sefter Mode I
-election
Input
I
Print Out
I
STANDARD
ON
Short
ATHLETIC
-11 -1
0
0
0
000
TARGET BF 00%
101
OFF
STANDARD
[ol
ATHLETIC
STANDARD
ATHLETIC
Long
[ll
101
I
I
STANDARD
ATHLETIC
1
1
00
00
For this Printing Selection, please refer to the page 13.
For this Goal Setter Mode, please refer to the page 14.
1
1
Body Composition Analysis
This explains the procedure when the printer function is turned on. Please be aware that the display may be
difkrent
if the number of printouts is set to [01.
Do not wipe the equipment with corrosive chemicals (gasoline, cleaner, etc.). Please use a neutral
detergent to clean the equipment.
When the equipment has been transferred to any location where there is a temperature difference of
20'C or more, wait for at least two hours before using it.
In taking measurements, please keep the person away from the unit, who uses transmitters such as a
mobile phone avoid causing margin errors.
1. Turn on the Power.
Press the [ (o/o) ] key.
"0.0" will appear on the upper portion of the display.
I
ATHLETIC
EaZD
%
FAT
AGE
2. Enter Clothes Weight.
STABILIZED
cm
AGE
% FAT
Enter clothes weight using the numerical keys.
Example: if the clothes weight is 2.0 kg, press [2],
[.l
and then [O].
When the data input is completed, the data will be
displayed as a minus number.
3. Select the Body Type.
STABILIZED
cm
ATHLETIC
%FAT
Select the Body Type from Standard Male, Standard
Female, Athletic Male and Athletic Female. Please use the
Athletic key when the user is 17 years or older and also
meets the following criteria.
See page 8 for Tanita's definition of "Athlete."
4. Enter Age.
.-
* If the user is 32 years old or younger.
STABILIZED
Example: Press [3] and [2].
* If the user is 9 years old or younger
Example: press [O] and [9].
ATHLETIC
% FAT
* If ages 16 or less are entered, even if Athletic is
selected for the Body Type, it will be automatically
changed to Standard.
0
l
FEMALE
4
ATHLETIC
m'zm
-
-3!.?
L.L!
(
4
77
(c
qkg
STABILIZED
m m
5. Enter Height.
cvsmnlo.
T f +he
'"'l
"
" user's
-..A
&
L
,
.
.
rqi
a1 LU r l tel L LL J.
UAL,.L,
height is 172 cm, please press [l],[7]
6. Set the Target Body Fat Ratio.
ATHLETIC
After you input the height, "GOAL" will
automatically flash on the display. Input the target
body fat ratio desired using the numerical keys.
Example: 16% = Press [l] and [6].
9% = Press [O] and [9].
* If the number of print outs is set to "0", nothing will
be displayed.
* If the target body fat ratio is set to OFF, the target
body fat ratio will not be printed out.
A
Before you start a body weight management
program and set the appropriate personal
body fat ratio, please consult your doctor.
Tanita i s not responsible for setting the
appropriate target~bodyfat ratio for specific
individuals.
For details of the desirable body fat
percentage, please refer to the Technical Notes.
Male athletes may wish to select a single digit
body fat percentage as their target. However,
this i s notrecornmended for ~tandordAdults, in
particular women, who should avoid becoming
excessively lean. Always consult a doctor about
the target body fat percentage most suitable for
your body type.
A
Do not step on the Weighing Platform until the
target body fat ratio setting has been
completed because the power may be
automatically turned off or the measurement
may be inaccurate.
* If you want to change the settings, please press the
[ @ ] key and the procedure will go back to the
former step. Please re-enter the data.
7. After "88888" is displayed on the upper portion
of the display, a flashing arrow will appear next
to F F m .
8. Start Measurement.
Step on the Weighing Platform with bare feet so they
touch the electrodes. Stand in a stable position without
bending your knees.
/I\
Do not use the hand grips, as you will only be
measuring your body weight this time.
9. Taking Measurement.
1
ATHLETIC
:
Step on the weighing platform in bare feet. Make sure heels
are placed on the posterior electrodes, and the front part of
the feet are in contact with the anterior electrodes.
An arrow will flash next to [STABILIZED] b and the
weight will be displayed on the LCD.
QQDQ
10.Measure the Impedance.
When the grips are grasped with both hands, nono
will a p p e a r a t t h e bottom of the display a n d t h e
impedance measurement will begin.
The onon marks will disappear one by one during the
measurement; after five full cycles, the measurement will be complete.
/I\
M1
Grab the grips (two locations) only after the body
weight figure on the display has stabilized.
Do not step off the Weighting Platform until
the "oooa 'Isymbols disappear completely.-,
In cases when measurements of the body fat r a
or the quantity of fat are abnormally small or the
error message (E01) is shown on the display, the
probable reason is that the soles of the feet and the
electrodes are not in full contact. Make sure you
step on the Weighing Platform so there is contact
between the electrodes and the soles of your feet.
If the problem is not solved this way, it is possible
that the soles of the feet have calluses and the
resistance is too great. Therefore, place about 0.5
ml of water on each of the four electrodes where
the feet touch before measurement.
FFMl
ATHLETIC
E
FAT
Left arm -
Left leg -
p Right leg
1
Trunk
IBILIZED
E
FAT
1 1.Measurement Is Completed.
Once the body weight and impedance measurements have
been completed, the overall body fat percentage will be
shown at the bottom of the display and a buzzer will sound.
Lf the printer is ON, the measurement results will be printed out. .
* With regard to the measurement result, please refer to P. 22.
If the printer is OFF, the measurement results (predicted
muscle mass, fat mass, and body fat percentage) for each
body part can be displayed using the ten-key pad.
Select the number of the desired body part on the ten-key pad.
141:
Left arm
161:
Right arm
101:
Left leg
[.l:
Right leg
[S] and 121: Trunk
"See page 13 for details on printer settings.
Step off the Weighing Platform.
12. When You Continue to Measure.
A f t e r p r i n t i n g i s c o m p l e t e d , g o b a c k t o s t e p 3.
Measure by entering the data in the same procedure.
13.Finish Measurement.
Press the [
] key and turn off the power.
-
Weight Only Function
1. After turning on the unit, press the
FEMALE^
cm
ATHLETIC
AGE
X FAT
[ml key.
.
After a momentary display check, "0.0" will appear
on the LCD. If measuring units need to be changed,
do so at this time by pressing the []key.
An arrow on the LCD will follow the selection of
weighing units.
2. Weight Measurement.
Step on the Weighing Platform.An arrow will light
next to [STABILIZED] ) and the weight measurement
L .L(
wwq
cm
FEMALE$
l
ATHLETIC
EmD
will be displayed on the LCD.
% FAT
AGE
3. When measuring is complete, press the
key to turn off the power.
L/
cm
ATHLETIC
AGE
% FAT
[ml
No printer i s available when measuring
weightonly.
If body composition analysis is desired, turn
the unit off and then on, using the
l
key.
[m
Important Note: There is no automatic weight lock
function.
Sewing of Clothes Weight
1 . Press the [
l key.
P T
l
c STABILIZED
cm
ATHLETIC
.-
cimD
7n
E.L(
MALE^
FEMALEB
rC
2. Enter the clothes weight.
C
kg
and then [O].
cm
ATHLETIC
AGIE
cm!Q
%IFAT
FEMALE/
ATHLETIC
Example: If the clothes weight is 2.0 kg, press [2], [.]
* When you want to correct an entry, press the [ @ ]
key and enter the data again.
cm
] key to finalize the clothes weight.
weight is displayed with a
minus, an arrow next to P T 4 lights up, and it
AGE
becomes possible to measure your weight.
% FAT
m
Explanation of the Print Out
Sample
BODY
BMI:Body Mass hidex is a height to weight
ratio, and is calculated by the following
formula:
Weight (kg)
Height (m2)
Desirable Ranee 18.5 - 24.9
2 I/SEP/2002 19:29
L
FAPkThe percentage of total L
that is fat.
,. .,.,.
COMPOSITION
AN ALYZER
BC-418
I
BODY TYPE
GENDER
AGE
HEIGHT
WEIGHT
BM1
BhlR
,
i
'FAT%
FFM:Fat Free Mass is comprised of muscle,
bone, tissue, water, and all other fat free
mass in the body.
-
STANDARD
MALE
34
179 cm
1 3 . 3 kg
23. 9
7294 'lk
1743 kcal
13. 1 %
9. 6 kg'
63. 7 kg
46. 6 kg
FAT MASS
FFM
TB\V
DESIRABLE RANGE
FAT%
8-20 I
FAT MASS
5 . 5-15. 9 kg
- - - - - - - - - PW.Pr edicted weit;ht
Calcu lated weigli t for the g iven Targett
BF%.
TARGET B F I is :
L-
BMR:Basal Metabolic Rate represents the
total energy expended by the body to
maintain normal functions at rest such as
respiration and circulation.
FAT MASS:Total weight of fat mass (in kg,
Ib) in the body.
TBW:Total Body Water is the amount of
water (expressed as Ib, kg, or st.lb) retained
in the body. TBW is said to comprise
between 50% - 70% of total body weight.
Generally, men tend to have higher water
weight than women d u e to a greater
amount of muscle.
20%
Predicted weight :
19. 6 kg
Predicted fat mass :
/
FAT TO LOSE/GAIN:
Calculated fat mass to lose or gain to
achieve the Predicted Weight.
FAT T O GAIN:
6 3 kg
PFM:Predicted fat mass
fat mass for the given Target
A Caluculated
BF%.
Conrul I your physician
bcfurc heginning any
w e i g h , manog?rnent program. Tanit. 9 s not rerpooriblc for determ i n i n g y o u r l a r g e , BFCn.
,IMPEDANCE
1MPEDANCE:Impedance reflects the body's
inherent resistance to an electrical current.
Muscle acts as a conductor of the electrical
current, adipose tissue acts as a resistor.
15. 9 kg,
Whole Body
Righl Leg
Lelt Leg
Rioht Arm
~ e i ~t r m
551 0
212 a
214 a
PMM:Predicted Muscle Mass
means bone-free lean tissue mass (LTM)
Segmental Analysis
Riehl Leg
fat%
8.9 1
Fat Mass
1 . 1 kg
FFhl
11.5 kg
Predicted MuscleMass
10.9 kg
Predicted MuscleMass
10.1 Z
1.2 kg
11.0 kg
-.
10.4 kg
Rioht Arm
fat%
14.0 Z
Fat Mass
0.6 %g
FFM
3.6 kg
Predicted MuscleMass
3.4 kg
Left Arm
Fat%
15.4 "m
Fat Mass
0.6 kg
FFM
3.5 %g
Predicted MuscleMass
3.3 kg
Trunk
Fat9
15.0 B
Fat Mass
6.0 kg
FFM
34.1 kg
Predicted MuscleMass
32.8 kg
N0TE:Please refer to the Technical Notes for details.
A
Please consult your doctor before you start a body weight management program. Tanita is not responsible for the
target body fat ratio.
I
Aae
Body Fat Ranges for Standard Adults
Underfat
Underfat
Healthy
Healthy
I
Overfat
Overfat
* As reported by Gallagher,et al., at NY Obesity Research Center.
Obese
Obese
To determine the percentage of body fat that's appropriate for your body,consuit
your physician.
Based on NIHIWHO BM1 Guidelines
BM1 < 18.5
Underwight
Obese
CLASS l
Obese
C L A S S ll
< 25
2 5 5 BM1 < 30
3 0 5 BM1 < 3 5
3 5 5 BM1 < 4 0
Obese
C L A S S Ill
BM1 2 4 0
18.5 5 BM1
Normal Range
Pre obese
23
m
Components of the Printer Unit
7
C
Automatic Cutter Unit
Printer Paper Outlet
I
I
U
Paper Release Lever
/
o
\\\\\\\v/
o
rm
////l ///
1
l0
) i
K
nI I - r
* This is a picture of the Control Box without the Printer Dispenser Cover and the Printer Cover, looking down
from above.
Clearing Paper Jams
ACAUTlON
Please pay careful attention to avoid injury from the sharp edge.
P b s e turn off the machine before clearing Paper jams.
1. Remove the Paper Dispenser Cover.
If you lift up the Paper Dispenser Cover from the
back of the Control Box, it can be easily removed.
2. Remove the Printer Cover.
As shown in the illustration, from the front side of the
Control Box, use a finger to lift up the Printer Cover.
The Printer Cover is firmly fixed by catches.
A
Please make sure not to drop the Control Box
when you remove the Printer Cover.
3. Lift up the Automatic Cutter Unit.
From the front side of the Control Box, lift up the
Automatic Cutter Unit with a finger.
/ '
Paper Release
Lever
Raise the Paper Release Lever and remove the
jammed paper.
Remove the printer roll paper and the jammed paper.
Return the Paper Release Lever, the Automatic
Cutter Unit and the Printer Cover to the normal
position.
Insert the catches of the Printer Cover into the guide
holes of the Control Box and push it down slowly
while pressing the catches on both the left and right
hand sides until a click is heard.
A
Failure to press down the Paper Release Lever
will result in continuous feeding of the printer
paper without it being cut automatically.
Return the printer paper roll.
Return the printer paper roll by following the
procedure in P. 11 [Loading Printer Paper Roll].
7. Return the Printer Dispenser Cover to the proper
position.
Press the Printer Dispenser Cover down slowly as the
catches of the cover go into the guide holes. P. 11.
25
0. ~
O bleshooting
U
Problem List
If problems occur, please refer to the following instructions before you ask for repairs.
Problem
Solution
Please confirm that the Control Box is properly connected to the AC
Adapter and the AC Adapter is properly connected to the cable.
Nothing appears on the display after
pushing [
l key
E-01 is displayed.
E-01 is displayed when the impedance shows an abnormal value
compared to height and weight.
Please make sure that measurement was carried out with bare feet, the
electrodes or the soles of the feet were clean, and the feet were correctly in
contact with the electrodes. If the feet are dry or have calluses, place water on
the electrodes before stepping on the unit.
It is possible that the body fat ratio exceeds the measuring capacity.
Please stop measuring.
E-02 is displayed and the reading of
This sign is displayed when the body fat percentage of the trunk is too
low and is off the measureable range.
Please refer to the readings of other parts for the body fat.
the trunk cannot be obtained.
E- l l is displayed.
E - 11 is displayed when there is a loose connection between the control
box and the weighing platform.
Confirm that none of connections between the scale and control box are
loose or unplugged.
There may be excessive vibration which will disturb the measurement process.
E- 12, 13 or 14 is displayed.
The equipment requires readjustment.
E- 16 is displayed.
Measurement is not possible because impedance is unstable. In order to
improve electrical conductivity, please clean the soles of the feet or
place water on the electrodes before using the equipment.
No print out
Please confirm the number of print outs selected is more than 0. (See P. 13)
Please confirm that the correct brand of paper is used.
Please confirm that the printer paper roll is placed in the correct position.
Please confirm that the printer paper is not jammed.
The printer paper does not come out.
Please confirm the printer paper is not jammed.
P.End is displayed and the equipment
is incapable of taking a measurement.
The printer paper is used up. Please put in a new printer paper roll. (See P.ll)
Please confirm that the printer paper is being advanced properly.
Please make sure that the Paper Release Lever is not in the "Up" position. (SeeP. 25)
---- is displayed.
It is possible that the maximum weight capacity has been exceeded.
Please stop measuring.
uuuu is displayed.
The power has turned off during measurement.
Feed Key is not functioning.
o
Do not stand on or put things on the Weighting Platform before starting measurement.
Start measurement after confirming there is nothing on the Weighing Platform.
It is possible that the number of print outs selected is 0 or the Weight
Scale Mode has been selected. Please select the Body Fat Measurement
Mode and select a number larger than 0 for the number of print outs.
RS-232C Interface Instructions
This section describes the interface for outputting the BC-418MA Body Composition Analyzer measurement results
as RS-232C signals to personal computers and other external devices.
ACAUTION
The BC-418MA is in full compliance with IEC601-1 Safety Standard.
Only connect IEC950-compliantcomputers to the BC-418MA.
Signal lines and connection methods
Specifications
-
Communication Standard
EIA RS-232C Compatible
Data bit length
Parity
Stop bit
Terminator
4800 baud
8 bits
None
1bit
CR+LF
[
-
Signal name
m
TXD
GND
00000
9
6
Connection example Always use a reverse cable when connecting to an external computer.
Personal computer or
other device
BC-4 1 8MA
1.
2. RXD
3. TXD
4.
5. GND
- S *
0
0
RXD
TXD
0
0
GND
An RS-232C connector (D sub 9-pin female) is located in the lower center on the back of the control box.
Use an RS-232C cross cable when connecting to a personal computer or other device.
RS-232C connector (D sub 9-pin male)
RS-232C cross ca
Transmission data
ACAUTION
Transmission data will be output after measurements regardless of the status of the
personal computer or other device at the receiving end. For that reason, the
personal computer or other device to which data will be transmitted must be put in a
reception-readystatus before measurement.
( I ).Output data items
Output data (ASCII code)
Data
Date
Time
Body type
Gertder
Heiight
We ight
Body fat percentage
Fat mass
Fat free mass
Body water mass
Age
BM1
BMR
Impedance Whole body
Right leg
Left leg
Right arm
Left arm
Right leg Body fat percentage
Fat mass
Fat free mass
Pred~ctedmuscle mass
Left leg
Body fat percentage
Fat mass
Fat free mass
Predicted muscle mass
Right arm Body fat percentage
Fat mass
Fat free mass
Predcted muscle mass
Left arm Body fat percentage
Fat mass
Fat free mass
Predicted muscle mass
Trunk
Body fat percentage
Fat mass
Fat free mass
Predicted muscle mass
/;\
A
kg mode
"dd/mrn/yyU(date/month/year)
"hh:mrn" (hour:minutes)
0: standard 2: athlete
1:male 2: female
Byte Length
xxxxx (cm)
5
5
(kg)
XX.X (%)
XXX.X (kg)
XXX.X (kg)
XXX.X (kg)
XXX.X
5
5
5
2
5
5
XXX.X
XX.X
(kg)
(kg)
(?h)
(kg)
xxx.x (kg)
XXX.X
XXX.X (kg)
XX.X (Oh)
XXX.X (kg)
XXX.X (kg)
XXX.X (kg)
XX.X (O/o)
XXX.X (kg)
XXX.X (kg)
XXX.X (kg)
xx.x (%)
XXX.X (kg)
XXX.X ( k g )
XXX.X
(kg)
key is used to switch to the body weight only mode.
Cakulationr are made using l kcal = 4.1 84k.J.
4
XX
XXX.X
[m1
7
1
1
xxx.~
xxxxx (kJ)
xxx (n)
xxx (0)
xxx ( 0 )
xxx ( 0 )
xxx ( D )
XX.X ( O h )
XXX.X (kg)
Data will not be output if +he
10
-
3
3
3
3
3
4
5
5
5
4
5
5
5
4
5
5
5
4
5
5
5
4
5
5
5
-
(2).0utput data format
Measurement data will be output in the following format.
A comma (,) is used as a separator between data items.
The terminators marking the end of data are CR (ASCII code: ODH) and LF (ASCII code: OAH).
If the digits in the data do not reach the stipulated length for fixed length data, the data will be rightjustified for output, with a zero (0) (ASCII code: 30H) entered in any empty spaces.
frea ~odywatehrmass l I
I Body fat percentage 1 1 Fat mass I
Comma
Comma
-
1
&
X X . X , X X X . X ,
' &
Whole body impedance
I
Right Ieg impedance
I
1Left leg impedance
I
l
I
/I
Fat free mass Predicted muscle mass
lBodyfat pe~centagell Fat mass
I
Left leg
I
-1
l l Comma l
I
I
I
I
Right arm impedance
-
I
m
I Right arm /
I
Left arm impedance
I
Igodp fat percentage ll
1 Fat free mass1 I l
Left arm
I
1
Output (Fat Monitor Mode) Format
Remote Mode
All types of data may be entered by connecting the BC-418MA to a PC and switching to Remote mode.
Switching to Remote Mode
1. When the unit is switched off, press the
and [ @ l keys simultaneously.
PT
STABILIZED
cm
AGE
/1\ NOte
[@l
The default setting is off.
I% FAT
2. Press [Ol, [81.
o)C
kQ
ATHLETIC
cmm
3. Switch Remote mode on and off by pressing [11-.
MALE f)
STABILIZED
cm
ATHLETIC
or [Ol.
[ 11 :Enables Remote mode
[O] :Disables Remote mode
AGE
4. Press [ @ l to confirm.
P T
MALE
8
FEMALE&
ATHLETIC
mm
PT
MALE^
FEMALE$
ATHLETIC
lmm
[m
l key.
Only "r S" will appear (standby screen).
5. Press the
STABILIZED
,- 5
cm
AGE
%FAT
To switch off Remote mode, start
from the beginning again and
select "OFF"at Step 3.
-
Control Commands
When in Remote mode, the body fat analyzer may be operated remotely by sending control commands from a host.
pJnmILF/
D? : Confirm current setting
pJpJmprJm[7pJmB DO : Set clothing weight (5-byte fixed length)
commands
nm/ymm
D1 : Set gender
male = 1
female = 2
pJmmmm
pJ3,mmpcJprJ,gpJ[EE]
D2 : Set body type standard = 0 athlete = 2
•
D4 : Set age (2-byte fixed length)
•
pJmpcJmpiJm
m
commands
El
BpJpJlLFl
Special
:ommands
CHR$(OlFH)
CHR$(OlEH)
l'
D3 : Set height (5-byte fixed length)
D6 : Set Target BF (2-byte fixed length)
G1: Start measuring body fat
G2: Measure weight only
CHR$(Ol FH): Reset settings
m
CHR$(OIEH): Cancel measurement
*All fixed-length data right aligned. Enter / for blanks.
Error Codes
If an error occurs, the body composition analyzer will send an error code to the host.
wpJm[CRIm
~
~
I
I
mpj/ymm
E00 : Attempted to start measuring without completing settings
_E01 : Error
I in calculating
~
~ body fat percentage
EXX :other error ' body fat analyzer switches off
*See p.26 "7. Troubleshooting"for details of errors.