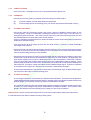
1
INSTRUCTION
N
U
C
LE
O
N
IX
SY
ST
EM
S
PV
T
G.M. COUNTING SYSTEM
LT
D
MANUAL
TYPE : GC 601A
NUCLEONIX SYSTEMS PRIVATE LIMITED
P l o t N o : 1 6 2 A & B , P H A S E I I , I . D . A . C h e r l a p a l l y, H y d e r a b a d - 5 0 0 0 5 1
Ph: 91-040-27263701/32918055, FAX : 27262146, e-mail : [email protected] (or) [email protected]
File Name
Date
:
:
GC601A_Man
20-08-2013
1
CONTENTS
Description
Pg.No.
Introduction
1-1
CHAPTER II
Front panel and Rear panel diagrams
2-3
CHAPTER III
Specifications
4-4
CHAPTER IV
Operating Instructions
4.2.
Instructions on Intelligent keypad
commands
5-8
Operating Procedure
8-9
Block diagram & Description
N
U
C
LE
O
N
IX
Optional Item/Accessories
CHAPTER VI
CHAPTER VII
PV
T
System Interconnections
SY
ST
EM
S
4.1.
4.3.
CHAPTER V
LT
D
CHAPTER I
5-5
10-10
Lead Caslte With Door For G.M Detector
Type LS 240
11-11
Availing of maintenance/ calibration services
and warranty clause (with in india)
12-15
2
CHAPTER - I
INTRODUCTION
Geiger Counting System(AT) Type : GC601A manufactured by NUCLEONIX system is an economy model designed
arroung eight bit micro controller chip. This system with accessories is an ideal choice for teaching/demonstrating
various G.M.Experiments as part of Experimental physics lab to U.G.,P.G., Science, Engineering, Instrumentation
students. Otherstreams such as Radiation physics, Radiationchemistry, Radiation Biology and Agricultural sciences
can also use the system.
This counting system will be an essiential tool for counting Beta activity in radioactive samples in Nuclear Research
LT
D
Institutes, Atomic power stations, Reprocessing Plants, Enrichment Plants etc. Also it can be used for carryingout
a number of Nuclear physics, Radiation Physics & Radio Chemistry experiments in academic institutions, Unversities
PV
T
etc.
Some important features of this unit are :
State of art microcontroller based design
❒
20x2 LCD dotmatrix display for counts, elapsed time and EHT
❒
Counts capacity 999999, preset time 9999 sec
❒
Variable EHT (0-1500V), 1mA
❒
Store and recall facility for data counts
N
U
C
LE
O
N
IX
SY
ST
EM
S
❒
1
CHAPTER - II
FRONT PANEL & REAR PANEL CONTROLS
FRONT PANEL CONTROLS AND INDICATIONS
2.1.1.
POWER ON SWITCH
This is a miniature ROCKER switch which is used to power the unit. When the switch is put 'ON' the
mains AC, power is made available to the unit, through +12V adaptor.
2.1.2.
EHT ( 0-1500V )
This is a knob to be rotated in the clockwise direction for increasing HV which is applied to the G.M.Detector.
Current HV value is indicated on the LCD dotmatrix display.
2.1.3.
INTELLIGENT KEYPAD
(a) PROG key button : This key is an important one which facilitates the user to programme the
operation of the instrument for different modes / conditions. More details are covered under "CHAPTER
IV OPERATING INSTRUCTIONS".
LT
D
2.1.
PV
T
(b) START key button : This is used for starting of acquisition once all the programme parameters have
been set.
(c) STOP key button : This key can be used to terminate acquisition inbetween course of action. In the
normal course acquisition will stop automatically at the end of preset time.
SY
ST
EM
S
(d) INC/DEC key button : These keys are used while setting the programme parameters to increment
and decrement a value or to change the option selected to another value available.
(e) STORE key button : This key is used for storing the readings or data values in the following way, in
the manual mode of storing only.
At the end of acquisition for a preset time if user presses this button, data counts and with or without EHT
will be stored and the Sl.No. in the display increments to the next value.
In CPS/CPM modes the current CPS/CPM is saved on pressing this button.
LCD DOTMATRIX DISPLAY
N
U
C
LE
O
N
IX
2.1.4.
This is a 20 X 2 alpha numeric LCD dotmatrix and responds to all the commands from the keypad and
displays programme parameters, current HV, data counts, preset and elapsed times etc,.
2.2.
2.2.1.
2.2.2.
REAR PANEL CONTROLS AND INDICATIONS
+12V ADAPTOR SOCKET
This is a low voltage socket for supply the board.
G.M.DETECTOR
This is a MHVsocket through a MHVto MHV cable, GM detector mounted in the G.M.stand gets connected
here. HV through a load circuit is applied to the detector.
2
SY
ST
EM
S
PV
T
LT
D
FRONT VIEW OF G.M COUNTING SYSTEM AT
TYPE : (GC601A)
N
U
C
LE
O
N
IX
REAR VIEW OF G.M COUNTING SYSTEM AT
TYPE : (GC601A)
3
CHAPTER - III
SPECIFICATIONS
:
:
Negative
500 mV (min)
Resolving time
:
6 micro sec (approx)
EHT output
:
Variable EHT using ten turn pot upto a maximum of 1500 volts
at 1 mA. Line and load regulation better than 0.05%.
Display
:
20 X 2 LCD dotmatrix display has been provided to indicate
data counts, Elapsed time and EHT
Counts capacity
:
999999 counts
Preset time
:
0 - 9999 seconds
Data storage
:
Upto 6665 readings
Command Buttons
:
START, STOP, PROG, STORE, INC & DEC command buttons
have been provided on the front panel key board.
Programmability
:
Includes selection of preset time, storing/ recalling of data,
starting and stoping of acquisition etc.
G.M.Socket
:
MHV connector for connecting to G.M.Detector.
Power
:
+12V adaptor about 1.4A at 230V at 50 Hz
Mechanical Dimensions
:
250mm(W) X 140mm (H) X 300mm (D)
PV
T
SY
ST
EM
S
N
U
C
LE
O
N
IX
ACCESSORIES
LT
D
G.M.Input (From G.M.Counter)
(a) Polarity
(b) Amplitude
The following accessories will be required for using the unit purposefully.
a.
b.
c.
d.
End Window G.M.Detector Stand
Type : SG200
End Window G.M.Tube
Type : GM 120 (or) GM125
Radioactive Source Kit
Type : SK210
Aluminium Absorber Set
Type : AA270
OPTIONAL ACCESSORIES
e.
Lead Castle
f.
External Keypad with one meter cable
Type : LS240
4
CHAPTER - IV
OPERATING INSTRUCTIONS
4.1.
SYSTEM INTERCONNECTIONS
Connection
From
Remarks
cable to be used
To
+12V adaptor
+12V adaptor
G.M. Detector MHV
Socket on Rear Panel
of GC601A
MHV Socket on
G.M.Stand
MHV to MHV cable
4.2.
INSTRUCTIONS ON INTELLIGENT KEYPAD COMMANDS
SY
ST
EM
S
When we switch on the unit, the display will show up,
PV
T
LT
D
+12V adaptor
G M COUNTING
SYSTEM
for 3 Sec.
NUCLEONIX
SYSTEMS
ACQUISTION MODE SELECTION
By default, display changes to,
N
U
C
LE
O
N
IX
4.2.1.
for 3 Sec.
ACQ MODE
PR.TIME
HV
XXXX
This signifies that by default "acquistion
is in preset time mode". Because in
majority of the situations counting is done
for a preset time set.
If you want other modes of acquistion
such as CPS (Counts per second) or CPM
(Counts per minute) then press ▲or ▼
keys to select required mode or else
proceed as follows. If ACQ MODE is
required by PR. TIME then, skip the above
selection and proceed as given below.
7
This always displays the current
HV. We can vary the HV by using
helipot knob on the front panel.
As you turn the knob in clockwise
direction HV increases. This is the
HV that is applied to G.M. detector.
4.2.2.
PRESET TIME SETTING
By pressing PROG key, display changes to,
PRESET
TIME
Cursor position
Λ
XXXX
HV
XXXX
This displays the previous preset time for counting. We can change the
preset time by the following way.
▲ Key can be used to increase the value at the cursor position.
▼ Key can be used to shift the cursor position to the left.
4.2.3.
OF READINGS STORED
SY
ST
EM
S
Now by pressing PROG key again display changes to,
READINGS.
XXXX
HV
XXXX
This displays the current no. of
readings stored in the EEPROM.
SAVING PROGRAMMED PARAMETERS
N
U
C
LE
O
N
IX
4.2.4.
PV
T
LT
D
By the above method set the required PRESET TIME for acquistion.
All the programmed parameters are to be saved by the user before he can start acquisition. Without
saving, the system will use the previous parameters for acquisition.
By pressing PROG key,
display changes to,
SAVE ? (PRG)
HV
XXXX
SAVE?
To save the above parameters press ▲or ▼ keys
"OK" will be displayed on saving of parameters (PRG)
6
4.2.5.
RECALL DATA READINGS
This is a very useful feature that has been provided in this unit. At the end of storing/saving of a set of
readings, this feature will enable the users to recall the readings on to the display, from the Sl.No. set in
the "RECALL" mode. Changing of the Sl.No. is similar to that explained under "PRESET TIME" selection.
By pressing PROG key, display changes to,
XXXXX
HV
XXXX
Sl.No.
No. of counts
This is the HV at the time of
data storing. If the data is
stored with HV only.
LT
D
RECALL
XXXX
STORING OF DATA READINGS
SY
ST
EM
S
This system has CMOS memory to store upto 1000 readings. Storing can be initiated in two ways.
(a) MANUAL
(b)
AUTO
User can select any of these options. In manual mode at the end of acquisition of each reading the user
has to press "STORE" command button once for each reading.
In AUTO mode, each of the data readings gets saved into memory along with lable. User intervention is
not required.
While acquisition is going on, user may observe that at the end of each acquisition, the Sl.No. pointer will
be incremented by one where the data counts will be stored.
By pressing PROG key, display changes to,
N
U
C
LE
O
N
IX
4.2.6.
PV
T
Recall serial number can be changed by ▲or ▼ keys.
STORE (DATA)
AUTO
HV
XXXX
Default mode is AUTO, to change to manual mode press ▲or ▼ key.
AUTO mode is used to store data automatically after acquisition (PR.
TIME).
Note : In case of CPS/CPM mode press STORE to store data at any time. AUTO storing is not valid in
CPS/CPM mode.
7
4.2.7.
STORING OF DATA READINGS : (WITH HV / WITHOUT HV)
By pressing PROG key , display changes to
STORE DATA
WITHOUT HV
HV
XXXX
Default mode is "without HV" to change it to "with HV" press ▲or ▼
keys.
LT
D
This is used to store, recall and printing of HV.
If it is in "WITH HV"
i.
data will be stored with HV
ii.
data will be recalled with HV (if you stored the data with HV only)
If it is in "WITHOUT HV" mode the above effect will not be in picture. i.e.,
ERASE MEMORY
SY
ST
EM
S
4.2.8
Data will be stored without HV
Data will be recalled without HV (if the number is stored with HV
also)
PV
T
i.
ii.
ERASE MEMORY
?
If you press ▲or ▼ keys. OK will be displayed.
It erases all the data which has been stored in memory.
OPERATING PROCEDURE
4.3.1.
GENERAL
N
U
C
LE
O
N
IX
4.3.
After making the interconnections as detailed under 4.1., the unit can be switched ON.
Before switching ON please ensure that the G.M. Detector is mounted inside the G.M.Stand and
interconnections are made between the detector and crocodile clips with proper polarity. Wrong connections
will damage the G.M. tube permanently.
Also ensure before switching ON, that EHT knob is in anti-clockwise position completely, so that HV
applied is almost zero volts.
Now user can place a radioactive source in the source tray and increase the HV after switching ON the
unit. User can notice that HV value will be displayed on the dot matrix display.
Now it may be better to go through the instructions given in 4.2. "Instructions on intelligent keypad
commands. Having practiced the commands on keypad, user can carryout the experiments as detailed
in the manual for "Experiments with G.M. Counter" or use the system for sample counting etc,.
4.3.2.
NORMAL SETTINGS
After confirmating that there are no visual damages to the unit you are requested to keep all the controls
in the NORMAL positions as indicated under general operating procedure in 4.3.1.
8
4.3.3.
POWER TO WORK
Now connect the +12V adaptor to the unit of rear panel and switch ON the unit.
4.3.4.
OPERATION
Normally the counting system is operated under two following conditions that is
(a).
(b).
(A)
At varied voltages. (for G.M.characteristics experiments).
At fixed voltage (known as operating point) - for all other experiments and sample counting.
AT VARIED VOLTAGES
LT
D
Now having made all connections properly and put the controls in NORMAL settings switch on the
counting system. We find the dotmatrix LCD display indication as given under "4.2. Instructions on
intelligent keypad commands". Now refer to these instructions and select a desired preset time and
press START button to acquire data counts of G.M. detector.
User may gradually increase the EHT from 300V to find that the counts will just start getting recorded and
displayed on dotmatrix display.
PV
T
User may just look for a HV setting at which the unit starts counting. This point is called 'STARTING
VOLTAGE' of the G.M.tube.
SY
ST
EM
S
Now press STOP command button and reduce the EHT slightly by 10 to 15V and restart the acquisition
from their onwards and each time take readings for EHT Vs Counts for the preset time till about 900V,
from the starting voltage which you have identified.
Repeat the above operation for each incremental voltage step and note down the readings. One would
observe that counts will increase first drastically for the first two or three readings. The initial steep rise
after starting voltage for this region is called knee portion of the characteristics. There after it remains
more or less constant with small increase (positive slope) for considerable number of readings. There
after there will be steep rise in data counts. At this stage one should stop recording further readings and
reduce the EHT. This region of steep rise in data counts is called discharge region. Continuous operation
of the detector in this region can reduce the life of the tube or permanently damage it.
(B)
N
U
C
LE
O
N
IX
The part of the characteristic curve between knee position and discharge region is called plateau region.
The mid point of this region is called operating point.
AT FIXED VOLTAGES
The mid region of the G.M. Characteristics is called PLATEAU REGION. The mid point of the plateau is
called OPERATING VOLTAGE of the G.M. detector. Normally when it is required to operate the G.M. tube
at fixed voltage, it is required to set the bias equal to OPERATING VOLTAGE.
The procedure to follow the G.M. tube at fixed voltage (operating voltage) is as follows. Repeat the procedure
as under " At varied voltages" and plot the characteristics to obtain the plateau. The mid point of the
plateau, ultimately becomes the operating point (voltage), for this mode of operation.
PRECAUTION : Always it is advised to keep the EHT in minimum position before starting the experiments.
It is also advised to keep EHT low before switching off the system.
9
CHAPTER - V
BLOCK DIAGRAM & DESCRIPTION
While going through these following lines, please refer to the enclosed block diagram. This is an advanced Nuclear
counting system (Integral) designed around microcontroller chip AT89552.
This unit has a High Voltage PCB, Microcontroller PCB, LV Power supply and GM pulse shaper circuit PCB and
20 X 2 LCD dotmatrix display.
HV circuit consists of DC to DC converter with external drive oscillator. This typically operates in the frequency
range of 25 KHz to 35 KHz. A 555 oscillator is used. R.F. transformer steps up the voltage. A voltage doubler, filter,
regulator etc., will give highly stable EHT variable in the range of (0-1500V) @1mA.
LT
D
Display for current EHT is achieved through a ADC chip which logs sample of HV and through microcontroller, it
goes to LCD display under software control and HV is indicated.
DETECTOR
SY
ST
EM
S
PV
T
The LV and input circuit PCB generates +5V, +12V, required for circuit functioning in this PCB. Also the negative
tail pulse output from th G.M. tube is processed by a pulse shaper circuit to give a standard TTL pulse, which is
sent to paralysis gating logic and to counter chip as indicated in block diagram. For every second micro controller
reads data from counter and it displays on the 20 X 2 LCD module. Once the preset time is completed microcontroller
reads the data from counter and resets the counter. The microcontroller stores the data in EEPROM and recalls
the data whenever we select recall mode. Whenever we press any key an interrupt is generated and the corresponding action will be processed.
>
HIGH VOLTAGE &
FILTER CIRCUIT
>
>
>
ADC
>
>
N
U
C
LE
O
N
IX
INPUT CIRCUIT
>
+5V
>
>
MICRO CONTROLLER
POWER SUPPLY
<
+12V
>
COUNTER
20 X 2 ALPHA
NUMERIC
DISPLAY
KEYPAD
10
EEPROM
CHAPTER - VI
LEAD CASTEL WITH DOOR FOR G.M DETECTOR LS240
This consists of 40mm lead shielding cylindrical rings assembly with total of eight lead assembly parts. There is
a hinged door in the bottom ring through which sample can be loaded in to the G.M stand sample tray.
PV
T
LEAD CASTEL WITH DOOR FOR G.M DETECTOR
WITH STAND TYPE
LT
D
A 1mm aluminum lining is provided on the inside surface of the lead shielding. When it is dispatched from here
usually it is packed in about four wooden boxes. So, on unpacking there parts could be assembled as shown in
the enclosed drawing.
7
SY
ST
EM
S
6
5
4
3
2
N
U
C
LE
O
N
IX
1
ASSEMBLED VIEW
There is a small cutout on the top ring to take the cable connection between G.M Stand to rear panel of the unit
(GC 601/602 or RC605). The top ring has a handle for lifting and this closes the lead castle from top side.
11
CHAPTER - VII
AVAILING OF MAINTENANCE/ CALIBRATION SERVICES AND
WARRANTY CLAUSE (with in India)
7.1
GENERAL
As per the warranty clause of the company, we provide one year warranty during which period we provide
free service at our works. Hence in case of any mal-function in our instruments, you are requested to send
the unit back to our works by RPP/COURIER/SPEED POST PARCEL/GATI/XPS/door delivery. We shall
arrange immediate rectification/replacement within two weeks from the date of receipt of the equipment at
our place. Please note that the equipment will be serviced at our works only.
The equipment is to be sent to:
LT
D
The Servicing Department
NUCLEONIX SYSTEMS PRIVATE LIMITED
Plot No: 162 A & B, PHASE II, I.D.A. Cherlapally,
Hyderabad - 500 051Ph: 040-27263701/329145448/32918055
E-mail: [email protected] www.nucleonix.com
PV
T
For all the Radiation monitoring equipment, detectors built-in or external probes will not have one-year
warranty, but only inspection warranty at the time of supply is provided. Since detectors will / may have
fragile glass construction, we do not provide warranty. In case of failure of these components, Nucleonix will
supply detector replacement at cost-cost price.
SY
ST
EM
S
Note: In respect of all types of portable radiation monitors, it may be necessary to checkup and recalibrate
the equipment once a year at our works.
7.2
EQUIPMENT REPAIRS / SERVICING POLICY (WITH IN INDIA)
(a)
During Warrantee
The following procedure is to be followed by the customers with in India for availing services/ repairing
facility during warrantee period.
Equipments are to be sent to our works for availing free repair services during warrantee, after the
customer receives approval from the customer support division, by sending an e-mail.
For all equipments, costing less than 6.0 lakhs one year warrantee & free service is offered, when the
equipments are sent to our works only. For larger systems such as installed systems, networked
systems, specialized systems, costing more than 6.0 lakhs during one year warrantee, free service
is offered at site. Field service Engineer will be deputed subject to warrantee terms & conditions.
This does not include personal computer related problems, for which local computer service provider
of the PC vendor is to be contacted. Also for software related problems online support will be provided.
Software support doesn't include cleaning of virus problems etc.
When the equipments are sent to our works for warrantee services, they are to be properly packed
with adequate cushion to prevent any transportation damages. Nucleonix Systems is not responsible
for damages or loss during transportation.
Packing / Freight charge is to be borne by customer when he sends the equipment to our works.
However when we return after servicing packing will be Nucleonix responsibility & Freight charges
will be to your account. Only services are free.
Please indicate in your correspondence equipment model & serial number.
All the equipments are to be sent to our works only on door delivery basis.
For Door Delivery Transportation contact XPS/GATI cargo in your city / town or a reliable courier
service to pick the consignment from your place. For their nearest local address & phone no's look
into their websites. Transit insurance if the customer feels is necessary it is to be covered.
Nucleonix Systems will not receive the equipments sent by other modes of transportation, such as
Rail/Road.
After servicing, equipments will be sent back by same mode of transport such as XPS/GATI/COURIER/
RPP.
N
U
C
LE
O
N
IX
●
●
●
●
●
●
●
●
●
●
12
●
●
After warrantee Services
●
●
●
●
●
●
●
LT
D
●
On expiry of 1yr warrantee if you like to send the equipment (low cost less than 6.0 lakhs) for repairs
to our works, you may please observe the following procedure.
Send an e-mail with details mentioning that you agree to pay service charges which includes: Basic
service charges per unit / module in the range of Rs: 2500 to Rs : 10,000 depending on the sophistication
of the unit calibration charges ( if applicable for your equipment) + cost of components + packing
charges + Return Freight charges @ actual.
Once our customer support department responds & requests you to despatch the equipment to our
works for repairs, you may do so by following the steps given below.
Followed by this you can send the equipment straight away if it is within 5 yrs old. If the equipment
is beyond 5 yrs old, then also you can send it for repairs, however only after you receive confirmation
from Customer Support Division, that it is repairable & is not an obsolete model. If the design is
obsolete then customer support division (CSD) may give you 'buy back' offer to replace with new
model or upgrade it with electronic circuit boards & enclosure.
For all installed equipments costing above Rs: 6.0 lakhs which are larger in size & for which field
servicing only is recommended, you can obtain a quotation with relevant details by sending an e-mail
& avail the services accordingly.
For all field servicing jobs, since we need to depute engineers, it is likely, to take time & also it will
cost more which includes Engineer's TA & DA etc., apart from basic service charges + cost of spares
etc. Please note that basic service charges will be different for different products depending upon
sophistication.
Also in some cases it may not be possible to fix-up the problems in the field itself, in such cases we
may advise you to send them to our works.
For all jobs to be serviced in the field, customer is requested to provide adequate details on the
nature of problems, to enable our engineer to come prepared with adequate spares.
For any additional information send an e-mail to [email protected], Atten: Customer support division.
PV
T
●
SY
ST
EM
S
(b)
All types of Radiation detectors, glass ware, PMTs etc which are fragile are not covered in warrantee,
if the failure is due to physical damage, external or internal due to shock, dropping, miss-handling
etc. If the failure is due to a natural fault then only it is covered under warrantee for a limited period of
three months. However complete electronics is covered for 1 year warrantee.
You can also send the equipment personally to our works for repairs either during or after warrantee,
after fixing up with our service dept (Customer Support Division). If possible we may repair on same
day or your person can stay for a day or two & get it repaired & or calibrated.
EQUIPMENT REPAIRS / SERVICING POLICY (FOR EXPORTS)
Equipments, manufactured & exported are subjected to a well defined quality assurance (QA) plan &
Factory acceptance tests (FAT). Nucleonix systems has the following policy to provide maintenance support
to overseas customers either directly or through international dealers / distributors.
(a)
During & after warranty:
●
For minor problems, which can be handled by customers, servicing tips have been provided in the
user manual / servicing manual.
●
Also most of the equipments have built-in fault diagnostic features which will indicate to the user
nature of problem in the equipment. Based on the visual indication in the instrument Display, user
can take corrective action or contact Nucleonix systems by email for help.
●
Nucleonix systems will guide in localizing the defective part / module or sub-system by interacting
with the customer if required. Skype will be used for communication.
●
During warranty free replacement of sub-system or board (PCB) will be done. However customer has
to send defective sub-system back to Nucleonix system with-in 15 days on arranging replacement.
●
During & after warranty, any Freight charges & customs clearance charges are to be borne by
customers, both ways.
●
If it is a manufacturing defect, then Nucleonix system will bear the replacement cost of sub-system
/ unit. However any Freight charges & customs clearance charges in their country are to be borne by
customer.
●
After warranty, services will be similar to that of services during warranty. However, customer will
have to pay for cost of parts replaced, freight charges both ways & customs clearance charges in
both the countries. Nucleonix systems plans to introduce audio visuals on web or on CDs to facilitate
product demonstration, installation & minor maintenance very soon.
N
U
C
LE
O
N
IX
7.3
13
7.4
HOW TO AVAIL CALIBRATION SERVICES (FOR INDIAN CUSTOMERS)
Nucleonix Systems offers radiation calibration services to its customers. Calibration services are provided
for Nucleonix Systems manufactured products only, in general, as a company policy.
How to avail calibration services:
It is best advised that each of the Radiation monitors including Area monitors are calibrated once in a year.
When you want to send your Radiation monitor / Area monitor / Contamination monitor for calibration to our
works. You may send the equipment for calibration, by following the steps given below:
4.
5.
6.
7.
HOW TO AVAIL CALIBRATION SERVICES (FOR FOREIGN CUSTOMERS)
Foreign customers can calibrate Nucleonix make Radiation monitors/equipments in their country at any of
their accredited Radiation calibration labs. Nucleonix systems will be happy to provide any help and guidance
if needed, for calibration. Alternatively if you send the equipment here to India we can also provide calibration
services.
Calibration Standards Lab & Facility:
We have two calibration labs.
N
U
C
LE
O
N
IX
7.5
LT
D
3.
PV
T
2.
Our standard calibration charges per equipment (All types of Radiation monitors including portable
survey meters, contamination monitors & Area Gamma Monitors) are Rs: 2500 + Packing + Freight
charges. You can email a 'work order' accepting these charges.
Email your work order and despatch / send the equipment to our works if it is 5 years old or less
including details of mode of transport sent with docket particulars.
Also mention in your work order & clearly indicate that you will agree to pay calibration charges &
also equipment repair charges additionally if the unit is faulty & requires repairs before one can take
it up for calibration.
You are requested to ensure good packing to avoid any transportation damages. Especially if there
are external detector probes, they are to be packed with sufficient soft foam to ensure no damage in
transportation.
Use only the specified following mode of transportation system for dispatching on door delivery
basis. XPS/GATI cargo / Courier/RPP/Speed Post parcel etc. Send the equipment on freight paid
basis. (Equipments sent by other methods such as Rail/Road etc will not be collected). Also you
can cover for transit insurance both ways if you wish. Nucleonix system is not responsible for any
transportation damages or loss during transportation both ways.
Immediately on receipt of the equipment, we will send an acknowledgement & also a proforma bill by
email/ post.
Based on the proforma bill, once we receive the payment, equipment will be dispatched back by
similar mode of transportation as mentioned above.
SY
ST
EM
S
1.
i.
ii.
Low Level Calibration Lab.
High Dose Rate Calibration lab.
Low Level Calibration Lab: This has a Cs-137, 165 mci standard. "Gamma Survey Instruments Calibrator"
from Amersham.
This calibration service has NIST Traceability standard. Calibration of all portable radiation monitors, survey
meters, contamination monitors, Area monitors etc., is carried out in this lab upto 1 R/hr max dose rates.
Gamma Survey instruments calibrator has Cs-137 source 161.5 mCi as on 05 Aug 2002. It is basically a
gamma survey instruments calibrator procured from AEA Technologies UK/USA. Has NIST traceability
accuracy within +/- 7%
14
Gamma Survey instruments calibrator has Cs-137 source 161.5 mCi as on 05 Aug 2002. It is basically a
gamma survey instruments calibrator procured from AEA Technologies UK/USA. Has NIST traceability
accuracy within +/- 7%
PV
T
ANNUAL MAINTENANCE CONTRACT (AMC)
SY
ST
EM
S
Annual maintenance contract (AMC) services:
For all sophisticated instruments & systems and also for installed monitors & networked systems in a
nuclear facility or a Radiological lab or in a Medical cyclotron facility where no. of instruments are networked,
it is advised that customer enters into an economical Annual maintenance contract with Nucleonix system.
Detailed AMC proposal can be obtained from our customer support division (CSD), by giving required
inputs.
Inputs required by our CSD to send you AMC proposal:
●
Name, year & data of purchase, Sl. Nos. of equipments, Model No's, No. of equipments for which
AMC is required. Additionally no. of calls per annum required for preventive & breakdown maintenance
may also be indicated.
Advantage of entering into AMC:
●
Equipment services offered will be prompt & timely
●
Nucleonix systems maintain required spares, spare tested PCBs, detectors & other critical
components which may become obsolete.
●
Obsolescence in electrons is quite rapid. If you enter into AMC guaranteed service for the period of
AMC will be the responsibility of Nucleonix Systems.
●
Nucleonix Systems will maintain Engineers at your disposal to attend to AMC calls on time
●
Without AMC prompt service calls are not guaranteed.
●
If some critical components become obsolete, then Nucleonix systems may request you to upgrade
the product with new model or new electronics which may be expensive if you are not under AMC.
N
U
C
LE
O
N
IX
7.5
LT
D
CRC-2 camera has Co-60 standard obtained from Bhabha Atomic Research Centre, Mumbai. It is a certified
source.
Training on maintenance / servicing:
●
To a limited extent, we offer training on maintenance / repairs at our works to customers on chargeable
basis. Details can be obtained from our customer support division, by customers who may require
such services.
15