1
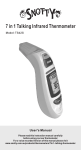
5 APPENDIX
5.1
MAINTENANCE
USER MANUAL
MS-400
No
ITEM
No
No
ITEM
1
plastic front cover of head
15
focus lens bracket
29
2
lens caps
front lens jump ring
Φ80 biprism
front lens fixed plate
Prism driving wheel
prism group
prism motor
synchronous belt
focus driven wheel group
driver board
focus driving wheel
focus lens motor
plactic head cover)
16
Φ62 flat convex lens
60 concave-convex lens
focus lens gasket
focus lens caps
Rotating gobo motor
gobo wheel bracket 2
synchronous belt
rotating gobo wheel
hall board
hall bracket 2
hall bracket 3
spinning pulley
Connection frame group
30
3
4
5
6
7
8
9
10
11
12
13
14
17
18
19
20
21
22
23
24
25
26
27
28
.15.
31
32
33
34
ITEM
fresnel
light lens holder
15°lens(7in1)
cooling fin
fixed frame for plastic head cover
fan bracket
35
90×90 f an
36
38
plastic back cover of head
clump weight
fixed frame for thermal protection device
39
driver board
37
40
41
42
gobo wheel bracket 1
color wheel
static gobo wheel
Please Read Over This Manual Before Operating The Light Fixture
1 PRODUCT SPECIFICATIONS
CHANNEL
1.1 PRODUCT SPECIFICATIONS
6
VALUE
0
61
60
150
151
165
166
255
PRISM & PRISM ROTATION
◆Voltage:AC100~240V,50/60Hz
7
◆Max Power:130W
◆ Size:360X270X520mm
◆ Weight:12kg
8
1.2
FUNCTION
GOBO 2 ROTATION
360 oindexing
Clockwise rotate from slow to fast
No function
Anti-clockwise rotate from slow to fast
PRODUCT FEATURES
9
0
4
5
9
10
127
128
132
White light
Prism but not turn
Anti-clockwise rotate from slow to fast
Prism but not turn
133
255
Clockwise rotate from slow to fast
0
0
255
FOCUS
Far
255
DIMMER
Dark
Near
Bright
STROBE
0
32
10
1
64
96
128
160
192
224
31
Close
63
95
127
159
191
223
255
Open
Strobe: Slow > Fast
Open
Rulse strobe effect: Slow > Fast
Open
Random strobe effect: Slow > Fast
Open
CONTROL
3
4
5
2
13
7
6
0
11
8
11
9
No
ITEM
No
ITEM
No
10
14 12
ITEM
1
Head
6
Up
11
DMX 3-PIN signal input
2
Side arm
7
Switch
12
DMX 3-PIN signal output
3
Menu
8
Fuse holder
13
DMX 5-PIN signal input
4
Enter
9
Power input
14
DMX 5-PIN signal output
5
Down
10
20
40
60
80
100
120
140
150
160
170
180
190
200
220
236
240
244
248
252
19
No function (After 3 S move light show board curve is preferred)
39
59
79
99
119
139
149
159
169
179
189
199
219
235
239
243
247
251
255
Pan/tilt black activated
Pan/tilt black deactivated
Fan automatic
Fan slow
Fan standard
Fan high-speed
Auto1
Auto2
Test
Custom
Sound 1
Sound 2
Reset
No function
DIM0
DIM1
DIM2
DIM3
DIM4
Note: no use for empty when word control to no effect.
Power OUT
.1.
.14.
PERSON2
1.3 SAFETY WARNING
CHANNEL
1
2
VALUE
0
0
FUNCTION
255
PAN
0~540°
255
PAN FINE
0~270°
IMPORTANT:
●This product must be installed by a qualified professional.
COLOR
0
3
4
5
9
10
19
20
29
30
39
40
49
50
59
60
69
70
79
80
99
100
119
120
139
140
159
160
179
180
199
200
219
220
255
0
10
11
20
21
30
31
40
41
50
51
60
61
70
71
80
81
95
96
110
NO
Red
Green
Yellow
Blue
Orange
Magenta
Light Blue
Light Blue
Magenta
Orange
Blue
Yellow
Green
Red
●All maintenance must be carried out by a qualified electrician.
●A minimum distance of 0.5m must be maintained between the equipment
and a combustible surface.
●The product must always be operated in a well ventilated area.
Magenta
Orange
Blue
Yellow
Green
Red
White
Rainbow or linear effect
171
185
186
255
0
11
21
31
41
51
61
71
86
101
116
131
146
161
10
20
30
40
50
60
70
85
100
115
130
145
160
255
GOBO 2
NO GOBO
GOBO 1
GOBO 2
GOBO 3
GOBO 4
GOBO 5
GOBO 6
Shaking gobo
Shaking gobo
Shaking gobo
Shaking gobo
Shaking gobo
Shaking gobo
Flow effect
125
126
140
141
155
156
170
●Always disconnect the power before carrying out any maintenance.
●The earth must always be connected to the ground.
●Ensure that all parts of the equipment are kept clean and free of dust.
GOBO1
NO GOBO
GOBO 1
GOBO 2
GOBO 3
GOBO 4
GOBO 5
GOBO 6
GOBO 7
Shaking gobo 7
Shaking gobo
Shaking gobo
Shaking gobo
Shaking gobo
Shaking gobo
Shaking gobo
Flow effect
111
●DO NOT stare directly into the LED light source.
.13.
6
5
4
3
2
1
6
5
4
3
2
1
.2.
2 INSTALLATION
2.1
CHANNEL
MOUNTING:
●The fixture can be mounted in any position.
●Always ensure that mounting surface can withstand 10 times the weight of the
fixture.
8
●Always use a safety cable when mounting the fixture in any elevated position.
SAFTY CABLE
9
BRACKET
VALUE
0
11
21
31
41
51
61
71
86
101
116
131
146
161
10
20
30
40
50
60
70
85
100
115
130
145
160
255
0
61
60
150
151
165
166
255
FUNCTION
GOBO 2
NO GOBO
GOBO 1
GOBO 2
GOBO 3
GOBO 4
GOBO 5
GOBO 6
Shaking gobo
Shaking gobo
Shaking gobo
Shaking gobo
Shaking gobo
Shaking gobo
Flow effect
6
5
4
3
2
1
GOBO 2 ROTATION
360 oindexing
Clockwise rotate from slow to fast
No function
Anti-clockwise rotate from slow to fast
PRISM & PRISM ROTATION
CLAMP
10
11
12
0
4
5
9
White light
Prism but not turn
10
127
Anti-clockwise rotate from slow to fast
128
132
133
255
Prism but not turn
Clockwise rotate from slow to fast
0
0
255
FOCUS
Far
255
DIMMER
Dark
Near
Bright
STROBE
0
32
13
HANGING
UPRIGHT
64
96
128
160
192
224
31
Close
63
95
127
159
191
223
255
Open
Strobe: Slow > Fast
Open
Rulse strobe effect: Slow > Fast
Open
Random strobe effect: Slow > Fast
Open
CONTROL
IMPORTANT SAFETY NOTE!!
Always use a safety cable when installing this unit!!
Be sure that the safety cable is connected to a solid load-bearing structure.
0
14
20
40
60
80
100
120
140
150
160
170
180
190
200
220
236
240
244
248
252
19
No function (After 3 S move light show board curve is preferred)
39
59
79
99
119
139
149
159
169
179
189
199
219
235
239
243
247
251
255
Pan/tilt black activated
Pan/tilt black deactivated
Fan automatic
Fan slow
Fan standard
Fan high-speed
Auto1
Auto2
Test
Custom
Sound 1
Sound 2
Reset
No function
DIM0
DIM1
DIM2
DIM3
DIM4
Note: no use for empty when word control to no effect.
.3.
.12.
4 USING A DMX512 CONTROLLER
4.1
CHANNEL ASSIGNMENT
● Note: This product have two DMX512 channel configuration:
【PERSON1】 and【PERSON2】.
2.2
FUSE REPLACEMENT
● Remove the safety cap by a screwdriver.
● Fetch the old fuse from safety cap.
● nstall
I
a new fuse.
● nstall
I
the safety cap.
FUSE
PERSON1
SAFTY CAP
CHANNEL
1
2
VALUE
FUNCTION
0
255
PAN
0~540°
0
255
PAN FINE
Fine control of tilt movement 0~3°
0
255
0~270°
0
255
TILT FINE
Fine control of tilt movement 0~3°
0
255
PAN/TILT SPEED
From fast to slow
TILT
3
4
5
COLOR
0
6
7
9
10
19
20
29
30
39
40
49
50
59
60
69
70
79
80
99
100
119
120
139
140
159
160
179
180
199
200
219
220
255
0
10
11
20
21
30
31
40
41
50
51
60
61
70
71
80
81
95
96
110
111
125
126
140
141
155
156
170
171
185
186
255
NO
Red
Green
Yellow
Blue
Orange
Magenta
Light Blue
Light Blue
Magenta
Orange
Blue
Yellow
Green
Red
Magenta
Orange
Blue
Yellow
Green
Red
White
Rainbow or linear effect
GOBO1
NO GOBO
GOBO 1
GOBO 2
GOBO 3
GOBO 4
GOBO 5
GOBO 6
GOBO 7
Shaking gobo 7
Shaking gobo
Shaking gobo
Shaking gobo
Shaking gobo
Shaking gobo
Shaking gobo
Flow effect
.11.
6
5
4
3
2
1
.4.
3.72 MANUAL
3 DISPLAY PANEL OPERATION
MENU
3.1
MANUAL
DMX value
TILT
COLOR
【 MENU 】Scroll through the main menu or exit from the current sub-menu
【ENTER】Enter the currently selected menu or confirm the current function
value
【 DOWN】Scroll 'DOWN' through the menu list or decrease the value of the
current function
【
UP 】Scroll 'UP' through the menu list or increase the value of the
Current function
MENU
UP
ENTER
DOWN
COBO1
(000~255)
(000~255)
COBO2
COBO2ROT
(000~255)
(000~255)
(000~255)
(000~255)
(000~255)
PRI & ROT
FOCUS
DIMMER
STROBE
●Adjust the values of【PAN/TILT/COLOR/COBO1/COBO2/COBO2ROT/
PRI & ROT/FOCUS/DIMMER/STROBE】in order to carry out manual control
3.71
3.2
(000~255)
(000~255)
(000~255)
PAN
BASIC
MENU
ACCESS
MENU
SERVICE
ACCESS
SETTLOCK
OFF
ON
MENU
ADDRESS
(001~512)
PERSON
PERSON1
SERVLOCK
OFF
ON
PERSON2
SETTINGS
PERFORM
PT SPEED
FAST
SLOW
PAN INV
NORM
INVERT
TILT INV
NORM
INVERT
OP SPEED
FAST
SLOW
BLACK
INSTANT
DIMMER
DIM4
DELAY
●【SETTLOCK】menu, select【ON】to enable access to
【SETTINGS】menu
●【SERV LOCK】menu, select【ON】to enable access to
【SERVICE】menu
3.82
INFO
DIM3
DIM2
MENU
SERVICE
VERSION
INFO
DIM1
OFF
DIM INV
NORM
INVERT
DMX ERROR
SAVE
BLACK
DMX RESET
DMX
DISPLAY
DISPLAY
LONG
SHORT
●【 INFO 】 software version number
3.83
CONTENT
ALWAYS
RANGE
KEYLOCK
YES
NO
HOMEPAGE
DMX
NAME+DMX
P.START
T.START
(000~255)
(000~255)
(000~255)
T.END
(000~255)
P.END
DEFAULT
NO
YES
SEND
SERVICE
DISPLAY1
CONTENT
SEND
******
NO
YES
●【DISPLAY 1】menu, edit first line of display content
●【SEND】 menu, select 【YES】in order to transfer display content to all
NO
YES
.5.
MENU
fixtures currently connected via data cable
.10.
3.62
RUNMODE
EDIT
RUN
DMX 512
AUTO1
AUTO2
MENU
RUNMODE
STEP
EDIT
PAN
TILT
COLOR
COBO1
COBO2
COBO2ROT
USE
NO
DIMMER
STROBE
SOUND2
CUSTOM
TEST
SLAVE
(000~255)
(000~255)
TIME
FOCUS
【 Edit 】
(001~49)
(000~255)
(000~255)
(000~255)
(000~255)
(000~255)
(000~255)
(000~255)
(000~255)
(000~255)
PRI & ROT
SOUND1
STEP
EDIT
PAN
TILT
COLOR
COBO1
COBO2
COBO2ROT
TIME
USE
NO
DIMMER
● Enter the【 Edit 】mode to edit the custom programs by adjusting the
value of【STEP】,【PAN】,【TILT】,【COLOR】,【COBO2】,【COBO2ROT】,
【PRI & ROT】,【FOCUS】,【DIMMER】,【STROBE】,【 TIME】
● Enter 【 Use】 and select 【Yes】 to run the steps user need.
(000~255)
(000~255)
(000~255)
(000~255)
(000~255)
(000~255)
(000~255)
(000~255)
PRI & ROT
FOCUS
YES
(001~49)
(000~255)
(000~255)
(000~255)
STROBE
YES
NO
SEND
YES
Note: if user want to circulate the created steps, please set the last step
【T ime】 as 0
‘s
MANUAL
RESET
NO
YES
DMX value
PAN
TILT
For example, there are 3 steps, the setting should be like belowed:
Step 1 【T ime】 = 4 【 Use】 = Yes
Step 2 【T ime】 = 5 【 Use】 = Yes
Step 3 【T ime】 = 0 【 Use】 = Yes
COLOR
COBO1
COBO2
COBO2ROT
SEND
SERVICE
ACCESS
(000~255)
(000~255)
STROBE
(000~255)
(000~255)
(000~255)
(000~255)
(000~255)
SETTLOCK
OFF
PRI & ROT
FOCUS
DIMMER
3.63
(000~255)
(000~255)
(000~255)
ON
MENU
SERVLOCK
RUNMODE
NO
SEND
INFO
VERSION
CONTENT
DISPLAY1
SEND
●【SEND】menu, select 【YES】 to send all custom programs to in-line fixtures.
MENU
DMX ADDRESS (ADDRESS)
MENU
MANUAL
RESET
NO
YES
******
NO
YES
3.3
3.71 MANUAL
OFF
ON
YES
ADDRESS
(001~512)
● Enter the【DMX】mode to set the DMX ADDRESS.
●【 RESET】menu, select【YES/NO】to carry out full fixture reset
3.4
PERSONALITY (PERSON)
MENU
PERSON
PERSON1
PERSON2
● Enter the【PERSON】mode to select DMX mode:【 PERSON1 】,
【PERSON 2】.
.9.
.6.
3.51 PERFOR MANCE(PERFORM)
MENU
SETTINGS
PERFORM
PT SPEED
3.52 RANGE
FAST
SLOW
PAN INV
NORM
INVERT
TILT INV
NORM
INVERT
OP SPEED
FAST
SLOW
BLACK
INSTANT
DELAY
DIMMER
DIM4
DIM3
DIM2
MENU
SETTINGS
P.START
RANGE
T.START
(000~255)
(000~255)
(000~255)
T.END
(000~255)
P.END
●【P/START】 Set pan start value 【000~255 】
●【P/END】 Set pan finish value
【000~255 】
●【T/START】 Set Tilt start value
●【T/END】 Set Tilt finish value
【000~255 】
【000~255 】
DIM1
OFF
DIM INV
NORM
INVERT
DMX ERROR
SAVE
BLACK
DMX RESET
DMX
DISPLAY
DISPLAY
LONG
SHORT
ALWAYS
KEYLOCK
YES
NO
HOMEPAGE
DMX
NAME+DMX
3.53 DEFAULT
MENU
SETTINGS
NO
DEFAULT
YES
●【DEFAULT】menu, select【YES】 to reset all settings to default.
3.54 SEND
●【PT SPEED】menu, select 【Slow/Fast】for required PAN/TILT movement
speed.
●【PAN INV】menu, select 【NORM/INVERT】for normal/inverted control of
the PAN function
●【TILT INV】menu, select 【NORM/INVERT】for normal/inverted control of
the TILT function
●【OP SPEED】menu, select【SLOW/FAST】for required optics speed
●【BLACK】menu, select 【INSTANT】for immediate activation of PAN/TILT
blackout when selected using the control channel or 【DELAY】 for 3 second delay
before activation.【DIMMER】 menu for selection of
【DIM1/DIM2/DIM3/DIM4/OFF】 special dimming curves
●【DIM INV】menu, select 【NORMAL/INVERT】for normal/inverted control of
DIMMING function
●【DMXerror】menu, select 【SAVE】to maintain last command or 【BLACK】
for blackout in case of DMX error。
●【DMXreset】menu, select 【DMX】to allow remote reset using DMX controller or
【DISPLAY】for reset only available at on-fixture display
●【DISPLAY】menu, select 【LONG/SHORT/ALWAYS】to determine the time mode
for the display backlight.
●【KEYLOCK】menu, select 【YES】in order to lock the display when not in use or
on start-up.
●【HOMESCREEN】menu, select【DMX】to display DMX address or 【NAME】to display
user-created content when display not in use.
.7.
MENU
SETTINGS
NO
SEND
YES
●【SEND】 menu, select 【YES】 to send all settings to in-line fixtures.
3.61
RUN
MENU
RUNMODE
RUN
DMX 512
AUTO1
AUTO2
SOUND1
SOUND2
CUSTOM
TEST
SLAVE
●【RUN】menu, select required run mode.
.8.