1
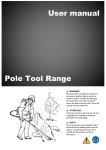
5 APPENDIX
5.1
USER MANUAL
MAINTENANCE
LED SPOT LIGHT
MS-400
No
ITEM
No
1
plastic front cover of head
15
2
16
5
lens caps
front lens jump ring
Φ80 biprism
front lens fixed plate
6
Prism driving wheel
20
7
prism group
prism motor
synchronous belt
focus driven wheel group
driver board
focus driving wheel
focus lens motor
plactic head cover
21
3
4
8
9
10
11
12
13
14
17
18
19
22
23
24
25
26
27
28
No
ITEM
focus lens bracket
Φ62 flat convex lens
60 concave-convex lens
focus lens gasket
focus lens caps
Rotating gobo motor
gobo wheel bracket 2
synchronous belt
rotating gobo wheel
hall board
hall bracket 2
hall bracket 3
spinning pulley
Connection frame group
.15.
29
30
31
32
33
34
ITEM
fresnel
light lens holder
15°lens(7in1)
cooling fin
fixed frame for plastic head cover
fan bracket
35
90×90 fan
36
plastic back cover of head
37
clump weight
38
fixed frame for thermal protection device
driver board
gobo wheel bracket 1
color wheel
static gobo wheel
39
40
41
42
Please Read Over This Manual Before Operating The Light Fixture
1 PRODUCT SPECIFICATIONS
CHANNEL
1.1 PRODUCT SPECIFICATIONS
6
The MS-400 is a precise, feature-rich moving head spot fixture that produces bright,
even beams of light from its advanced led optical system which includes 7x high output
CREE® LEDs. The combination of dual gobo wheels, a richly saturated color wheel, and a
three-facet prism enables awesome effects and totally smooth gobo morphing!
• Voltage:AC90~260V 50/60Hz
• Max Power:130W
•Compact Intelligent Moving Head Fixture
•70W(7*10w)Cree Led Source
•7 Dichroic Colors+White
•11/14-Channel Dmx Control Modes
•4-button LCD Control Panel
•Pan:540°/Tilt:270°(8-16Bit Resolution)
•Dual Gobo Wheels
•Static Gobos:7 Metal+open
•Rotating Gobos: 2 Glass,4 Metal+Open
•Rotating 3-Facet Prism
•Variable Electronic Dimmer(0-100%)
•Electronic Focus
•Gobo-Flow,Rainbow-Flow+Shake w/Bi-Directional Rotation
•Multiple Built-in Auto & Sound Activated Programs
•Cooling System:Forced Convection Cooling
•Housing:Flame-Retardant Plastic(V0)
•Modes:DMX-512,Auto,Sound Active & Master-Slave
•Dimension:265x341x546mm
•Weight:33.1 Pounds(15kg)
VALUE
0
61
60
150
151
165
166
255
FUNCTION
GOBO 2 ROTATION
360 oindexing
Clockwise rotate from slow to fast
No function
Anti-clockwise rotate from slow to fast
PRISM & PRISM ROTATION
7
8
9
0
4
5
9
10
127
128
132
White light
Prism but not turn
Anti-clockwise rotate from slow to fast
Prism but not turn
133
255
Clockwise rotate from slow to fast
0
0
255
FOCUS
Far
255
DIMMER
Dark
Near
Bright
STROBE
10
Close
11
220
221
231
246
230
245
255
Strobe: Slow > Fast
Open
Random strobe effect: Slow > Fast
Open
0
10
CONTROL
0
11
19
140
150
160
170
149
159
169
179
No function (After 3 S move light show board curve is preferred)
Auto Program1
Auto Program2
Auto Program3
No function
180
200
189
219
Sound
Reset
220
255
No function
Note: no use for empty when word control to no effect.
.1.
.14.
PERSON2
CHANNEL
1
2
VALUE
0
0
FUNCTION
255
PAN
0~540°
255
PAN FINE
0~270°
• Carton box dimension:410x420x540mm
410
42
0
M
COLOR
0
4
5
10
19
20
29
30
39
40
49
50
59
60
69
70
79
80
99
100
119
120
139
140
159
160
179
180
199
200
219
220
255
0
10
11
20
21
30
31
40
41
50
51
60
61
70
71
80
81
95
96
110
111
125
126
140
141
155
156
170
171
185
186
255
0
11
21
31
41
51
61
71
86
101
116
131
146
161
10
20
30
40
50
60
70
85
100
115
130
145
160
255
NO
Color 1
Color 2
Color 3
Color 4
Color 5
Color 6
Color 7
Color 7
Color 6
Color 5
Color 4
Color 3
Color 2
Color 1
S
-
0
0
400
Color 4
Color 3
Color 2
Color 1
White
Rainbow or linear effect
Shaking gobo
Shaking gobo
Shaking gobo
Shaking gobo
Shaking gobo
Shaking gobo
Flow effect
.13.
MS-
Color 6
Color 5
1.2
PRODUCT FEATURES
GOBO1
NO GOBO
GOBO 1
GOBO 2
GOBO 3
GOBO 4
GOBO 5
GOBO 6
GOBO 7
Shaking gobo 1
GOBO 2
NO GOBO
GOBO 1
GOBO 2
GOBO 3
GOBO 4
GOBO 5
GOBO 6
Shaking gobo
Shaking gobo
Shaking gobo
Shaking gobo
Shaking gobo
Shaking gobo
Flow effect
4
540
3
9
1
3
2
3
4
5
6
7
4
7
No
1
2
3
4
5
6
5
6
2
ITEM
No
ITEM
8
ITEM
No
9 10 11 12
No
1
Head
4
Enter
7
Powercon input
2
Side arm
5
Down
8
Powercon output 11
Menu
6
Up
9
3
Switch
.2.
10
12
ITEM
Fuse holder
DMX 3-PIN signal input
DMX 3-PIN signal output
2 INSTALLATION
2.1
CHANNEL
MOUNTING:
●The fixture can be mounted in any position.
●Always ensure that mounting surface can withstand 10 times the weight of the
fixture.
8
●Always use a safety cable when mounting the fixture in any elevated position.
9
SAFTY CABLE
VALUE
0
11
21
31
41
51
61
71
86
101
116
131
146
161
10
20
30
40
50
60
70
85
100
115
130
145
160
255
FUNCTION
GOBO 2
NO GOBO
GOBO 1
GOBO 2
GOBO 3
GOBO 4
GOBO 5
GOBO 6
Shaking gobo
Shaking gobo
Shaking gobo
Shaking gobo
Shaking gobo
Shaking gobo
Flow effect
1
2
3
4
5
6
GOBO 2 ROTATION
o
Gobo
Position
0
128
127
189
190
193
Gobo Rotation(CW):Slow→Fast
Gobo Static
194
255
Gobo Rotation(CW):Slow→Fast
PRISM & PRISM ROTATION
BRACKET
10
CLAMP
11
12
0
4
5
9
White light
Prism but not turn
10
127
Anti-clockwise rotate from slow to fast
128
132
133
255
Prism but not turn
Clockwise rotate from slow to fast
0
0
255
FOCUS
Far
255
DIMMER
Dark
Near
Bright
STROBE
10
Close
11
220
221
231
246
230
245
255
Strobe: Slow > Fast
Open
Random strobe effect: Slow > Fast
Open
0
13
CONTROL
0
HANGING
UPRIGHT
IMPORTANT SAFETY NOTE!!
Always use a safety cable when installing this unit!!
Be sure that the safety cable is connected to a solid load-bearing structure.
.3.
14
19
140
150
160
170
149
159
169
179
180
200
189
219
220
255
No function (After 3 S move light show board curve is preferred)
Auto Program1
Auto Program2
Auto Program3
No function
Sound
Reset
No function
Note: no use for empty when word control to no effect.
.12.
4 USING A DMX512 CONTROLLER
4.1
2.2
FUSE REPLACEMENT
Channel Mode
●
●
●
●
●
● Note: This product have two DMX512 channel configuration:
【Standard】 and【PERSON2】.
1
2
VALUE
FUNCTION
0
255
PAN
0~540°
0
255
PAN FINE
Fine control of tilt movement 0~3°
0
255
0~270°
0
255
TILT FINE
Fine control of tilt movement 0~3°
0
255
PAN/TILT SPEED
From fast to slow
2.3
TILT
3
4
5
7
9
10
19
20
29
30
39
40
49
50
59
60
69
70
79
80
99
NO
Color 1
Color 2
Color 3
Color 4
Color 5
Color 6
Color 7
Color 7
Color 6
Color 5
Color 6
Color 5
100
119
120
139
140
159
160
179
180
199
200
219
Color 4
Color 3
Color 2
Color 1
220
255
Rainbow or linear effect
0
10
11
20
21
30
31
40
41
50
51
60
61
70
71
80
81
95
96
110
111
125
126
140
141
155
156
170
171
185
186
255
Color 4
【ALWAYS READ THE USER MANUAL BEFORE OPERATION. 】
【PLEASE CONFIRM THAT THE POWER SUPPLY STATED ON THE
PRODUCT IS THE SAME AS THE MAINS POWER SUPPLY IN YOUR AREA.】
● This product must be installed by a qualified professional.
● Always operate the equipment as described in the user manual.
●A minimum distance of 0.5m must be maintained between the equipment and
combustible surface.
● The product must always be placed in a well ventilated area.
● Always make sure that the equipment is installed securely.
● DO NOT stand close to the equipment and stare directly into the LED light
source.
● Always disconnect the power supply before attempting and maintenance.
● Always make sure that the supporting structure is solid and can support the
combined weight of the products.
Color 3
Color 2
Color 1
White
GOBO1
NO GOBO
GOBO 1
GOBO 2
GOBO 3
GOBO 4
GOBO 5
GOBO 6
GOBO 7
Shaking gobo 1
Shaking gobo
Shaking gobo
Shaking gobo
Shaking gobo
Shaking gobo
Shaking gobo
Flow effect
.11.
SAFETY WARNING
IMPORTANT
COLOR
0
6
SAFTY CAP
.
PERSON1
CHANNEL
Remove the safety cap by a screwdriver.
Fetch the old fuse from safety cap.
FUSE
nstall
I
a new fuse.
nstall
I
the safety cap.
Fuse:3A,250V
2
3
4
5
6
7
ATTENTION
● This product left the place of manufacture in perfect condition. In
order to maintain this condition and for safe operation, the user must
always follow the instructions and safety warnings described in this
user manual.
● Avoid shaking or strong impacts to any part of the equipment.
● Make sure that all parts of the equipment are kept clean and free of
dust.
● Always make sure that the power connections are connected
correct and secure.
● If there is any malfunction of the equipment, contact your us
immediately.
● When transferring the product, it is advisable to use the original
packaging in which the product left the factory.
● Shields, lenses or ultraviolet screens shall be changed if they have
become damaged to such an extent that their effectiveness is
.4.
3.7 Option
3 DISPLAY PANEL OPERATION
Pan/Tilt
3.1
BASIC
【 MENU 】Scroll through the main menu or exit from the current sub-menu
【ENTER】Enter the currently selected menu or confirm the current function
value
【 DOWN】Scroll 'DOWN' through the menu list or decrease the value of the
current function
【
UP 】Scroll 'UP' through the menu list or increase the value of the
Current function
MENU
3.2
DOWN
UP
ADDRESS
(001~512)
SYSTEM
CHANNEL MODE
Swap Pan-Tilt
Pan/Tilt
Allows you to select the Pan/Tilt.
1) Press Ok - the current settings appear on the display (Invert Pan,
Invert Tilt or Swap Pan-Tilt).
2) Use the UP
and DOWN
settings:
- Invert Pan
- Invert Tilt
- Swap Pan-Tilt
keys to select one of the following
3) Press Ok to confirm the selection or MENU M to keep current
settings.
ENTER
MENU
MENU
Invert Pan
Invert Tilt
Standard
Display
Normal
Turn over
Reduuced
DISPLAY
Manual
Language
中文
English
Reset
Head Reset
P-T
Reset
System Reset
Channel
Run Mode
Auto Program 1
Auto Program 2
Allows you to select the DISPLAY.
1) Press Ok - the current settings appear on the display (Normal,
or Turnover).
2) Use the UP
settings:
- Normal
- Turnover
and DOWN
3) Press Ok to confirm the selection or MENUM to keep current
settings.
Auto Program 3
Sound Mode
DMX512 Mode
Pan/Tilt
Option
Invert Pan
Invert Tilt
Swap Pan-Tilt
Display
Normal
Turn over
Information
.5.
keys to select one of the following
.10.
3.3
DMX ADDRESS (ADDRESS)
(001~512)
ADDRESS
Sonud Mode
OK
Cancel
● Allows you to select the DMX ADDRESS.
1) Press Ok - the current DMX Adress appear on the display.
Sonud Mode
Allows you to select the Sonud Mode .
1) Press Ok - the current settings appear on the display (OK,
or Cancel).
2) Use the UP
and DOWN
keys to select one of the following
settings:
- OK
- Cancel
M to keep current
3) Press Ok to confirm the selection or MENU
settings.
DMX512 Mode
keys to plan the DMX Address.
2) Use the UP
and DOWN
Ok
M to keep current
3) Press
to confirm the selection or MENU
3.4
SyStem
SYSTEM
CHANNEL MODE
Standard
Reduuced
... BACK
Allows you to select the ...
1) Press Ok - the current main form appear on the display.
OK
Cancel
CHANNEL MODE
DMX512 Mode
Allows you to select the DMX512 Mode .
1) Press Ok - the current settings appear on the display (OK,
or Cancel).
keys to select one of the following
2) Use the UP
and DOWN
settings:
- OK
- Cancel
3) Press Ok to confirm the selection or MENU M to keep current
settings.
Allows you to select the Channel Mode.
1) Press Ok - the current settings appear on the display (Standard,
Reduced ).
2) Use the UP
settings:
- Standard
- Reduced
and DOWN
keys to select one of the following
3) Press Ok to confirm the selection or MENU M
settings.
Language
to keep current
中文
English
LANGUAGE
Allows you to select the LANGUAGE.
1) Press Ok - the current settings appear on the display (中文,
or English).
keys to select one of the following
2) Use the UP
and DOWN
settings:
- 中文
- English
M to keep current
3) Press Ok to confirm the selection or MENU
settings.
.9.
.6.
3.5 Manual
3.6 Run Mode
Reset
Head Reset
P-T
Auto Program 1
Reset
System Reset
OK
Cancel
Auto Program 1
RESET
Allows you to select the RESET.
1) Press Ok - the current settings appear on the display (Head Reset,
Pan-Tilt Rest or System Reset).
keys to select one of the following
2) Use the UP
and DOWN
settings:
- Head Reset
- Pan-Tilt Reset
- System Reset
3) Press Ok to confirm the selection or MENU M to keep current
settings.
Allows you to select the Auto Program1.
1) Press Ok - the current settings appear on the display (OK,
or Cancel).
keys to select one of the following
2) Use the UP
and DOWN
settings:
- OK
- Cancel
3) Press Ok to confirm the selection or MENU M to keep current
settings.
Auto Program 2
OK
Cancel
Auto Program 2
Allows you to select the Auto Program2.
1) Press Ok - the current settings appear on the display (OK,
Channel
CHANNEL
Allows you to select the CHANNEL.
1) Press Ok - the current settings appear on the display (Channel1,
Channel2,Channel3...Channeln).
tokeys select one of the following
2) Use the UP
and DOWN
settings:
- Channel1
- Channel2
- Channel3
- ...
- Channeln
3) Press Ok to confirm the selection or MENU M to keep current
settings.
.7.
or Cancel).
keys to select one of the following
2) Use the UP
and DOWN
settings:
- OK
- Cancel
3) Press Ok to confirm the selection or MENU M to keep current
settings.
Auto Program 3
OK
Cancel
Auto Program 3
Allows you to select the Auto Program3.
1) Press Ok - the current settings appear on the display (OK,
or Cancel).
2) Use the UP
and DOWN
keys to select one of the following
settings:
- OK
- Cancel
3) Press Ok to confirm the selection or MENU M to keep current
settings.
.8.