1
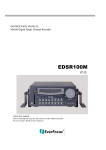
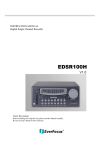
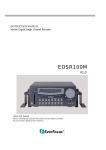
DVR Reader User’s Manual
Version 1.0.1
May 20, 2004
Before installing and using this unit, please read this manual carefully. Please
make sure to keep it handy for later reference.
Table of Content
1 UNDERSTAND DVR READER .................................................................... 1
1.1 Package Content.................................................................................................... 1
1.2 Front Panel ............................................................................................................ 1
1.3 Back Panel ............................................................................................................. 1
1.4 Minimum System Requirements ......................................................................... 2
1.5 Specifications ......................................................................................................... 2
2 SETUP DVR READER ............................................................................. 3
2.1 Install DVR Reader software ............................................................................... 3
2.2 Connect DVR Reader to PC................................................................................. 3
2.3 Insert HDD carrier to DVR Reader .................................................................... 3
2.4 Remove HDD carrier from DVR Reader............................................................ 4
3 USING DVR READER SOFTWARE ........................................................ 5
3.1 Start DVR Reader Software................................................................................. 5
3.2 Understand User Interfaces ................................................................................. 5
3.3.1 Open DVR HDD/File....................................................................................... 6
3.3.2 Playback Controls ............................................................................................ 6
3.3.3 Select Display Mode ........................................................................................ 7
3.3.4 Set Playback Channel....................................................................................... 7
3.3.5 Set Video.......................................................................................................... 7
3.3.5 Set Audio.......................................................................................................... 8
3.4 Search Video.......................................................................................................... 8
3.4.1 Search by Segment........................................................................................... 8
3.4.2 Search by Alarm............................................................................................... 8
3.4.3 Search by Date/Time........................................................................................ 9
3.4.4 Search by Video Slide Bar ............................................................................... 9
3.5 Archive and Print.................................................................................................. 9
3.5.1 Archive Video .................................................................................................. 9
3.5.2 Save Image..................................................................................................... 10
3.5.3 Print Image..................................................................................................... 10
DVR Reader User’s Manual
1 Understand DVR Reader
1.1 Package Content
The package includes DVR Reader, power adapter, power cord, USB2.0 cable, and keys.
Note: Hard disk tray is not included.
1.2 Front Panel
Key Lock
Power LED
HDD LED
Note: Hard disk tray is not included.
1.3 Back Panel
Power Switch
DC 5/12V
USB 2.0
-1-
DVR Reader User’s Manual
1.4 Minimum System Requirements
CPU
Memory
HDD
USB
Peripherals
OS
Intel® Pentium® 4, 2GHz processor or faster
256MB RAM (512MB or more recommended)
100MB hard disk space; additional disk space for video capture
USB 2.0 port
Windows-compatible display with at least 1024x768 resolution
Windows-compatible mouse or pointing device
Windows-compatible sound card
Windows-compatible CD-ROM drive
Microsoft® Windows® 2000/XP™
1.5 Specifications
Supported Products
DVR Models
Multiplexer Models
1/4/6/9/16 channel DVR
4BDX, 4CDX, 8CDX, 16CTX
Front Panel
Lights
Lock
Two LED’s to indicate power and hard disk activity
HDD tray lock
Rear Panel
Power switch
Interface Connector
Power Connector
Power ON/OFF
USB Type B connector
6 pin 5V/12V DC
Software Functions
Operations
Search
Archive
1/4/9/16 multi-channel playback
Playback forward/backward at 0.1~16x speed
Audio playback for 1~60FPS recordings
Pause
Step forward/backward
Jump to beginning or end of a segment
Search video by segment list, date/time and alarm list
Slide bar to move video pointer
Display current video date/time
Save still image to BMP or JPEG file
Print still image
Save video to Motion JPEG AVI file up to 4GB
Save disk raw data into proprietary file
Save meta-data to text or binary file
*: Length limitation depends on various PC hardware, disk and OS
configurations.
Power
Power
DC 5/12V
Operational Environment
Temperature
0 °C ~ 50°C (32 °F ~ 122°F)
Dimensions & Weight
Dimensions (W/H/D)
Weight
155 mm × 47mm × 277mm (6.1in × 1.8in × 10.9in)
1.35 kg (3.0 lbs)
-2-
DVR Reader User’s Manual
2
Setup DVR Reader
Note: Please carefully follow these instructions to insert and remove the HDD carrier to avoid
damages to the DVR Reader or hard disk.
2.1 Install DVR Reader software
Please note that DVR Reader only supports Windows 2000/XP.
1. Turn on your PC
2. Insert DVR Reader CD-ROM
3. Run [CDROM]:\setup.exe if the program does not automatically run
4.
5.
Click DirectX 9.0b Runtime and follow the instructions to install DirectX 9.0b Runtime
Click DVR Reader and follow the instructions to install DVR Reader software
2.2 Connect DVR Reader to PC
DVR Reader
Power Adapter
1.
2.
3.
4.
5.
USB 2.0 Cable
PC
Connect USB2.0 cable to DVR Reader and your PC
Connect power adapter’s cable to DVR Reader
Connect power cord to power adapter
Make sure the power switch is at OFF position
Connect power cord to power surge
2.3 Insert HDD carrier to DVR Reader
WARNING! Make sure your HDD carrier is compatible with this DVR Reader. Inserting a wrong
HDD carrier to DVR Reader will seriously damage the disk and the device
1. Take out HDD carrier from DVR (Please refer to DVR user’s manual)
2. Insert HDD carrier to DVR Reader and firmly push to the end
3. Lock HDD carrier
4. Turn on DVR Reader
5. Wait until the Remove/Eject icon shows up in System Tray
-3-
DVR Reader User’s Manual
2.4 Remove HDD carrier from DVR Reader
1.
2.
3.
4.
5.
Exit from DVR Reader application
Click on Remove/Eject icon in System Tray to stop the USB Mass Storage Device
Turn off the power
Unlock the HDD carrier lock
Remove HDD carrier from DVR Reader
-4-
DVR Reader User’s Manual
3
Using DVR Reader Software
3.1 Start DVR Reader Software
Start DVR Reader software from desktop shortcut or from Start Menu Start -> Program Files -> DVR
Reader
3.2 Understand User Interfaces
Video Window
HDD/File Menu
Open
Status Bar
Video Search Tabs
DVR Model Menu
Archive Time
Settings
Playback
Direction/Speed
Buttons
Date/Time
Video Slide Bar
Playback
Control Buttons
-5-
DVR Reader User’s Manual
3.3 Basic Operations
3.3.1 Open DVR HDD/File
1.
Choose a HDD from HDD/File Menu or Local File to load disk image file (*.eds). Note that
HDD/File Menu only shows the HDD’s, which are recognized by DVR Reader software.
2.
3.
Click Open button.
Please wait while DVR Reader is reading disk information. Status Bar shows the progress of
reading disk process.
Choose a proper DVR model or DVR/multiplexer combination from DVR/ Model Menu.
4.
3.3.2 Playback Controls
1.
Click on Playback Control Buttons to Playback, Pause, Step Forward/Backward, Jump to
Beginning/End.
Step Backward
To Beginning
2.
Step Forward
Play/Pause
To End
Click on Playback Direction/Speed Buttons to change playback direction and speed.
Increase Playback Speed
Playback Backward
Playback Forward
Decrease Playback Speed
Note: Playback speed range is 0.1~16x and they are approximate speeds.
-6-
DVR Reader User’s Manual
3.3.3 Select Display Mode
1.
2.
Right click on Video Window to bring up Function Menu
Click on Display Mode and choose desired display mode.
3.3.4 Set Playback Channel
1.
2.
Right click on Video Window where playback channel is to be set.
In Function Menu, click on Set Channel to choose desired playback channel.
Note: One channel can only be shown in one window. If two windows are set to playback the same
channel, only the last set one will show video correctly.
3.3.5 Set Video
1.
2.
Right click on Video Window to bring up Function Menu.
Click on Video to set video mode to NTSC or PAL
-7-
DVR Reader User’s Manual
3.3.5 Set Audio
3.
4.
Right click on Video Window to bring up Function Menu.
Click on Audio to set audio to On or Off
3.4 Search Video
3.4.1 Search by Segment
1.
Choose a segment from Segment List
3.4.2 Search by Alarm
1.
Choose an alarm time from Alarm List
-8-
DVR Reader User’s Manual
3.4.3 Search by Date/Time
1.
2.
Set desired Date/Time on Video Search Time Tab
Click on Set button
3.4.4 Search by Video Slide Bar
1.
Grab Video Slide Bar cursor to move to desired position.
Note: Video Slide Bar can only move inside the current segment.
3.5 Archive and Print
3.5.1 Archive Video
DVR Reader can archive video into AVI file or disk image. However, archive functions are not
designed to save long time video. Archive to AVI file should always be limited to the minimum time
range. Archive AVI file over 4GB is not supported.
1.
Set archive in/out points by clicking on Archive In button and Archive Out button.
Note: for Disk Image (.eds) format, the actual Archive In time will be equal or earlier than
specified time, and Archive Out time will be equal or later.
Archive In
Archive Out
2.
3.
4.
5.
Right click on Video Window to bring up Function Menu.
Click on Archive to bring up Save As dialog box.
Type in filename.
Choose file type.
-9-
DVR Reader User’s Manual
Type
Motion JPEG (.avi)
Video
√
Audio
√
Data
*
Motion JPEG Full Size (.avi)
√
√
*
Disk Image (.eds)
√
√
√
Data only - Text (.txt)
Data only - Binary (.bin)
*: Optional to save to a separate file
√
√
Single channel archive. Original video.
Fast.
Stretched and recompressed single
channel video. Slow.
Complete multi-channel archive. Fast. Can
only be read by DVR Reader software
Data saved in text mode
Data saved in binary mode
Table 3.1 Archive Type Comparison
6.
7.
Check Full Size checkbox if full size video is desired. [MJPEG type only]
Check Capture Data and choose Text or Binary if data capture is desired. [MJPEG type only]
8.
Click OK to start archiving. Archive Processing dialog box will show up. Click Cancel if you
want to cancel archiving. The progress bar and the right bottom corner’s Date/Time indicate
the archive progress.
Note: If the Date/Time doesn’t change for long time, e.g. 30 seconds, the disk might be full or
other problem happened. In such case, please cancel the process and archive a shorter range of
video.
3.5.2 Save Image
1.
2.
5.
6.
Right click on Video Window to bring up Function Menu.
Click on Save Image to bring up Save As dialog box
Type in filename
Choose file type: Bitmap or JPEG
3.5.3 Print Image
1.
2.
3.
Right click on Video Window to bring up Function Menu.
Click on Print Image to bring up Printer dialog box
Configure printer and click OK to print the image.
- 10 -