1
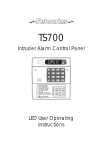
TS700 Intruder Alarm Control Panel _ ~ OPEN A 1 2 3 B 4 5 6 C 7 8 9 D ENT 0 ESC Setting the System Ent er your pa sscode XXXX th en lea ve th e pro tect ed a re a. Unsetting the System Go dire ct ly to t he ke yp ad and en ter you r p asscod e XXXX . Resetting Ent er your pa sscode XXXX f ollow ed by EN T the n 3. Te leph on e you r a larm com pan y and follow th eir instruct io ns. ! See User Manual A 1 2 3 Part Set B ELL TES T WALK TEST RE SET B 4 5 6 CHIME 24 Hr OMIT Part Set NE W CODE C 7 8 Part Set ZONE OM IT SILENT D ENT 0 9 ESC FULL S ET Starburst User Operating Instructions Glossary Of Terms Bell Test - A facility to test the operation of the external bells, strobes and the internal sounder. Chime - An optional facility which allows detectors or door contact devices to generate a two-tone “chime” if activated whilst the system is unset. Digicom - (Digital Communicator) A remote signalling device fitted to the system which will transmit alarm information via the telephone line to the alarm receiving centre. Duress - A means of entering a passcode (first two digits of a passcode reversed) which will generate a “silent” alarm via the remote signalling device (if fitted) to the alarm receiving centre. Exit/Entry Route - The route which must be used for entering or leaving the protected premises when the system is being set or unset. Entry Time - A preset time delay to allow the user to enter the protected premises and access the remote keypad without causing an alarm. Exit Time - A preset time delay to allow the user to leave the protected premises or area when the system is being set by the timed exit method. Exit Terminator - An external push button switch used to complete the setting of the alarm system. Full set - State of the system when it is protecting all of the premises. Final Exit - The door or detector that is used for leaving and entering the premises. Log - A record of system activity (200 events) which is stored in memory. Master User - The person in overall charge of the system i.e., the person who allocates the passcodes to all other users. Night Circuit - A circuit that armed when the system is full set or part set (if programmed). Omit - To intentionally exclude the monitoring of one or more detection circuits when setting the alarm system. Part Set - The state of the system when it is protecting part of the premises. Passcode - A unique four digit code number allocated to each user by the master user which must be entered before the system can be operated. P.A.(Panic Alarm) - An emergency push button switch used to trigger an alarm. The alarm signal will also be transmitted to the alarm receiving centre if a remote signalling device is fitted. Remote Keypad - A device located away from the main control panel that is used to operate the alarm system. Reset - Action required to return the system to its normal state after an alarm. Tamper Alarm - An alarm caused by the system being physically interfered with. unset - State of the system when it is not monitoring the activity of Night circuits. Users - Those people allocated a passcode which allows them to operate the alarm system. Walk Test - A facility for testing circuits without sounding the external sounder. 24hr Circuit - A circuit that is continuously monitored. TS700 Starburst User Operating Instructions Contents System Overview . . . . . . . . . . . . . . . . . . . . . . . . . . . . . . . . . . . . . . . . . . . . . . . . 1 Operating the System 1 Introduction . . . . . . . . . . . . . . . . . . . . . . . . . . . . . . . . . . . . . . . . . . . . . . . . 2 2 Full Setting the System . . . . . . . . . . . . . . . . . . . . . . . . . . . . . . . . . . . . . . . . 2 3 Part Setting the System (Users 1 - 9) . . . . . . . . . . . . . . . . . . . . . . . . . . . . . . 2 4 Part Setting the System using Part Set codes . . . . . . . . . . . . . . . . . . . . . . . 3 5 setting with Circuits Omitted . . . . . . . . . . . . . . . . . . . . . . . . . . . . . . . . . . . 3 6 Silent setting . . . . . . . . . . . . . . . . . . . . . . . . . . . . . . . . . . . . . . . . . . . . . . . 3 7 Setting and unsetting with a Keyswitch . . . . . . . . . . . . . . . . . . . . . . . . . . . 3 8 Unsetting . . . . . . . . . . . . . . . . . . . . . . . . . . . . . . . . . . . . . . . . . . . . . . . . . . 4 9 Unsetting after an Alarm . . . . . . . . . . . . . . . . . . . . . . . . . . . . . . . . . . . . . . 4 10 Resetting after an Alarm . . . . . . . . . . . . . . . . . . . . . . . . . . . . . . . . . . . . . . 4 User Menus Quick reference . . . . . . . . . . . . . . . . . . . . . . . . . . . . . . . . . . . . . . . 5 User menus 11 Introduction . . . . . . . . . . . . . . . . . . . . . . . . . . . . . . . . . . . . . . . . . . . . . . . 6 12 Bell Test . . . . . . . . . . . . . . . . . . . . . . . . . . . . . . . . . . . . . . . . . . . . . . . . . . . 6 13 Walk Test . . . . . . . . . . . . . . . . . . . . . . . . . . . . . . . . . . . . . . . . . . . . . . . . . . 6 14 Change Passcode . . . . . . . . . . . . . . . . . . . . . . . . . . . . . . . . . . . . . . . . . . 7 15 Enable Chime . . . . . . . . . . . . . . . . . . . . . . . . . . . . . . . . . . . . . . . . . . . . . . 7 16 Omit 24hr Group . . . . . . . . . . . . . . . . . . . . . . . . . . . . . . . . . . . . . . . . . . . 7 17 User Menu 2 . . . . . . . . . . . . . . . . . . . . . . . . . . . . . . . . . . . . . . . . . . . . . . . 7 18 View Circuits . . . . . . . . . . . . . . . . . . . . . . . . . . . . . . . . . . . . . . . . . . . . . . . 8 19 Change Time . . . . . . . . . . . . . . . . . . . . . . . . . . . . . . . . . . . . . . . . . . . . . . 8 20 Change Date . . . . . . . . . . . . . . . . . . . . . . . . . . . . . . . . . . . . . . . . . . . . . . 8 21 Setup New Users . . . . . . . . . . . . . . . . . . . . . . . . . . . . . . . . . . . . . . . . . . . . 8 22 Configure Chime Circuits . . . . . . . . . . . . . . . . . . . . . . . . . . . . . . . . . . . . 9 23 Configure 24hr Omit Group. . . . . . . . . . . . . . . . . . . . . . . . . . . . . . . . . . . . 9 24 Print System Log. . . . . . . . . . . . . . . . . . . . . . . . . . . . . . . . . . . . . . . . . . . . 10 25 Configure Part Set Groups . . . . . . . . . . . . . . . . . . . . . . . . . . . . . . . . . . . . 10 26 View System Log . . . . . . . . . . . . . . . . . . . . . . . . . . . . . . . . . . . . . . . . . . . 10 Table 1. Log and Display Codes . . . . . . . . . . . . . . . . . . . . . . . . . . . . . . . . . . . 11 Service Record . . . . . . . . . . . . . . . . . . . . . . . . . . . . . . . . . . . . . . . . . . . . . . . . 12 User Record . . . . . . . . . . . . . . . . . . . . . . . . . . . . . . . . . . . . . . . . . . . . . . . . . . . 13 System Configuration Record . . . . . . . . . . . . . . . . . . . . . . . . . . . . . . . . . . . . . 13 Circuit Designation Record . . . . . . . . . . . . . . . . . . . . . . . . . . . . . . . . Back Cover System Overview The TS700 intruder alarm control system uses state of the art electronics to provide a comprehensive but flexible protection for both domestic and commercial premises. The system comprises a number of components linked to a central control unit which is concealed from view but accessible for maintenance. All system operations are carried out from one of the remote keypads (up to four may be connected). Detection devices such as door contacts or movement sensors are allocated to detection circuits which are identified on the remote keypad displays. Each alarm installation is specific to the site and its occupier, and may differ from other TS700 installations. This manual describes in detail all the functions and procedures available to the user. To avoid unnecessary operating errors please discuss the details of the system with your installation company before attempting to use it. 1 TS700 Starburst User Operating Instructions Operating the System 1. Introduction System operation can only be carried out after entering your passcode. Up to twelve passcodes can be allocated and they can only be defined by the “master user” (user 1). Users A, B and C can only set and unset their respective areas. Entering a passcode with the first two digits reversed will cause a “Duress Alarm”. Each key press is acknowledged by the keypad sounder. Pressing the [ESC] key takes the user back to the previous step in the menu. When the system is not being used the keypad display shows the current time. The “ENGINEER ON SITE” message is displayed after an engineer has left his menu and is cleared the next time a user passcode is entered. 2. Part Setting the System (users 1 To 9) Ensure that all monitored areas are secured. Enter your passcode (users 1 to 9 only) and within 5 seconds press [A] or [B] or [C] (depending upon the part set area required). If the five seconds is exceeded the system will full set. The display shows the selected group/area that will be omitted and the sounder makes a continuous tone. If required leave via the normal exit route and close the final exit door, (pressing the Exit Terminator button if fitted). The system is part set when the exit sounder stops, the display will alternate between the group/area that is omitted and the current time. 2 ENGINEER ON-SITE Enter user passcode to clear Full Setting the System Ensure that all monitored areas are secured. Enter your passcode (users 1 to 9 only) and the display will show "FUNCTION". After five seconds the display will show how much time is left before the system is set and the sounder makes a continuous tone. Leave via the normal exit route and close the final exit door (pressing the Exit Terminator button if fitted). The system is full set when the exit sounder stops, the display will show "SET" for five seconds then reverts to showing the current time. WARNING: If an attempt is made to set the system whilst any circuits are active (such as a door being open), the display will indicate the circuits that are in fault and the internal sounder generates an interrupted tone. The fault must be cleared before the setting procedure can be completed. If the system is set by ‘Timed Exit’ and the fault is still present at the end of the exit time an internal alarm will be generated. If fitted, the external strobe light will flash indicating the system has failed to set. To prevent this alarm simply re-enter your passcode before the time expires. 3. 22.34 This is the normal display when the system is set or unset. The time is displayed and the "dot" segment flashes FUNCTION User passcode entered 9999 This figure indicates the time to set in secs. 9999 indicates the system is being set by Last Exit or Exit Terminator. Any other figure is timed exit. SET The display will show set for 5 seconds, then revert to only displaying the time. FUNCTION User passcode entered OMIT A Omit button [A] is pressed. BC SET The display shows the group that has been omitted (A). TS700 Starburst User Operating Instructions 4. Part Setting using Part Set Codes Ensure that all monitored areas are secured. Enter your passcode, the exit sounder will make a continuous tone. If required leave via the normal exit route and close the final exit door, (pressing the Exit Terminator button if fitted). The system is part set when the exit sounder stops, the display will alternate between the group/area which has been armed and the current time. 0015 User passcode B entered. Group/area B will set in 15 seconds. B SET Group/area B is now armed. 5. Setting with Circuits Omitted It may sometimes be desirable to omit a circuit when full or part setting the system. 1. Enter your passcode (users 1-9) and press [ within 5 seconds. 2. Press 7 and the display will show the circuit number followed by its omit status. N = not omitted and Y = omitted. 3. Press 0 to change the status of the circuit and [ to confirm the change. A low tone will indicate that the circuit cannot be omitted or a high pitch multi-tone indicates that the change has been accepted. Continue with the next circuit if required. 4. 6. Press ] to quit to “user menu 1" and continue with setting by pressing 0 for full-set or A or B or C for part-set (see 2 and 3). USER 1 “User menu 1" selected. CCT 01 - N Circuit 01 will not be omitted. CCT 01 - Y Press [0] to change the status. Circuit 01 will now be omitted. Silent Setting The system can be full set or part set silently except for the final system set sound. Enter your passcode (users 1-9) and for full set press 8 within 5 seconds. For part set press A or B or C then press 8 . Alternatively Enter your passcode (users 1-9) and press [ within 5 seconds. Press 8 and the display will show "SILENT -". Enter 0 for silent full set or A or B or C for silent part set. 7. Setting and Unsetting With a Keyswitch USER 1 “User menu 1" selected. SILENT - Press [0] for silent full set or [A] or [B] or [C] for silent part set. Operate the keyswitch (or door lock) and leave via the exit route. The system will be full set or part set when the exit sounder stops. To unset the system, operate the keyswitch (or lock) again. 3 TS700 Starburst User Operating Instructions 8. Unsetting Enter the premises via the normal entry route and go directly to the keypad. Enter your passcode. The display will show “OPEN” and then revert to displaying the current time. The sounder will sound at entry and will stop when the system is unset. If the entry time is exceeded an internal alarm is generated and the entry timer is restarted. If at the end of the second entry timer the system has not been unset a full alarm will occur. 9. OPEN System is now unset (OPEN). Unsetting after an Alarm Enter the premises via the normal entry route and go directly to the keypad. Enter your passcode. The sounder will sound at entry and will stop when the passcode is entered. The display will show the circuit that caused the alarm and the system must be reset. 10. 0023 Enter passcode before entry timer expires. ALARM 03 Circuit Alarm 03. Resetting after an Alarm Your system is programmed as EITHER User Reset or Engineer reset, consult your installation company if you are not sure. User Reset 1. 2. 3. Enter your passcode. Press ] within 5 seconds. The display will show “OPEN” and then revert to the current time. Engineer Reset 1. Enter your passcode. 2. Press ] within 5 seconds. 3. The “CALL ENGINEER” message is displayed and the engineer must now be called to reset the system. Remote Reset 1. Enter your passcode followed by [ within 5 seconds. 2. The display will show “USER 1-”. 3. Press 3, the display will show a four digit "seed" code. 4. Telephone your central station or installation company and quote the “seed” code. They will quote you a four digit “Reset” code in return. 5. Enter the “Reset” code and press [. A low tone indicates the “Reset” code was either incorrect or incorrectly entered. A high tone indicates the code was accepted. 6. Press ] to return to the “OPEN” condition. 4 OPEN System is now reset. CALL ENGINEER System requires an engineer to reset or Remote Reset. USER 1 “User Menu 1" selected. 8302 The four digit “seed” code. Note: This code is only an example. 2843 The four digit “Reset” code entered. TS700 Starburst User Operating Instructions User Menus Quick Reference 11.58 FUNCTION USER 1 The system is unset, the display shows the current time. Enter user passcode. The display shows “Function”. Press [ within 5 seconds to select “User Menu 1". “User Menu 1" selected. ] Return To Open - 1 Bell Test - 2 Walk Test - 3 Remote Reset 4 Change Passcode 5 Enable Chime 6 Omit 24 Hour Group 7 Omit Circuits 8 Silent set 0 Full Set - Abandons “User Menu 1" and returns the system to the unset (OPEN) condition. Allows the internal sounders, external sounder and strobe to be tested Allows all detection circuits to be tested without generating an alarm. Reset the system by exchange of 4 digit codes. Change your passcode. Enable or disable the chime option. Omit a pre-defined group of 24 Hour circuits. Select circuits to be omitted before setting the system. Select “silent” full set or part set. Full set the system. A Part Set Group A B Part Set Group B - Part set the system with group A omitted. Part set the system with group B omitted. C Part Set Group C [ User Menu 2 - Part set the system with group C omitted. Select “User Menu 2" (master user only). USER 2 “User Menu 2" selected. 1 View Circuits 2 Change Time - View the status of all detection circuits. Set the system clock. 3 Change Date 4 Setup New Users 5 Change Chime Circuits 6 Change 24hr Group 7 Print System Log 8 Configure Part Set Groups - Set the system date. Setup and delete user passcodes. - Select circuits that will chime. Setup a group of 24hr circuits so that can be omitted. - Print the contents of the system log (200 events). Configure part set groups A, B & C. 9 View System Log ] User Menu 1 - View the contents of the system log. Return to “User Menu 1". ☞ Options 4, 5, 6, 7, 8 & 9 in "User Menu 2" are only available if programmed by the installation company. 5 TS700 Starburst User Operating Instructions User Menus 11. Introduction In addition to setting and unsetting the system, users 1 - 9 may carry out other operations. These are selected via two user menus, “User Menu 1" is available to users 1 - 9 and ”User Menu 2" which is only available to the master user. To access “User Menu 1" enter your passcode and then press [ within 5 seconds. Pressing ] returns the user to the previous position in the menu. 12. Bell test This test allows the user to test the bells, sounders and strobes. 1. Ensure that “User Menu 1" is selected. 2. Press 1 to select the Bell Test option. 3. The sounders, bells and strobes will operate sequentially for 9 seconds each. 4. Testing may be stopped by pressing ] or advanced to next test by pressing [. 5. Press ] to return to the “OPEN” condition. 13. USER 1- Test completed. “User Menu 1" selected. Walk Test This test allows the user to test the function of individual circuits without creating an alarm. As each circuit is activated its number and status are displayed and the internal sounder generates a two-tone sound. As more circuits are tested they are added in turn to a scrolling display showing the status of each tested circuit. 1. Ensure that “User Menu 1" is selected. 2. Press 2 to select the Walk Test option. 3. Activate circuits in turn by opening doors with contacts and walking in front of detectors. 4. Check the display to verify which circuits have been tested. 5. On completion press ] to quit the Walk Test option. 6. Press ] to return to the “OPEN” condition. 6 ON-9 Count down display for Bell Test. x NONE x Walk Test selected, but no circuits have been tested. CCT 05-A Circuit 05 is now active CCT 05-H Circuit 05 is now healthy TS700 Starburst User Operating Instructions 14. Change Passcode All users can change their own passcode. 1. Ensure that “User Menu 1" is selected. 2. Press 4 to select the Change Passcode option. 3. Enter your new passcode and press [. 4. A high pitched multi-tone indicates that the new passcode has been accepted. A low tone indicates that the passcode is already in use and has not been accepted. Try again with a different number. 5. Press ] to return to the “OPEN” condition. 15. 1. Ensure that “User Menu 1" is selected. 2. Press 5 to select the Chime option. 3. Press 0 to toggle the Chime ON or OFF. 4. Press [ to accept. OFF The Chime option is off. Press [0] to change. ON The Chime option is on. Omit 24hr Group This option allows 24 Hour, circuits to be omitted when the system is unset so that they will not alarm if activated but will alarm if tampered with. Only the circuits programmed by the engineer or master user (“User Menu 2" option 6) will be omitted. 1. Ensure that “User Menu 1" is selected. 2. Press 6 to select the 24hr Omit option. 3. The display will show “CIRCUITS OMITTED”. 4. Enter your passcode to reinstate the omitted circuits. 17. 2305 New passcode 2305 entered. Press [ENT] to accept. Enable Chime The enable chime option allows a user to switch the chime facility on or off. This will only affect circuits that have been programmed as chime in “User Menu 2" option 5. 16. ---- Waiting for new passcode. User Menu 2 (master user only) The master user may access this menu by pressing [ when “User Menu 1" is selected. Options 4 to 9 are only available to the master user if programmed by the installation company. CIRCUITS OMITTED 24hr circuit isolated. Enter passcode to cancel. USER 2 ‘User Menu 2’ selected. 7 TS700 Starburst User Operating Instructions 18. View Circuits This option allows the user to view the status of each detection circuit. The circuit status conditions are H=Healthy, A=Active, S=Shorted or T=Tamper. 1. Ensure that “User Menu 2" is selected. 2. Press 1 to select the View Circuits option. 3. Circuit status will be displayed. 4. Select circuits either by entering the number or by pressing [ to scroll through the circuits. 5. Press ] to leave this option and return to ‘User Menu 2’. 6. Press ] twice to return to the “OPEN” condition. 19. 2. Ensure that “User Menu 2" is selected. Press 2 to select the Change Time option. 3. Enter the time in 24 hour notation (e.g., 1805). 4. Press [ to accept. 5. Press ] twice to return to the “OPEN” condition. 20. 1. Ensure that “User Menu 2" is selected. 2. Press 3 to select the Change Date option. 3. Enter the date as four digits. 4. Press [ to accept. 5. Press ] twice to return to the “OPEN” condition. Setup New Users Up to 12 users can be allocated to operate the alarm system. The master user (user 1) can change all user passcodes. If a passcode is entered with the first two digits reversed, a “Duress Alarm” is generated. If this facility is not required ensure that the 1st and 2nd digits are the same, (e.g., 1123). If a passcode is entered with the last two digits reversed, the “Access Control” output is operated. If this facility is not required ensure that the 3rd and 4th digits are the same, (e.g., 1233). 1. 8 ---- Waiting for time entry. 1805 Time entered 1805 (6:05 pm) Change Date The system calendar may be changed by entering the date as four digits representing the day and month e.g., 0207 is the 2nd July. 21. CCT 03-A Circuit 03 is Active. Change Time The system clock may be changed using 24 hour clock format. 1. CCT 03-H Circuit 03 is Healthy Ensure that “User Menu 2" is selected. ---- Waiting for date entry. 0207 Date entered (02 July) TS700 Starburst User Operating Instructions 2. Press 4 to select the Setup New Users option. 3. Enter the user number (1 to 9 or A,B,C). 4. Enter the new passcode then press [ to accept. 5. A high tone will indicate acceptance. A low tone sound will indicate that the passcode is already in use. 6. Press ] twice to return to the “OPEN” condition. To delete a user passcode from the system, select the user number you wish to delete at step 3, then enter your own passcode (master user) at step 4. USER - Waiting for passcode type [1] [9] or [A] or [B] or [C]. ---- Waiting for new passcode to be entered. 5750 New passcode 5750 entered. Press [ENT] to accept. Passcode Types Master User Code (1) - This passcode allows setting and unsetting of the system and allows entry to both user menus. Standard User Codes (2-7) - These passcodes allow setting and unsetting of the system and entry to “User Menu 1". Cleaner Code (8) - This passcode allows only setting of the system and entry to “User Menu 1". Holiday Code (9) - This passcode allows setting and unsetting of the system and allows entry to “User Menu 1". The code is erased from the system when the master user code is next used to unset the system. Part Set Code A (A) - This passcode allows the setting and unsetting of group A. Part Set Code B (B) - This passcode allows the setting and unsetting of group B. Part Set Code C (C) - This passcode allows the setting and unsetting of group C. 22. Configure Chime Circuits This option is used to select the circuits that will chime. 1. Ensure that “User Menu 2" is selected. 2. Press 5 to select the Chime Circuits option. 3. Circuits will be displayed as Y to chime or N not to chime. Change status by pressing 0 (“toggle” action). 4. Press [ to accept (high tone) and go to next circuit. Circuits may be selected by number. Press ] to quit. 5. Press ] twice to return to the “OPEN” condition. 23. CCT 01-N Circuit 01 will not chime. Press [0] to change. CCT 01-Y Circuit 01 will chime. Press [ENT] to accept. Configure 24hr Omit Group This option allows the master user to select the 24 hour circuits that will be omitted when the 24 hour omit option is selected in “User Menu 1" option 6. 1. Ensure that “User Menu 2" is selected. 2. Press 6 to select the 24Hour Omit Group option. 9 TS700 Starburst User Operating Instructions 3. Circuits will be displayed as O=Omitted or A=Armed. Press 0 to change (“toggle” action). 4. Press [ to accept (high note) and go to next circuit. A low tone indicates that the circuit cannot be omitted. 5. Circuits may be selected by number. Press ] to quit. 6. Press ] twice to return to the “OPEN” condition. 24. CCT 02-A Circuit 02 will remain Armed . Press [0] to change. CCT 02-O Circuit 02 will be omitted. Press [ENT] to accept. Print System Log A printer may be connected to produce a print-out of the last 200 system events. 1. Ensure that “User Menu 2" is selected. 2. Press 7 to select the Print Log option. 3. Enter the number of events to be printed. 4. Press [ to start printing. To stop printing select the menu again and enter 000 as the number of events to be printed. 5. Press ] twice to return to the “OPEN” condition. 25. --- Enter the number of events to be printed. Press [ENT] to start. Configure Part Set Groups When the system is part set certain circuits are omitted. This option allows the master user to select those circuits to be omitted when part-set A or B or C is selected. 1. Ensure that “User Menu 2" is selected. 2. Press 8 to select the Part Set Groups option. 3. Select the part-set group A or B or C. 4. Circuits will be displayed as O=Omitted or A=Armed. Press 0 to change (“toggle” action). 5. Press [ to accept displayed status (high tone) and go to next circuit. Circuits may be selected by number. 6. Press ] to go to step 2 and ] again to go back to “User Menu 2". 7. 26. Press ] twice to return to the “OPEN” condition. P. SET Enter part set group A, B or C. CCT 01-A Circuit 01 will remain Armed for the selected part set group. Press [0] to change. CCT 01-O Circuit 01 will be omitted for the selected part set group. Press [ENT] to accept. View System Log The time, date and nature of the last 200 events on the system may be viewed starting with the most recent event. 1. Ensure that “User Menu 2" is selected. 2. Press 9 to select the View Log option. 3. The most recent event will be displayed (see Table 1) 4. Press A to scroll backwards and C to scroll forward. 10 ALARM 01 Log event showing ‘Circuit Alarm 01’. Press [A] to scroll back or [C] to scroll forward. Press [B] to view time and date. TS700 Starburst User Operating Instructions 5. Press B to show the time of the event (first press), the date (second press) the time in minutes and seconds (third press) the event again (fourth press). 6. Press ] to quit. 7. Press ] twice to return to the “OPEN” condition. ALM SENT Action alarm (Alarm output activated) ACC'SS xx A c c e s s p a s s c o d e ( u s e r c o d e SYS OPEN System open (unset) **entered with the last two digits reversed) DELAY xx Alarm delayed (the system is part set OMIT REM and circuit ** was activated) AUX xx Auxiliary alarm from circuit ** PA.ALM xx BATT FLT Battery Fault A.C. OFF Power failure (remote power LED flashes) BELL TST Bell test operated A.C. ON Power restored ALARM xx Circuit alarm from circuit ** P.SET x Part set (area *) COMS OK�� Comms successful C.TMP xx Code tamper (from remote keypad **) COMS FLT RE-ARME D System re-armed 24HR OM'T Circuits isolated (24 hour circuits) REM RST System reset by REMOTE CODE RESET OMIT'D xx Circuit ** omitted R.REM xx Remote Keypad ** removed or lost DATE CHG Date changed R.TMP xx Remote Keypad ** case tamper DEFLT 01 Default user code 1 to 5678 SET FAIL System failed to set DUR'SS xx Duress alarm from user code ** SITE. RST System on-site reset (LK1 open on power up) EN.ALM xx Area * set using part set codes Comms failed LID TAMP Lid tamper, Aux tamper or SAB tamper Omitted circuits reinstated PA alarm from circuit ** Entry alarm from circuit ** W.SET x ENTRY xx Entry from circuit ** KEY.SW xx Part set keyswitch ** operated FIRE xx Fire alarm from circuit ** TAMP'R xx Tamper alarm from circuit ** FUSE 01 Auxiliary fuse blown TIME CHG Time changed FIRST xx First knock from circuit ** T.FAIL xx Circuit ** failed test FACT.RST Factory reset (LK1 closed on power up) TEST OFF FULL SET Full set UNSET x Area * unset using part set codes LINE FLT Telephone line fault USER xx User code ** entered LINE OK Telephone line restored NO EVENT No event All circuits on test removed from test Table 1. Event Log Codes 11 TS700 Starburst User Operating Instructions Service Record Date Engineer Installation Company: Address: For Service Telephone: For Remote Reset Telephone: 12 Action TS700 Starburst User Operating Instructions User Record User No. User Type 01 Master 02 Standard 03 Standard 04 Standard 05 Standard 06 Standard 07 Standard 08 Cleaner Code 09 Holiday 10 (A) Part-set A 11 (B) Part-set B 12 (C) Part-set C User Name System Configuration Record Entry Time: Exit Time: Bell Delay: Bell Duration: System Reset By: Engineer User Remote Reset 13 Circuit Designation Record No. Location Omit Chime A B C 01 02 03 04 05 06 07 08 09 10 11 12 13 14 15 16 18833 Drg No. 33:2159:00 Issue 01. Doc 04. August 98