1
Flybox
®
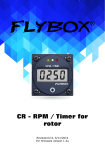
RT1 multifunction
RPM / Timer
Page intentionally left blank
SECTIONS
FLYBOX®
Introduction
Thank you for purchasing a Flybox® product. We hope
it fully satisfy you and makes your flights pleasant and
secure.
Developing RT1, our intent was to create a compact and
lightweight tachometer, easy to install and quick to
consult.
SYMBOLS USED IN THE MANUAL
NOTE: Used to highlight important informations.
CAUTION: Used to warn the user and indicate a potentially
hazardous situation or improper use of the product.
WARNING: Used to indicate a dangerous situation that can
cause personal injury or death if the instruction is
disregarded.
RT1 - Manuale Utente
Rev. 3
FLYBOX
®
NOTE: Keep this manual in the aircraft.
This document must accompany the instrument in the event
of change of ownership.
NOTE: This device is intended for installation onto non type
certified aircraft only, because it has no aviation certifications.
Refer to your local aviation authorities to check if this device
may be installed in your aircraft.
CAUTION: Read entirely this manual before installing the
instrument in your aircraft, and follow the installation and
operating instructions described here.
CAUTION: Using this instrument over the maximum
allowable ranges can cause malfunction or wrong indications.
CAUTION: Microel s.r.l. reserves the right to change or
improve its products. Information in this document is subject
to changes without notice.
RT1 - Manuale Utente
Rev. 3
FLYBOX®
Index
• SECTION 1
1.1
Mechanical installation
7
• SECTION 2
2.1
Dimensions
8
• SECTION 3
3.1
Electrical installation
10
• SECTION 4
4.1
Panel indicators and commands
12
• SECTION 5
5.1
Use during flight
13
Flight timer
14
• SECTION 6
6.1
Use after the flight
15
• SECTION 7
7.1
Programming
18
• QUICK REFERENCE
21
• SECTION 8
8.1
Technical specifications
RT1 - User’s manual
Rev. 3
22
FLYBOX
®
Mechanical installation
SECTION 1
1.1 MECHANICAL INSTALLATION
1) RT1 fits in a standard 2 1/4” (57 mm) cutouts.
2) Avoid placing in hot locations (for example near heater
vents).
3) Find a location where the display will always be
completely visible.
RT1 - User’s manual
Rev. 3
7
FLYBOX®
Dimensions
SECTION 2
2.1 DIMENSIONS
Front view
Dimensions in millimeters
8
RT1 - User’s manual
Rev. 3
FLYBOX
®
Dimensions
Side view
Dimensions in millimeters
RT1 - User’s manual
Rev. 3
9
FLYBOX®
Electrical installation
SECTION 3
3.1 ELECTRICAL INSTALLATION
On the back of the instrument there's a four-pole
connector.
10
RT1 - User’s manual
Rev. 3
FLYBOX
®
Electrical connections
Description of connections:
+12 BATT:
power lead, can be connected to an auxiliary
backup battery, if available.
+12 V:
power lead, connects to 12 Volt main line.
RPM IN:
RPM signal input from engine pickup.
GND:
Ground lead
NOTE:
- For ROTAX 503/582 engines: connect “RPM IN” to
gray wire.
- For JABIRU engines: Use the pickup available at RS
components with the code 285-756.
To have a correct signal from the pickup it's important
to place it to the minimum possible distance from the
metal block.
- Insert a 1 Ampere circuit breaker to the power lead
(+12V wire).
CAUTION: Voltage peaks on the supply line that
exceeds the operating limits can damage the device.
RT1 - User’s manual
Rev. 3
11
FLYBOX®
Panel indicator and commands
SECTION 4
4.1 PANEL INDICATOR AND COMMANDS
GREEN LED
YELLOW LED
RED LED
DISPLAY
PUSHBUTTON
-
Symbols used in the manual:
LED IS OFF
LED IS ON
LED IS FLASHING
12
RT1 - User’s manual
Rev. 3
FLYBOX
®
Use during flight
SECTION 5
5.1 USE DURING FLIGHT
After power-on the display briefly shows the software
version, then it will be ready to work.
when the engine is stopped the display
shows "0000" and the three LEDs are off;
when the engine is running, the display
shows the RPM and at the same time one
of the LEDs turns on indicating the
rotation range of the engine.
Engine RPM / range colors match table
ENGINE
ROTAX
912/914
ROTAX
503/582
GREEN ZONE
500-5500 RPM
500-6200 RPM
JABIRU
500-2800 RPM
SIMONINI
500-5800 RPM
YELLOW
ZONE
5500-5800
RPM
6200-6800
RPM
2800-3200
RPM
5800-6500
RPM
RT1 - User’s manual
Rev. 3
RED ZONE
> 5800 RPM
> 6800 RPM
> 3200 RPM
> 6500 RPM
13
FLYBOX®
Use during flight
FLIGHT TIMER:
The flight timer starts automatically when the engine
meets or exceeds 4000 RPM for 30 seconds (2400 RPM
for JABIRU engines) and it stops automatically when
the engine is turned off (0000 RPM).
Click on the button to view the
duration of the current flight (the
time is shown in hours and
minutes); click again to return to
the RPM mode (or wait 5 seconds).
The maximum measurable value
is 9h59min.
During the flight it is possible to reset the timer by
pressing the button for 3 seconds, until the display
shows “Clrd”.
14
RT1 - User’s manual
Rev. 3
FLYBOX
®
Use after the flight
SECTION 6
6.1 USE AFTER THE FLIGHT
After the flight, seven different readouts become
available:
1) Last flight timer
2) Max RPM reached by the engine during the last flight
3) Total accumulated engine time
4) Total accumulated time in “green” zone
5) Total accumulated time in “yellow” zone
6) Total accumulated time in “red” zone
7) Max RPM ever reached by the engine
NOTE:
- After 10 seconds of inactivity the display automatically
return to the actual RPM screen.
RT1 - User’s manual
Rev. 3
15
FLYBOX®
Use after the flight
To scroll through the various functions click on the
button; the following describes in sequence the
various functions displayed:
1- The Flight timer stores in memory
the last flight's time in hours and
minutes; it will reset automatically at
the next takeoff. It’s available also
during the flight, showing the current
flight time.
2- Maximum peak RPM reached by
the engine in the last flight; it will reset
automatically at the next takeoff.
All the following functions show the time in the format
HHHH:MM (thousands of hours and minutes); the
display shows alternatively the hours and then the
minutes, for example:
means 174 hours and 1 minute.
16
RT1 - User’s manual
Rev. 3
FLYBOX
®
Use after the flight
3- Total time accumulated by the
engine.
4- Total accumulated time in “green”
zone.
5- Total accumulated time in “yellow”
zone.
6- Total accumulated time in “red”
zone.
RT1 - User’s manual
Rev. 3
17
FLYBOX®
Programming
7- Maximum peak RPM reached by
the engine during its life.
SECTION 7
7.1 PROGRAMMING
The programming mode allows you to:
- Reset or modify the total accumulated engine time
(modify is useful when installing on a used engine).
- Reset the total accumulated time in “yellow” and “red”
zone
- Reset the maximum peak RPM
To enter the programming mode:
With the instrument turned off press and hold the button,
then power on the instrument and wait 5 seconds until
the display shows the word “ProG”, that continuously
alternates with the first parameter to be programmed.
18
RT1 - User’s manual
Rev. 3
FLYBOX
®
Programming
Now you can set the hour for the total
accumulated engine time in “green”
zone (and therefore also in the total
accumulated engine time).
Press the button again for 3 seconds until the display
shows the first digit of the number flashing; click on the
button to increase the value by one unit, hold the button
to go to the next digit, and repeat this step for all four
digits.
When the insertion is completed the
value is stored in memory and the
display confirms by showing the word
“MEMO”.
The following values (total accumulated time in “yellow”
and in “red” zone) can only be cleared (reset to zero):
RT1 - User’s manual
Rev. 3
19
FLYBOX®
Programming
To clear a value press and hold the
button until the display shows “Clrd”,
to jump to the next value without
clearing just click the button.
The last parameter is the maximum peak reached by
the engine; this parameter can only be cleared (reset to
zero). To clear it press and hold the button until the
display shows “Clrd”.
To exit the programming mode turn off the power and
wait a few seconds before turning on again.
20
RT1 - User’s manual
Rev. 3
FLYBOX
®
Quick reference
USE DURING FLIGHT
(ENGINE ON)
USE AFTER FLIGHT
(ENGINE OFF)
0000
10sec.
FLIGHT TIMER
(LAST FLIGHT)
10sec.
MAX RPM
(LAST FLIGHT)
10sec.
TOTAL ACCUM.
ENGINE TIME
10sec.
RPM
FLIGHT
TIMER
5sec.
TOTAL TIME
IN GREEN
ZONE
TOTAL TIME
IN YELLOW
ZONE
TOTAL TIME
IN RED
ZONE
MAX RPM
(ENGINE LIFE)
RT1 - User’s manual
Rev. 3
10sec.
10sec.
10sec.
10sec.
21
Technical specifications
FLYBOX®
SECTION 8
8.1 TECHNICAL SPECIFICATIONS
- Case dimensions: 60 x 60 x 40.5 mm
- Weight: 103 g
- Power requirements: 10 ~ 30 V / 40 mA
- Measurable RPM Range: 500 ~ 8000 RPM
- Resolution: 10 RPM
- Accuracy: 0.02%
- Operating temperature range: -20 ~ +70 °C
- Relative humidity: 10% ~ 90% (without condensate)
22
RT1 - User’s manual
Rev. 3
FLYBOX
®
WARRANTY:
This product is warranted to be free from defects for a
period of 12 months from the user invoice date.
The warranty only covers manufacturer defects; and
shall not apply to a product that has been improperly
installed, misused or incorrect maintenance, repaired or
altered by non-qualified person.
Date
03/2010
04/2014
Version
2.4
3.0
Description
First release
Layout update
WARNING: All photos, data, drawings, instruments layouts, technical solutions and
data representation you find in this document or watching at FLYBOX® instruments
working and/or you can access by means of any other media, including web sites,
are sole property of MICROEL s.r.l., cannot be copied or imitate without a written
permission of MICROEL s.r.l. itself and are protected by law, even by means of
extended international copyright and/or specific patents deposited. Any infringement
of this statement and of MICROEL s.r.l. intellectual property will be prosecuted.
©2014 Microel s.r.l. – all rights reserved.
RT1 - User’s manual
Rev. 3
23
MICROEL s.r.l.
Via Mortara 192-194
27038 Robbio (PV) - ITALY
Tel +39-0384-670602 - Fax +39-0384-671830
www.flyboxavionics.it