Download User Manual and Installation
Transcript
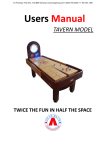
User Manual and Installation Components Cradle This part of the game is the cabinet the playfield lays in. These cradles are in two sections ranging from 6’ to 11’ each depending on the size of the game. All of the holes needed for assembly are pre-drilled. Playfield The playfield, also known as the plank, is made from maple and finished with a polymer surface on top. On the bottom of the playfield you will notice metal brackets known as climatic adjusters. DO NOT ATTEMPT TO ADJUST THESE AS THEY ARE FACTORY SET ON YOUR NEW TABLE. End Legs These legs support the cradle. The number of legs depends on the size of the game. 12’, 14’, 16’ shuffleboards – 2 legs 18’, 20’, 22’ shuffleboards – 4 legs Center Leg The center leg attaches the two cradle halves. The center leg harnesses the scoreboard. It can also be identified by having a hole on one side which allows the scoreboard cables to pass through. The end legs and center leg also come with leg levelers. Accessories In the crates containing the cradles, you will find the following: One set of pucks (4 Red 4 Blue) 2 bottles of speed powder 1 Can of silicone spray Climatic adjusters Electronic scoreboard (optional) Scoring control panels and cables Board Wipe 2 seam covers (these are used to cover the middle seam where the cradles meet) Hardware - nuts, screws, bolts, washers, hex-wrench (2) 1. Installing The Cradle Now that you have all the components for the game, let’s get started. a. Unload the contents of the cradles and the accessory box. Remove the components (legs, scoreboard, etc.) and place them off to the side (we’ll get to them soon). Once the cradle is unloaded, place the two halves of the cradle upside down as close to where you want the permanent location of the table to be. NOTE: One side-wall of the assembled cradle has a mounting bracket and pre-drilled holes located where the cradles join. This is where the scoreboard attaches. This will be the back side of your game. ©2014 Hudson Shuffleboards b. Attach the end legs by aligning the pre-drilled holes of the cradle with the pre-drilled holes in the legs. Attach the leg levelers to the bottom of the leg and the leveler. Attach the two skirts (these look like half circles) to the bottom of the two outermost end legs. Again, these holes are pre-drilled. c. Next, place the center leg in the spot where the shuffleboard will be permanently located. Attach the leg levelers as you did on the end legs. NOW, turn both halves of the cradle upright and attach them to the center leg. Do this one leg at a time. Make sure this is where you want the shuffleboard to be. Once the playfield is installed, moving the shuffleboard is not an option. It is recommended to have the side of the cradle at least 4” away from the wall. This provides your elbow room to clear the side of the cradle when shooting off the rail nearest the wall. d. Once the cradle is upright and assembled, locate the two decorative brass plates. Remove the protective tape and position the plates over the cradle rail where the two cradles join. Attach each plate with two screws (included). st e. Now is the time to perform the 1 level check. Using a 24” level on the bed of the cradle and directly above the location of each leg, check to make sure the table is level (or at least close at this point) side-to-side. If not, adjust the leg levelers accordingly. The bulk of the leveling and adjusting is done once the playfield is installed. 2. Installing the Scoreboard and Control Panel Once you have your cradle assembled and in place, the next step is to install the scoreboard and control panel. The scoreboard and mounting pole are pre-assembled. Locate the scoreboard and remove the protective wrapping. a. With a friend holding the scoreboard, feed the wires (that are attached to the scoreboard) through the predrilled hole on the side of the cradle wall. b. Attach the mounting pole to the side of the cradle using the (4) 4”-bolts which are included. c. Once the scoreboard is attached, connect the additional wiring harness to the scoreboard wiring. Feed the additional wire to both ends of the cradle. There are guide holes under both halves of the cradle for the wiring to pass through. Finish by connecting each end to the wiring harness to the back of the control panels. d. Using screws provided, attach the control panel to the cradle wall. DEPENDING ON YOUR MODEL, THE CONTROL PANEL IS ATTACHED TO A WOOD BRACKET WITH AN OVAL CUTOUT. ATTACH THE CONTROL PANEL OVER THE OVAL CUTOUT. ONCE ATTACHED, THIS BRACKET IS ATTACHED TO THE UNDERSIDE OF THE TOP RAIL. e. Once the control panel is attached and mounted, assemble the plug by fastening the wires. Once the plug is assembled and you have checked to make sure the connections are correct, plug in the scoreboard. f. Now, check all buttons to ensure proper connection. If you have any problems, unplug the scoreboard and re-check all connections. For scoreboard operation, see step 5 below 3. Installing The Playfield Now that you have installed the cradle in its permanent location, you’re ready for the playfield. Remember, the playfield is very heavy. a. Find all the help you need and trust us, the more the better. We recommend at least 3-5 people depending on the size of table. ©2014 Hudson Shuffleboards b. Once you have opened the crate containing the playfield, remove any exposed nails and screws. Pad the rails of the crate and cradle to prevent scratching the playfield. This can be your first resting spot. IMPORTANT: Be sure to take your time and communicate the game plan with the others before you lift. c. After the crate is opened and the rails are padded, tilt the crate on one edge and lean it slightly forward allowing the playfield to lie on its side. Again, moving the playfield without damaging it requires strength and lots of communication. d. Once the playfield is on its side, remove the crate and any excess material away from the installation site. e. Next, lift the playfield with even support and lie it face up next to the assembled cradle. Important: when lying the playfield face up, be sure to have proper padding to prevent any scratching or damage caused by the climatic adjusters f. Lift the playfield on its side and remove the padding. Place the padding over the cradle rails where the playfield will be lifted in the next steps. g. Place two playing weights (upside down) onto the carpet at each end of the assembled cradle approximately 10” from the end and 8-10” apart. These will be used to rest the playfield and give you enough room to get your fingers out of the way. h. With all hands on deck, lift the playfield with even support and bring it towards the assembled cradle. NOTE: It’s very important to lift the playfield high enough to clear the cradle rails, especially with the climatic adjusters. The climatic adjusters will severely damage the cradle and rails if the playfield is not lifted high enough. i. Once the playfield has cleared the cradle wall, rest the shuffleboard on the 4 playing weights. With the playfield resting, send 1-2 people under one end of the cradle. Their job is to lift and lower the playfield, allowing the weights to be removed. Once this process is repeated for both ends, the playfield should be resting in the floor of the cradle. 4. Leveling and Adjusting Once you have the playfield in place and everyone has caught their breath, you’re now ready to add for the final adjustments. To fine tune your shuffleboard, you’ll need to utilize the leg levelers. Climatic Adjusters a. ***IMPORTANT*** Your shuffleboard is shipped with the climatic adjusters attached and gauged within .001” accuracy at the factory prior to shipping. The amount of “wrap” or concave at each adjuster varies depending on the location of the adjuster and length of the shuffleboard. The playing surface is designed to be concave and NOT flat, meaning weights that are thrown from the sides of the board will drift towards the center of the playing surface. ***CHECK TO MAKE SURE ALL NUTS ARE STILL TIGHT ON THE CLIMATIC ADJUSTERS. ***IF SO DO NOT ATTEMPT TO ADJUST THE CLIMATICS*** b. In the event adjustments are needed on your climatics, start at either end of the playfield and lay your 24” level or straight edge measuring at least across the playfield over the first climatic adjuster. This will determine if your playfield is convex or concave. You want your playfield to be slightly concave. The way this is determined is by sliding 2 stacked notecards (each notecard measures .005” thick) back and forth under the middle of the level or straight edge. c. If the straight edge/level rocks from side to side the playfield is convex and needs to be correcting. Begin by adjusting the climatic adjusters located under the cradle. Each climatic adjuster consists of two brackets with an all thread bolt running between them. These are held in place by four nuts (two per bracket). To adjust, tighten the inside and outside nut of one bracket to hold the bolt in place. Loosen the outside bolt on the ©2014 Hudson Shuffleboards opposite bracket moving it away from the outside of the bracket. Then begin tightening the inside nut. This will start adding space between the brackets raising the outer edge of the playfield, making it concave. Now, tighten the inside nut slowly with ¼ to ¾ turns while checking the straight edge regularly with the paper to make the appropriate adjustment. d. Continue down the table making the same adjustments at each climatic adjuster. When all the adjustments are made the table should be concave to some minor degree. If the weights drift slightly toward the center of the scoring zone, the cradle and playfield are level. NOTE: Don’t expect to see a direct response. The table will react to the adjustments for several days. If you’re unable to make the desired adjustment, allow the table a few days to continue to conform to the pressure of the climatic adjusters. After a few days, check it again with the straight edge/level. If more adjustments are needed at that time make them as described above. 5. Creating the “Dish” and Leveling the Table Using the Leg Levelers a. Once you have installed the concave playfield, you’ll need to double check that the playing surface is still level side-to-side. Using the same steps outlined in section 1.e above, place the 24” level across the width of the playing surface directly over the location of each leg. Start at one end of the table and adjust the table using the leg levelers. Repeat this step over each leg. b. Now that your table is level side-to-side, it’s now time to create the “dish” in your playing surface. A properly set up table has the ends of the playing surface slightly higher than the center of the board. In other words, the weights will travel downhill towards the center of the board than back uphill towards the other end. The amount of dish in a board is 3/16”. To obtain this, start at one end of the table and place your level directly over the 1-2-3 on the playing surface. Since your table is level side-to-side, turn each leg leveler on the first end leg in even increments to raise that end leg. Again, be sure to turn each leveler in even increments. Repeat this step on the opposite end leg. c. Once the dish is created, check all remaining leg levelers to ensure they are making contact with the floor and supporting the weight of the table. 6. Now You’re Ready to Play a. Apply the silicone spray. The silicone spray acts as a hairspray keeping the powder from what we call “tracking” or streaking with the weight. It provides for a more consistent playing surface. To apply the silicone, start at one end of the table and spray the silicone outwards letting it fall down onto the playing surface. Work your way down to the other end of the table and then back to other end finishing at the same spot you started. Using the board wipe, lightly wipe down the silicone on the playing surface then let it dry for 5-10 minutes. b. Next step is to apply the first coat of shuffleboard powder. Once this is done, grab your weights and start by throwing a few of them down the center of the table. A weight thrown down the center of the board should go straight. It may take you a few tries to do this but take your time. The direction the weights drift will tell you which way to adjust your board. c. Once you’ve thrown a few weights straight down the center, the direction of the weight will tell you if additional adjustments are needed. If the weights continually drift to one side of the playfield, you need to raise that side by extending the leg levelers. We recommend increments of ½ to ¾ turn per adjustment. Keep in mind that the closer to the rail you start your weight, the more it will drift towards the center given the playing surface is concave. 7. Operating the Scoreboard The scoreboard has two large displays, each for a red score and blue score. The scoreboard also keeps track of time played, games played, games won, and points the game is played to. ©2014 Hudson Shuffleboards Power-Up a. Turn the scoreboard on using the on/off switch which is located between the scoreboard and the arched metal frame.metal post. b. All digits flash for a quick moment c. All displays show zero To Start a New Game d. Press “New Run” on the control panel e. Press “Target Score” once for a game to 15 or twice for a game to 21 Keeping Score f. Any push of the scoring button will increment the associated color until the score for the game being played is reached. g. Points can also be subtracted using the “Red Minus” and “Blue Minus” buttons. h. Once the game score is reached, the game will reset itself automatically. i. As soon as the game resets, the scoreboard will keep track of games won per color. This is shown with lights above each score. ©2014 Hudson Shuffleboards REVISED 6/14 ©2014 Hudson Shuffleboards


