1
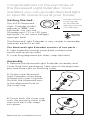
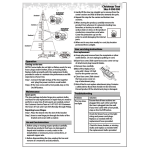
4. Loosen the adjustment
ring on the securing collar
and slide the collar down the
shaft towards the lamp hood
until the collar is just above
the ring line of the swivel joint.
Your recessed light extender
is now ready to install.
Installation
1. Turn the power off to the
fixture. Simply unscrew the
light bulb from the existing
recessed can light. Insert
the light bulb into the
Recessed Light Extender and
screw securely into place.
Note: For the R20 size Recessed Light
Extender, use a R20 size light bulb.
Use Incandescent, CFL or LED type
bulbs. Not for use with Halogen
type bulbs.
2. Screw in the Recessed
Light Extender into the
recessed light socket
until the screw base begins
to click. The Recessed Light
Extender has a safety ratchet
mechanism to ensure the
extender cannot be screwed
in too far and damage
the socket.
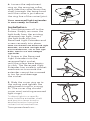
3. Slide the cover ring up to
the ceiling and tighten the
adjustment ring for a snug
ustrations
fit. (The cover ring should
cover most existing recessed
light rings.)
To direct light to a specific
area, hold the extender shaft
and position lamp hood to
desired location using the
rocker/swivel mechanism.
Turn power back on...
illustrations